Integrating MS Visio with Excel can help you visually represent data and create analytical diagrams that facilitate decision-making. Whether it's business metrics, monthly revenues, or product comparisons, with the right link, you can create interactive diagrams from your Excel data in Visio. This guide will show you how to effectively connect an Excel workbook with Visio to present your data visually comprehensibly.
Key Insights
- You can connect Excel data with Visio through drag-and-drop or the import function.
- There are various methods to integrate Excel data into Visio diagrams.
- Updates to data in Excel are dynamically reflected in Visio.
Step-by-Step Guide
Step 1: Prepare MS Visio and Excel
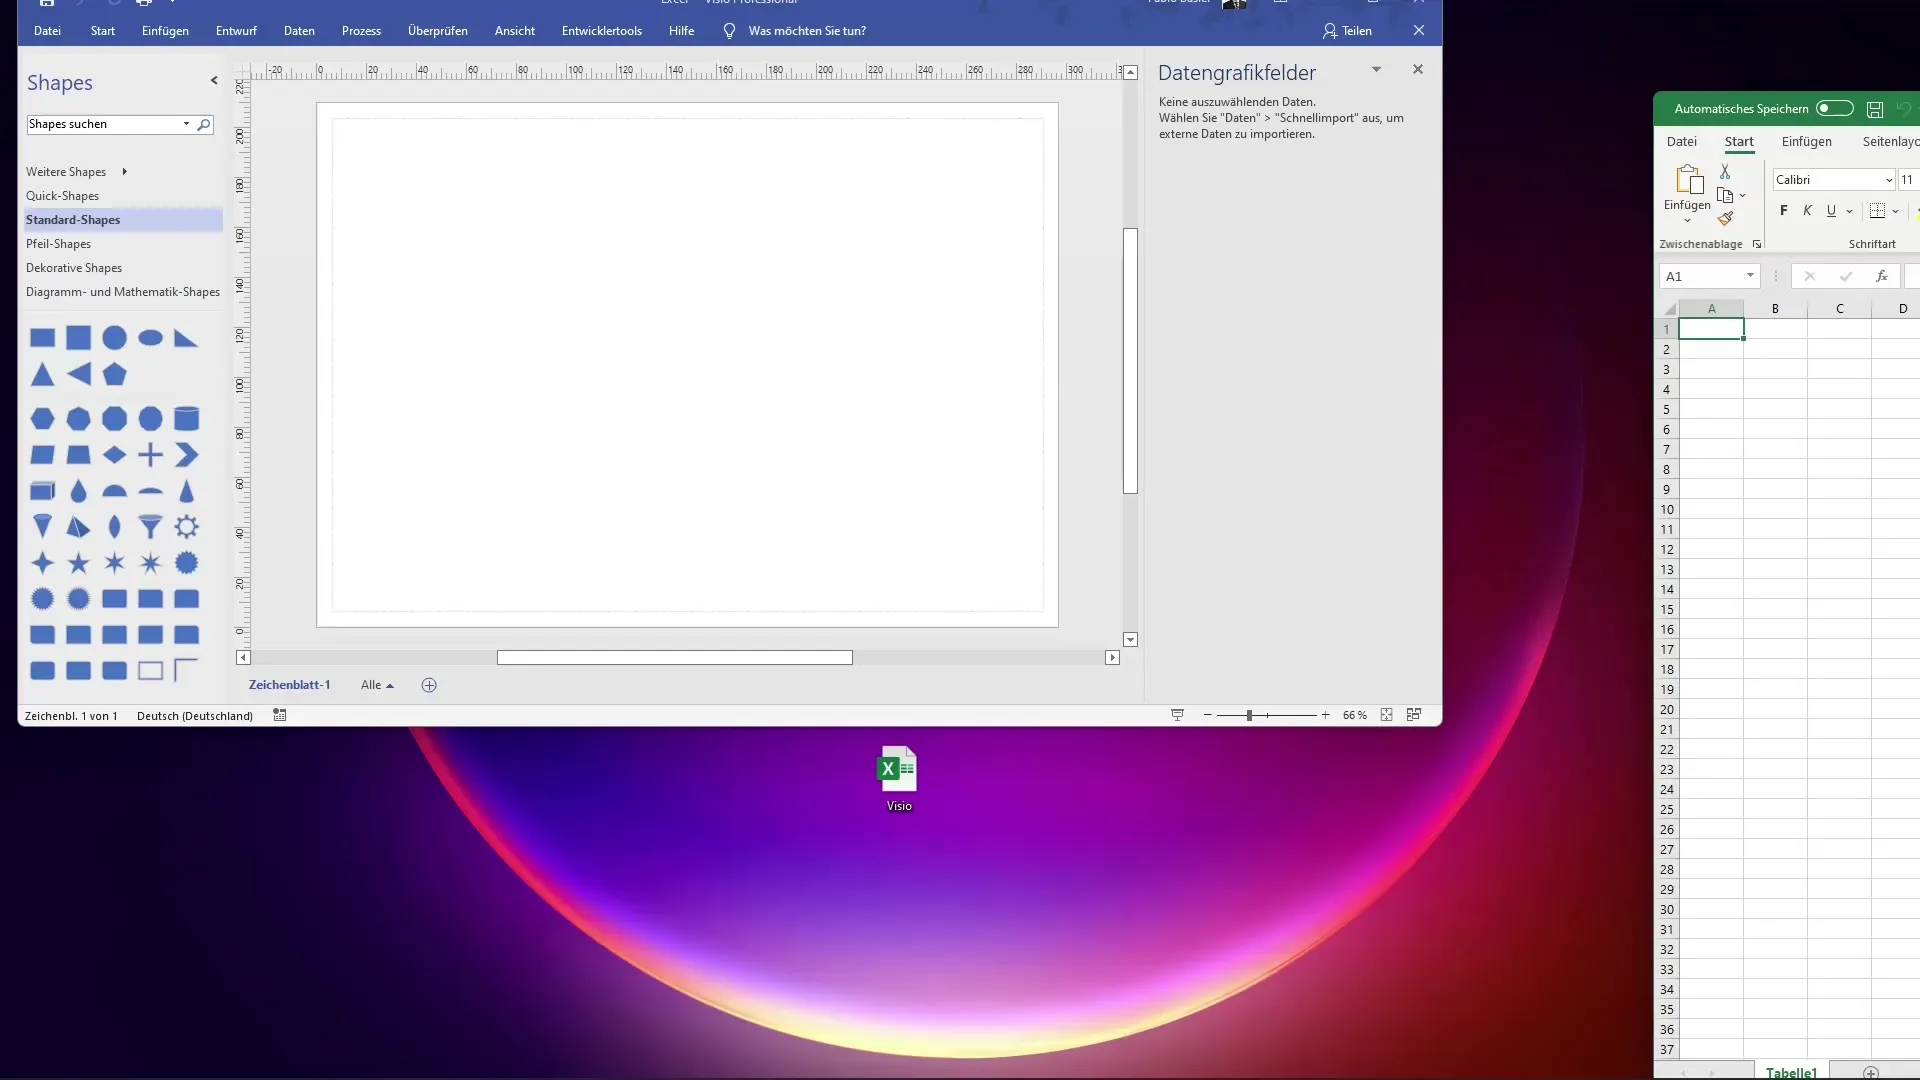
First, open MS Visio on your desktop. You can start it by double-clicking the icon or selecting it under "New". Name your new document, for example, "Excel," and choose a default chart. To create Excel, press the Windows key along with the down arrow, right-click on the desktop, select "New," and then "Excel Workbook."
Step 2: Enter Data in Excel
Open the newly created Excel file and begin entering data. Enter the months from January to December in column A. You can simply enter the months by selecting the first cell and then using the Autofill function to fill in the remaining months. For columns B and C, you can generate random numbers or business overviews using the formula "=RAND()".
Step 3: Save and Close the Excel File
Once you have entered the required data in Excel, save the file. Use the keyboard shortcut "Ctrl + S" to do so. To close Excel, press "Alt + F4".
Step 4: Establish Data Connection between Visio and Excel
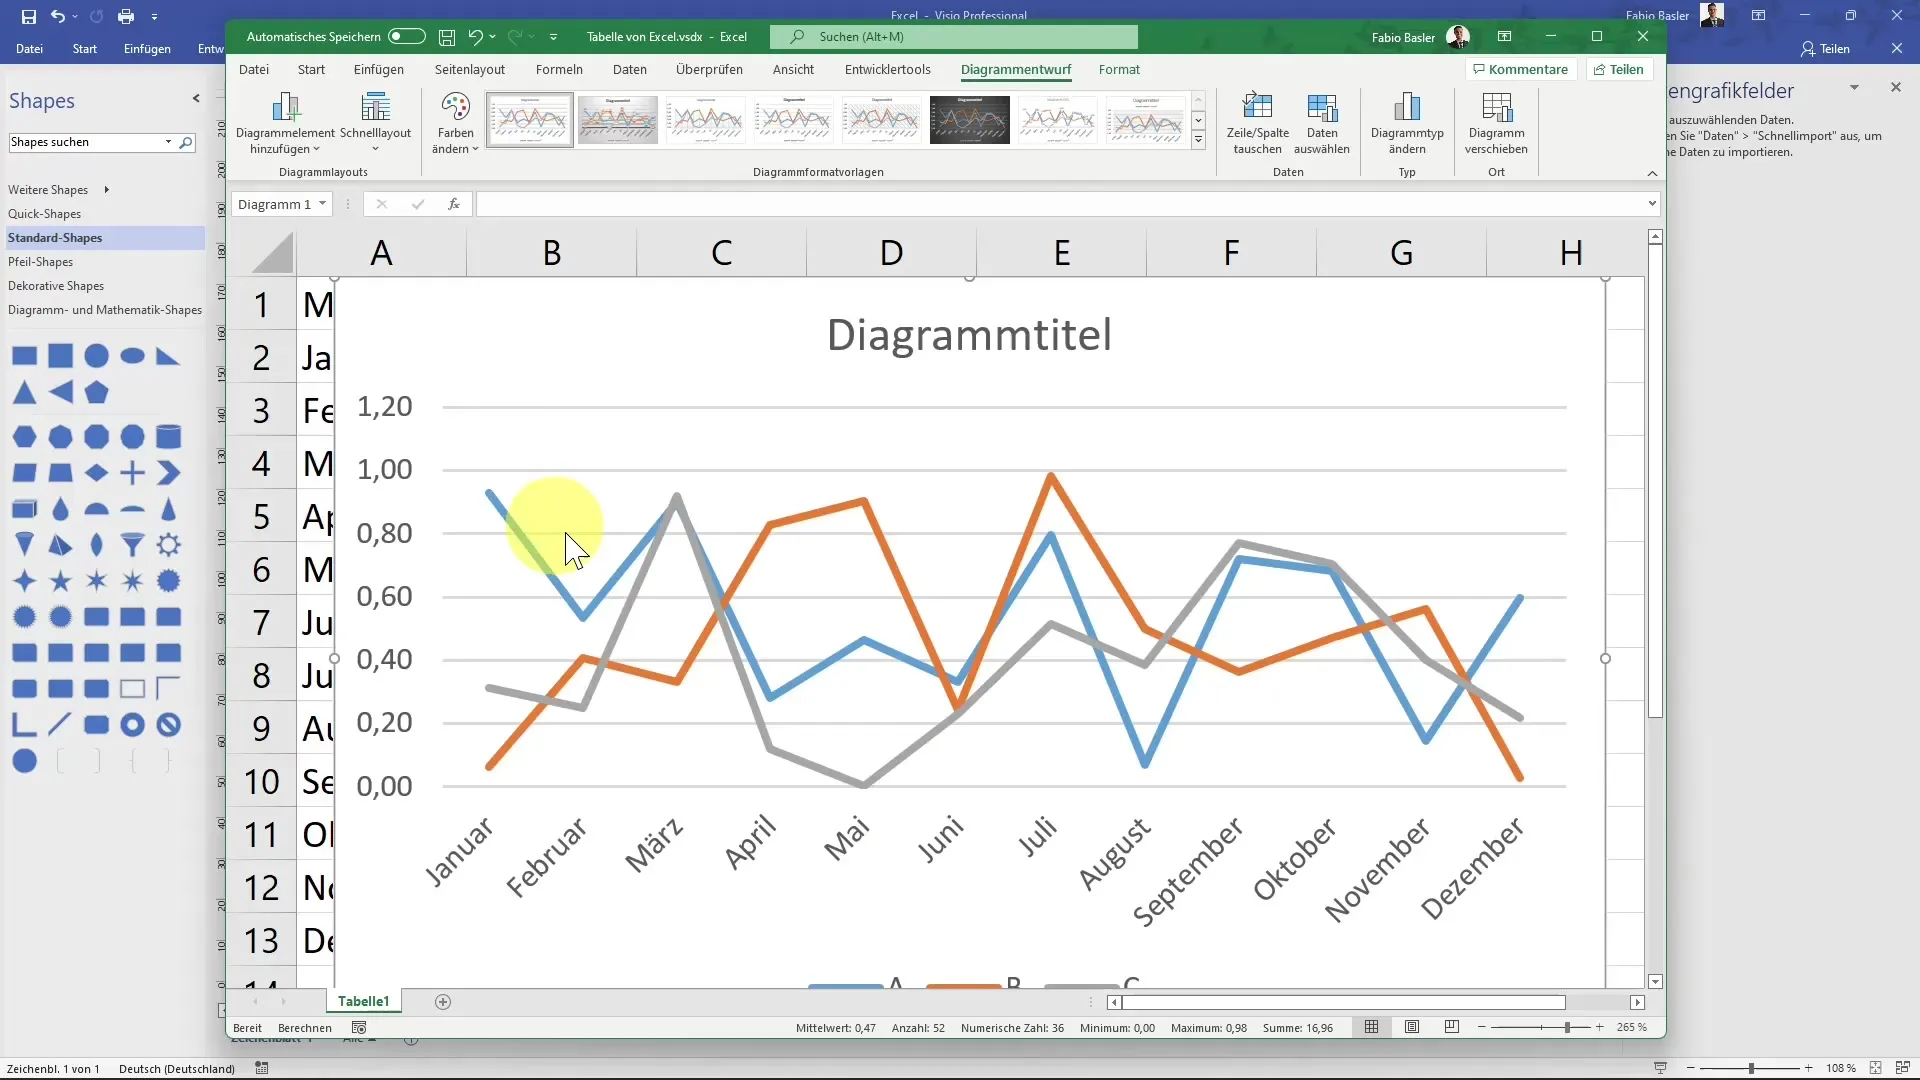
To establish a connection between your Excel file and Visio, you can drag the Excel document into the open Visio diagram. This will create a direct link to the data that you can access at any time by double-clicking on the diagram.
Step 5: Create Diagram
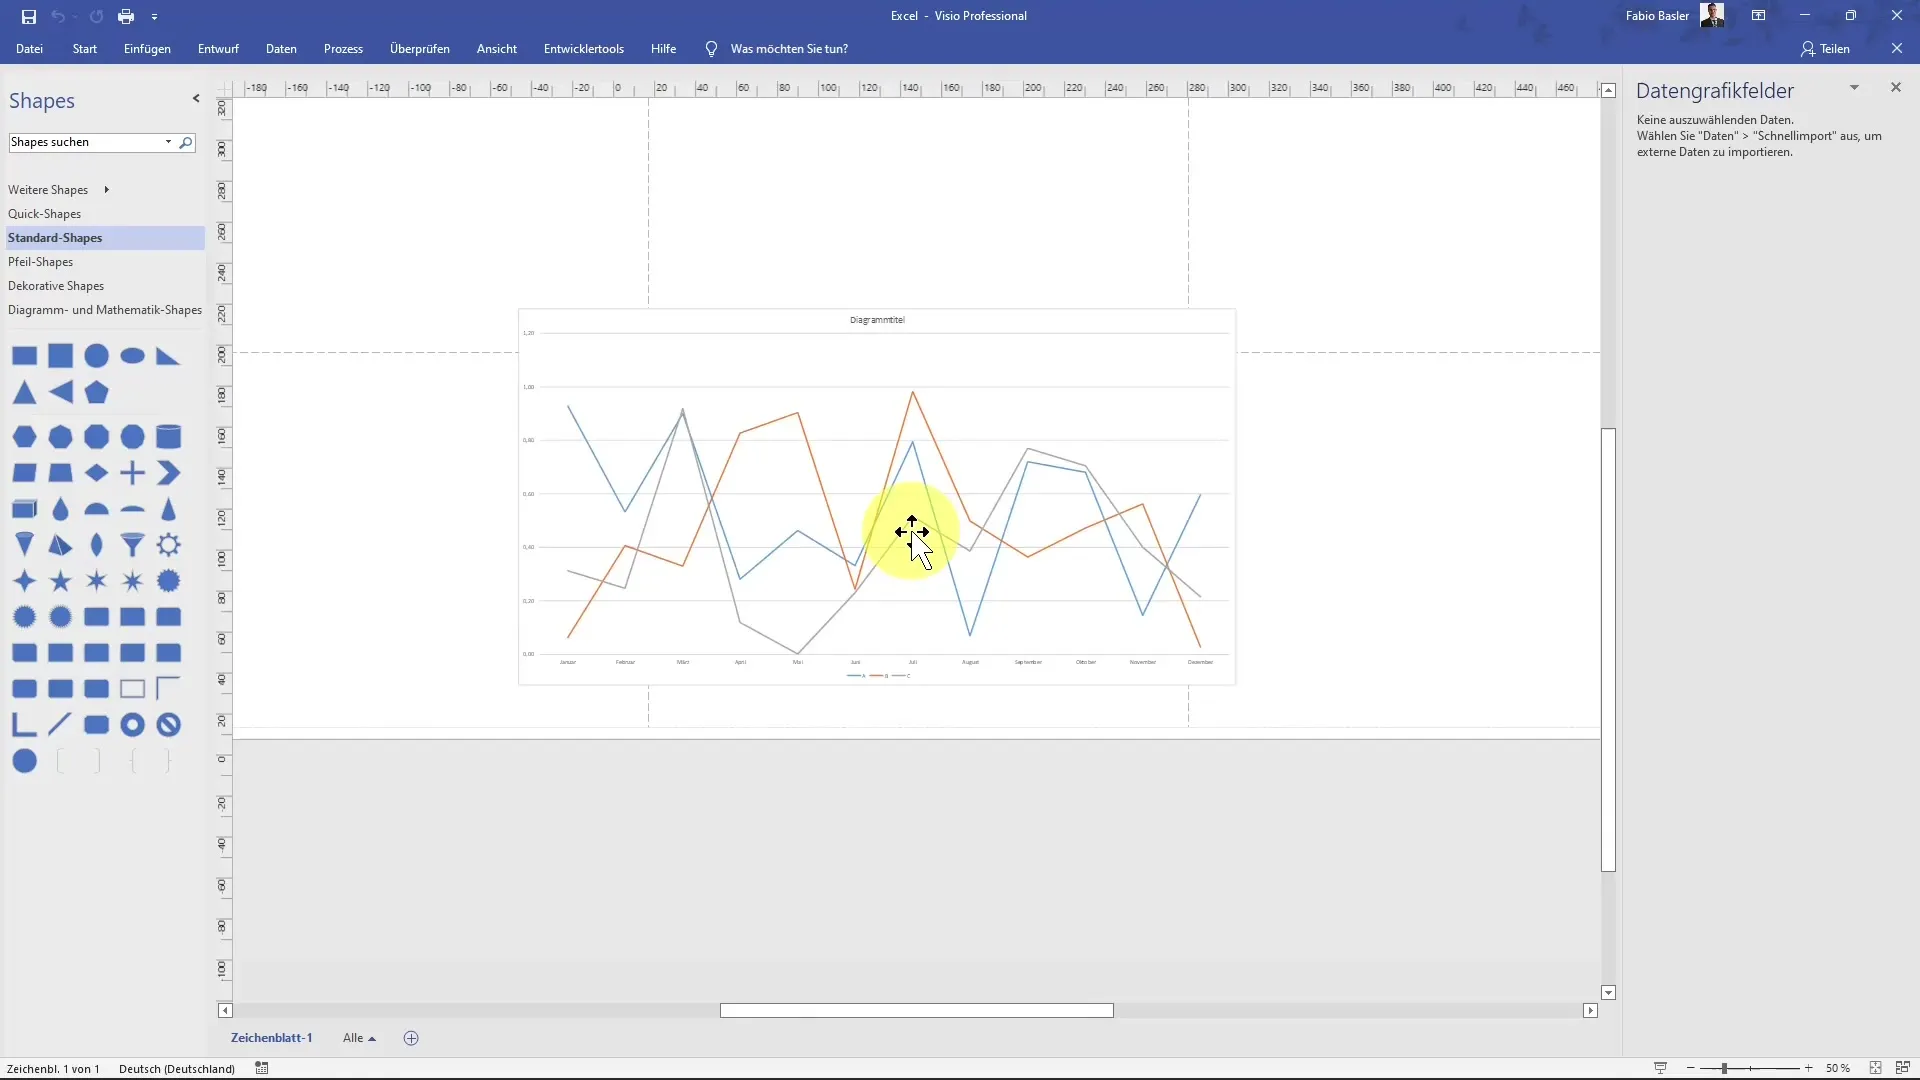
With the link established, you can create a diagram in Visio. Use the keyboard shortcut "Ctrl + Q" to draw a simple line graph for your data. Then, move the diagram to a new sheet to optimize the representation.
Step 6: Customize and Save Diagram
You can customize the diagram by changing its size or editing the representation. Save the Visio document after making changes to not lose your progress. Upon closing the diagram, you will see that the link to Excel remains intact.
Step 7: Import External Data
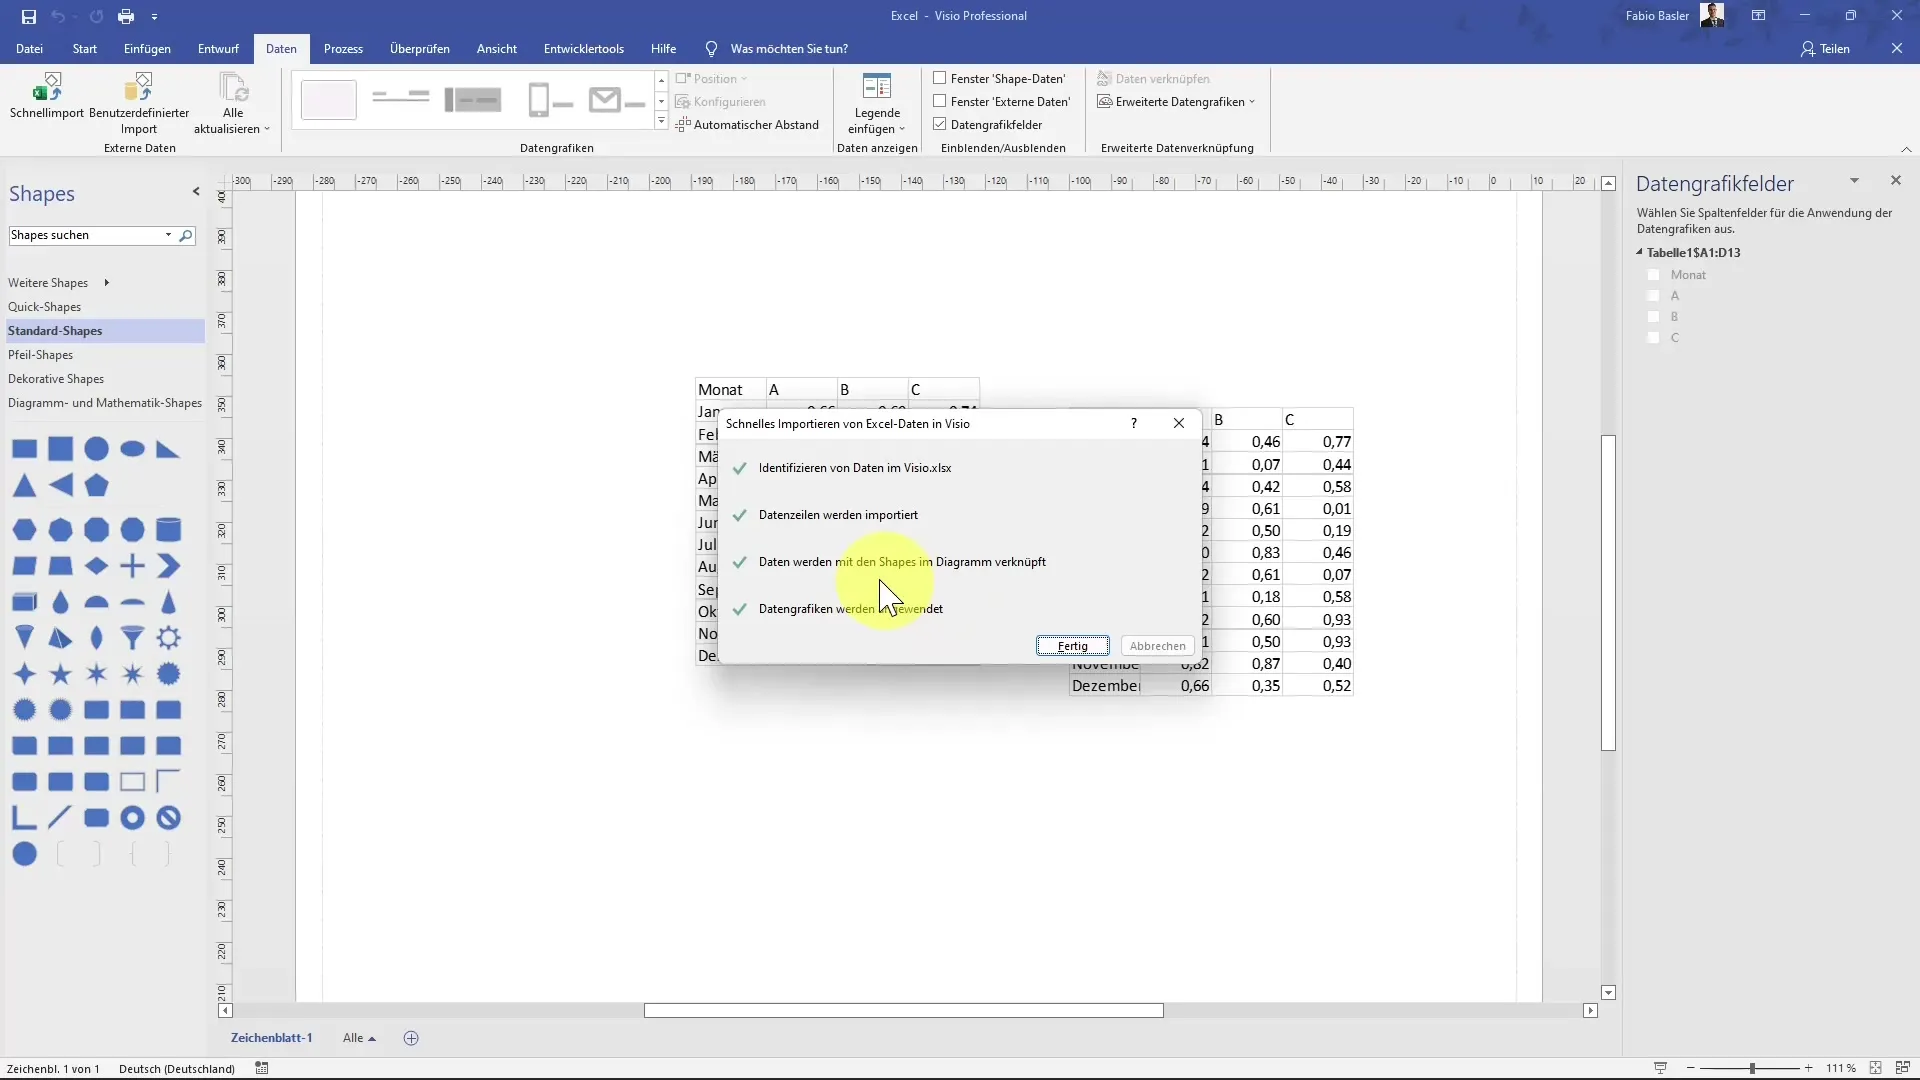
If you want to import additional data from Excel, you can do so through the "Data" tab in Visio. Here you will find the "Quick Import" option, where you can select an Excel file (e.g., "visio.xlsx") and follow the steps to establish the data connection.
Step 8: Connect Data with Shapes
Now you can insert shapes in Visio that are linked to your Excel data. Duplicate an existing shape and change the label according to data series A, B, and C. Right-click on the shape, then select the respective data series to establish the connection.
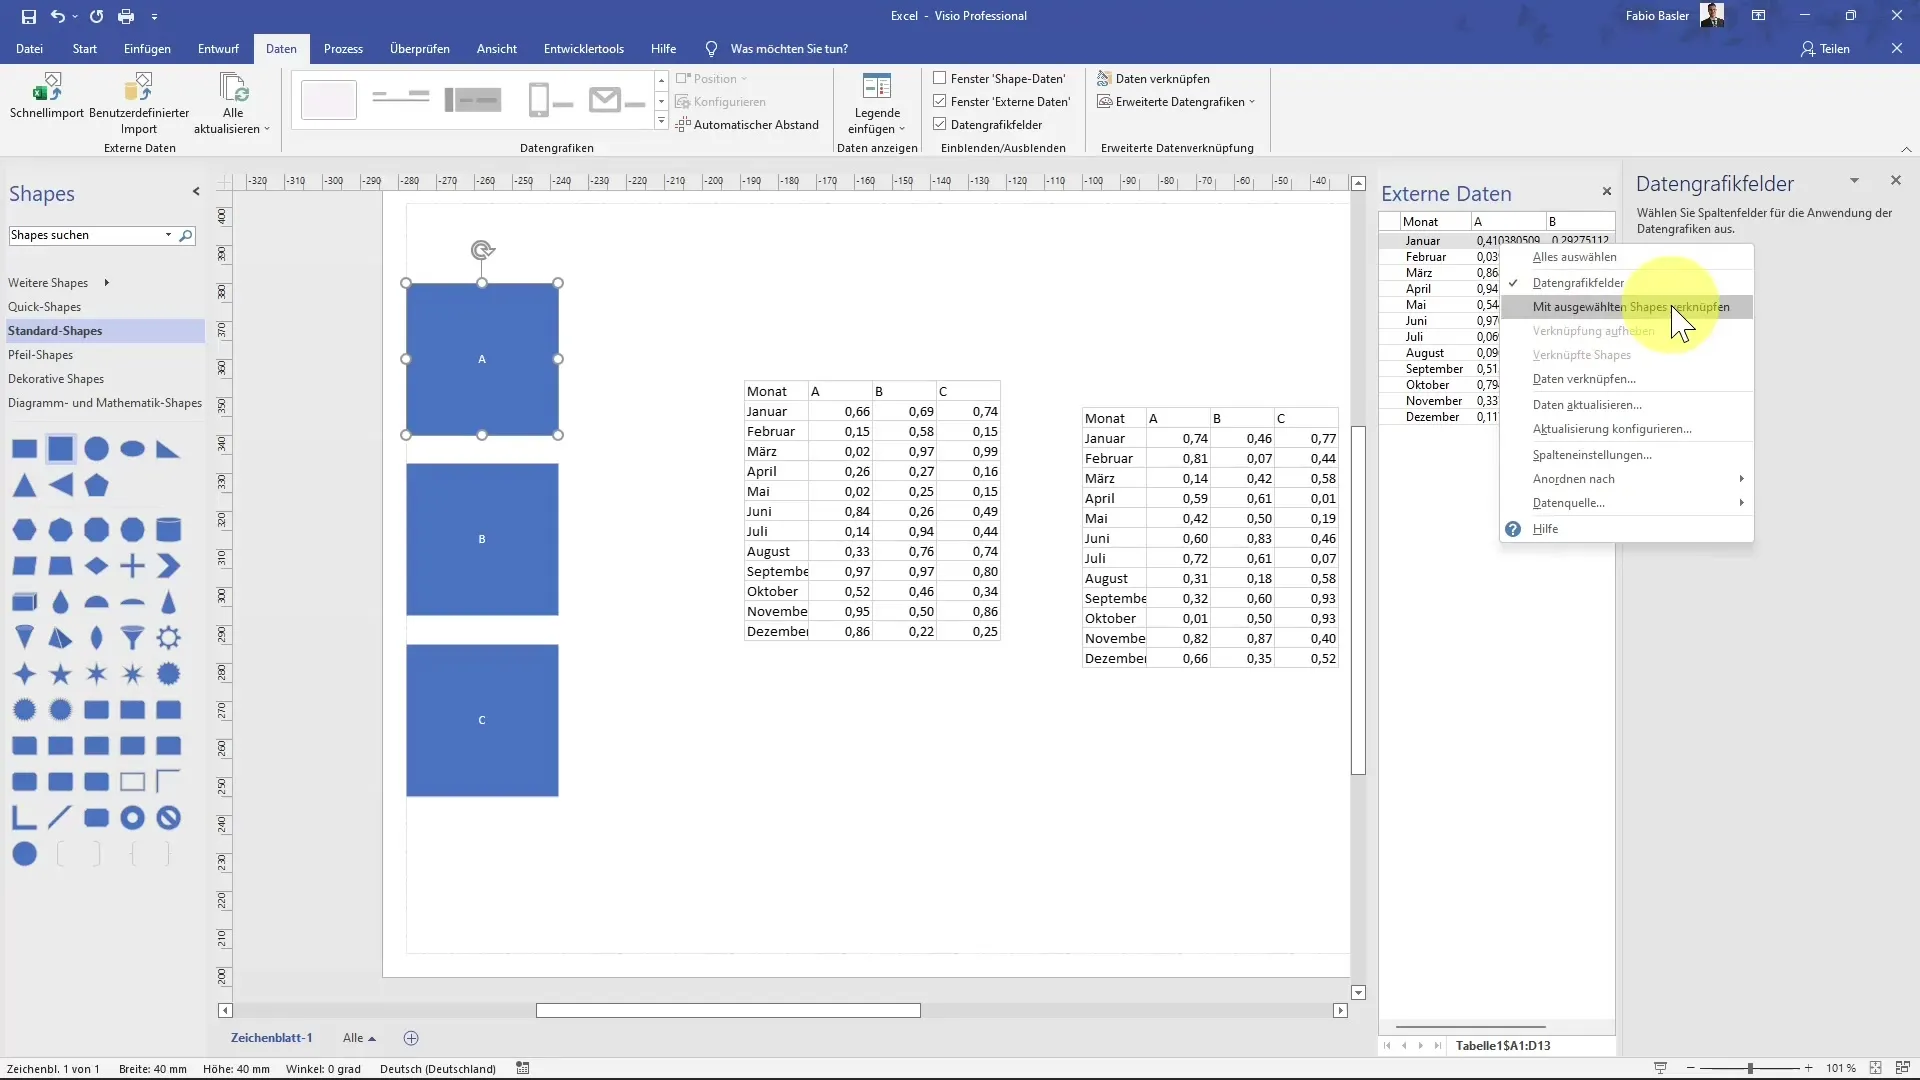
Step 9: Make Updates
One of the strengths of the link is the ability to dynamically reflect updated data in Excel in Visio. You can change your Excel cells and perform updates in Visio using the "Update All" command. This ensures that your visualizations always contain the latest information.
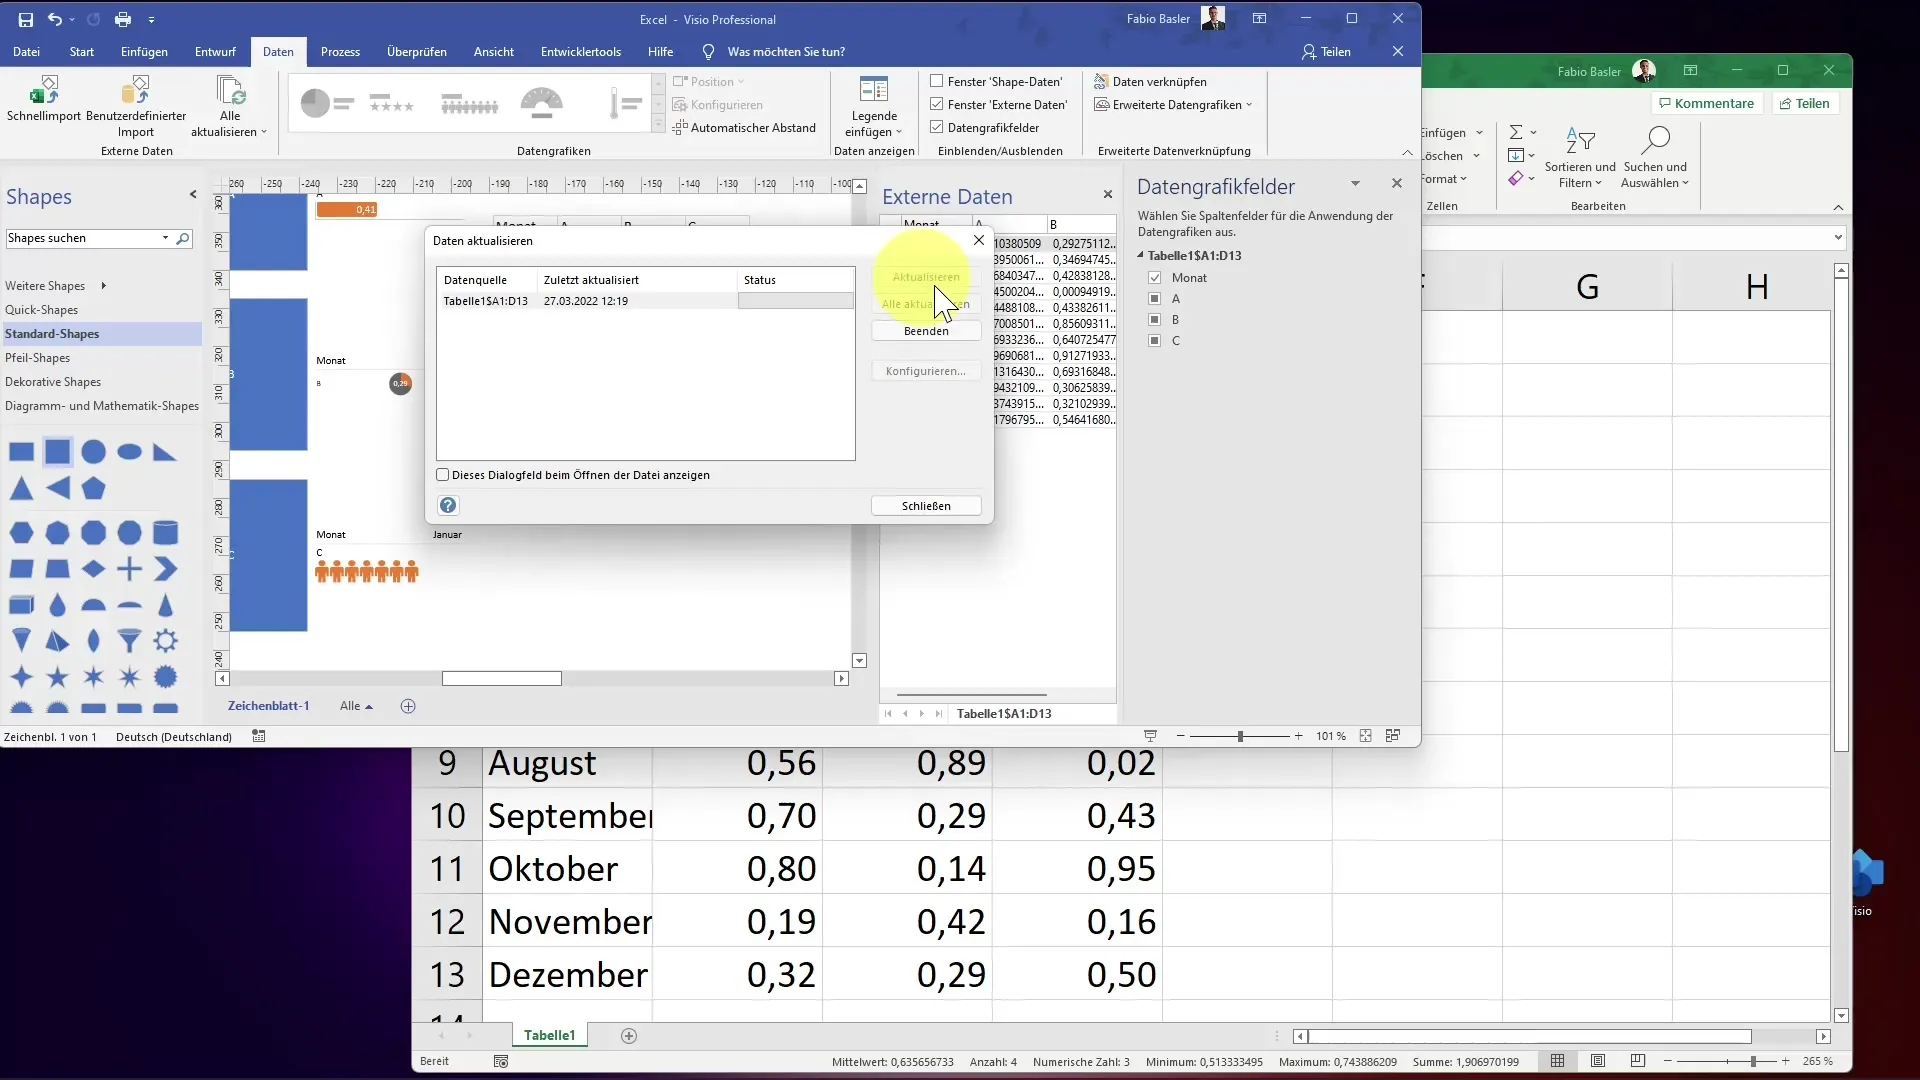
Summary
Connecting MS Visio and Excel allows you to effectively visualize your data. You have learned how to enter data in Excel, import it into Visio, and make dynamic updates to keep your diagrams up to date. With these steps, you can significantly enhance your presentations and reports.
Frequently Asked Questions
How do I connect Visio and Excel?You can integrate Excel data into Visio through drag-and-drop or using the import function in the "Data" tab.
What happens to my Visio diagrams if I change the Excel file?The diagrams in Visio automatically update when you change the data in the Excel file and use the update option in Visio.
Can I link multiple Excel files to Visio?Yes, you can link multiple Excel files to Visio and create various diagrams or data series.
