Basics
While there were extended versions of Photoshop CS3 to CS6 for 3D functionalities and other special applications (e.g. batch mode), with CC there is now only one version that contains all the functions of the extended version for all CC users.
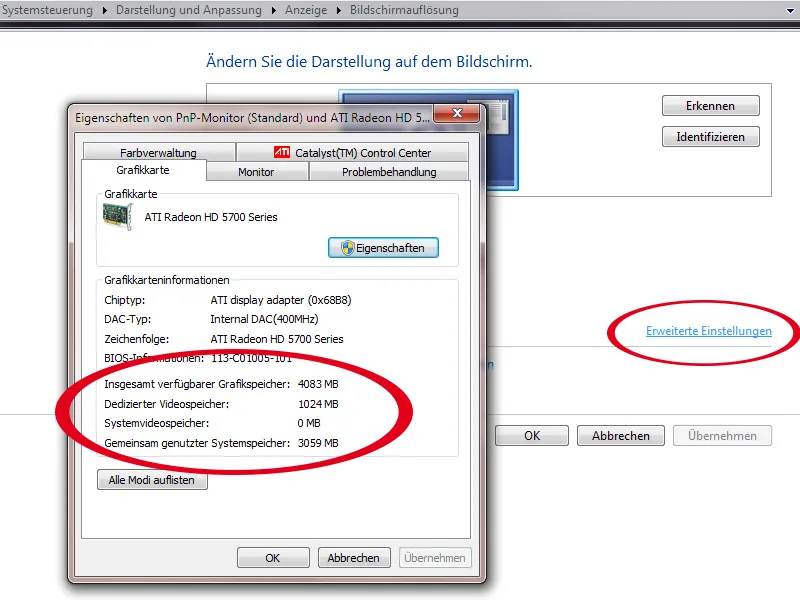
Photoshop CC does not run on Windows XP and requires at least Windows 7 as the operating system. In addition, Photoshop CC requires more graphics RAM - mainly because of the 3D functions - and specifies a minimum of 512 MB. If there are compatibility problems in Photoshop CC, we recommend that you simply check the performance of your graphics card.
If you open the menu on your desktop with the right mouse button and open the screen resolution settings and then the advanced settings, you will see your graphics RAM under the dedicated video memory.
Photoshop is now also supported for high-resolution displays, especially the Retina displays of the MacBook Pro. You can clearly see this in the larger tools and control panels in 100 percent view in Photoshop, which still come without pixelated gradations.
Synchronization of presets
First of all: It's nice that when I install CC and open it for the first time, Photoshop immediately asks me if I want to migrate my presets from CS6. Preset migration was already introduced in CS6, but I don't think there was an automatic query at the beginning.
Now with CC it is also possible to synchronize a selection of settings via the cloud with one click.
There is a synchronization icon in the footer at the bottom left. Alternatively, you can also go to the Edit menu. Your email address is stored there. In the submenu, you will find the command for immediate synchronization.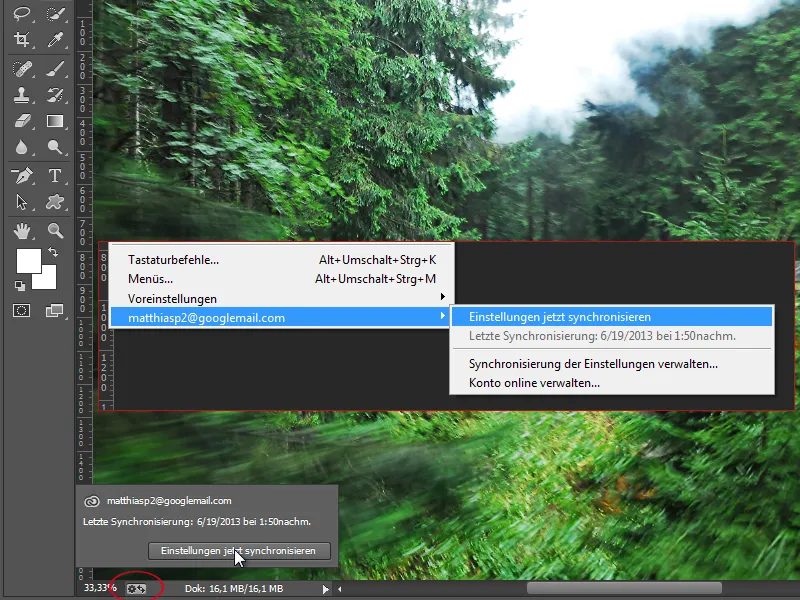
There is also a new Synchronize settings tab in the Preferences. This contains the settings that should be taken into account by default during synchronization. These include presets, color fields, custom shapes, tool presets, actions, styles, patterns, brushes, gradients and contours.
This function is important when working on a laptop in the office, for example. I want to continue working at home in the evening and now the custom shapes I have created to work on my layout are not available on site. This way, my workspace in Photoshop is always kept up to date, regardless of the device I'm using.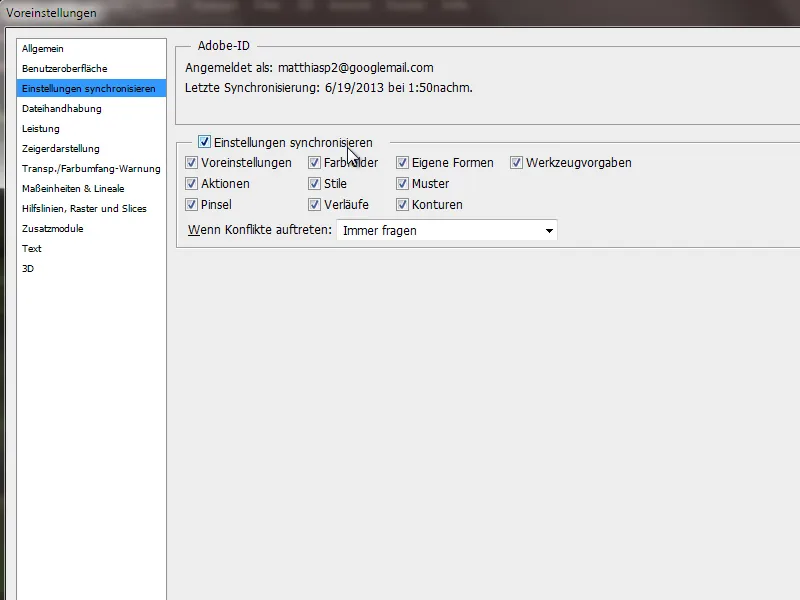
Renaming in the program interface and Retina support
The menu command Actual pixels, which can be called up with the shortcut Ctrl+Alt+0, has now been renamed to 100%. The shortcut 1 in the image does not really make sense, because I use it to set the opacity in the image to 10 percent. I therefore recommend the shortcut Ctrl+Alt+0 for the 100% view.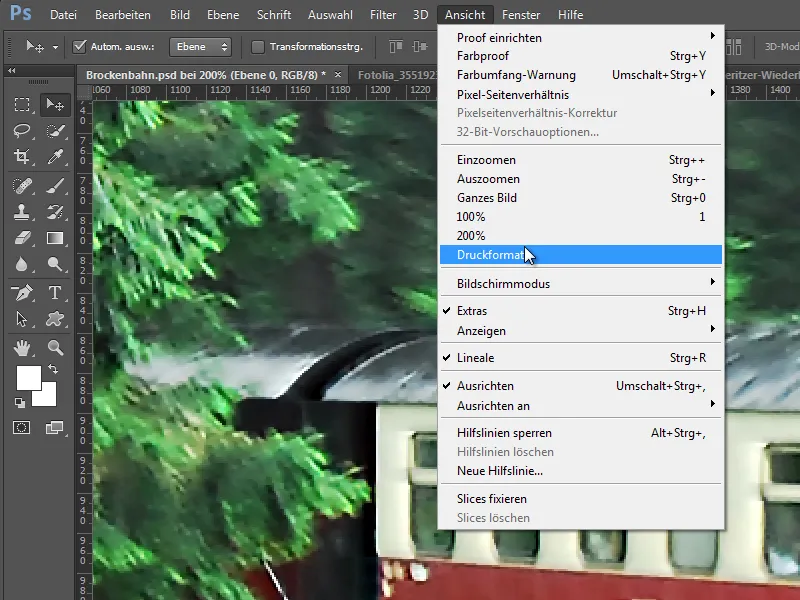
The renaming is probably related to the support of high-resolution displays. Because with the renaming, the 200% view was also introduced, which shows approximately the image on Retina displays that you would otherwise have on normal displays below 100% to give you an idea of how the Retina displays look. That would be an approx. 44" on a 15" device. These devices have a higher pixel density than normal displays and display around four times as many pixels on the same surface area. As a result, the eye can no longer easily break down these very sharp graphics and texts into their pixel components.
Photoshop was already optimized for Retina displays with the 13.1 update. In this update, the print format view was dropped, which is now back with CC. In addition, numerous filters and control panels/dialogues have also been optimized for high-resolution displays, which makes working on these devices even more pleasant.
Innovations thanks to the JDI initiative in Photoshop CC
JDI stands for Just do it! and was an initiative to implement small optimizations that users have always wanted. There are numerous such small JDI improvements. I would like to introduce a few of them here. You can find out about major innovations from this initiative in the following topics.
a) In the File Handling tab of the Preferences, there is a selection field that allows me to increase the list of recently opened files in the File menu to up to 100. Up to CS6, 30 files could be allowed with a default value of 10 files. In CC, the default was increased to 20 files and an optional increase up to 100 files was allowed.
b) In the Save as dialog, the checkbox for the use of lowercase letters has been removed. This affects the file extensions, i.e. whether a document should be saved as .jpg or .JPG. Instead, the handling can be set via the default settings.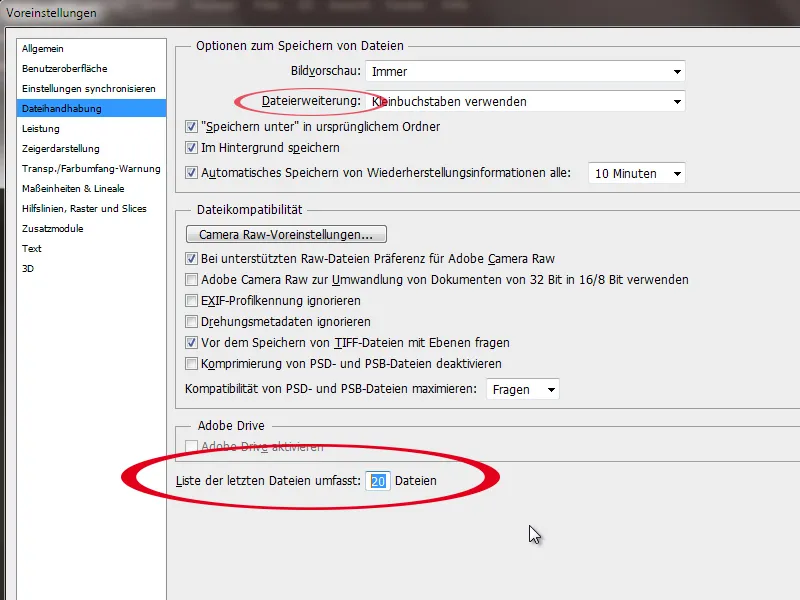
c) Better performance for very large documents.
d) Up to CS6, JPG documents could be saved with a page length of up to 30,000 pixels. This maximum value has now been increased to up to 65,535 pixels page length. This is certainly very practical for huge banners or panoramas.
e) Metadata and color profiles can now also be included in PNG files.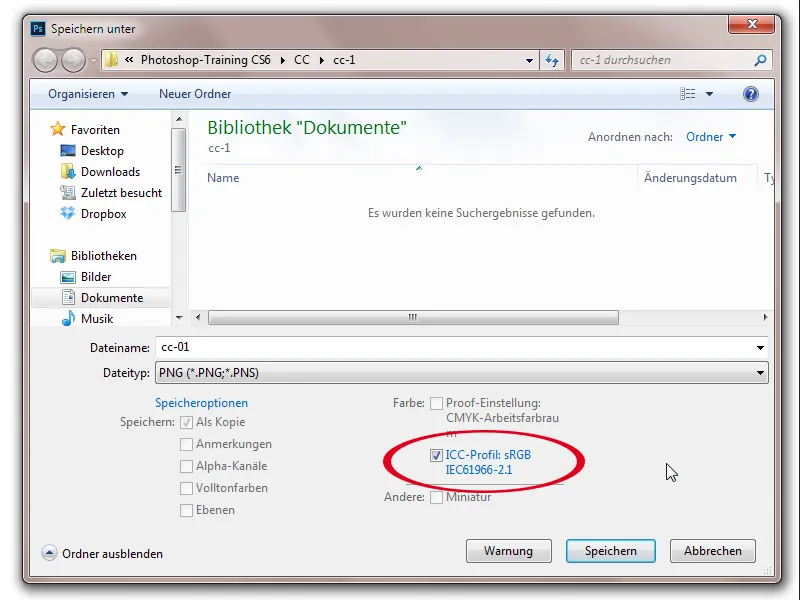
f) When placing content, the file browser that opens has been tidied up. I can now find the files on the left and a preview on the right. Unfortunately, multi-placement - as in InDesign, for example - is still not possible.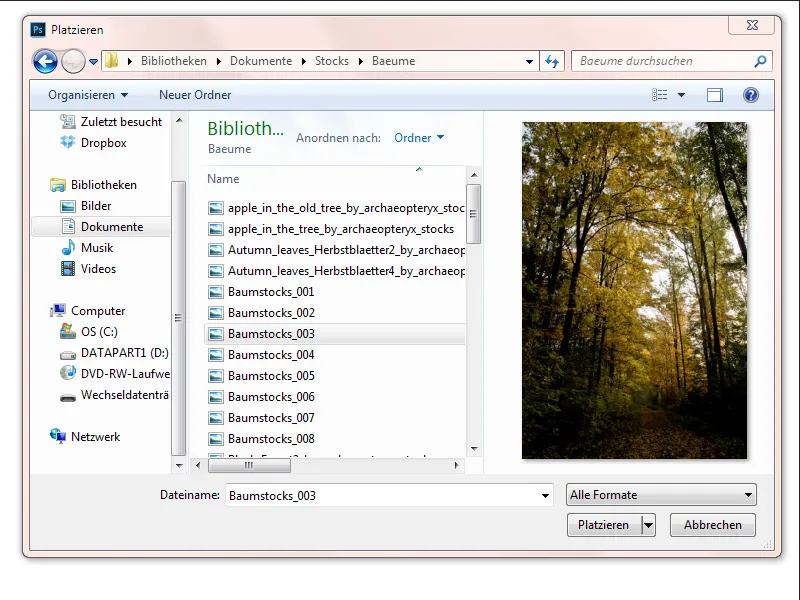
g) When working in the document, it is now possible to isolate selected layers by right-clicking or via the menu Selection>Isolate Layers. It is immediately clear in the Layers panel that the layer filter outputs the selected layers. And so I can just as easily isolate layers for editing via the layer filter. The option to isolate layers also makes sense for larger documents if, for example, I only want to edit a section of a web layout without having to show or hide dozens of layers and groups separately.
In this example, I have selected and isolated the two rectangular shapes and the two text layers.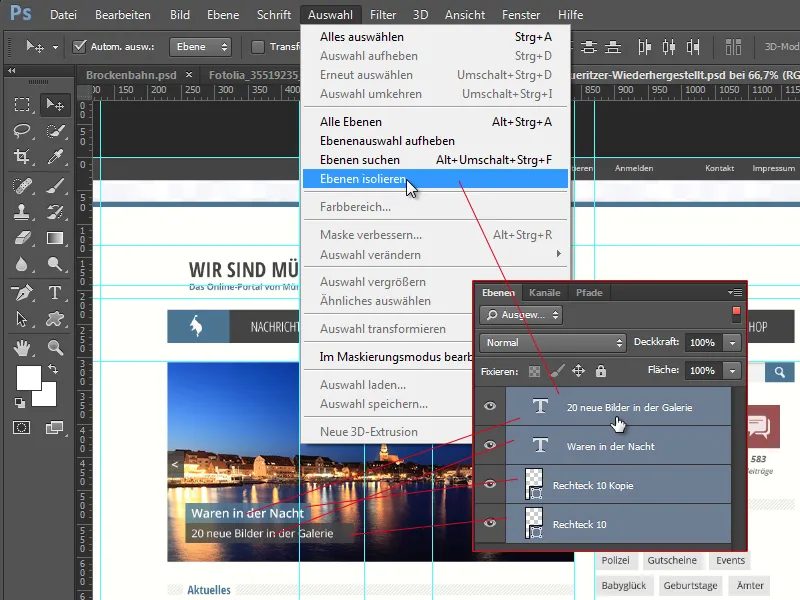
h) The second time you open it, it becomes clear that something has changed in the color range selection. This is because the color range selection does not use the foreground color set in the toolbar as a basis, as was usual up to CS6, but instead displays the last setting values of a previously made selection. The color range dialog has also been given better face and skin tone recognition.
In this example, I have selected the white steam of the Brockenbahn. After deselecting, I open the color range selection again and see the last selection in the preview.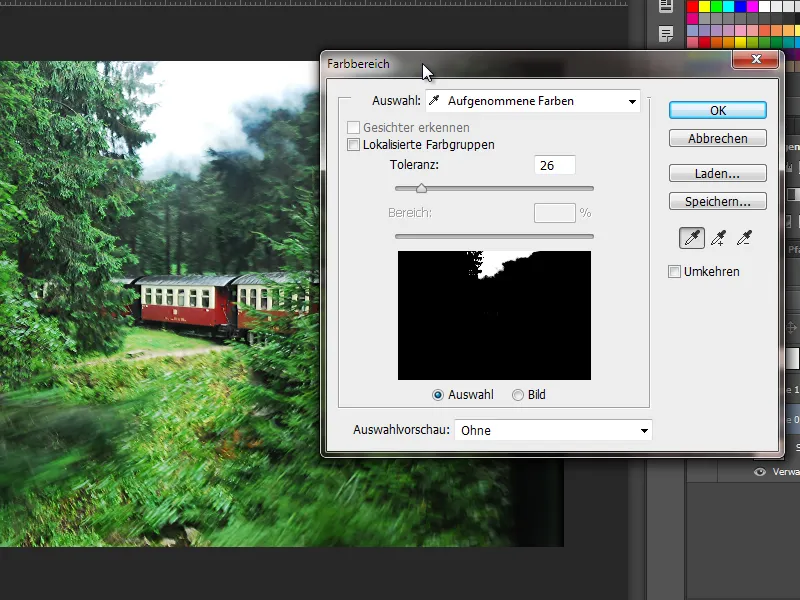
i) Brush rotations and brush roundness are now also possible independently of the brush control panel with a right-click. To do this, I simply rotate my brush using the triangle in the crosshairs. I can set the roundness using the side circle. By holding down the Shift key, I can jump to the values, which may make sense when rotating. The set value is also directly synchronized with the display in the brush control panel.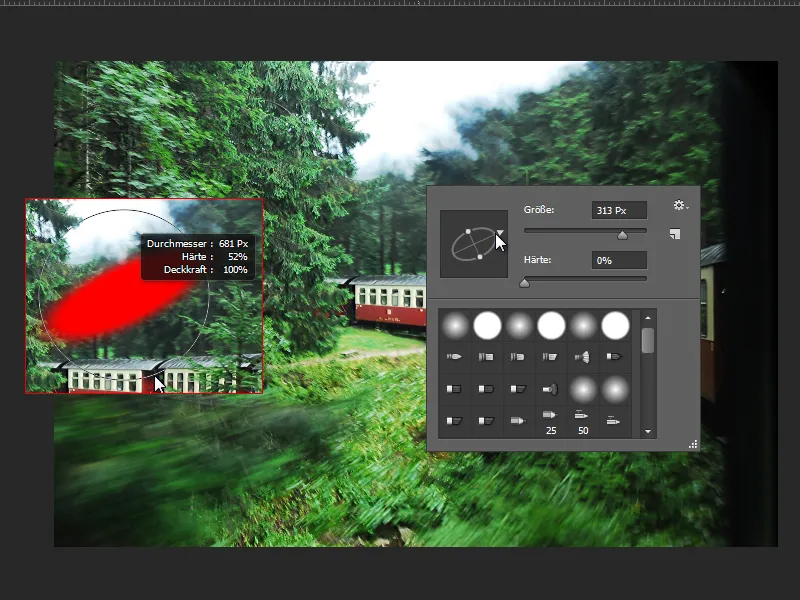
Improvements to the clipping tool
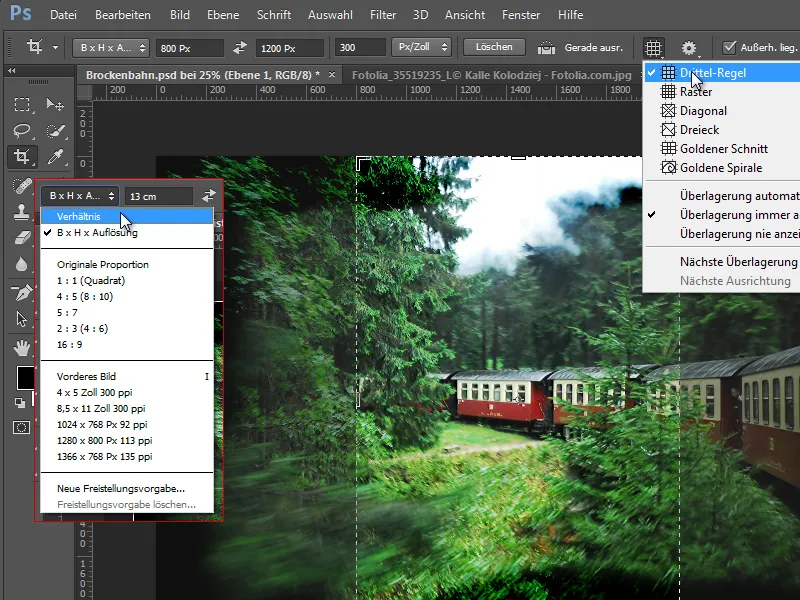
A new feature is that I now have small icons for the overlay options. In CS6 they were only indicated in text, now I can already see an icon for the respective overlay.
Another new feature is the option of cropping according to the aspect ratio as well as recalculating the resolution at the same time. This option can be found under W x H x Resolution.
The difference to ratio cropping: With ratio, the image is retained in its resolution and I receive an image cropped according to the cropping specifications. With W x H x resolution, I can specify whether I would also like to have it in 300 dpi and with cropping, the calculation is made to my desired resolution.