Eye-catching background is the key to a successful flyer. With Photoshop, you can create impressive designs that stand out in just a few minutes. In this tutorial, I will show you five quick and easy techniques for creating popular flyer backgrounds – from dynamic color gradients to cool grunge textures and modern geometric patterns. Perfect for parties, events, or business flyers. Let's get started and take your flyers to the next level!
1. Scanlines
The classic choice are scanlines, which can be placed in a flyer background in vertical, diagonal, or horizontal form.
Step 1: Create a New Document
To create such a background, I simply need a suitable pattern that inserts the scanlines into my image. I create a new document (Ctrl+N) with dimensions of 4x4 pixels. The background is transparent.
Step 2: Select Scanline Pattern
I zoom in as much as possible into my document.
Using the Selection Tool, I now select exactly four square selections that move diagonally from bottom left to top right. To add another selection to an existing one, I hold down the Shift key while dragging.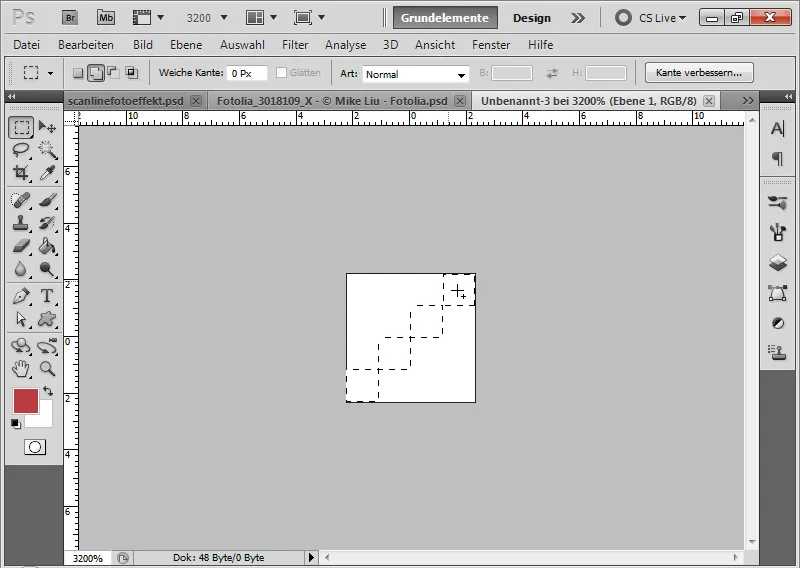
Step 3: Fill Selection with Black
I set the default colors in the Tool Bar with D, if they are not already set, and fill the black foreground color into my selection fields with Alt+Backspace.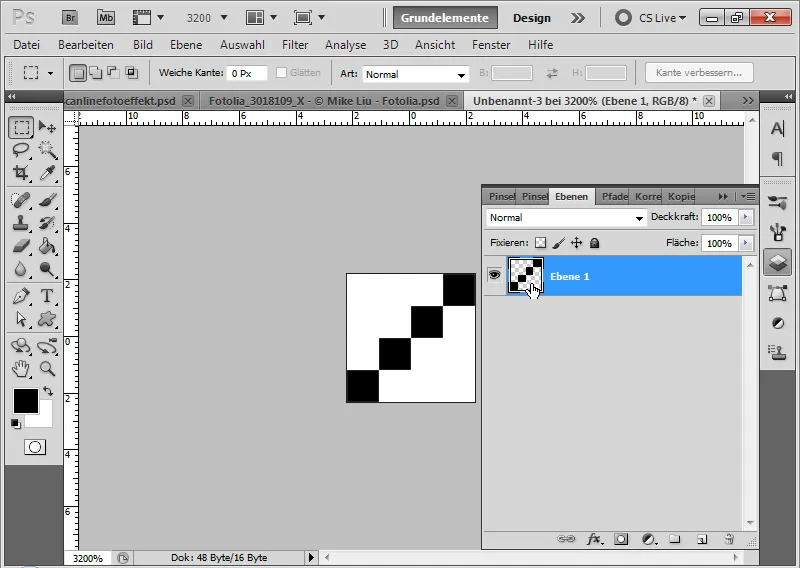
Step 4: Set as Pattern
I release the selection with Ctrl+D. I choose Edit>Define Pattern from the menu. In the dialog window that opens, I name my new pattern "Diagonal Scanline."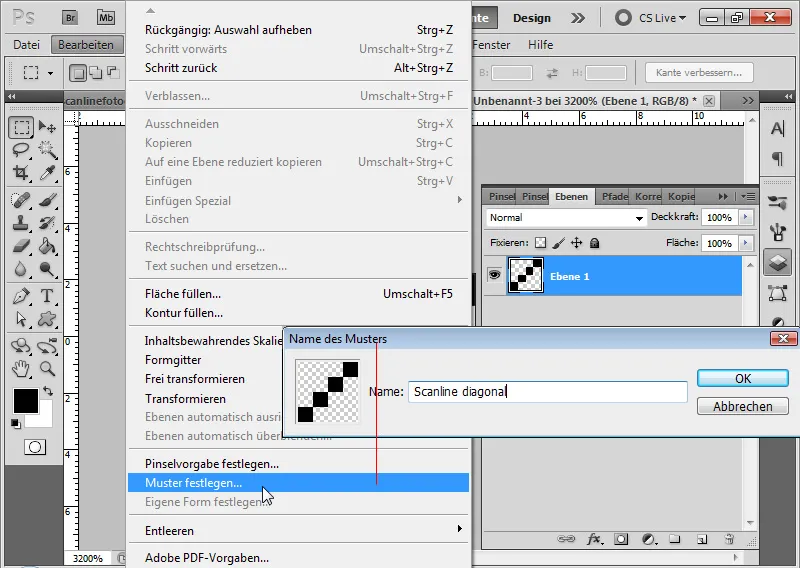
Step 5: Applying the Scanline
In a new layer on my flyer, I now use the Paint Bucket Tool to fill my scanline pattern into the document. The setting in the menu bar is Pattern. In the Pattern Selection menu, I choose my newly defined pattern. Now I simply click on the document.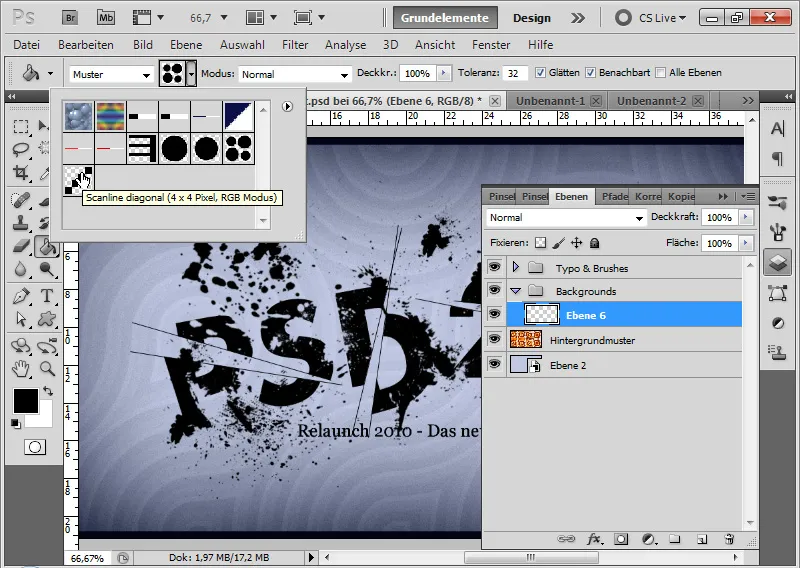
If needed, I can decrease the Opacity. In this example, I set the Opacity to 25 percent.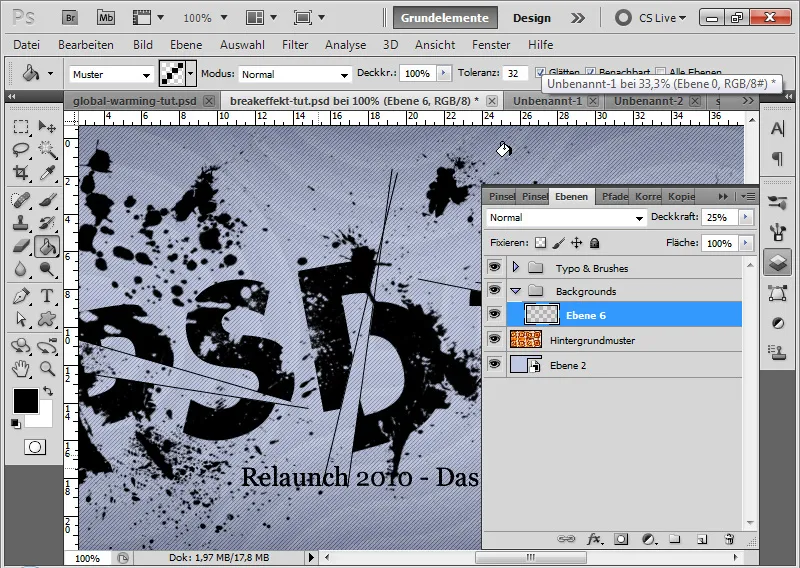
Step 6: Variation for Vertical and Horizontal Scanlines
If I prefer straight vertical or horizontal scanlines instead of diagonal ones, I can easily create these with a custom pattern.
For vertical scanlines, my pattern document is: 4x1 pixels
For horizontal scanlines, my pattern document is: 1x4 pixels
I simply place a black dot in the document as described above. Then I define the patterns via the Edit menu. In this example, the layer with the horizontal scanlines was set to Overlay mode.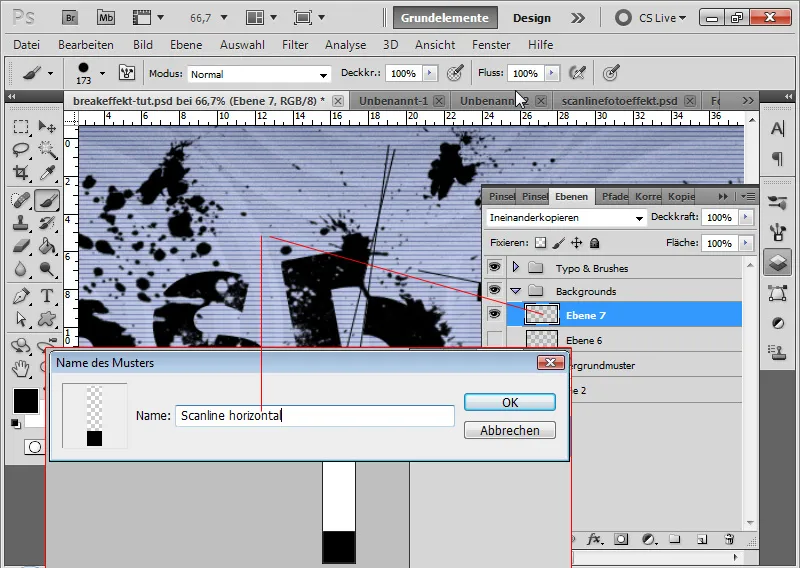
If I want to decrease or shorten the distances between the lines, I simply adjust the page size of the pattern file accordingly. For wider spaces, I choose an aspect ratio of 5:1, 6:1, or more, for narrower spaces of 3:1 or 2:1.
Intuitively, I can also just use the Crop Tool to enlarge the document. This way, the aspect ratio increases as desired.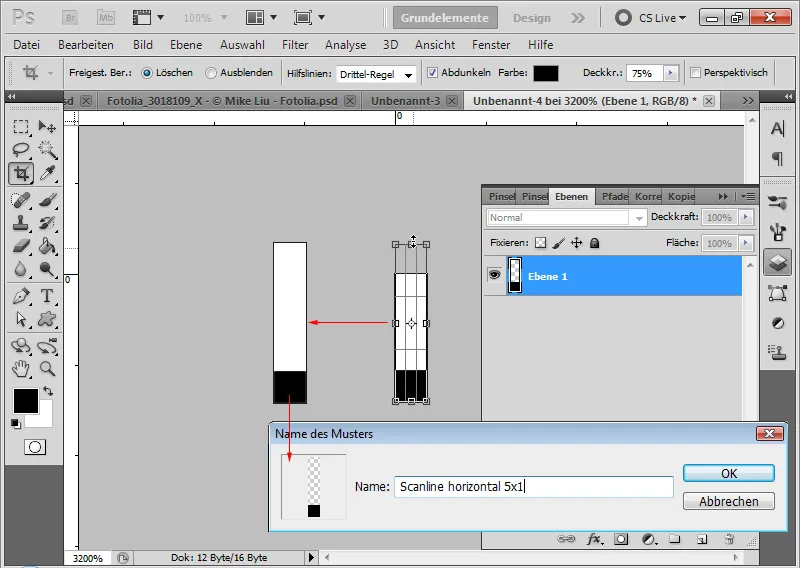
Step 7: Scaling Scanlines
The pattern can also be applied as a Pattern Overlay. I create a new layer with Ctrl+Shift+Alt+N and fill it with any color. I set the Opacity slider to 0 percent. In the Fill Options, I choose the Pattern Overlay tab. There, I can access my newly defined pattern. I can scale this pattern to further optimize the scanline look.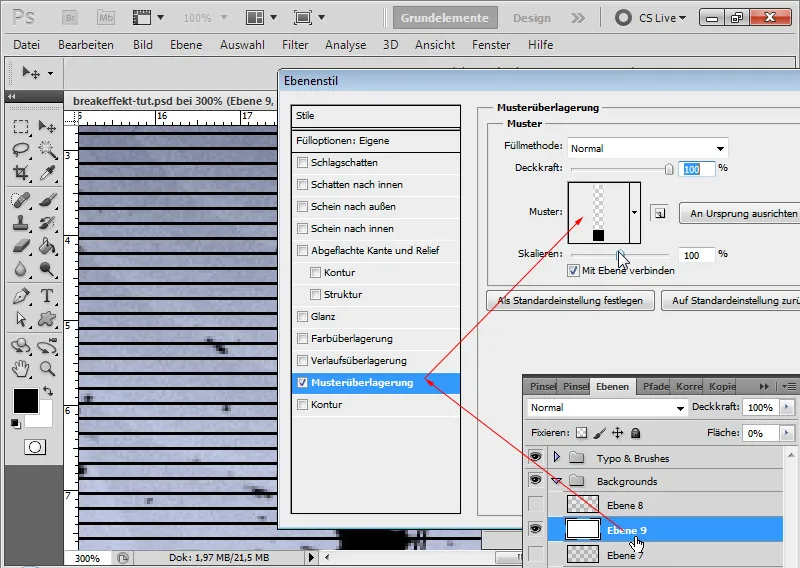
Side Note: Scanlines Photo Effect
Our moderator Mosh presented a quick tip on how a scanline-like effect can enhance photographs in a tutorial.
Example: Lighthouse Image – Image Source: Denis Pepin @ Fotolia.com
First, I duplicate my background layer with Ctrl+J. Using the Single Column Selection Tool, I select a column of pixels in a prominent part of my image.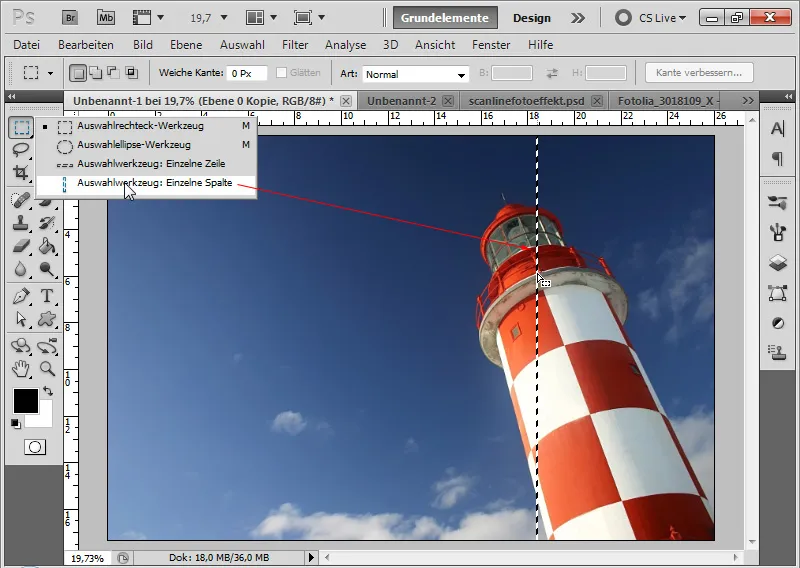
With Ctrl+T, I can transform my selection. I drag the selection frame to the left and right to the edges of the image.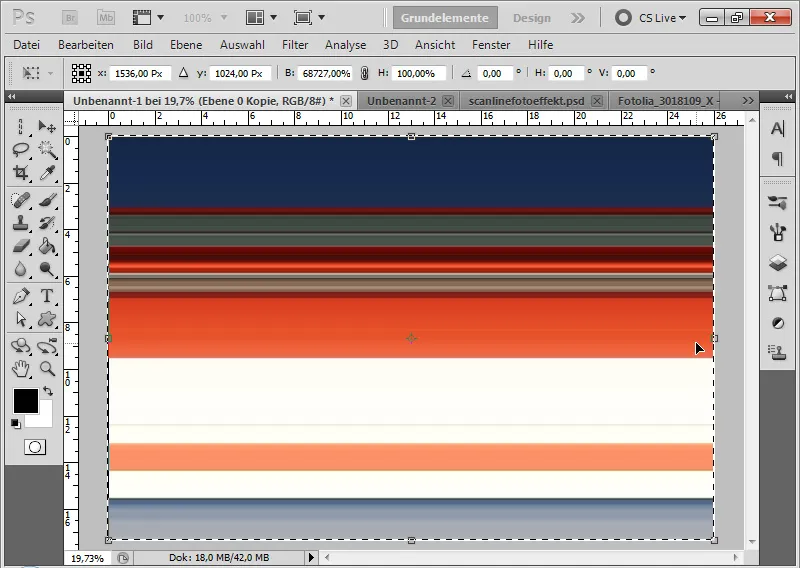
I can deselect the selection with Ctrl+D. I change the fill method to Luminosity at 30 percent opacity.
I duplicate the layer with Ctrl+J and set the duplicate to the layer mode Soft Light at 30 percent opacity.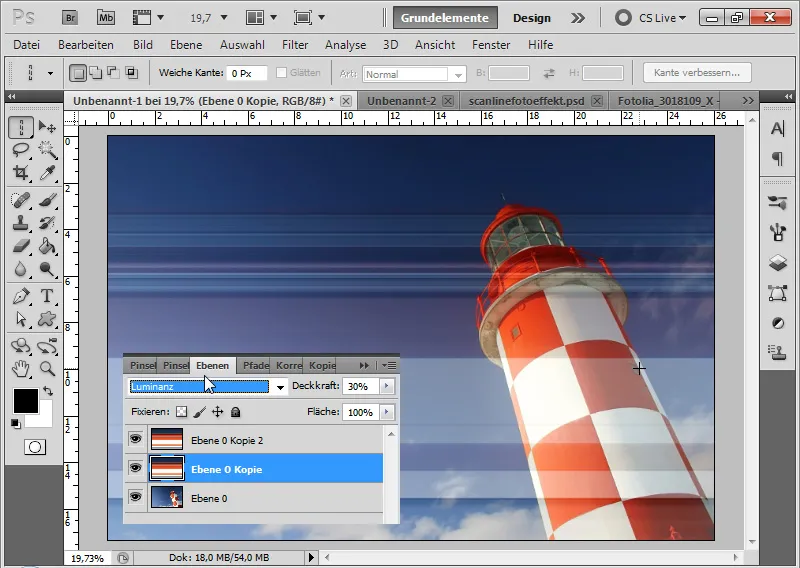
Before the final step, through the menu, I can add a vignette to my background layer by selecting Filter>Lens Correction. I choose a Strength of -100 with a Midpoint of +20. Lastly, I add a short text "Rügen 2010" using a 150-Pt Jellyka font in black.
That's a quick tip for a photo effect. Just try it out and experiment with the fill methods.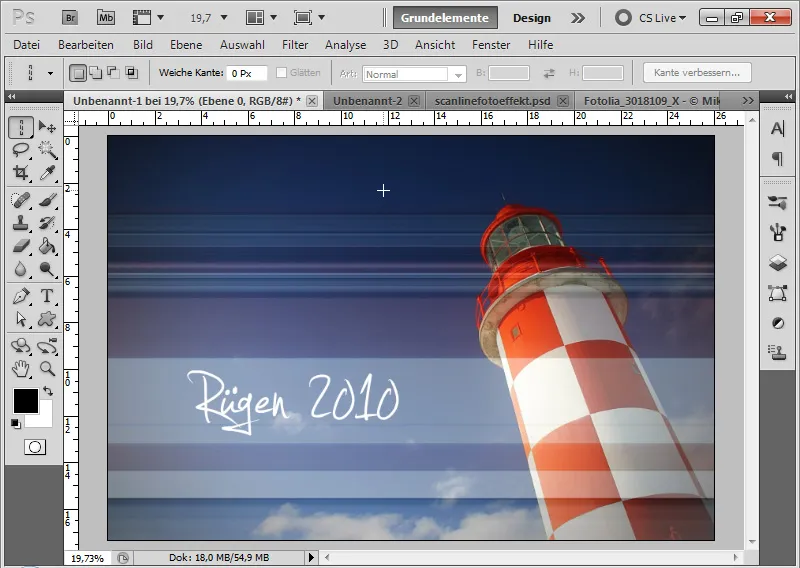
2. Dotted and with Relief
Step 1: Simply dotted
Similar to generating scanlines, I can also create dotted patterns for flyer backgrounds. To do this, I simply create a new document sized 4x4 pixels.
Using the selection tool, I select the four pixels at the bottom right and fill them with black. Then I define the pattern through the Edit menu.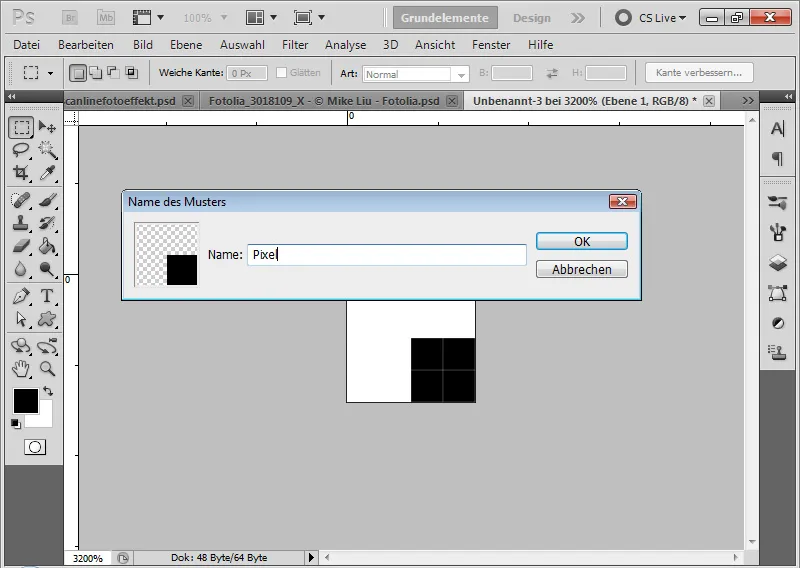
In Overlay mode at 70 percent opacity, it also provides a quick way to create an interesting background for flyers.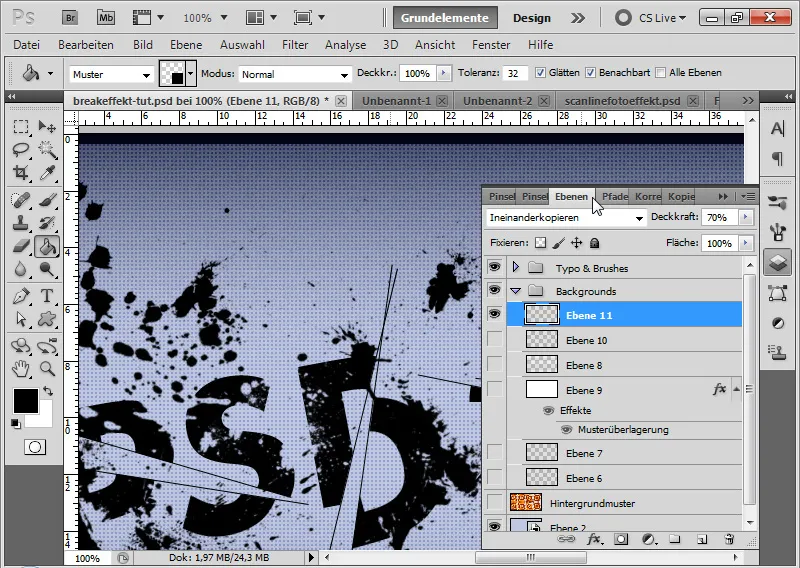
Step 2: Dotted with Relief
To enhance the dotted look, I create a pixel relief.
First, I create a new document sized 3x3 pixels. I fill the middle pixel with black. The two adjacent pixels at the bottom and to the right each receive 50% gray. The pixel at the bottom right is filled with 80 percent light gray.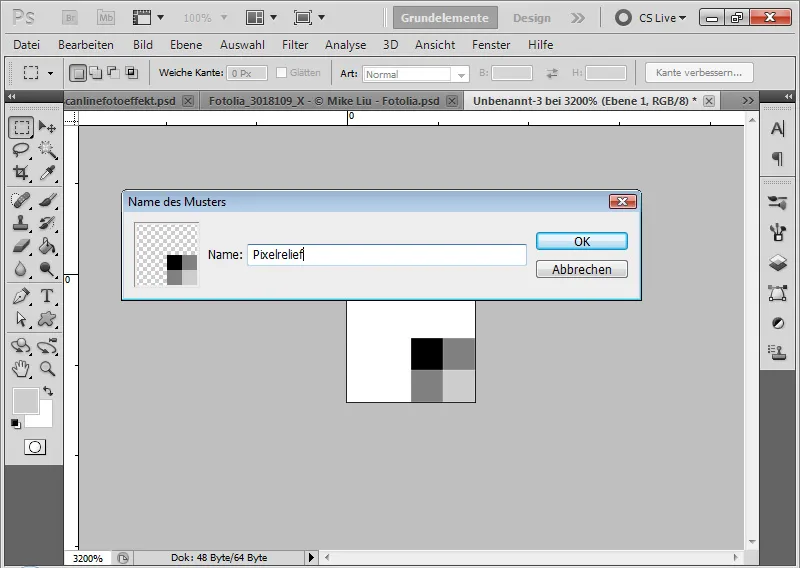
In Overlay mode, the relief effect offers another interesting way to design flyer elements.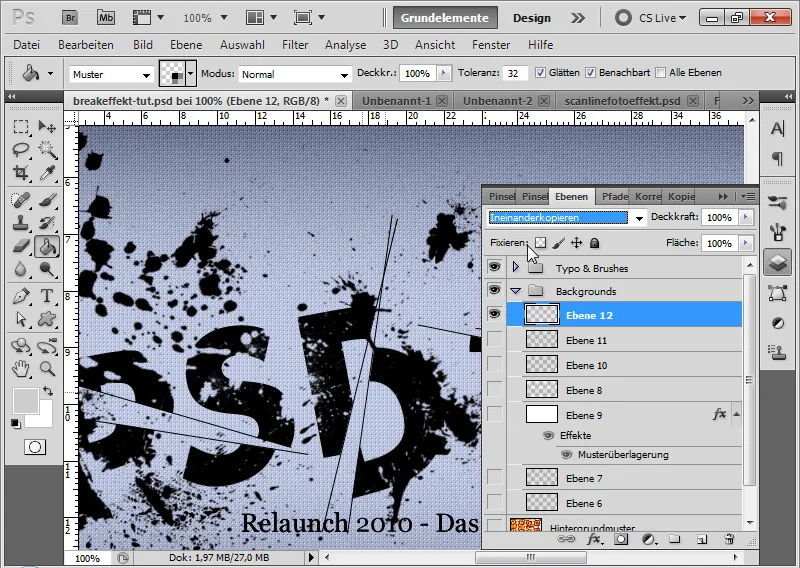
Step 3: Circular Mosaic
I create another new document sized 20x20 pixels. The background remains transparent here too.
Using the Ellipse tool, with the Shift key held (which ensures my circle is perfectly round), I draw a circle on the document. The color is black – but that's not really important.
The circle is then set as a pattern and can be used as a background effect. Alternatively, I can also leave the circle transparent and color the outer areas black. This can beautifully accentuate photographs artistically.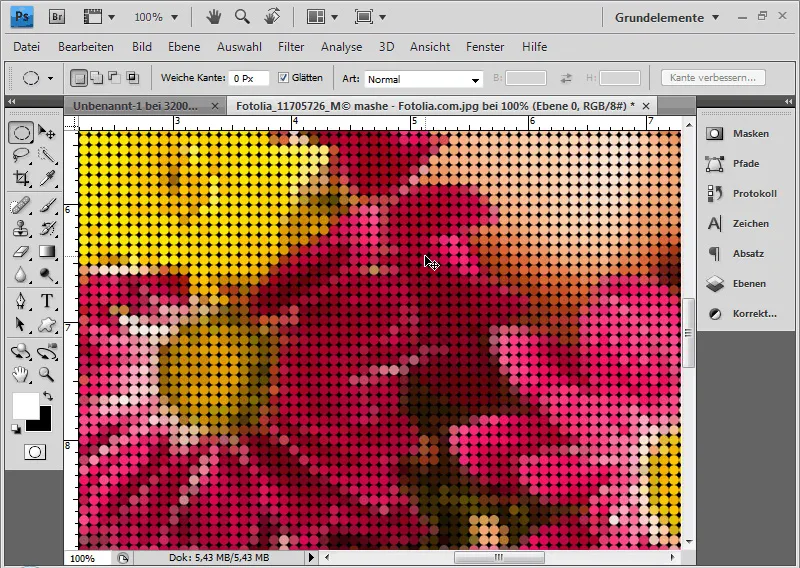
3. Halftone Effects
Step 1: Halftone Filter as an Alternative to Pattern Definition
The option of creating dotted backgrounds using patterns is available without defining patterns.
I create a new layer and fill it with 50% gray. I set the mode to Overlay.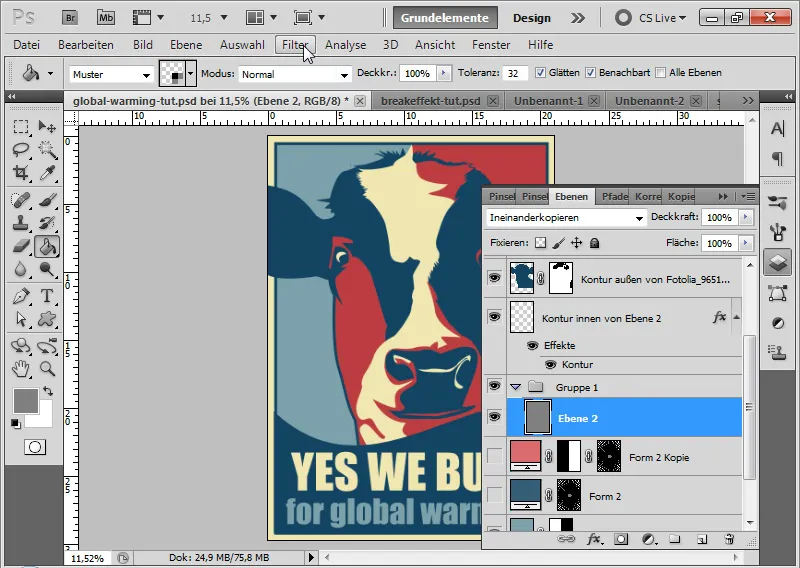
Next, I open the Halftone Effect filter through the Filter>Artistic filter.
The pattern type is Point with a Size of 1 and a Contrast of 30. To determine the contrast, it is advisable to zoom in on the preview view (400 percent works well).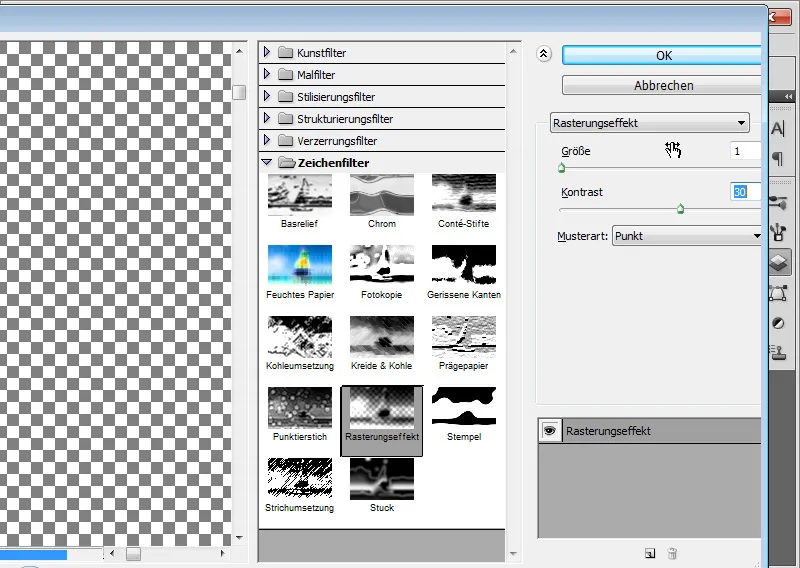
I confirm with OK. My halftone raster is done.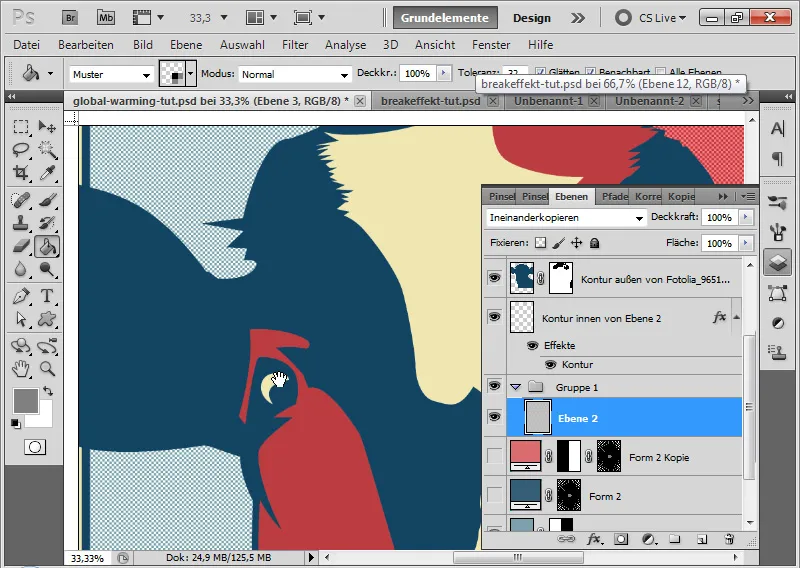
Step 2: Variation with Circles and Lines
As an alternative to the Point pattern, I also find the Circle and Lines patterns in the Halftone Effect filter. These two pattern types are also very nice options for simple flyer backgrounds.
Example for horizontal lines: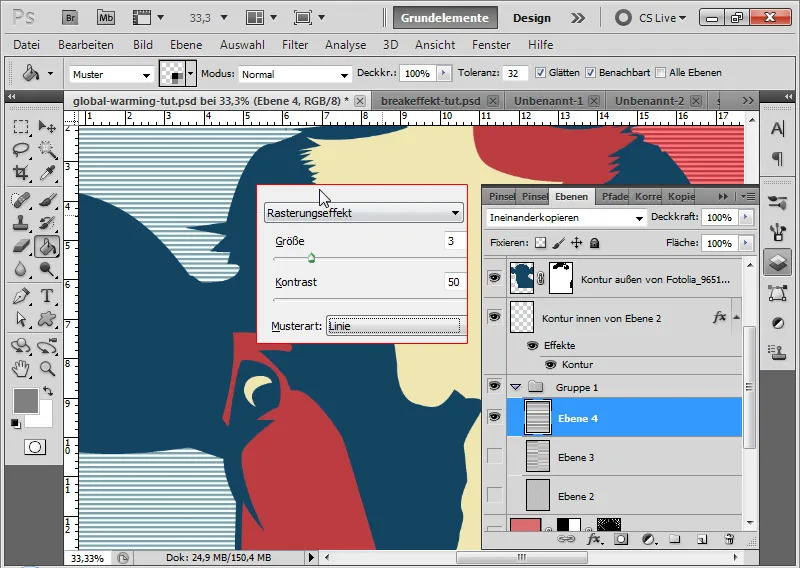
Step 3: Transformations with Lines
The limitation of generating halftone effects through the filter is that I do not have extensive size variation possibilities. If I want very fine lines in the image, I reach the limit with this filter. In this case, my only option is to either carry out the halftone effect in a larger document, duplicate it into my current document, and resize it using Ctrl+T.
I can also do the same by resizing the existing layer from the beginning using Ctrl+T, duplicating it with Ctrl+J, and inserting it into the resulting gap accordingly.
Conclusion: The Halftone Effect filter is capable of providing quick solutions for smooth flyer backgrounds. However, for finely tuned spacing of lines and dots, patterns are unavoidable.
Example for circles: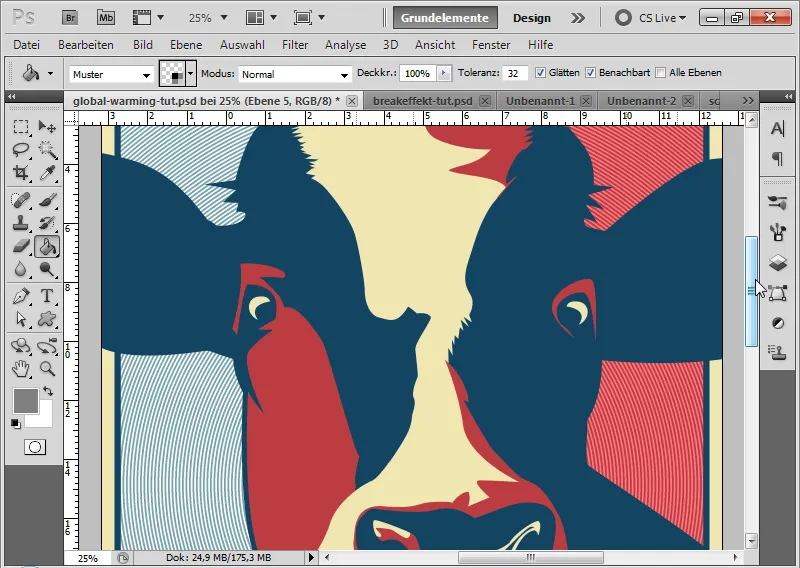
4. Grid and Line Patterns
For presenting products, logos, or type elements, it can sometimes be beneficial to use an effective grid or pattern as the background for a flyer. Here I would like to show two possible ways to create interesting backgrounds easily.
4.1 Line Pattern with Shine Effect
In the first example, I demonstrate the creation of a line pattern with a shine effect.
Step 1: New Document
I create a new document with the size 1200 x 800 pixels. The background is black.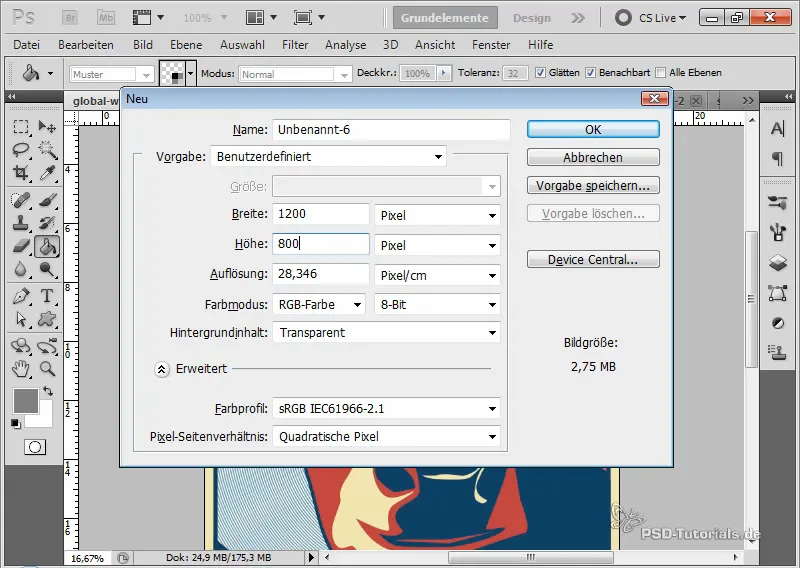
Step 2: Create Two New Layers
Using Ctrl+Shift+Alt+N, I create a new layer. I repeat the shortcut twice.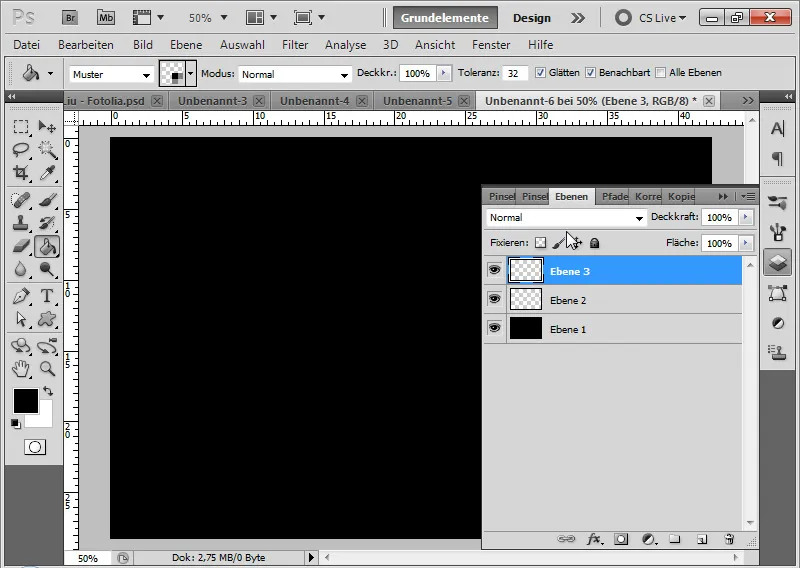
Step 3: Select Line Area and Fill with White Color
Using the Lasso Tool, I select the approximate area of my line pattern with the top layer activated. I fill the selection with white color.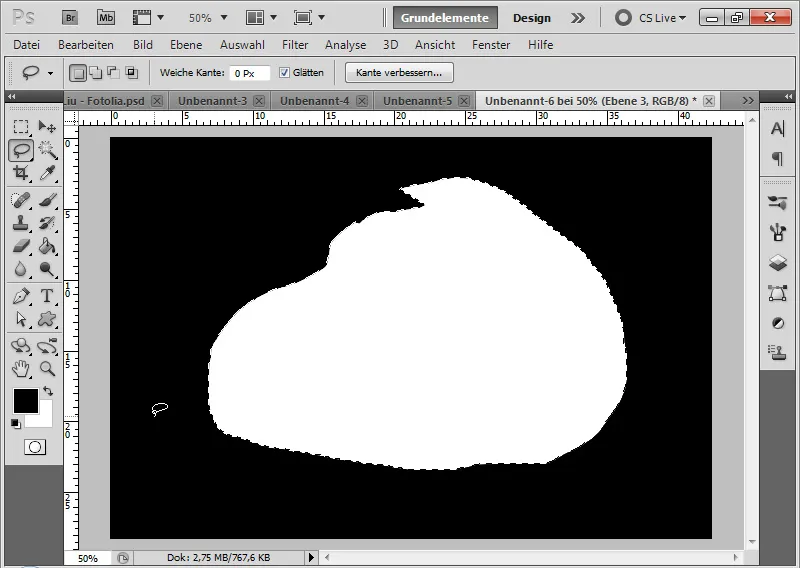
Step 4: Blur
To apply the blur effect, I access the Gaussian Blur filter under the menu Filter>Blur Filters.
The Radius should be chosen such that the edges are nicely blurred. In my example, around 50 pixels work very well.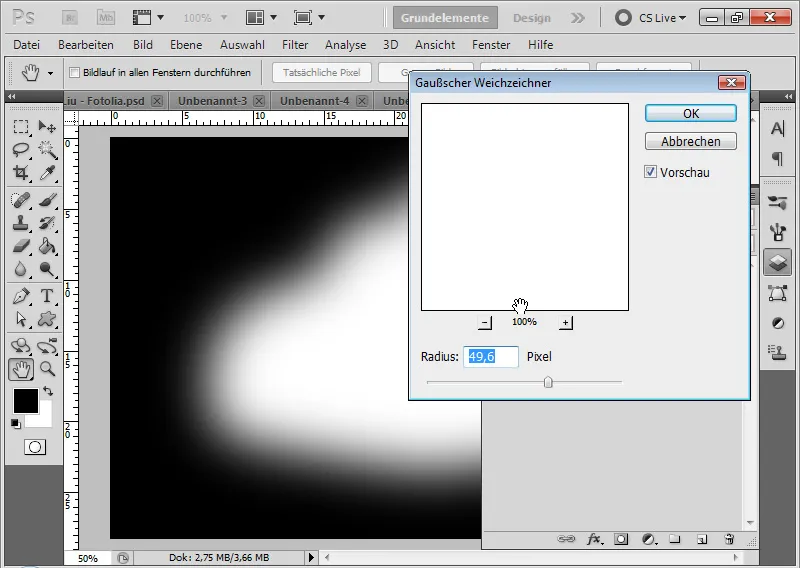
Step 5: Speckle
I set the layer mode to Speckle.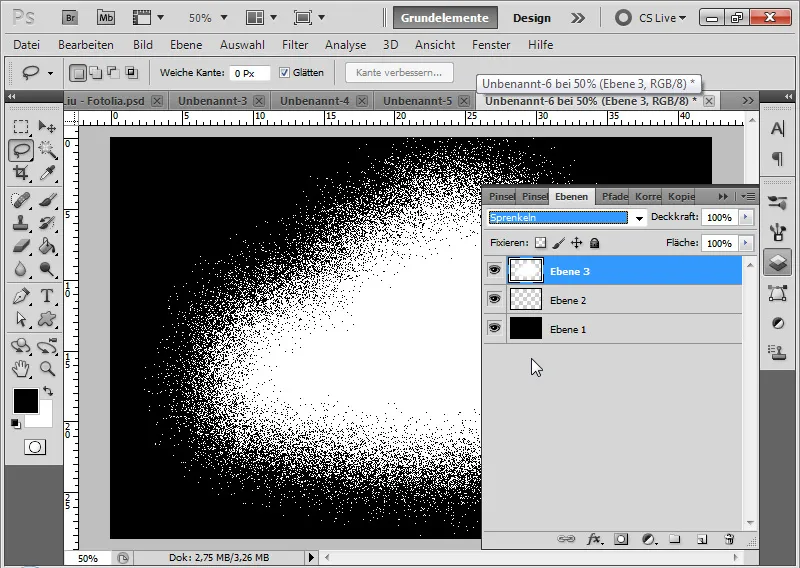
Step 6: Reduce to One Layer with Underlying Layer
To preserve the speckled effect but return to the Normal layer mode, I select the layer with the underlying one and reduce them to one using the shortcut Ctrl+E.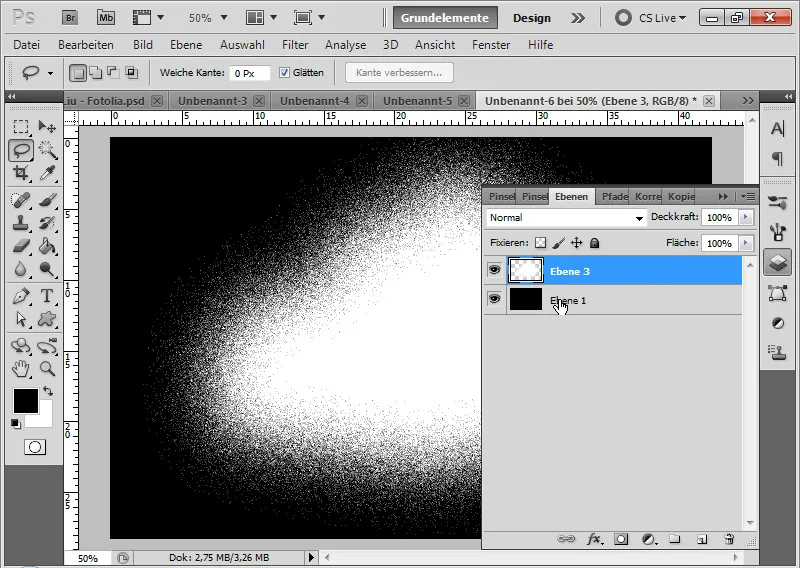
Step 7: Motion Blur
I select the Motion Blur filter under the menu Filter>Blur Filters.
There I choose a moderate Distance of about 275 pixels to create a linear effect from my speckles.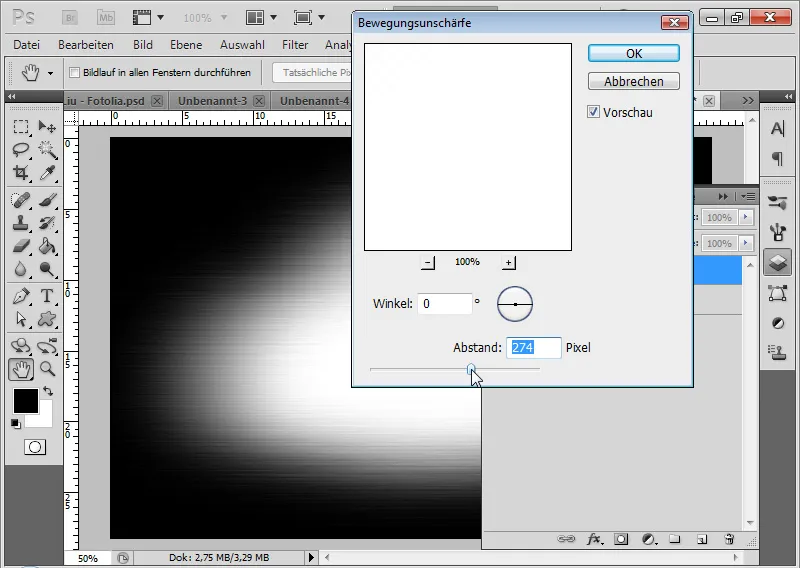
Step 8: Duplicate Layer and Halftone Effect
In the next step, I duplicate the layer, reduce the Opacity to 50 percent, and access the Halftone Filter under the menu Filter>Pattern Filters.
I set the Pattern Type to Line with a Size of 1 and a Contrast of 0.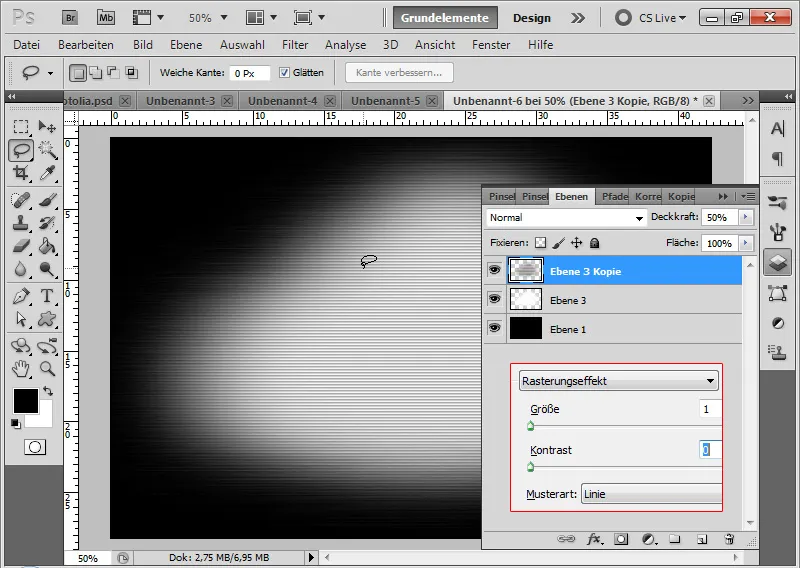
Step 9: Colorize Filter Effect
I create an adjustment layer Hue/Saturation. To colorize my line effect, I activate the Colorize checkbox.
• Hue: 224 for the blue tone
• Saturation: 39
• Brightness: -10 to 0 – depending on the desired appearance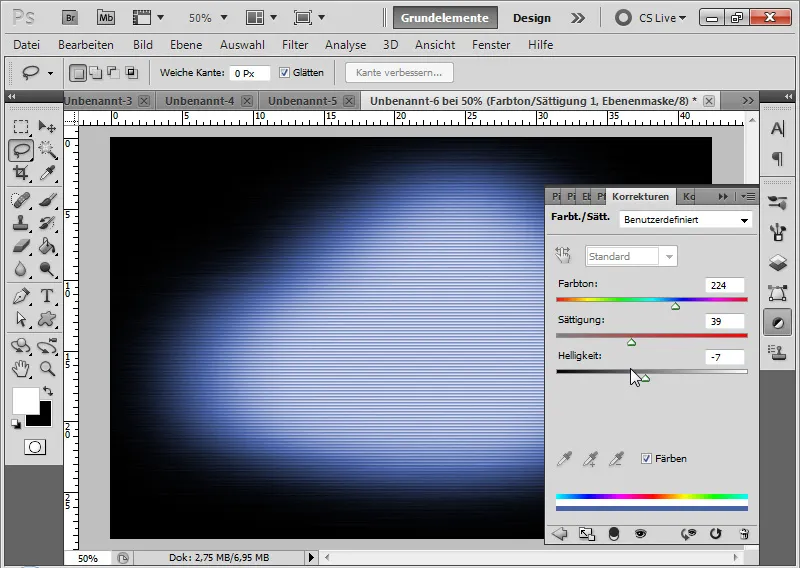
The background is ready and can be assigned to a logo, text, or similar:
Step 10: Transform
I select the two line layers and then convert them into a Smart Object. I can make the view a bit more dynamic by using Ctrl+T to make the lines run from bottom left to top right.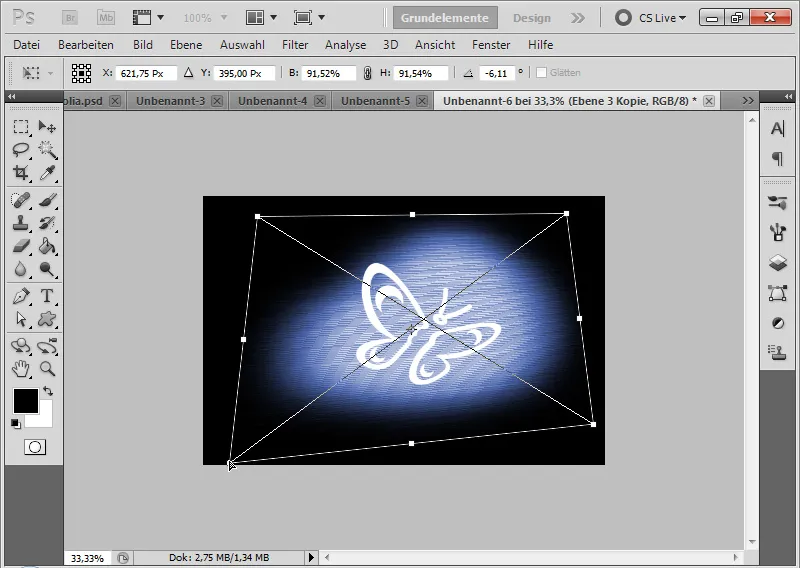
Step 11: Adjust Logo and Crop
I colorize my logo black using a Color Overlay in the Layer Styles and add an Outer Glow in white at 75 percent Opacity and 35 px Size in Color Dodge mode.
Using the Crop Tool, I can adjust the size of my document as needed.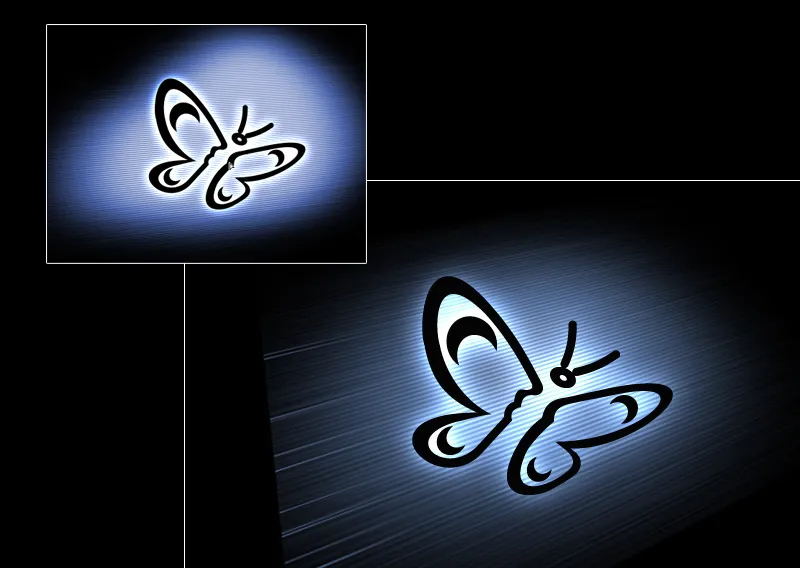
4.2 Grid Pattern
A grid pattern works very well as a background element in a flyer. It can be used entirely in the background or as an accentuating design element.
Step 1: Create Pattern
In a new document with a size of 50x50 with a transparent background, I draw a narrow selection strip at the top and left using the Marquee Tool. I fill this selection with white or black color.
Then, I save the pattern under the menu Edit>Define Pattern.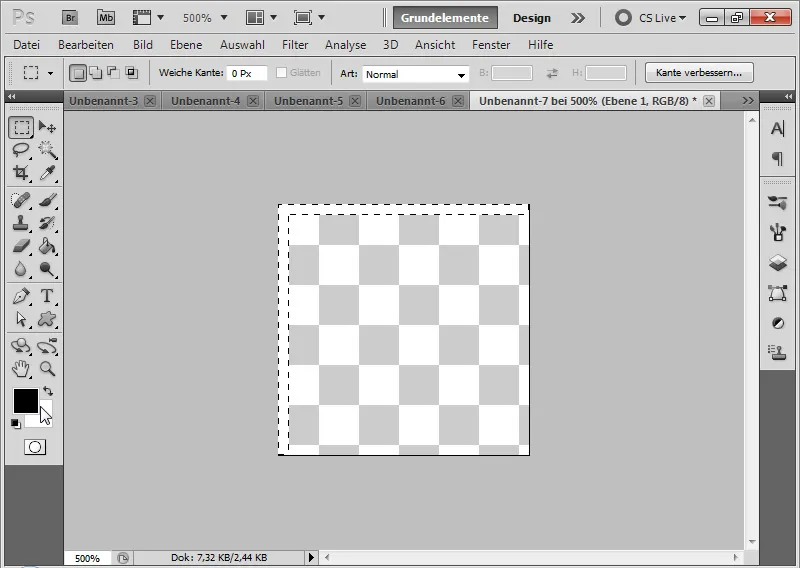
Step 2: Grid as Background Pattern
I can use the pattern as a normal background element by filling a new layer with the pattern using the fill tool.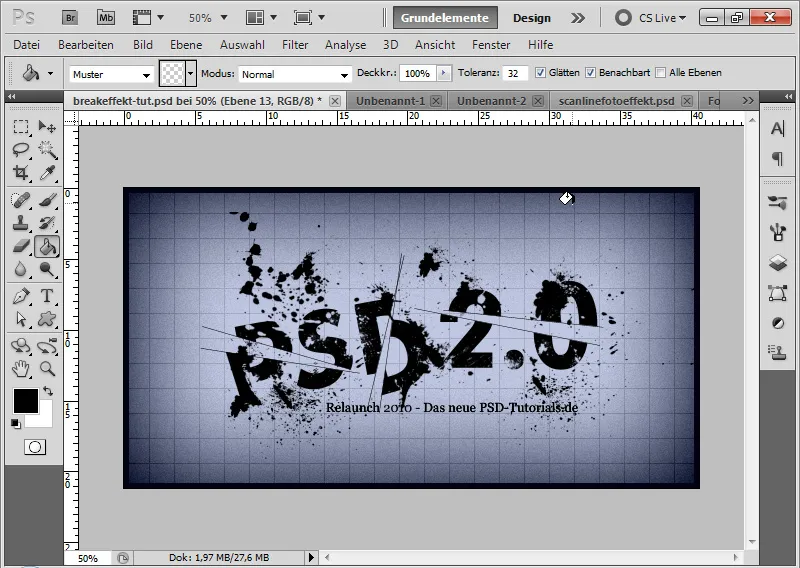
If I want wider grids, I can easily do it through the fill options by adding an outline in the same filling method to the grid.
If I want the grid to be larger or smaller instead, it is useful to create a layer with any color, set the area slider to 0, and set a pattern overlay with the grid pattern in the fill options. There I can then scale the grid as needed.
For optimal further editing, I can also output my pattern overlay as its own layer via right-click.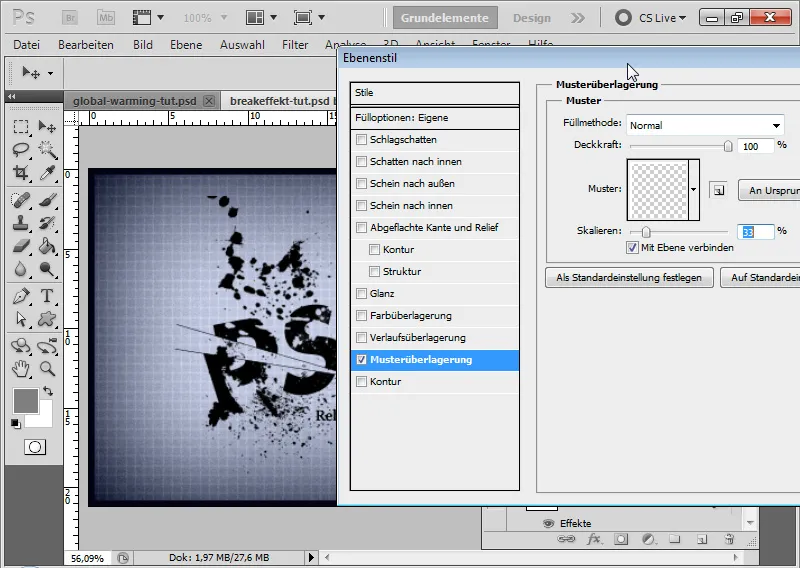
Step 3: Grid as Design Element
A grid can also be used as a design element.
In this example (Image Source: Mike Liu - Fotolia.com), to give more dynamism to the light glare, I add the grid pattern to a new layer using the fill tool.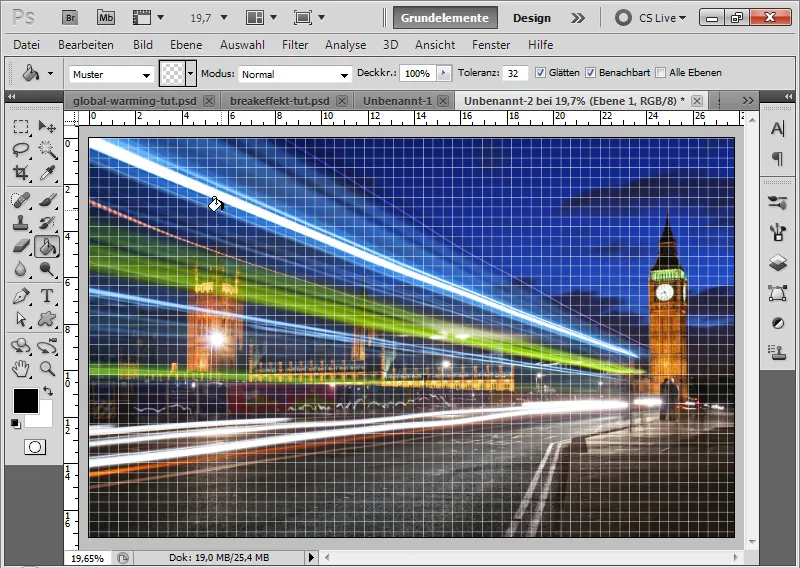
By using Ctrl+T>Warp, I adjust the grid to the light glare gradient. This gives the light glare a dynamic additional effect.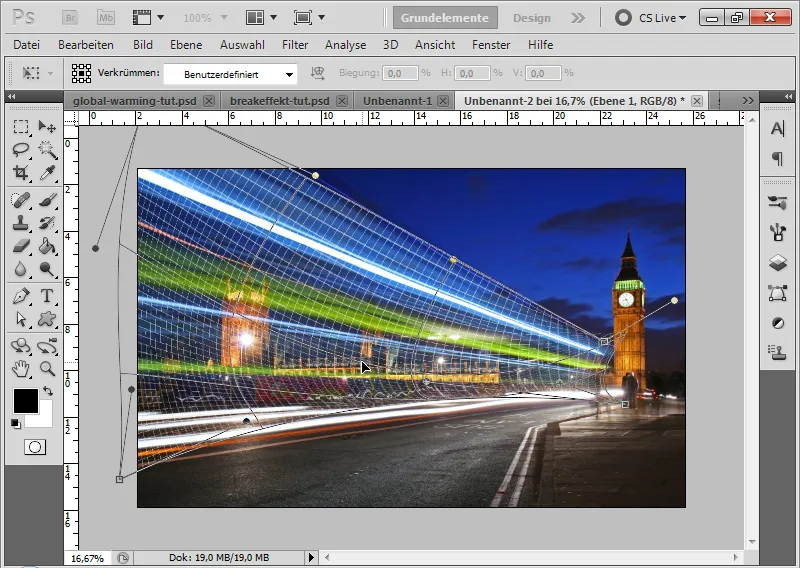
If I set a white shine to the outside with a size of 20 pixels in the fill options in the Color Dodge mode, the effect seems even more pleasant.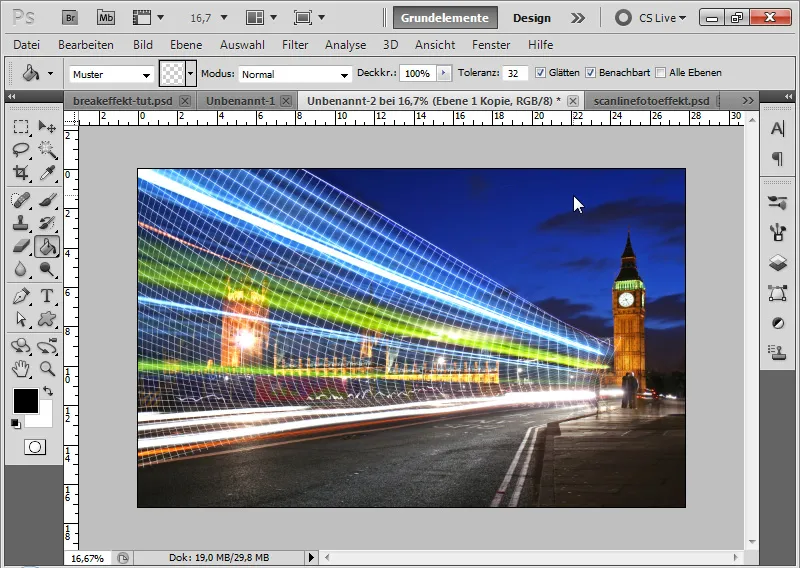
In the lighthouse image, I can enhance the maritime atmosphere by simulating a wave with a grid. Here too, I add my grid to a new layer and warp it to create a wave-like appearance.
In the fill options, I also give the grid a white outline on the outside with a size of 1 pixel, making the grid slightly thicker.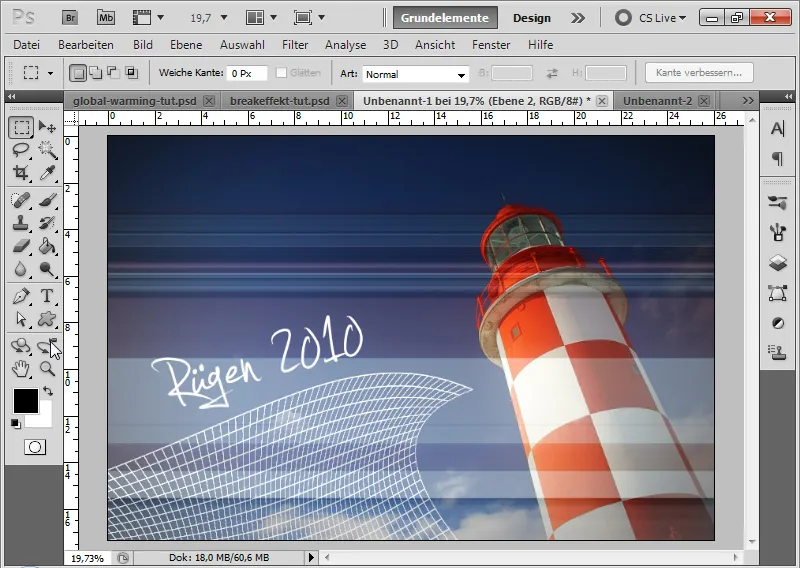
Just as the grid can be varied in shape through Warp, I can also accentuate grids, lines, and circles using Transformations and Layer Masks in the view. In line patterns, I can even simulate Sinedots.
In this example, I inserted a circular grid and restricted it to the inner area via a Layer Mask in the view, creating a kind of spark effect at the lighthouse tip.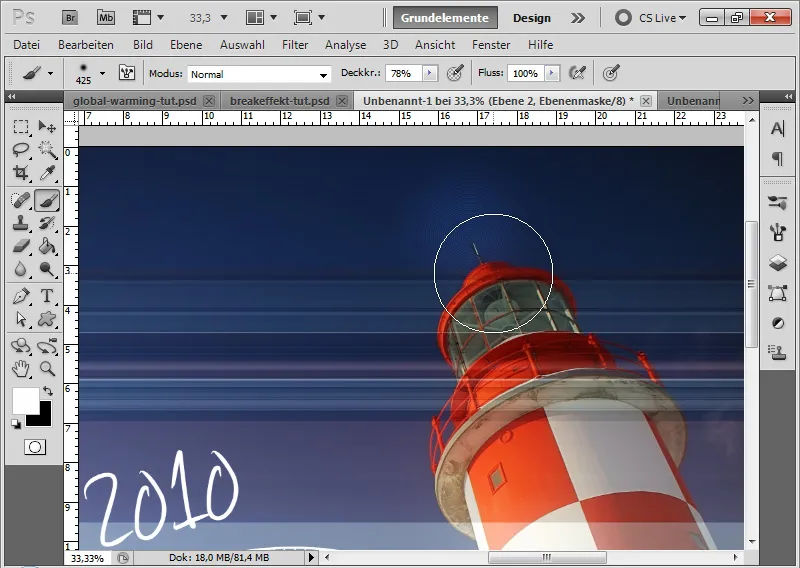
5. Endless Patterns and Seamless Tiles
Endless patterns and seamless tiles are often used for flyer and website backgrounds. In the final part of my tutorial, I want to show several approaches to creating endless patterns.
5.1 Simple Endless Pattern
I have a section of an image that I would like to create as an endless pattern. With textured images, I often succeed in creating a pattern without visible seams. It is important that my selection is successful.
Step 1: Selecting Pattern Area
In my example, I want to create an endless pattern from this texture. I use Ctrl+A to select the entire image area. Since - even with CS5 - the option to modify selections via the Selection menu is grayed out, I take an alternative path to create an exact selection.
After Right-click>Transform Selection, several numerical input fields appear in the menu bar. I set my selection's height and width to 70 percent each. Then I confirm with Enter.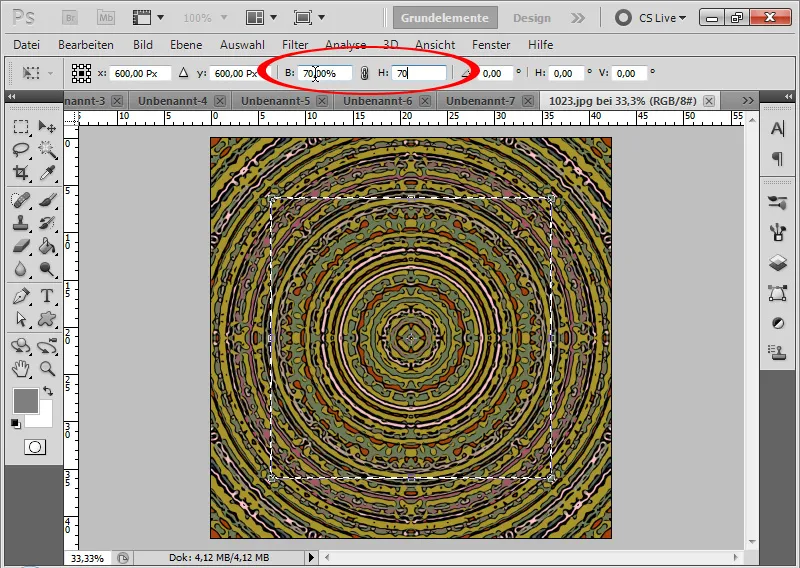
Step 2: Copy and Paste Selection
I can copy my selection and paste it into a new layer using Ctrl+C & Ctrl+V.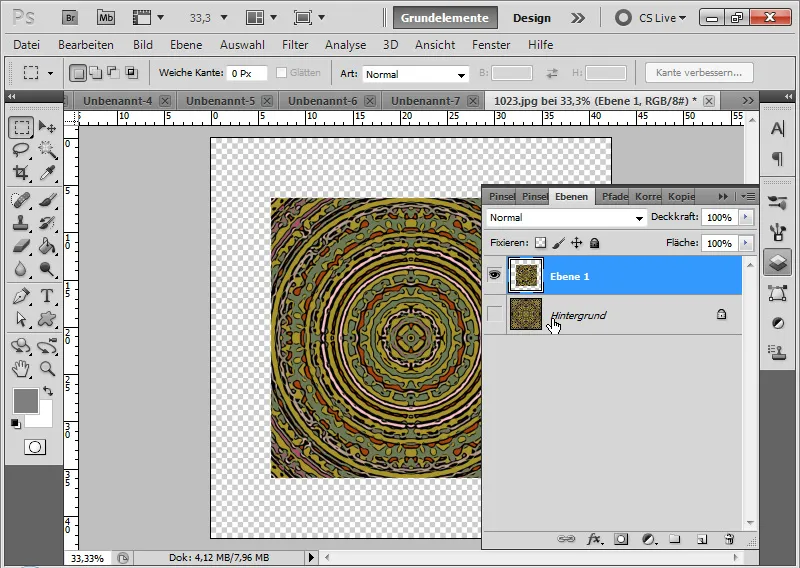
Step 3: Cut Out Pattern and Set as Pattern
Using the Cropping Tool, I cut out the pattern. I can set the pattern via the Edit menu.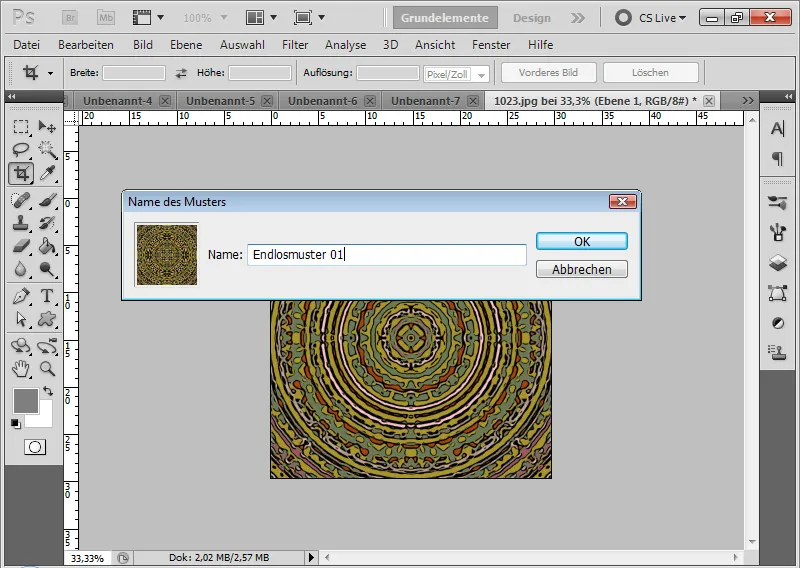
Step 4: Use as Background
In my flyer, I create a new layer and fill it with any color. I set the area slider to 0 percent. In the fill options, I assign the previously set pattern to my flyer in the Pattern Overlay tab.
I set the Fill Method to Luminance. The Opacity is reduced to a lower value. I can vary the size of the pattern with the Scaling slider. For precise positioning, it is advisable to directly move my pattern to the right place in the document with the mouse.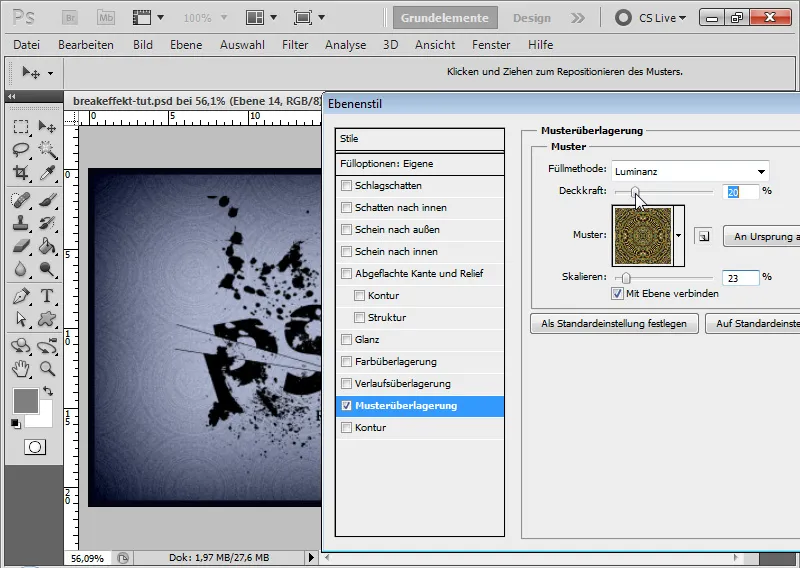
5.2 The repeating pattern
In order to achieve this typical "wallpaper effect" that is commonly seen as a repeating pattern in website and flyer backgrounds, I need to use a displacement filter.
Step 1: Drawing a shape and setting it as a pattern
Using the Custom Shape Tool, I draw a floral shape in a document sized 500 x 500 pixels, which will become my wallpaper pattern. I position the shape right in the center of the document. Then, I set my floral shape as a pattern.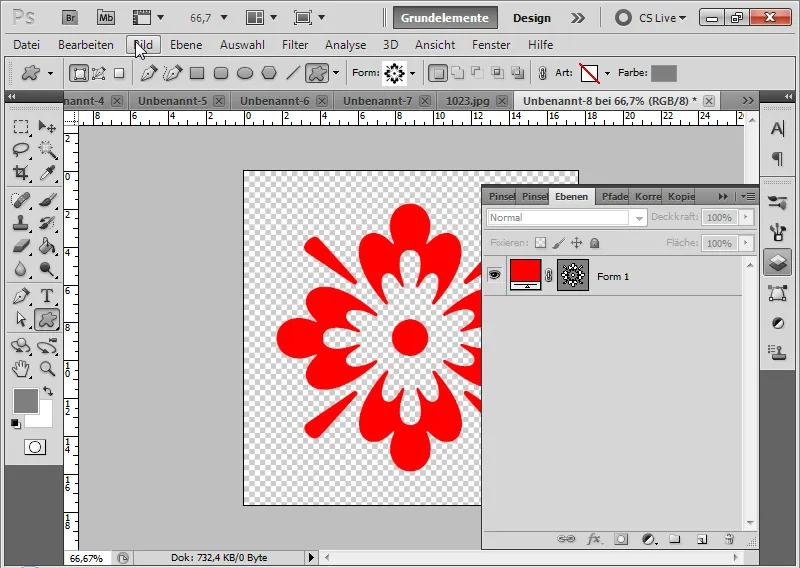
Step 2: Adjusting the offset
The wallpaper look is not yet complete, even though I could already use the pattern repetitively. What is missing is the offset. To achieve this, I create a new document twice the size of the previous one, i.e., 1000x1000 pixels.
I fill a layer with my pattern. Four elements are displayed. Using the Marquee Tool, I select a column of the pattern.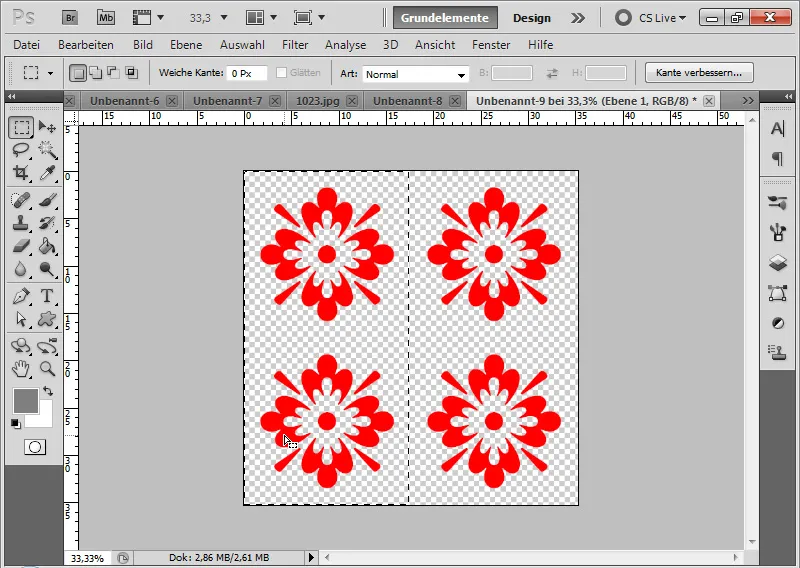
Through the Filter>Other Filters>Displace Effect menu, I adjust a vertical displacement effect. I select the pixels so that the top edge precisely connects to the bottom edge.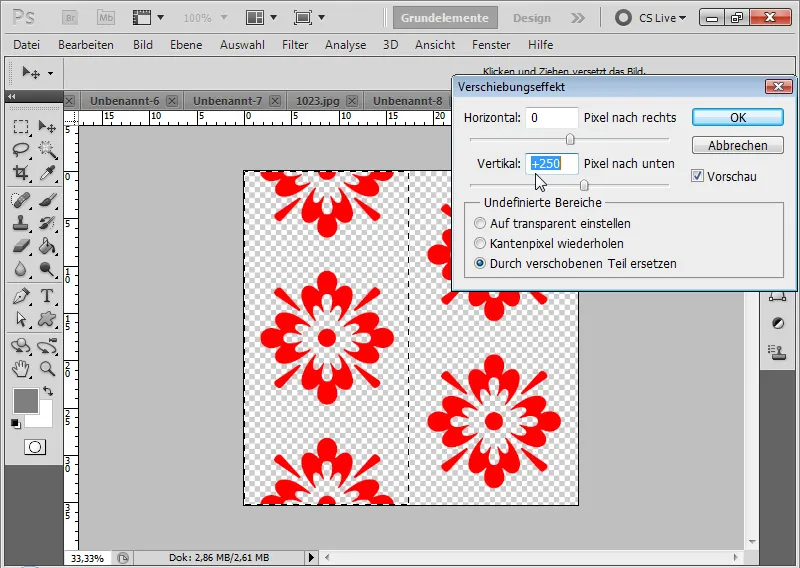
Subsequently, I set this pattern by using the Edit menu, and can use it as a background in my flyer. Here, the pattern is placed as a pattern overlay on a gray layer using the Luminance mode at 20% opacity.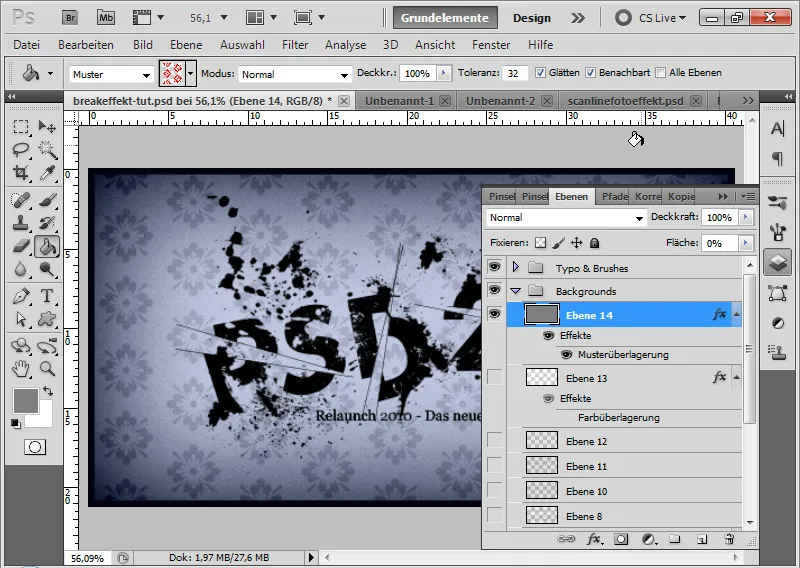
5.3 Seamless tiles for textures
Generating a pattern without visible seams is rarely as simple as in the first example.
However, irregular textures can also be made seamlessly tileable. To achieve this, I once again use the Displace Effect filter and then fix the visible edges.
Step 1: Applying the displacement effect
My texture has a size of 1000 x 1000 pixels. When I set this as a pattern and apply it in a larger document, the transitions look as follows: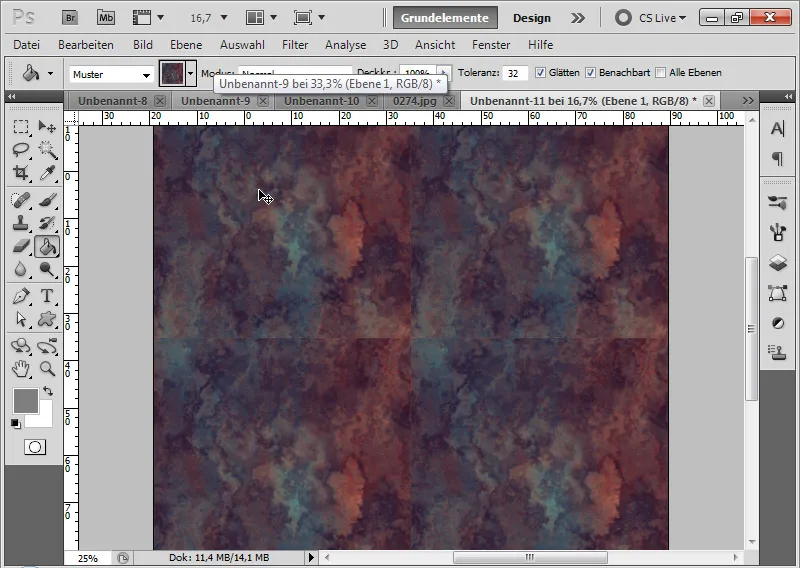
I go back to my texture file with the original size of 1000x1000 pixels. Through the Filter>Other Filters menu, I select the Displace Effect filter. There, I set a horizontal and vertical displacement of exactly half, i.e., in both cases 500 pixels.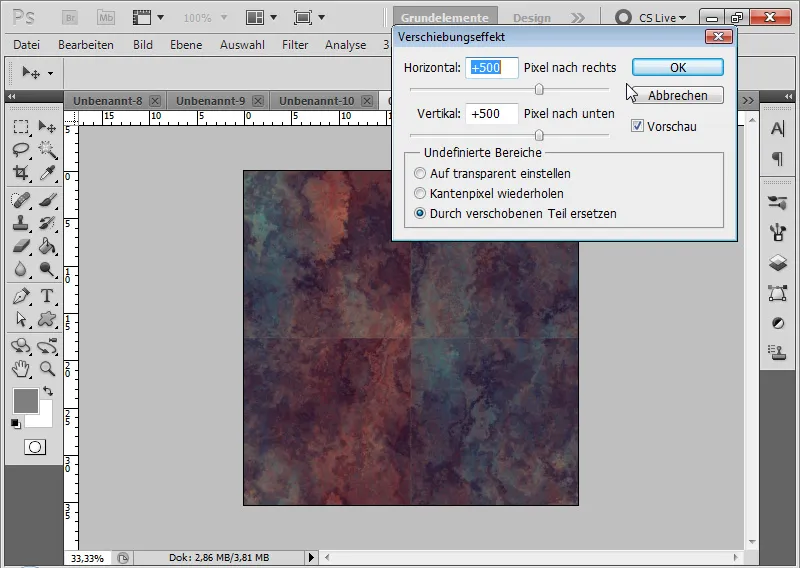
Step 2: Repairing visible seam
Now, the visible seam in the middle is clearly visible.
Since CS5, there has been a function called content-aware fill in the Spot Healing Brush. Using the Spot Healing Brush with a soft brush tip, I mark the seams. The Content-Aware checkbox is activated.
The seams are now automatically repaired. It may be necessary to repeat the process several times.
However, the most effective tool for repairing edges remains the Healing Brush Tool, which can also be used by users who do not yet have the CS5 version. With the Source Checkbox activated, I simply select the seams and drag the selection into a clean area. A calculation involving hue, saturation, brightness, and contrast occurs, and the visible seam is convincingly repaired.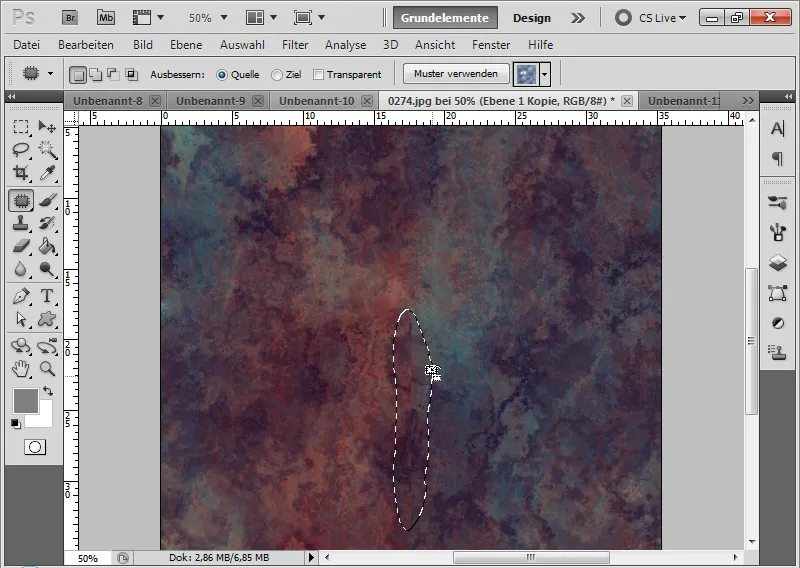
Once the visible seam is repaired, I set my pattern through the Edit menu.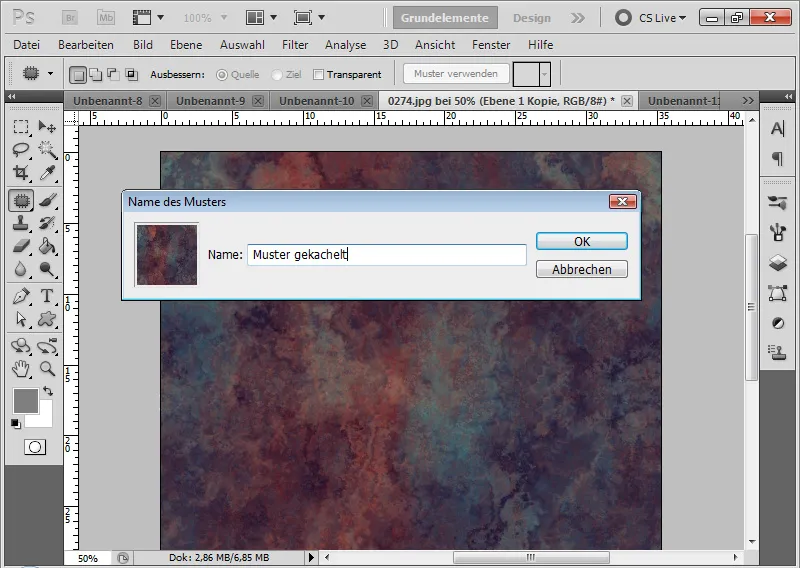
Step 3: Applying seamless tiled pattern
I create a new file sized 2000x2000 and can now use the Fill Tool to insert my seamlessly tiled texture.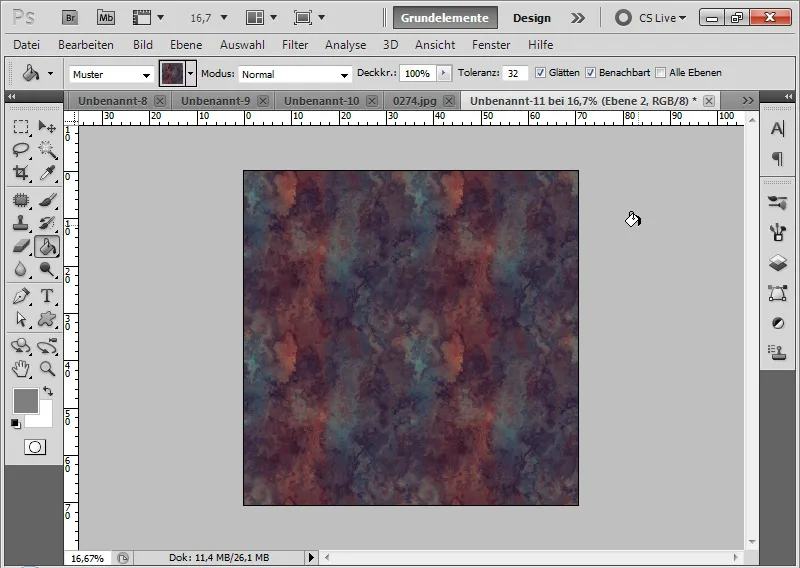
Textures, especially, are very useful when aging effects, grunge effects, etc., need to be inserted into images. See the image below (Image source: Lev Dolgatsjov – Fotolia.com).
Therefore, when working with very large documents, it is convenient to make non-tiled textures seamlessly tileable. In this example image, the texture shown above was placed in the image using the Screen mode as an overlay and slightly desaturated with a Hue/Saturation adjustment layer as a clipping mask.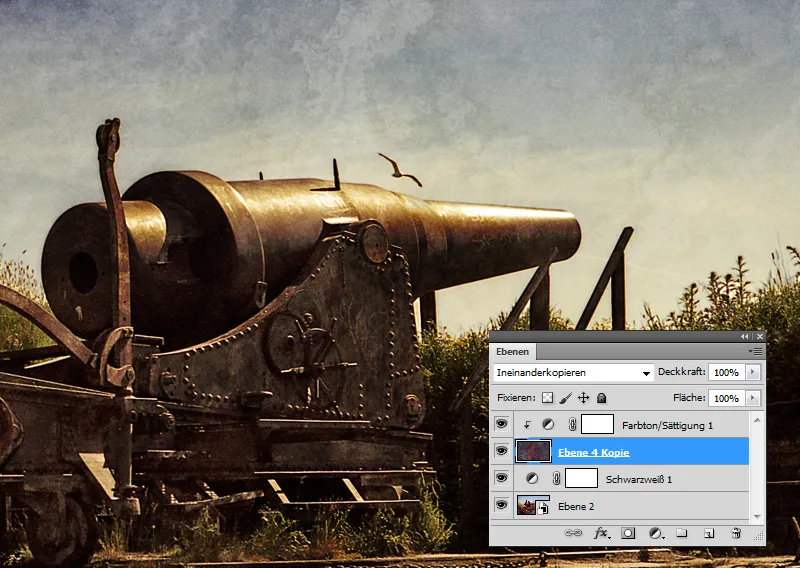
This tutorial includes a set of 16 patterns as working files. The patterns feature the diagonal, horizontal, and vertical scanlines, pixel reliefs, dot patterns, circular mosaic patterns, and grid patterns shown in this tutorial.


