E-books have become an integral part of today's market and Adobe is also involved with various approaches. InDesign offers the option of creating and exporting files in ePUB format. The main challenge is to make the layout displayable and readable for all size and resolution ratios, as such an ePUB is to be displayed on smartphones, tablets and e-readers.
1.1 ePUB - getting started
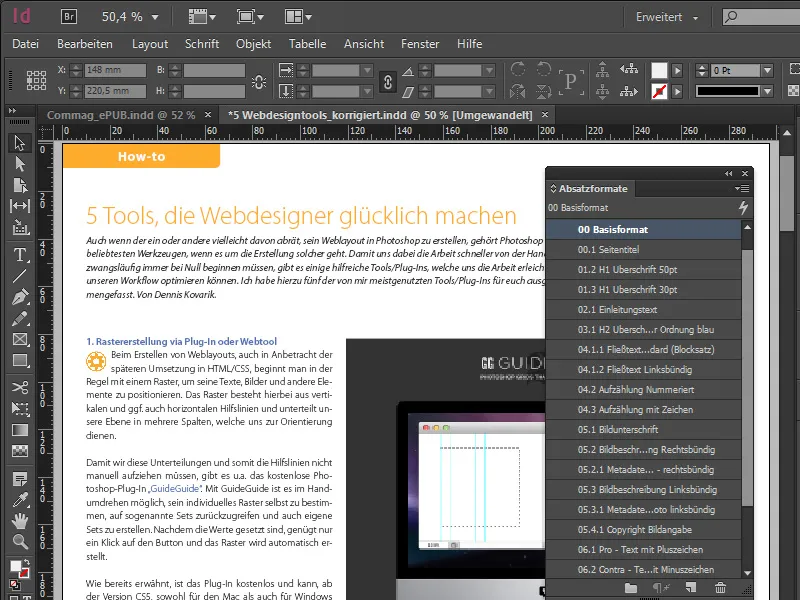
Print layouts or PDFs are relatively easy to create with InDesign. With a variety of tools, the layout designer can really let off steam and give free rein to their creativity when designing. The image below shows an excerpt from an article in our Commag. We have some text fields, placed graphics and elements, a large number of paragraph and character formats, which are recognizable in the control panel, and other various formatting.
If you want to create and export an ePUB, the design is subject to some challenges. The layout shown is intended for digital publication and has the dimensions 1024x768 px - based on the iPad. The layout in the ePUB area is relatively simple in structure and presentation, paragraph formats are also simple and clearly laid out and typographical subtleties are also very limited as a typesetter.
All text fields created in an ePUB should be linked together as text links and images or graphics placed in an ePUB must also be anchored in fixed positions. The reason for this is that if you change the view from vertical to horizontal, the image is always assigned to the correct text and does not move accidentally. InDesign refers to anchored objects in this case.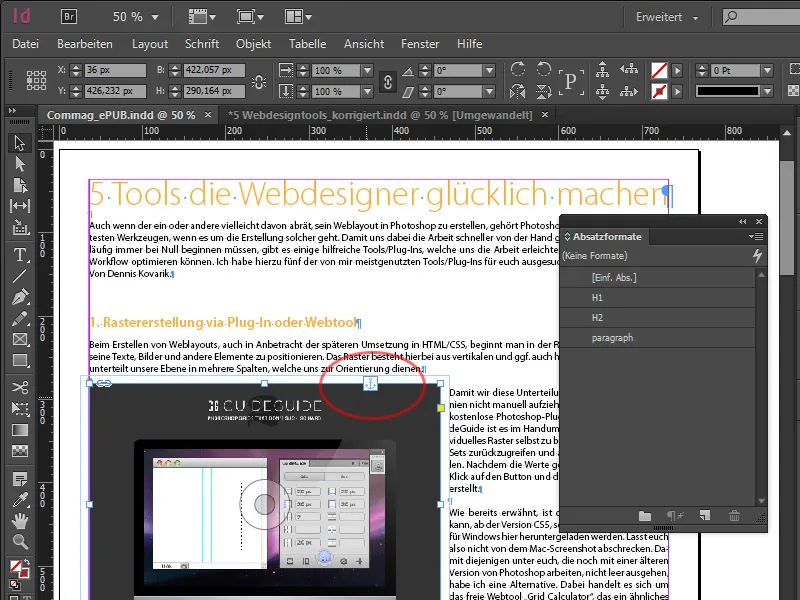
If you now simulate a variable display size by scaling the text field horizontally, you can see how the text in the frame changes, but the image always remains where it belongs in terms of content.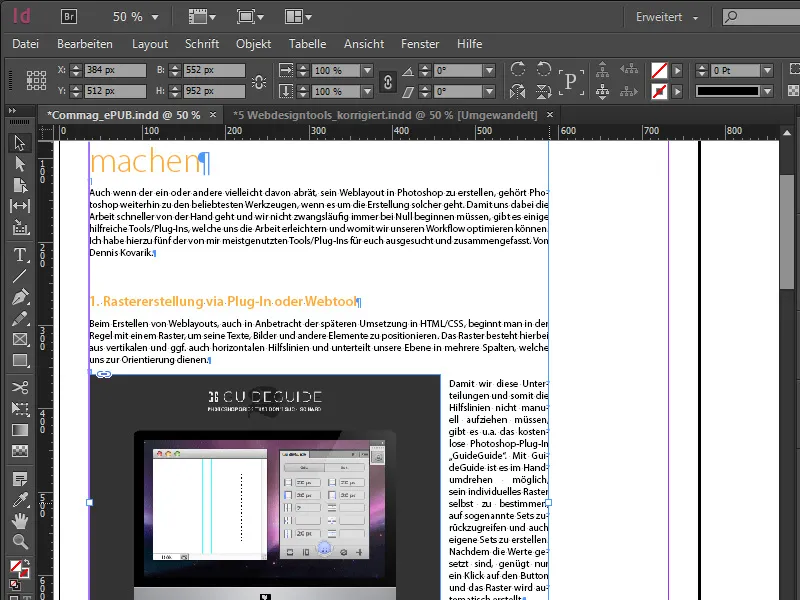
Let's now take a brief look at the export workflow. We select File>Export... in the upper menu palette , whereupon a dialog opens in which we can enter the name of the ePUB. Strictly speaking, the file format corresponds to *.epub, but the file name can also be changed in Explorer by replacing the .epub file extension with .zip. We can see that this is just a container that holds several files together. These include an XHTML version containing the document, as well as the associated style sheets, images and document fonts.
Back to the export. The export dialog looks a little different to what we are used to from other publications. Please note the following for the ePUB versions: The specification for version 3 was approved in October 2011, and as is always the case with the latest standards, these should be taken with a grain of salt as not all readers can necessarily handle them yet.
Version 2, on the other hand, is supported by almost all devices and underlines the common format. In the Advanced section, we can also output the ePUB completely without CSS by clicking on the corresponding checkbox, regardless of all the settings selected in the document, or other stylesheets can be loaded. After we have gone through the largely self-explanatory export once, we receive our ePUB in *.epub format.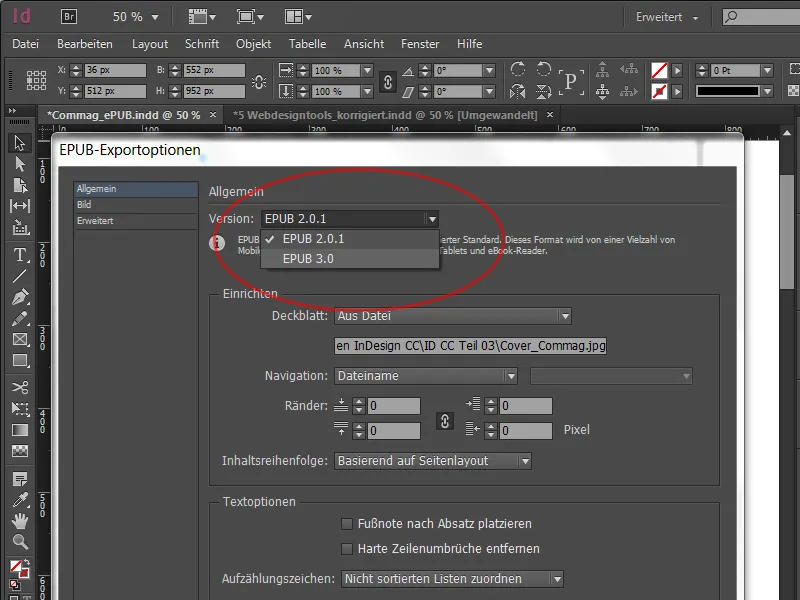
As soon as our ePUB has been exported, it can be examined. If you don't have a suitable reading device to hand, you can also view the file on your own computer. For this purpose, Adobe provides a more or less well-equipped software called Adobe Digital Editions, which allows us to display the ePUB locally on our own computer. There we can navigate through the pages and define the font size, which is also known as dynamic layout. In addition, we can simulate how other display sizes will cope with the ePUB by scaling the margins. There is certainly other software with a better range of functions, but I would like to leave it at this example.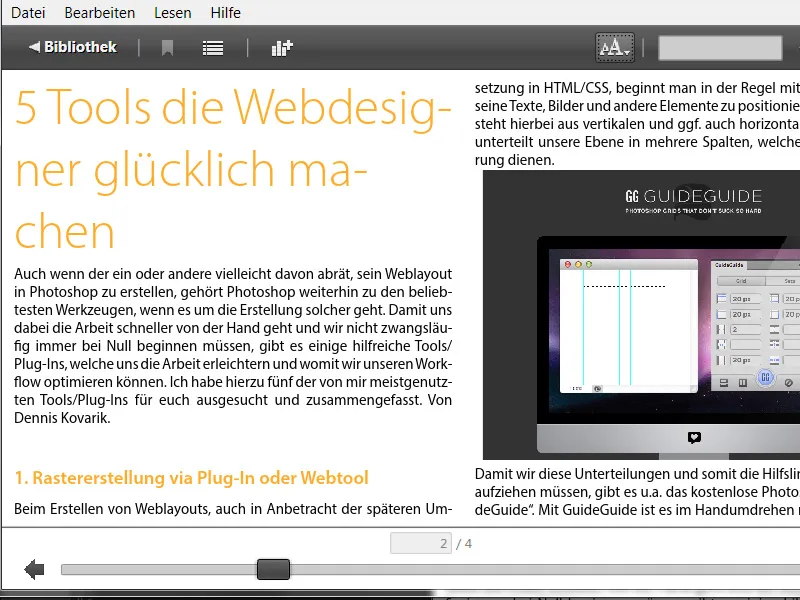
1.2 ePUB with table of contents
To create a table of contents in InDesign, we click on Layout>Table of Contents in the menu bar. In the dialog that opens, we select the paragraph formats to be included. In our example, we select H1 and H2 as subcategories. We select them on the right and move them to the left column with Add. It is important to mark both formats with the entry format: Table of contents main text and to select the checkbox at the bottom - which is new - Create text anchor in source paragraph. These text anchors allow you to jump directly to the beginning of the paragraph on the reader when selecting a category in the table of contents.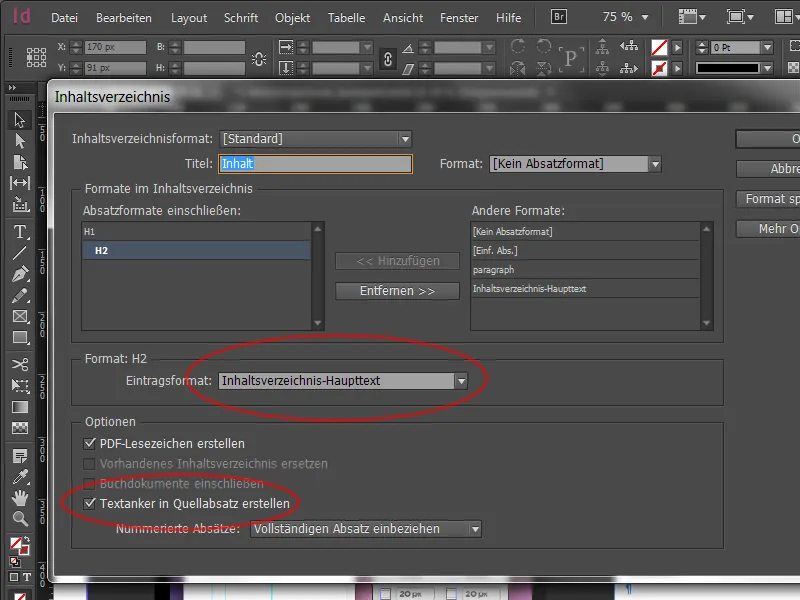
After clicking OK, we have our IHV in the loaded mouse pointer. We can simply place this on the assembly area, as it does not need to appear in the visible document. Let's go back to the export dialog. In the Navigation: Table of contents format area, let's now select the format we have created - in my case - Standard. Terms such as TOC, which stands for table of content, are often used here. We already have a practical IHV on our end devices that is based on the set paragraph formats. The functionality should then be checked after the output with the Adobe Digital Editions software itself.
1.3 Object export options and object formats
We have already described above that it is definitely easier to work with anchored objects. However, these settings previously had nothing to do with how an object appears in the actual e-book. That's why there are the object export options. They can be found in the menu bar under Object>Object export options. The EPUB and HTML tab is new here. It can be used to define the behavior of a selected object in the ePUB more precisely.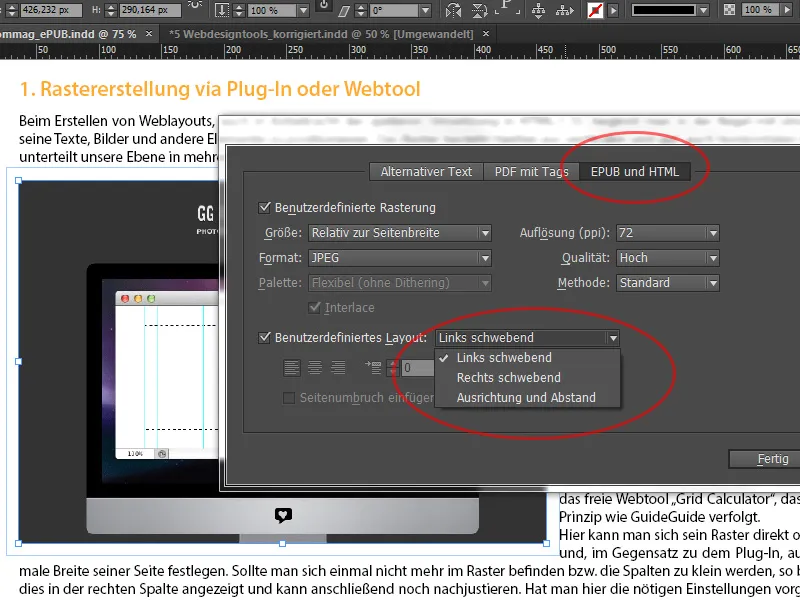
The inserted image takes up slightly more than half of the total page. We now have the option of activating User-defined rasterization and specifying in the Size drop-down menu that this object should be arranged relative to the page width during output so that we can find it in place and it does not jump around wildly in the document.
On the right, it sometimes makes sense to recalculate the resolution of the image. The idea behind this relates to the presentation on end devices with high-resolution displays (which also allow magnification), in which it makes sense to set this to 150ppi instead of the frequently used 72.
The behavior of the position can be defined under Custom layout. In our example, floating on the left, which means that it floats in the layout but has a fixed position in the text.
But what do we do if we now have 30 formats to edit? This would be very time-consuming using the procedure above. InDesign provides a remedy, because these options can now also be stored in the object formats to make it easier to handle multiple elements. To do this, we select the EPUB and HTML area at the bottom of the newly created object format, in which the same mask can be found.
This makes it easy to provide several objects with uniform settings. Further up in the tag export, there is now also the option to save the whole thing as a div-box and then output it, which means you can work more precisely in the CSS code using the div-box and change the position. In addition, the output of CSS can also be deactivated if you want to touch the document again later in the editor.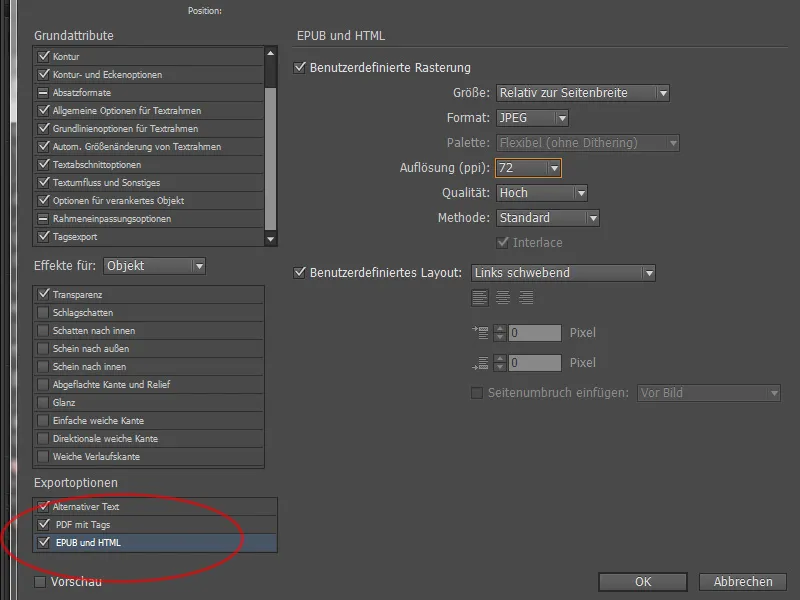
1.4 Assigning formats and CSS
In addition to the object formats, which now support a div-box and can include CSS code, you can work a little more precisely in the paragraph formats than in the previous versions. Specifically, I am talking here about the definition of various tags. To do this, we select the paragraph format h1 with a double-click and go down to Tag export. Now we also assign a corresponding tag to the format. You can also view a list of what should happen to the paragraph format in the export details. Changes to the paragraph format are directly visible here.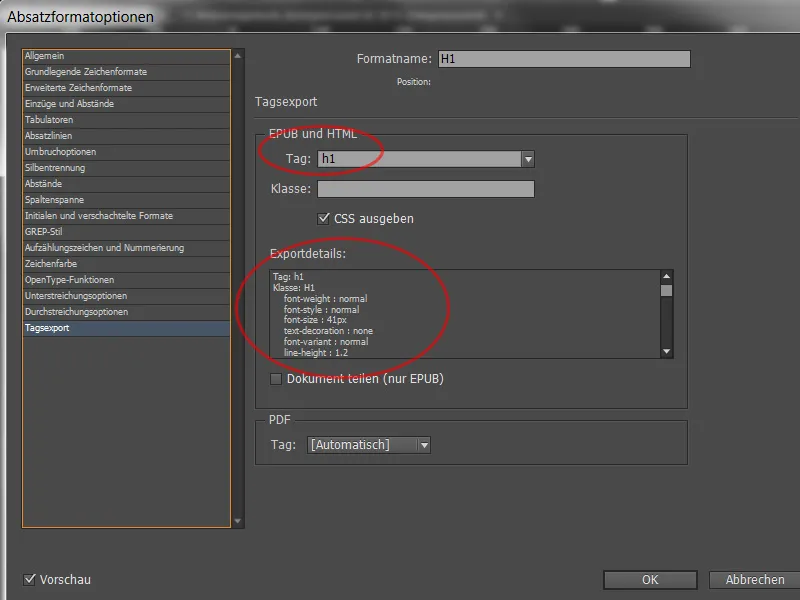
A lot of CSS code is now generated during export. As just described, you can define tags in the paragraph and character formats and check the tag export. For the most part, the formatting is adopted, which conversely means a lot of effort when checking. For this reason, the menu item Edit all export tags... can be called up in the paragraph formats control panel if all tags are to be edited centrally.
Here you can assign a tag to each format and quickly see whether you have forgotten one. Irrelevant data can be excluded via the checkbox on the right to avoid creating too much code. This often includes simple text frames and simple graphic frames. The document can now be exported again as already explained in chapter 1.1.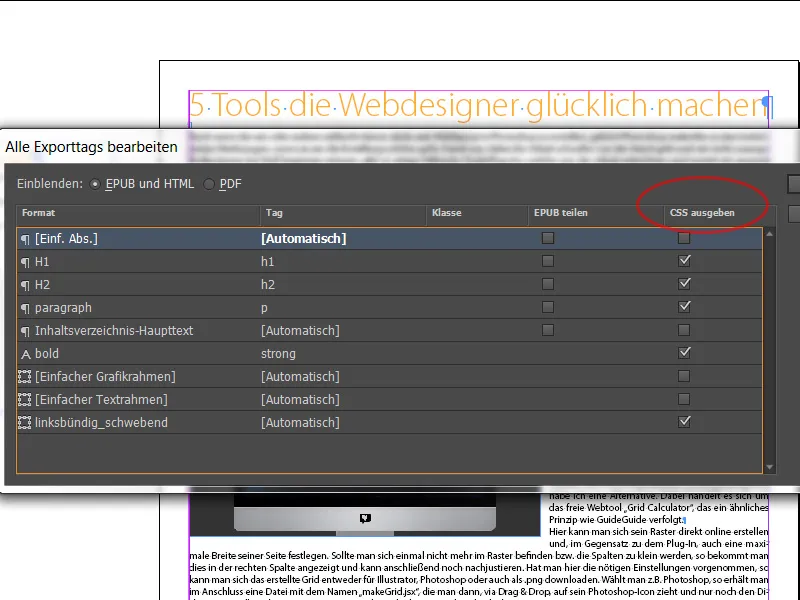
1.5 ePUB control
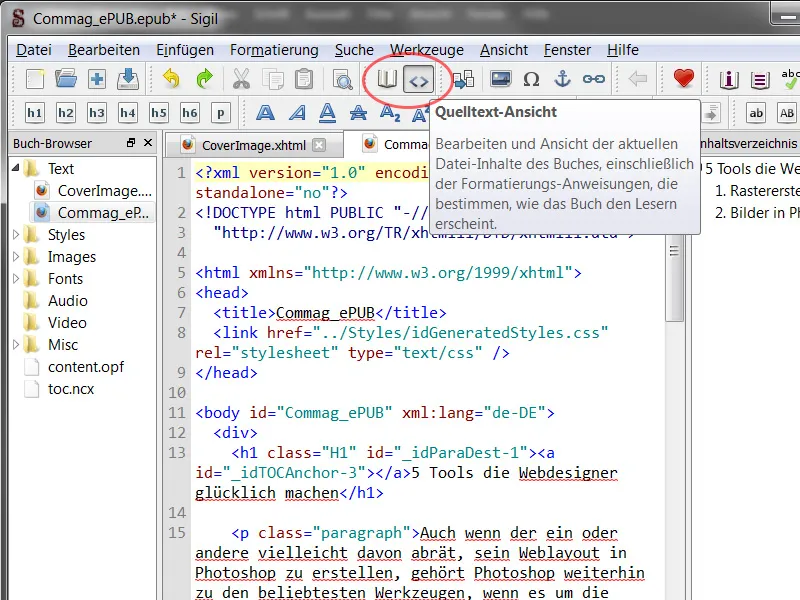
You can find a lot of software on the net to disassemble the finished ePUB. I have downloaded the free Sigil software from the Internet for this purpose. With Sigil, the container can be split into its individual parts and any specifications made can be viewed and changed as required. You can also find the table of contents in the right sidebar and the stored fonts and images on the left. By clicking on the two double brackets Menu at the top of the menu bar, we open the source code view with a multitude of cryptic characters. With the corresponding know-how, all specific changes can now be adjusted afterwards, even though the document has already been exported.