The possibilities that Pinterest offers for marketing are enormous. One of the best resources for this is Tailwind, a platform that helps you prepare and optimize your Pins. By integrating a Smart Calendar as well as helpful editing features, you can make your marketing strategies more effective and stay focused. In this guide, I will show you how to edit and automate Pins directly in Tailwind.
Key Insights
- Tailwind offers a Smart Calendar that suggests optimal times for pinning.
- You can edit Pins directly while uploading them.
- The tool allows for creative adjustments to the image to make it more appealing.
Step-by-Step Guide
1. Preparing the Pins
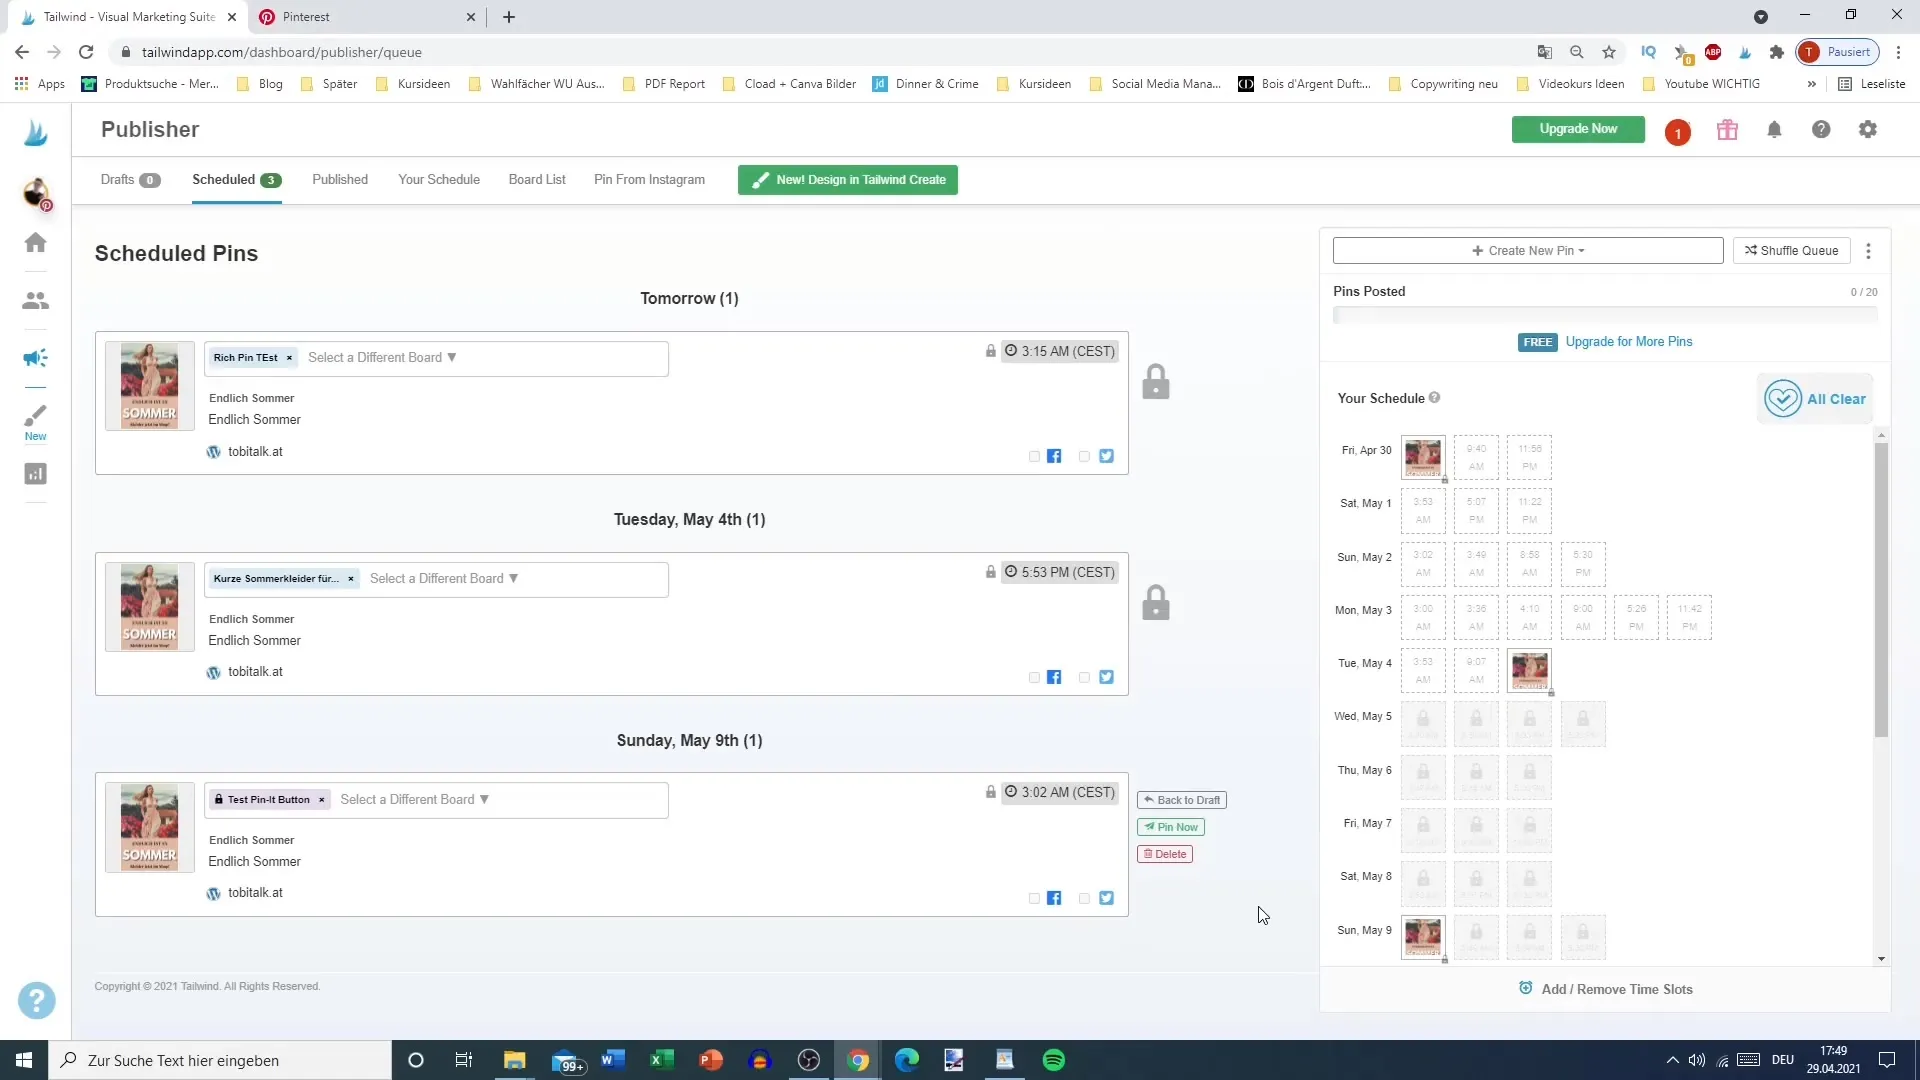
Before you start, it is essential to understand how you can upload and prepare your Pins. Start in Tailwind and go to the "Publisher." Here you have the option to upload new Pins as well as edit existing Pins. It is important to have a clear idea of the content of your Pin so that it immediately appears engaging.
2. Optimizing Calendar Settings
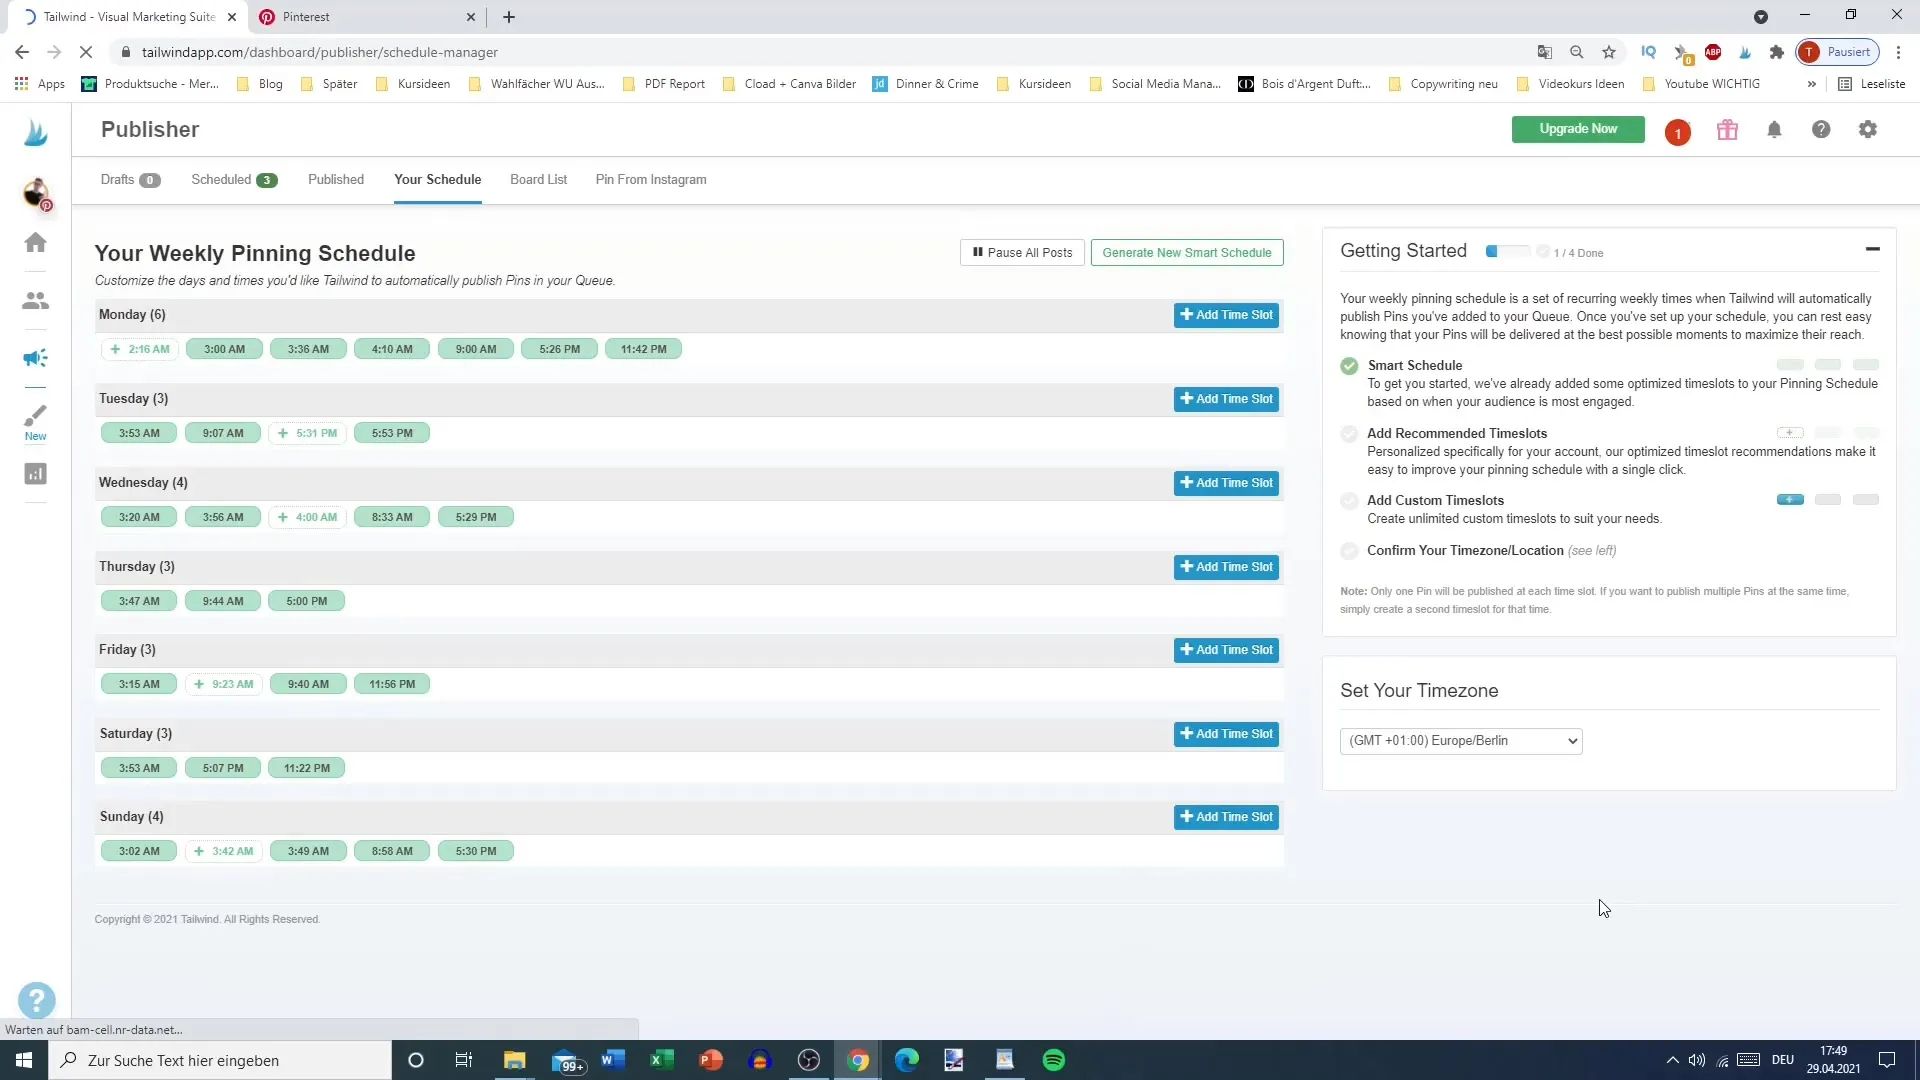
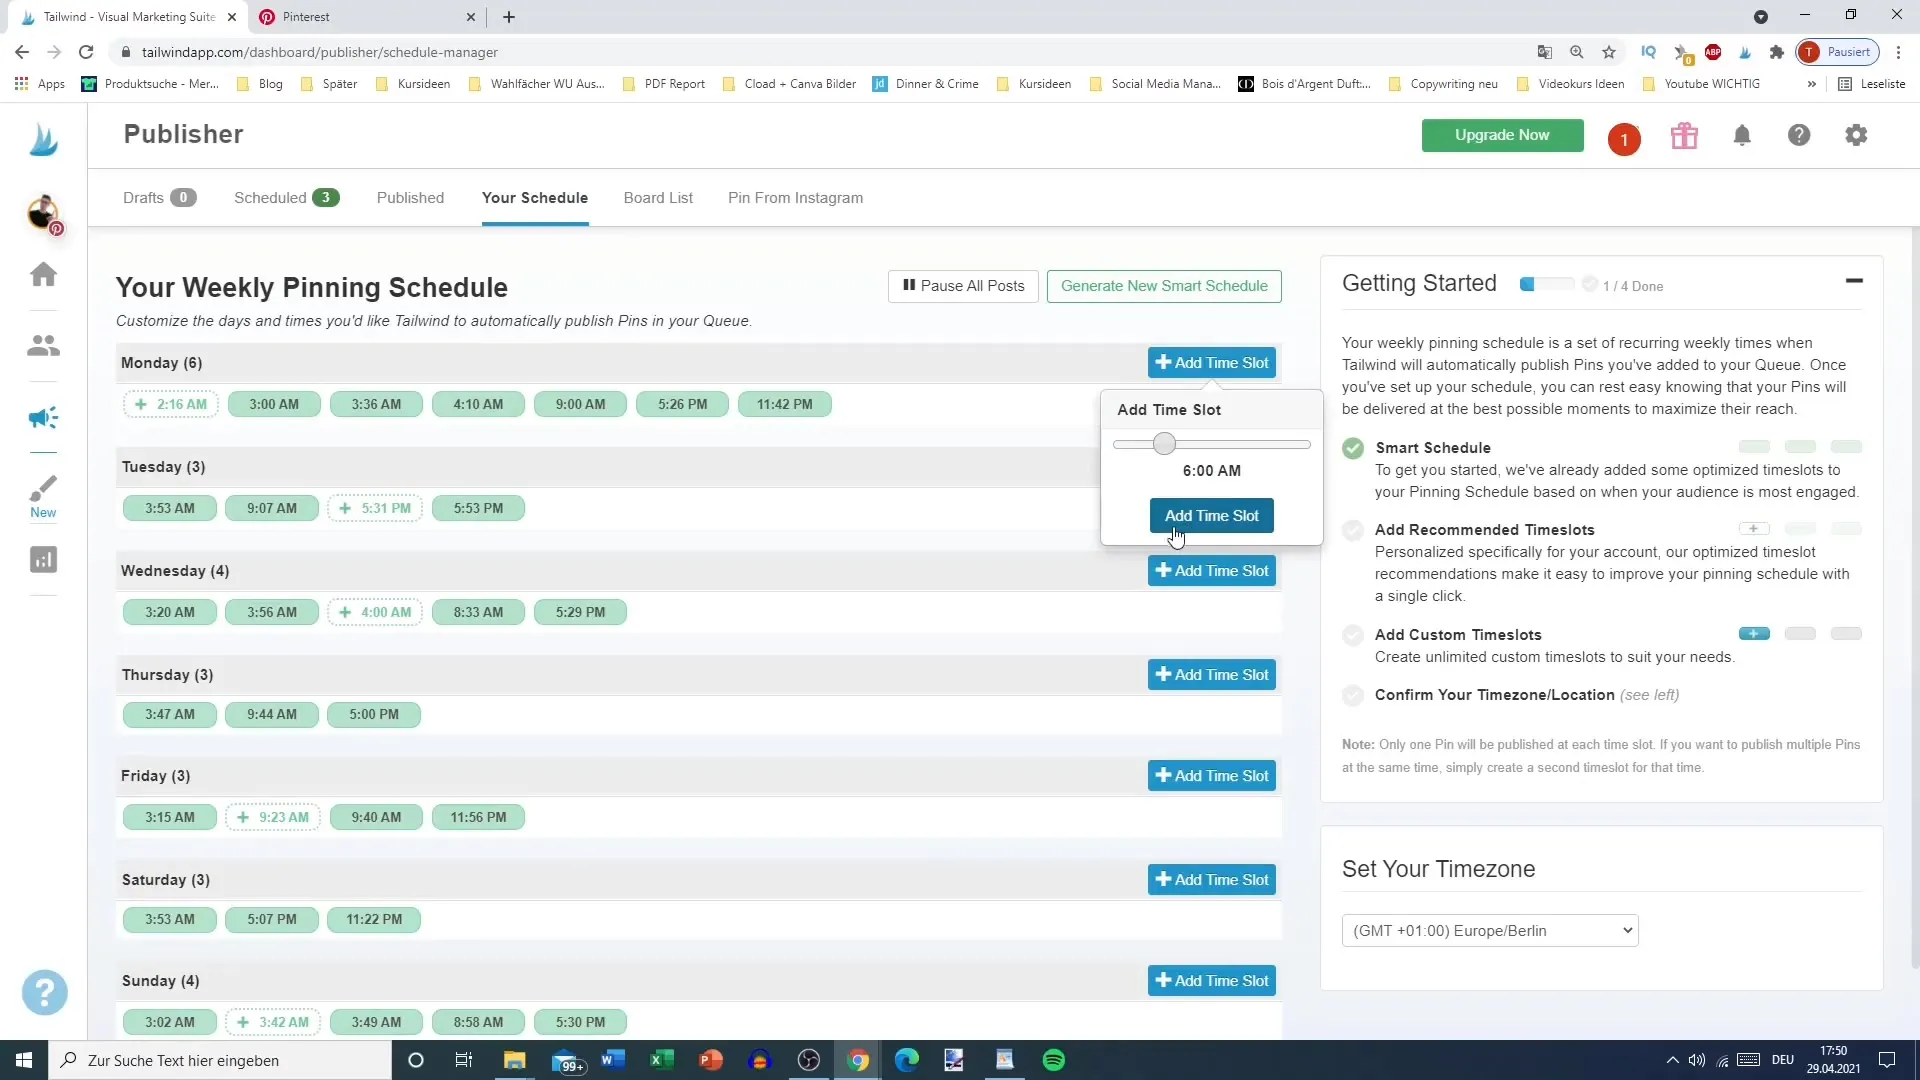
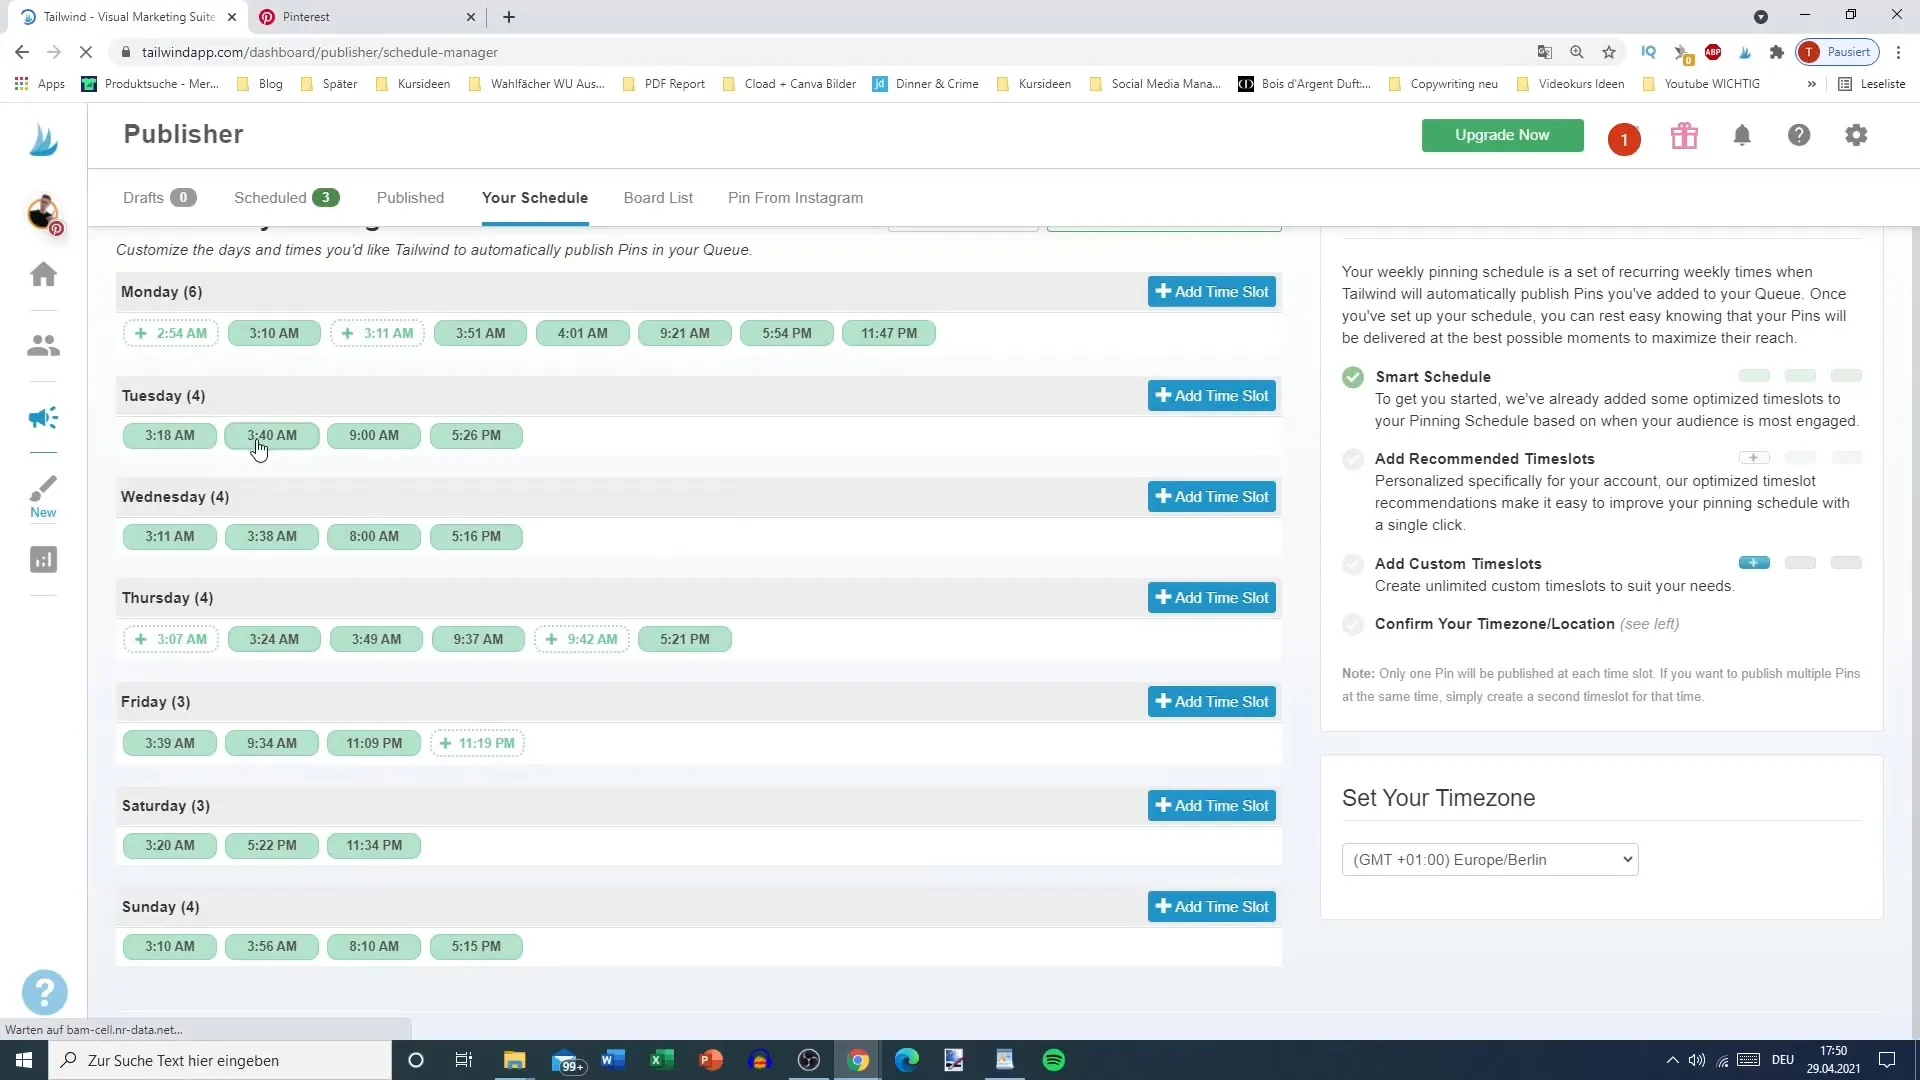
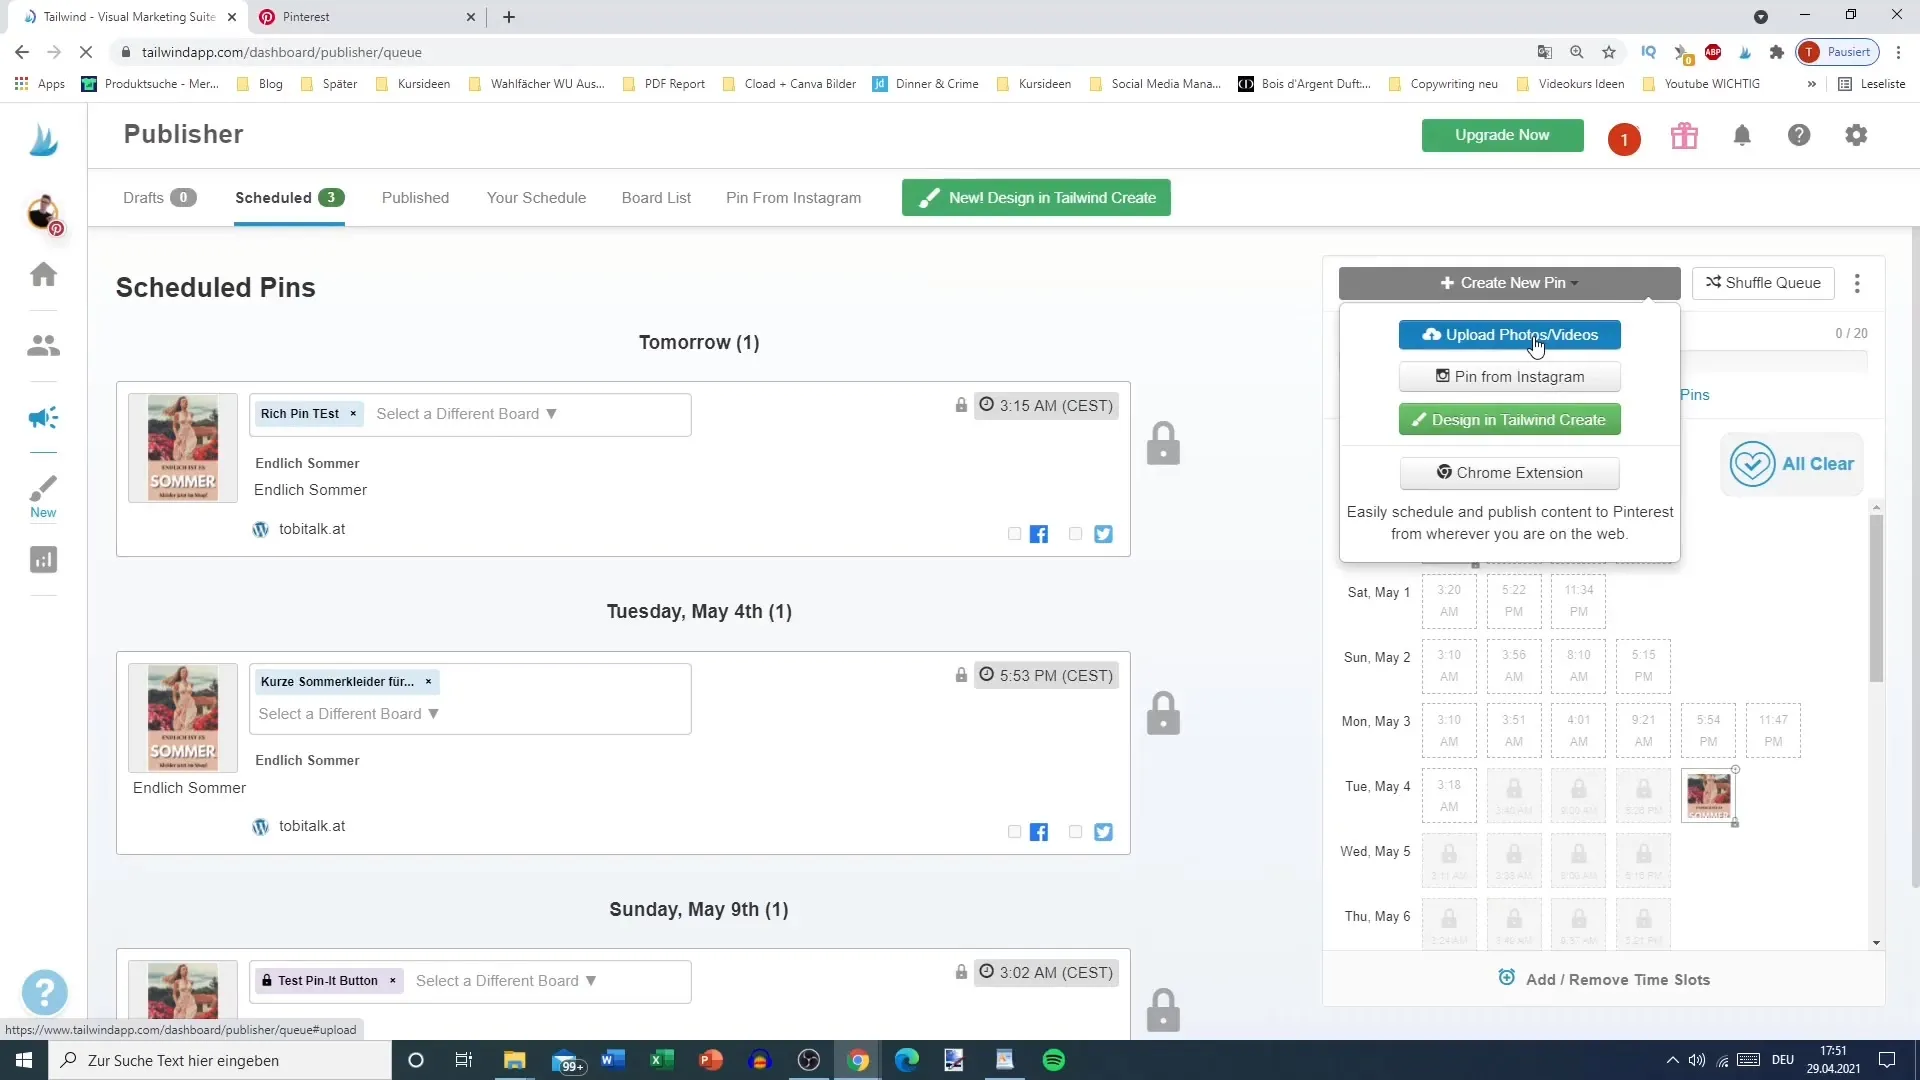
Navigate to the Smart Calendar. Here, you will be shown the best times to pin your content. The optimal times are marked in green, making planning much easier for you. You can also make settings to add new slot times for pinning, depending on the number of daily posts you aim for.
3. Creating an Upload Plan
Once you have determined how many posts you want to schedule daily, Tailwind will generate an upload plan. After specifying the daily post count, you will receive immediate suggestions for the best pinning times. It's important to regularly review the suggestions to ensure they stay updated and relevant.
4. Uploading Images
To create a new Pin, click on "Create Pin." Choose the image you want to upload. You will notice that certain images can be uploaded faster than others – this may vary. Always check if the image has been uploaded correctly and refresh the page if necessary.
5. Editing Your Pin
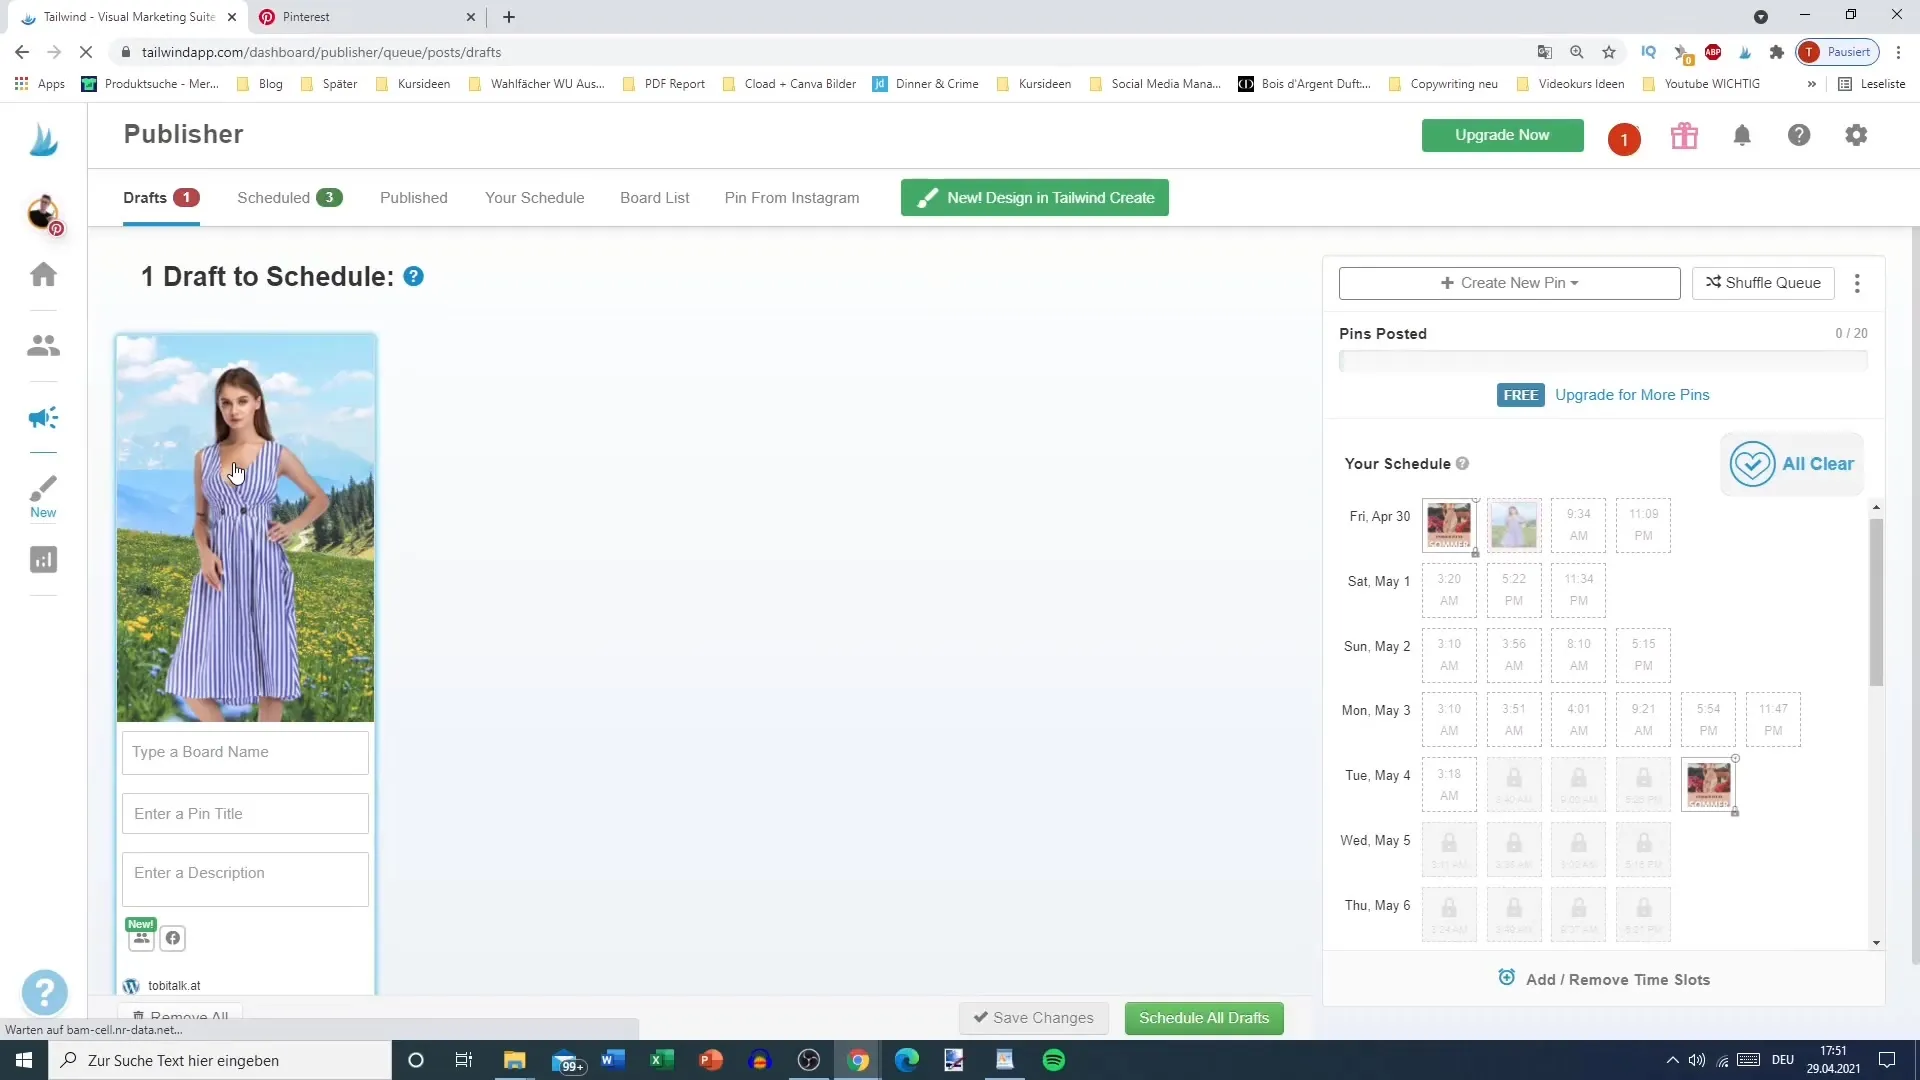
Once the image is uploaded, you can directly adjust it in Tailwind's editing interface. The options are similar to graphic software like Photoshop. Use the "Edit" function to resize the image and adjust the colors. Remember, an attractive image significantly increases the attention of potential followers on Pinterest.
6. Applying Filters and Effects
Tailwind also offers you the option to apply various filters and transform the image. You can crop the image or convert it to formats like square or elongated. Experiment with the different settings to achieve the best effect for your image.
7. Saving and Publishing
After making your adjustments, save the image. Then, select the relevant boards on which the Pin should be published. Write an engaging title and a concise description for your Pin. It is often helpful to incorporate keywords to increase discoverability.
8. Automated Pin Scheduling
Use the scheduled intervals to optimally place your Pins. Tailwind allows you to define the publication times for each Pin, ensuring that your content is published exactly when it can achieve the greatest reach.
Summary
This guide has shown you how easy it is to edit and schedule pins in Tailwind. With the tools at your disposal, you can significantly optimize your Pinterest strategy and effectively target your audience.
Frequently Asked Questions
What is the Smart Calendar in Tailwind?The Smart Calendar shows you the best times to post content on Pinterest.
How do I edit a pin in Tailwind?After uploading a pin, you can use various editing functions to adjust the image.
Can I upload multiple images in one pin?Yes, you can create multiple images in one pin and test different variations.
How do I optimize my pin description?Integrate relevant keywords and write a clear, engaging description that invites the reader to learn more.


