In this little workshop I would like to show you how to create multicolored color fields. Have you ever seen something like this before? Probably not, because InDesign doesn't actually offer the option to create multicolored swatches. I will now show you how to do it anyway.
Step 1
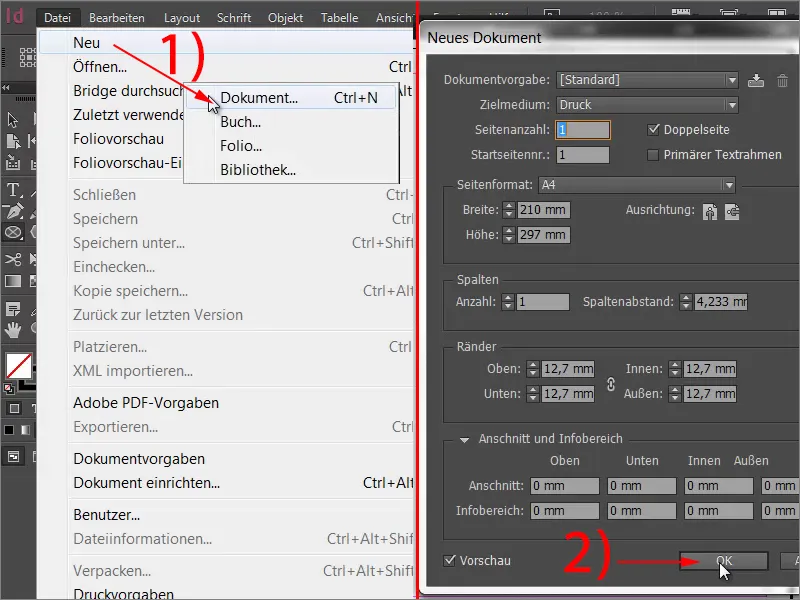
You create a new document via File>New>Document (1) and click OK in the New Document window (2).

Step 2
In the next step, draw a circle with the ellipse tool.
Step 3
This circle should now shine in two colors. First, create a new gradient field (1) and name it "2-colored" (2) under Color field name, for example. Next, define the first color. To do this, click on the small color slider on the left of the gradient bar (3). I choose yellow as the color here. To do this, I drag the bar at yellow to 100 %. To define the second color, click on the other color slider in the gradient bar (3), here still highlighted in black, and ...
Step 4
... select magenta, for example (1). At the bottom you will see the Position field. This indicates the position at which the color has its maximum degree of saturation. It is currently at 100 %. Reduce this value to 50 % (2). Do the same for yellow so that both color sliders are at 50 % (3).
Step 5
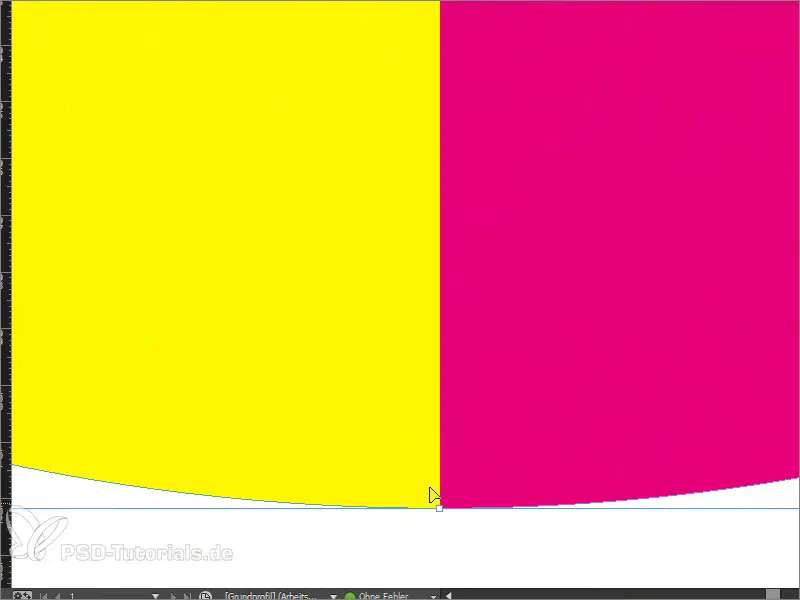
Now you can see what happens. Click on Add and look at the circle.
Step 6
You have created a vector shape with a razor-sharp cut edge between the two colors. You can now scale this up and down and the edge will remain razor-sharp.
Step 7
Of course, one wonders where a two-tone color field makes sense. A classic example is the rating system, which we will now recreate together. To do this, first draw five rectangular frames to represent the rating range. You can simply copy a rectangular frame by holding down the Alt key. You can move it with Shift and the right arrow key.
Step 8
We will add a little help by naming the "evaluation sheet". Font family: Myriad Pro, font weight: 50 pt.
Step 9
In the next step, you fill the evaluation sheet with the typical colors green for positive and red for negative. We create a new gradient field (see step 3 of the tutorial) with a shade of green and a shade of red. To do this, pull the overlapping color sliders in the gradient bar with the current colors yellow and red apart again. Then define a shade of green (for example: cyan = 75 %, magenta = 5 %, yellow = 100 %, black = 0 %) and a shade of red (for example: cyan = 0 %, magenta = 100 %, yellow = 100 %, black = 0 %).
Step 10
Next, we will determine the position. The first four fields on the evaluation sheet should be green and the fifth field should be red. This could be seen as a performance spectrum, i.e. four out of five points have been achieved. Since we have a total of five fields, we have to divide the 100 % by five. This results in 20%. As we want to make four fields green, we take the value times four, so we end up with 80 %. Set the position of both color sliders to 80 %.
Step 11
If you apply the color field to a single rectangular frame, you will see that only this rectangle is filled with the desired color field. But what do we do if we want to fill them all?
Step 12
The solution to the problem is quite simple: Select all five rectangle frames and addthem together using the Pathfinder with the Add function.
Step 13
If you now apply the gradient field, it will look like this.
Something like this can then be duplicated super quickly and processed in large quantities. Now you know how to create multicolored swatches with a razor-sharp vector edge.


