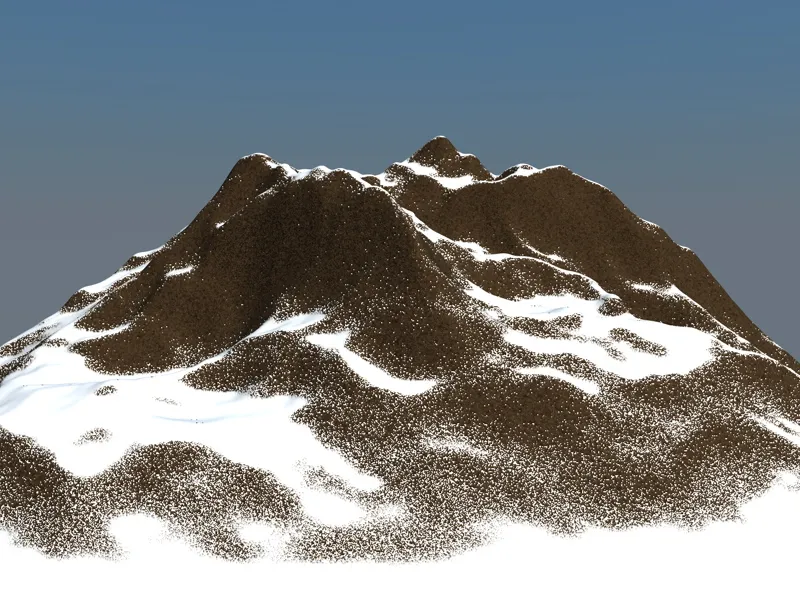
In the working file for this tutorial you will find the textured version of the mountains. The terrain mask shader, as well as the physical sky that we use as a background and for the lighting, is reserved for owners of the CINEMA 4D variants Visualize and Studio.
You can of course use the finished material later for any object. However, as the settings of the terrain mask shader also relate directly to the size or height of the object, adjustments will be necessary here in most cases.
Structure of the scene
For the mountains, I used a landscape object from the basic objects palette.

You can find the information on size, segmentation and other landscape properties in the following illustration if you want to achieve exactly the same result. The segmentation for the depth of the landscapeobject is also raised accordingly so that the subdivision is as uniform as possible.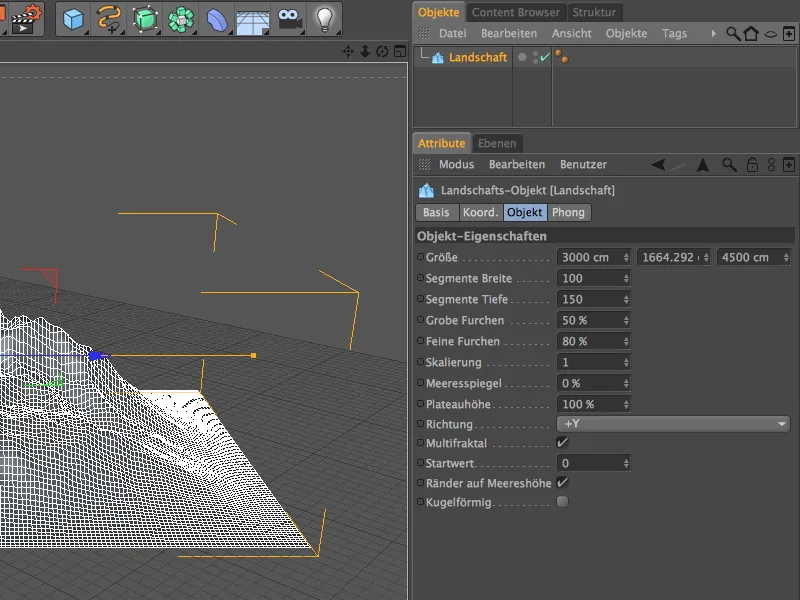
As this rather moderate subdivision of the landscape object leads to quite a few jags in the mountains, we also place the landscape object in a HyperNURBS cage to smooth the surface.
In the settings dialog of the HyperNURBS object, a double subdivision during rendering is sufficient. If you also want to see this smoothed version in the editor view, you can also increase the Editor subdivision parameter ...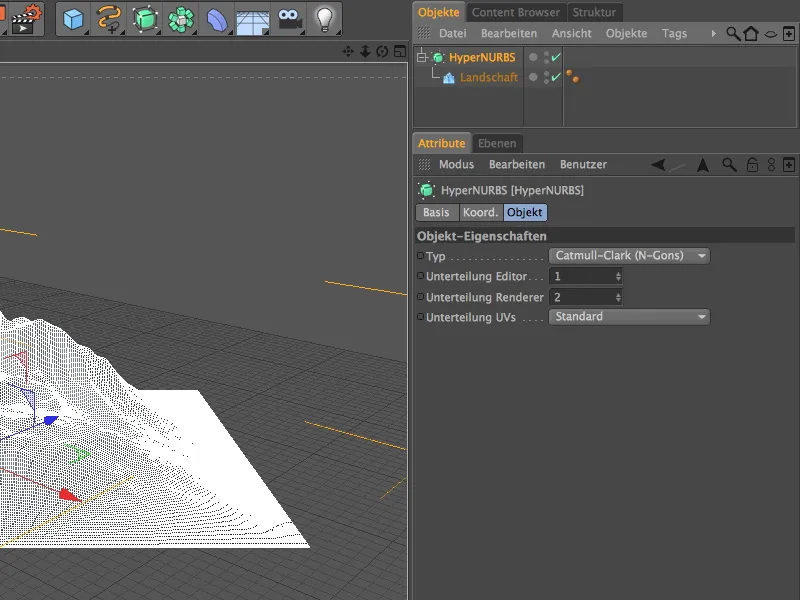
... or specify the use of the render detail level for the view in the Options>Detail level menu of the editor view.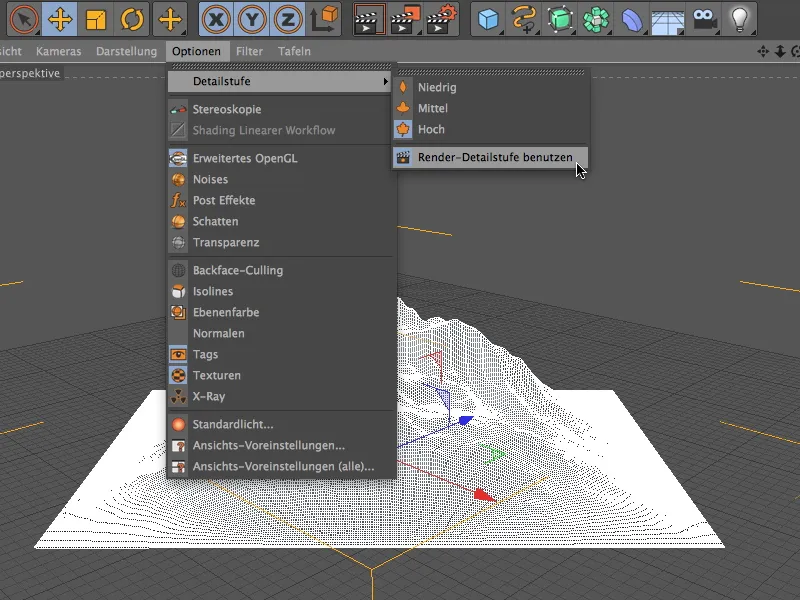
To quickly and easily create a usable background with natural lighting for the outdoor scene, you can use the physical sky, which was called Sky before version 13.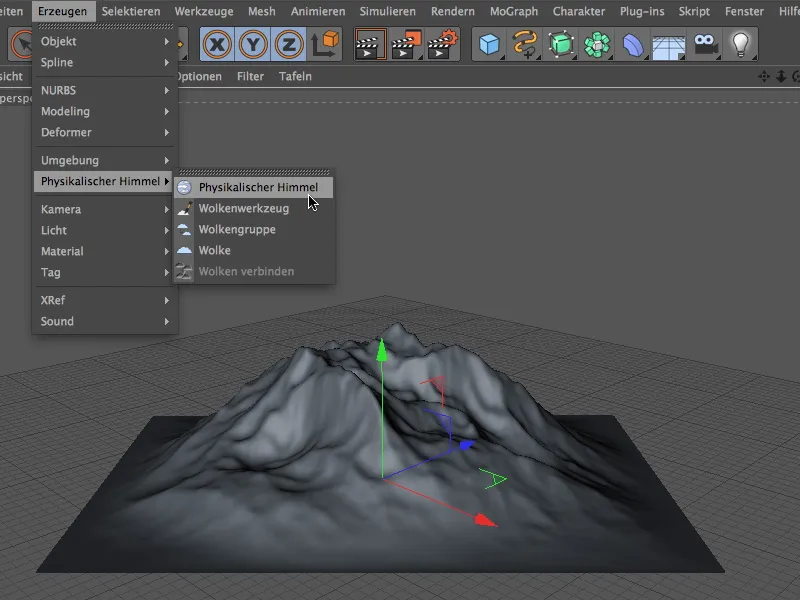
We make the basic settings for the physical sky on the time and position page of the settings dialog. This is also where another minor new feature is hidden in version 13 - the improved time and date interface. In my example, I will use a morning in June. I have left all other parameters of the physical sky unchanged in my example - you are welcome to expand the sky further.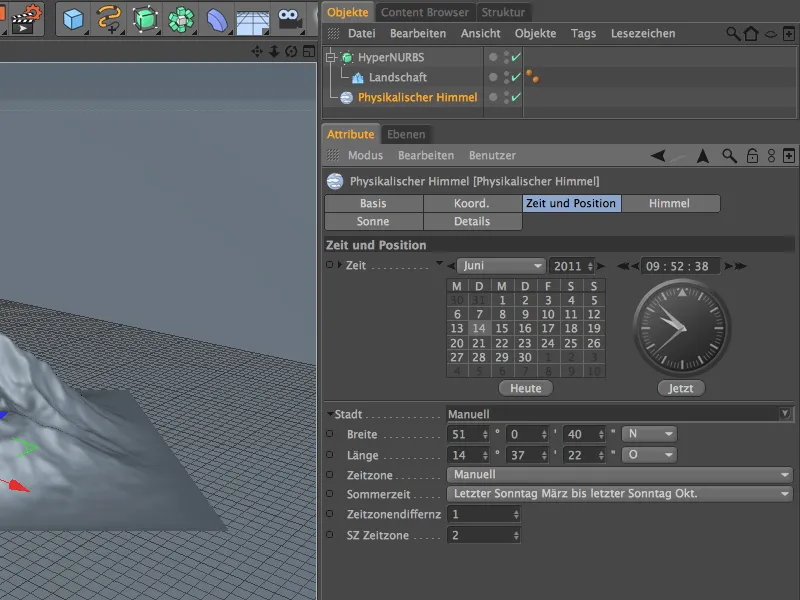
An intermediate rendering shows the current state of the scene. Let's finally take care of the material for the mountains.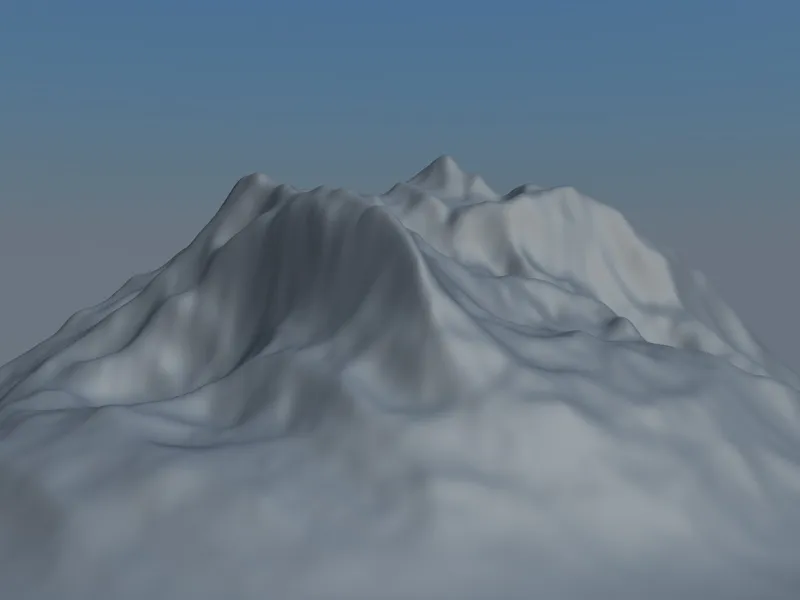
Material for the mountains
Double-click on a free space in the material manager to create a new material with a meaningful name. On the basic page of the settings dialog, we activate the color and relief channel. We can deactivate the Highlight channel, which is active by default, for our example.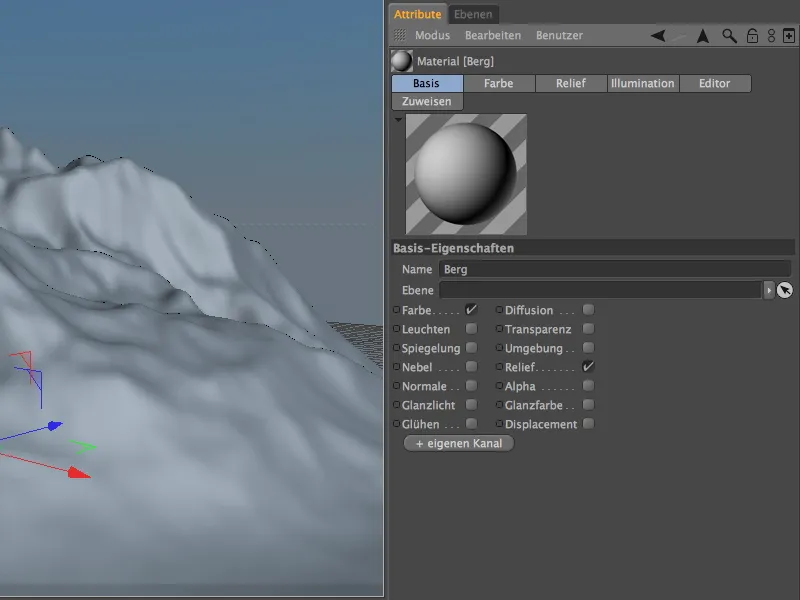
Let's start with the color channel. The terrain mask shader has the task of combining two different textures or shaders depending on the surface or gradient. The Fusion shader provides us with this so-called mask channel for this purpose, which is why we first load this shader into the color channel as a texture via the arrow button menu.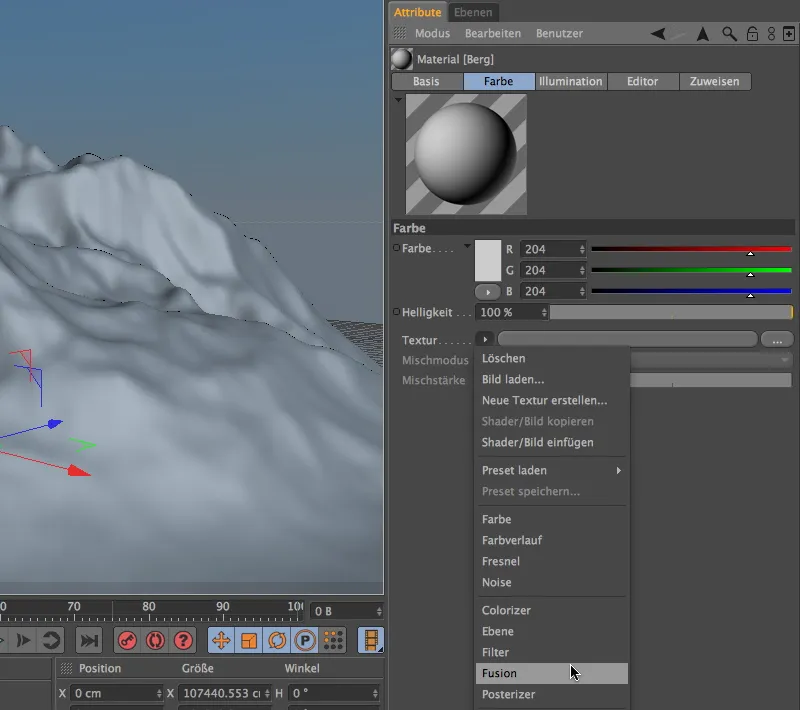
Clicking on the texture button filled with the Fusion shader takes us to the Fusion shader settings dialog. There we first activate the Use mask option in order to be able to add a shader to the mask channel.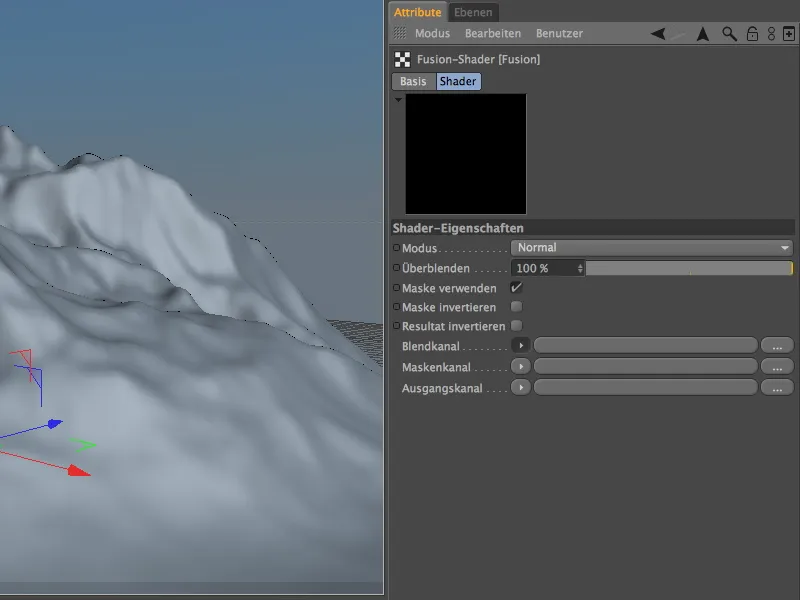
Within the fusion shader , we first take care of the output channel. In this channel, we define the "unsnowed" rock structure of the mountains. To be able to create this structure with some superimposed noise shaders, we load the plane shader into the output channel via the menu in the arrow button.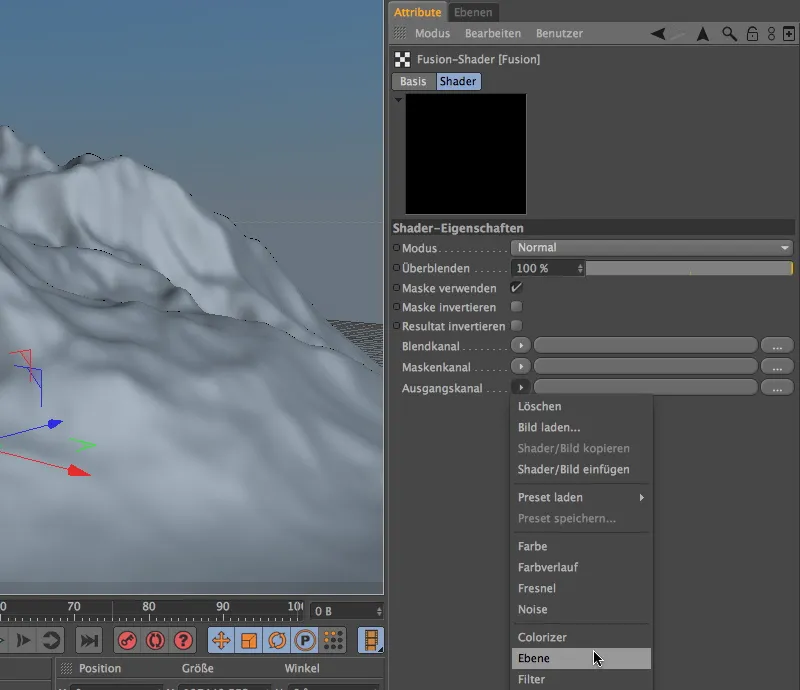
The layer shader button takes us to the settings dialog, or rather to the layer management of the shader. The illustration below shows the four-part structure of my layer shader, consisting of a color shader as the base layer and three different noise shaders superimposed using multiply or add blend modes.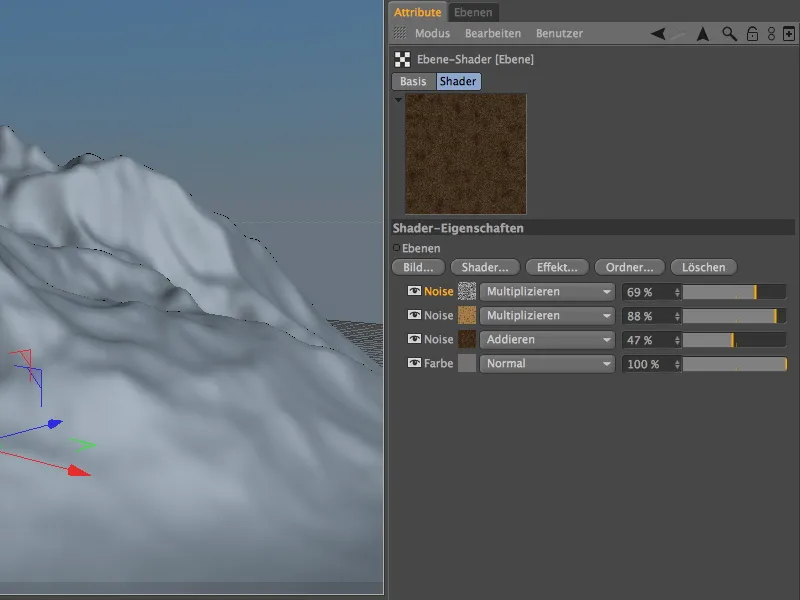
For all those who want the exact same result for the rock structure, I will briefly introduce the four shader layers. A simple color shader serves as the background.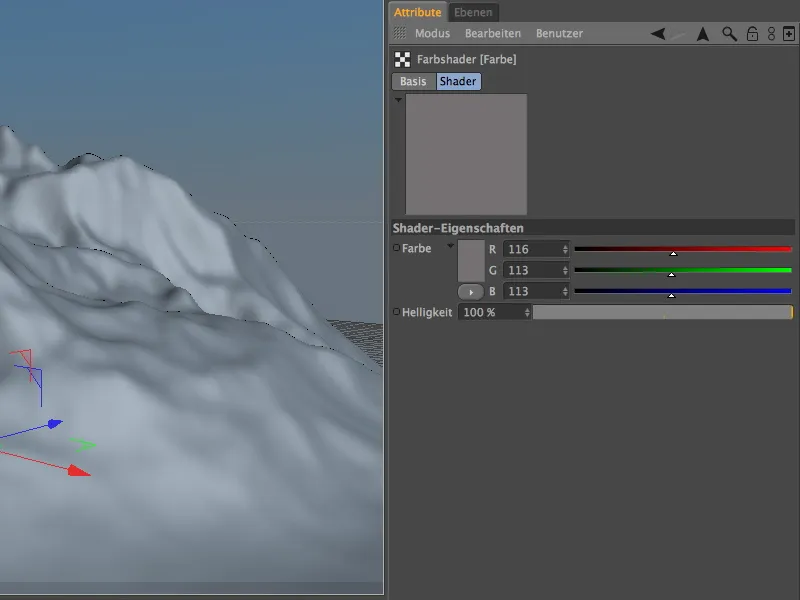
This is followed by a first noise shader for the rough rock structure. The Texture space parameter ensures that the material is later oriented to the texture tag of the textured object.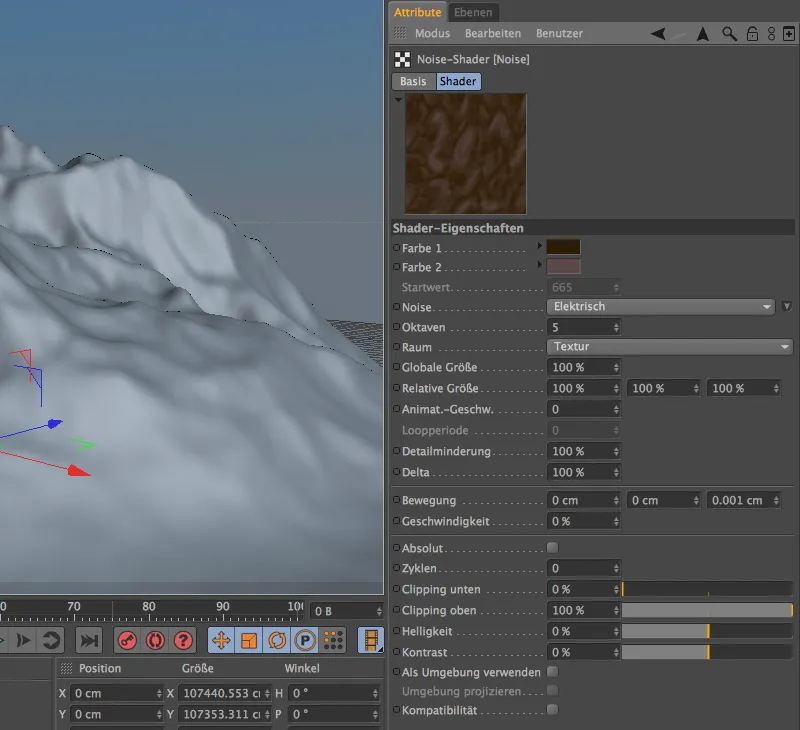
A second, somewhat finer noise shader provides the colored accents in the rock structure. Of course, we also need the Texture spatial parameter here for a uniform result.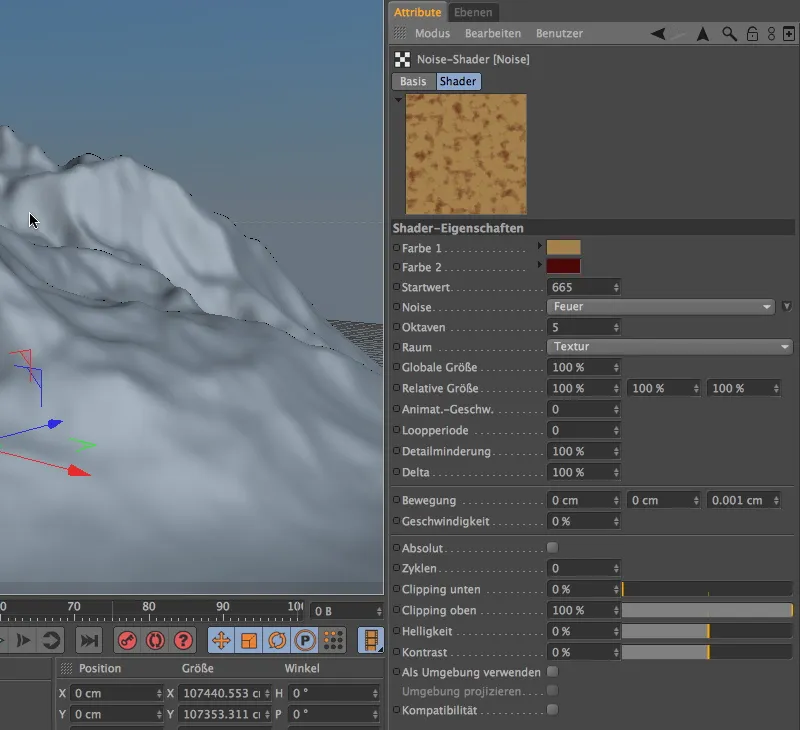
The final touch is achieved with a fine noise shader with a small global size of 10%. It overlays all the underlying shaders and gives the rock a slightly porous surface structure.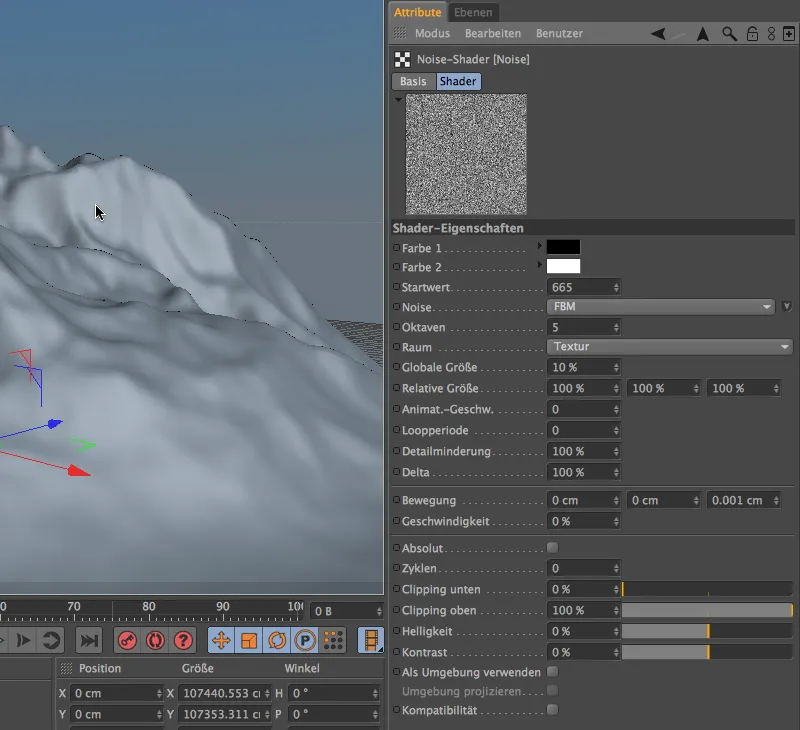
Now that the rock structure has been added to the output channel, the next step is to take care of the blend channel. For our purposes, a simple color shader is sufficient at this point ,...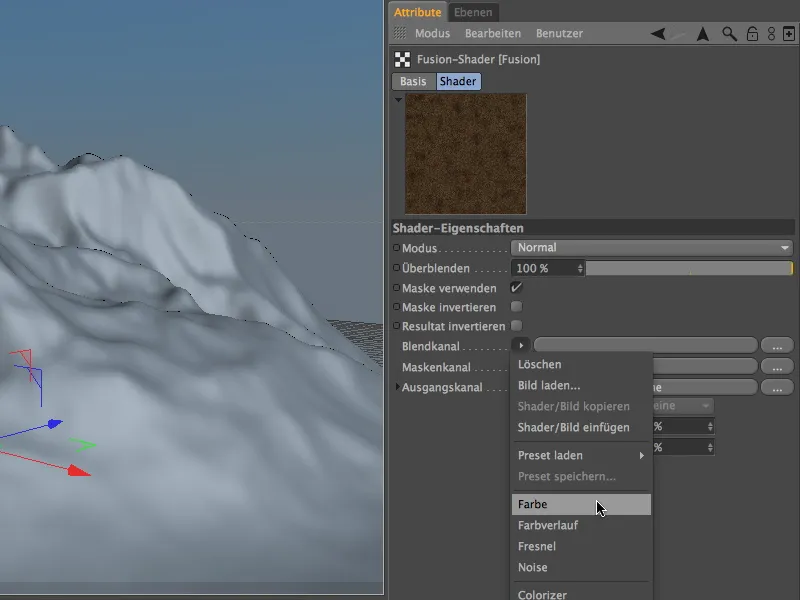
... to which we add the color white. If you want to work out the snow layer even further, you can also create additional structures in the snow with a layer shader and a few noise layers.
Now the terrain mask shader finally makes an appearance. In the mask channel, it ensures that our mountains are covered with the rock structure or snow depending on the surface or gradient.
We can find it in the texture menu of the arrow button in the Effects submenu.
We can access the settings dialog for the terrain mask shader again by clicking on the shader button. The definition of the shader is roughly divided into the specifications for the height and slope masking.
The area between the minimum and maximum inclination of the surface is the area occupied by the glare channel. In my example, this concerns angles between 0° and 45°. All surfaces with a larger angle are assigned the output channel. You can control the transition between the two channels for both limits with a softening.
Height masking works in a very similar way, but here we are not moving between two angles, but between two height parameters, in our example the snow line, so to speak.
The Noise height parameter ensures that the transition between the channels is additionally broken up by a noise and is not unnaturally smooth.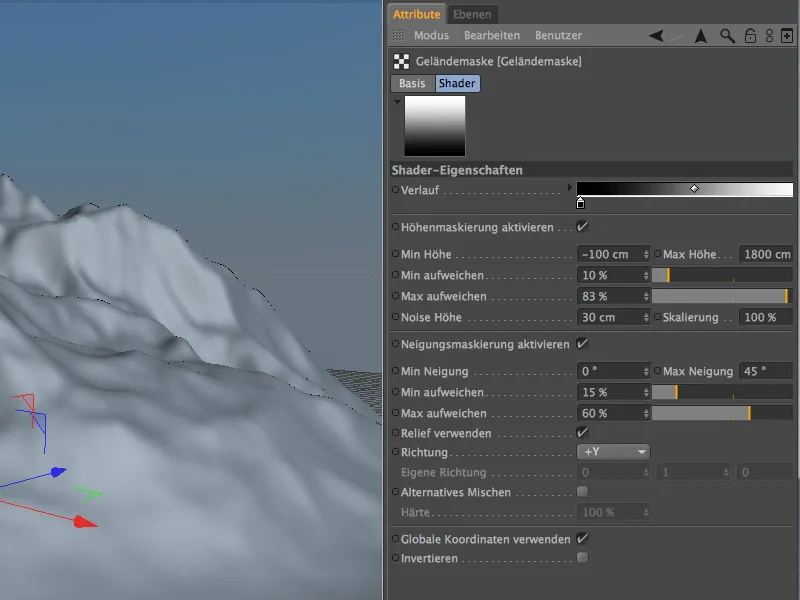
Thanks to the activated Use global coordinates option, the height masking information used in my example refers to the dimensions of the landscape object. To create the snow at sea level, the minimum height starts just below 100 cm. As the height of the mountains is approx. 1660 cm, I have also added a little buffer here and set the maximum height to 1800 cm.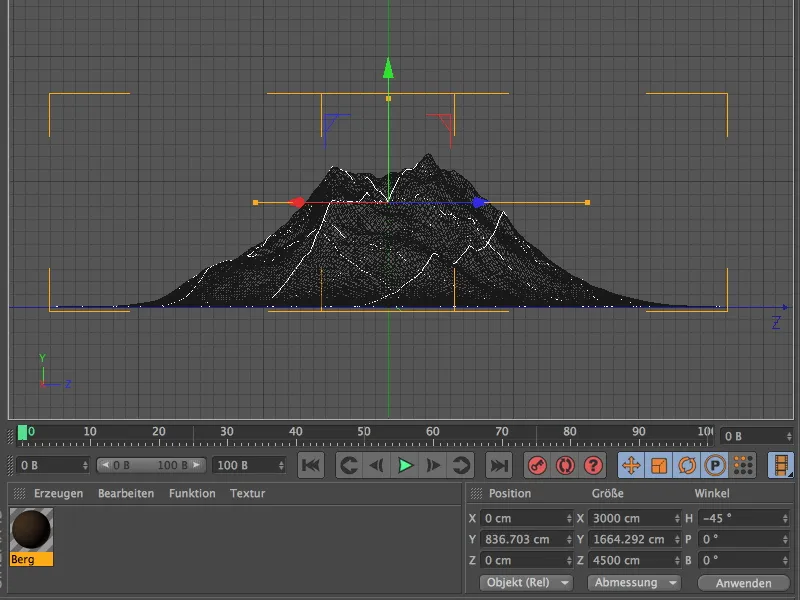
The terrain mask shader is now configured so that we can jump back to the color channel using the progression buttons on the shaders. The relief channel now also needs a texture so that the surface of the mountain rocks can be well defined. Of course, the obvious thing to do here is to use the fusion shader we just created from the color channel. To do this, we copy the fusion shader from the texture menu of the arrow button using the Copy shader/image command.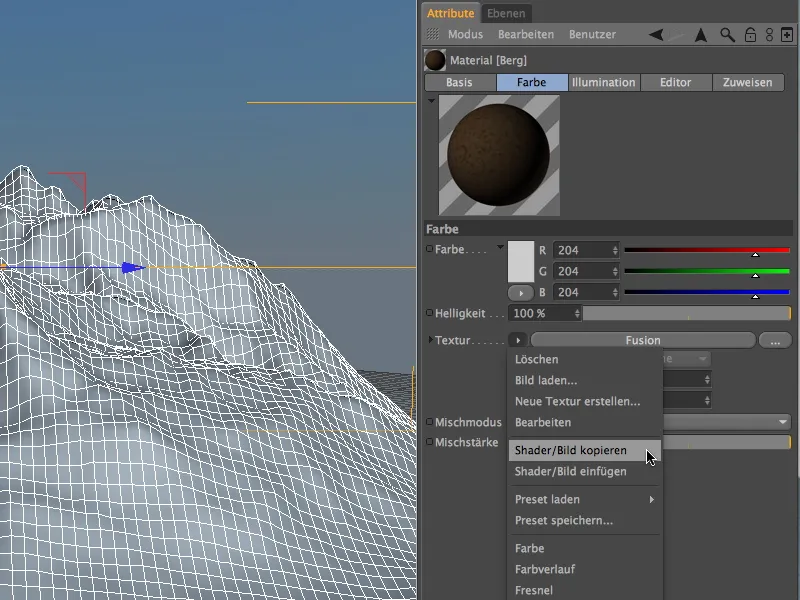
In the relief channel, we insert the copied fusion shader as a texture for the channel via the texture menu of the arrow button. In our example, we do not necessarily have to change the settings in the shader, as the relief channel can also cope with colored textures. We set the strength of the relief to approx. 77% so that the surface structure is clearly noticeable.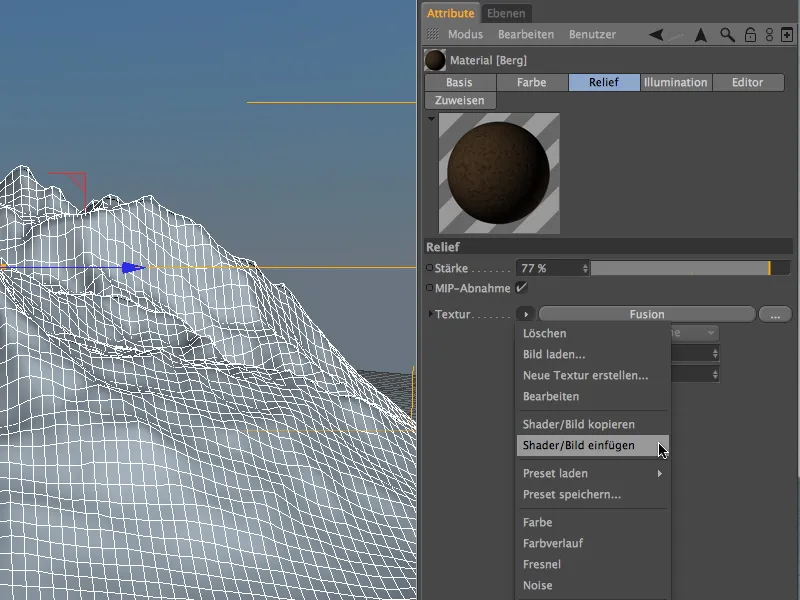
Texturing the mountains
We can now assign the finished material for the mountains to the landscape object using the object manager or the editor. Further changes to the standard parameters are not absolutely necessary.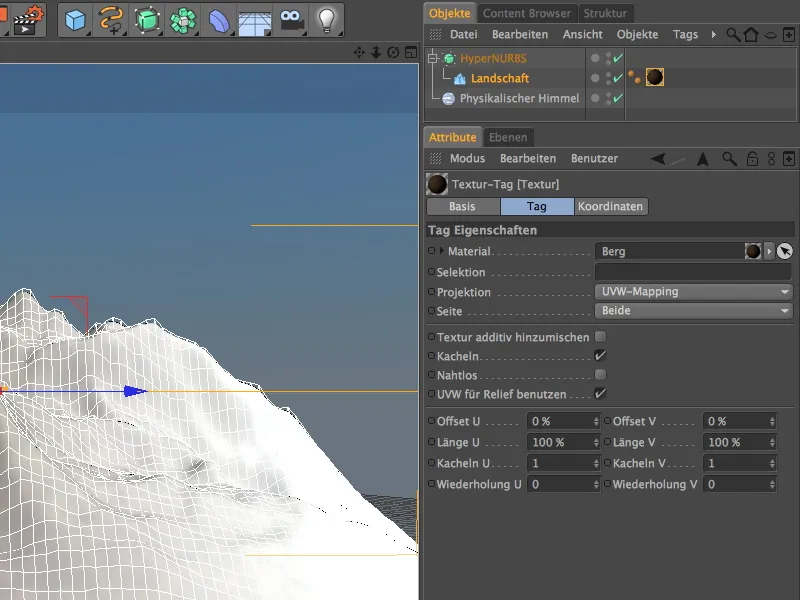
After clicking on the Render button, you can view the result. I can only recommend experimenting with the parameters of the terrain mask shader in order to better assess their effects on the result. The terrain mask shader is not only ideal for snow, but also for moss or meadows.