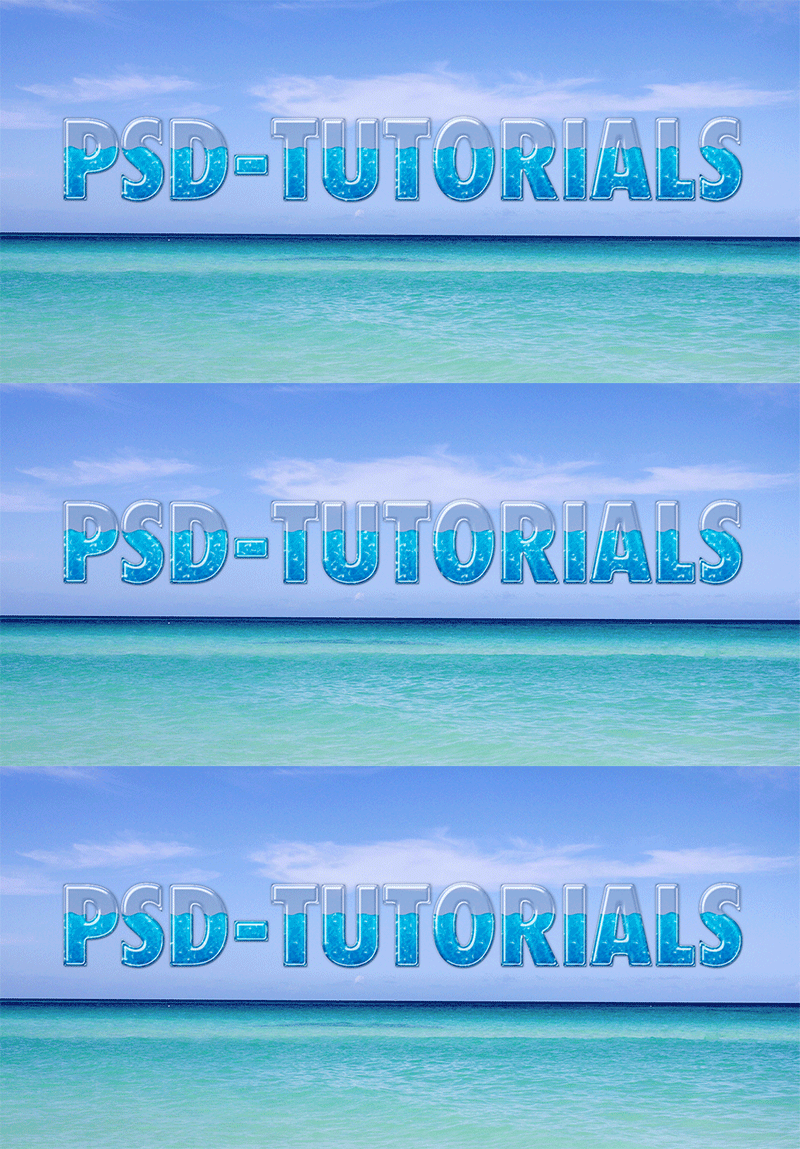
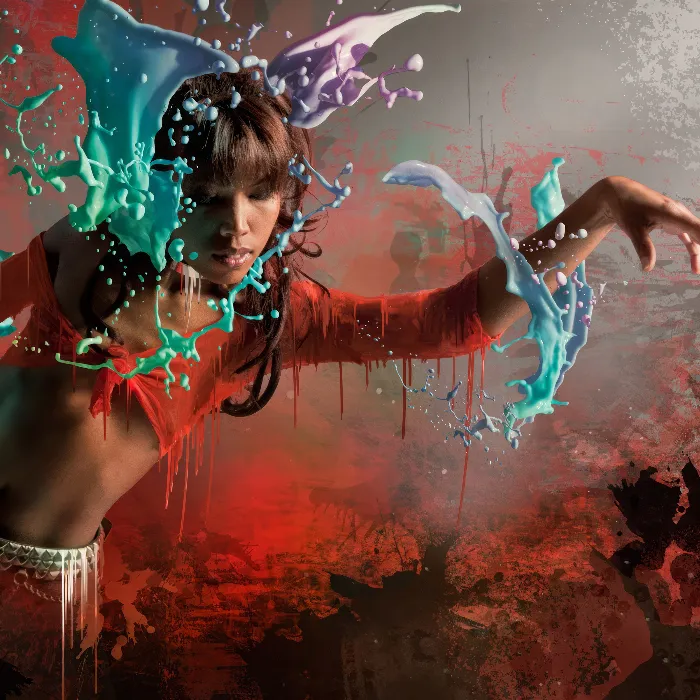
A water-filled glass text combines transparency and movement for an impressive effect. Perfect for digital projects like advertising banners or social media graphics, you can create and animate this look in Photoshop. With layer styles, masks, and timeline animations, your text will stand out with realistic water filling and flowing movement. In this tutorial, I'll show you step by step how to create an animated, water-filled glass text. Let's get started and bring your text to life!
1. New Document
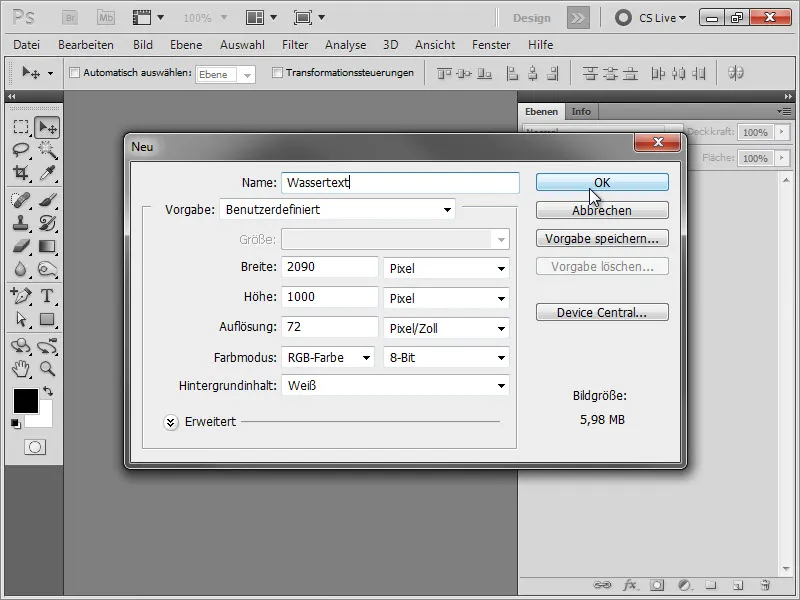
We start by creating a new document with 2090 x 1000 px.
Next, we go to the website sxc.hu to find our background image. Simply enter the following image number into the search bar: 1327434.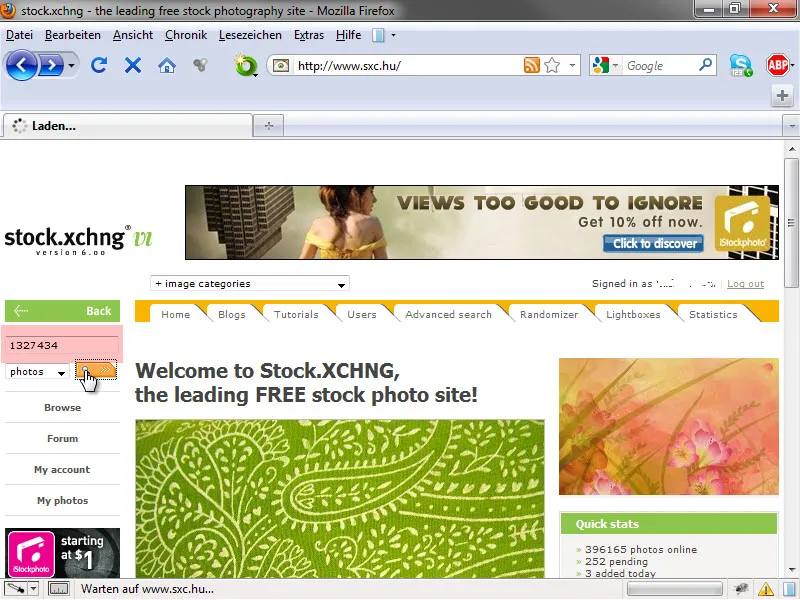
Click on the image and drag it into our Photoshop document.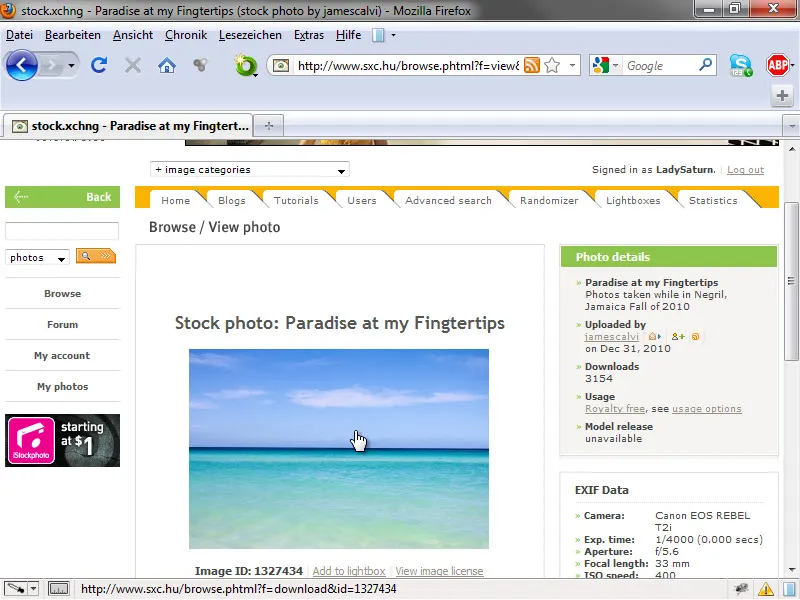
If needed, we may scale the image a bit wider (Ctrl+T) so that it fits our workspace.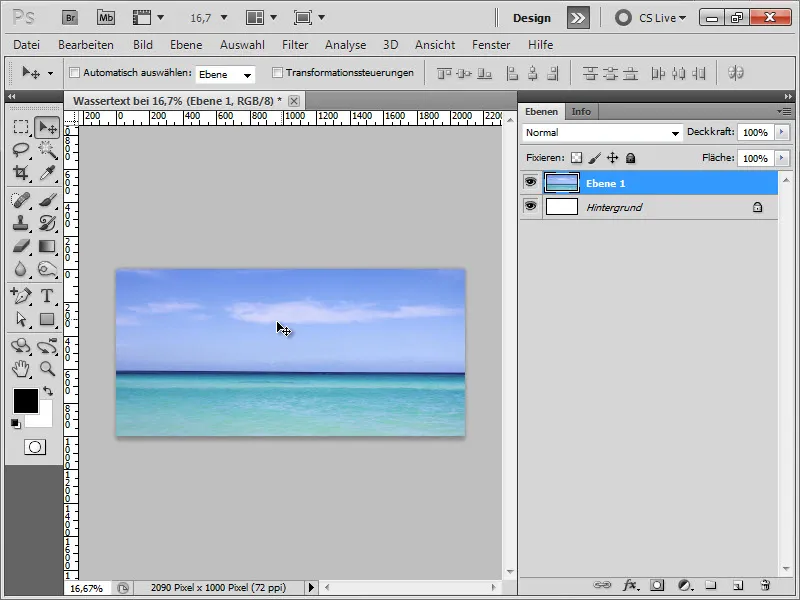
2. Create Text
Now we write the text on which we want to create the effect. We use the color #dbdbdb, a size of 300 px, and the font "FutonCondensed" in Bold. Another bold font would also work. We just need a lot of space for the water effect to stand out.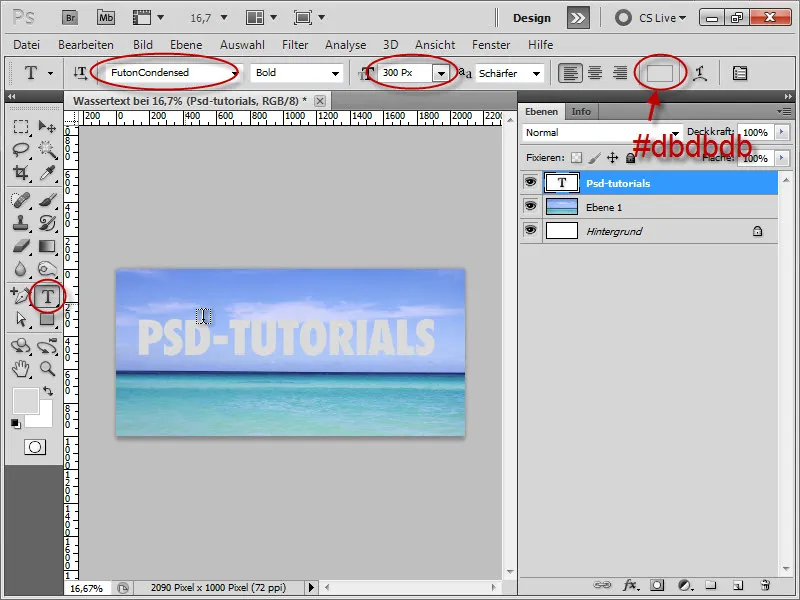
We duplicate the text layer and rename both layers. The bottom one we name "bottom", the top one "top".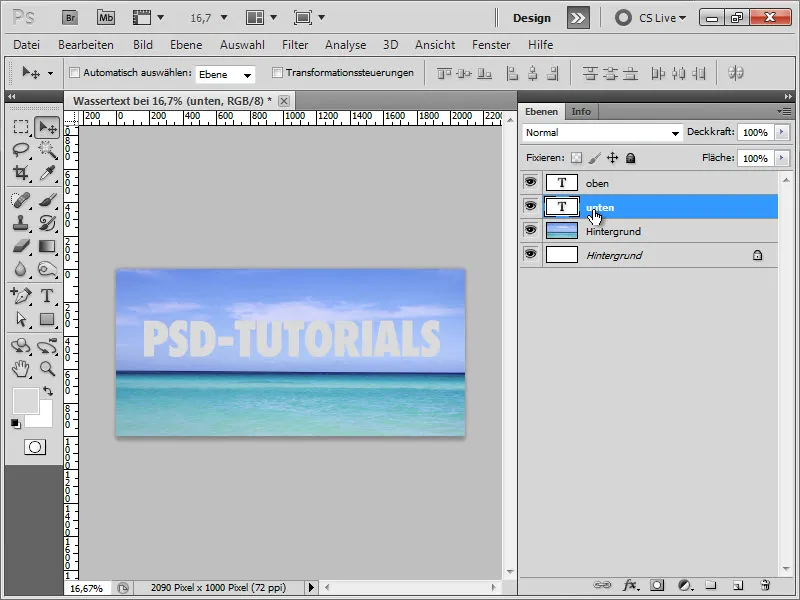
3. Layer Effects for the "bottom" Layer
Double-click on the "bottom" layer and add the following layer styles:
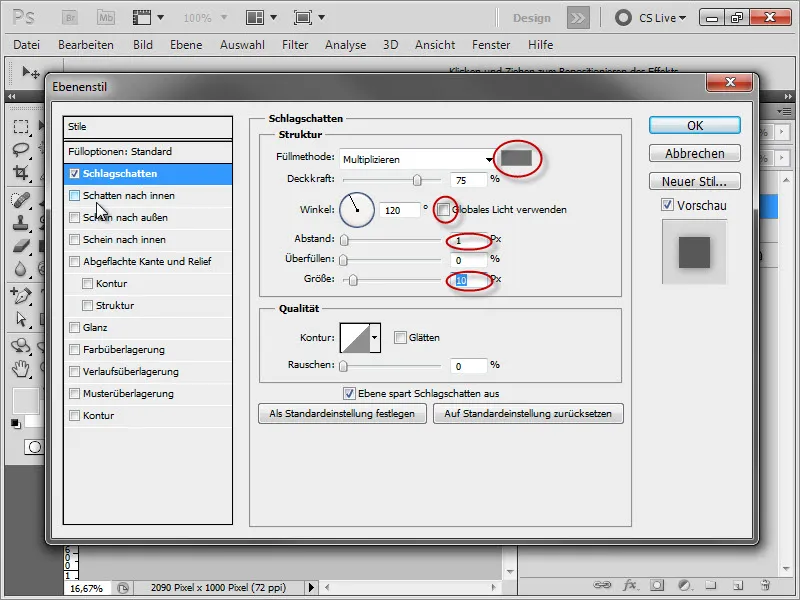
• Drop Shadow:
| Color | #707070 |
| Angle | 120°, disable "Global Light" |
| Distance | 1 px |
| Size | 10 px |
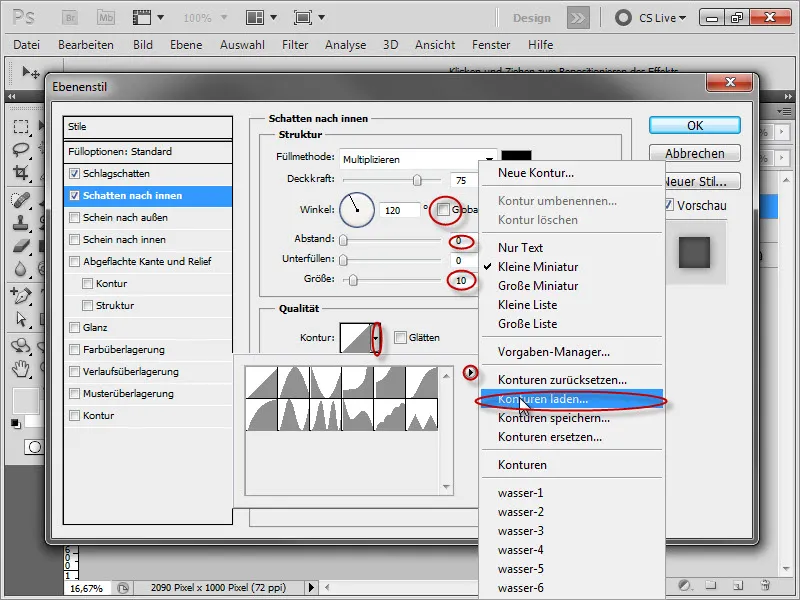
• Inner Shadow:
| Angle | Disable "Global Light" |
| Distance | 0 px |
| Size | 10 px |
| Contour | Load "Water 1" by clicking on the arrow next to Contour, then on the small arrow to the right, then click on Load Contours, and select "water-1.shc" |
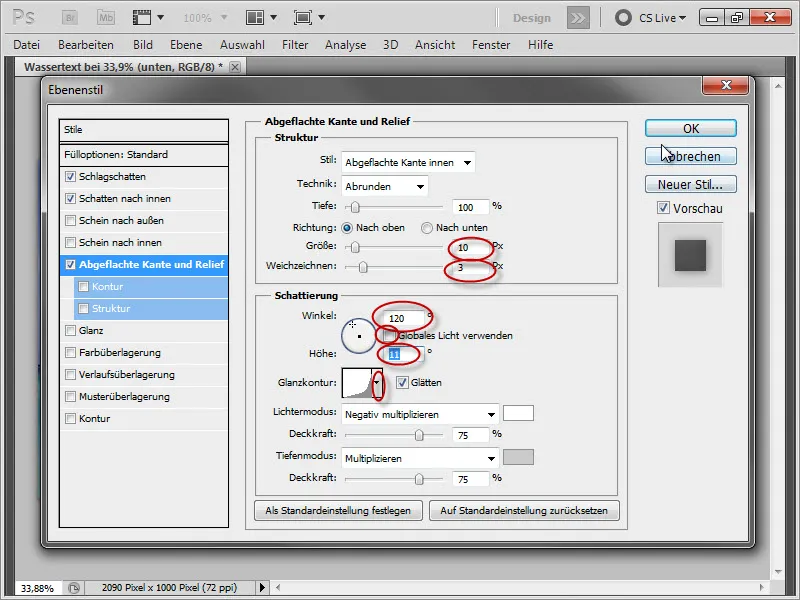
• Bevel and Emboss:
| Size | 10 px |
| Soften | 3 px |
| Angle | 120°, disable "Global Light", 11° Altitude |
| Contour | Load "Water 2" by clicking on the arrow next to Contour, then on the small arrow to the right, then click on Load Contours, and select "water-2.shc" |
Intermediate result: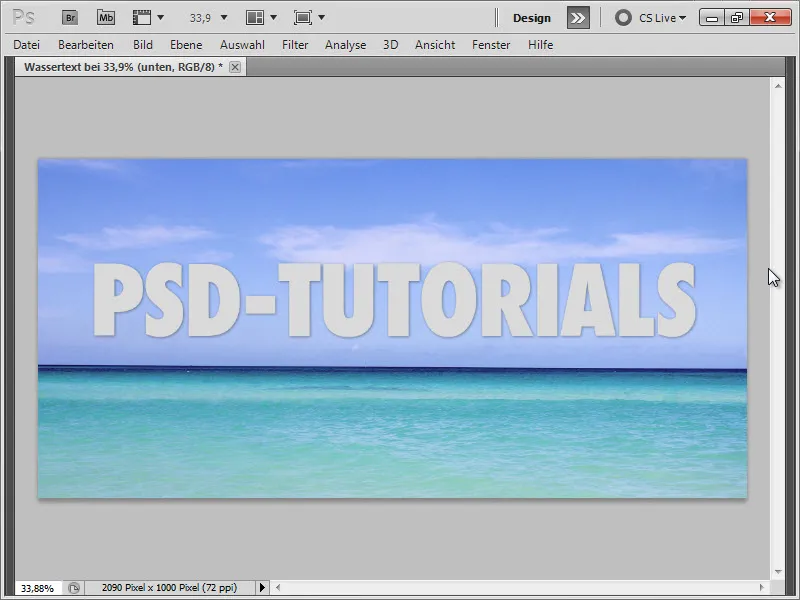
• Bevel and Emboss - Contour:
| Smooth | Check |
| Contour | Load "Water 3" by clicking on the arrow next to Contour, then on the small arrow to the right, then click on Load Contours, and select "water-3.shc" |
| Range | 100% |
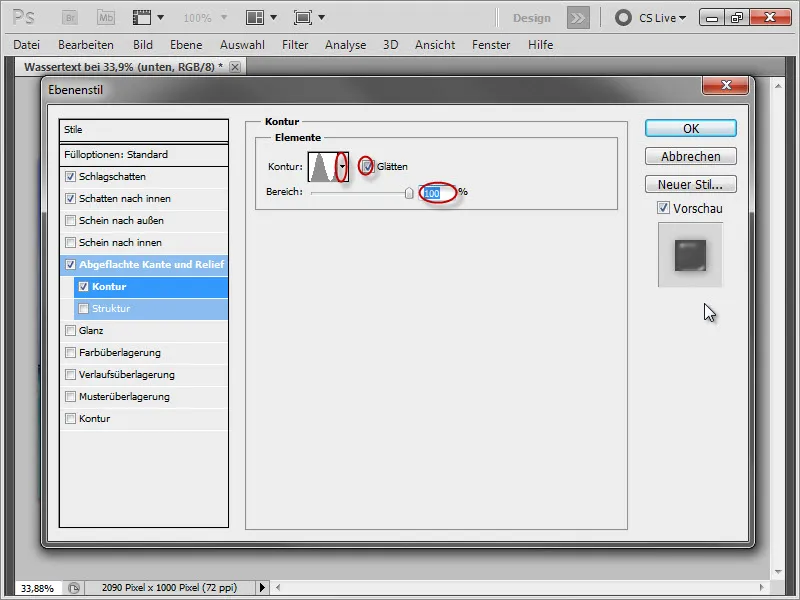
Intermediate result (the "top" layer must be turned off beforehand):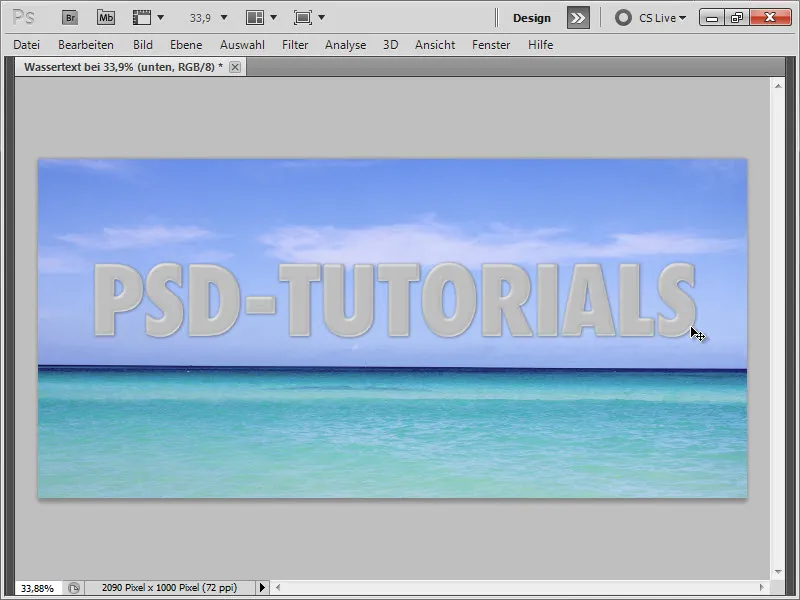
For the "top" layer, we set the Fill Opacity to 0%, so only the layer effects will shine through later.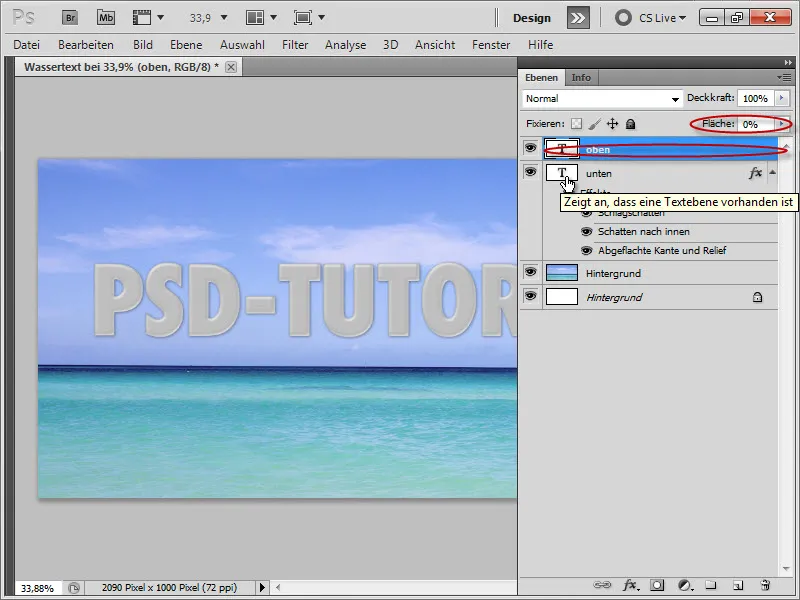
Then, we double-click on the top text layer a bit to the right and configure the following layer effects:
• Inner Shadow:
| Angle | Disable "Global Light" |
| Distance | 0 Px |
| Size | 7 Px |
| Smooth | Check the box |
| Contour | Load "Water 4" by clicking on the arrow next to "Contour", then on the small arrow on the right, then click on Load Contours and select "water-4.shc" |
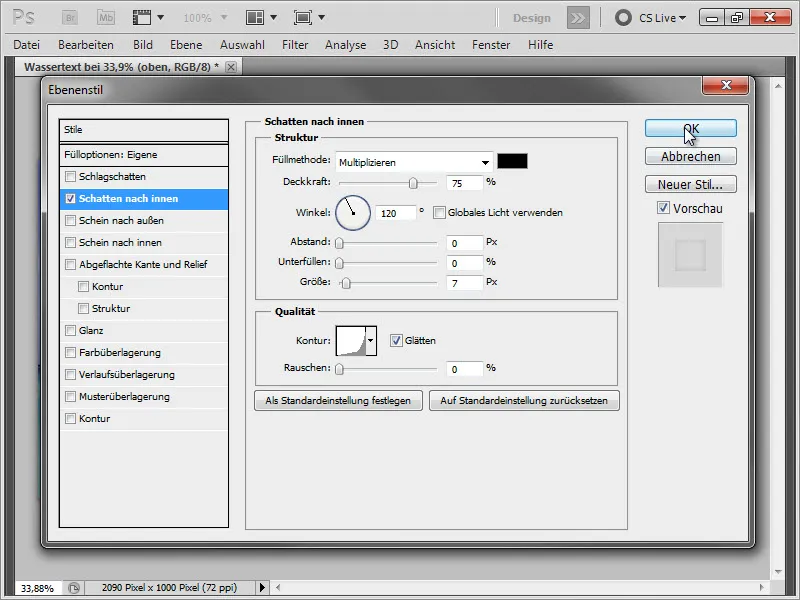
Intermediate result: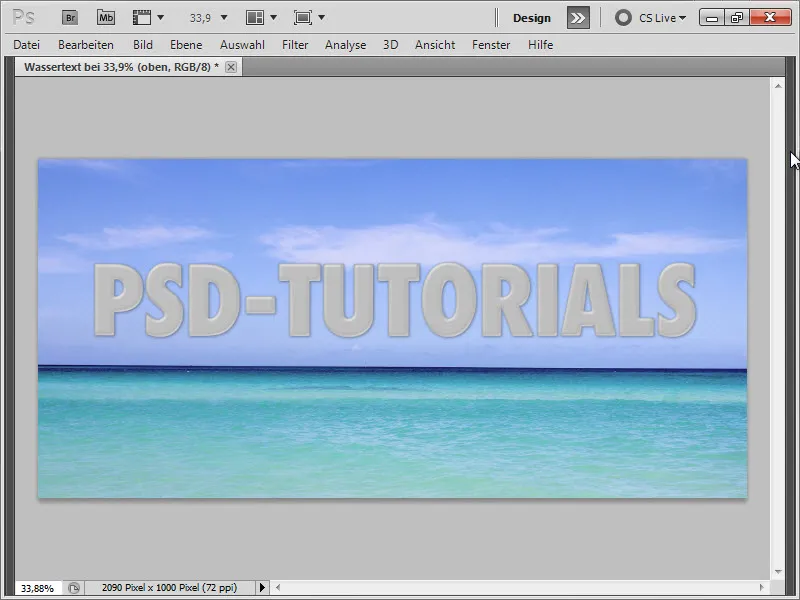
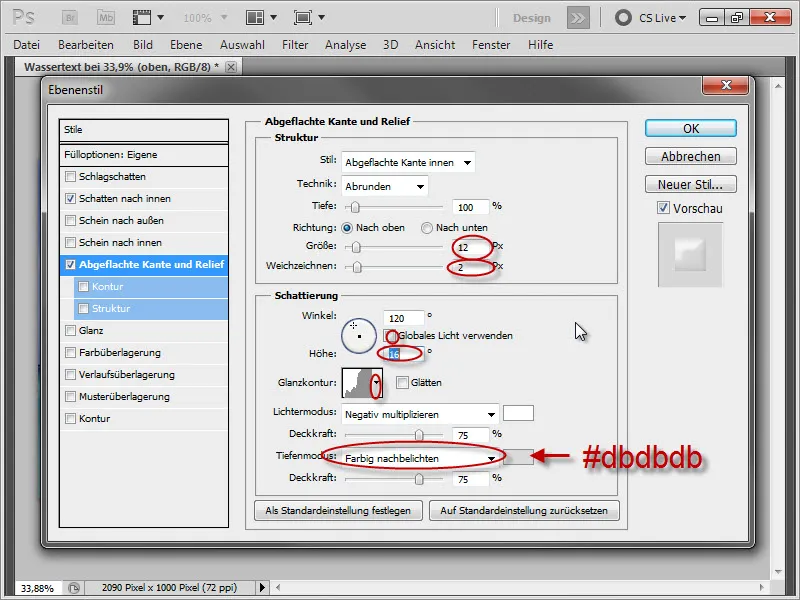
• Flat Edge and Relief:
| Size | 12 Px (later experiment with 24 Px for even more plasticity) |
| Blur | 2 Px |
| Shading: | 120° Disable "Global Light", 16° height |
| Contour | Load "Water 5" by clicking on the arrow next to "Contour", then on the small arrow on the right, then click on Load Contours and select "water-5.shc" |
Intermediate result: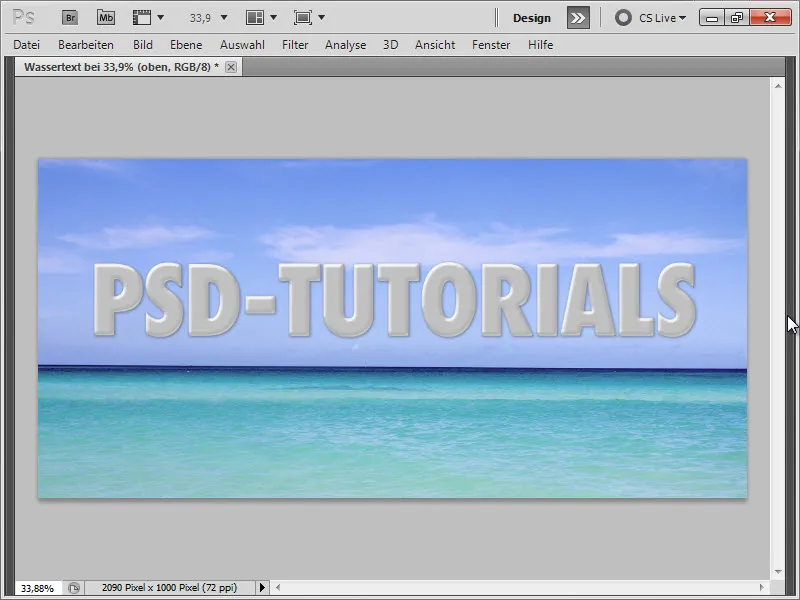
• Flat Edge and Relief - Contour:
| Contour | Load "Water 6" by clicking on the arrow next to "Contour", then on the small arrow on the right, then click on Load Contours and select "water-6.shc" |
| Area | 100% |
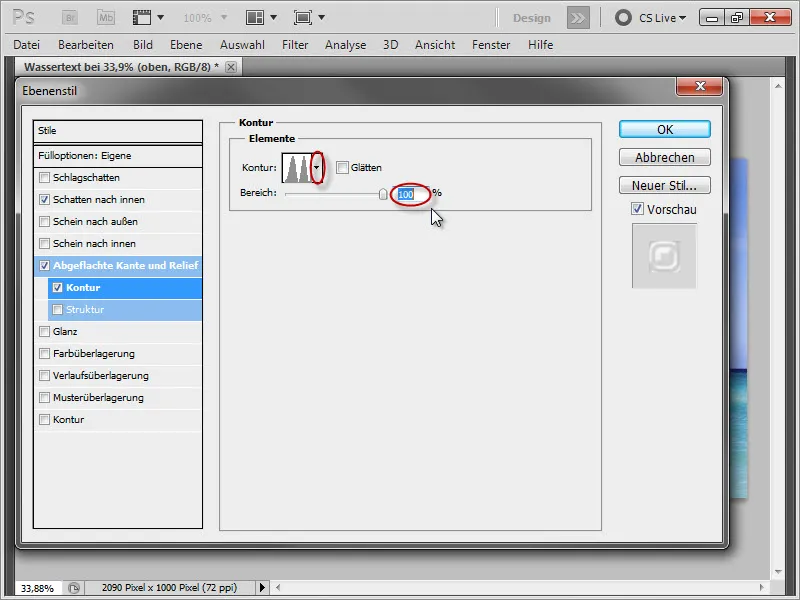
Intermediate result: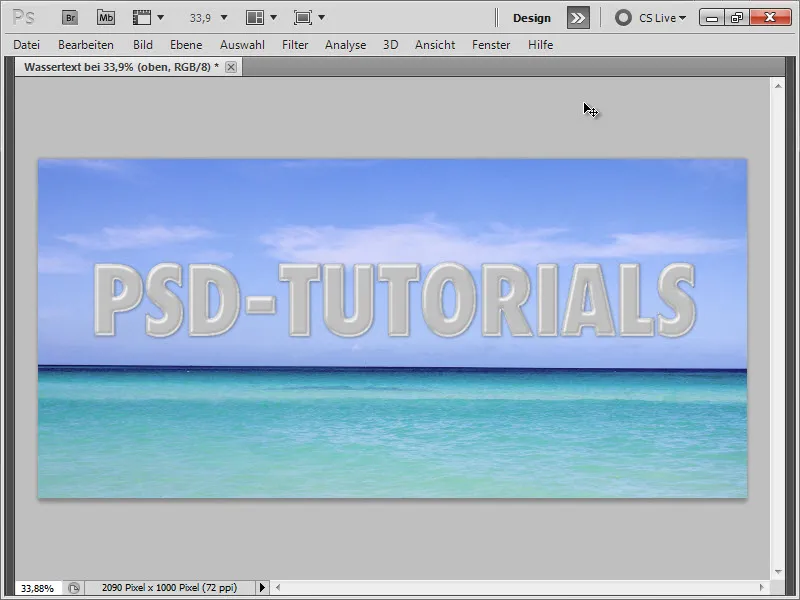
5. Fill Text with Water
Now we take the Rectangle Tool …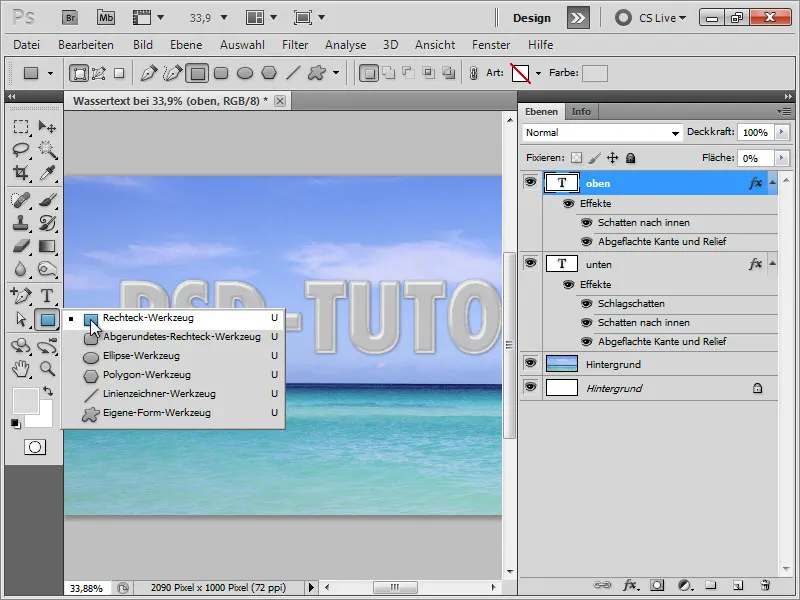
… and draw a rectangular shape covering the lower half of the text.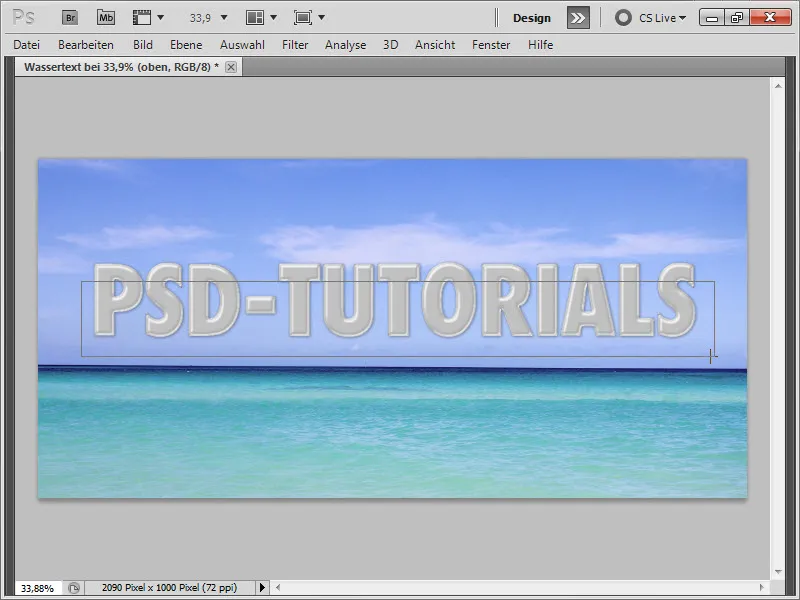
The Color should be #4594ab. This new layer should be positioned between the two text layers "bottom" and "top".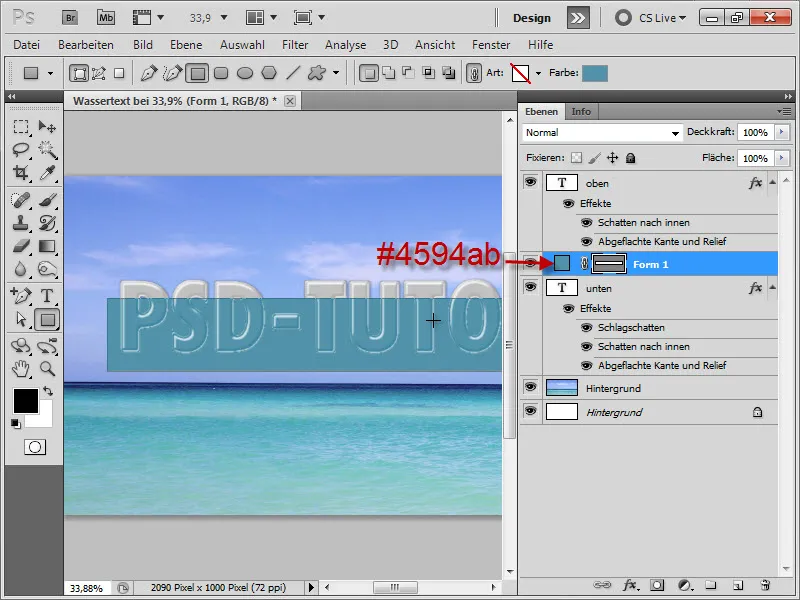
6. Set Initial Anchor Points
Now we take the Add Anchor Point Tool …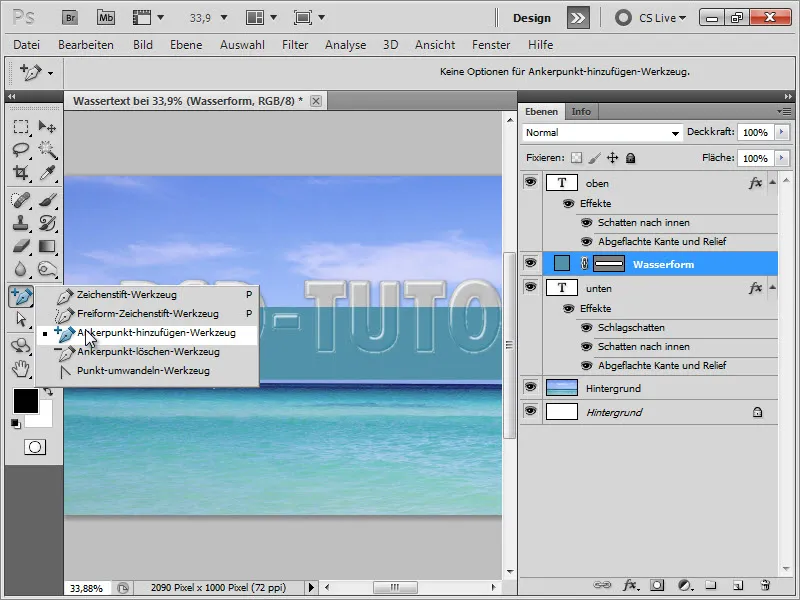
… and place anchor points at the outer edges of each character.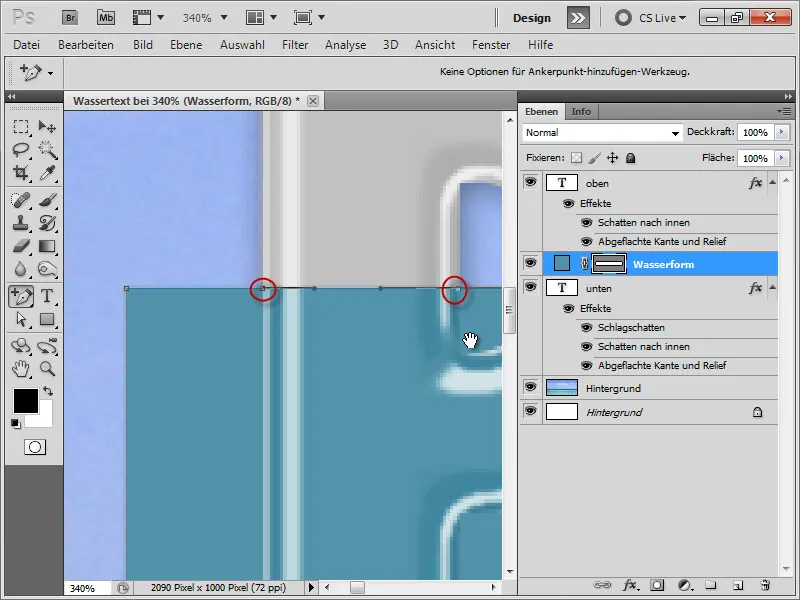
7. Create Wave
Once we have done that, we place even more anchor points inside the characters.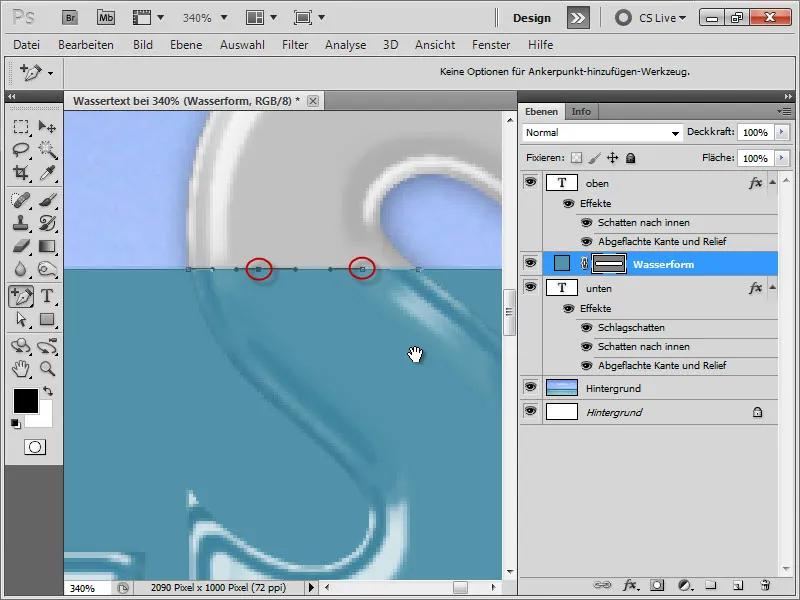
Using the Direct Selection Tool, we move each of them up and down slightly, creating a wave. If there are too many points, we can remove them using the Delete Anchor Point Tool.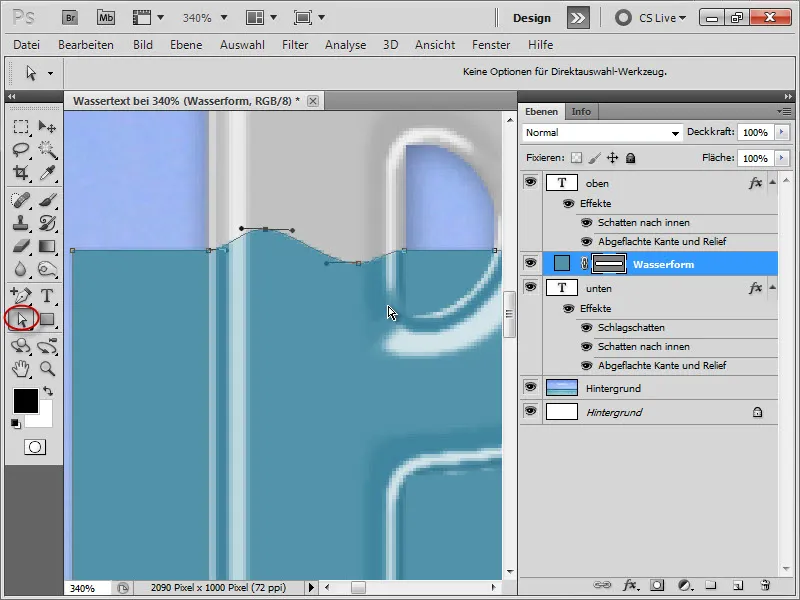
Intermediate result: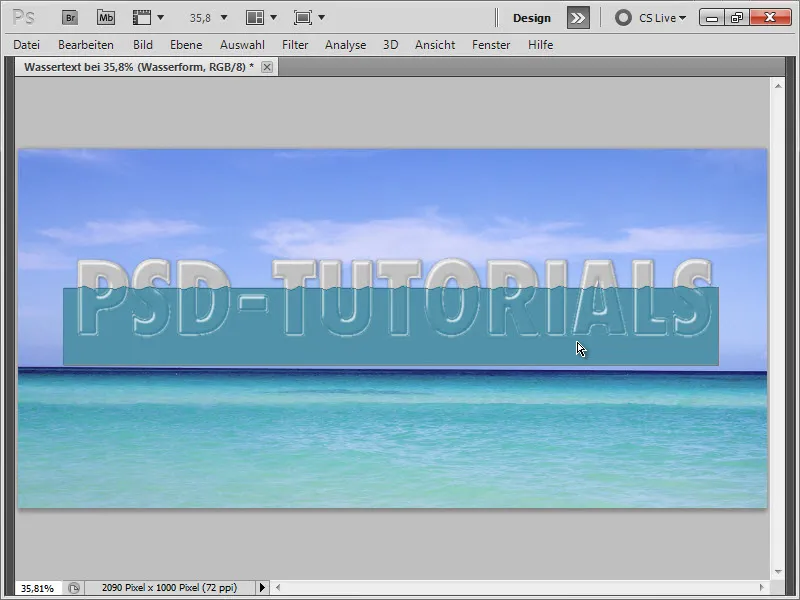
8. Remove Outlines
Next, we rasterize the Rectangle Layer; meaning we first duplicate it, hide the bottom layer, then right-click on the copy and choose Rasterize Layer.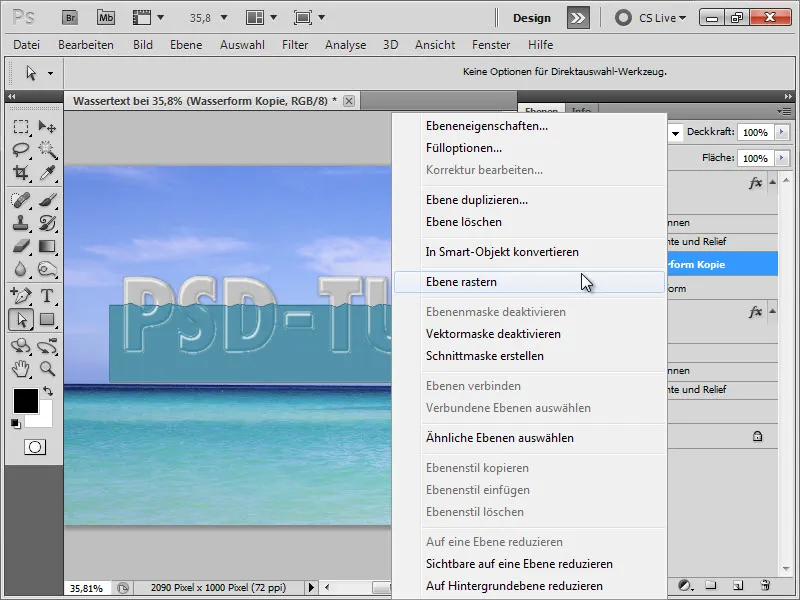
We press the Ctrl key, and while holding it, click on the icon in the layers palette of the "bottom" text layer to create a selection around the text.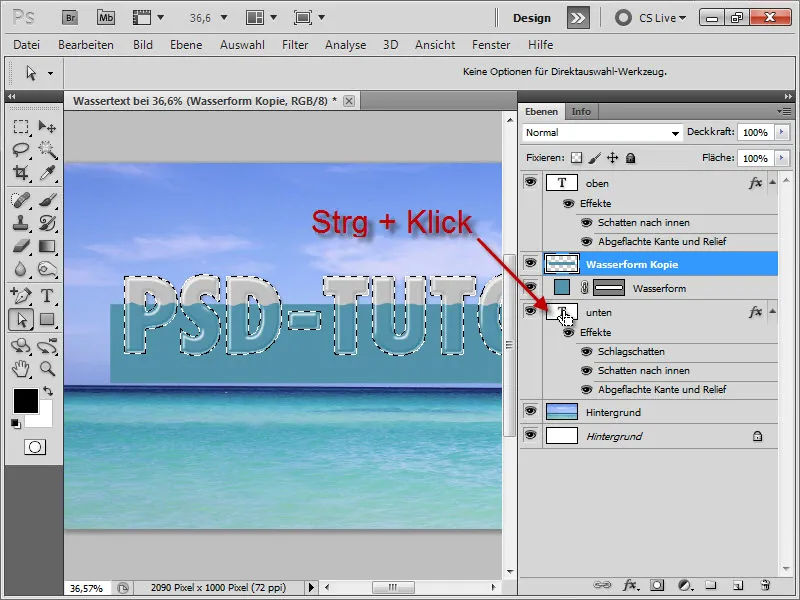
Then we press Ctrl+Shift+I, to invert the selection, reselect the water shape copy, and press Delete. Then hide the lower water shape layer.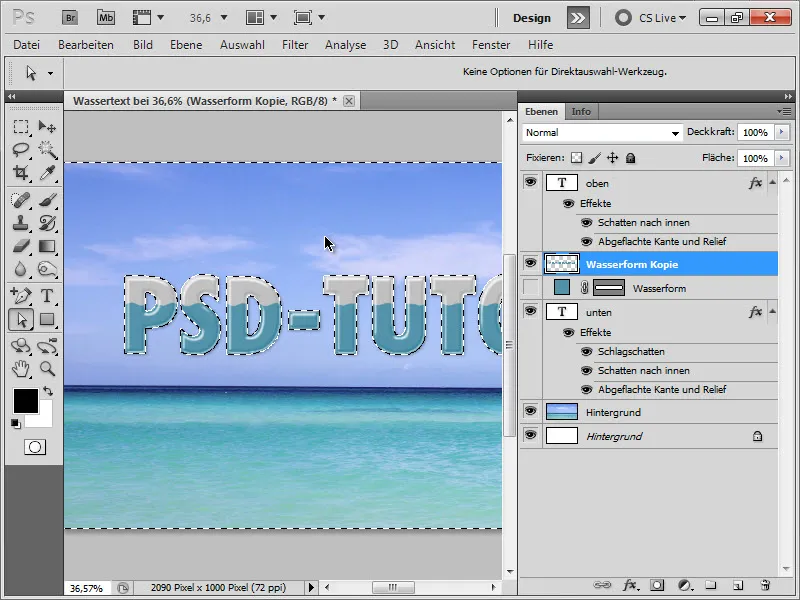
9. Add Layer Effects to the Water
Next, double-click on the water layer for layer effects to give the water a texture of real water.
• Drop Shadow:
| Fill Method | Multiply, #4494ab |
| Global Light | disable |
| Distance | 3 Px |
| Overfill | 12 % |
| Size | 3 Px |
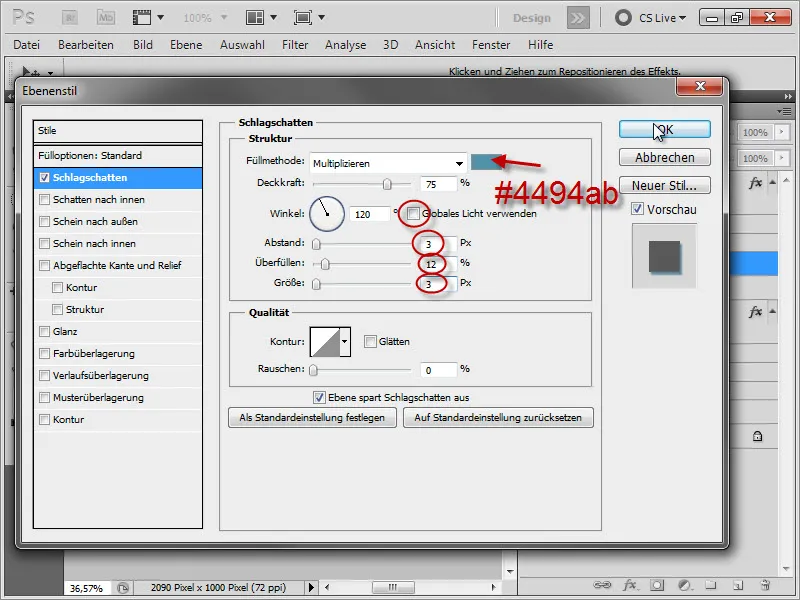
Intermediate result: 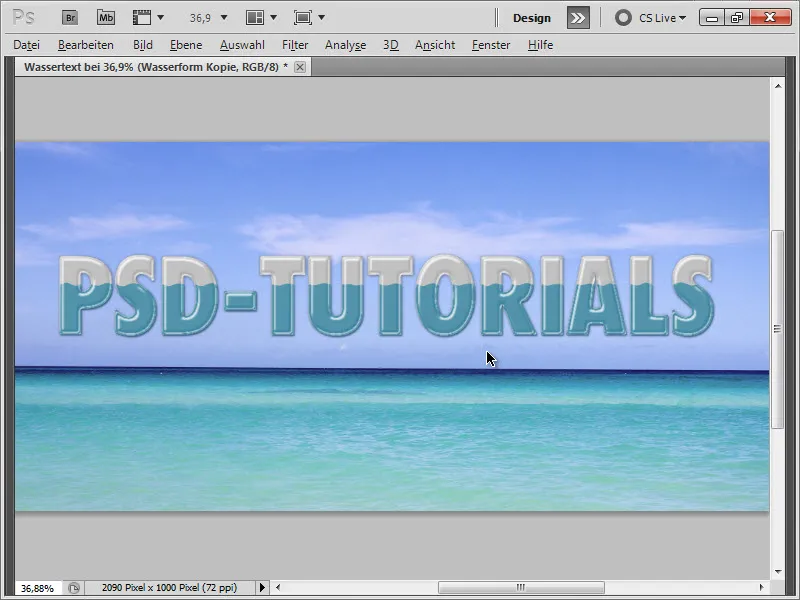
• Inner Shadow:
| Fill Method | Multiply, #4494ab |
| Angle | -75° |
| Distance | 0 Px |
| Size | 16 Px |
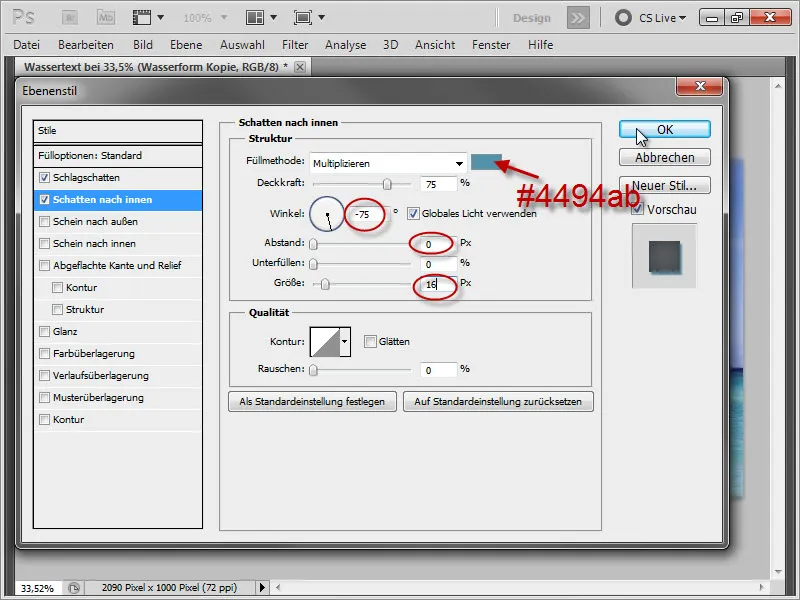
Intermediate result: 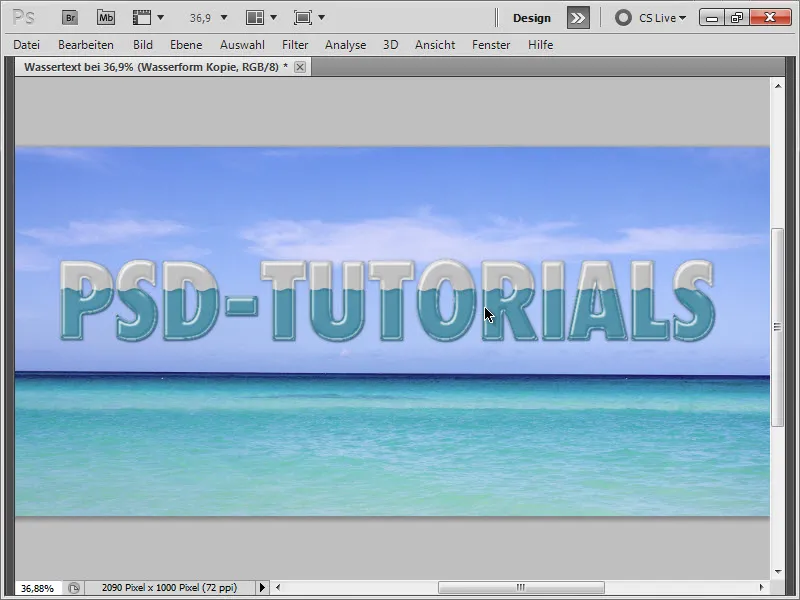
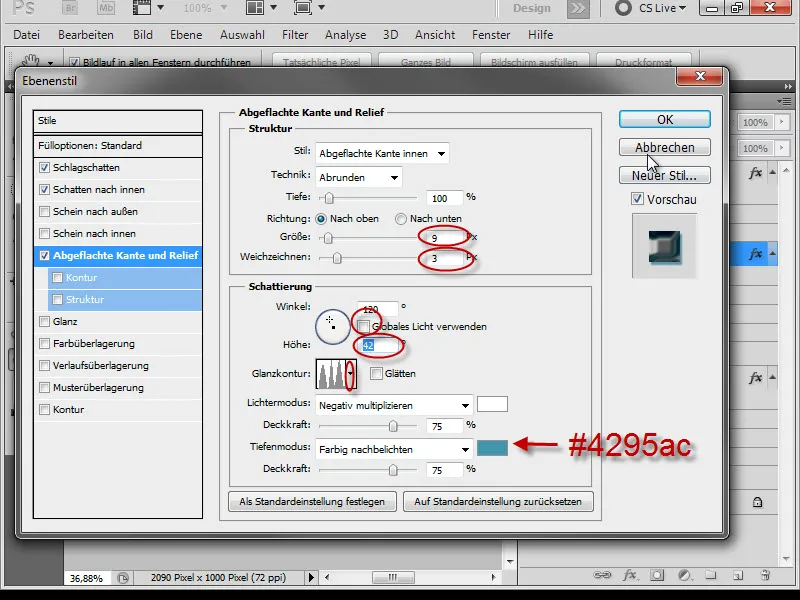
• Beveled Edge and Emboss:
| Size | 9 Px |
| Blurring | 3 Px |
| Angle | 120°, disable "Global Light", Height 42° |
| Contour | Load "Wasser 7" by clicking the arrow on the contour, then the small arrow on the right, then Load Contours and select "wasser-7.shc" |
| Depth Mode | Color Dodge, #4295ac |
Intermediate result: 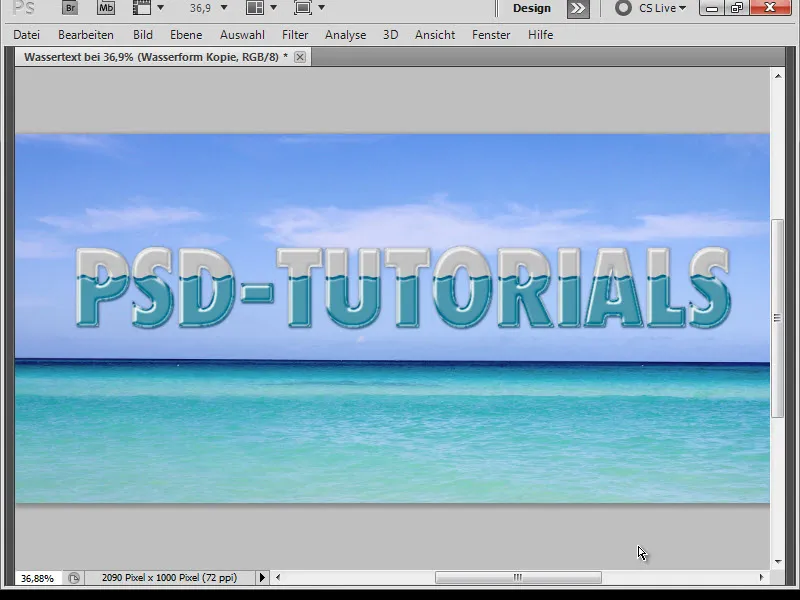
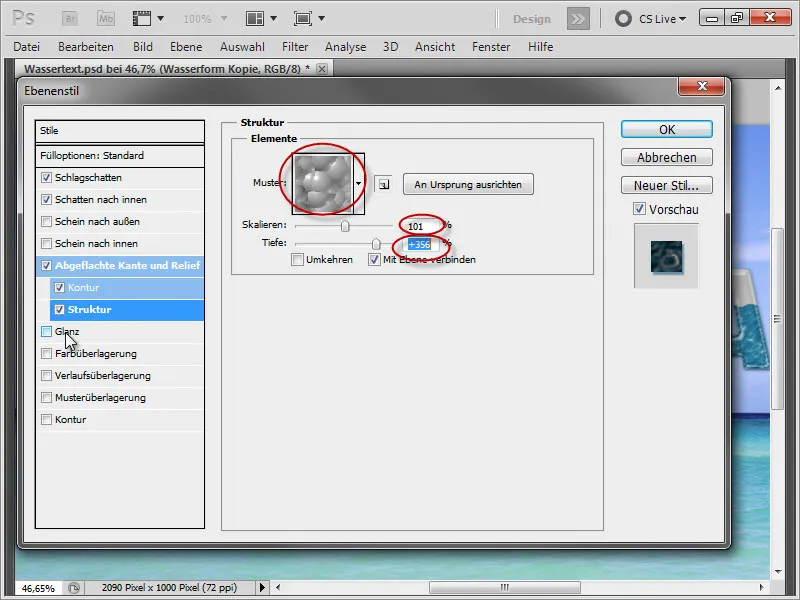
The following settings provide for the water texture:
• Texture:
| Pattern | 9 Px |
| Scale | 101 % |
| Depth | +356 % |
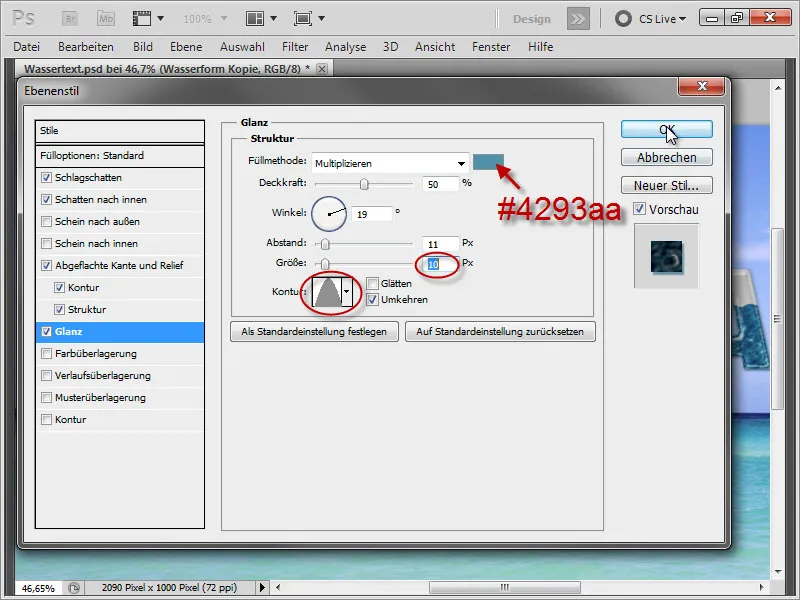
• Shine:
| Fill Method | Multiply, #4293aa |
| Size | 10 Px |
| Contour | wide cone shape, see below. |
Intermediate result: 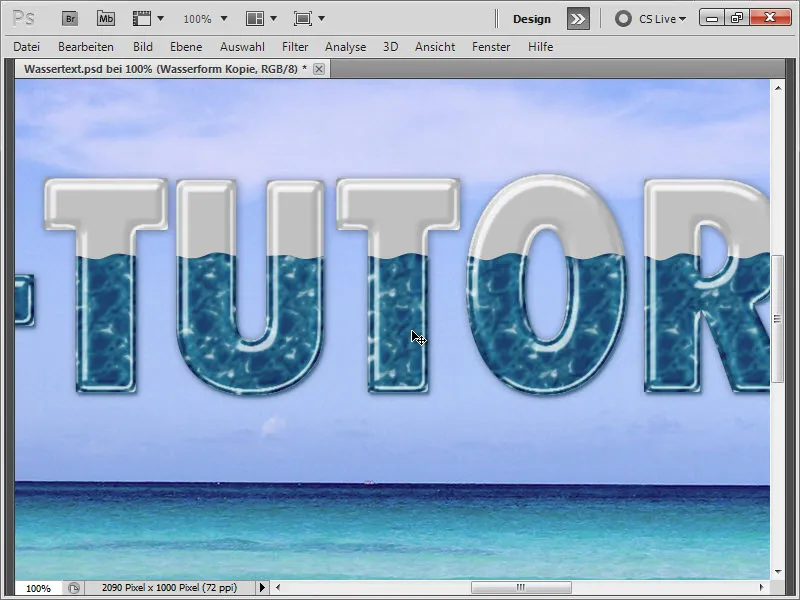
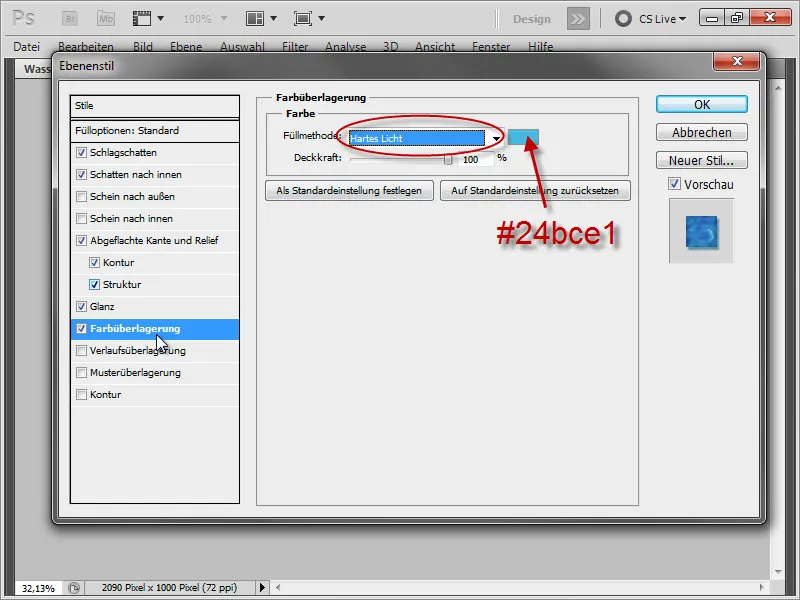
Now the water is somewhat dark; therefore, we will add a Color Overlay. And to ensure the lighter color does not appear too flat, we will also change the fill method. The details are as follows:
• Color Overlay:
| Fill Method | Hard Light, #24bce1 |
Intermediate result: 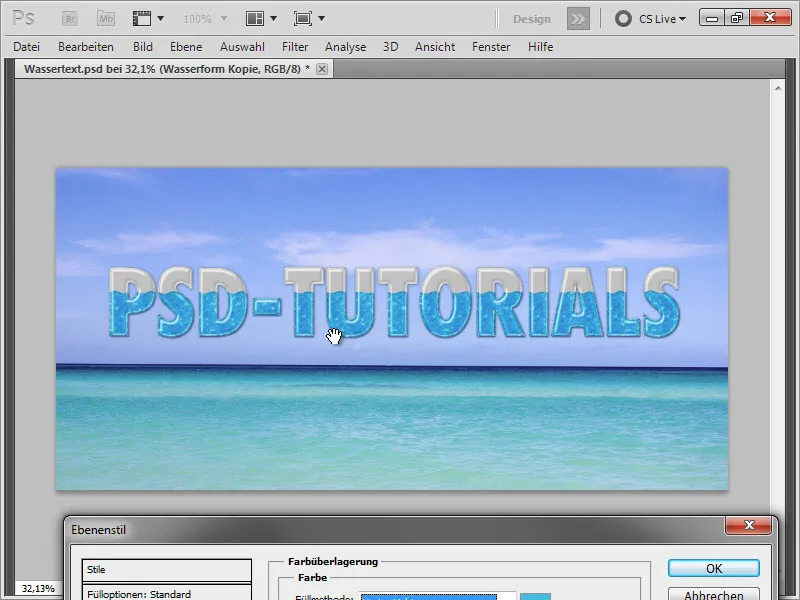
• Gradient Overlay:
| Fill Method | Soft Light |
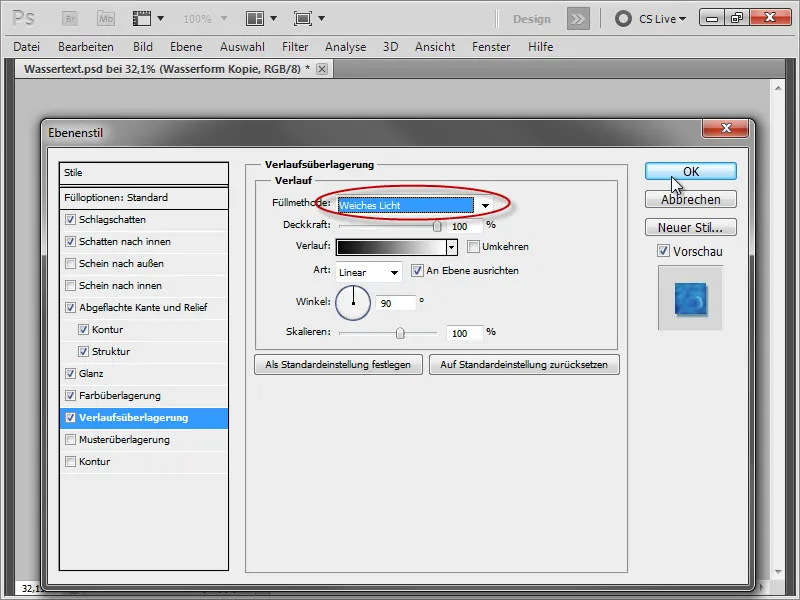
Intermediate result: 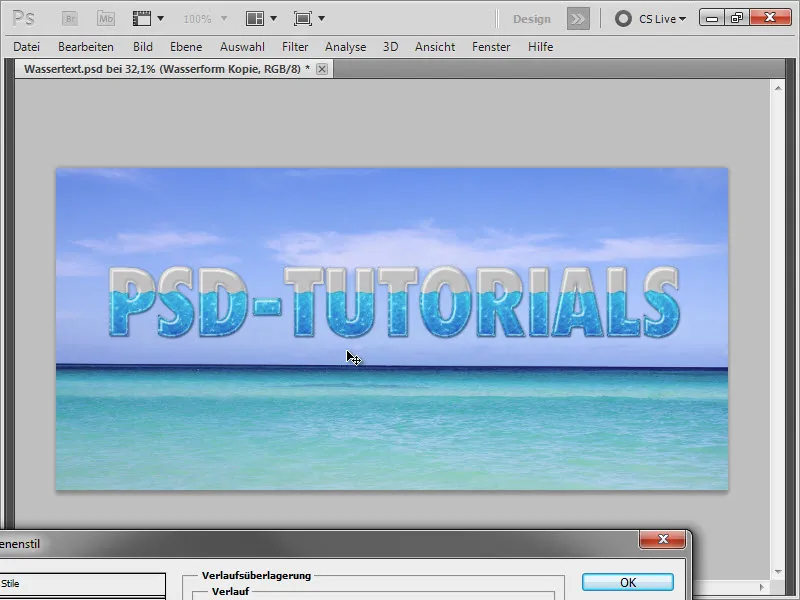
Intermediate result enlarged: 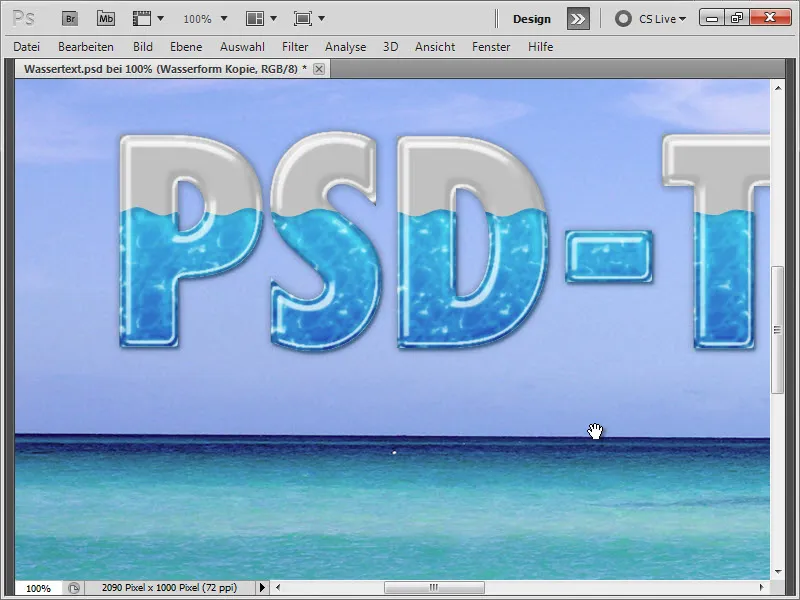
So that the rest of the text not only appears gray, but like a glass vessel, simply go to the "bottom" layer and set the Fill Opacity to 0%. 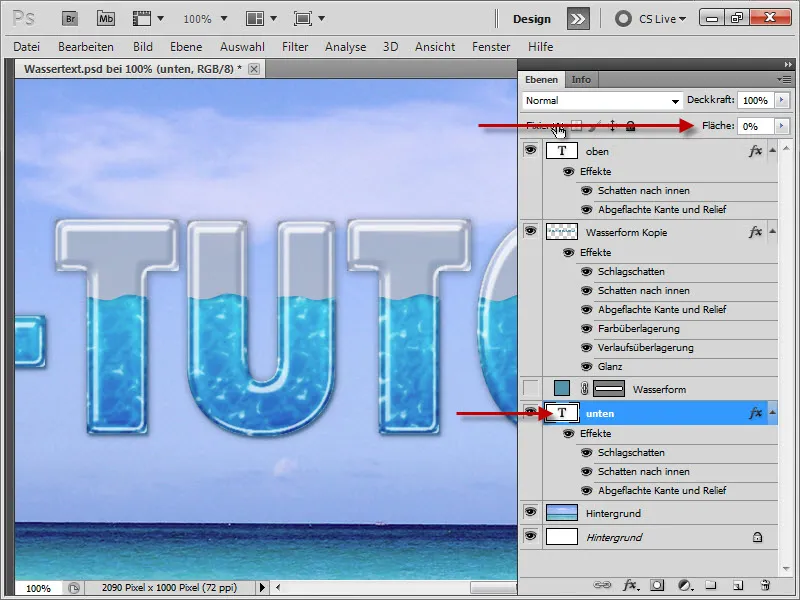
Final result: 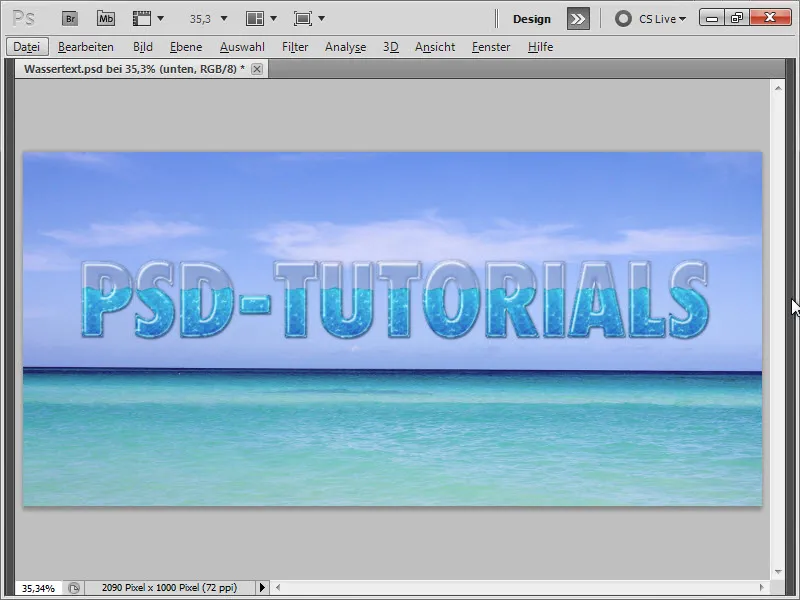
10. Variations: Change Blue Tone
Here, I would like to show you through some small optimizations, what more we can do with the text. Among other things, we can change the blue tone of the water by adding an adjustment layer Hue/Saturation in the layers palette..., 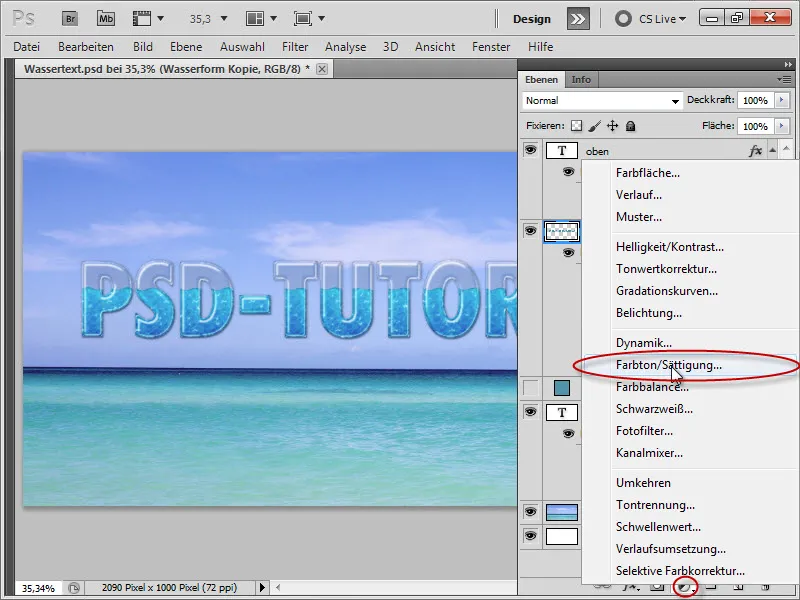
move this over our water shape layer and with the Alt key held down and clicking, create a Clipping Mask, so the effects only affect this lower layer. 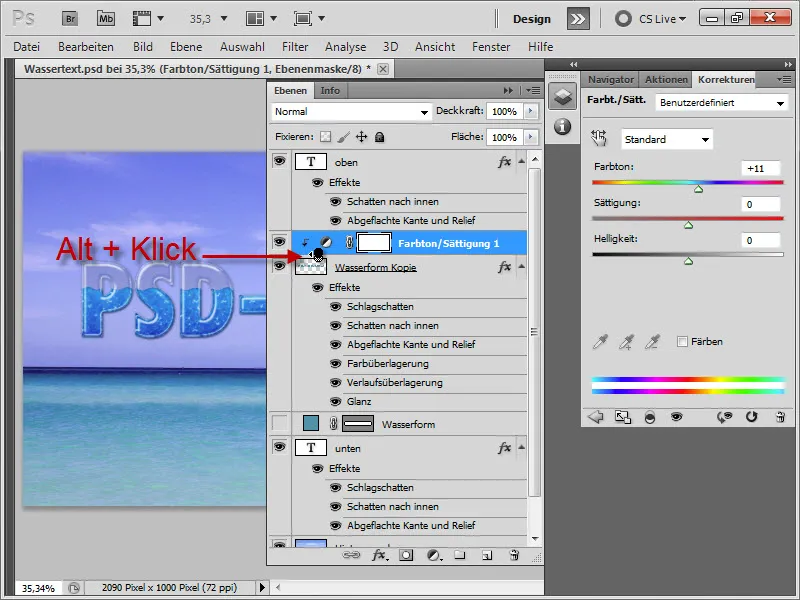
By adjusting the controls slightly, you can give the water a little more depth.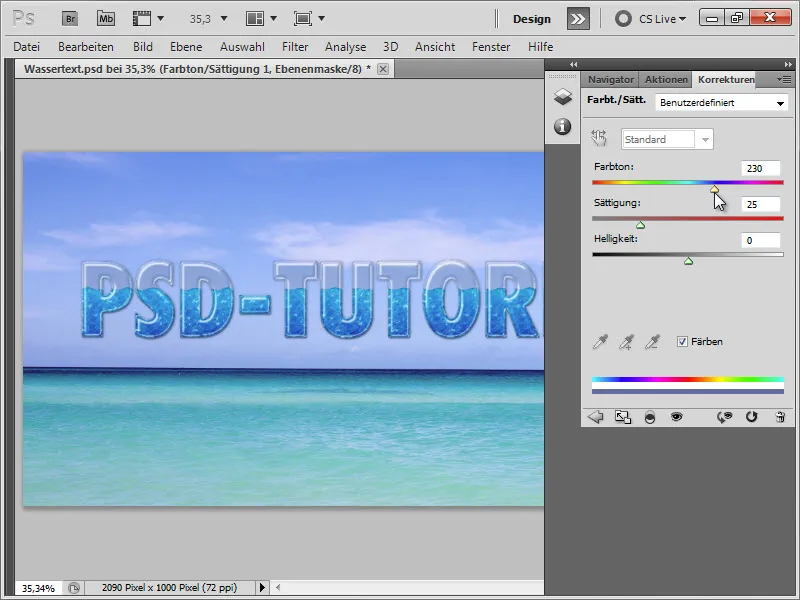
11. Variations: Animating Water
Another possibility would be to duplicate the water layer (first apply the clipping mask again with Alt+click) and then double-click on Bevel and Emboss to access the layer style settings.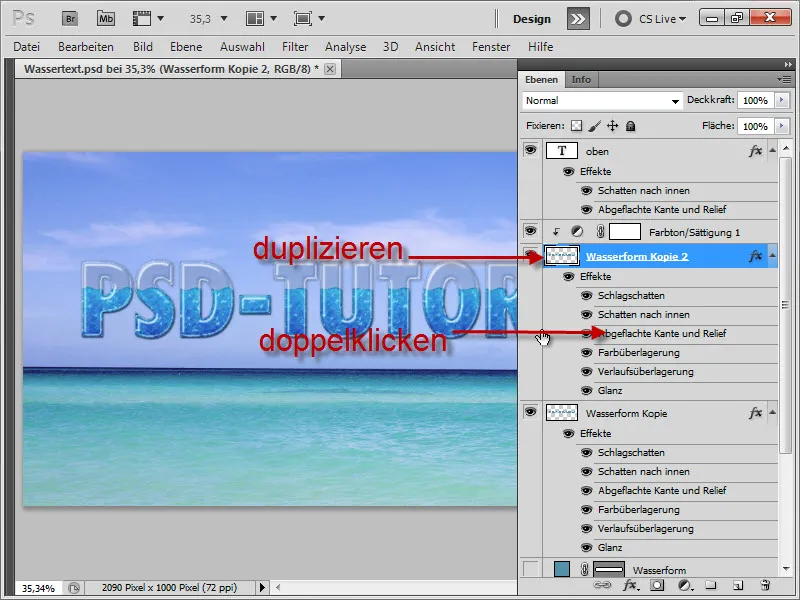
Next, we go to Structure and adjust the Depth to 280%. This will change the water's movement slightly.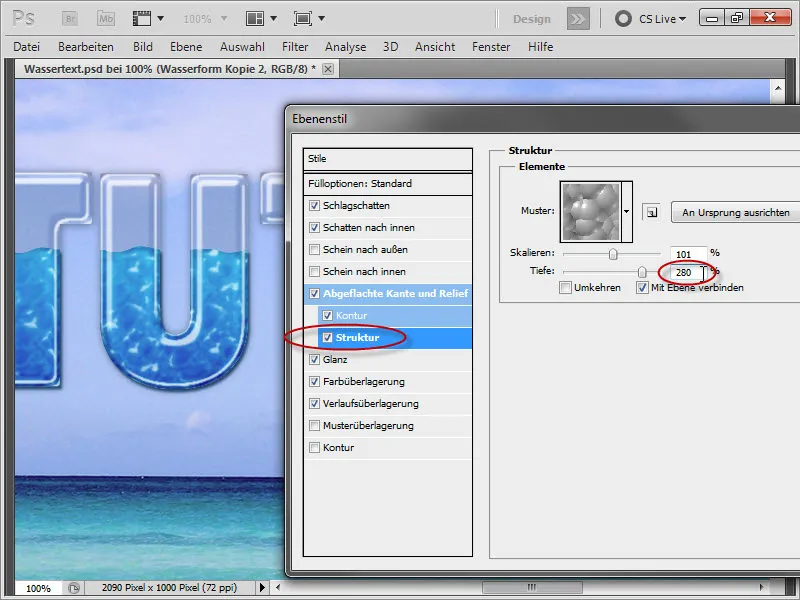
Then we duplicate the water layer again to modify the structure a second time…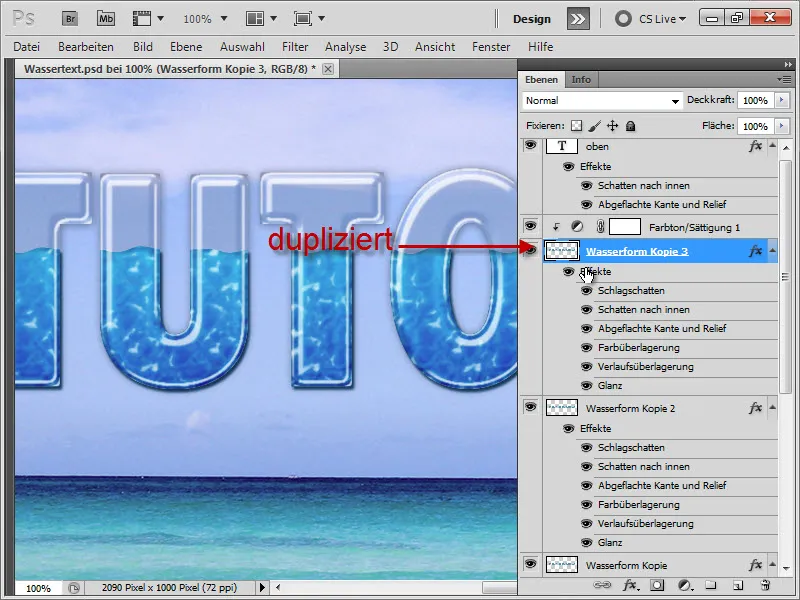
… and set the value of Depth to 470%.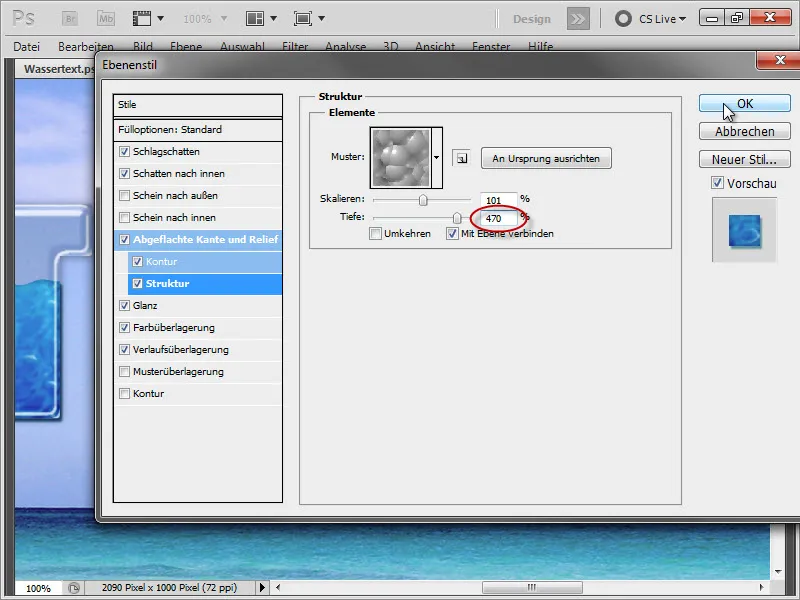
Next, we go to Window>Animation to open the Timeline panel.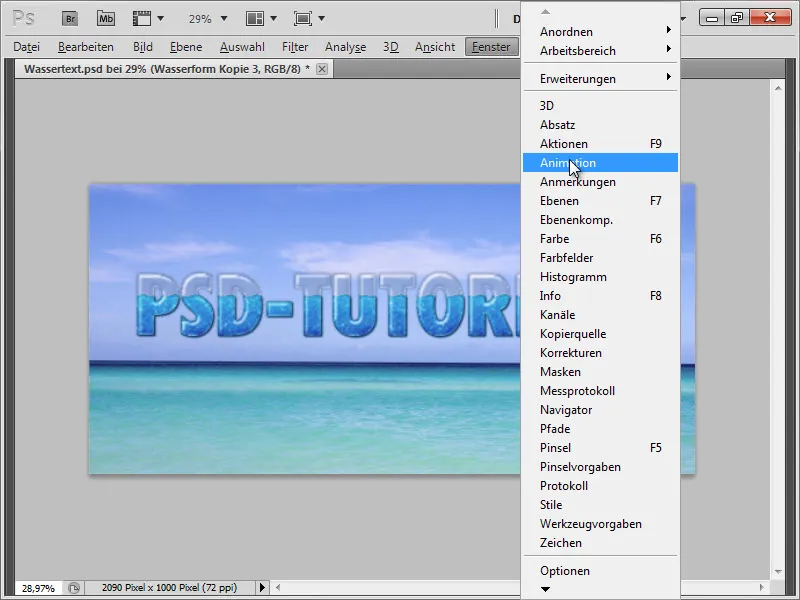
Then we click on the symbol below to switch to the Frame Animation view: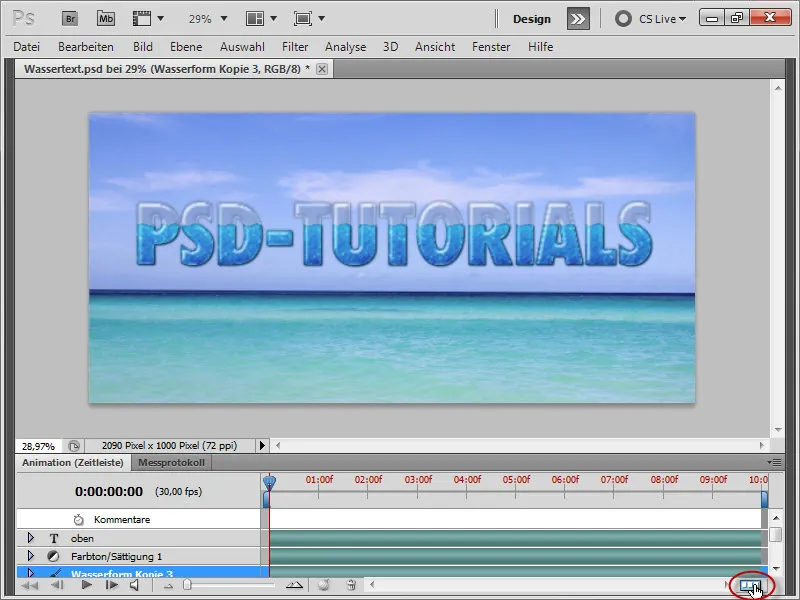
Now we click twice on the symbol shown below to create 2 more frames.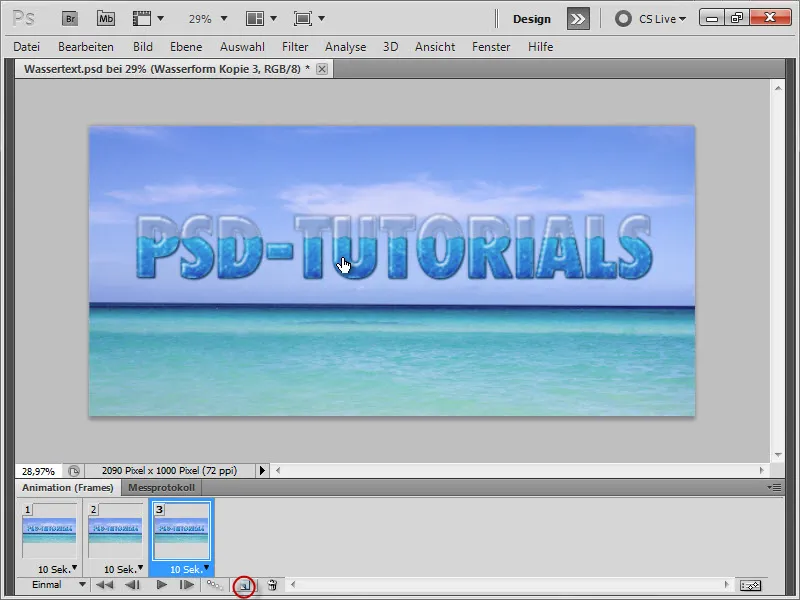
Afterwards, we select the first frame by clicking on it: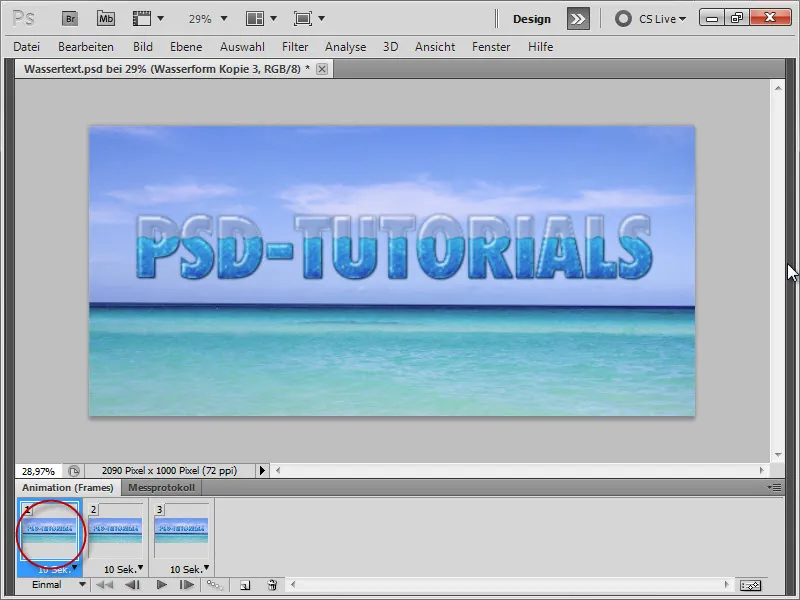
Then we hide the lower two water layers. Only the upper one with the clipping mask should be visible.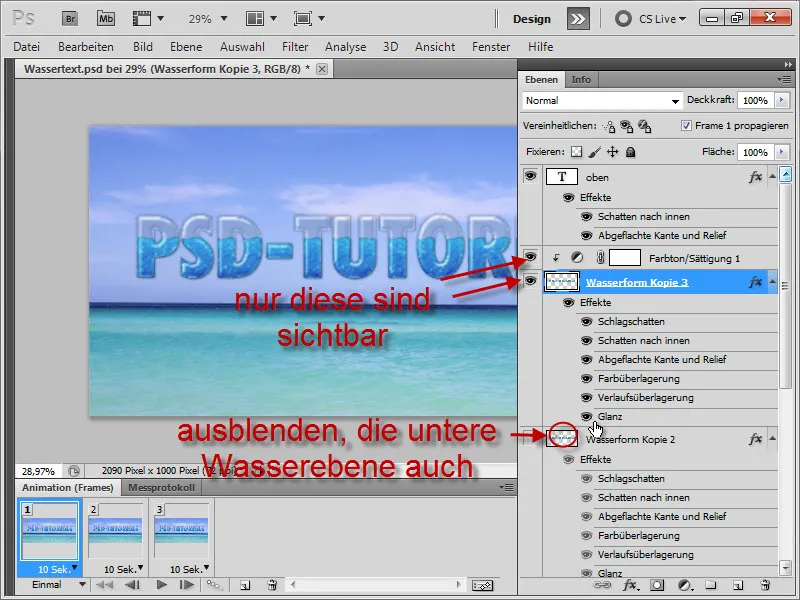
Next, we click on the second frame below, hide the upper and lower water layers, and only display the middle one. We also add the Hue/Saturation Adjustment Layer.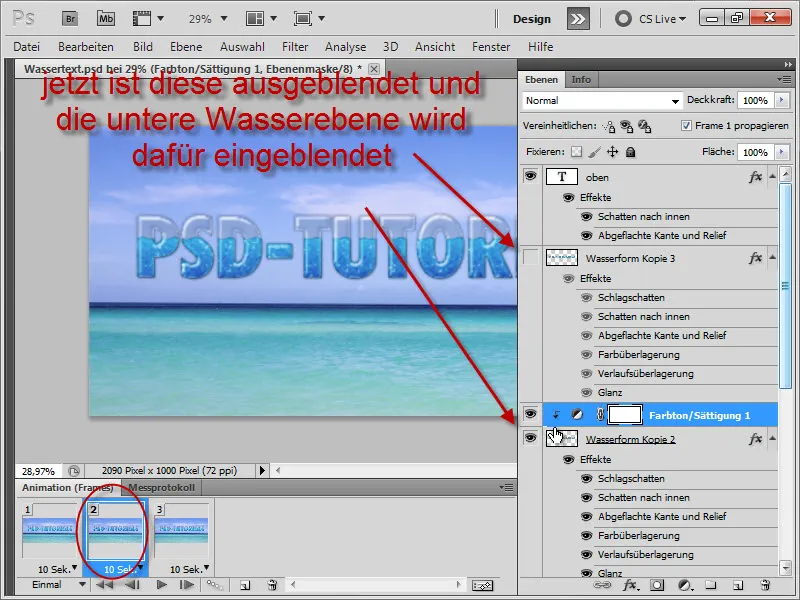
We repeat the same steps for the third frame, showing only the lower water layer. Then we select all 3 frames and set the Seconds to 0.2.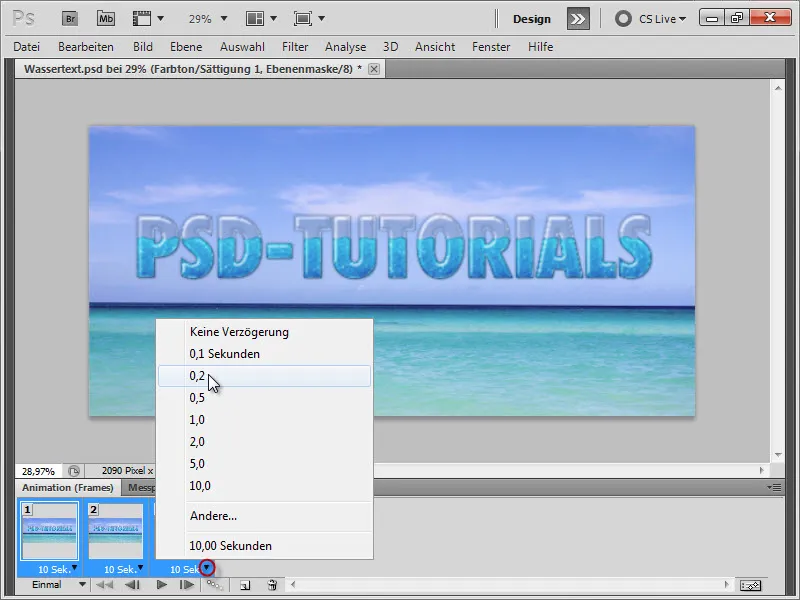
On the left, we click on the triangle next to Once and select Forever so that the animation plays continuously.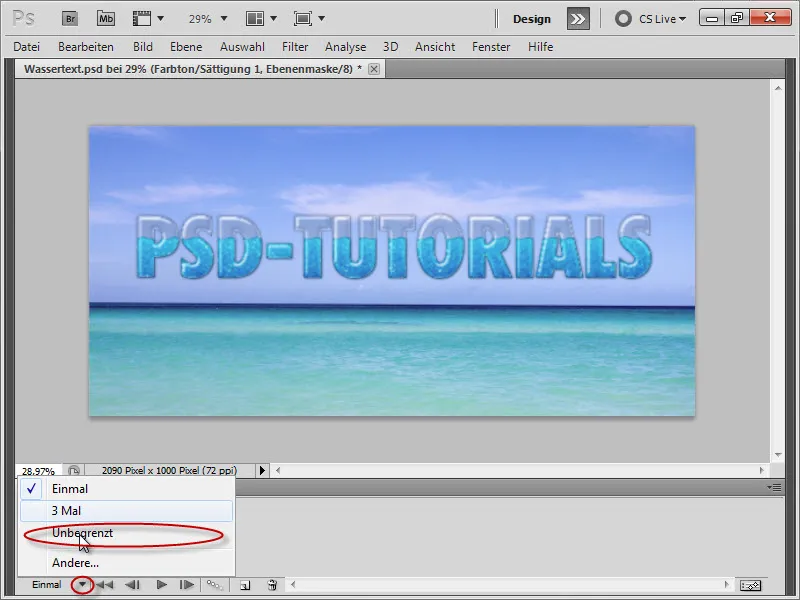
By clicking on the Play button, we can see the water in motion. We can now save it as a GIF file by going to File>Export>Save for Web.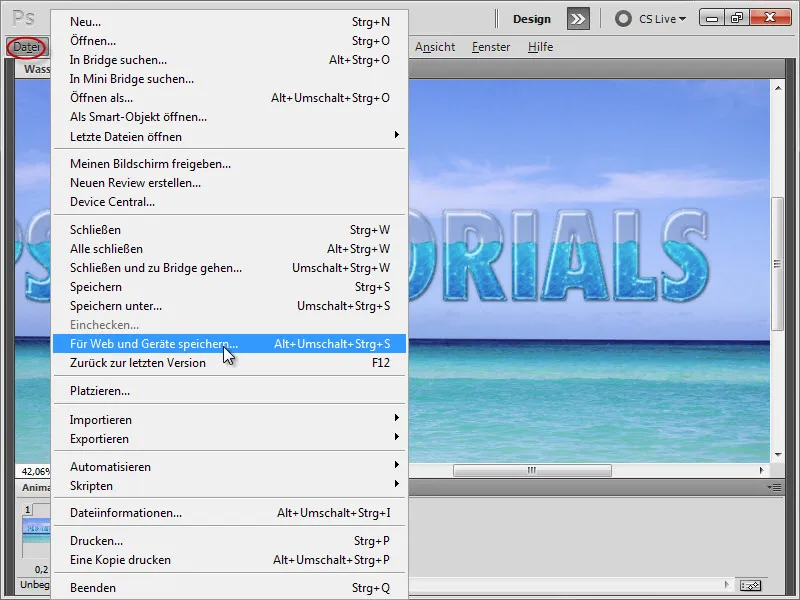
There we select GIF and click on Save.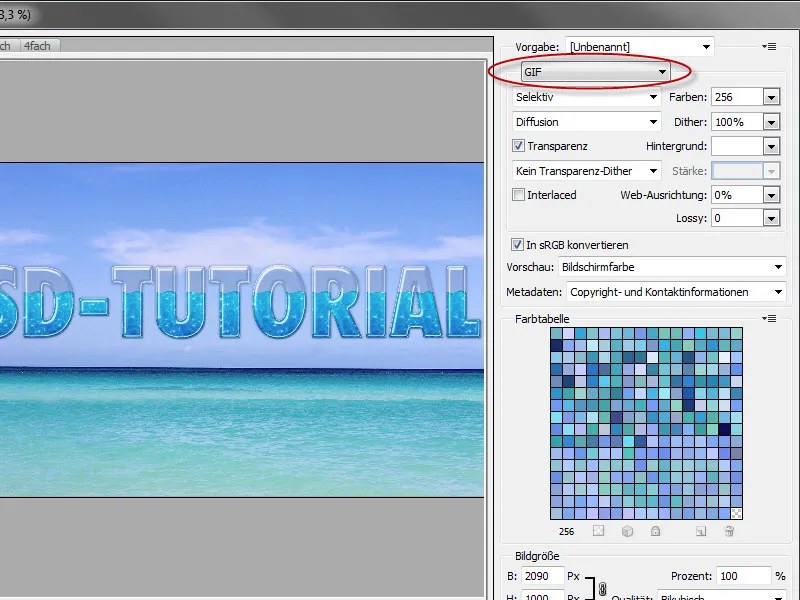
To view the entire animation, it's better to drag the file into a browser. It will play there.
So, that's it. I hope you enjoyed this workshop. Here below you can see our animated end result again: