Before we start creating the animation above, let's first take a look at how the collision deformer works. As the name suggests, it is a deformation object that in CINEMA 4D must always be grouped with or subordinate to the object to be deformed.
Deformation with a simple ring object
In the working file "PSD_C4D_R13_Kollisionsdeformer_1.c4d" you will find my first example, in which a parametric plane object is to be deformed with an equally parametric ring object.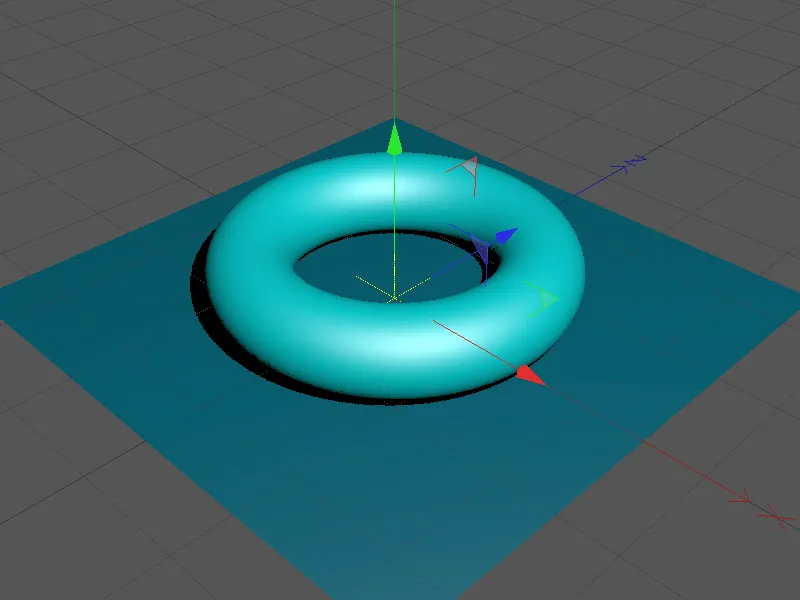
Let's take a quick look at the elements of the scene. The plane object is large enough to accommodate all the deformations of the ring object. Equally important is the relatively high subdivision (segmentation) in width and depth. If the subdivision is insufficient, no soft deformation can take place when colliding with another object; the surfaces then look jagged and stair-like.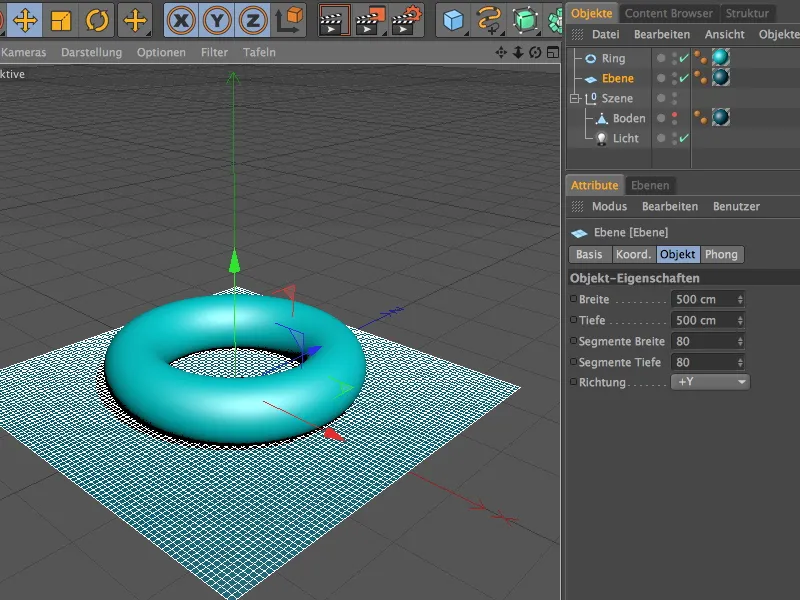
I have not skimped on subdivisions in the ring object either. This segmentation is also necessary so that the deforming object can collide precisely.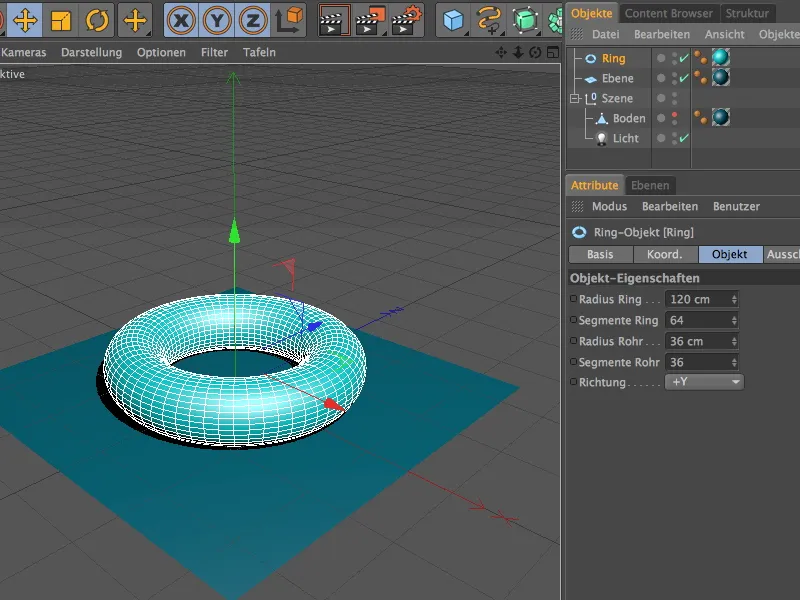
As you would expect, we find the collision deformer in the palette with the other deformation objects.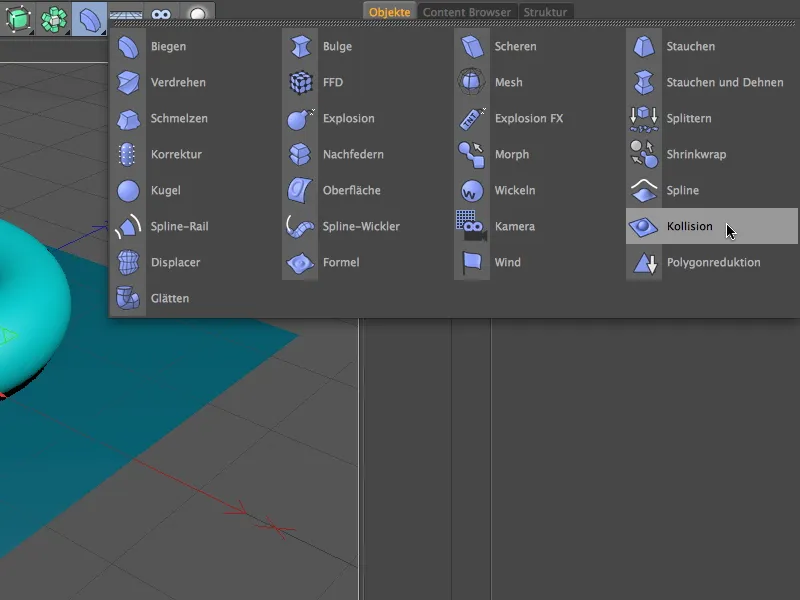
We drag the collision deformer onto the plane object in the Object Manager in order to apply the deformer to the plane. The next step is to tell the deformer which objects are allowed to participate in the deformation. Since in my case the ring object is to be responsible for the deformation, it is dragged and dropped into the Objects field on the collision page of the settings dialog.
We can use the Penetrate solver setting for the first tests. Here, the collision deformer decides for itself whether the deformation takes place inside or outside the object to be deformed based on the position of the objects.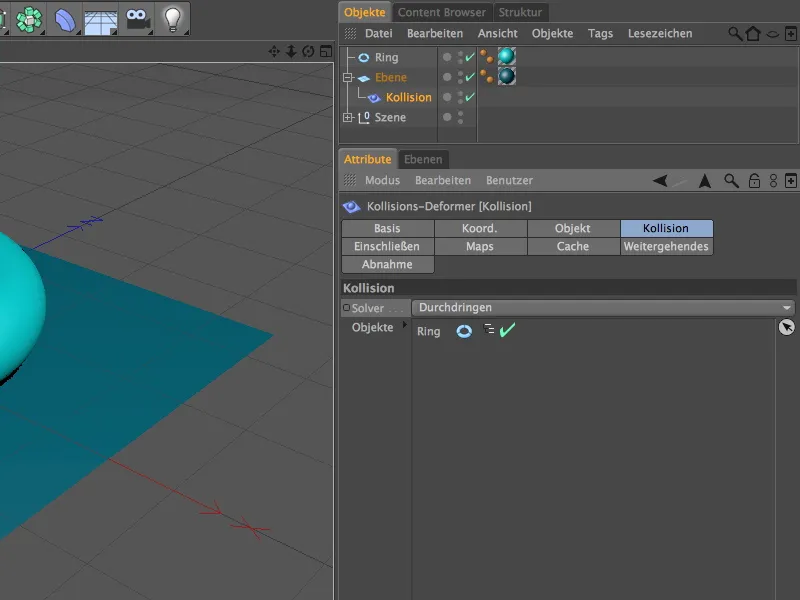
On the objects page, we find the fine settings for the implementation of the deformation in the event of a collision. You can use the decrease parameter to specify whether and in what way (by UV coordinates, by distance, by surface or collision) an additional decay of the deformation takes place. There are also parameters for the size ( distance) and the strength of the collision reduction.
We will discuss the Restore shape parameter in more detail later. We can use it to ensure that the deformation does not return, but remains as an impression or shape.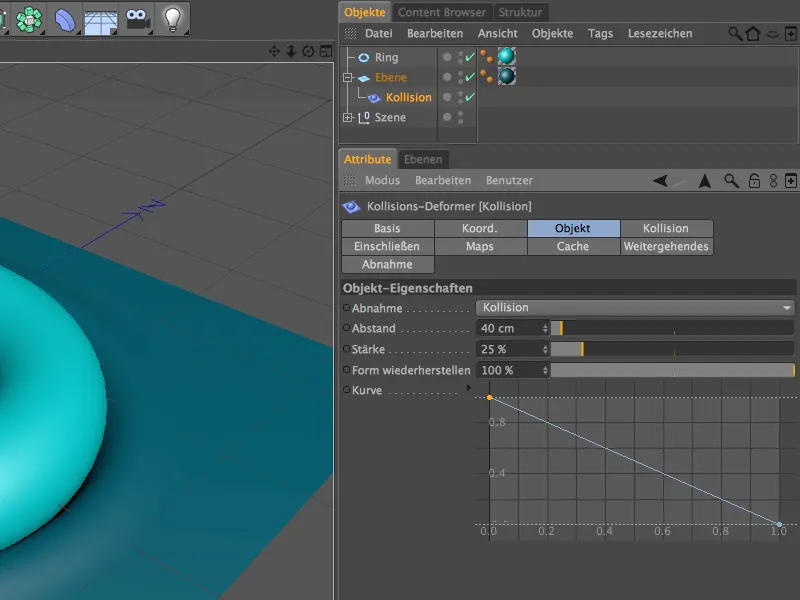
Even in the initial position, the ring object leaves clear traces on the plane. As we have selected the Penetrate solver setting, the ring object can be pressed into the plane to a large extent by moving it, ...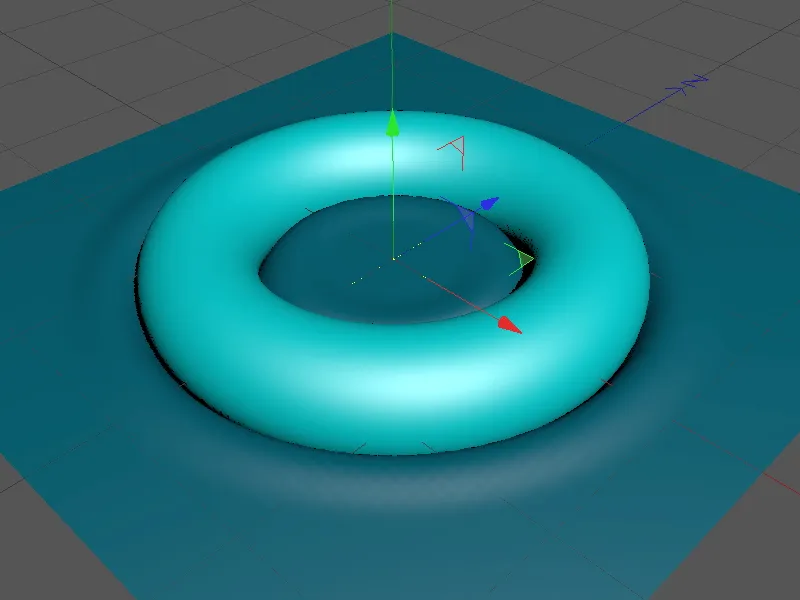
... until the position of the ring object tells the collision deformer that it is inside the plane and forms a shape.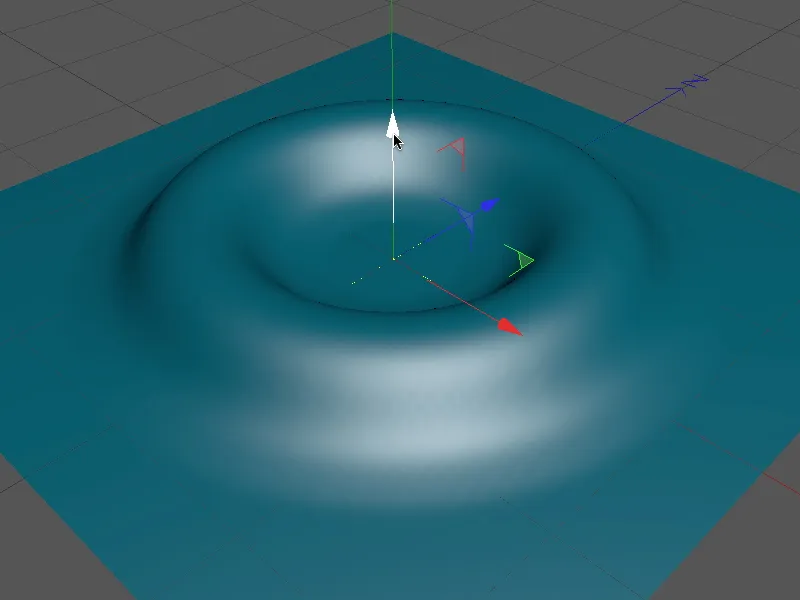
As this automatic detection is not always desirable, we simply change the solver setting to Inside (stretching). In contrast to the normal within setting, stretching ensures that the deformed object can be deformed for as long as possible by stretching.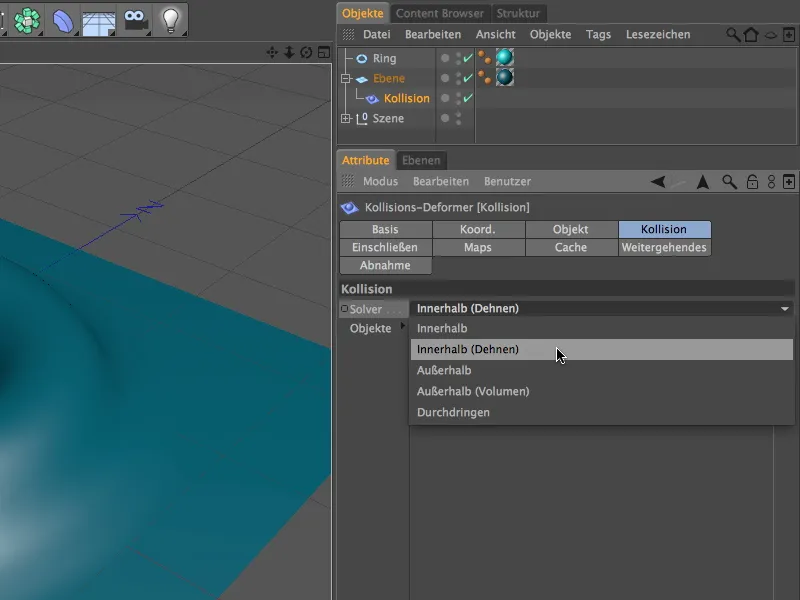
Accidental folding to the outside is now prevented so that we can move the ring under the plane object at any time without any problems.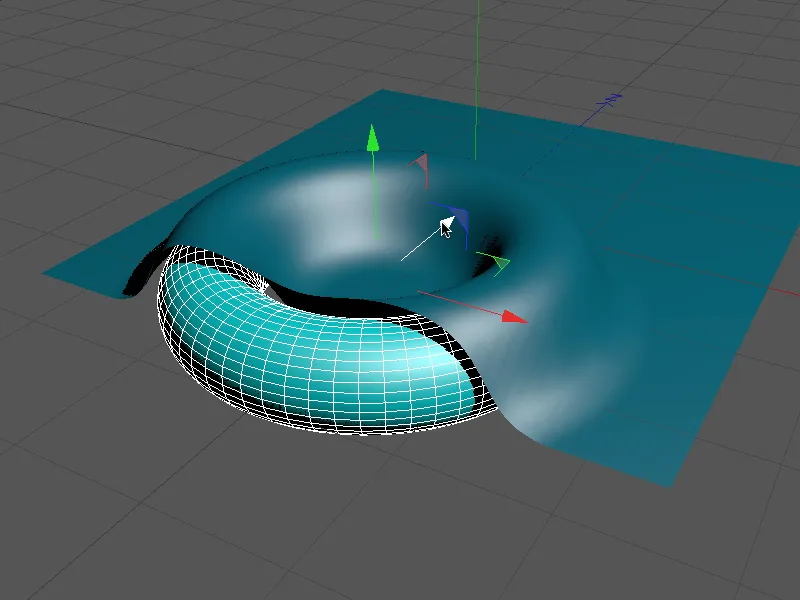
This makes it easy to create covered objects, which can of course also move.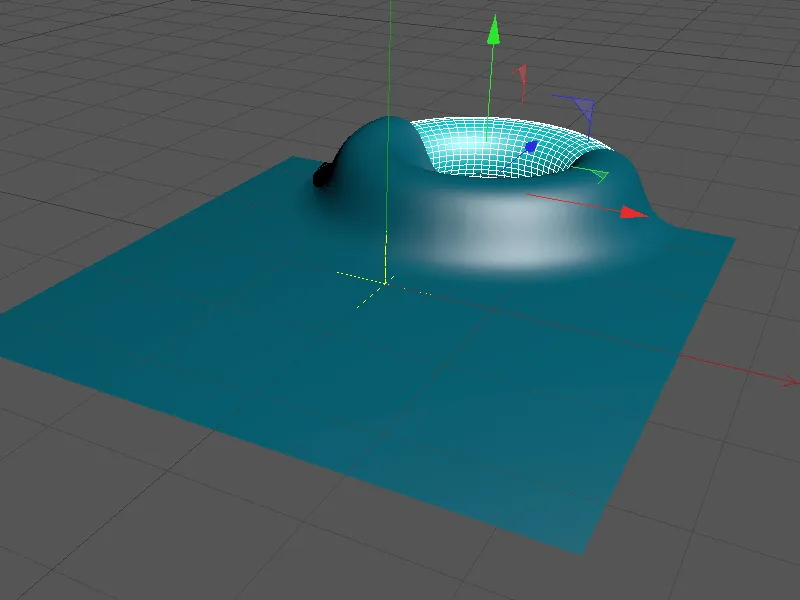
Let's take a look at the fixed solver setting Outside in comparison. Here we specify that the deforming object is always outside the object to be deformed. Here, too, we have the option of giving the object more scope for deformation by adding volume.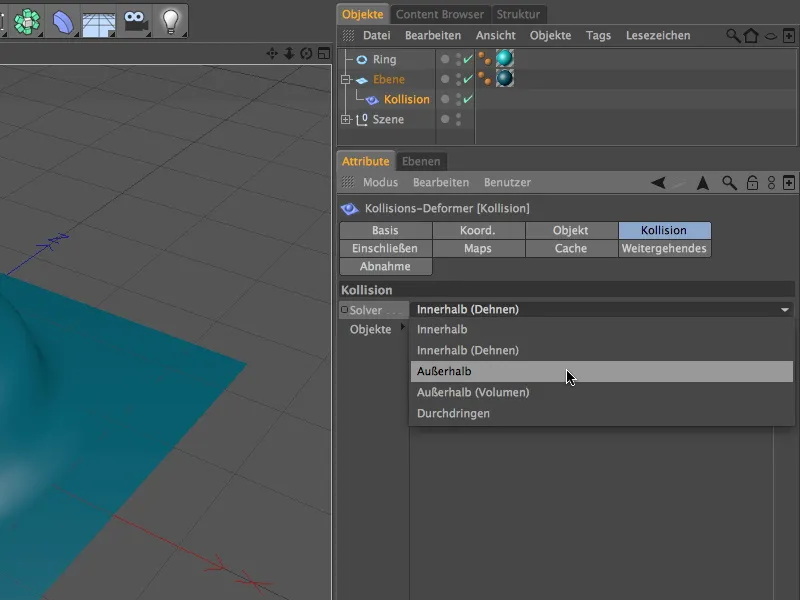
The ring object now dips into the deformed plane object as far as we want it to when we move it.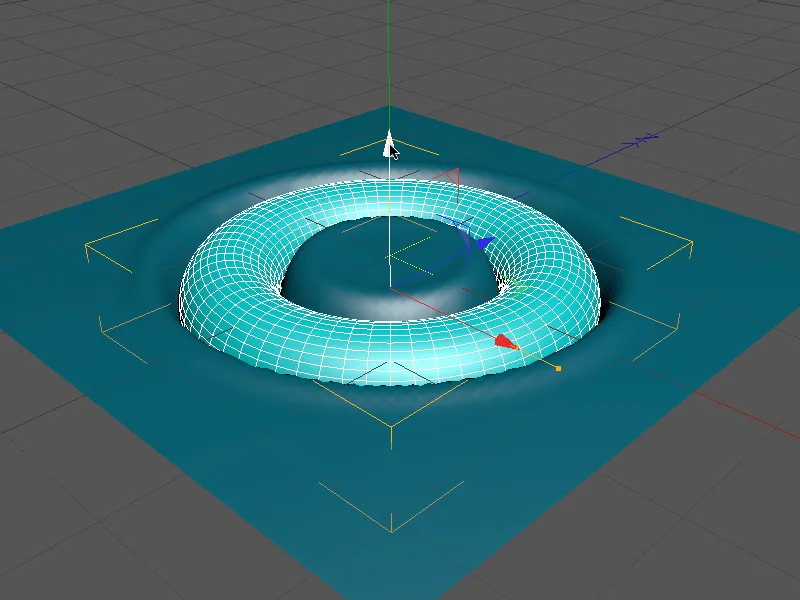
Deformation with an animated sphere
We have now largely illuminated the most important options of the collision object, so that we can venture into a small animation. In the working file "PSD_C4D_R13_Kollisionsdeformer_2.c4d" you will find the finished animation for comparison.
Our scene consists of the familiar plane object, a parametric sphere and a flat helix as the animation path for the sphere.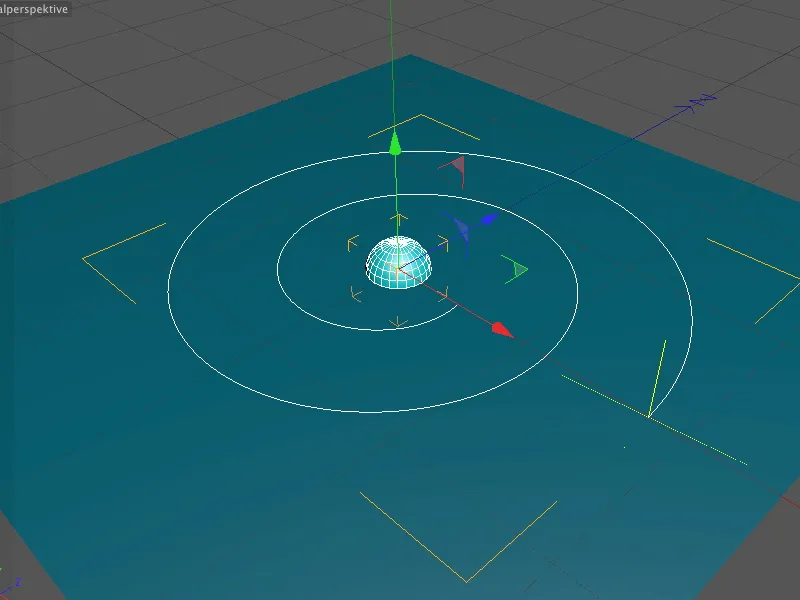
The helix is flat because the height has been set to 0. In addition to aligning the plane in the XZ direction, it is important to specify evenly distributed intermediate points so that the animation of the sphere also runs smoothly later on.
To ensure that the deformation caused by the collision with the sphere is as smooth and undisturbed as possible, we increase the subdivision of the plane in the settings dialog of the plane object to 120 segments each.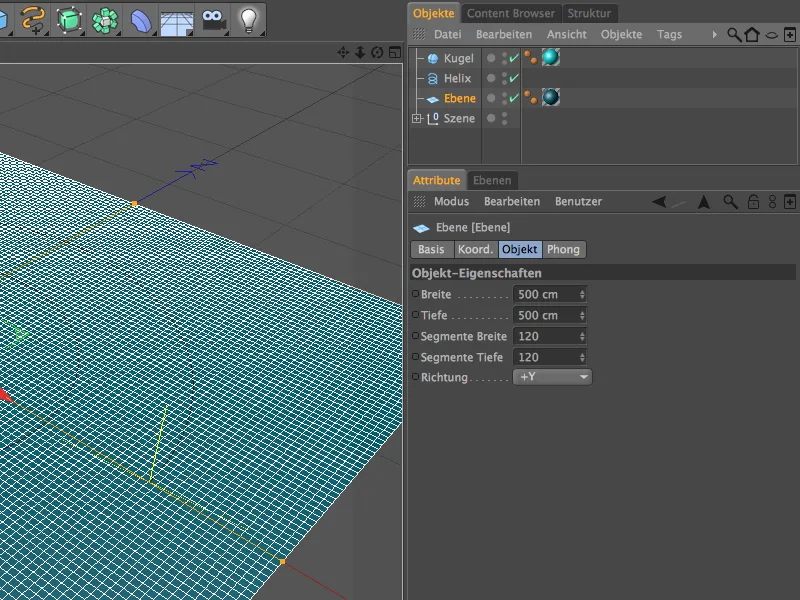
Before we continue with the actual deformation, we will first take care of the animation of the sphere.
In order for the sphere to move along the helix spline, it needs an on-spline alignment expression from the CINEMA 4D Tags menu, which we call up using the right mouse button.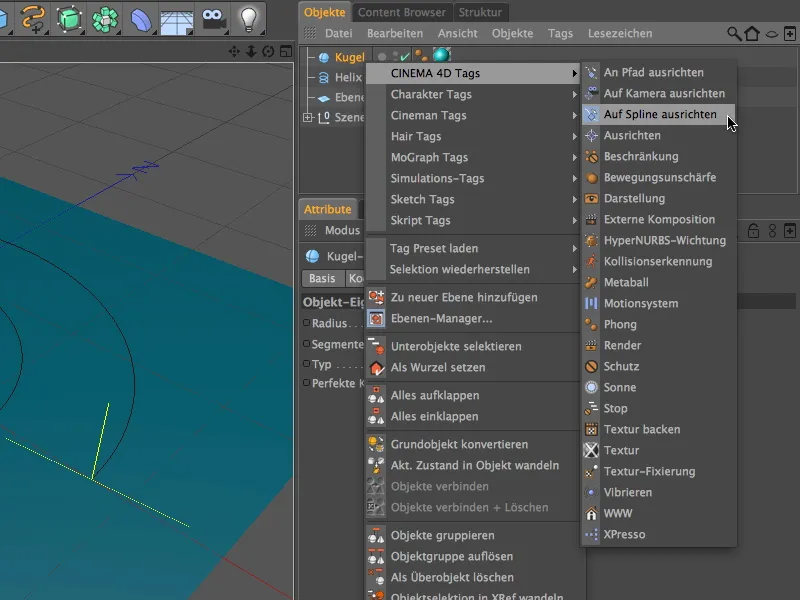
In the settings dialog of the on-spline alignment expression, we drag the helix spline as a spline path into the field provided. The actual animation of the sphere now takes place via the Position parameter. We set the time slider of the animation palette to the start time either by moving it or by entering the desired image (in my case image 0) and set a keyframe for the Position parameter by clicking on the parameter box while holding down the Ctrl key.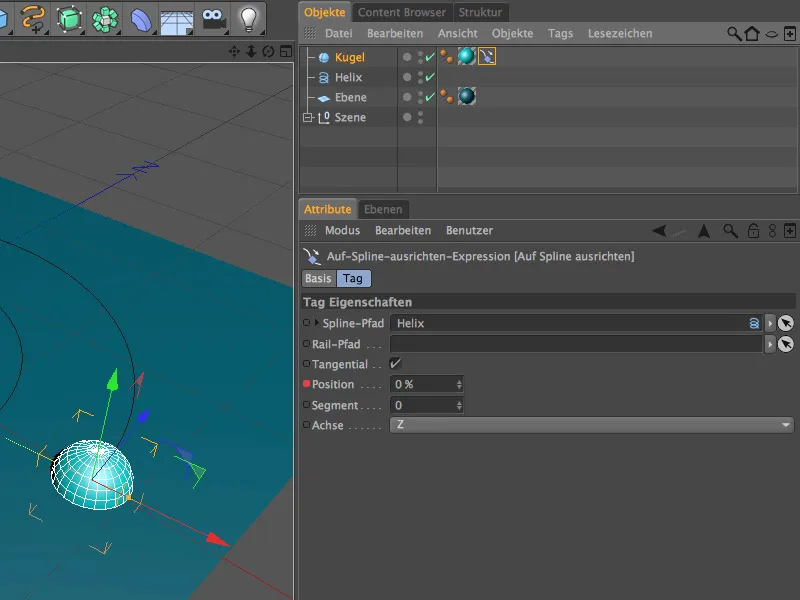
We get to the end time of the animation (in my case image 200) in the same way. Here we enter the value 100% in the Position parameter for the complete reaching of the end point of the spline path and also generate a keyframe here by clicking on the parameter box while holding down the Ctrl key.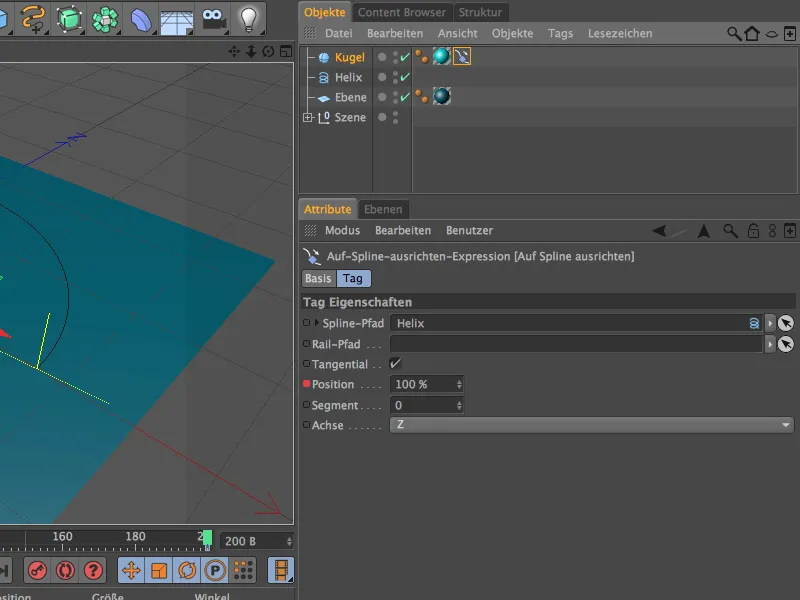
The animation of the sphere is now complete; you can let the sphere move along the spline path by clicking on the play button in the animation palette. As the sphere has no special features such as patterns or proximity, we do not need to worry about its rotation in this particular case.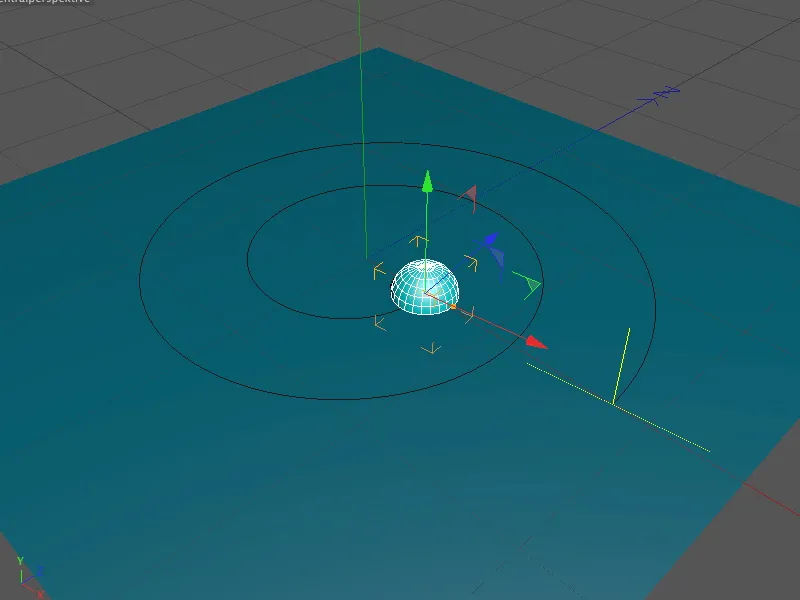
Now that all the elements involved in the animation have been prepared, we need to realize the deformation triggered by the ball. To do this, we get the collision deformer from the deformation objects palette.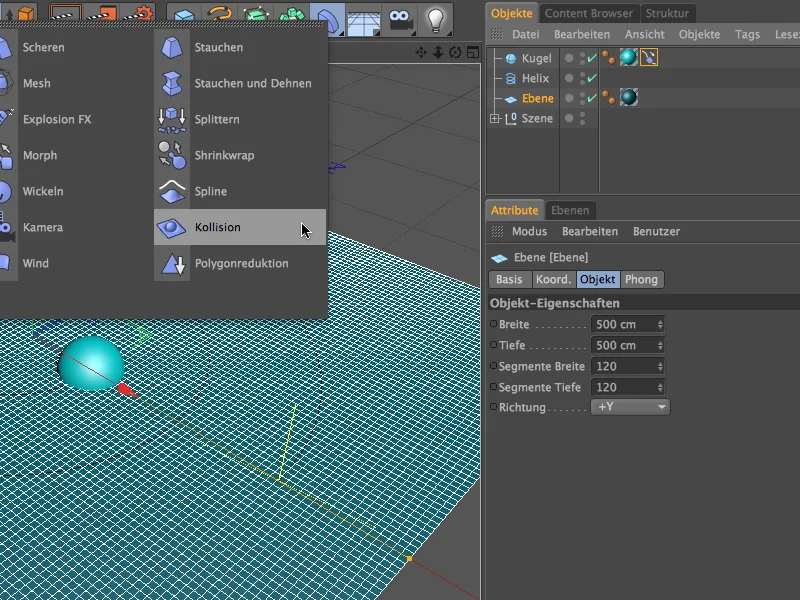
As usual, the collision deformer becomes a sub-object of the layer by dragging it onto the layer object in the Object Manager so that it can take effect there.
On the Objects page of the settings dialog, we start with the first properties for the colliding objects. In order to obtain the most accurate removal of the deformation, we set the removal type to Collision. Relatively low values for distance and strength ensure that the displaced "mass" does not spread too far.
The Restore shape parameter specifies the extent to which the deformation is restored after the collision. As we want the track created by the ball to be completely preserved, we set the value to 0% to prevent recovery.
To create tracks, we need the Outside setting on the collision page. As the deforming object, we drag the sphere object into the object field provided for this purpose.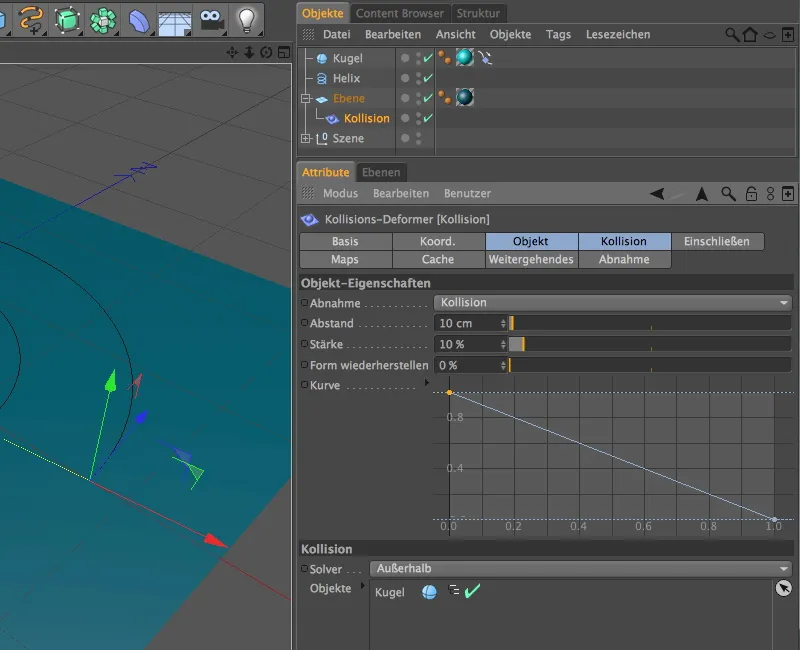
Further setting options for the object deformed by the collision deformer can be found on the Advanced page. Here we can define the material properties of the plane in more detail. In order to give the plane sufficient scope for deformation, we set the Stretch parameter to approx. 10-15.
Very small values for the hardness, structure and bending parameters ensure that the material can be displaced from the sphere with almost no resistance. Simply experiment with the values to get a feel for the effect of the parameters.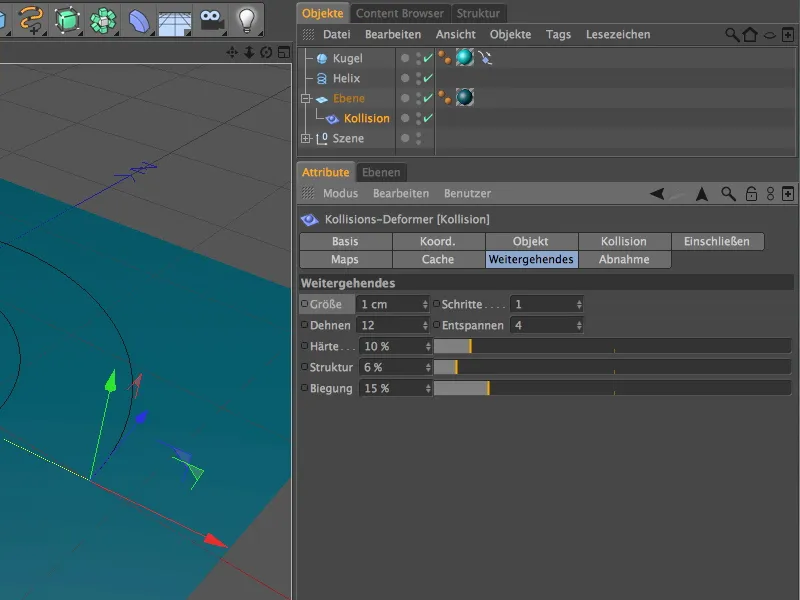
This completes all the work on the animation. A look at the editor view at the starting point reveals that the sphere deforms the plane object as desired using the collision deformer.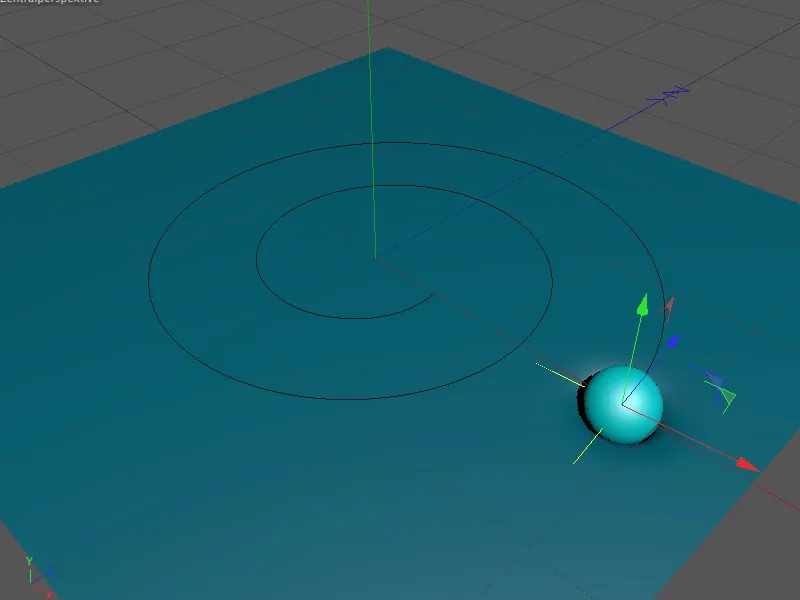
After clicking on the play button in the animation palette, we can watch the ball move along the surface. Please note that the deformation results from each collision of the sphere with the plane. Time jumps, where images are simply omitted, are therefore noticeable as an unwanted lack of deformation in the plane.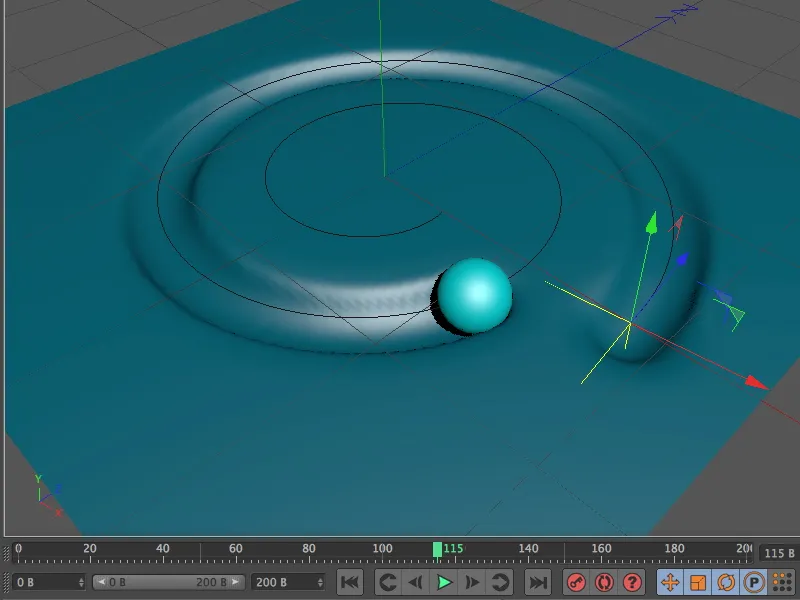
You can now render the finished animation. If the smoothing of the deformed surface does not appear to be sufficient, the subdivision or segmentation of the deformed object is the first port of call.


