Tags are a central element in Google Analytics that allow you to collect valuable data about user behavior on your website. They serve as a link between your online content and Google's analytics tools. In this guide, you will learn everything you need to know about tags – from creation to effective use.
Main Insights
- Tags are crucial for tracking user interactions.
- Linking with Google Analytics allows for precise data analysis.
- Triggers and variables are key elements for controlling when and how tags are executed.
Step-by-Step Guide
To work successfully with tags in Google Analytics, follow these steps:
First, it is important to develop a basic understanding of what tags are and how they work. Tags are small snippets of code that are integrated into the source code of your website. They collect data and send it to Google Analytics. If you want to delve into the topic of tags, check out the introductions to tags, triggers, and variables mentioned in the video, as they provide a solid starting point for better understanding the next steps.
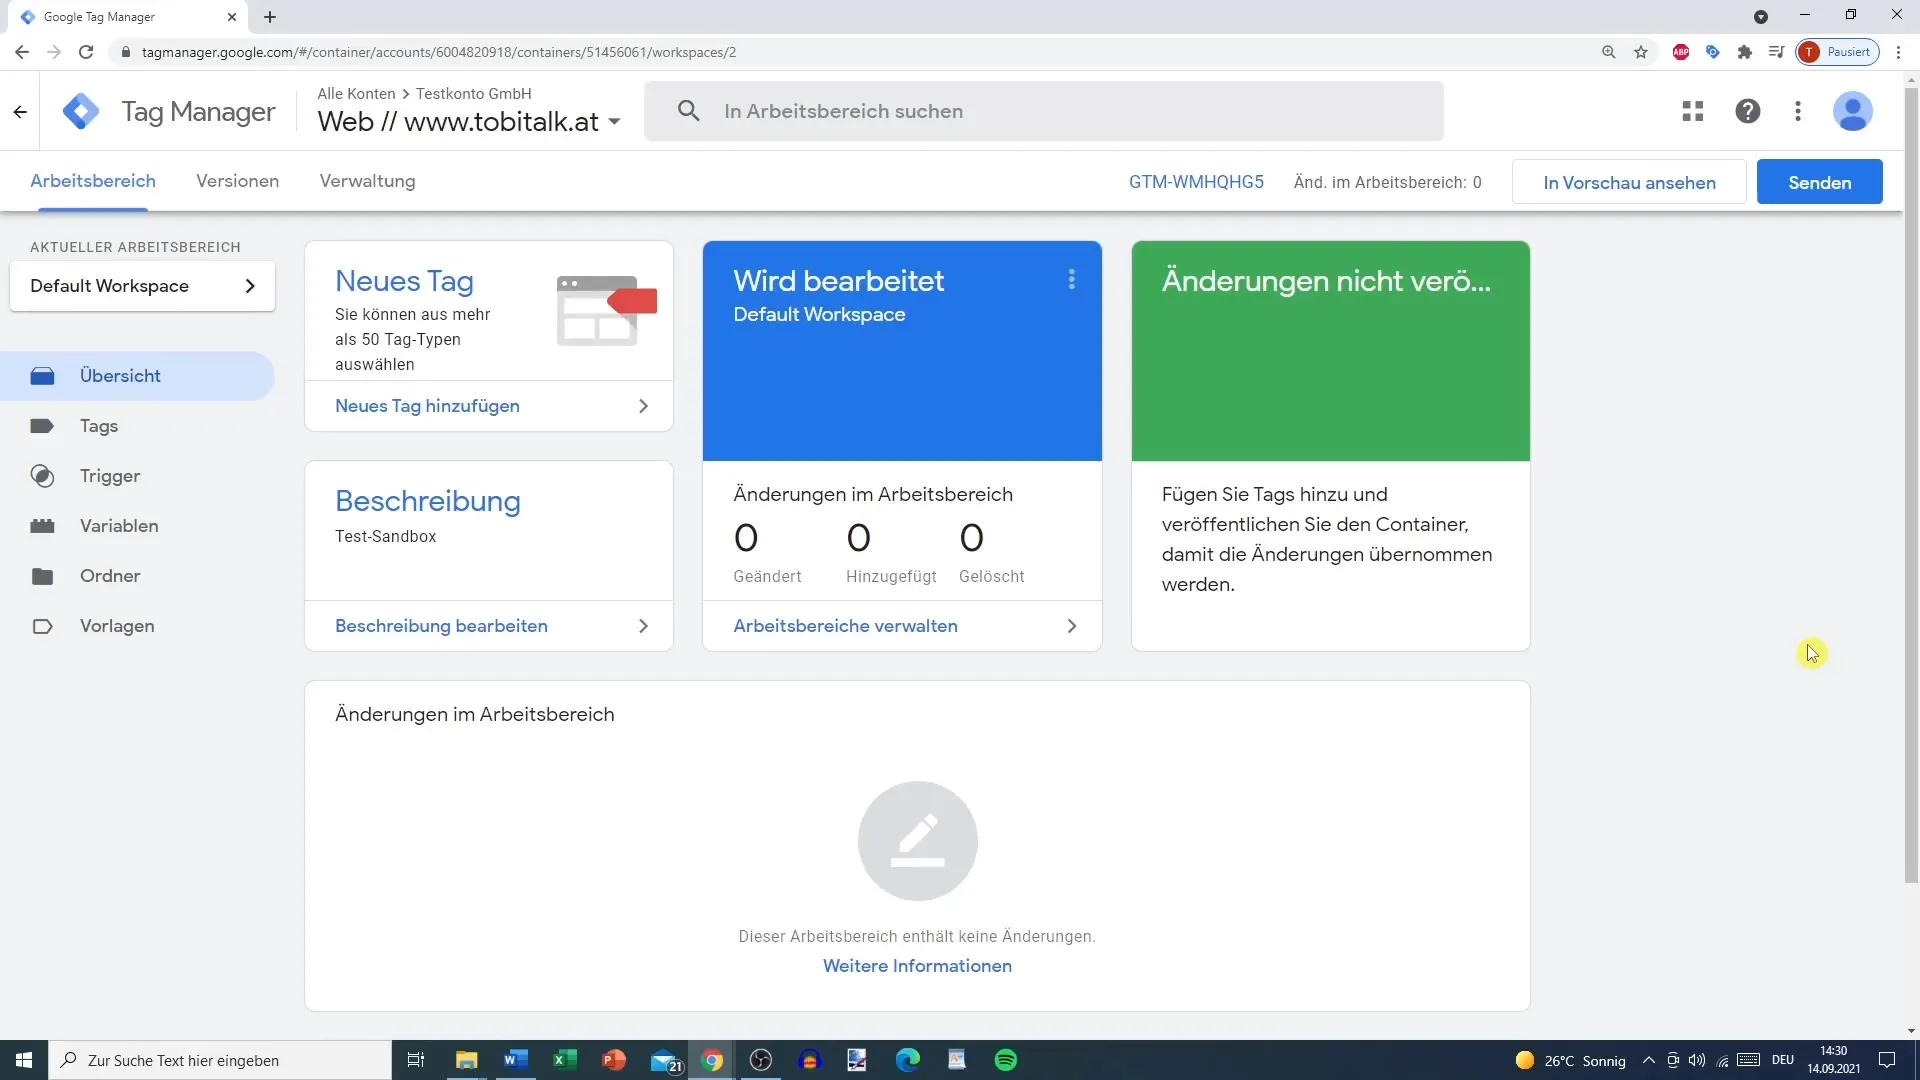
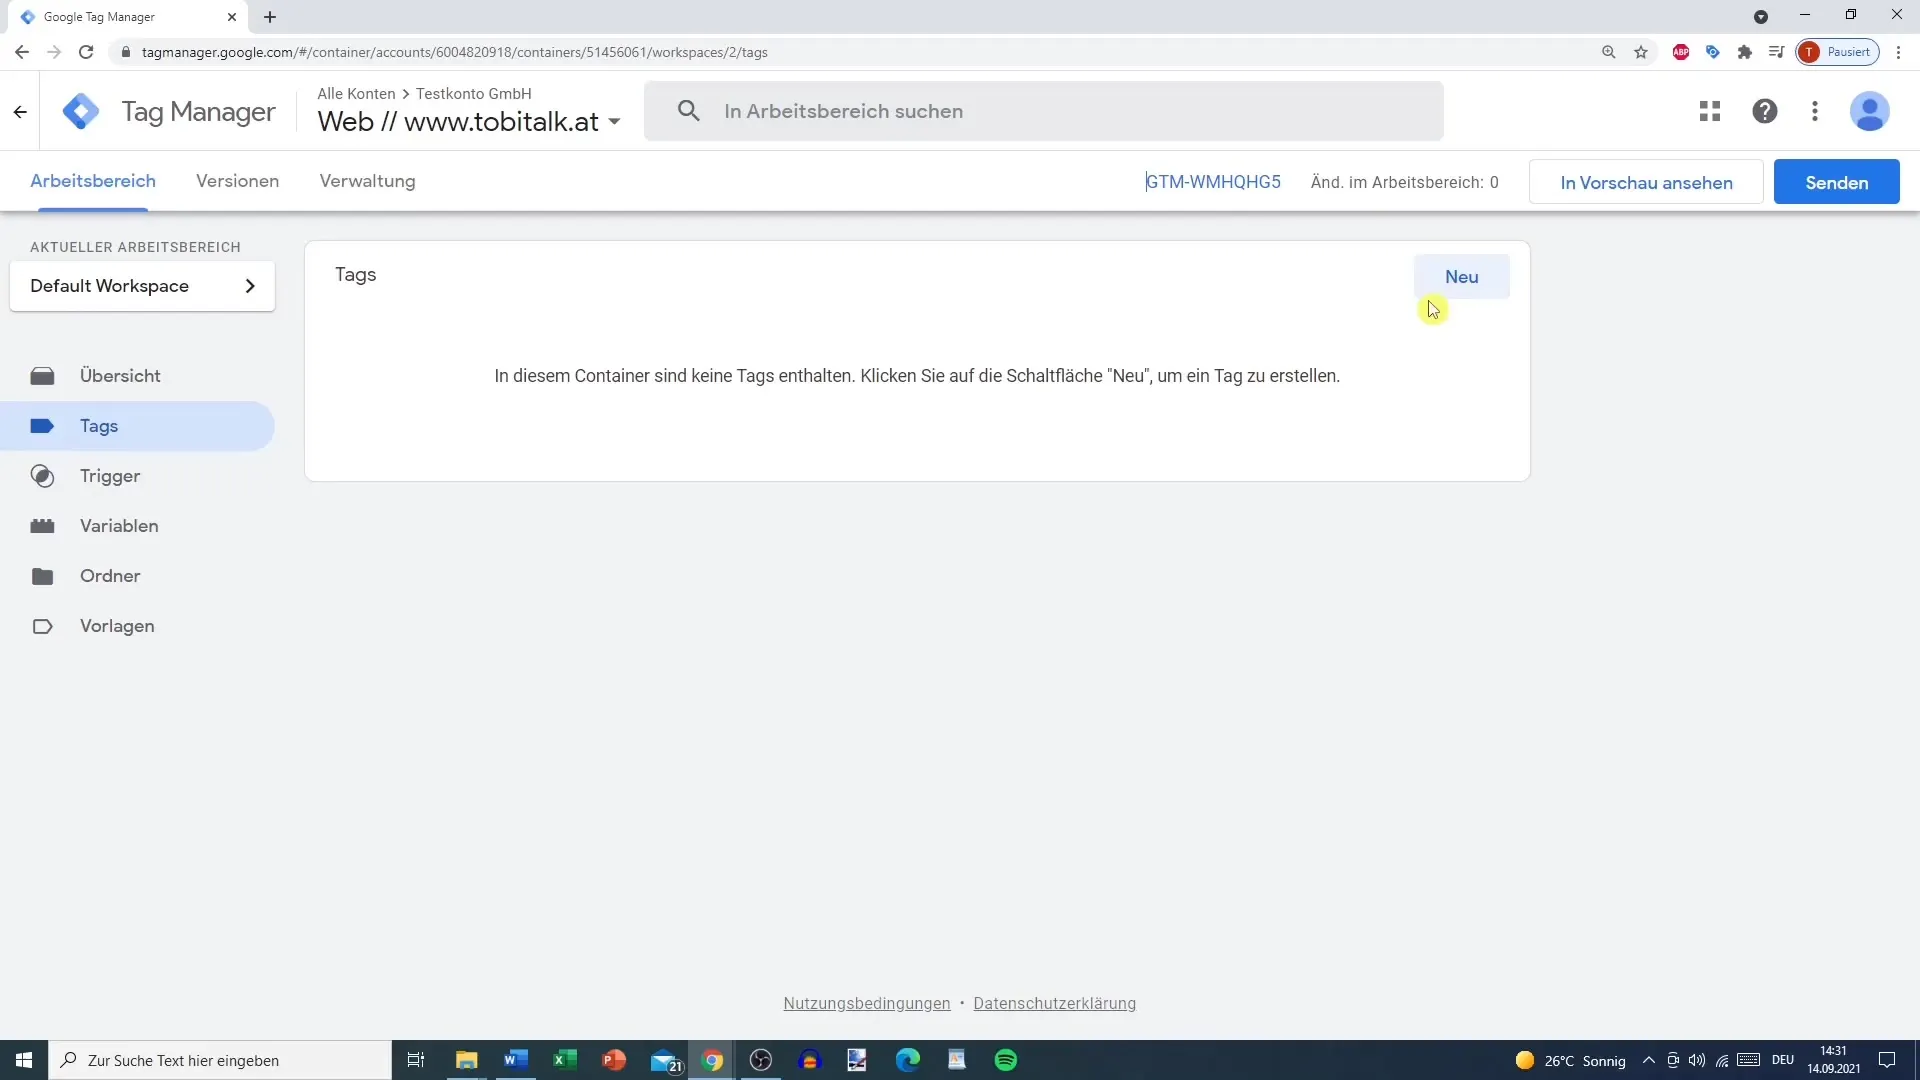
Now, it's time to create a new tag. Go to your Google Tag Manager where you can manage tags, and click on "New." Give your tag a meaningful name so that you can quickly decide what each tag does later. A concise name could be "Facebook Pixel" or "Google Analytics." Choosing a clear name helps you keep track of things.
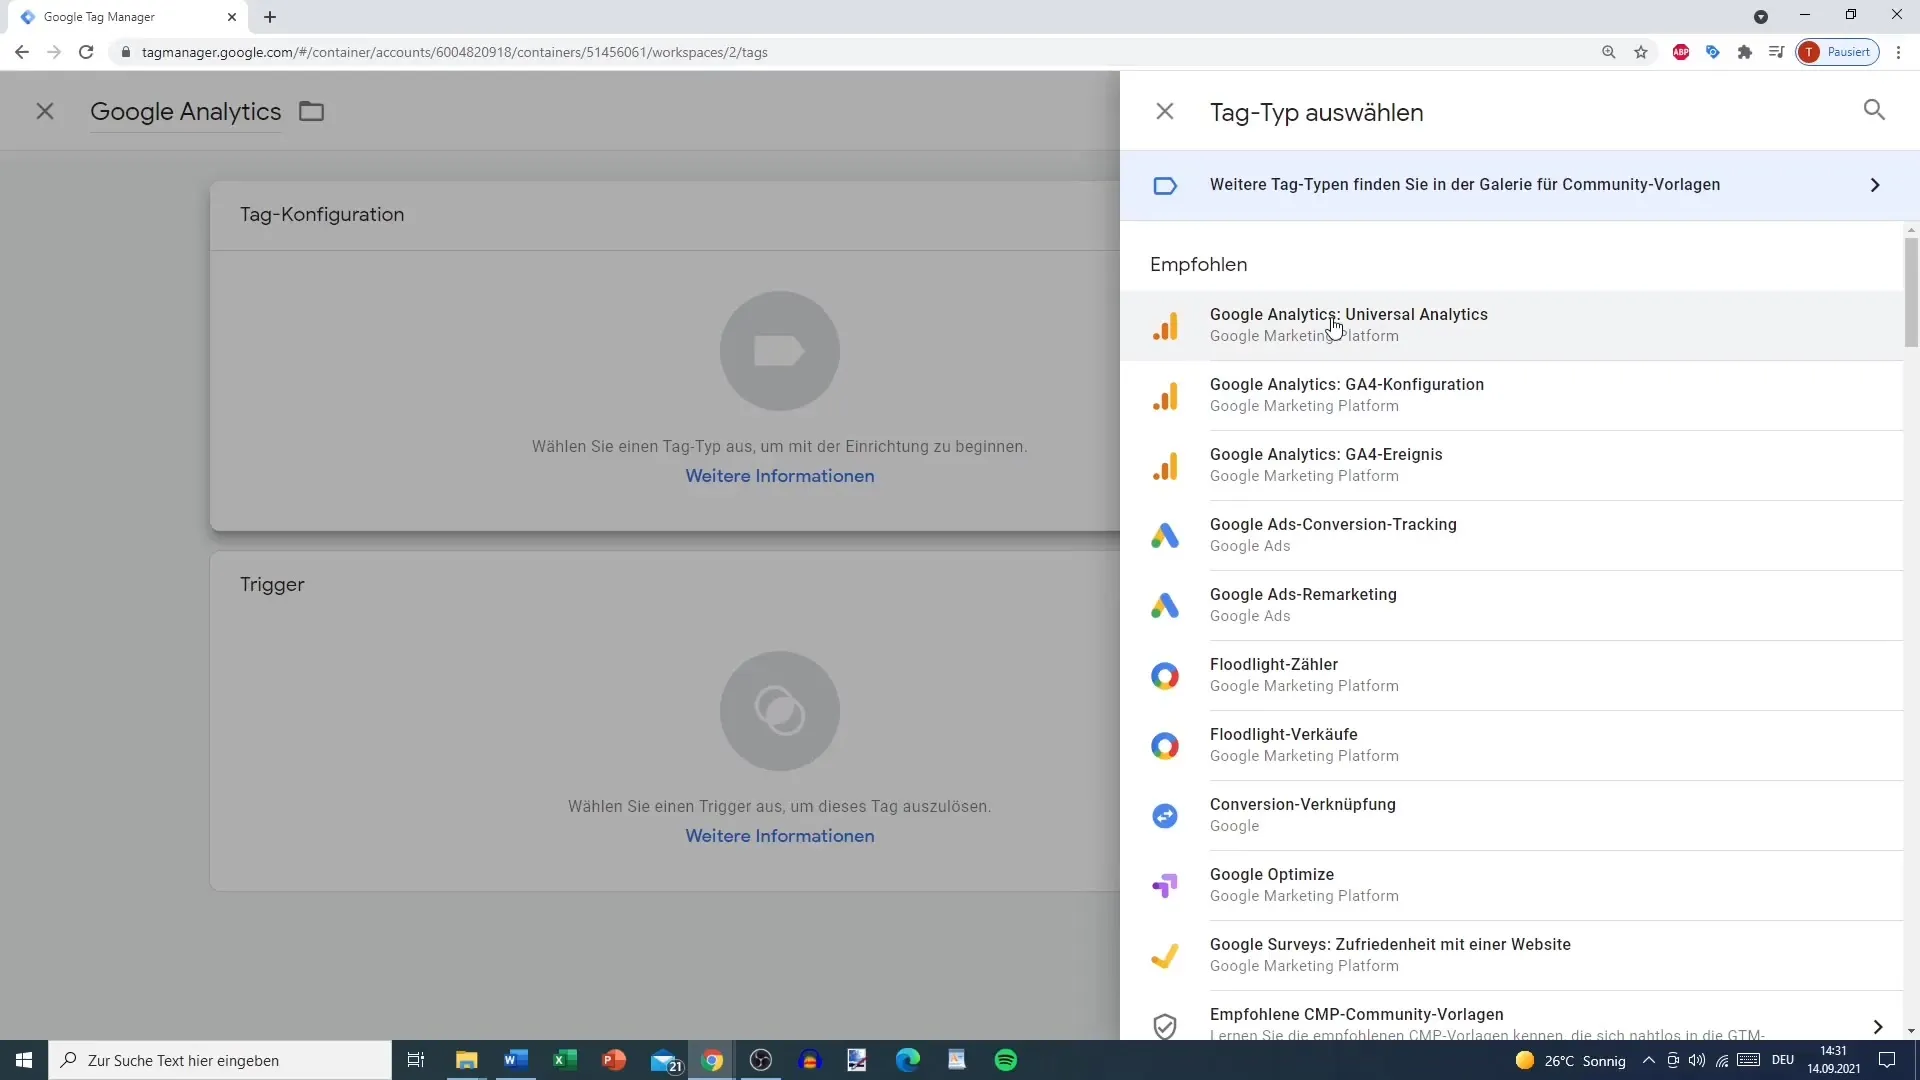
Next, proceed to tag configuration. Click on "Tag Configuration," where you will find a list of standard tags provided by Google. You can choose whether you want to configure your tag for Google Analytics, Google Ads, or even Facebook Pixel. It's smart to have an overview of the different tags so that you can quickly select the appropriate tag.
Once you have selected the right tag, proceed with setting the tracking type. Here, you can decide what exactly you want to track. Do you want to track clicks on a link, video plays, or downloads of PDFs? The set tracking allows for detailed analysis and is particularly useful if you want to differentiate between different interactions.
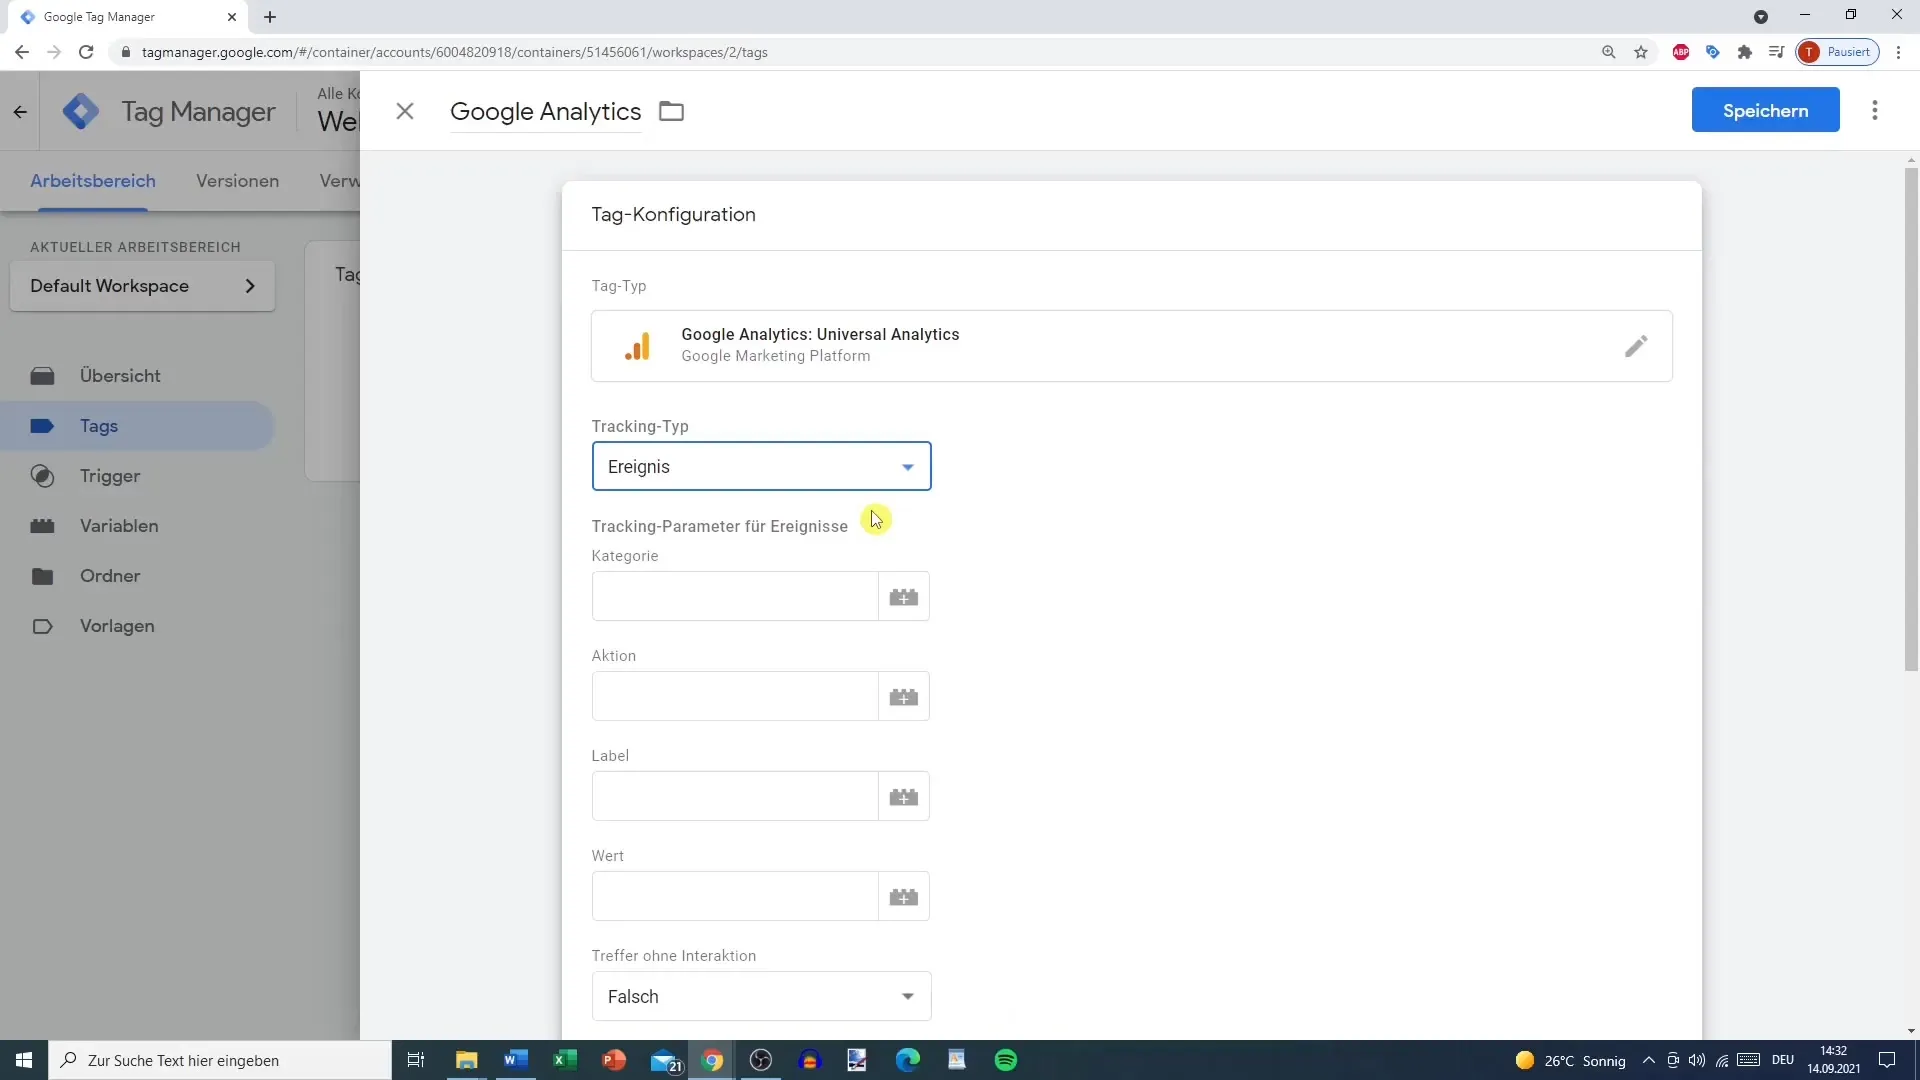
If you want to ensure that you can track purchases accurately, choose "Pageview" as the tracking type. This way, the tag will be triggered whenever someone reaches the thank you page after a purchase. This allows you to measure how many visitors actually convert your offers into purchases.
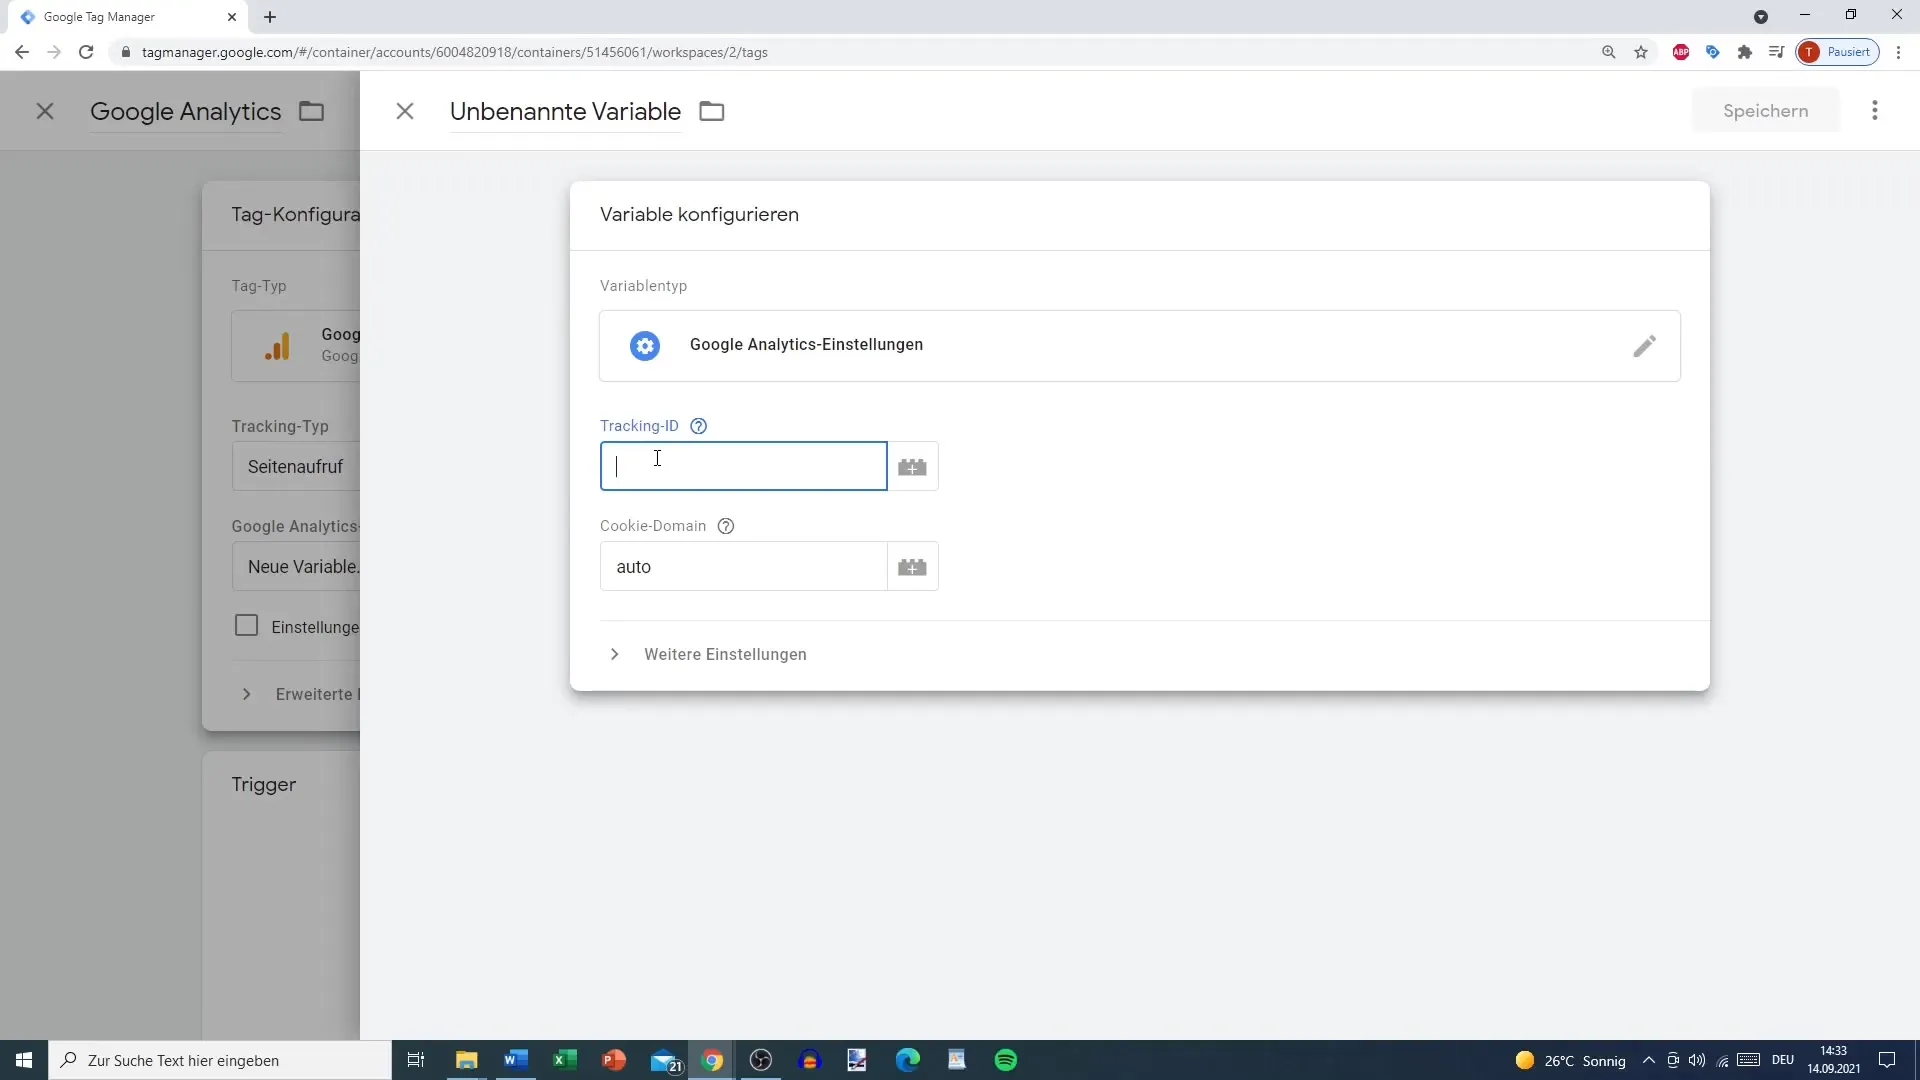
To link your Google Analytics account with your new tag, you need to add your tracking ID. This transaction is done through a new variable that you create if you haven't already added a tracking ID. You can obtain your tracking ID directly in your Google Analytics account. Make sure to append the correct ID to ensure error-free data evaluation.
After you have made all the configurations, it is important to check the advanced settings. Here, you can determine the priority of your tags or specify the order in which tags should be executed if multiple tags are active simultaneously. Each of these settings can affect the accuracy of your data analysis – something to pay special attention to when setting up your tags.
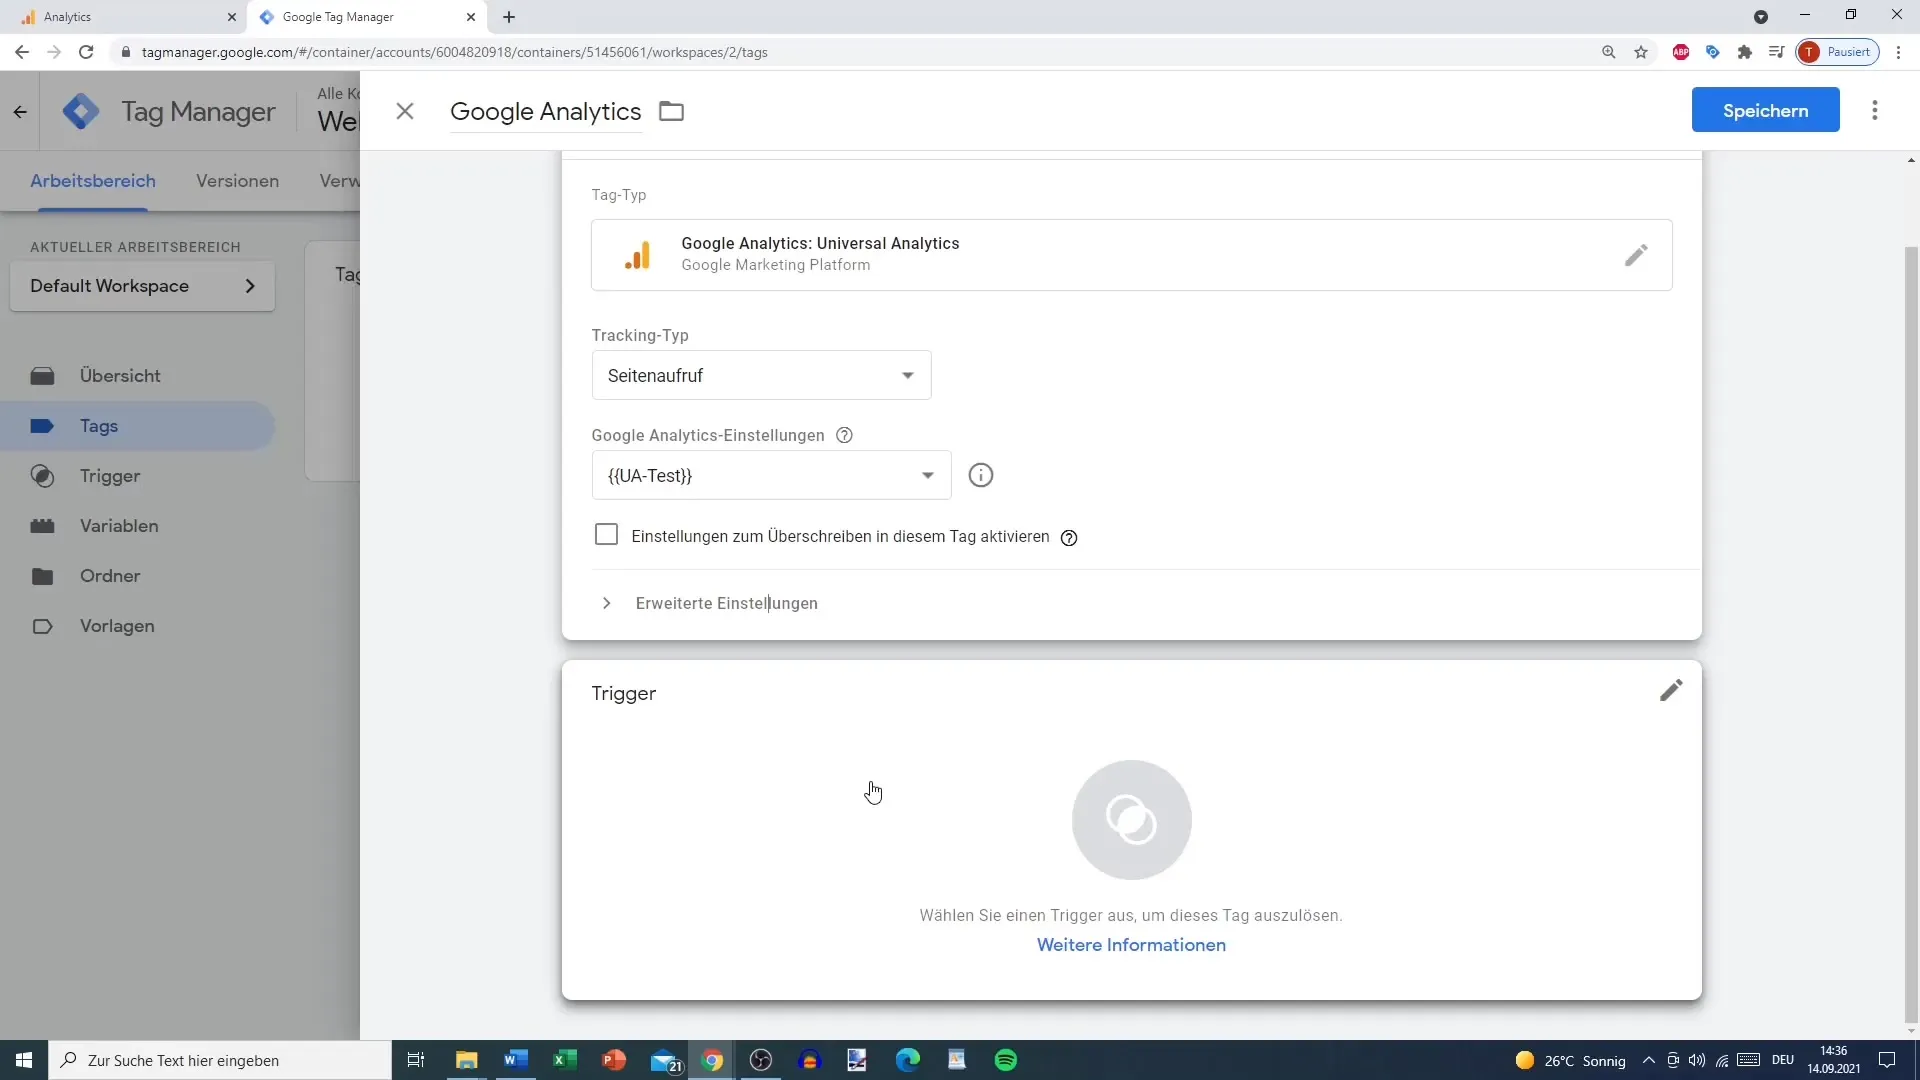
Once the tag configuration is complete, you need to add a trigger. A tag alone cannot be active without a trigger set. Now, you have the opportunity to create a trigger that defines under what conditions the tag should be triggered. Without a trigger, your tag can only exist theoretically, but it would not capture any data – which wouldn't be meaningful.
Finally, it is helpful to look at the various variables you can use. Depending on the type of tag and tracking strategy you are following, you can insert different variables. This makes the tracking more flexible and tailored precisely to your needs.
Summary
By carefully implementing and configuring tags in Google Analytics, you can ensure effective tracking of your user interactions. The combination of tags, triggers, and variables allows you to make informed decisions based on precise data.
Frequently Asked Questions
What are tags in Google Analytics?Tags are code snippets that collect data on user interactions on your website and send it to Google Analytics.
How do I link my Google Analytics account to a tag?You need to insert the tracking ID of your Google Analytics account into the appropriate tag settings in Google Tag Manager.
What are triggers in Google Analytics?Triggers define when a tag is fired, for example, on a page view or a link click.
Where can I find the tracking ID for Google Analytics?You can find the tracking ID in your Google Analytics account under the settings for your property.
How can I ensure that my tags are working correctly?It is advisable to test the functionality of the tags directly in Google Tag Manager and verify the collected data in Google Analytics.
