Integrating Google Tag Manager (GTM) into your WordPress website is a crucial step to optimize your online marketing and analysis. This guide shows you how to integrate Google Tag Manager into your WordPress website step by step.
Key Insights
- You need a Google Tag Manager container.
- Installation of a suitable plugin in WordPress.
- Linking your Google Tag Manager with your website.
- Important settings for data collection and anonymization.
Step 1: Prepare Google Tag Manager Container
Start by logging into your Google Tag Manager account. Go to Administration and select the container you want to use. Make sure that each container has its own container code which you will need.
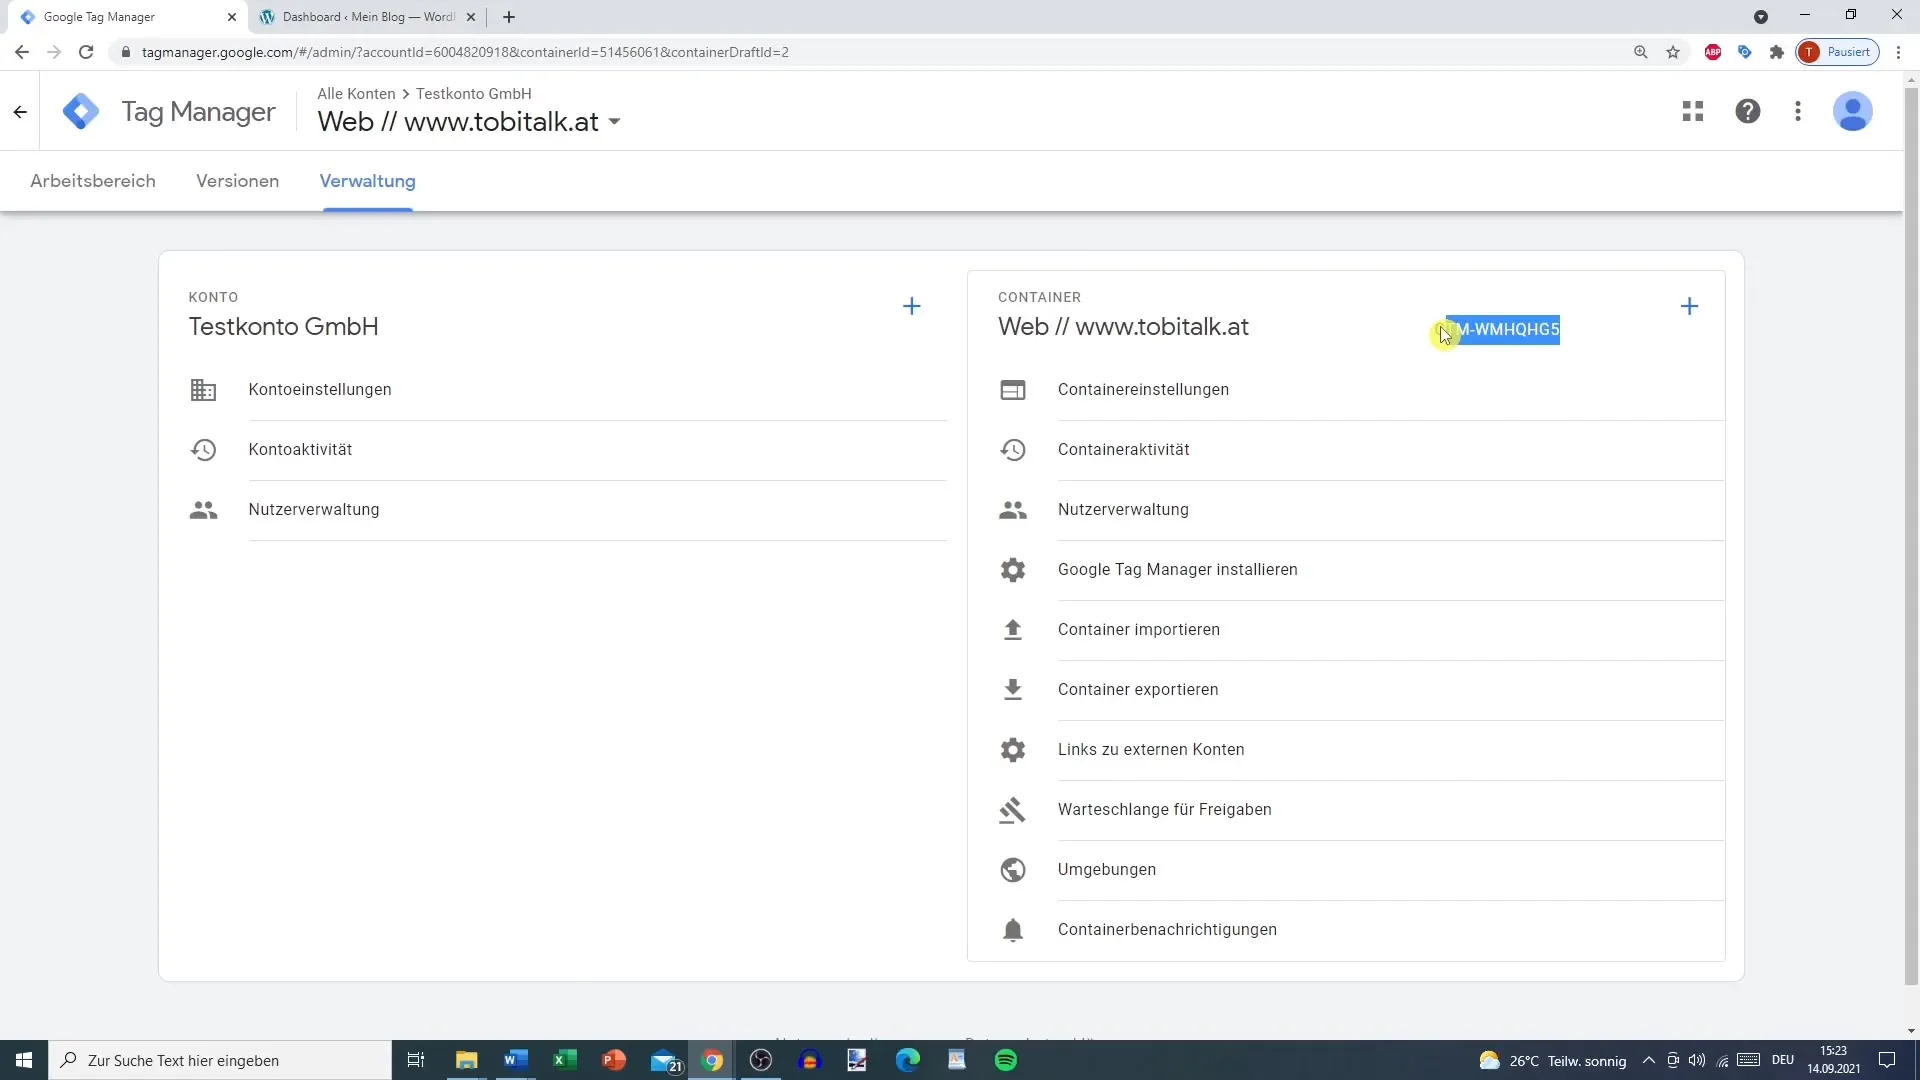
Copy the container code to your clipboard as you will need it later in WordPress.
Step 2: Install Google Tag Manager Plugin
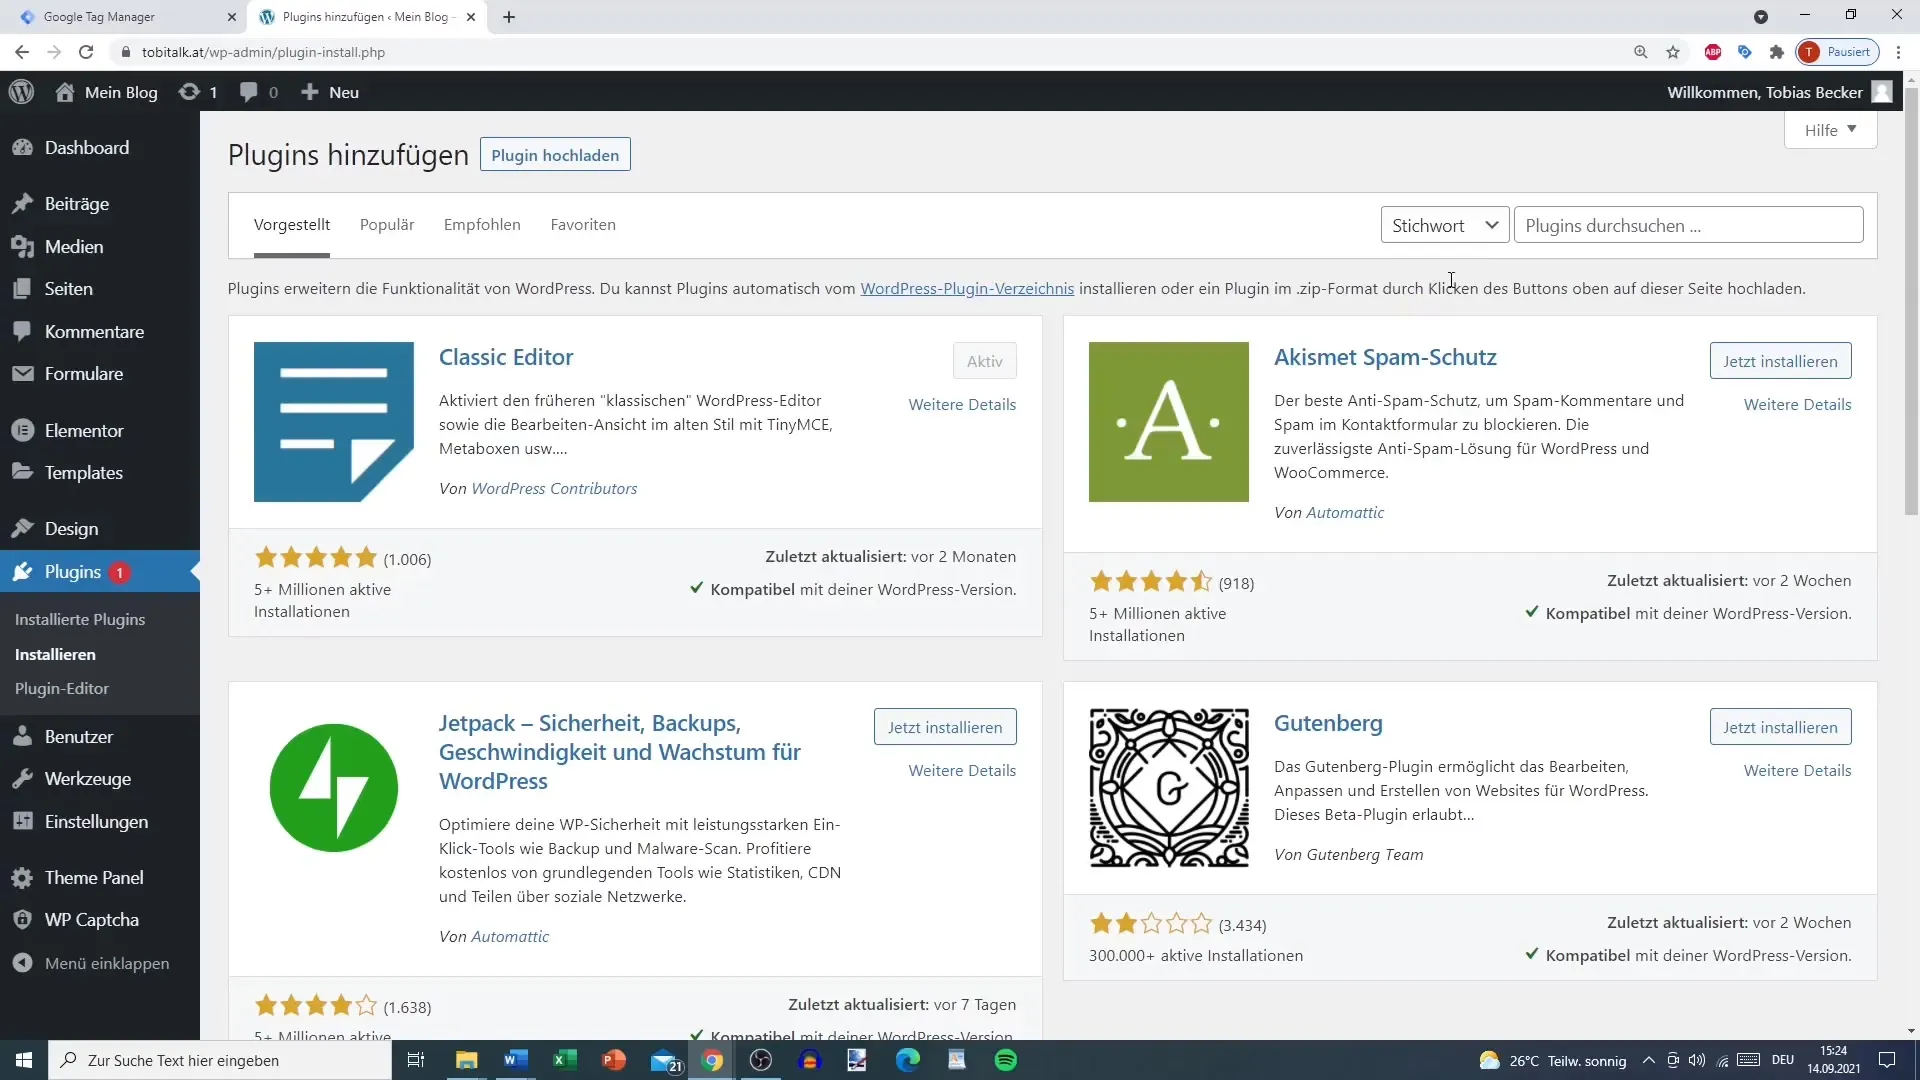
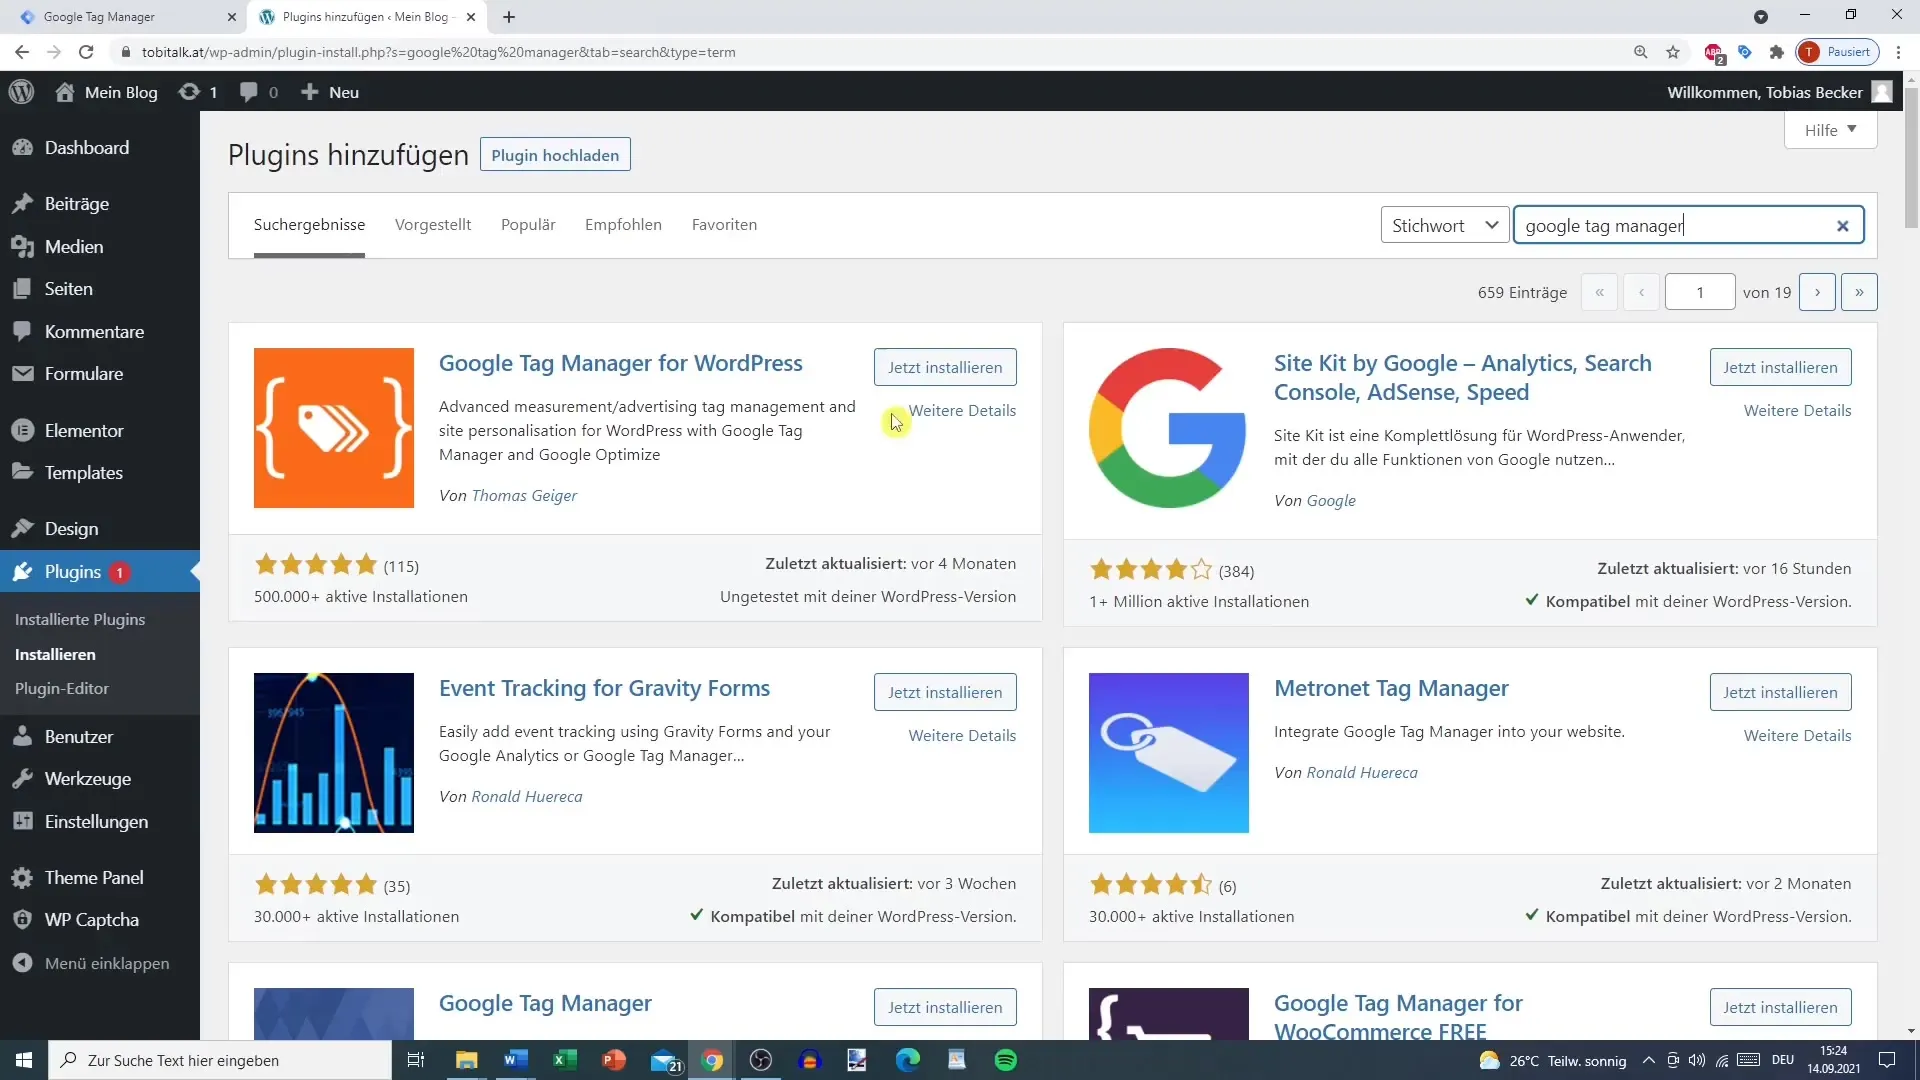
Now switch to your WordPress website. Log in to the admin area and go to Plugins. Select "Install" and search for the keyword "Google Tag Manager".
The plugin you are looking for has an orange logo and has over 500,000 installations. Install it and activate the plugin.
Step 3: Configure Google Tag Manager
After activation, you will find a new tab for Google Tag Manager under settings. There you can paste the Google Tag Manager ID - which is the ID you copied in the first step.
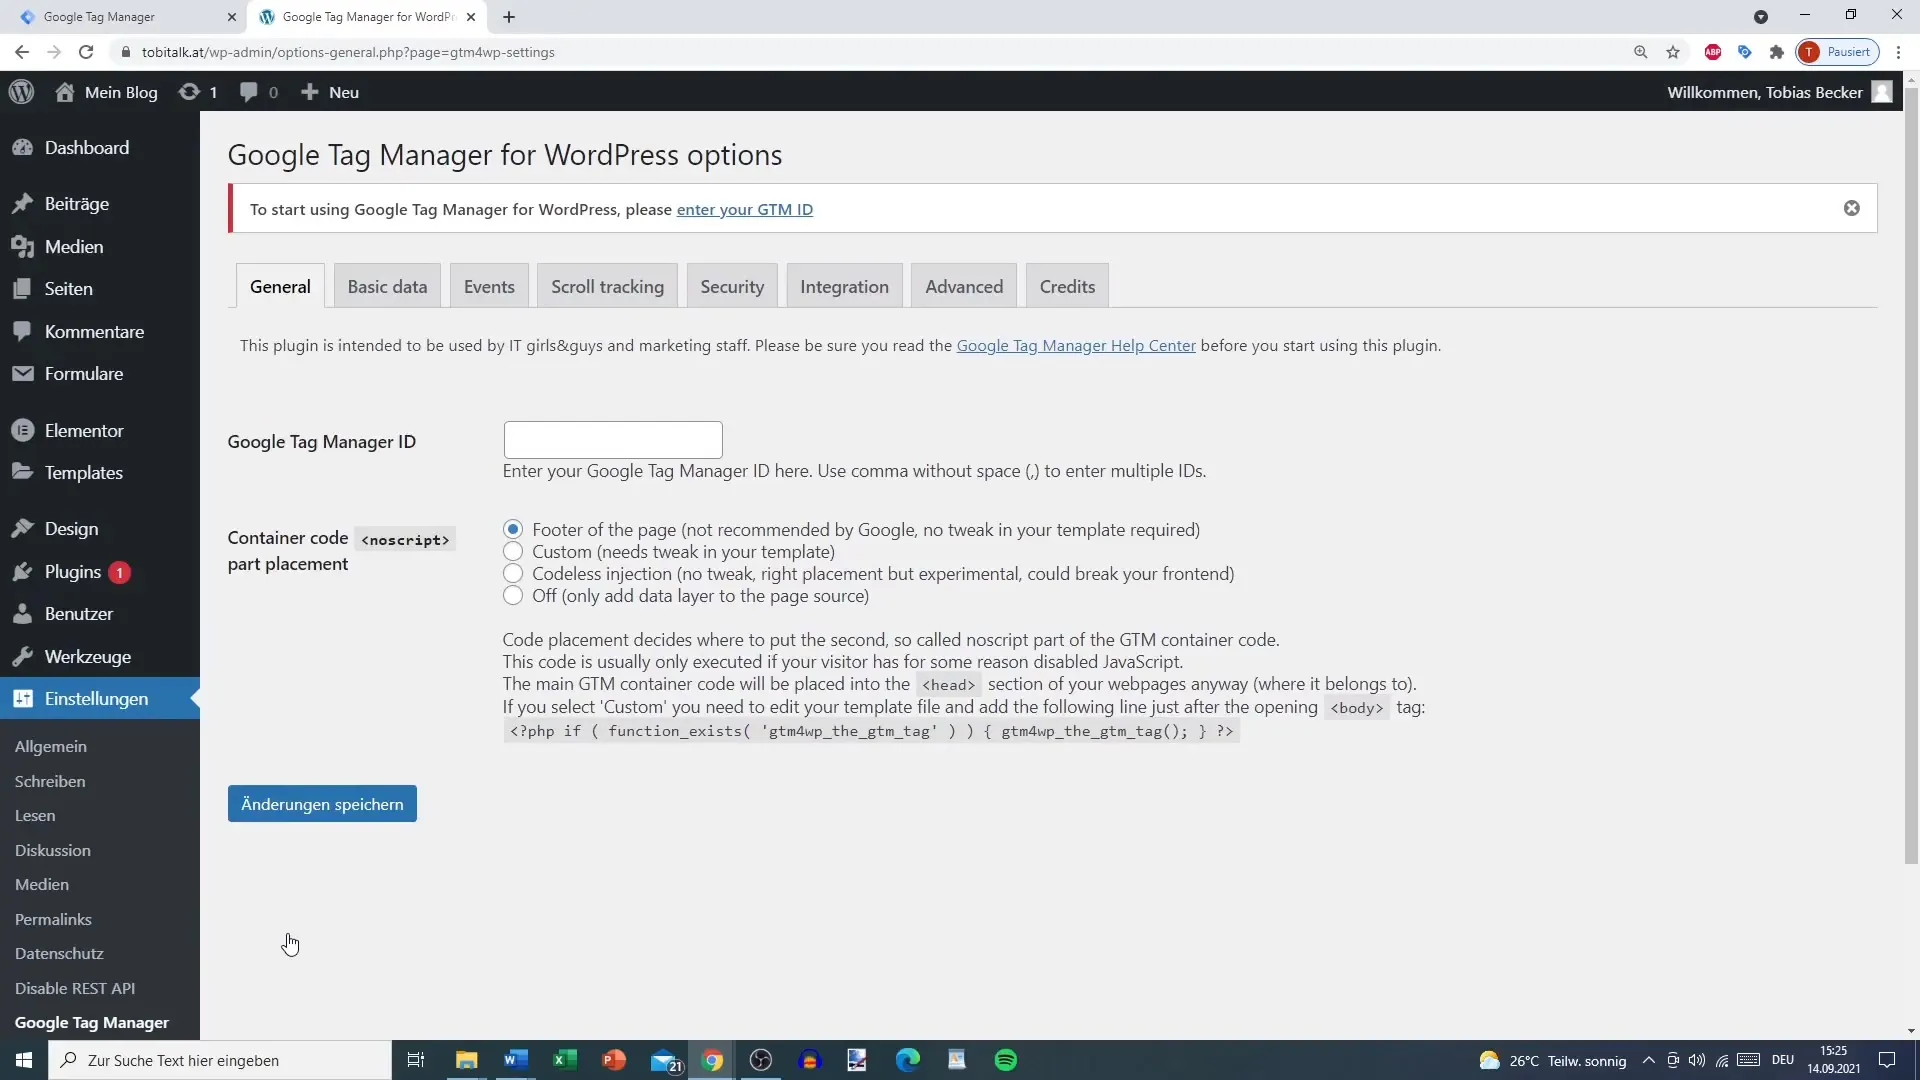
After pasting the ID, save the changes to activate the link between your WordPress and Google Tag Manager.
Step 4: Choose Code Placement
You have the option to choose where the Tag Manager code should be included. There are two options for this: either via footer or through code injection. It is important to be cautious as this could potentially affect the functionality of your site.
Using the classic footer method is recommended, although Google prefers the code to be implemented higher up on the page.
If you choose codeless injection, make sure to check the impact on the website.
Step 5: Make Required Settings
Now that Google Tag Manager is set up, you can make various settings in your account. For example, you can specify whether you want to have the author of each post in the analytics data.
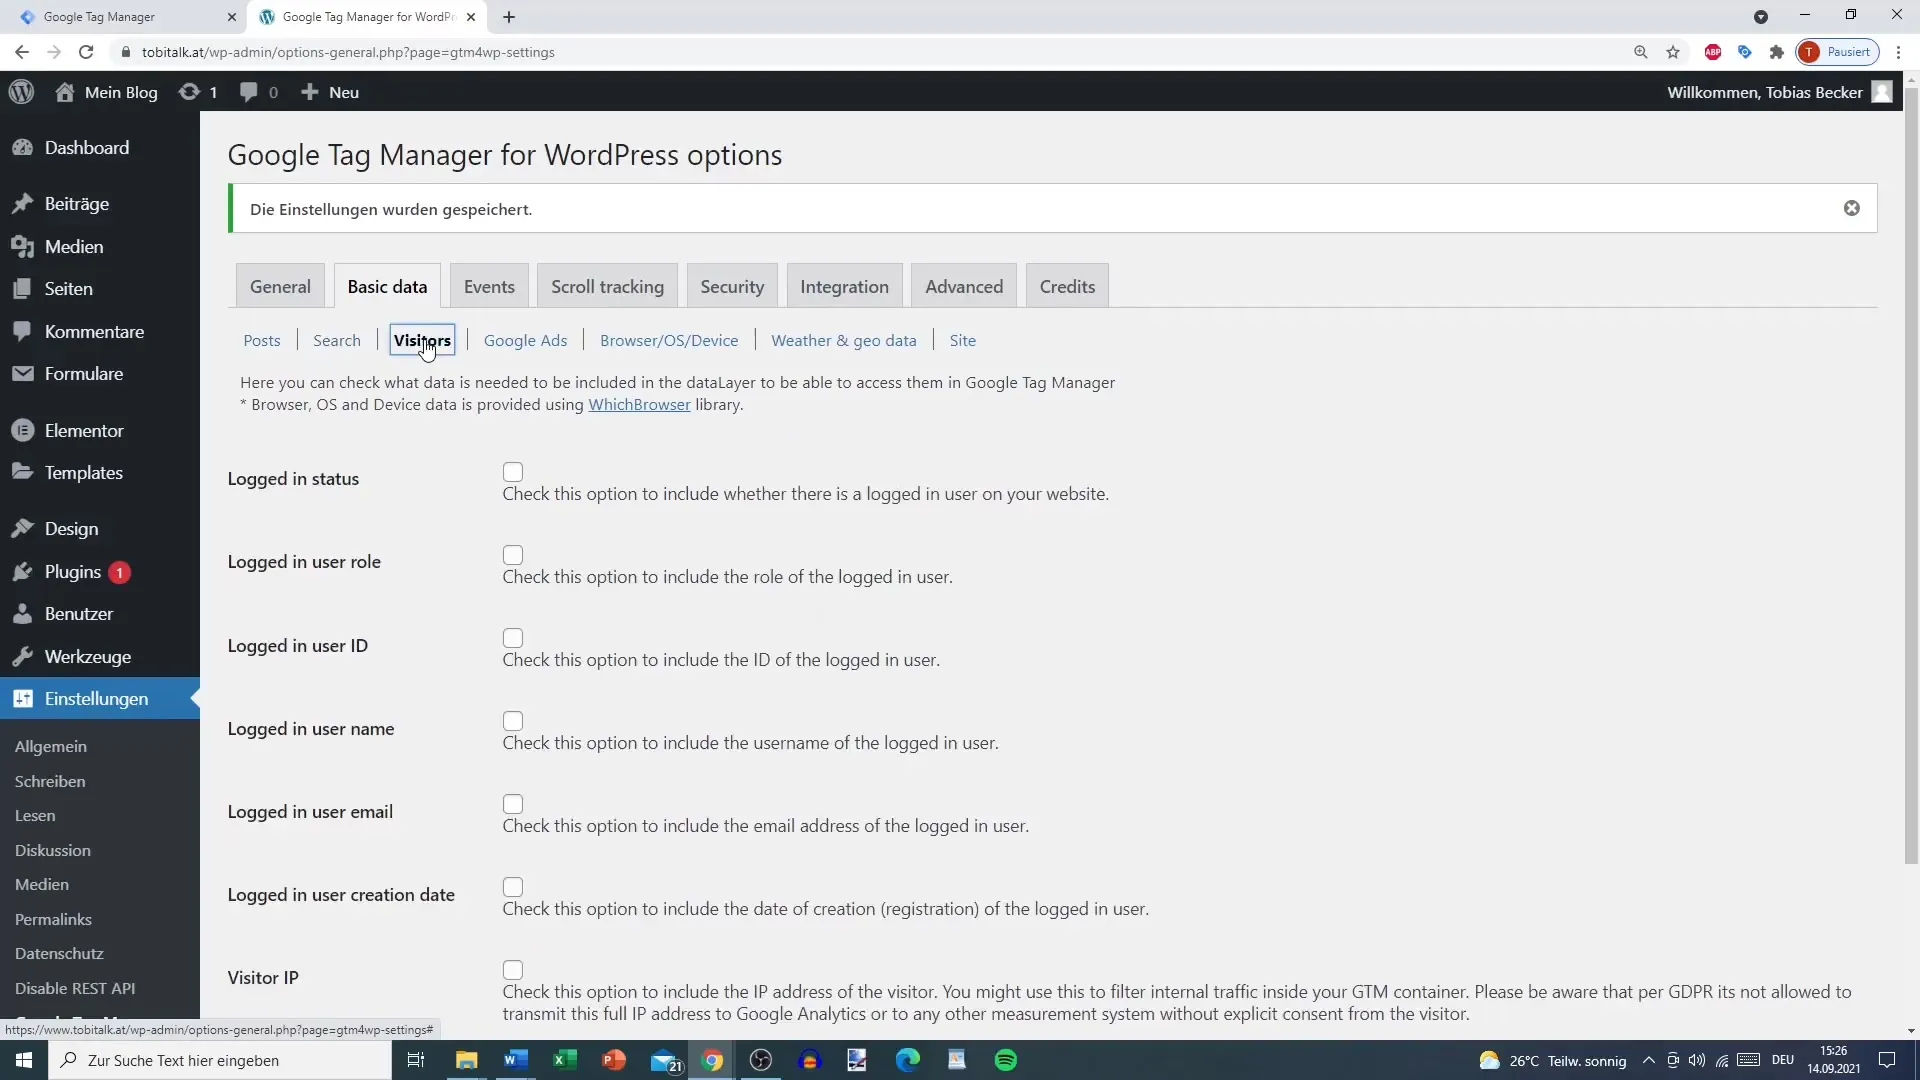
This is especially useful to see which author was successful under what circumstances.
If you want to track visitors, you can also set whether you want to track logged-in users or general visitors.
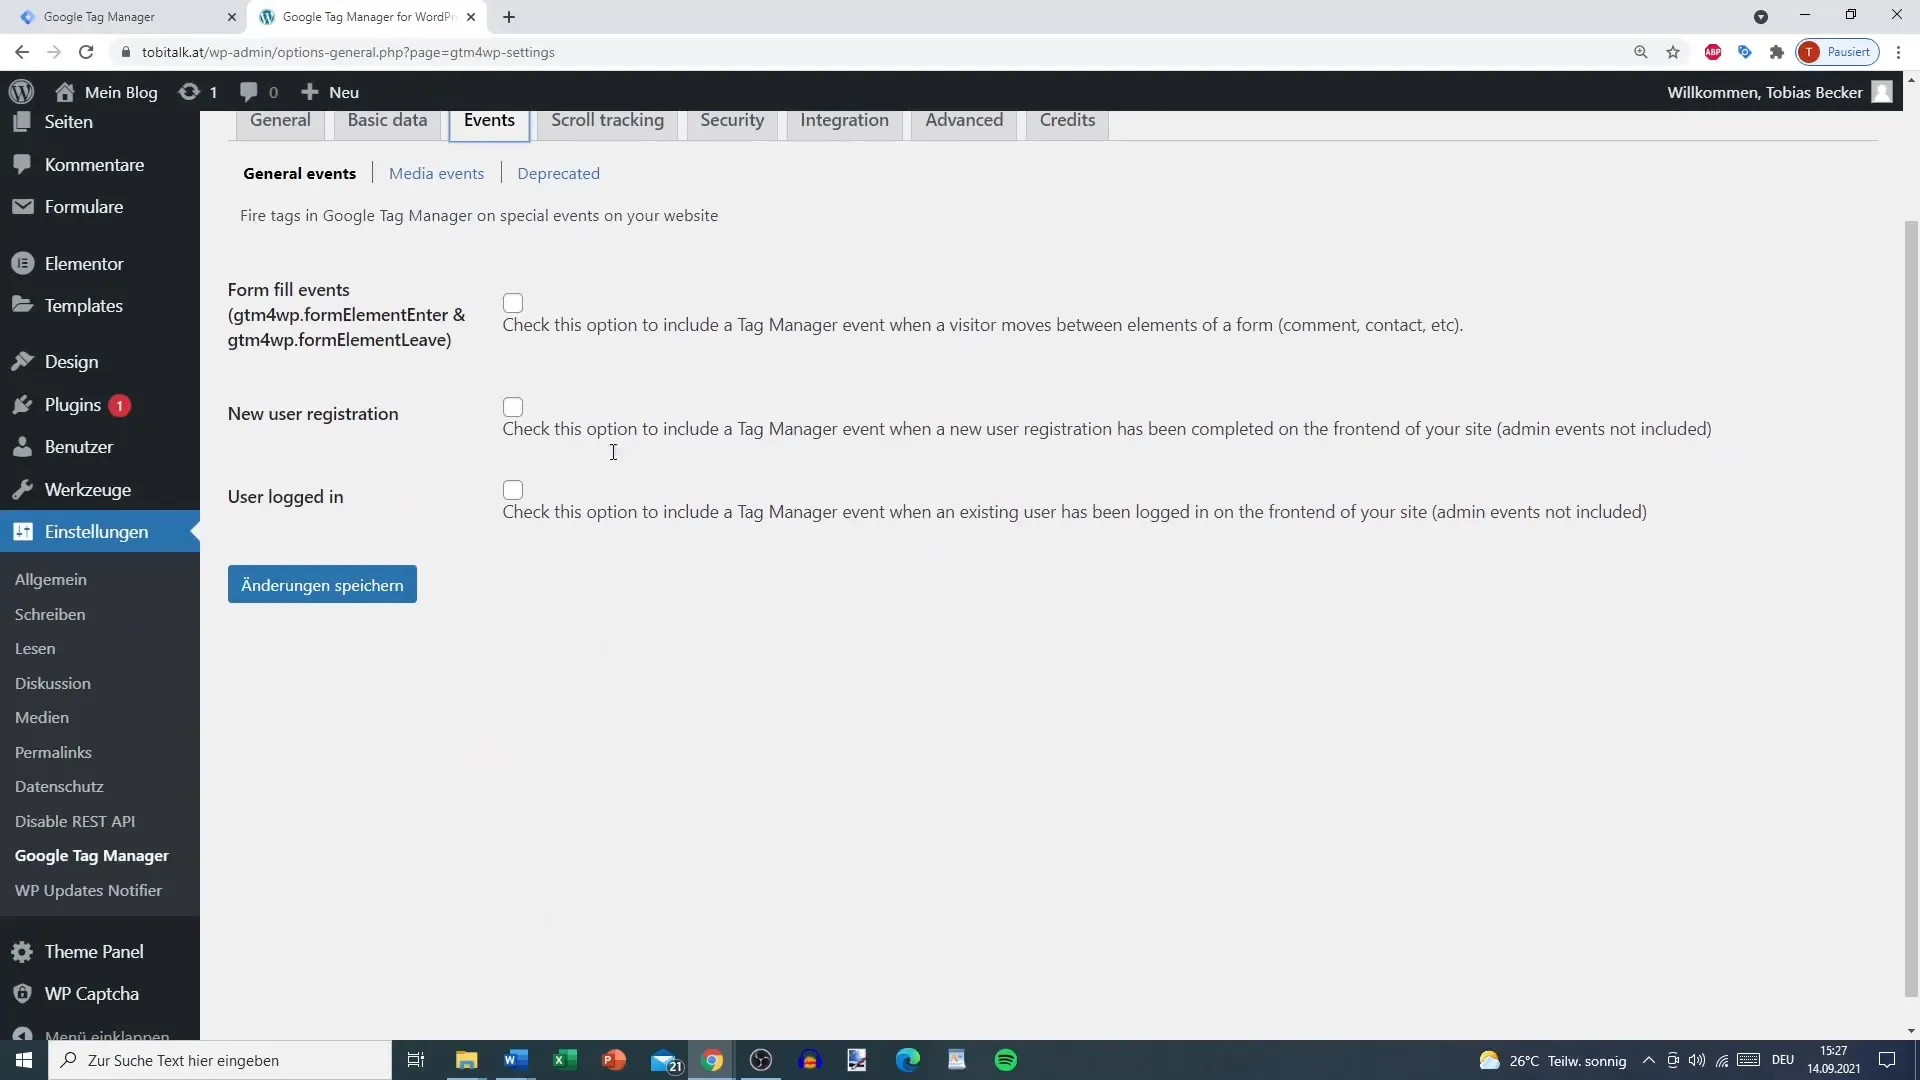
Each of these options provides valuable insights into user behavior on your website.
Step 6: Save Settings
After adjusting your settings, it is important to save the changes. This ensures that all the settings you have made take effect and that you have successfully linked Google Tag Manager with your WordPress website.
Summary
Integrating Google Tag Manager into your WordPress website allows you to perform important analyses and effectively track user behavior. This guide has shown you the changes and settings required for this. After following the steps, you are well-positioned to take advantage of Google Tag Manager benefits.


