Menu → File > New
Checking profiles are a collection of different checking rules. However, you can also create a single rule yourself to check a file for a very specific error. For example, it can happen that black text is not overprinted, i.e. the areas with the text are left out in the areas below. This can lead to unsightly flashes and should therefore be corrected. To create a check rule for this purpose, first open the preflight control panel, click on the icon for individual checks and then select Create new preflight check from the context menu of the options.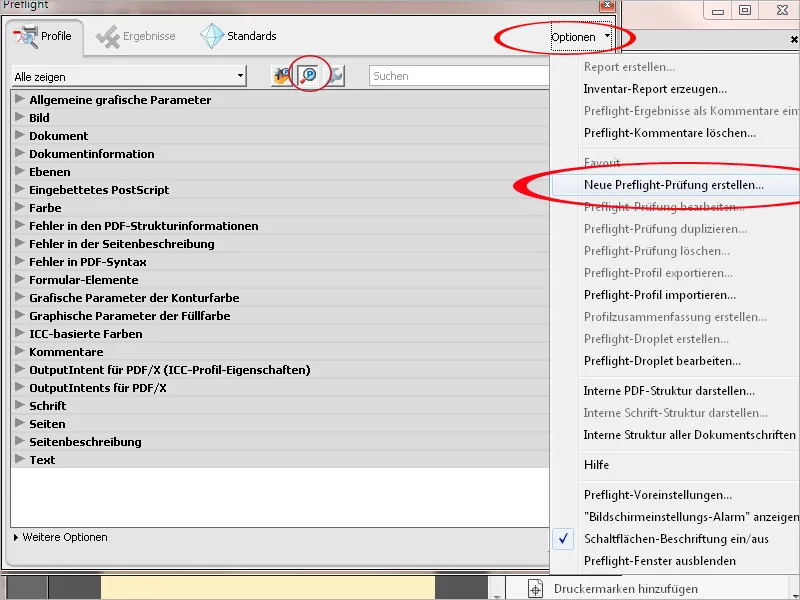
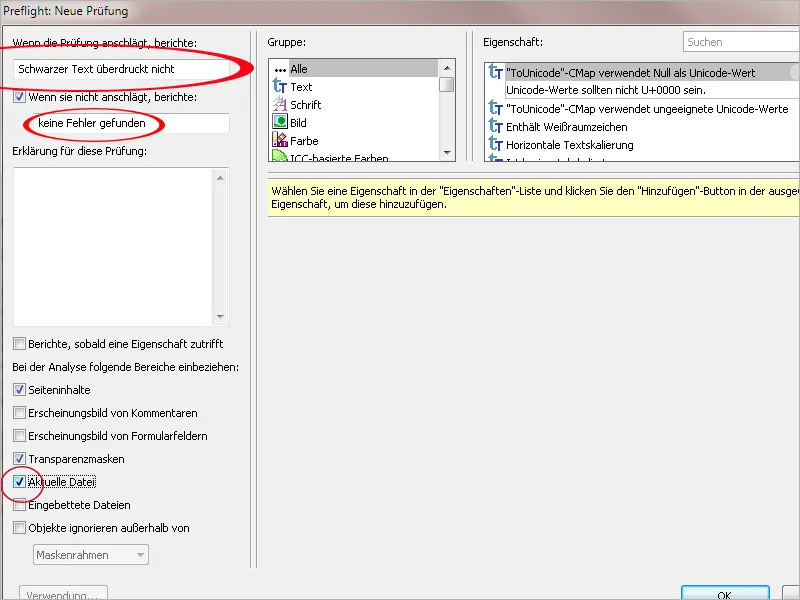
Now enter a name that will appear if the check finds errors; if none are found, a corresponding message can also be displayed. In the list below, the checkboxes Page contents, Transparency masks and Current file should be activated.
Now select the entry Page description in the Group field , select the property Is text in the field to the right and click on Add.
This condition is then transferred to the lower area of the window. Complete the setting with the parameter Applies.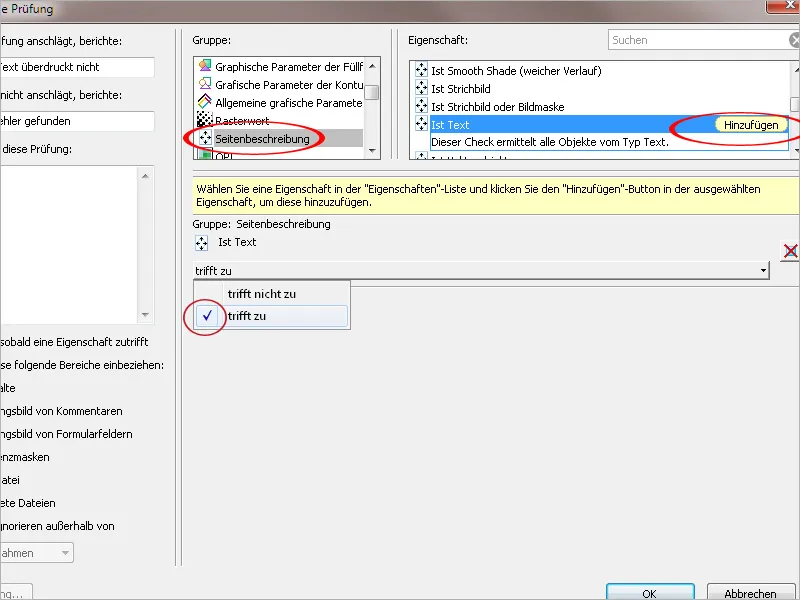
In the next step, define the condition in the Color group that the object (in this case the text) is 100% black, add it to the list of conditions and complete the entry again with the Applies to parameter.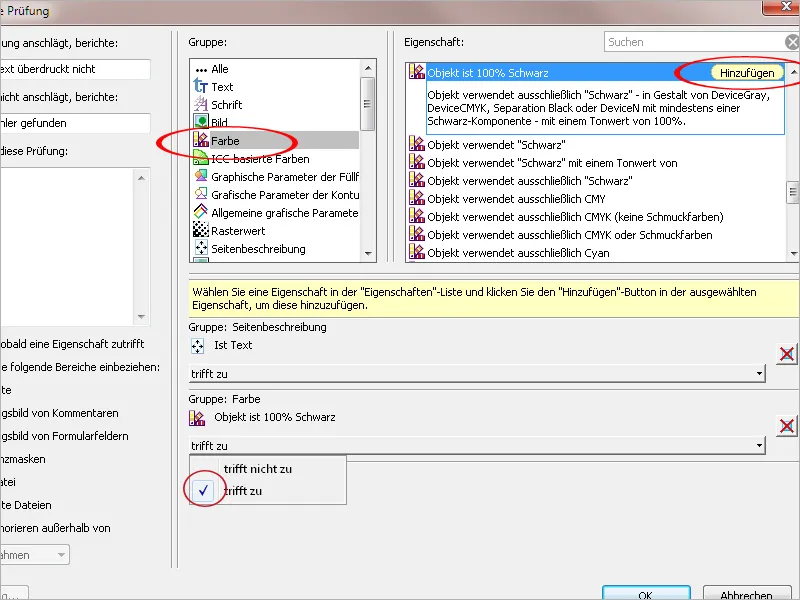
The following condition to be selected, Fill color is overprinting, can be found in the group Graphic parameters of the fill color. Add this condition to the list and set the parameter to Does not apply, as this is the crucial point that should be identified as an error by applying this rule to a document.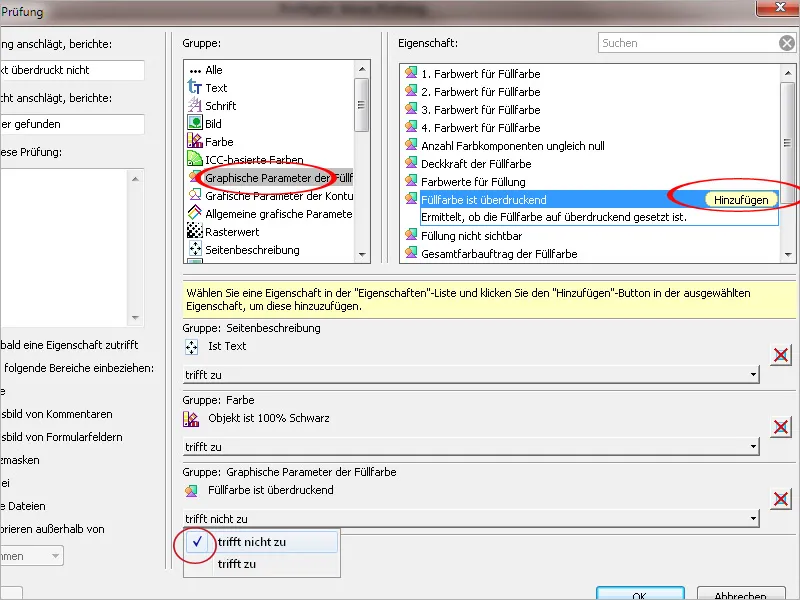
After clicking OK, the settings are applied and the check rule is now available in the Page description category of the individual checks. In contrast to a checking profile, which always includes a whole bundle of checking rules, this allows you to search for specific errors in PDF files.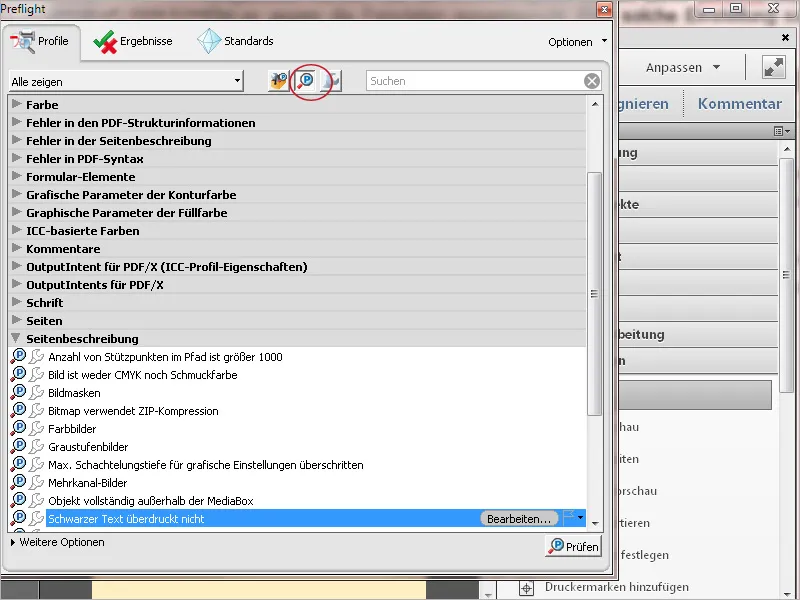
These self-created checking rules can now also be added to a checking profile. To do this, select the desired profile from the list of profiles and click on Edit.
Now select the Custom checks entry in the profile categories on the left-hand side, then select the desired one from the All custom checks list on the right-hand side and add it to the currently selected profile using the small arrow below.
After clicking on Save and OK, the rule is now also applied in this check profile.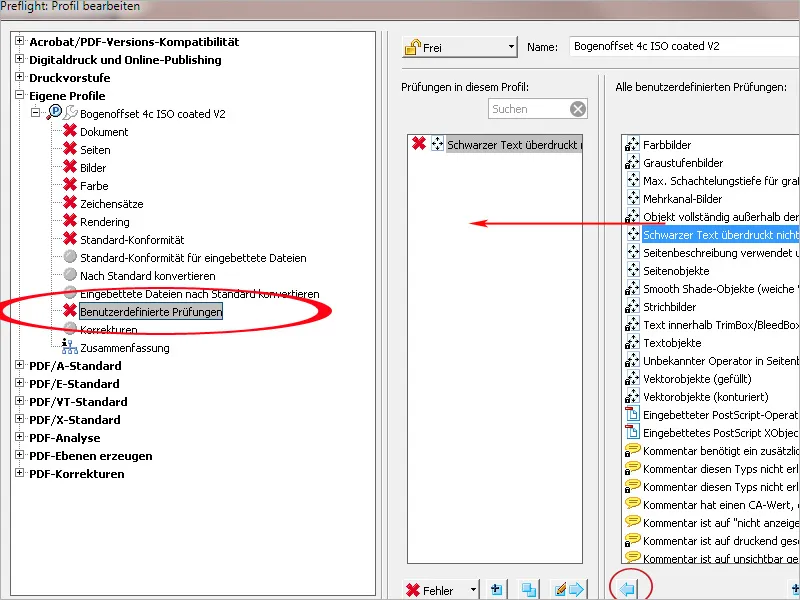
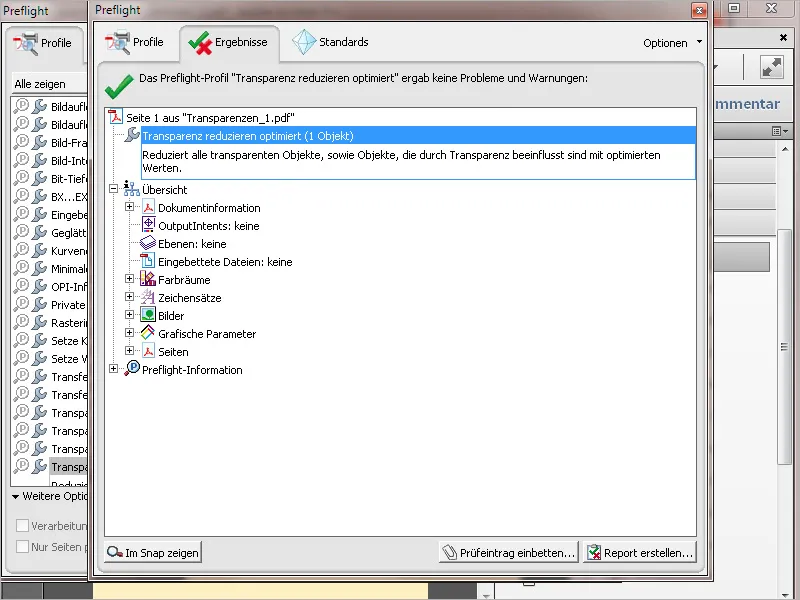
PDF files can not only be checked, but certain errors can also be corrected automatically. I will demonstrate this using a new correction rule with optimized settings for reducing transparencies. To create your own correction rule, you can also adapt an existing one. However, this is locked and cannot be edited. You must therefore first duplicate a correction rule selected in the list of correction rules in the context menu of the options and save it under a new name.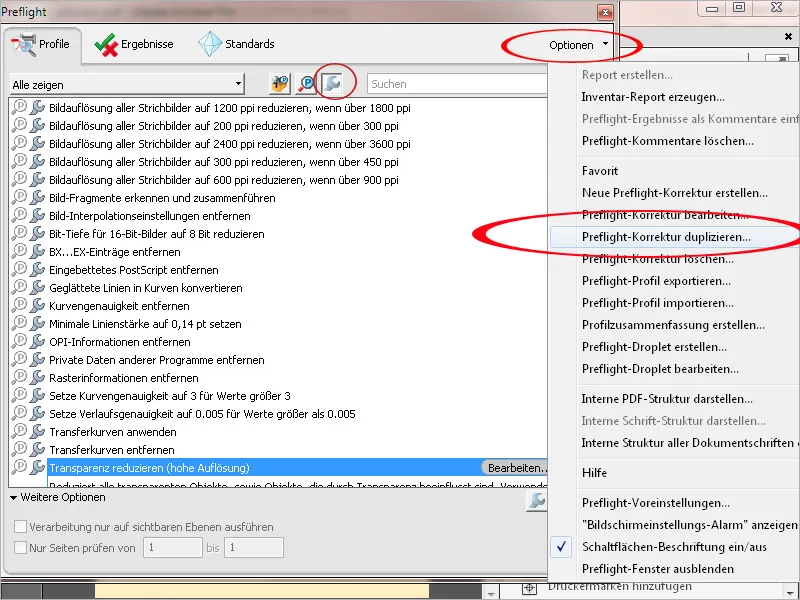
Now I give the correction rule a new name and adjust the description. I change the value for the resolution of vector graphics and text from 1200 to 1600 ppi and the value for the resolution of gradient and grid from 300 to 400 ppi. All checkboxes are unchecked except for Keep overprint. Click on the OK button to save the new correction rule.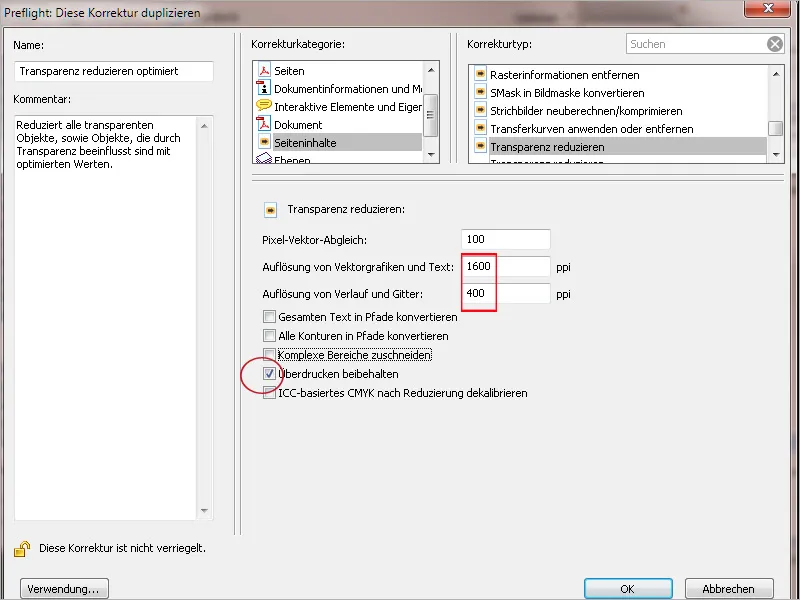
Now you can apply this rule immediately by clicking on the Correct button. Acrobat suggests that you save it again under a new name to retain the original file.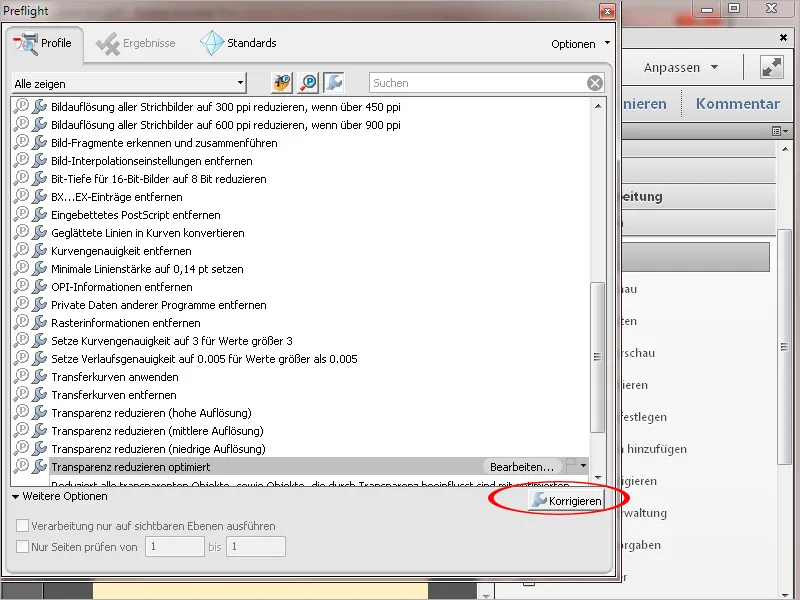
After clicking on Save, Acrobat analyzes the document and applies the corresponding correction. A window then opens in which the results are documented. If required, you can also generate a report. Embedding the check entry in the document is not possible with a single check or correction rule; this only works if a check profile has been executed.