Many areas of application are conceivable. For example, depending on the document format, I could have the logo placed at a specific position in the document.
In this tutorial, I would like to show you an example of how such an if-then condition can be created in an action. To do this, I first create an image aging effect, which I immediately record as an action. To do this, I create a new record and call my action "Image aging".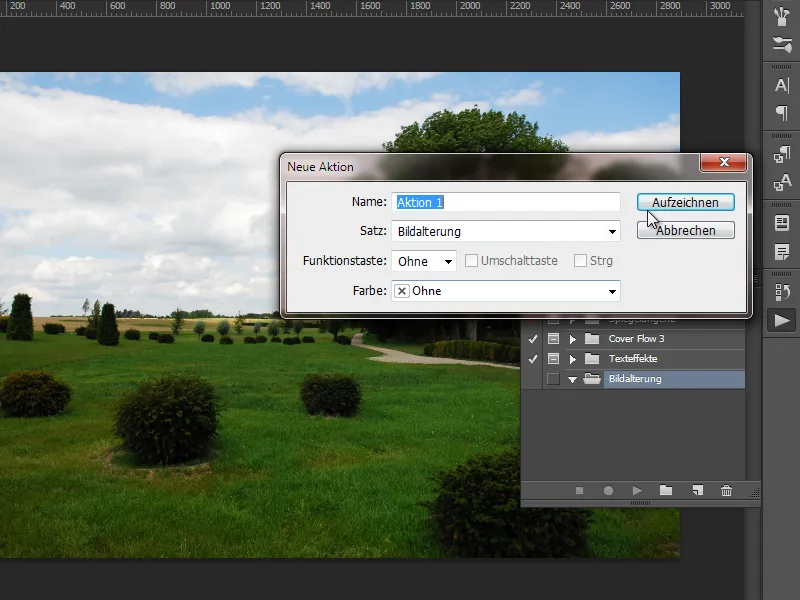
I create the effect by duplicating the background layer. I convert the duplicate into a smart object. I create a black and white adjustment layer for the sepia effect as a clipping mask for the smart object. I then place a texture in the Interlace mode.
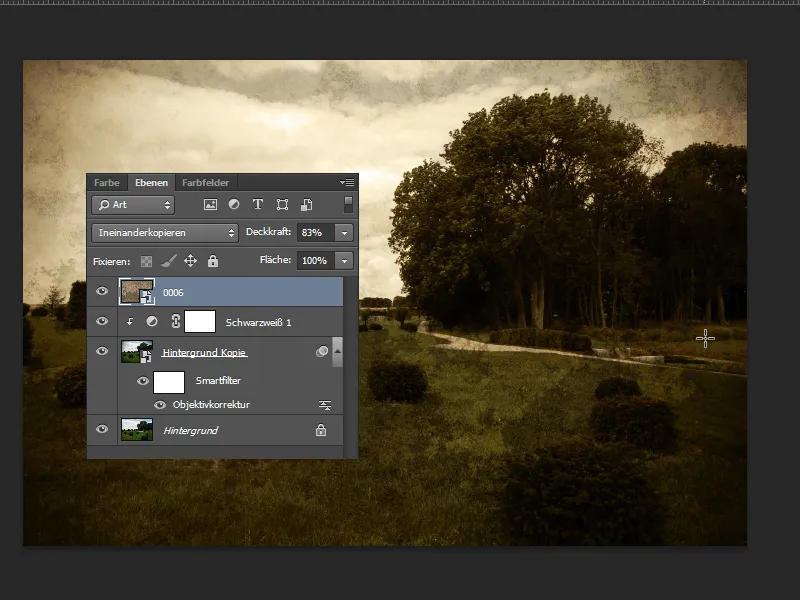
In a further step, I add a magnifying glass shape from my own shapes. In a new layer, I make a round selection for the round magnifying glass area and fill it with a color of my choice. The area slider for the colored layer is set to 0 percent.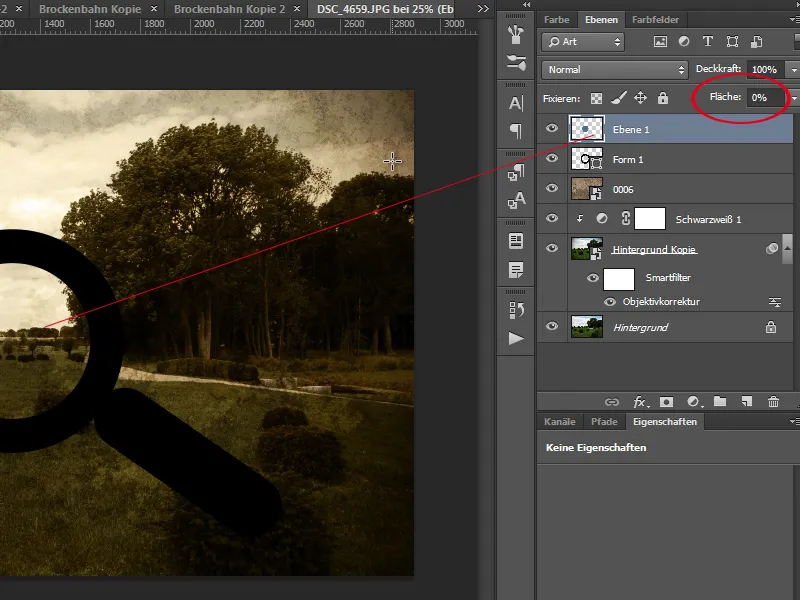
Now I open the fill options and set a slight cut-out under the advanced fill options.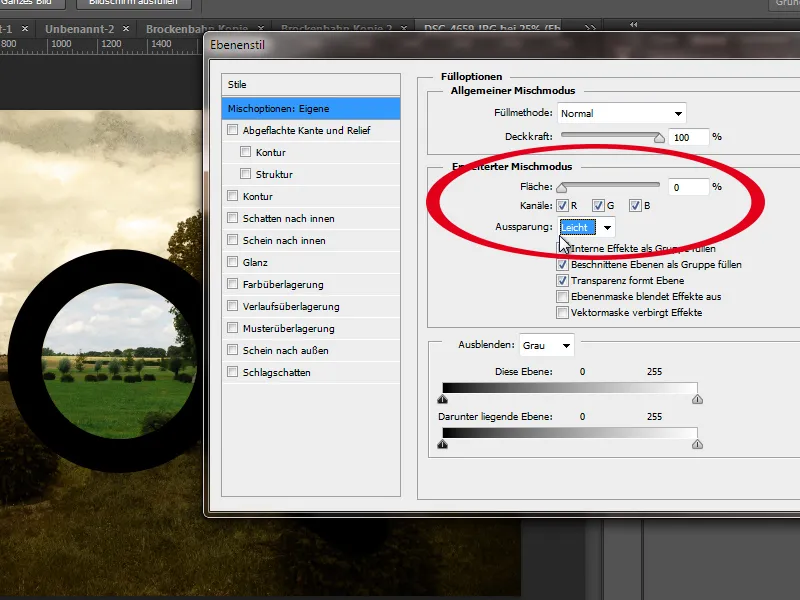
The effect is that the cut-out area of the layer now hides the contents of all other layers that can take transparency into account. A background layer does not take transparency into account, which is why the opacity cannot simply be reduced. This is why the original layer is shown here. If I now go through the image with my magnifying glass, I can see the original motif without the image aging. I can now stop the recording of the action.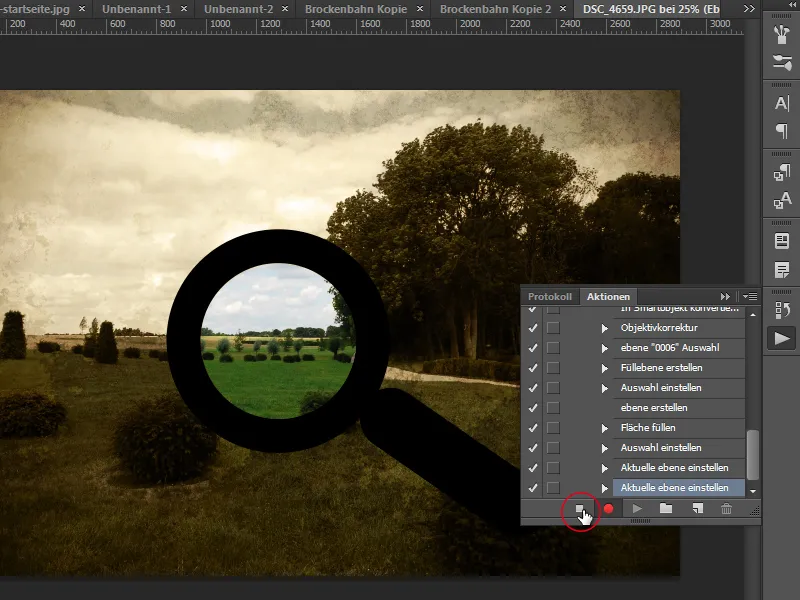
The magnifying glass effect is of course only an example. I could just as easily have used writing as a cut-out layer or other motifs. My aim now is to show what happens when the background layer is a normal pixel layer. To do this, I double-click on the background layer so that it changes to a pixel layer.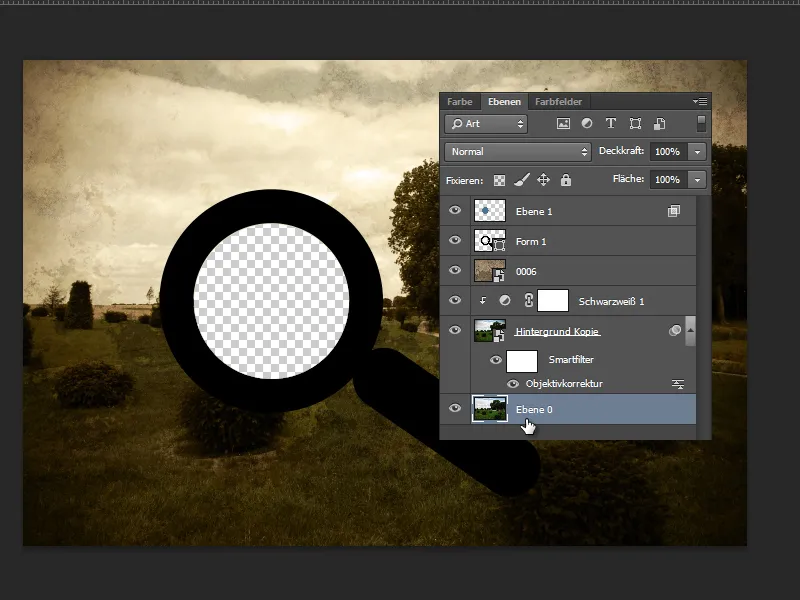
Lo and behold, the effect no longer works because the pixels of this layer are also "cut out". If I try my action on another image where the background has already been converted to a pixel layer, I get an error message in the action and the effect at the end is that the inner area of the magnifying glass is transparent.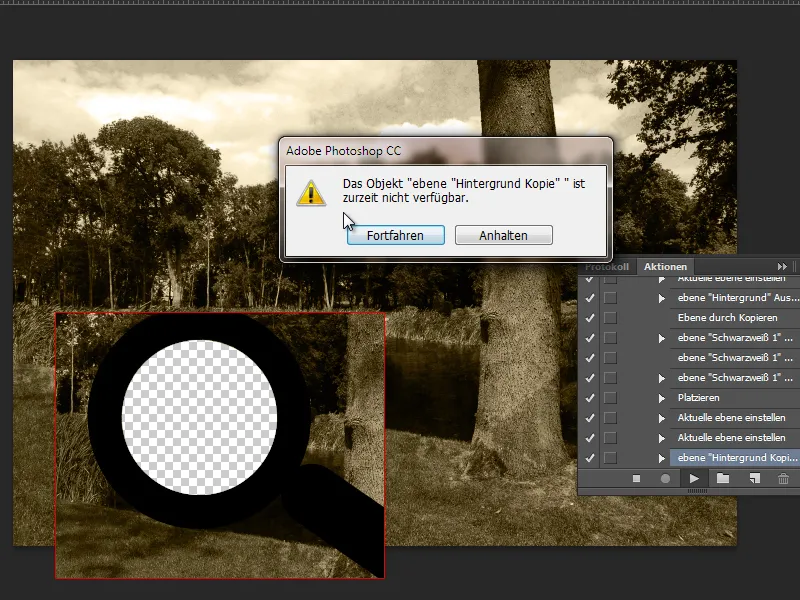
So it makes sense to add a condition to my action to ensure that the image aging effect with the magnifying glass also works if someone has their subject open as a pixel layer or smart object. And before I can insert the condition, I must of course record another action that contains the command sequence when the condition is fulfilled. And in this case it is that my pixel layer converts to a background layer via the Layer>New>Layer from Background menu.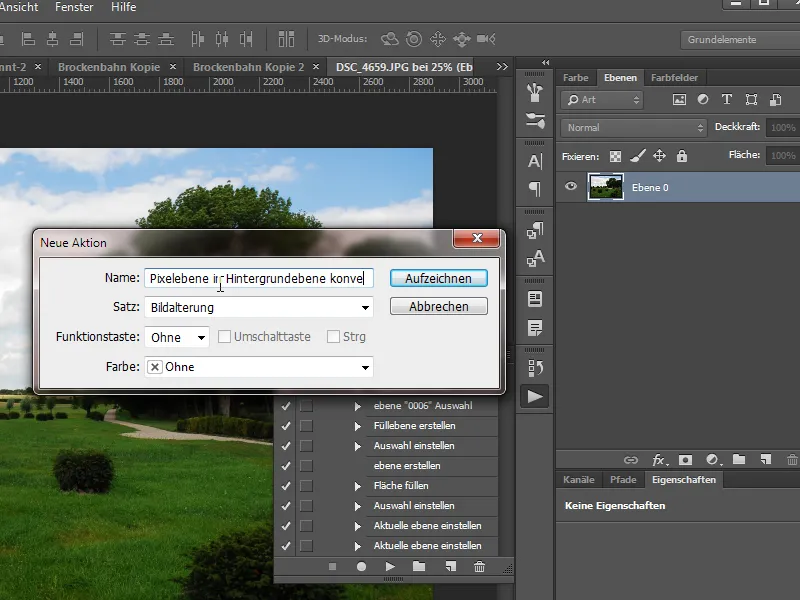
If the action is recorded that contains the command to convert a pixel layer to a background layer, then I can insert my condition via the Actions panel menu.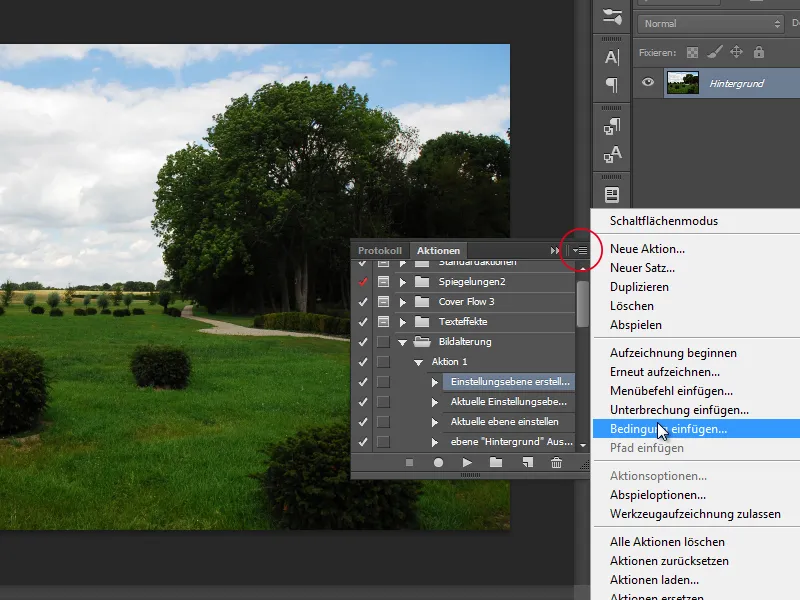
In the dialog box that opens, I can find the various conditions for actions. The relevant condition for me is: Layer is the pixel layer. In the second field, I arrange the action I have just created, which converts my pixel layer into a background layer. I leave the third field as None.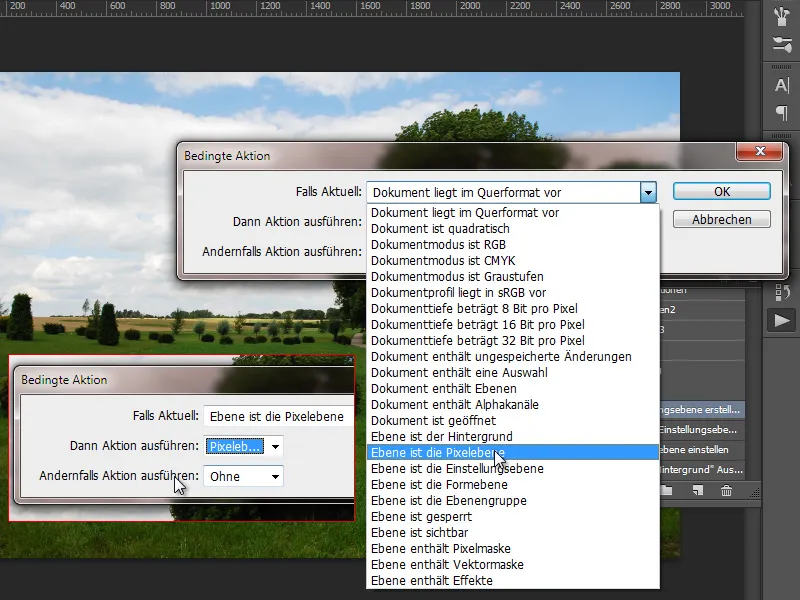
The condition is placed at the top of my first created action, which creates the image aging with the cut-out.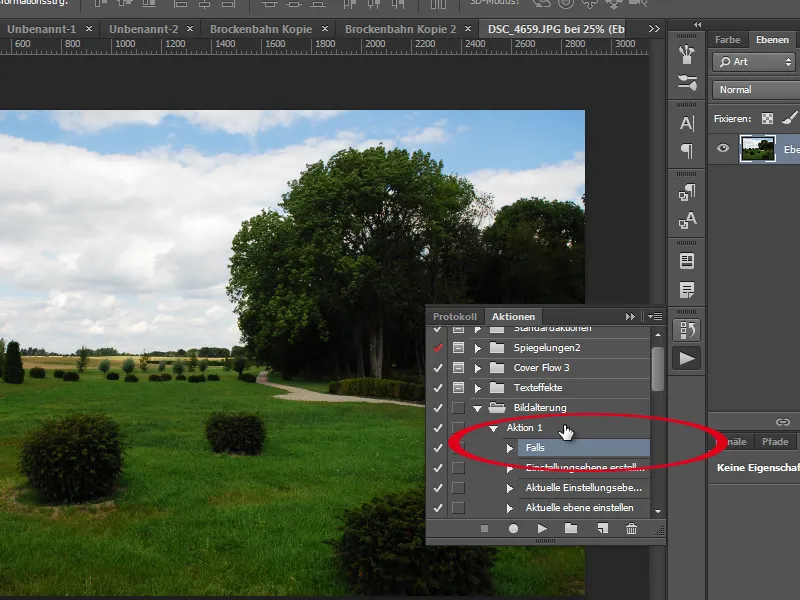
The cut-out effect only works if the bottom layer is a background layer. Thanks to this condition, it now doesn't matter whether someone has opened a background layer, a pixel layer or a smart object.
That was my example of how conditions can be built into actions. There are countless ways to use conditions to make the applicability of actions more effective and versatile. That's why this is one of the top new features in Photoshop CC.


