The functions for spell checking and 'Find and Replace' in Adobe InDesign are essential tools for efficiently editing text and avoiding errors. With spell checking, you can check documents for spelling errors and correct them directly. With 'Find and Replace,' you can specifically adjust terms or formatting in an entire document or specific sections. In this guide, I will show you step by step how to use both functions to make your texts error-free and consistent. Let's get started and optimize your text editing!
Through the Edit menu, you can access spell checking. By activating the Dynamic Spell Check, all terms unknown to the currently selected dictionary are displayed with a red underline.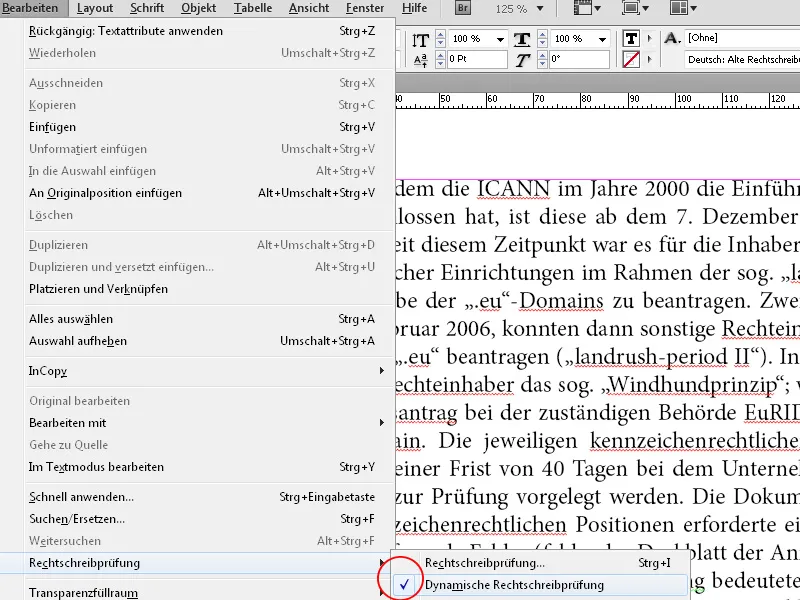
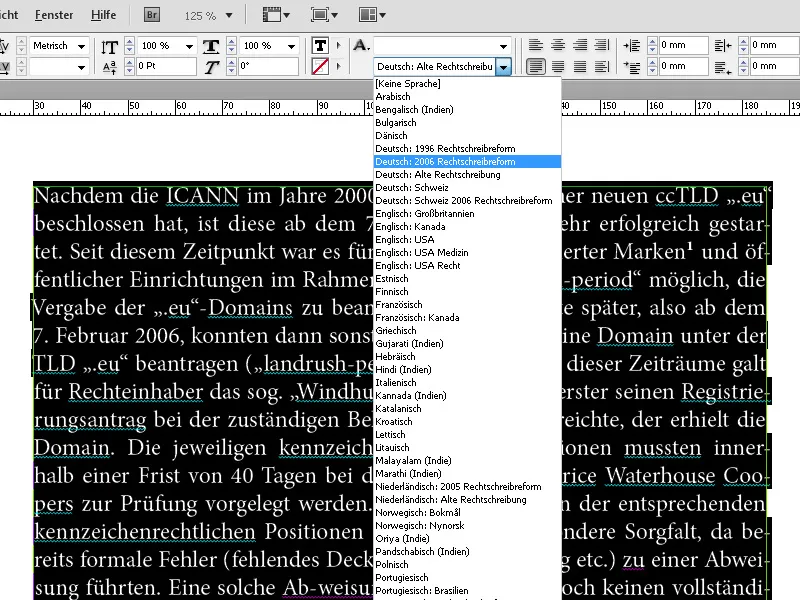
Next, highlight the entire text and then select the required language from the drop-down list in the Control Palette.
Afterwards, use the shortcut Ctrl+I to access the spell check.
InDesign jumps immediately to the first unknown term in the document. At the bottom, you can initially select the scope to which the spell check should apply. This can be a selected area, a text section, the entire document, or all currently open documents.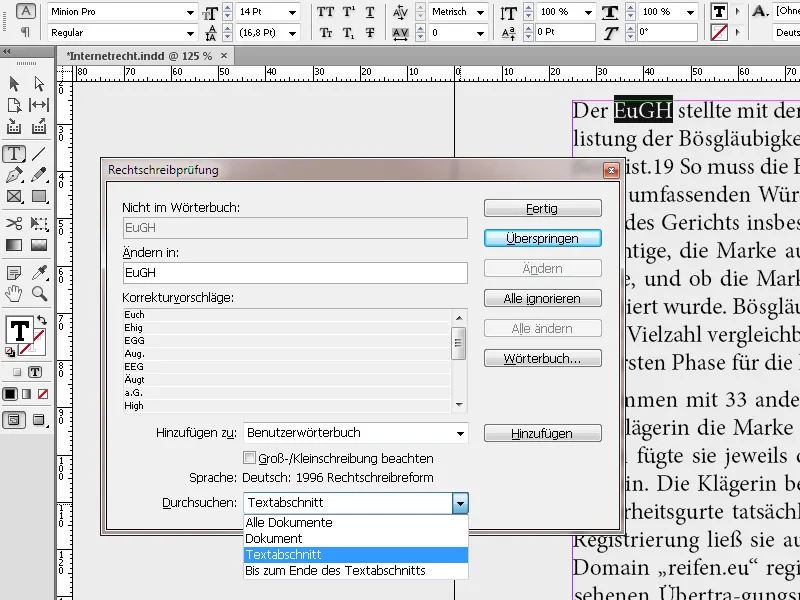
For the first unknown term, you can either skip it or add it to the dictionary. By clicking on Ignore All, the highlighted term will no longer be marked as unknown in the current InDesign session, but will not be added to the dictionary. To add options for hyphenation to the dictionary, click on the Dictionary button. This opens another window where by clicking on the button, hyphenation for the highlighted term is suggested with tildes.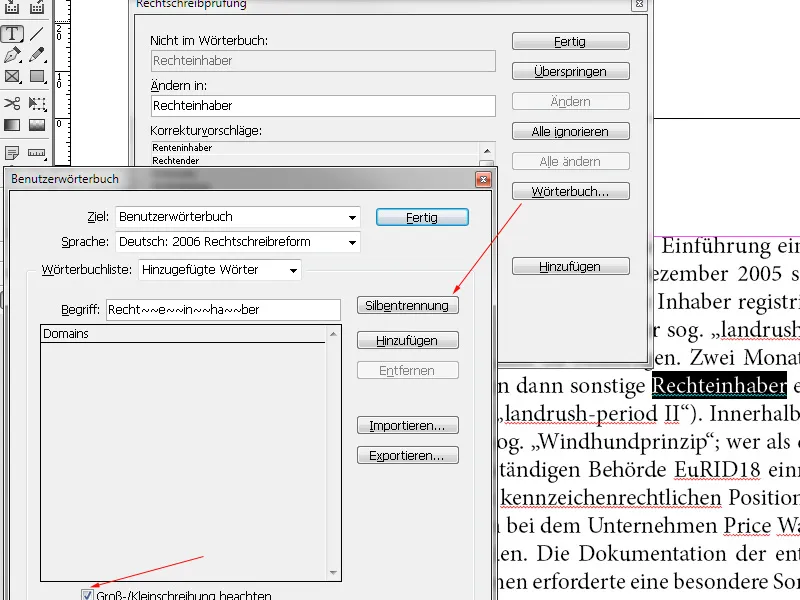
You can edit these to prevent unwanted separations. Also, capitalization is saved and checked in the future by enabling the checkbox. By clicking Add, the unknown term is added to the dictionary.
When working on documents with many technical terms, you can also export dictionary lists as text files. These can then be imported by other users on other computers, making them immediately available. The spell check then accepts the terms as already known.
With the Dynamic Spell Check enabled, errors can also be corrected using the context menu. Click on the corresponding word and right-click to access the context menu. InDesign immediately offers correction suggestions or the option to add the term to the dictionary or to access the dictionary for corrections and additional options.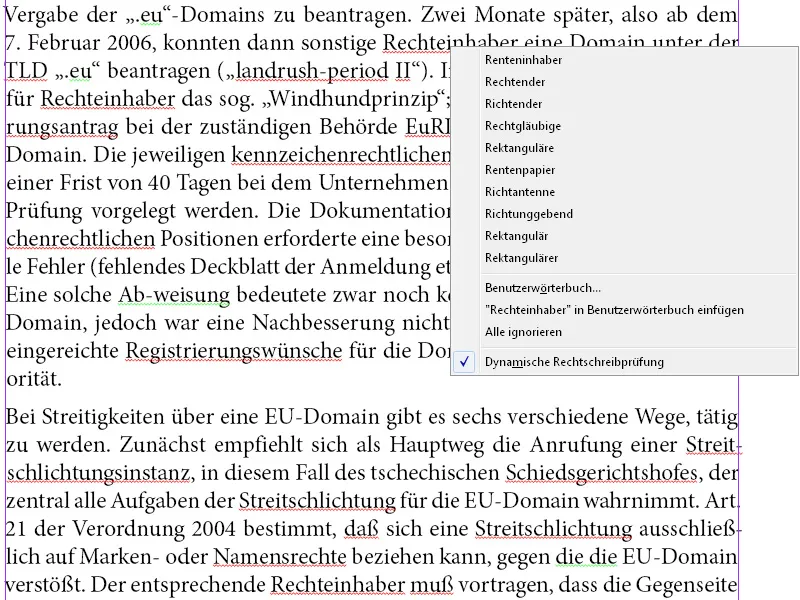
Find and Replace
Through the Edit menu (or the shortcut Ctrl+F), you can access the Find and Replace dialog.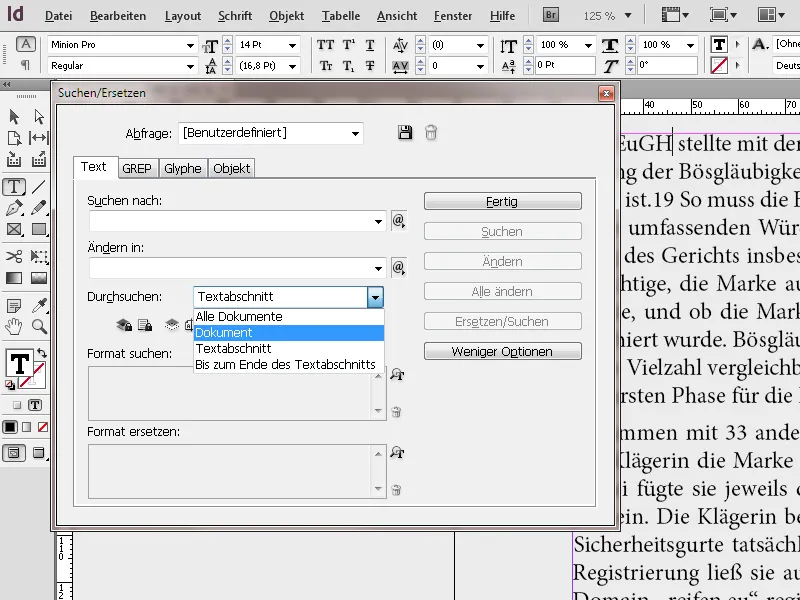
Here, you can search for terms in the entire document (or parts of it) and replace them with a correction. For example, if the word "Straße" was consistently misspelled with "ss" in the source document, you can easily replace it with the term spelled correctly. Apart from terms, you can also search for character- and paragraph formats and format options and replace them with others.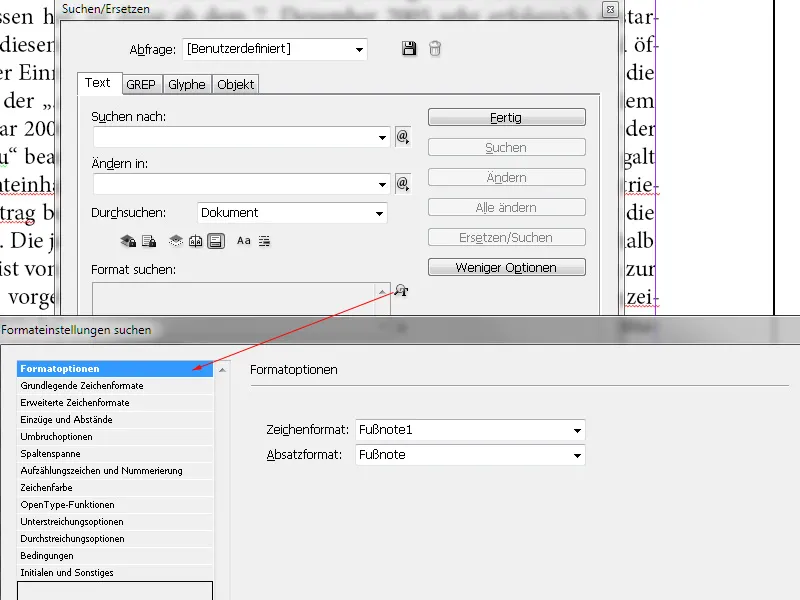
For example, you can search for a specific word and replace it with the same word, but at the same time change the text color or font style, etc., or assign it a custom character format. Or you can search for a specific formatting (e.g., semibold) and replace it with another (e.g., italic). In this case, the lines Find and Change to will remain empty.
If you are searching for tab stops, spaces, or other special characters or want to replace them, select the appropriate special character (metacharacter) from the pop-up menu to the right of the Find field. Furthermore, you can use placeholders such as Any Digit or Any Letter to search. You can select the same special characters or placeholders from the pop-up menu next to the Change to field as well..webp?tutkfid=83789)
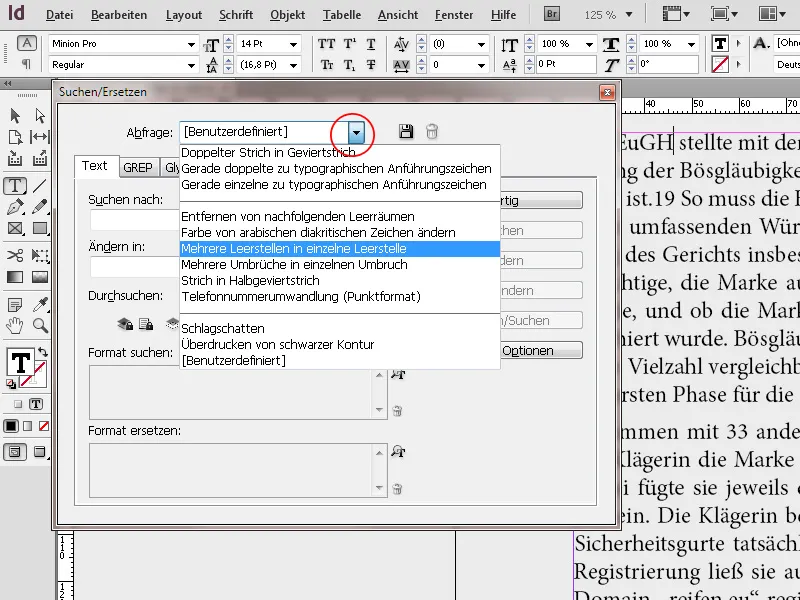
Additionally, it can also be determined whether locked layers, master pages, and footnotes should be included in the search. Especially complex search and replace queries can also be saved so they can be executed more quickly later on. InDesign already comes with a number of predefined queries, such as those for multiple spaces, which can then be changed with a single click.