Footnotes are an essential element in academic papers, books, and reports to clearly and concisely present additional information or source references. Adobe InDesign provides powerful tools to automatically create, number, and manage footnotes. In this guide, I will show you step by step how to insert, format, and customize footnotes in your layout to create professional and readable documents. Let's start and explore the benefits of the footnote feature in InDesign!
Footnotes can easily be inserted in the running text. Simply highlight the word to which the footnote should be assigned, or place the cursor after it, click on the Font menu or right-click to bring up the context menu and select the option to Insert footnote.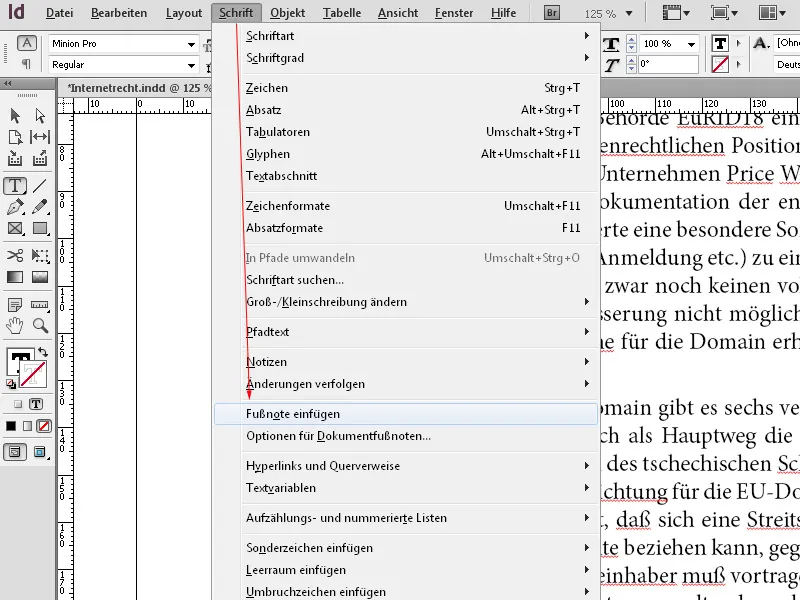
InDesign then places the footnote after the word, creates space at the bottom of the current page, and separates it from the rest of the text with a short dividing line. The footnote text can be immediately typed in or pasted from the clipboard.
The required space dynamically expands upwards, displacing the text to the next page. The width of the footnote text is based on the width of the column containing the footnote reference marker. Footnotes cannot extend across columns in a text frame.
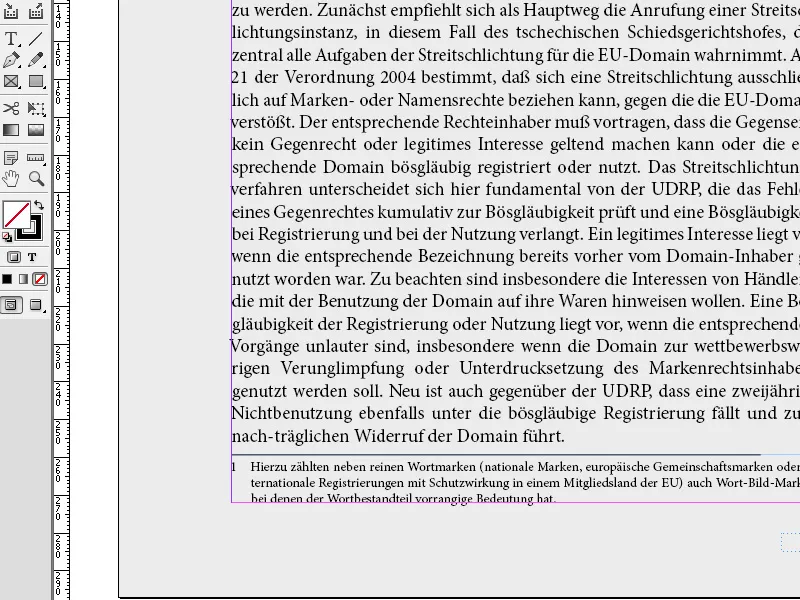
The footnote area expands upward until it reaches the line with the footnote reference. At this point, the footnote is split and continued in the next text frame column or in the next linked frame, if possible. If the footnote cannot be split and the footnote text is too long for the footnote area, the line with the footnote reference is moved to the next column or an overset text symbol is displayed. In this case, you should adjust the frame size or text formatting.
If the insertion point is in a footnote, you can use Font>Go to Footnote Reference to return to where you left off.
Through the Font menu, you can then customize the footnote options according to your needs. Initially, you can choose to display the enumeration using Arabic or Roman numerals or even letters.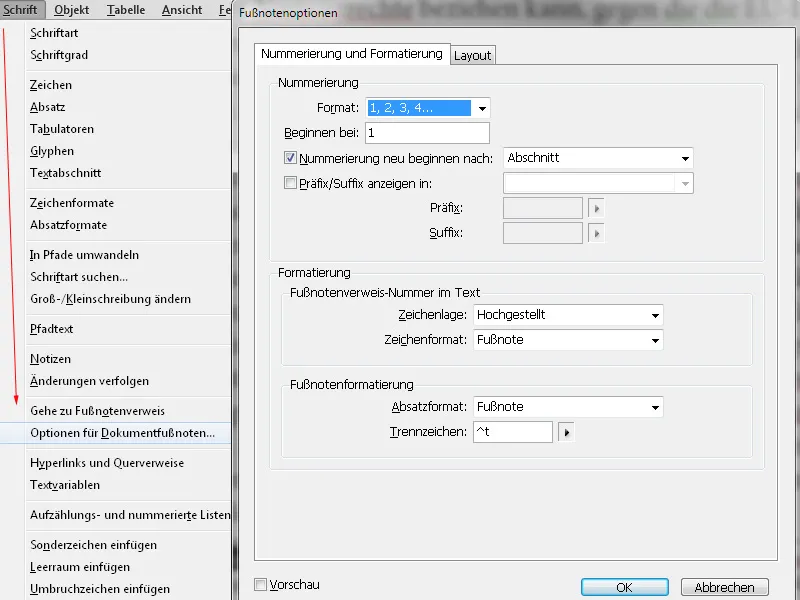
Furthermore, you can specify at which number the enumeration should begin, whether it should occur on each page or printing sheet, or whether it should start anew sectionally. The Section setting means that the next text frame not linked with the previous is considered a new section and the numbering is then restarted. This is particularly useful for books with different chapters and facilitates orientation.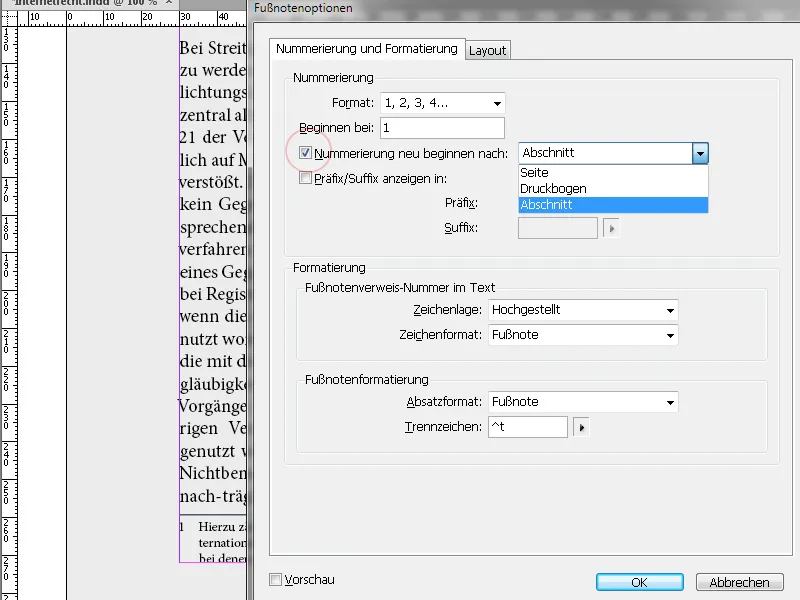
To maintain consistent formatting of the footnote text, it is best to create a dedicated paragraph style that centrally controls all details. If not already done, select Paragraph Style in the drop-down menu in the Footnote Formatting area and adjust all necessary settings there.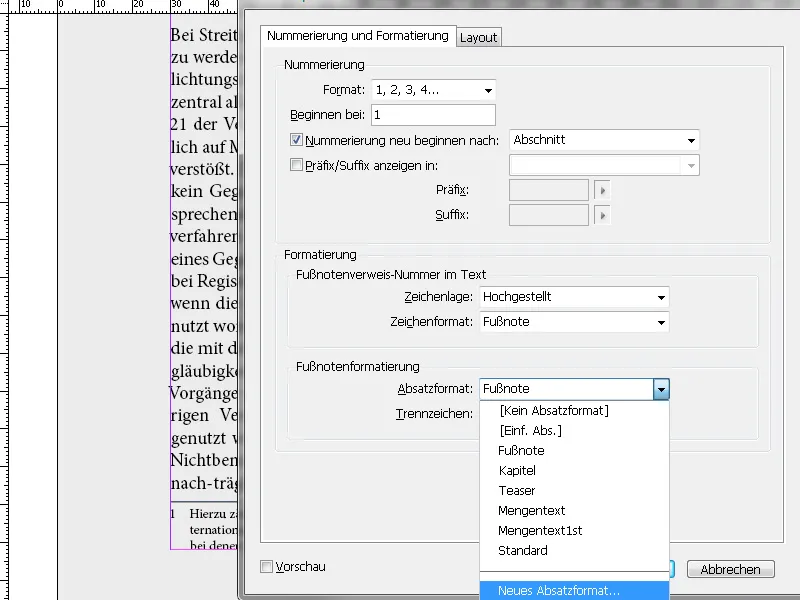
You can also use a Tab in creating an indentation and aligning the text neatly. On the Indents and Spacing tab of the Paragraph Style Options, adjust the left and negative indent of the first line to set the distance of the footnote number and text from the margin.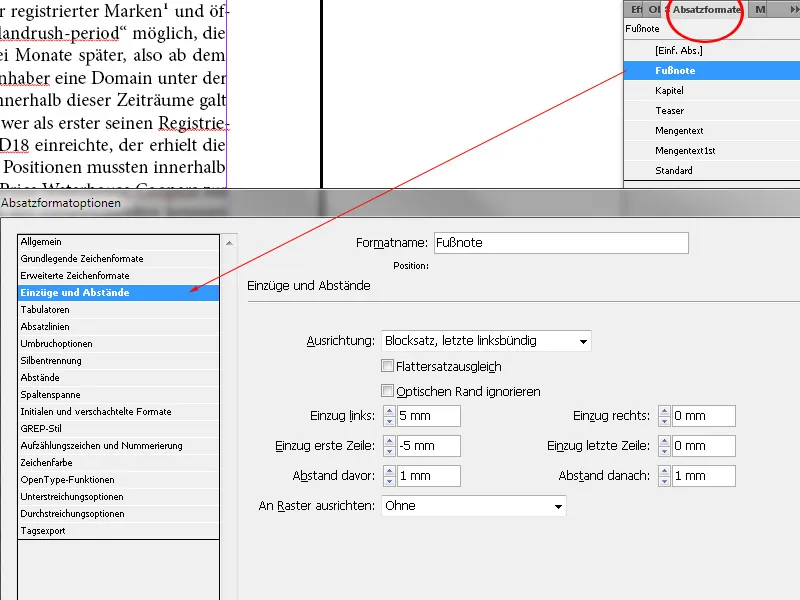
You can control the appearance of the footnote itself in the Formatting>Character Format area ideally with its own character format (New Character Format), where all details can be precisely determined.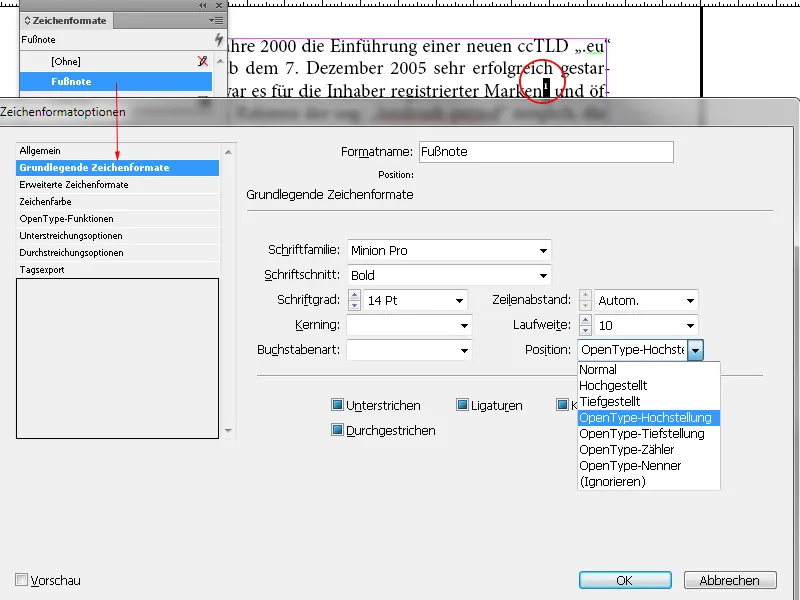
On the Layout tab of the Footnote Options, you can adjust spaces before and between footnotes, as well as the thickness and width of the dividing line.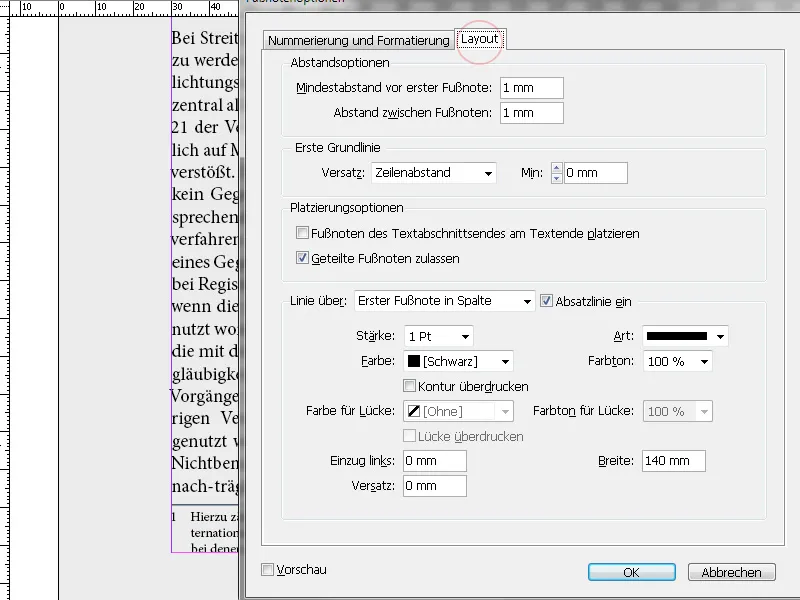
Footnotes cannot be added within tables. To delete a footnote, remove it from the running text; the associated footnote text will then automatically disappear.