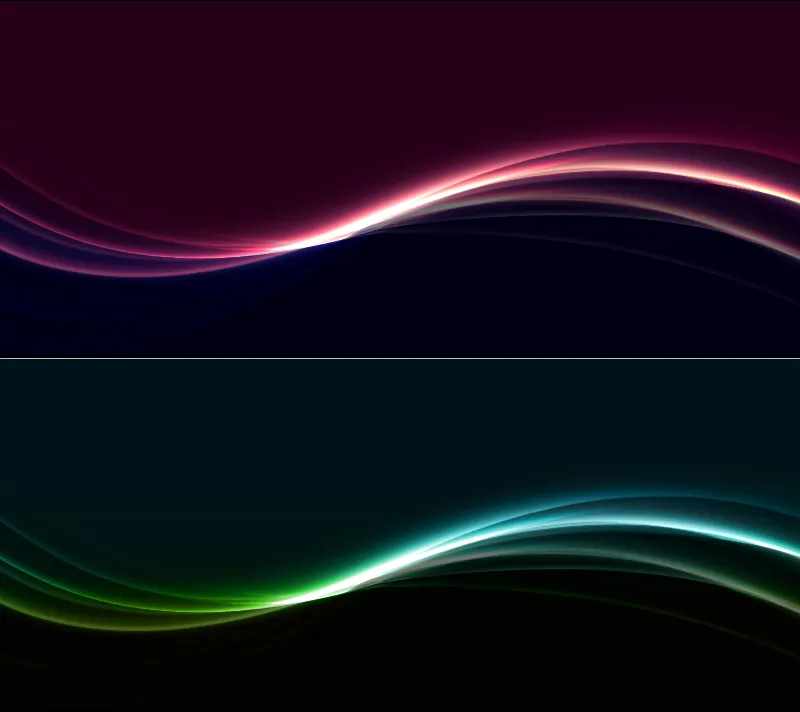
A lens flare effect gives backgrounds an elegant and modern look. It is versatile and perfect for flyers, websites, and wallpapers to add a subtle but impressive accent. With Photoshop, you can easily create this effect by combining gradients, layer styles, and lighting effects. In this tutorial, I'll show you how to step by step create an impressive lens flare effect that stylishly enhances your designs. Let's get started and give your projects more radiance!
Step 1: Create a new document
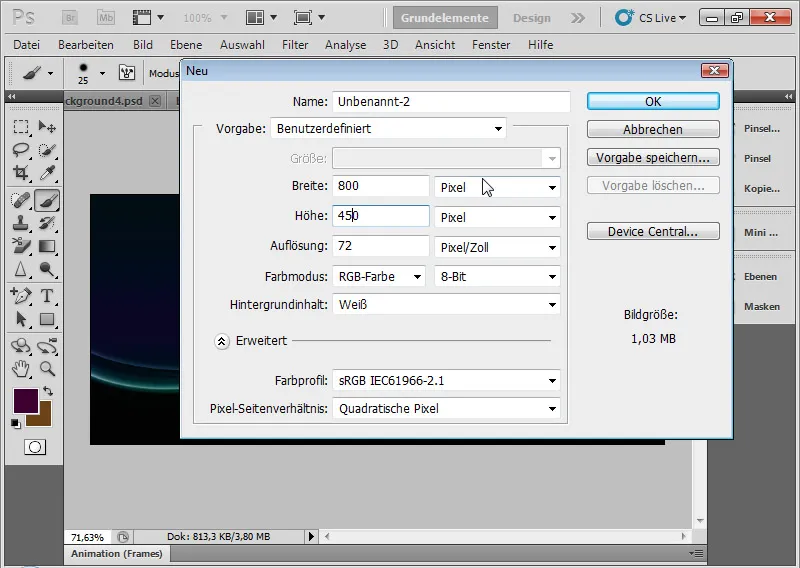
I create a new file sized 800x450px using Ctrl+N.
Note: Inputs in the Fill Options need to be adjusted according to the size of the document.
Step 2: Fill background layer with color
I fill the background layer with a dark color. In my example, I choose a dark lilac tone. I can use the Paint Bucket Tool to fill the background layer with the color corresponding to the foreground color set in the Color Picker, or I can use the shortcut Alt+Backspace.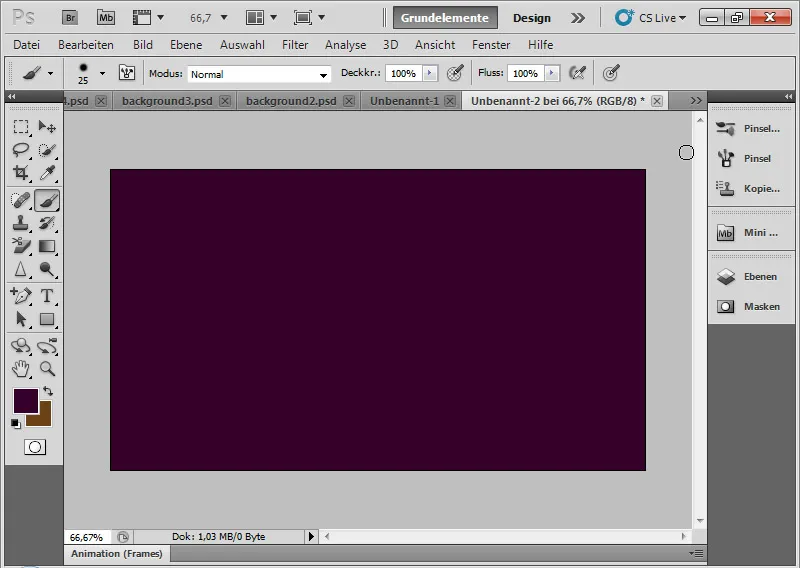
Step 3: Draw a rectangle
Using the Rectangle Tool (U), I draw a rectangle from the bottom up to about halfway of the document. The rectangle can extend beyond the document boundaries downward.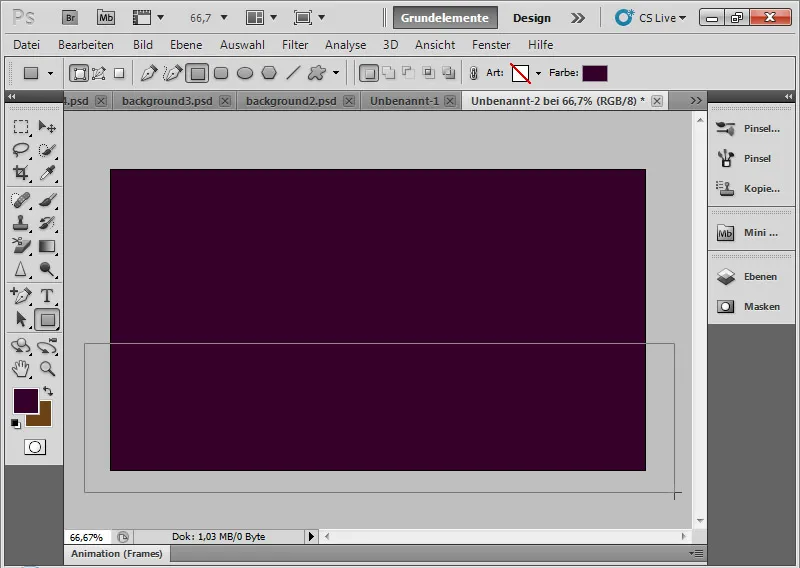
Step 4: Adjust the color of the rectangle
I can change the color of the rectangle by clicking on the layer thumbnail of the rectangle layer. In the opened Color Picker, I choose a shade of blue.
Lastly, I change the fill method to Screen. This layer mode mixes the colors in a way that keeps the shadows and highlights of both layers while slightly increasing saturation simultaneously. This preservation of contrast makes this fill method ideal for this light effect and will be used in further layers as well.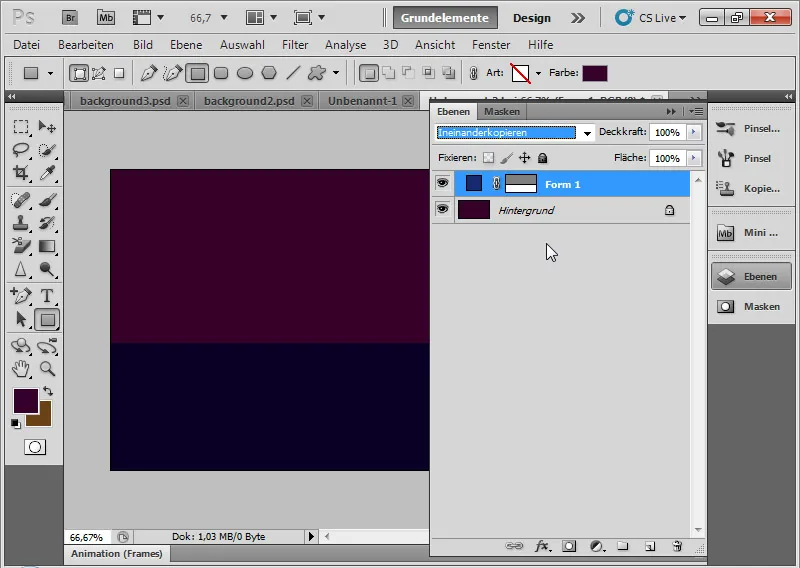
Step 5: Add a curve to the rectangle
Using the Add Anchor Point Tool, I click in the middle of the top line of the rectangle. The vector mask must be activated in the Layers Panel for this.
While holding the mouse button down, I drag the anchor point to the side to create a curve.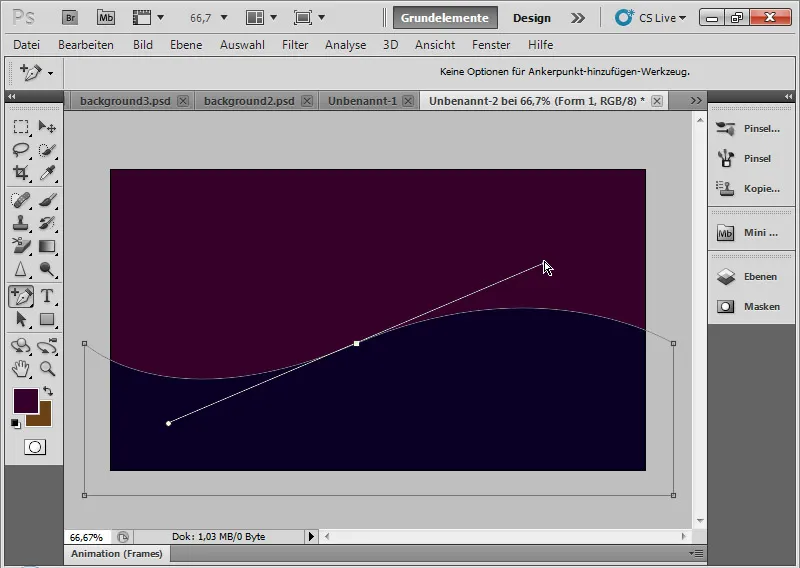
Step 6: Add an outer glow to the curve
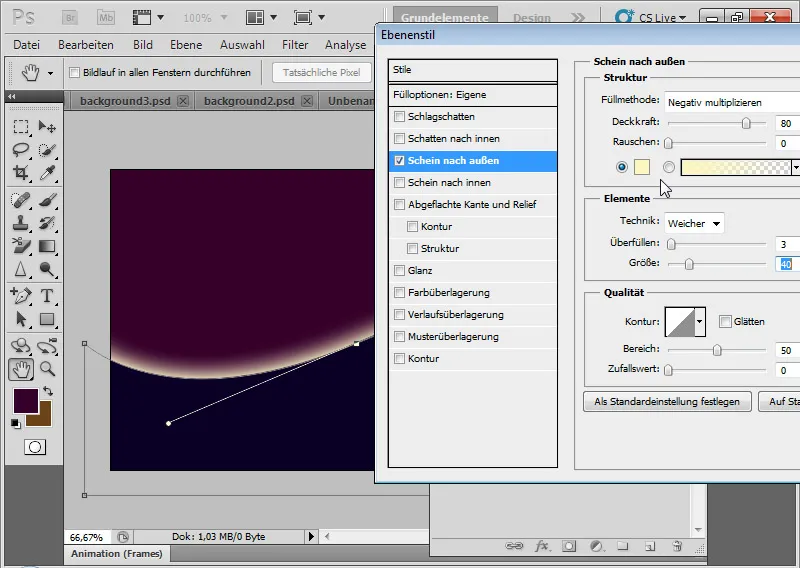
I right-click on the rectangle layer in the Layers Panel to open the Layer Style. In the Layer Style, I choose the menu for Outer Glow.
For the default setting, I choose the following options:
| Opacity: | 80 % |
| Spread: | 3 percent |
| Size: | 40px |
Step 7: Duplicate rectangle layer and adjust shape
I duplicate the rectangle layer with Ctrl+J. Using Ctrl+T and right-click, I can easily and intuitively change the duplicated rectangle layer's shape with the Warp Transform. I drag the left side slightly over and the right side under my original layer.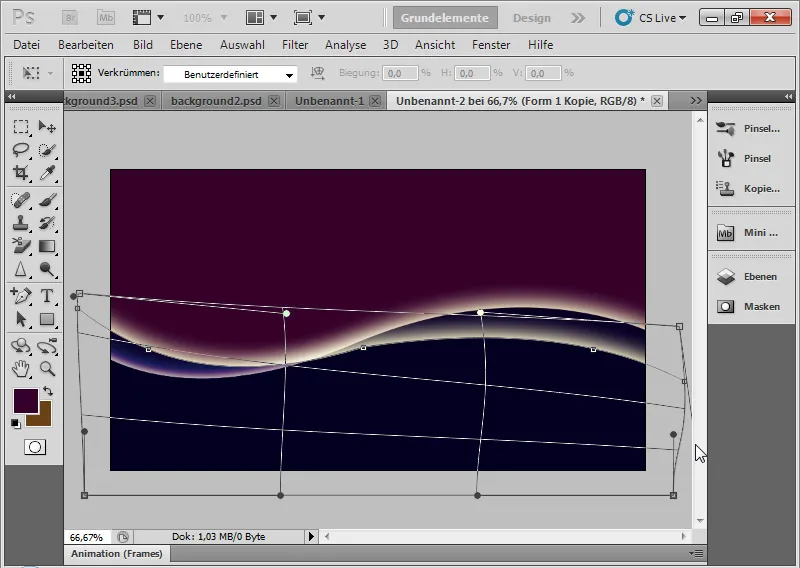
Step 8: Vary fill options
In the Layer Style, I vary the Outer Glow. Here, I choose the following settings:
| Opacity: | 50 % |
| Spread: | 0 percent |
| Size: | 10 px |
I keep the fill method set to Screen.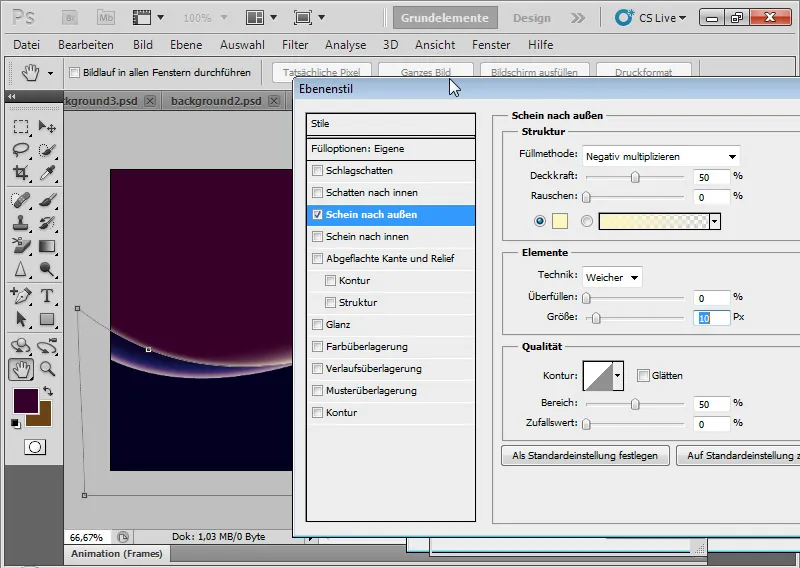
Step 9: Duplicate all visible layers onto a reduced layer
Next, I will copy and merge all visible layers onto a reduced layer using the shortcut Ctrl+Shift+Alt+E.
With Ctrl+T, I can again adjust my effect to both sides using the Warp Transform. I set the layer mode to Screen with an Opacity of about 60 percent.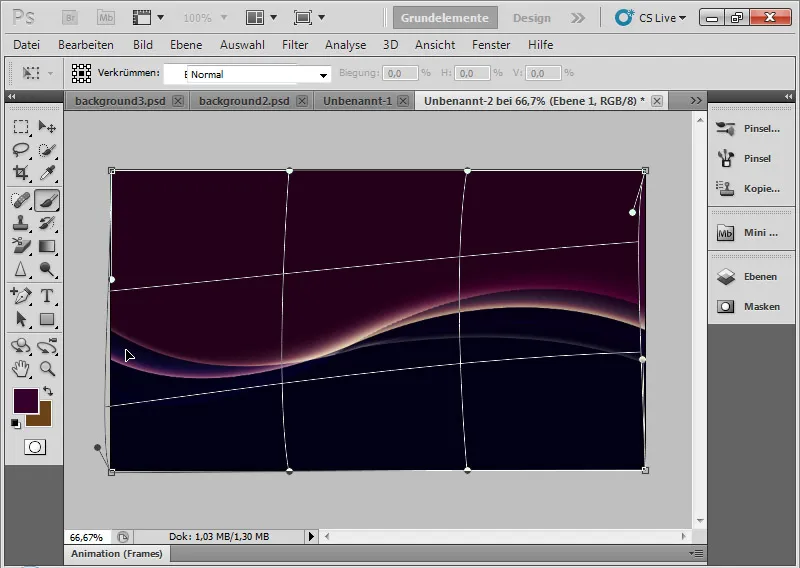
Step 10: Repeat
I repeat the step previously taken and once again copy all visible layers via Ctrl+Shift+Alt+E. I set the opacity to about 50 percent. Then, using Ctrl+T, I slightly warp the layer again to further expand the effect.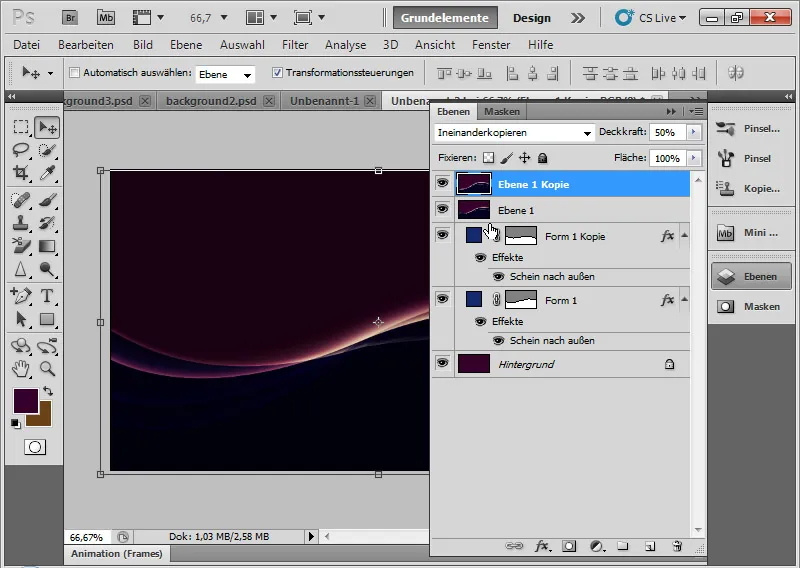
Step 11: Repeat and Blend Mode Color Dodge
I repeat the step again, but this time I set the new layer to the Color Dodge blend mode with an opacity of 100 percent. Using Ctrl+T, I slightly warp the light effect again, bringing us closer to the final look.
With Color Dodge, the contrast of the color channels decreases. The saturation increases!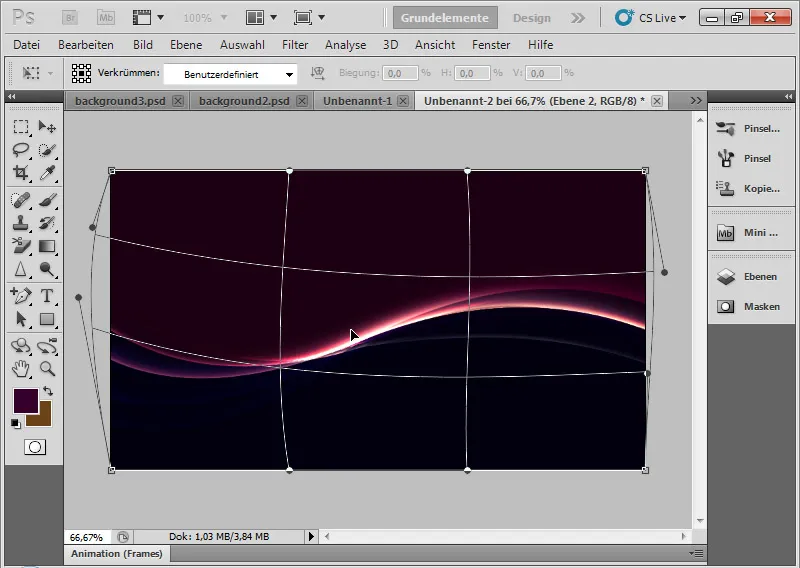
Step 12: Gradient Fill
I create a gradient fill layer with a pleasing gradient. I set the blend mode to Hue, allowing the gradient to blend nicely with the existing colors.
Tip: Simply browse through the Gradient Presets Menu. Many gradients complement the effect beautifully, enhancing the color mood.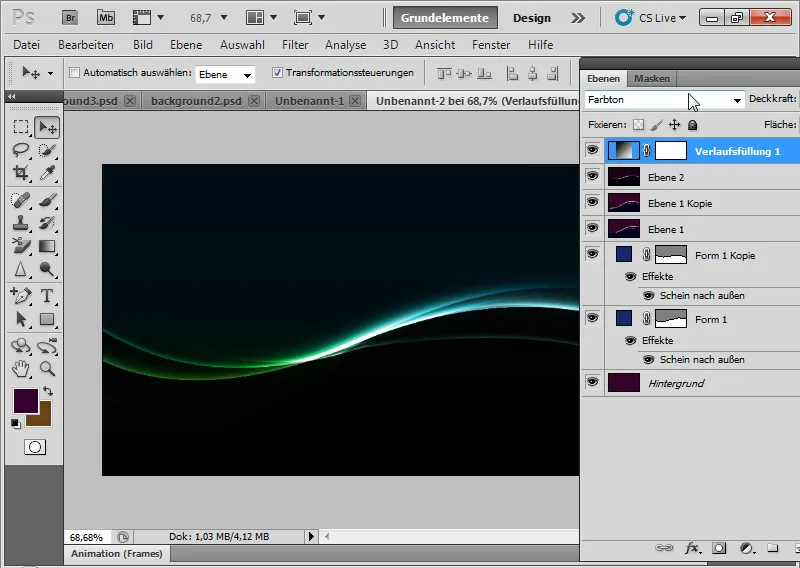
Step 13: Fine-tune Light Effect
In my first rectangle layer with a curve effect, I can add an outer glow along with an inner glow at an opacity of 50 percent and a size of 10 pixels. By blending with the other layers, this light effect emphasizes the overall impact of the background.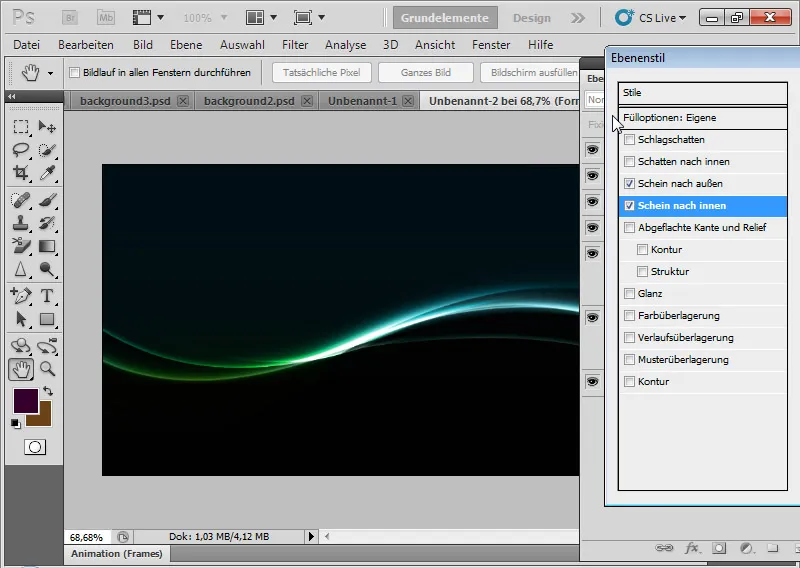
Step 14: Variations
With the gradient fill or a solid color layer, I can easily vary the light effect in color. Different colors can create different light moods effectively.
Using fill options and further warping of duplicated layers, the light effect can also be made to look like rays. Just experiment! With each attempt, very different yet pleasant background graphics can be created, suitable for flyers, websites, and wallpapers.
In the last image, a duplicate of all visible layers was created again and set to Negatively multiply to enhance the light effect even more in the picture.