Texts in multi-page documents are generally structured using paragraph styles. These styles need to be created initially or imported from other InDesign documents. To do this, open the Paragraph Styles panel (shortcut F11). In a new document, this panel initially contains only the default style Basic Paragraph. To import paragraph styles from other InDesign documents, click on the top right corner on the button for the context menu of the style palette and select the option Load Paragraph Styles.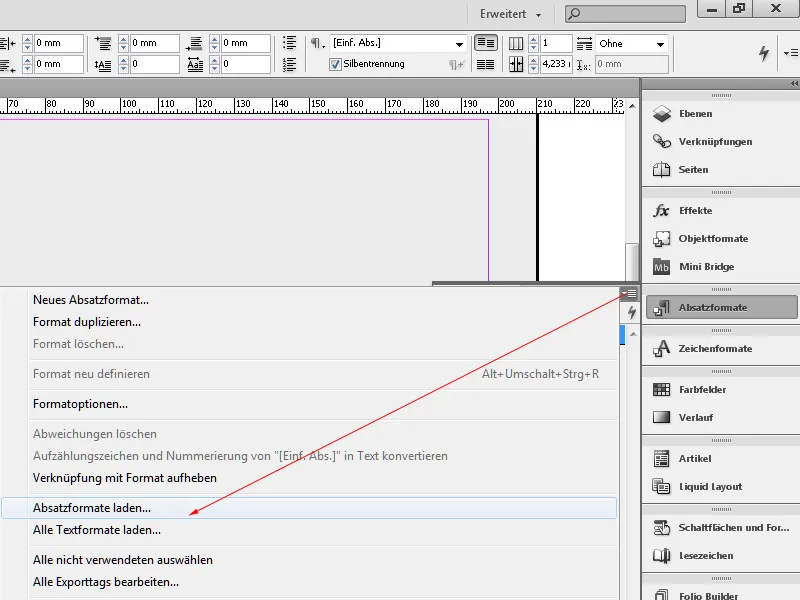
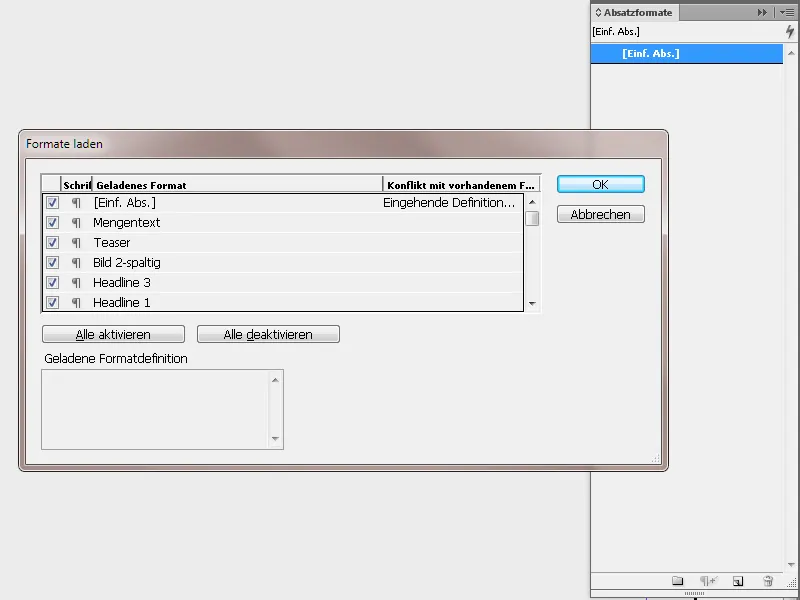
In the ensuing dialog box, select the source file. Another dialog box will appear, giving you the option to select specific paragraph styles from the source document instead of importing all. After clicking OK, the Paragraph Styles panel will contain these templates.
To create new paragraph styles, click on the New Style button at the bottom of the panel.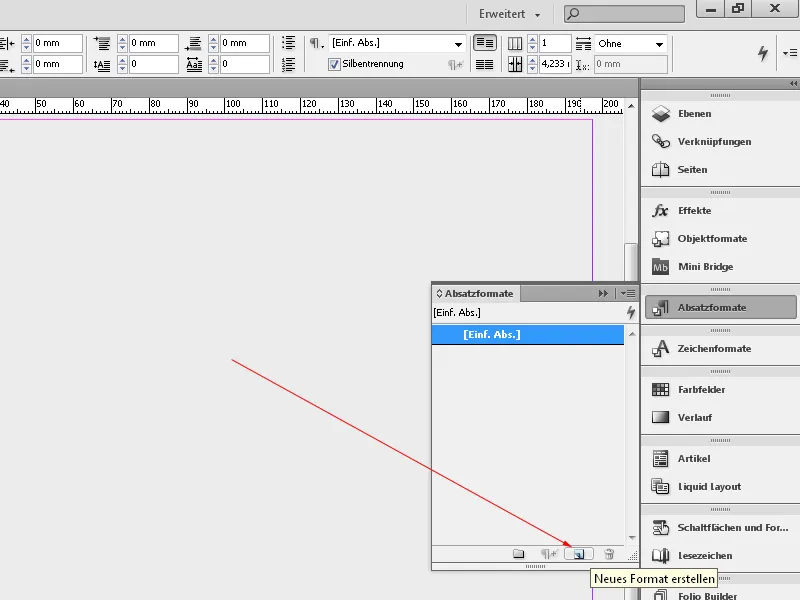
A new style named "Paragraph Style 1" will be created. To edit it specifically, double-click on the entry in the Paragraph Styles panel. This will open the paragraph style options for this new style.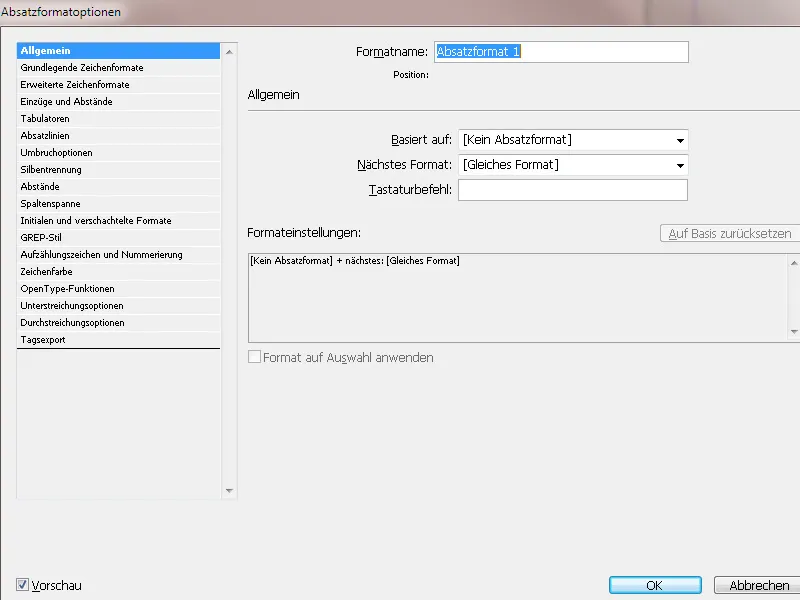
On the left, there are various categories while on the right, there are specific settings for the currently selected style. You can immediately overwrite the highlighted style name on the General tab with your own. The Based on option allows you to choose an existing style as a basis for a modified new style, ensuring that many settings are carried over. However, keep in mind that any changes to the base style will affect the styles built upon it.
In longer systematically structured texts (e.g. a title, a subtitle, and body text in a consistent sequence), it is beneficial to inform the current style in the Next Styles line which style to apply in the following paragraph.
If you let the Title style know that the following paragraph should use the Subtitle style, and in turn, the Subtitle style should be followed by the Body Text style, you can save time by selecting the complete text, right-clicking the first desired style in the Paragraph Styles panel, selecting Apply Named Style from the context menu, and then Apply Next Style. This will format all selected paragraphs in the specified order.
When structuring longer texts with paragraph styles, assigning a unique keyboard shortcut to each style is useful. This can be applied more quickly than using the mouse. The shortcut always consists of a combination of the Ctrl+Alt keys and a number on the number pad. Click on the Keyboard Shortcut line and press the desired combination.
On the Basic Character Formats tab, you can make relevant settings for the template such as font family, font style, font size, line spacing, tracking, etc. With Preview enabled, you can see the result directly in the active paragraph.
Under the Advanced Character Formats tab, it is important to select the relevant dictionary for spell checking under Language.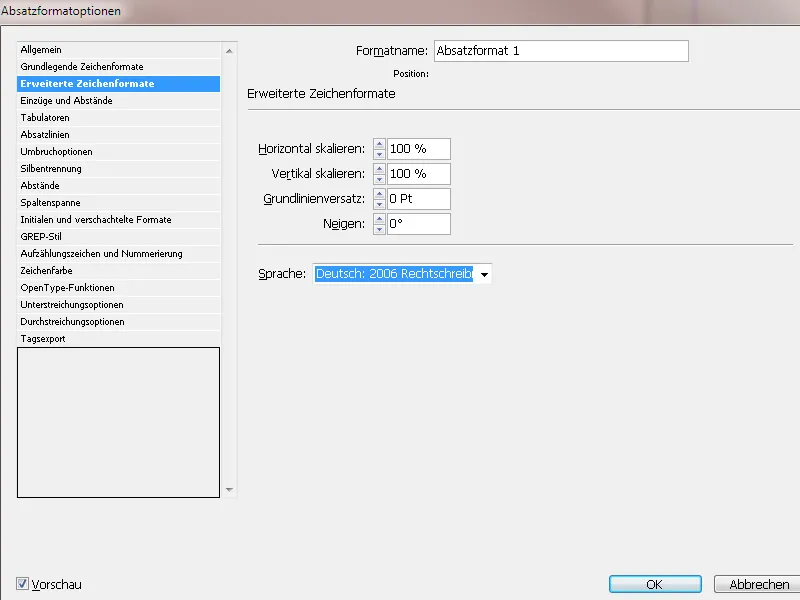
The Indents and Spacing tab offers important settings for alignment (left/right aligned, justified, etc.) and the space before and after paragraphs. Enabling Grep causes InDesign to calculate the wrap of left- or right-aligned paragraphs to achieve a more even line length distribution.
An essential option is Align to Grid, which aligns the text to the (previously defined in the Preferences > Grid) baseline grid. This ensures that the lines of adjacent (double) pages and the lines on the front and back of a page are always at the same height.
On the Tabulator tab, you can intuitively create left and right indents by dragging the sliders on the ruler. For example, in tables of contents, it is helpful to use a fill character like a dot to connect to a right-aligned tab stop with the page number.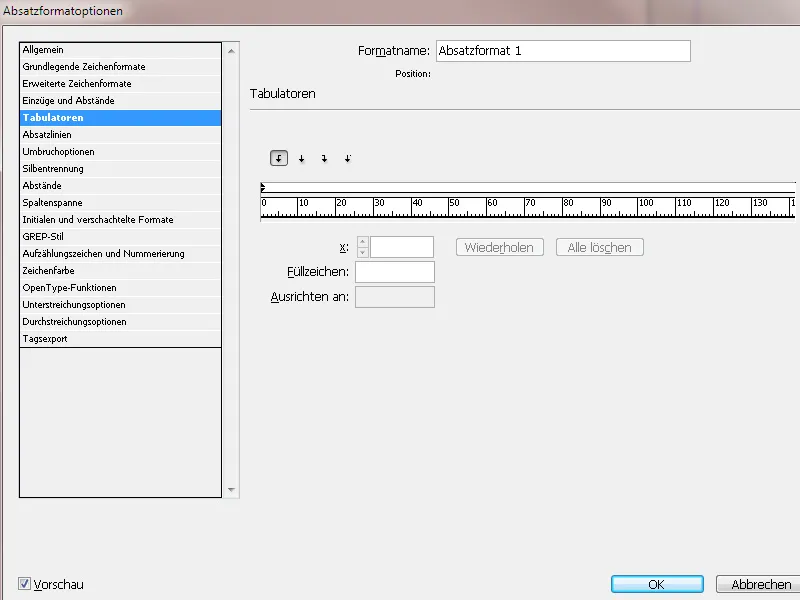
The Paragraph Rules tab allows you to create rule lines above and/or below the paragraph by checking the Rule Above box. Below that, you can adjust the weight, type, color, tint, width, and potential offset. Initially, the line aligns with the baseline of the line in the paragraph. To position it above or below the paragraph, a positive or negative offset must be entered.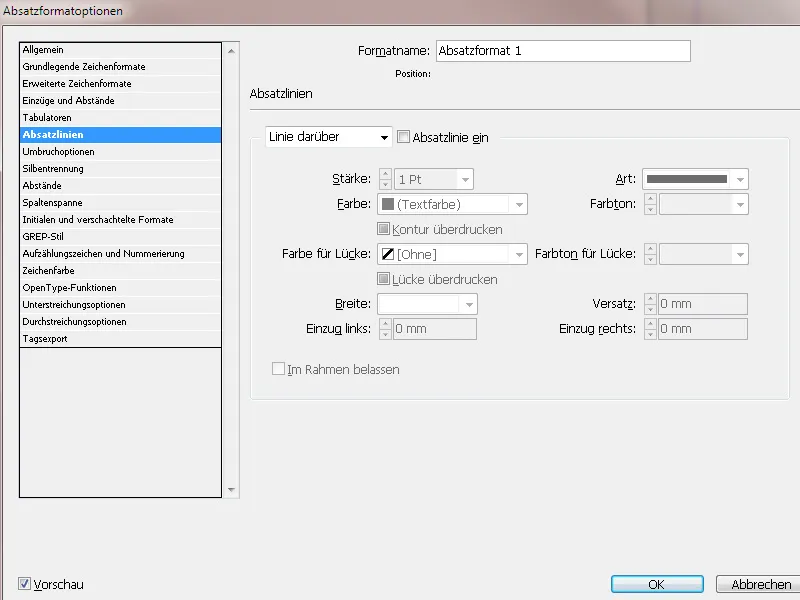
In the hyphenation options, you can specify how many lines of the following paragraph should remain with the current paragraph when it is moved between frames. This way, you ensure that headings are not separated from their corresponding text. In InDesign, paragraphs can be marked for occasional hyphenation mismatches.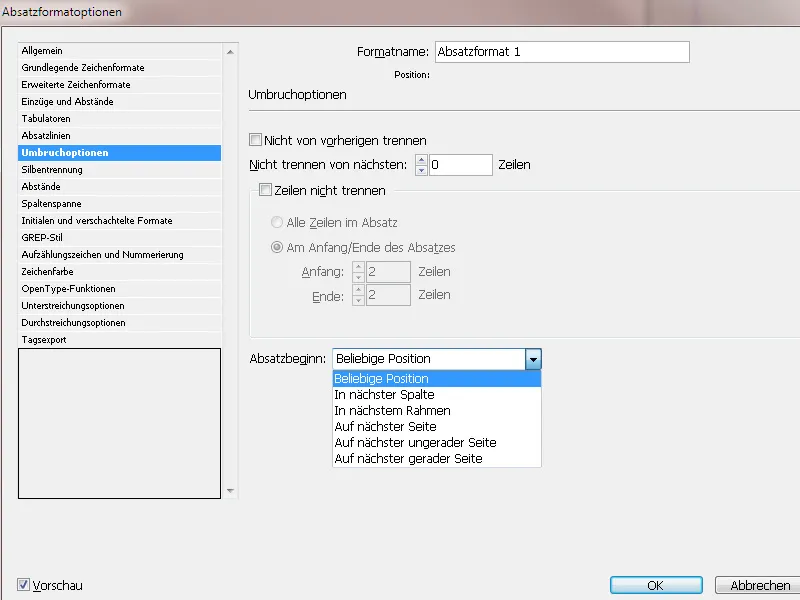
• Choose Do not separate from previous, to avoid separating the first line of the current paragraph from the last line of the previous paragraph.
• For Do not separate from the next _ lines, enter the number of lines (up to 5) from the following paragraphs to remain with the last line of the current paragraph. This option is especially useful to ensure that a heading is followed by several lines of the following paragraph.
• Enable the option Do not separate lines, and choose All lines in the paragraph, to prevent the paragraph from being hyphenated.
• Enable the option Do not separate lines, choose At the beginning/end of the paragraph, and specify the number of lines required at the beginning or end of the paragraph to avoid widows (page break after the first line of a new paragraph) or orphans (last line of a paragraph moves to a new page).
• Select an option under Paragraph Start, to move the paragraph to the next column, frame, or page. With Any Position, the starting position is determined by the settings under Do not separate lines. With the other options, the paragraph begins at the specified position.
Hyphenation: Here you can initially activate or deactivate the hyphenation for the respective paragraph format. After that, you can specify how InDesign should perform the hyphenation more precisely.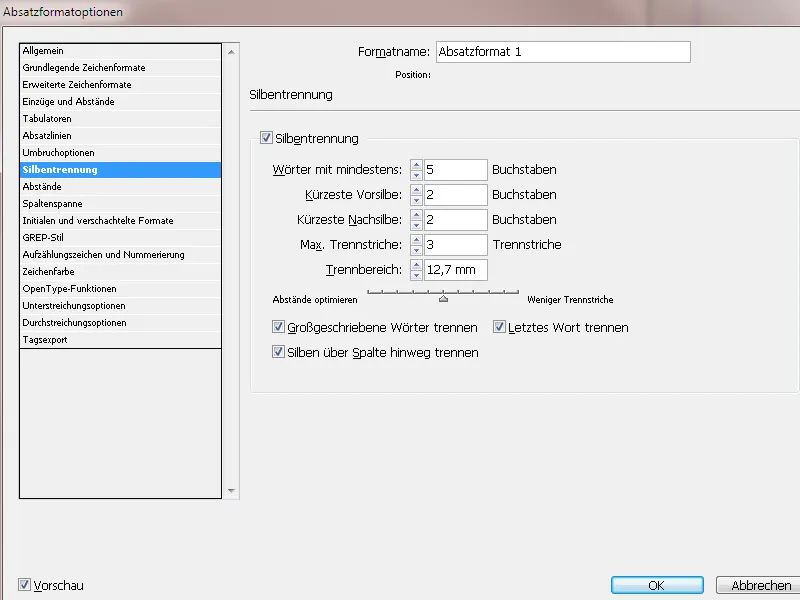
• Words with at least _ letters: indicates the minimum number of characters for words to be hyphenated.
• Shortest Prefix: _ letters, Shortest Suffix: _ letters: specifies the minimum number of characters at the beginning or end of a word that can be hyphenated. For example, if you enter the value of 3, the word "international" would appear as inter-national after hyphenation, but not as in-ternational or internationa-le.
• Max. Hyphens _ Hyphens: indicates the maximum number of hyphens that can be displayed in consecutive lines. A value of 0 allows for an unlimited number of hyphens.
• Hyphenation Zone: specifies how much space within text without justified alignment can be left at the end of a line before a word is hyphenated. This option only affects the use of the single-line composer for text without justified alignment.
• Optimize Spaces/Fewer Hyphens: To adjust the balance between these settings, you can adjust the slider at the bottom of the dialog box.
• Separate Uppercased Words: To prevent hyphenation of uppercase words, this option must be deactivated.
• Prevent Last Word Hyphenation: To avoid hyphenating the last word in a paragraph, this option must be deactivated.
• Hyphenate Across Column: To prevent words from being hyphenated across a column, frame, or page, this option must be deactivated.
On the Spacing tab, you can set how the spacing between characters and words Minimum, Optimal, and Maximum should be calculated: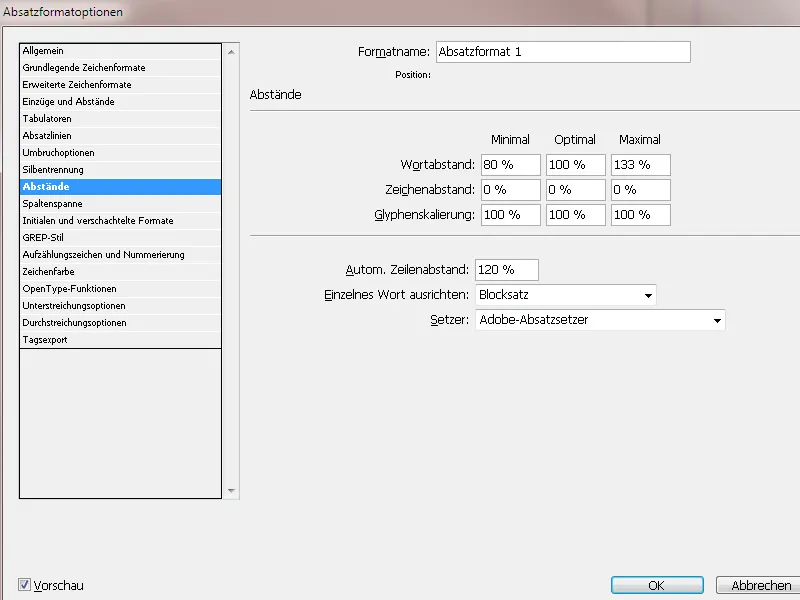
• Word Spacing: the spacing between words created by pressing the Spacebar. Word spacing can range from 0% to 1000%; at 100%, no additional space is added between words.
• Letter Spacing: the spacing between characters including kerning and tracking values. Values between -100% and 500% can be set. At 0%, the spacing between letters is not increased; at 100%, an entire character width is added between letters.
• Glyph Scaling: the width of a character. Glyph scaling values can range from 50% to 200%. By using glyph scaling, you can achieve even spacing. However, values that deviate more than 3% from the standard 100% may result in distorted letter forms. It's best to use fine values like 97–100–103 for glyph scaling.
• With the Single Word Justification option, you can specify how paragraphs consisting of a single word should be justified. In narrow columns, a line may sometimes be occupied by a single word. If the paragraph is justified, a single word in a line can be horizontally stretched. Instead of applying full justification to such words, you can center or align them to the right or left.
• Composer is an algorithm for text spacing and line breaks. The default is the Adobe paragraph composer. The Adobe single-line composer uses the engine from PageMaker and is integrated for importing texts from such files to achieve similar text breaks as much as possible.
On the Span Columns tab, you can specify that the text of this paragraph style should flow across two or more columns on the page (useful for headings in multi-column layouts). To do this, select Span Columns in the Paragraph Layout and then choose the Number of columns or select all over which the text of this paragraph should run. With Space Before and After Column, you create space before and after the connected columns.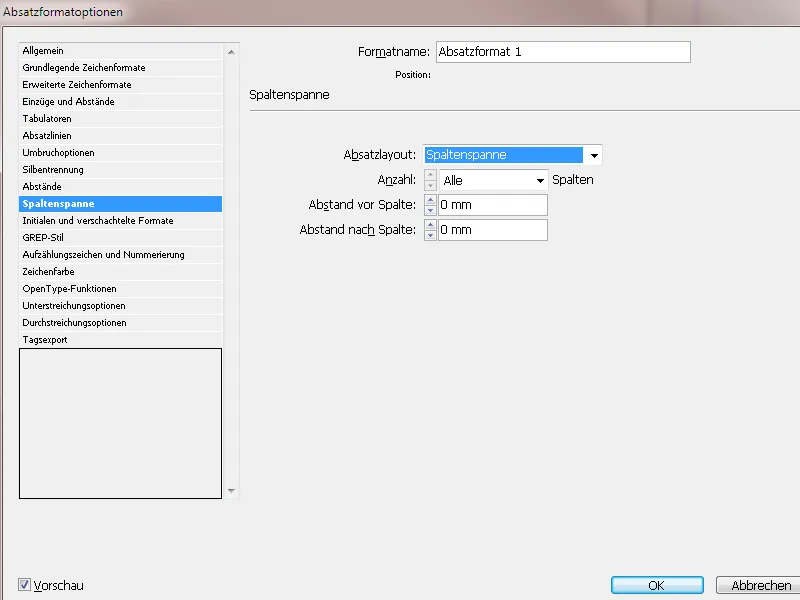
In contrast, with the option Divided Column in a single-column layout or within a column, you create additional subcolumns to accommodate lists or similar content in a space-saving manner within the text. Here, you can define the inner distance between the columns and the outer distance.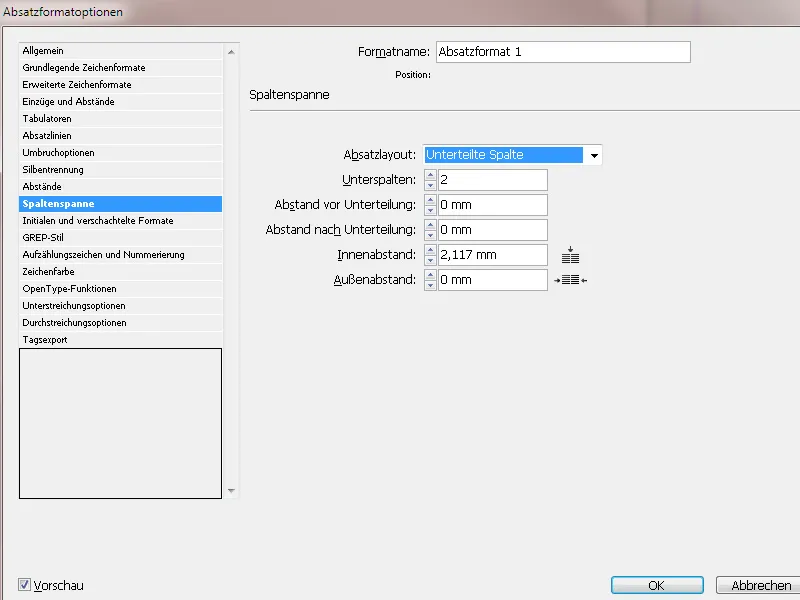
On the tab Initials and Nested Formats you can highlight the first letter or letters of a paragraph as an initial.
In the Lines field, you define over how many lines the initial should extend. In Characters, you can set the number of letters to be formatted as an initial. In Character format, you can choose an existing one or create a new one to use a special color or a different font style for highlighting.
If the initial is too far from the left edge, select Align Left Edge. This will use the original left alignment of the initial character instead of the higher value. This is particularly useful for initials in Sans-Serif fonts. If the initial overlaps the text below, choose Scale for Descenders.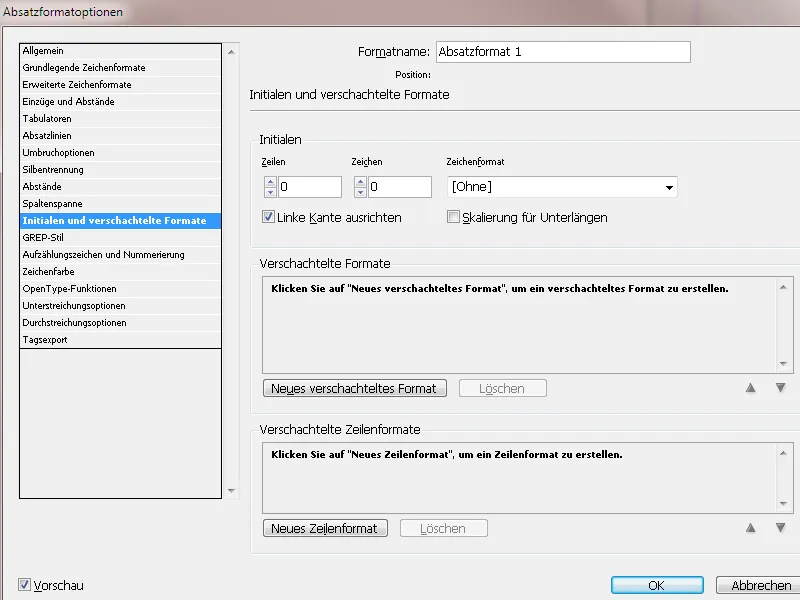
With nested formats, you can define formatting on a character level for one or more text ranges within a paragraph. If you want to highlight quotes in the text, click on New Nested Format. The logic is that a point is defined first, from which a different character format is applied within a paragraph.
For simplicity, I start in the right column, click on Words, and then enter an opening quotation mark. I leave the number 1 to the left of it; it means that a character (which I have just entered) initiates recognition. To the left of that remains the option Until and to the left of that, Without. This means that everything to the left (or above) of the set character will receive the character format Without – meaning no different character formatting.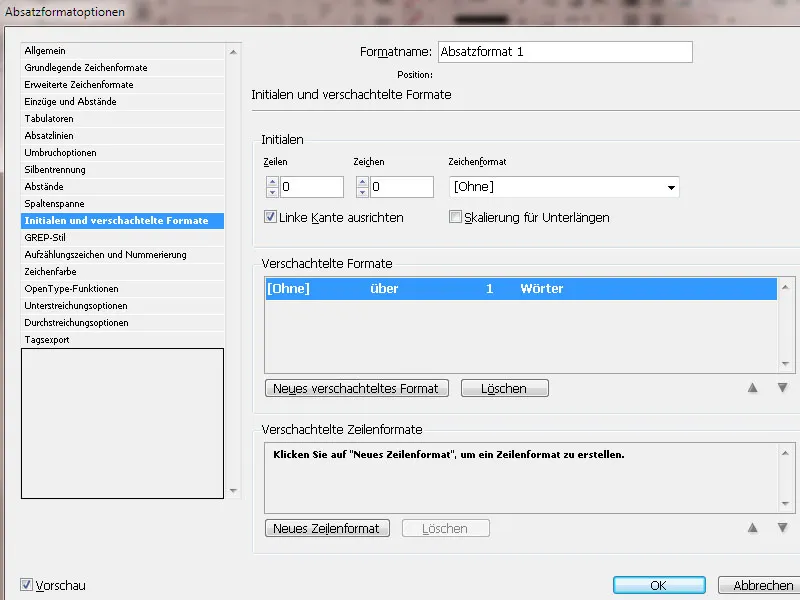
Next, the point must be defined at which a different character format should be applied - the endpoint. To do this, I click again on New Nested Format, then on Without, and now choose an existing character format or create a new one. In order to include the character marking the endpoint in the formatting, I select the option over to the right of it.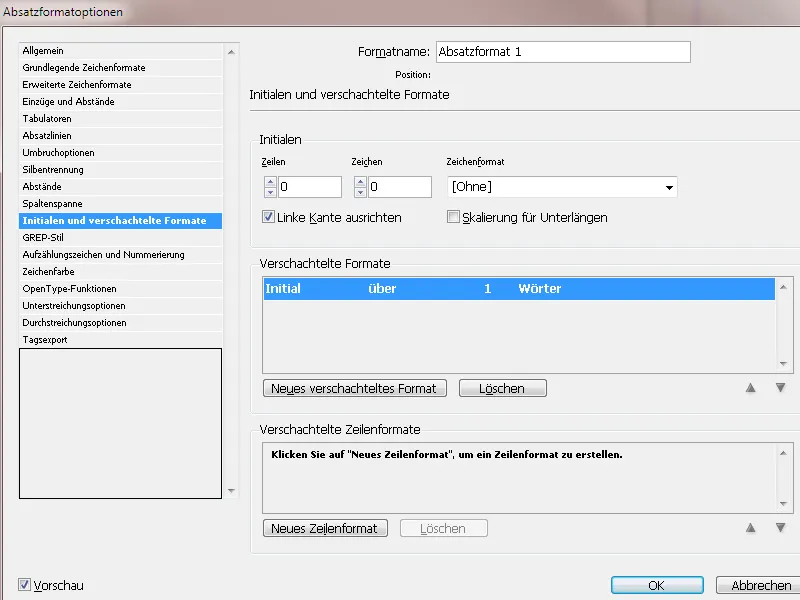
On the far right, I click on Words and enter the closing quotation mark there..webp?tutkfid=84525)
Now, within the paragraphs marked with this paragraph format, all characters within quotation marks will be displayed with the chosen character format.
GREP (global regular expression print) is a program for searching and filtering defined character strings. It expands the possibilities of nested formats. Since the application offers extremely complex possibilities, I will limit myself here to a simple example:
To assign a special format to all numbers in the paragraph, regardless of their length or number of digits, click on New GREP Style. First, select an existing character format or create a new one under Apply format.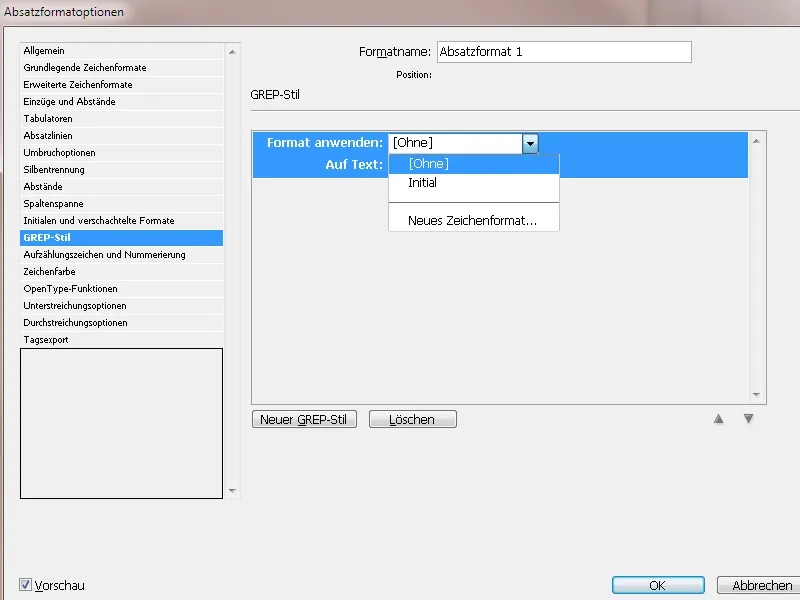
Then, click to the right of the field On text on the @ symbol. In the now appearing context menu, select Placeholders>Any digit. Now, all digits in the paragraph will be displayed with the chosen character format.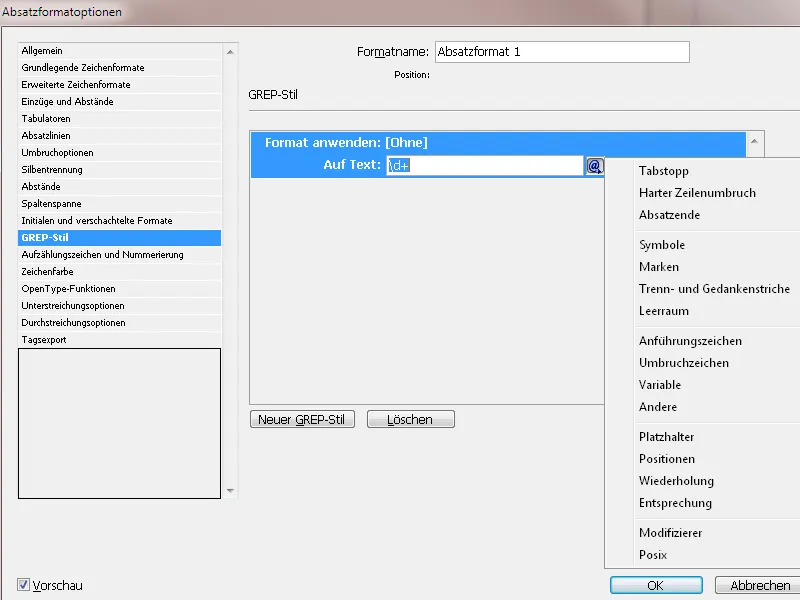
As visible in the context menu, InDesign already offers a variety of predefined typographic elements to choose from.
These are represented in a very specific syntax. By combining these regular expressions, almost all queries can be done with a few special characters, otherwise describing them might require entire paragraphs and could still be ambiguous.
Below is a small selection of regular terms:
\d digit
\w any letter, alphanumeric characters
\W non-alphanumeric characters
\D any character that is not a digit
[ ] for character classes
^ line start
$ line end
\b word boundary
\B non-word boundary
\s whitespace character
\S non-whitespace character
\A start of string
\Z end of string
- The character before must occur at least 1 time in the character string
- The character before can occur any number of times or not at all
? The character before can occur at most once, but it's not mandatory
x character repetitions, min.
y character repetitions, max.
?= lookahead (looking ahead)
?! negative lookahead
?<= lookbehind (looking back)
?<! negative lookbehind
\ Escaping
^ Negating the character class if it is the first character - Marking a range
] Ending the character class
As already mentioned, formulating individual queries requires a more in-depth study of Regular Expressions. InDesign already offers most standard queries in the context menu of GREP Styles.
Bullets and Numbering: For a differentiated representation of lists and bullet points, InDesign provides a separate tab in the Paragraph Style Options. First, in the List Type field, you must choose whether the list should be numbered or displayed with a symbol.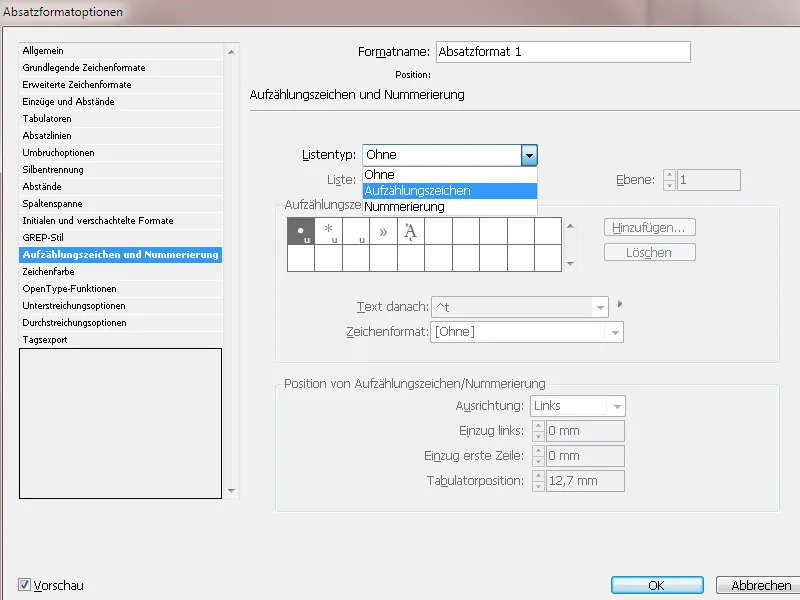
With the option Bullets, InDesign offers a few standard symbols. However, you don't have to settle for them. Click on the Add button and choose any glyph from a font family installed on your system.
In the Text after field, you can select a defined distance from the dropdown context menu like en space, em space, etc. by clicking on the small arrow on the right edge. Personally, I prefer the tab (^t), which I can adjust precisely in the Tab stop field. By setting an equal left and negative first line indent, a flush alignment of the bullets is achieved.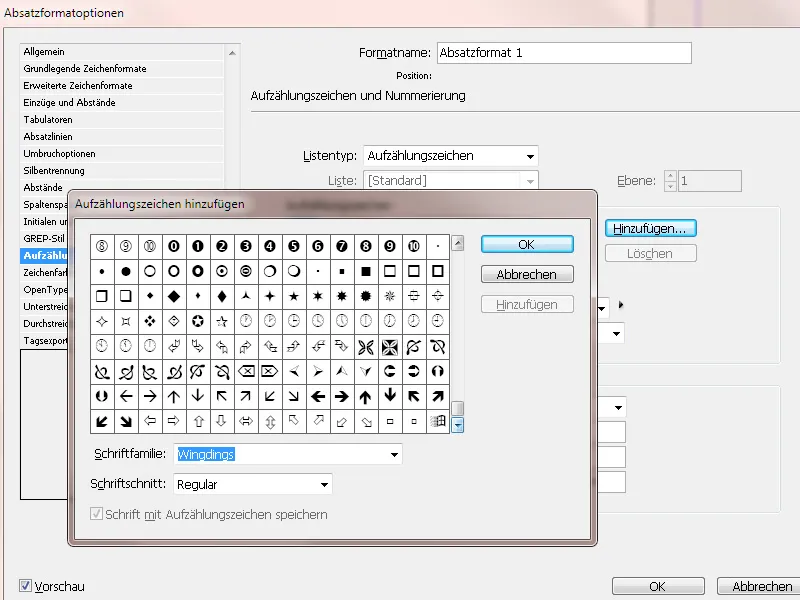
If you want to highlight the Bullets in color, select an existing one from the dropdown list of Character format, or create a new one with the desired color using New character format>Character color.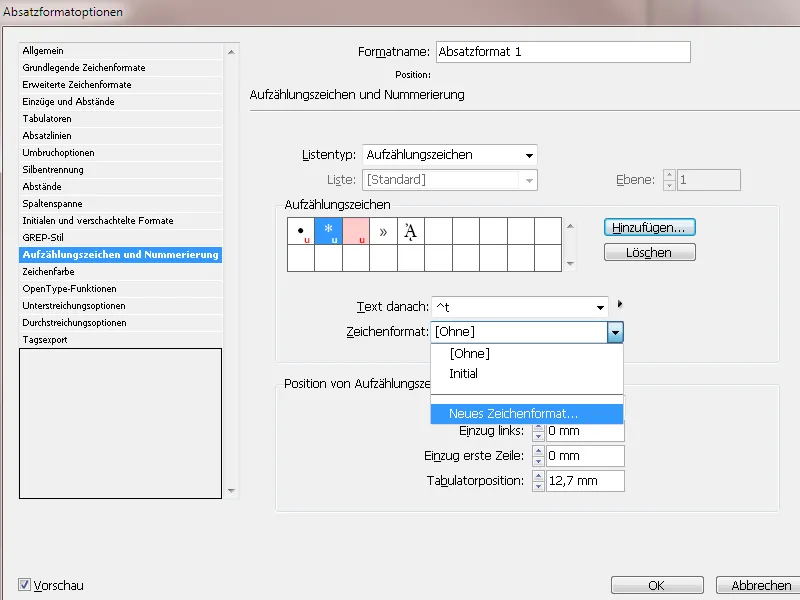
For the List type Numbering, you can choose the desired representation with Arabic or Roman numerals, or even letters from the dropdown menu of the Format field.
If you want to subdivide bullet points (e.g., 1. a) b) c) 2. a) b) etc.), create a copy of the Paragraph format and set the number 2 in the Level field. To start the numbering anew in each paragraph (so 1. a b c continues with 2. a b c), the checkbox Start the numbering at level after must be activated. The first level of the bulleted list then receives the paragraph format Bullet Level 1, and the second level receives the paragraph format Bullet Level 2.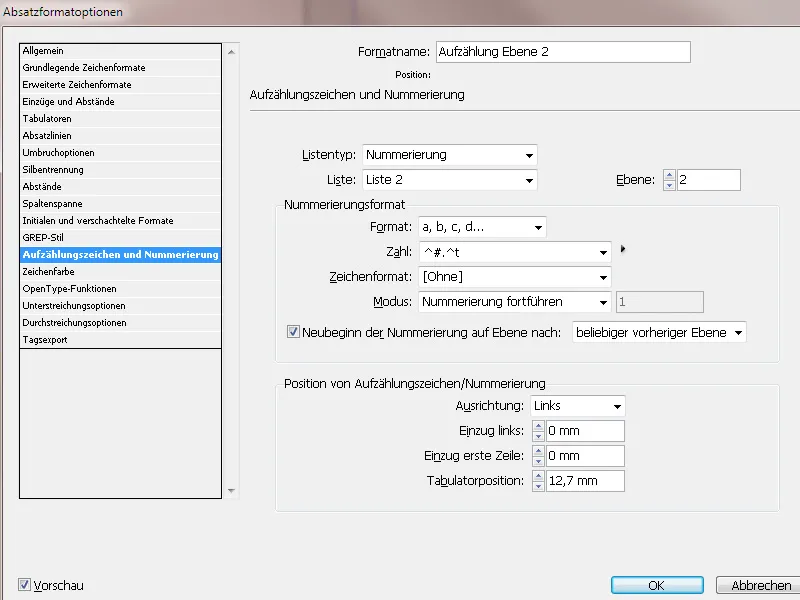
If you want to start a new numbering at the beginning of a second list in your text, place the cursor in the first paragraph, open the Paragraph Control panel (Menu Window>Types and Tables>Paragraph - or the shortcut Alt+Ctrl+T) and choose Start numbering anew from the context menu of the panel.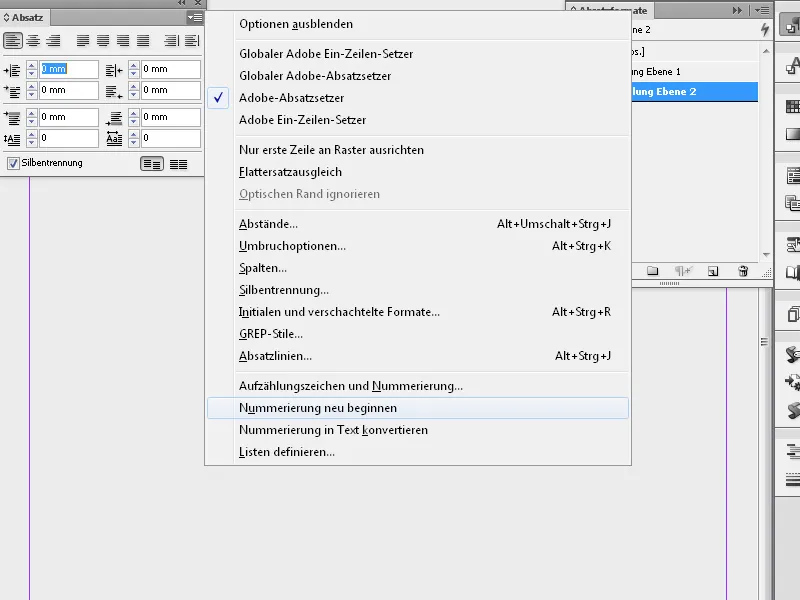
Alternatively, you can also create a copy of the Paragraph format of level 1 and choose Begin with in the Mode field; the number 1 is then entered in the adjacent field. Now, when using this Paragraph format, the bulleted lists will start again from 1.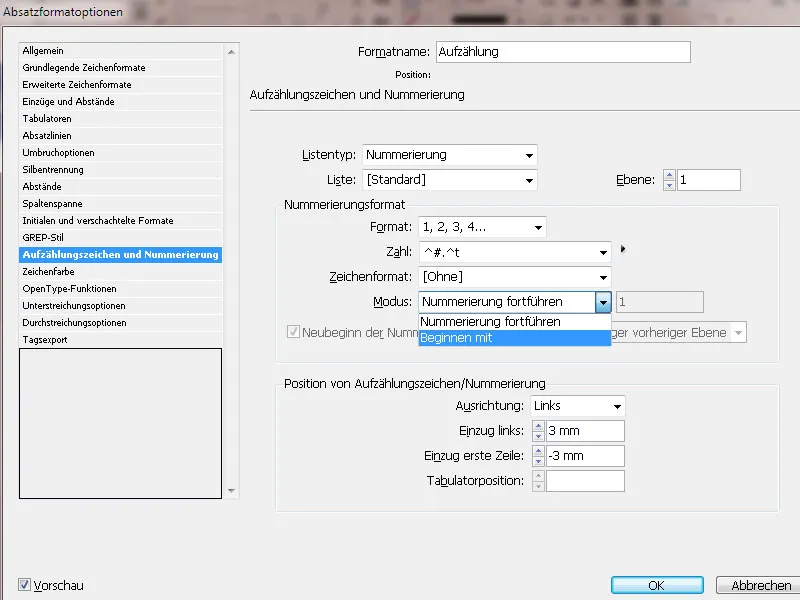
If a paragraph of the numbered list is removed or added, the numbering is automatically updated.
On the Character Color tab, you can select a color for the Paragraph format from the existing color fields. To create a new color, first open the Color Fields panel (F5). Subsequently, this color will be available in the Paragraph format options.
In addition to the Character color, by clicking on the symbol to the left of the color fields, you can also determine Outline (e.g., for Headlines) and Outline thickness.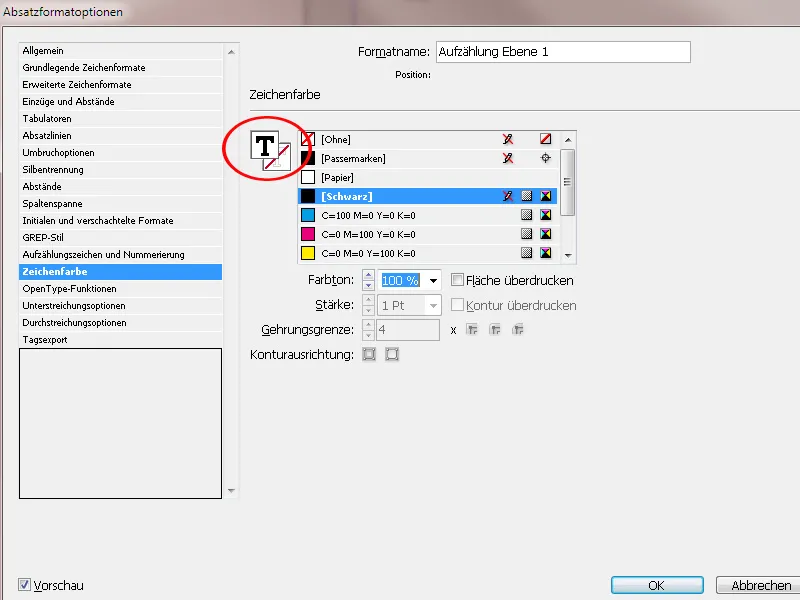
You can select OpenType features when using an OpenType font for a Paragraph format. However, this feature must be provided by the chosen font or font style, which is not the case for all. The Minion Pro font offers a wide range of options.
Here is an overview of the symbols before the fonts in the dropdown list: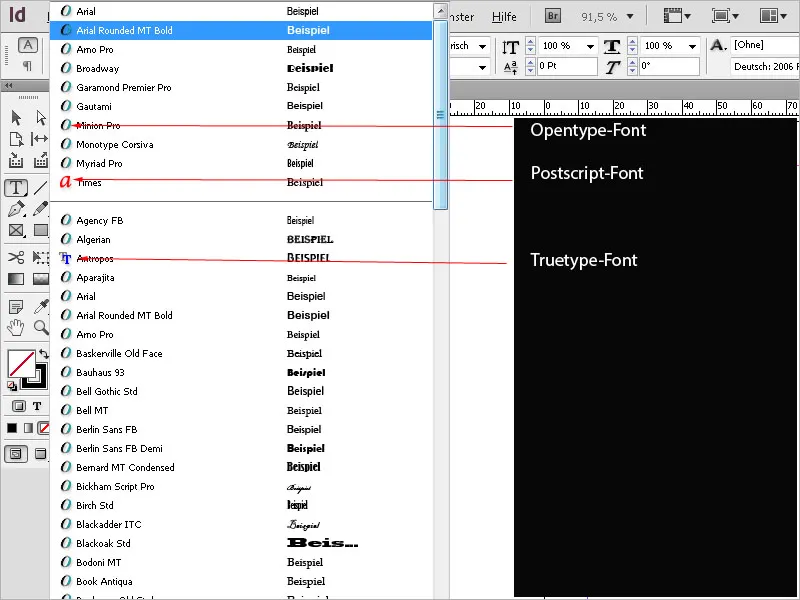
• Font variants for titles: Characters in uppercase will be activated if available.
• Contextual Alternatives: If the font contains contextual ligatures and connection alternatives, they will be activated. Some fonts have alternative characters to create more appealing letter combinations. For example, the letter pair Bl can be connected in Bloom to make the word look handwritten. This option is activated by default.
• Ordinal marks: In languages where ordinal numbers are written with a combination of numbers and letters, the associated letters are superscripted if the font supports this feature. This applies to English (for 1st, 1st is used and for 2nd, 2nd is used).
... and the translation continues for the rest of the German text.
• Underline/Strikeout Options: Here you can apply lines to all lines of the paragraph in any thickness and color. In the Type field, you can select the desired style and lighten the color by a value less than 100% in Shade.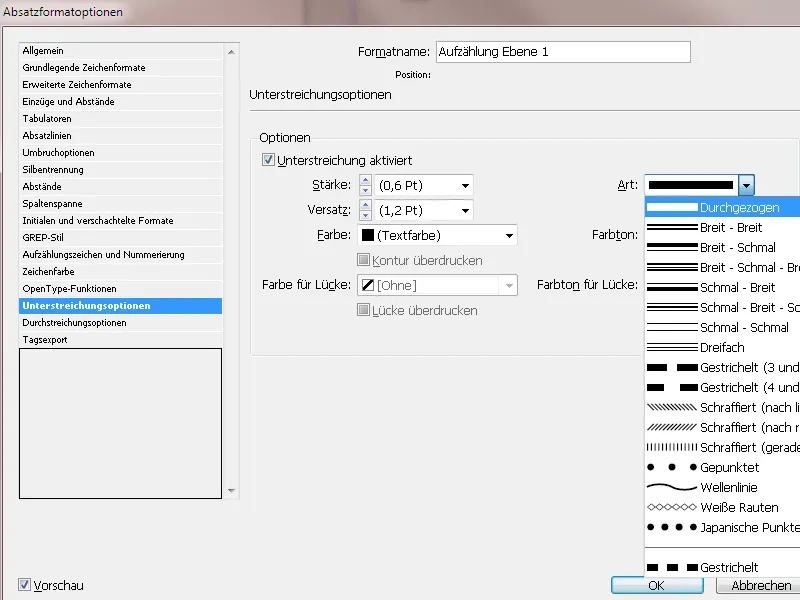
This way you can define your own style templates for text sections like headings, body text, etc., which can then be easily and quickly assigned with a click or shortcut.


