Nice to see you at the start again today. Here you can see the result: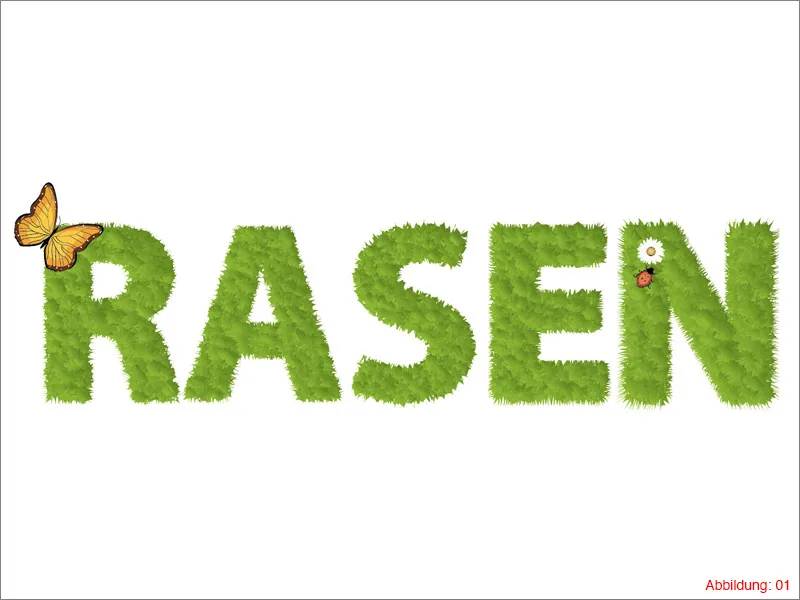
So, enough talk now. Let's get straight to it ...
Step 1: Create lettering
Once in Illustrator, the first thing you need to do is create a new artboard. To do this, go to File>New in the top menu bar. For the size, select a format of DIN A3 in landscape format and confirm with OK. (Figure 02).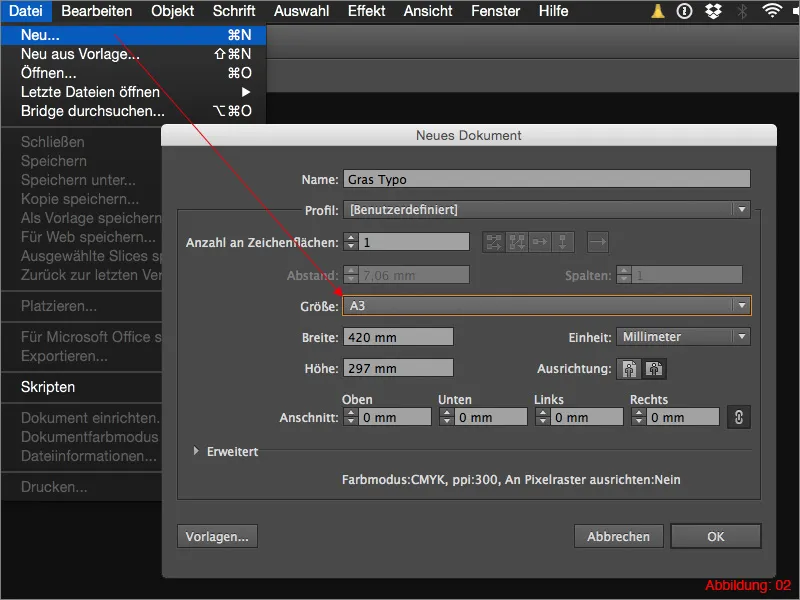
Next, grab the text tool from the tool palette and click on your artboard. You can now type in your lettering. In my case, I am writing the word RASEN in capital letters using the font Myriad Pro in Bold. I use 160pt for the font size (Figure 03).
Mini tip:
I recommend a relatively thick and stable font for this lawn effect so that the lawn can really come into its own later on. Thin and very fine fonts such as "Zapfino" are not at all suitable for this.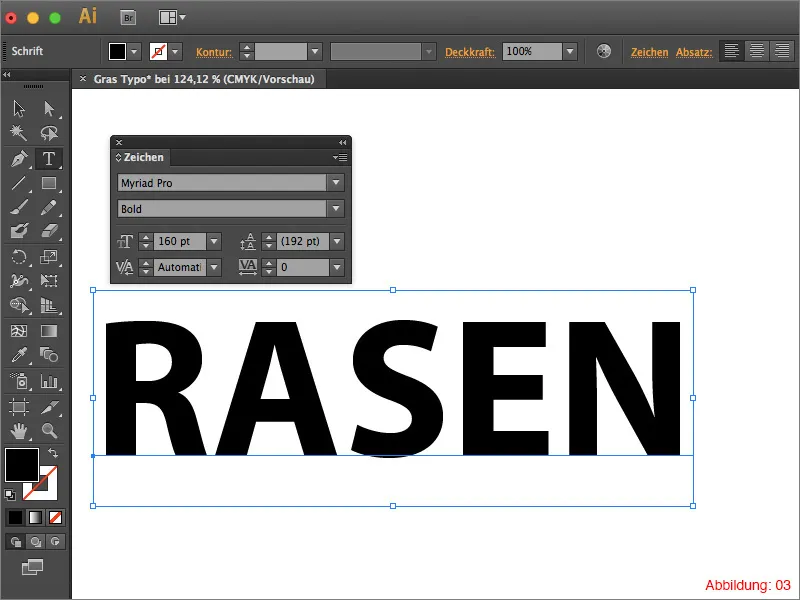
Once you have created your lettering, you need to convert your font into paths. To do this, go to Font>Convert to paths in the top menu bar or use the shortcut Command+Shift+O (Figure 04).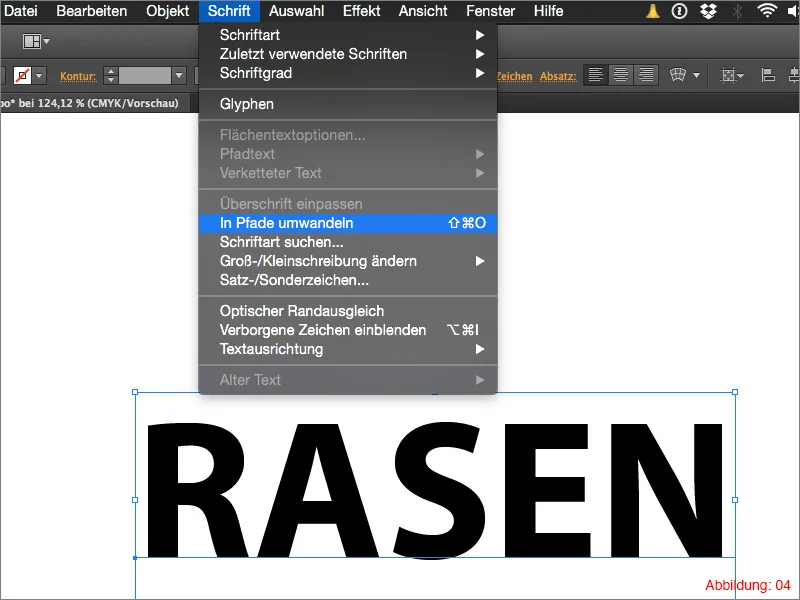
Step 2: Work with effects
Select your lettering and then go to Object>Ungroup. Alternatively, you can also use the shortcut Command+Shift+G (on PC: Ctrl+Shift+G).
As a result of ungrouping, you can now select each letter of your word individually (the individual letters will also be displayed in the layer palette ).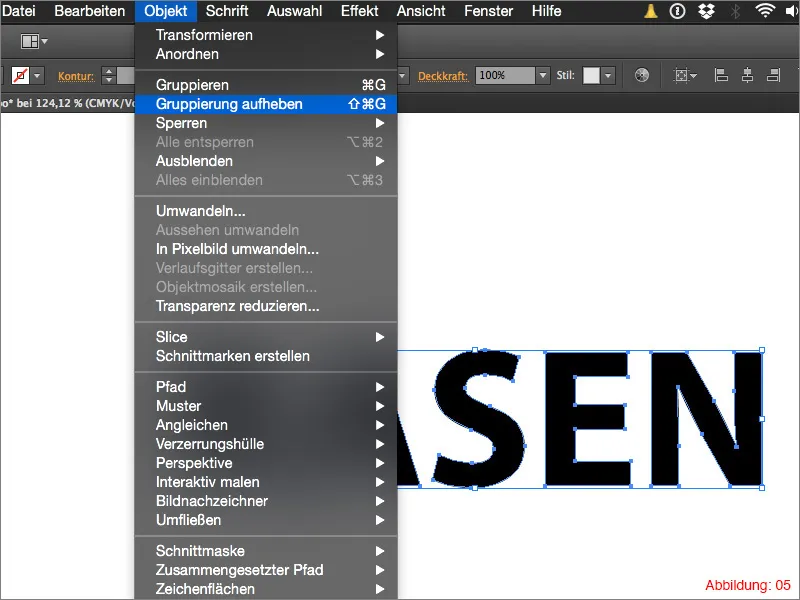
Use Command+A (on PC: Ctrl+A) to select everything and then go to Effect>Effects Gallery ... in the top menu bar (Figure 06).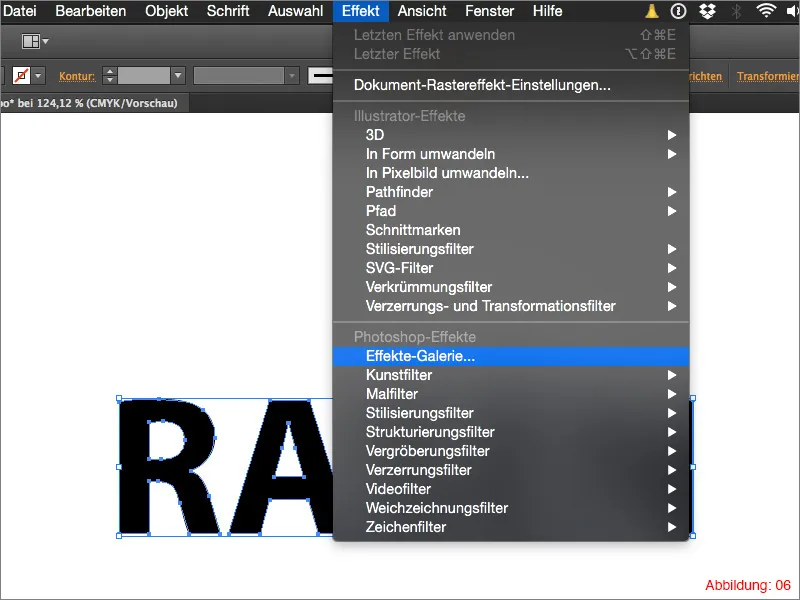
In the Drawing filter folder you will find the Embossed paper effect. Select this and confirm with OK. (You can simply leave the preset values for this filter as they are).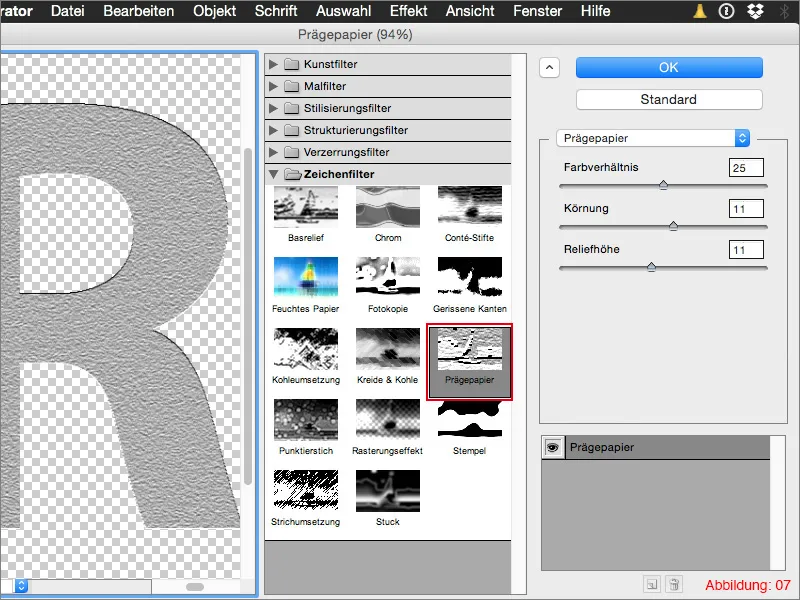
The whole thing should now look something like this (Figure 08).
Now select everything again with Command+A (on PC: Ctrl+A) and then click on Object>Convert Appearance in the top menu bar. Your lettering will then be temporarily converted into a pixel file (Figure 09).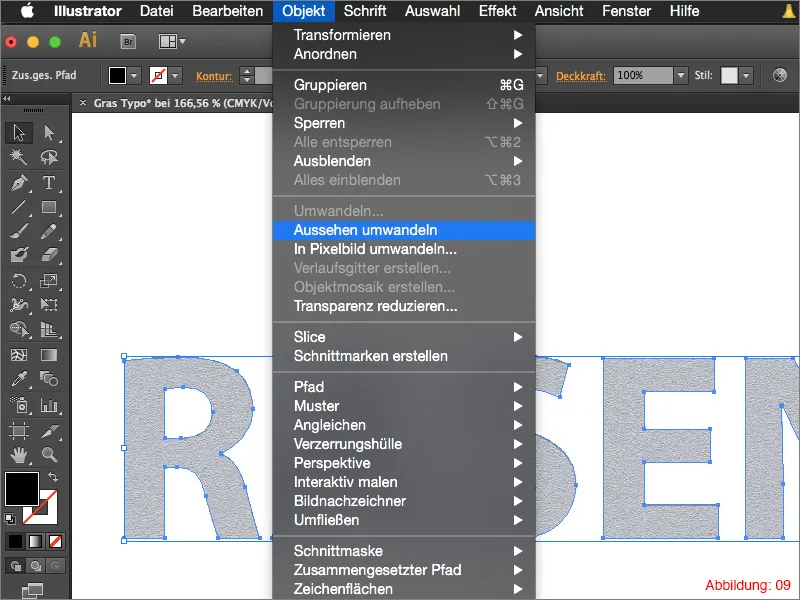
Next, select the first letter of your lettering and then click on the small arrow next to the image tracer. This will open a small pull-down menu in which you have to click on Grayscale.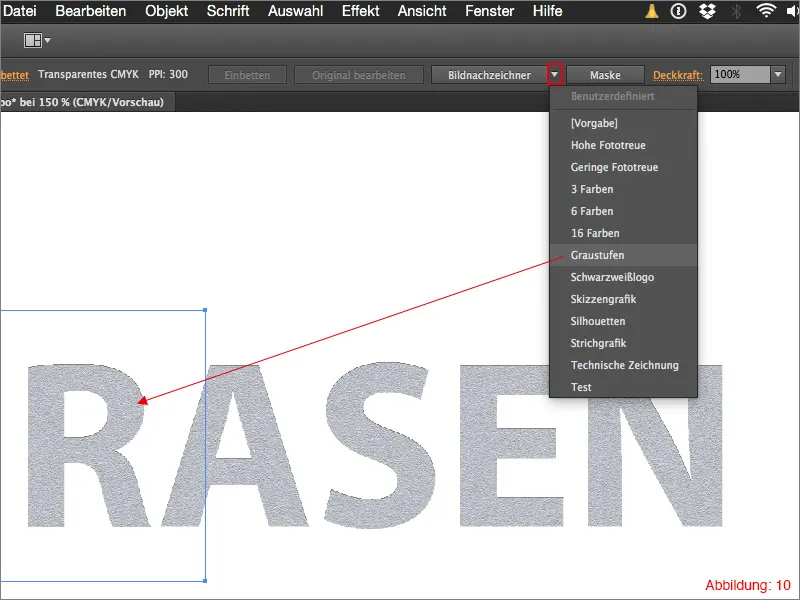
As this setting is not yet optimal, you have to click on the small icon (see Figure 11) to access the settings of the image tracing tool.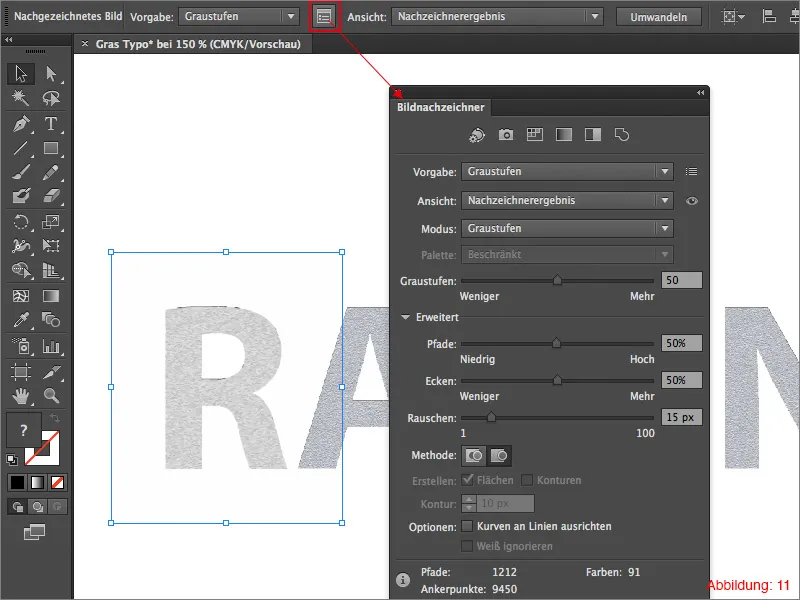
You can see the exact settings I have chosen in Figure 12. The most important thing with these settings is that you check the Ignore white box. If you do not do this, white or transparent areas will also be traced and filled with white color.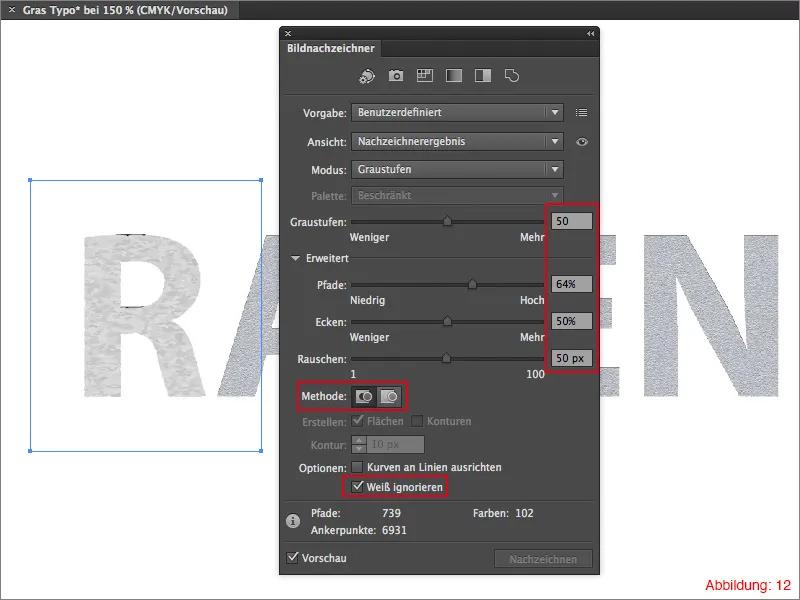
Once you have made all the settings, you can create a new preset for the image tracer using the small icon (see Figure 13). Give this preset a meaningful name, such as lawn or grass, so that you will still know in six months' time what you have created this preset for.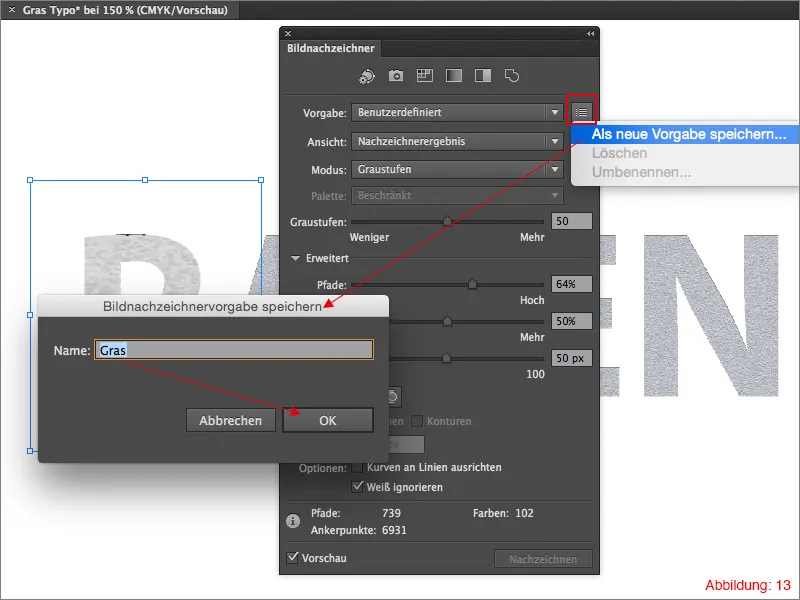
Once you have saved this preset, select the next letter and click on the small arrow next to the image tracing button again. This time, however, you no longer have to click on Grayscale, but can directly access your saved preset (Figure 14).
Now do the same with all the other letters in the lettering. (You must select each letter individually as the image tracing tool can only work with one object at a time).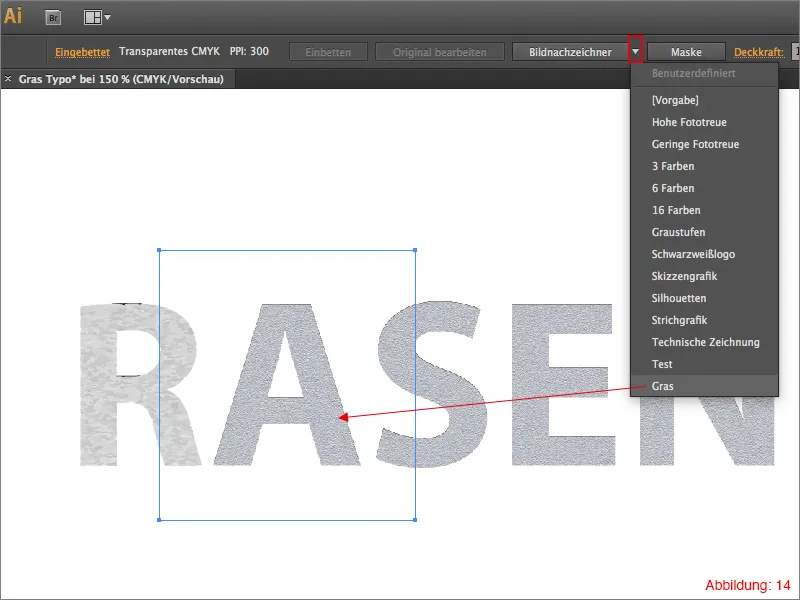
After you have applied the tracing tool to each letter, you must select everything again (Command+A or Ctrl+A). Then click in the menu bar on Object>Convert ... You can simply confirm the following dialog box with OK.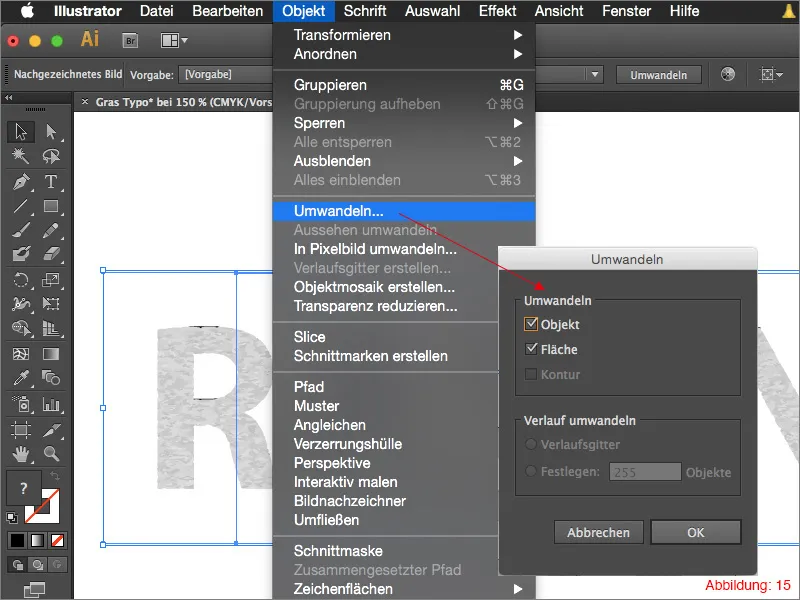
After the conversion, the whole thing should look something like this (Figure 16):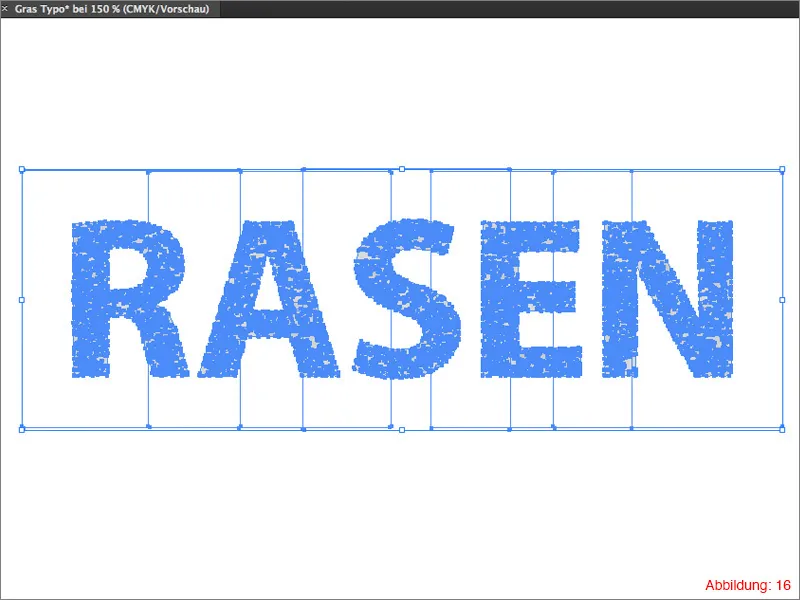
Now grab the direct selection tool (the white mouse pointer) and draw a selection rectangle over the still protruding rectangles that were created by the conversion (Figure 17).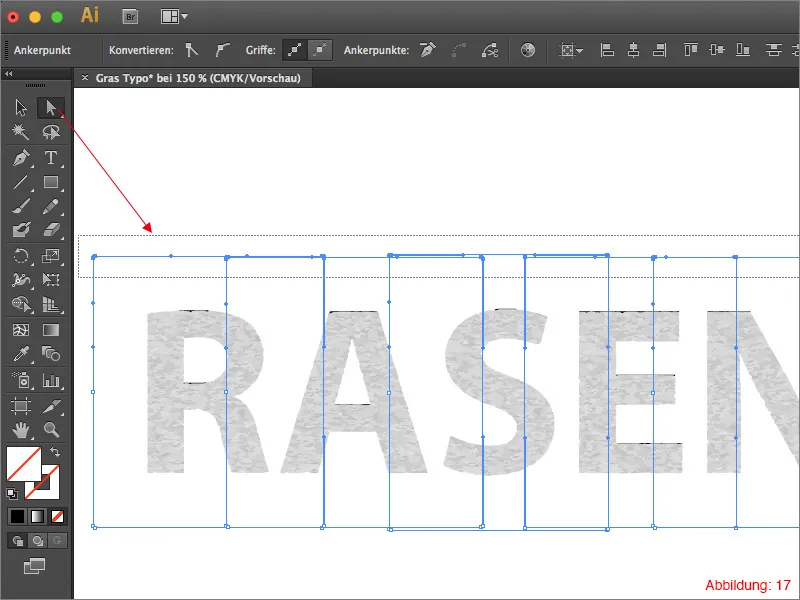
Delete them with the delete key on your keyboard (you will probably have to press it twice). Afterwards, only the lettering should be visible (Figure 18).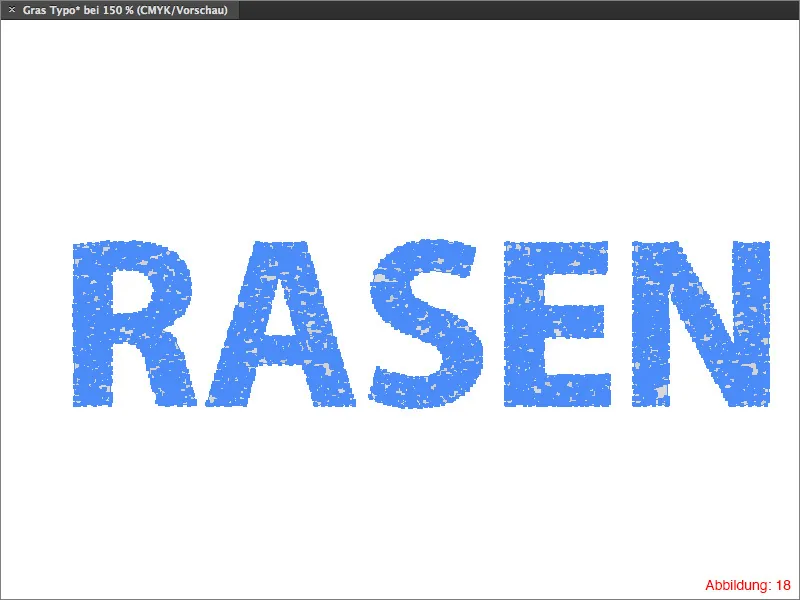
It is very likely that small black edges will remain, as shown in Figure 19, and will now need to be removed. To do this, grab the direct selection tool, simply click once on the black areas and remove them.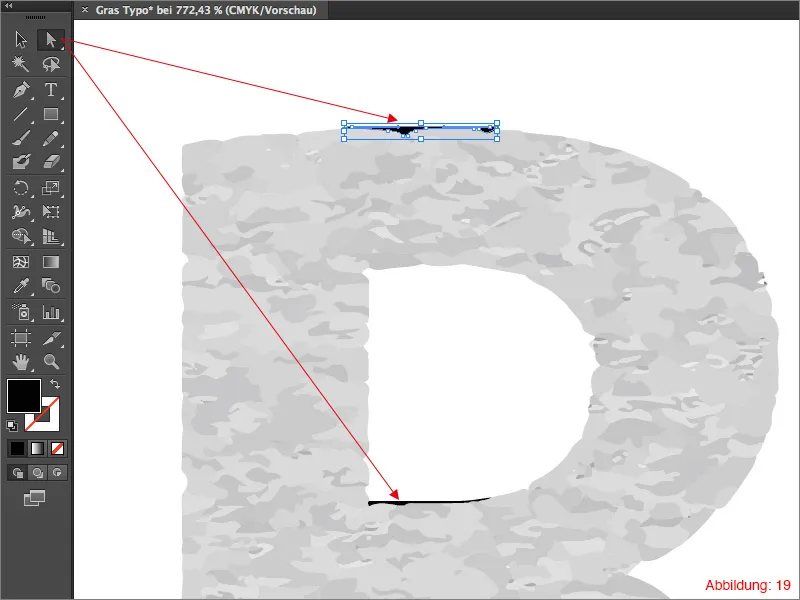
Once you have removed the black areas, it is now time to apply a color gradient to the lettering.
To do this, you will need the gradient palette. If this is not yet displayed, you can find it via Window>Gradient or via the shortcut Command+F9.
Now click on the preset default gradient in the gradient palette.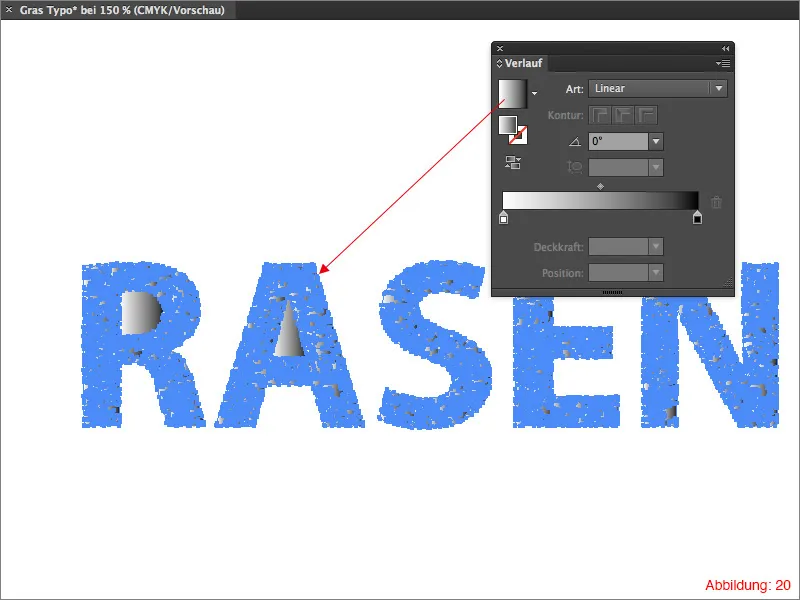
As this gradient is set to black and white by default, you still need to adjust these two colors. To do this, double-click on a color field in the gradient palette. You can then set a color for each. Use a darker and a lighter green for our lawn font.
I have chosen the following CMYK values:
- dark green - CMYK - 50/0/100/47
- light green - CMYK - 50/0/100/0
You then have to rotate this gradient by 45°.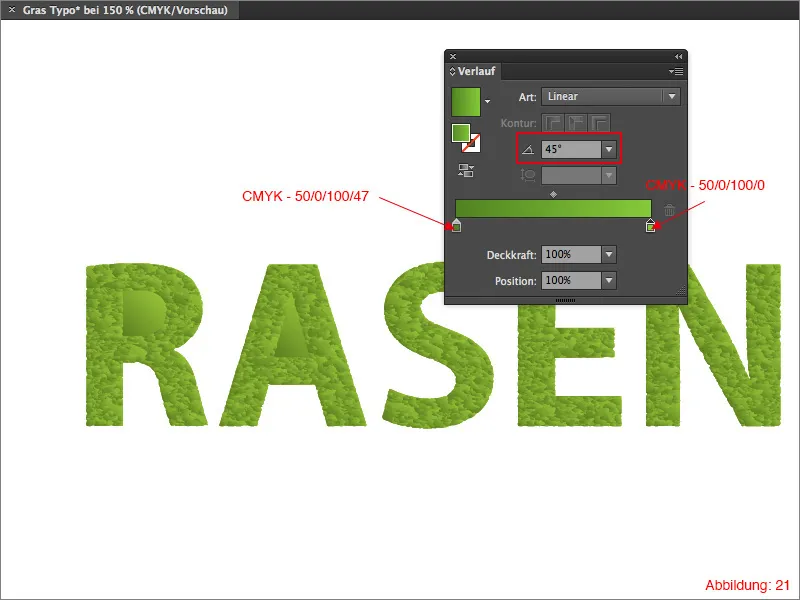
In most cases, letters with a cavity are displayed incorrectly (Figure 22).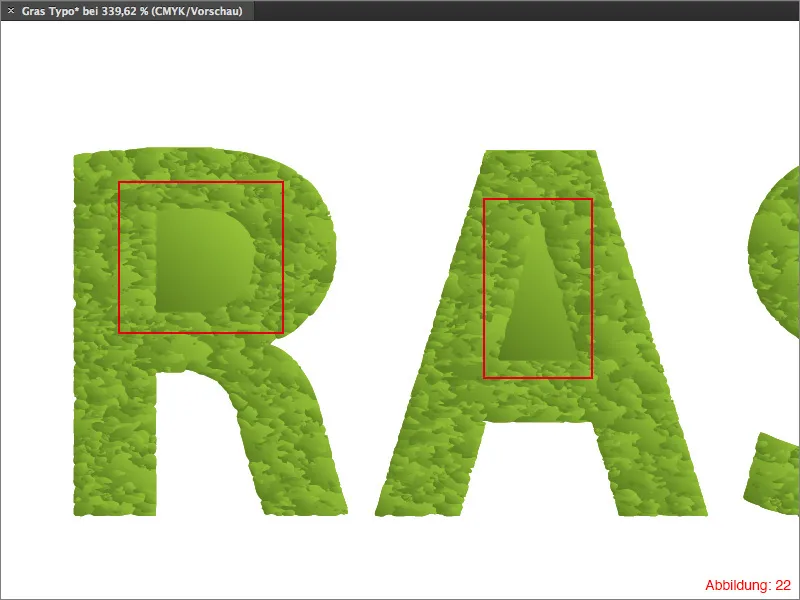
To fix this problem, you need to grab the direct selection tool and select and delete the cavities with a single mouse click.
Your lettering should then look normal again (Figure 23).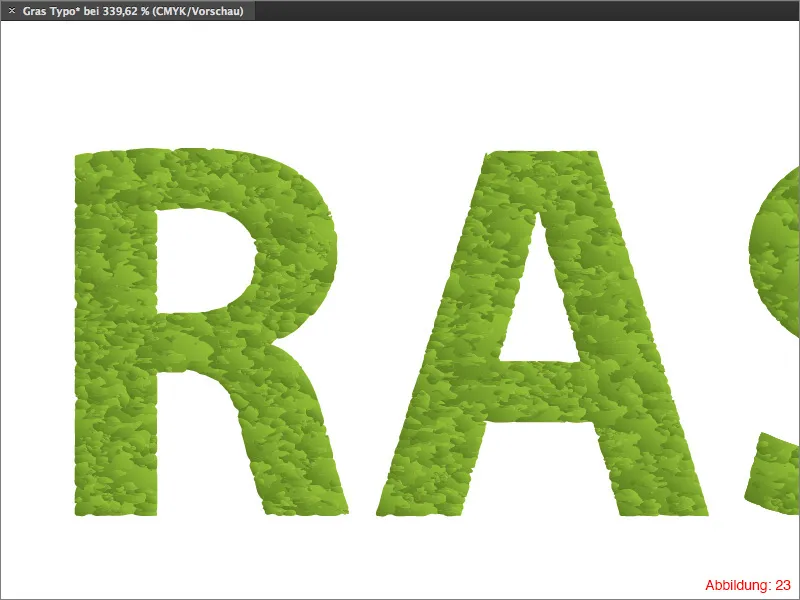
Now we have almost reached our goal.
Select your lettering and then go to Effect>Distortion and transformation filter>Zigzag ... in the menu bar.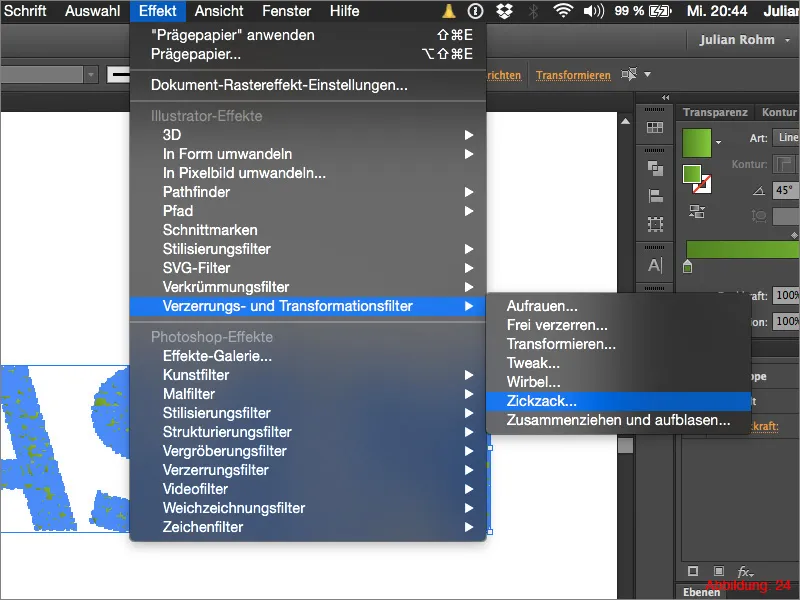
You can now make various settings in the following window. For the size, I recommend a value of 1.76mm. Select 3 for Waves per segment and click on Transition for the Point setting. Then confirm the whole thing with OK.
Mini tip:
You can also use the Zigzag filter if you want to create a wavy line or a zigzag line in Illustrator. You should then simply experiment a little with the settings.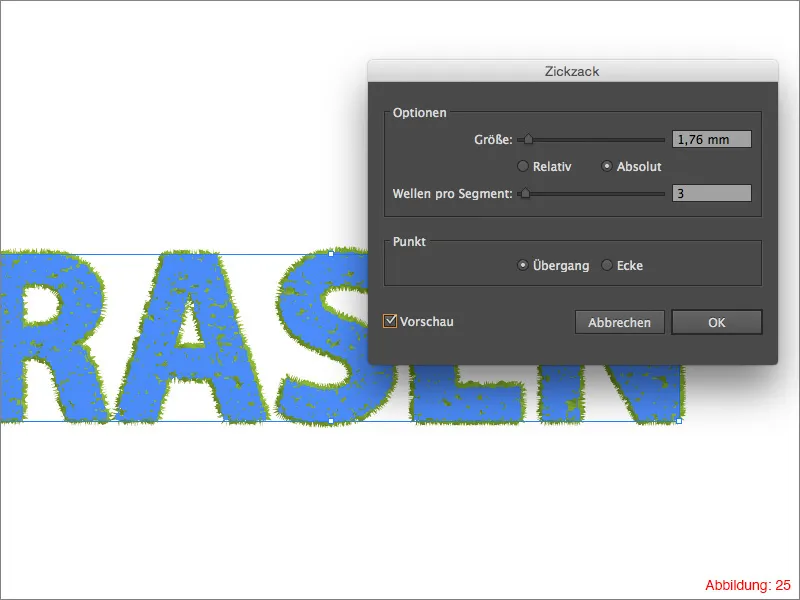
Then go to Effect>Distortion and transformation filter again and select Constrict and Inflate instead of Zigzag.
Select a value of -4% and confirm the dialog box with OK.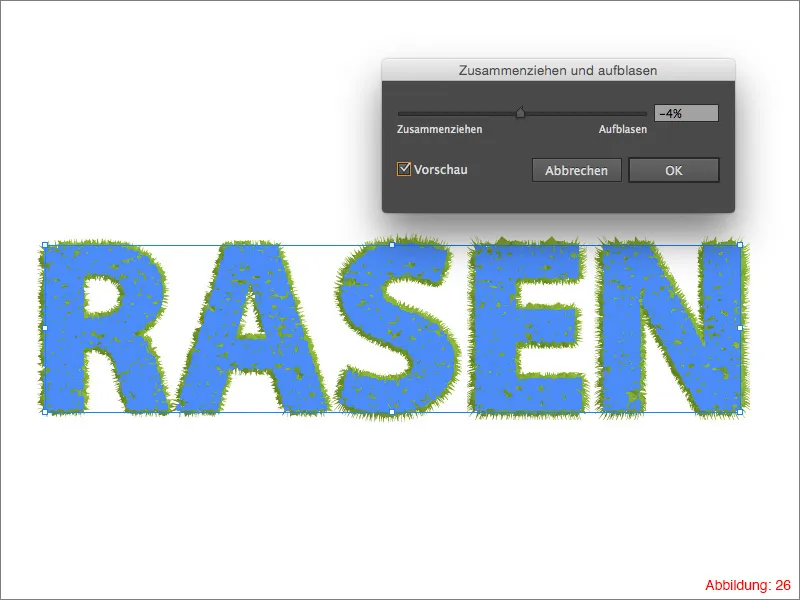
Your grass typography is ready.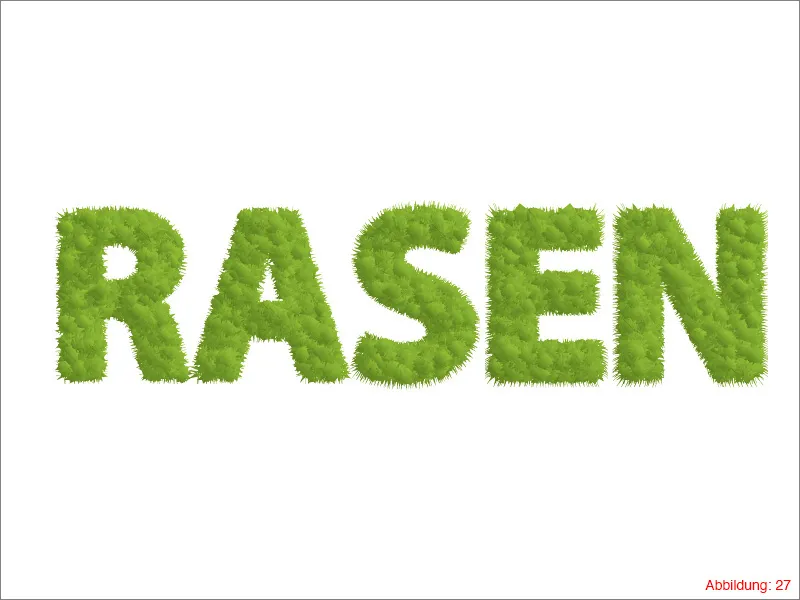
You certainly can't compare this effect with photorealistic grass, in which case I would rather advise you to use Photoshop and real grass textures. However, I find this effect quite nice if you quickly need an eye-catching headline and want to create it completely with vectors. Especially if you need a headline for a report about gardening or plants in spring or summer, you can use such effects very well.
As some people may find the pure grass typography a little too boring, I have a few tips and tricks here on how you can spice things up a little with Illustrator's on-board tools.
Step 3: Finishing touches
Many Illustrator users know that the Symbols palette exists, but only very few know how many different ways it can be used. (You can find the Appearance palette in the menu bar under Window>Symbols). (Figure 28).
By default, you will find six different icons in this palette.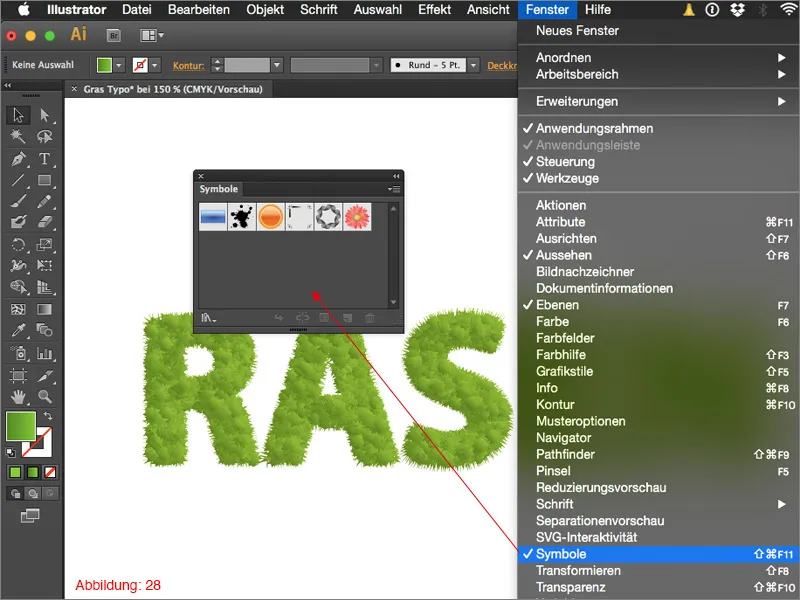
All well and good, but that doesn't do us much good for our grass typography. But now comes the trick to this story. Click on the small arrow at the top right of the symbols palette to open a pull-down menu.
In the lower area, you have the option of activating many more symbols in Illustrator via Open symbol library.
For our grass typography, it is best to select Flowers and Nature (Figure 29).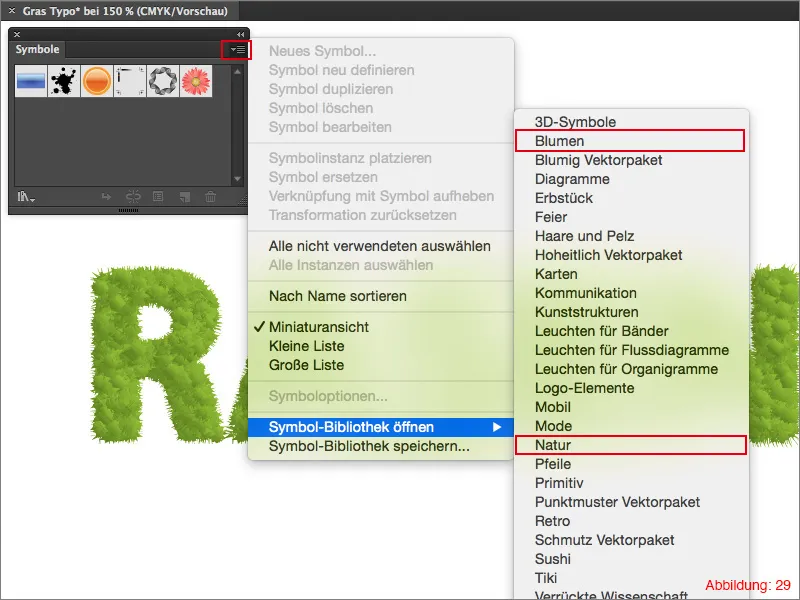
In these two symbol packs, you will now find flowers, insects, grasses and other things that you can use to embellish your lettering. To use a symbol, simply drag and drop it from the symbols palette onto your workspace (Figure 30).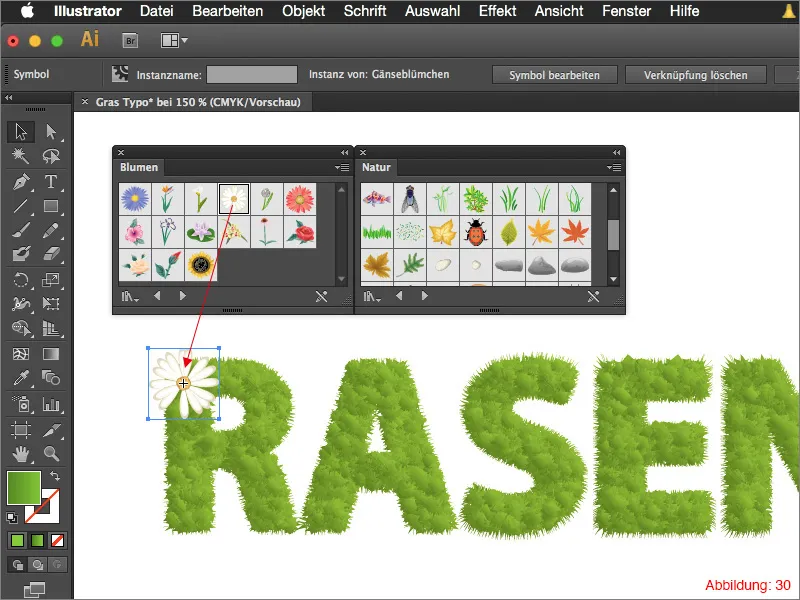
This is where your creativity comes in. Cover your lettering with flowers, ladybugs, leaves, branches, etc. ...
Here you now have the opportunity to make your lettering as individual as possible.
Final words:
I hope you enjoyed today's tutorial and that you were able to learn a thing or two. If you have any further questions on this topic, please feel free to write them in the comments below this tutorial. I will do my best to answer them as soon as possible.
Now I wish you lots of fun trying it out.
Stay creative ...
Yours, Julian


