Character and paragraph formats are essential tools in Adobe InDesign for designing texts consistently and efficiently. Character formats are used to define specific text features such as font, size, or color, while paragraph formats control more comprehensive settings like indents, spacing, and alignments. These formats make it easier for you to work on large documents and ensure uniform layouts. In this guide, I will show you step by step how to create, apply, and manage character and paragraph formats to optimize your workflow. Let's begin and perfect your text design!
1. Character Formats
To emphasize specific characters or words, e.g., with a color or a different font style, within a paragraph, there are character formats. These are created in the same way as paragraph formats via the Character Formats panel (accessed by the shortcut Shift+F11).
Click on Create New Format at the bottom of the panel.
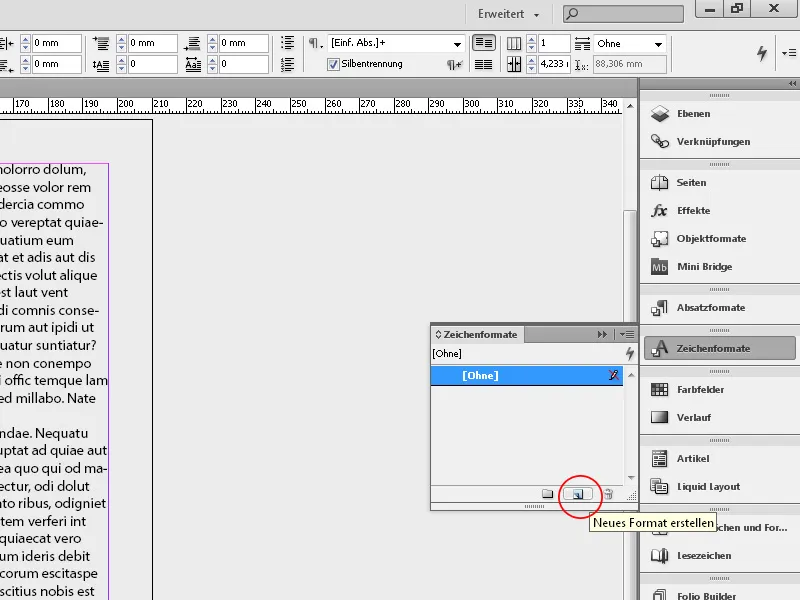
A new Character Format 1 is now added to the panel. Open it with a double-click and first assign a meaningful name.
The further settings are similar to those described in the chapter on paragraph formats. For quick assignment of the character format, it is recommended to use a keyboard shortcut (Ctrl+Alt+ a number from the numeric keypad).
There is a dependency between the paragraph and the character format. If the highlighted word should have the same font attributes as the rest of the paragraph, the fields for font size, line spacing, etc., on the Basic Character Formats tab remain empty. Changing these values in the paragraph format options will automatically update the characters and words formatted separately with the character format.
If a value is entered for the font size, it will remain unchanged even when the surrounding paragraph format is altered.
The Advanced Character Formats tab allows you to stretch and skew the text horizontally and vertically, set the language for spelling, and may require a different dictionary for the terms to be formatted than the one used for the rest of the text.
In the Character Color tab, you can select from existing color swatches. To create a new color, first open the Swatches panel (F5). This new color will then be available in the character format options. In the Hue field, you can adjust the brightness of the selected color.
In addition to the character color, you can also determine a color for the stroke (e.g., for headlines) and the stroke thickness by clicking on the symbol to the left of the color swatches.
If you activate the Overprint checkbox for Fill and/or Stroke, elements below will not be knocked out but will be printed on top. This will blend the colors of the layer below and the one above.
Even a simple black can be slightly distorted, so it is better to mix it from several colors to make it opaque.
2. Line Formats
A line format is initially a paragraph format in which a character format is applied to a specified number of lines. Like with nested formats, two or more line formats can be combined to create a repeating sequence. This allows, for example, alternating lines to be highlighted in color.
Various character formats are a prerequisite for linking the line formats. If you want to alternate background colors for lines, start by creating a character format with the first color. Since there is no direct background color option, use a workaround by using underline options.
Activate the underline by checking the box and set a thickness slightly larger than the line spacing. As it is an underline, it must be offset by a negative value to be moved far enough up so that the text is evenly covered at the top and bottom. Choose a color and set a percentage for the hue where the text is still legible. Select a solid line for the line style. With the preview enabled and slightly enlarged, the result can be immediately checked.
Next, right-click on the new character format (in the Character Format panel) to make a copy of it. Here (on the General tab), set the based on option to the format just created. This way, all settings already made will be adopted. The only difference now lies in a different hue value to differentiate from the first character format.
Now you have created two character formats that differ only in a shade of color.
After this preparation, move on to the actual line format.
To do this, first make a copy of the relevant paragraph format for the text area by right-clicking in the paragraph format panel with a name that deviates accordingly. The settings for the line format are located on the Initials and Nested Formats tab.
Click the New Line Format button under the Nested Line Formats section.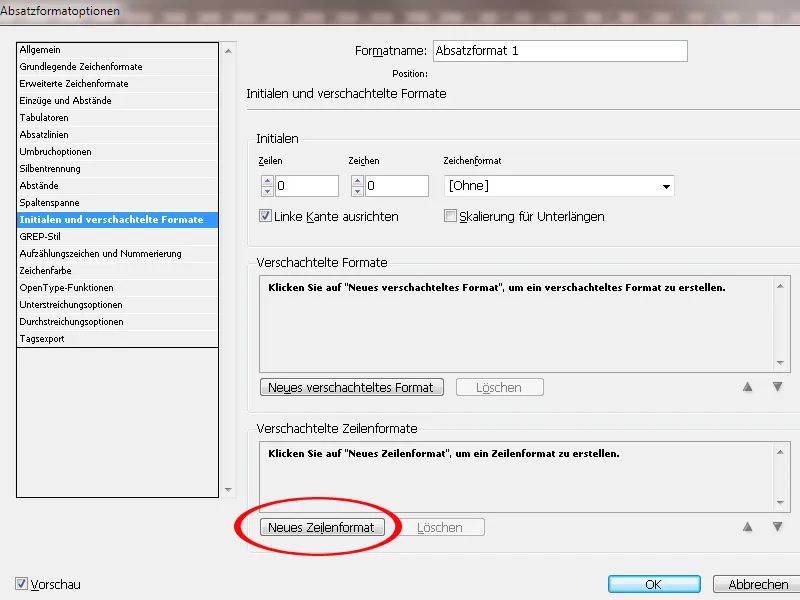
Now, click on the small arrow in the left column of the new format and select the first previously created character format from the drop-down menu.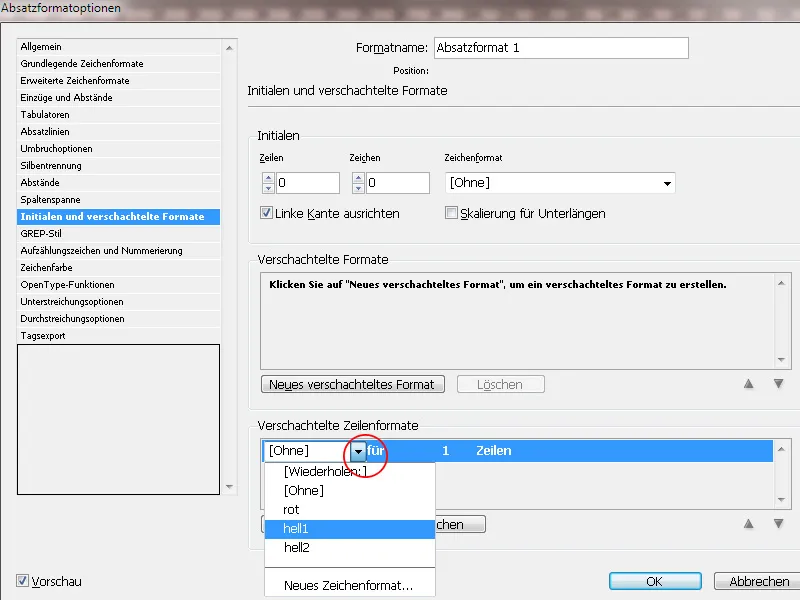
Now it says Character Format 1 - for - 1 - Lines. If two or more lines consecutively are to receive this character format, click on the column with the number one and enter a different value. Then, create a second new line format, which is linked to the second previously created character format.
To repeat the pattern, create a third new line format. For this one, instead of selecting a character format, choose the Repeat entry from the drop-down menu. The value for the number of lines corresponds to the upper line formats.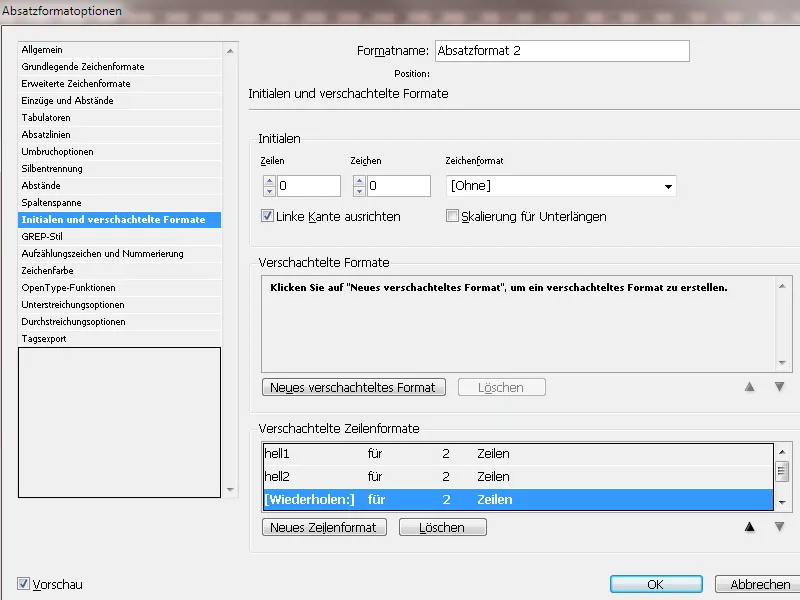
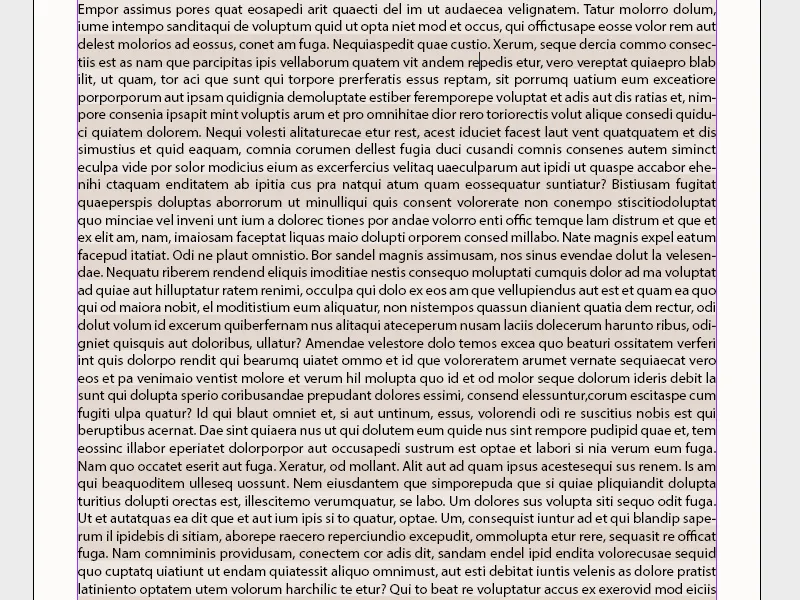
With these settings completed, when you assign this format to a paragraph, it will be displayed with alternating colored backgrounds on each line.