Tables provide an excellent way to present information in a structured and organized manner. Google Docs makes it easy to create and customize tables, allowing you to manage your data effortlessly. This guide will walk you through the process of creating, editing, and formatting tables in Google Docs step by step. You will learn how to work with rows and columns, utilize different formatting options, and even delete or adjust entire tables.
Key Insights
- Tables can be easily inserted and customized.
- The formatting of cells, rows, and columns is flexible.
- You can easily add or delete rows and columns.
- Google's table feature offers many options for data organization.
Step-by-Step Guide
To create a table in Google Docs, start by opening a document. Then navigate through the menu to insert the table.
Step 1: Insert
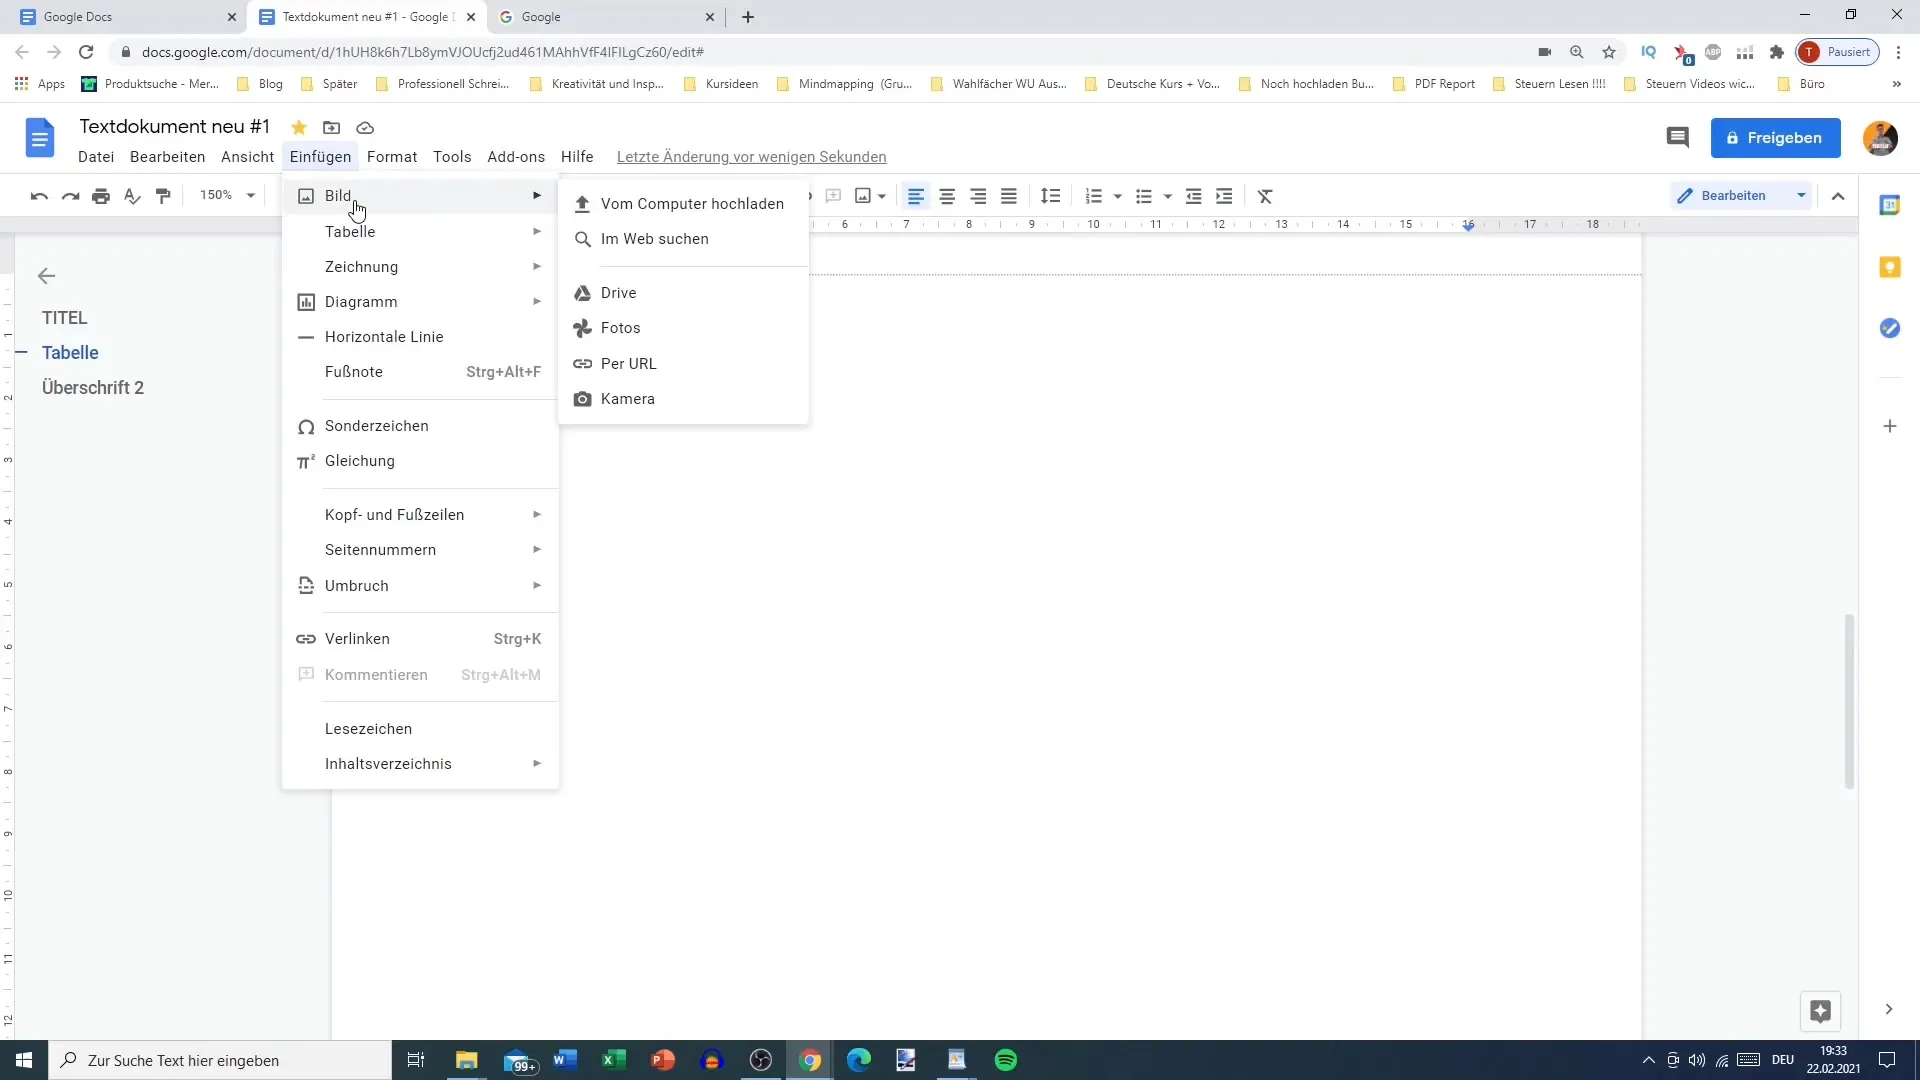
Open your Google Docs document. Go to Insert in the top menu. Then select Table from the dropdown menu. Here, you can choose the desired number of rows and columns. For example, if you want to create a 4x3 table, select 4 columns and 3 rows. If you are not sure yet how many rows and columns you need, you can start with a smaller table and add more later.

Step 2: Customize Cells
After inserting your table, you can click on the cells to input text. For instance, you can insert the title "Table 1" in the first cell and highlight this cell by marking it yellow or making it bold. Don't forget to adjust the cell size by resizing it to ensure the text is readable.
Step 3: Enter Data
Fill the table with data. This can be numbers, letters, or other information. Make sure the information is clear and easy to understand. For example, you could insert the values "1" and "A" in cells B2 and C2 to generate a simple data series.
Step 4: Distribute Columns and Rows Equally
To distribute the columns and rows equally, select them and choose the option Distribute Columns Evenly from the menu. This feature ensures that the width of the columns and the height of the rows are evenly distributed, making the table more organized.

Step 5: Format Cells
You can also customize the formatting of individual cells. Select the cell you want to modify and use the mouse to drag the cell's edge. This way, you can adjust the size of the cell individually. To align the text in the cells, you can use the alignment options in the menu – choose between center, left-align, or right-align.
Step 6: Delete or Add Rows and Columns
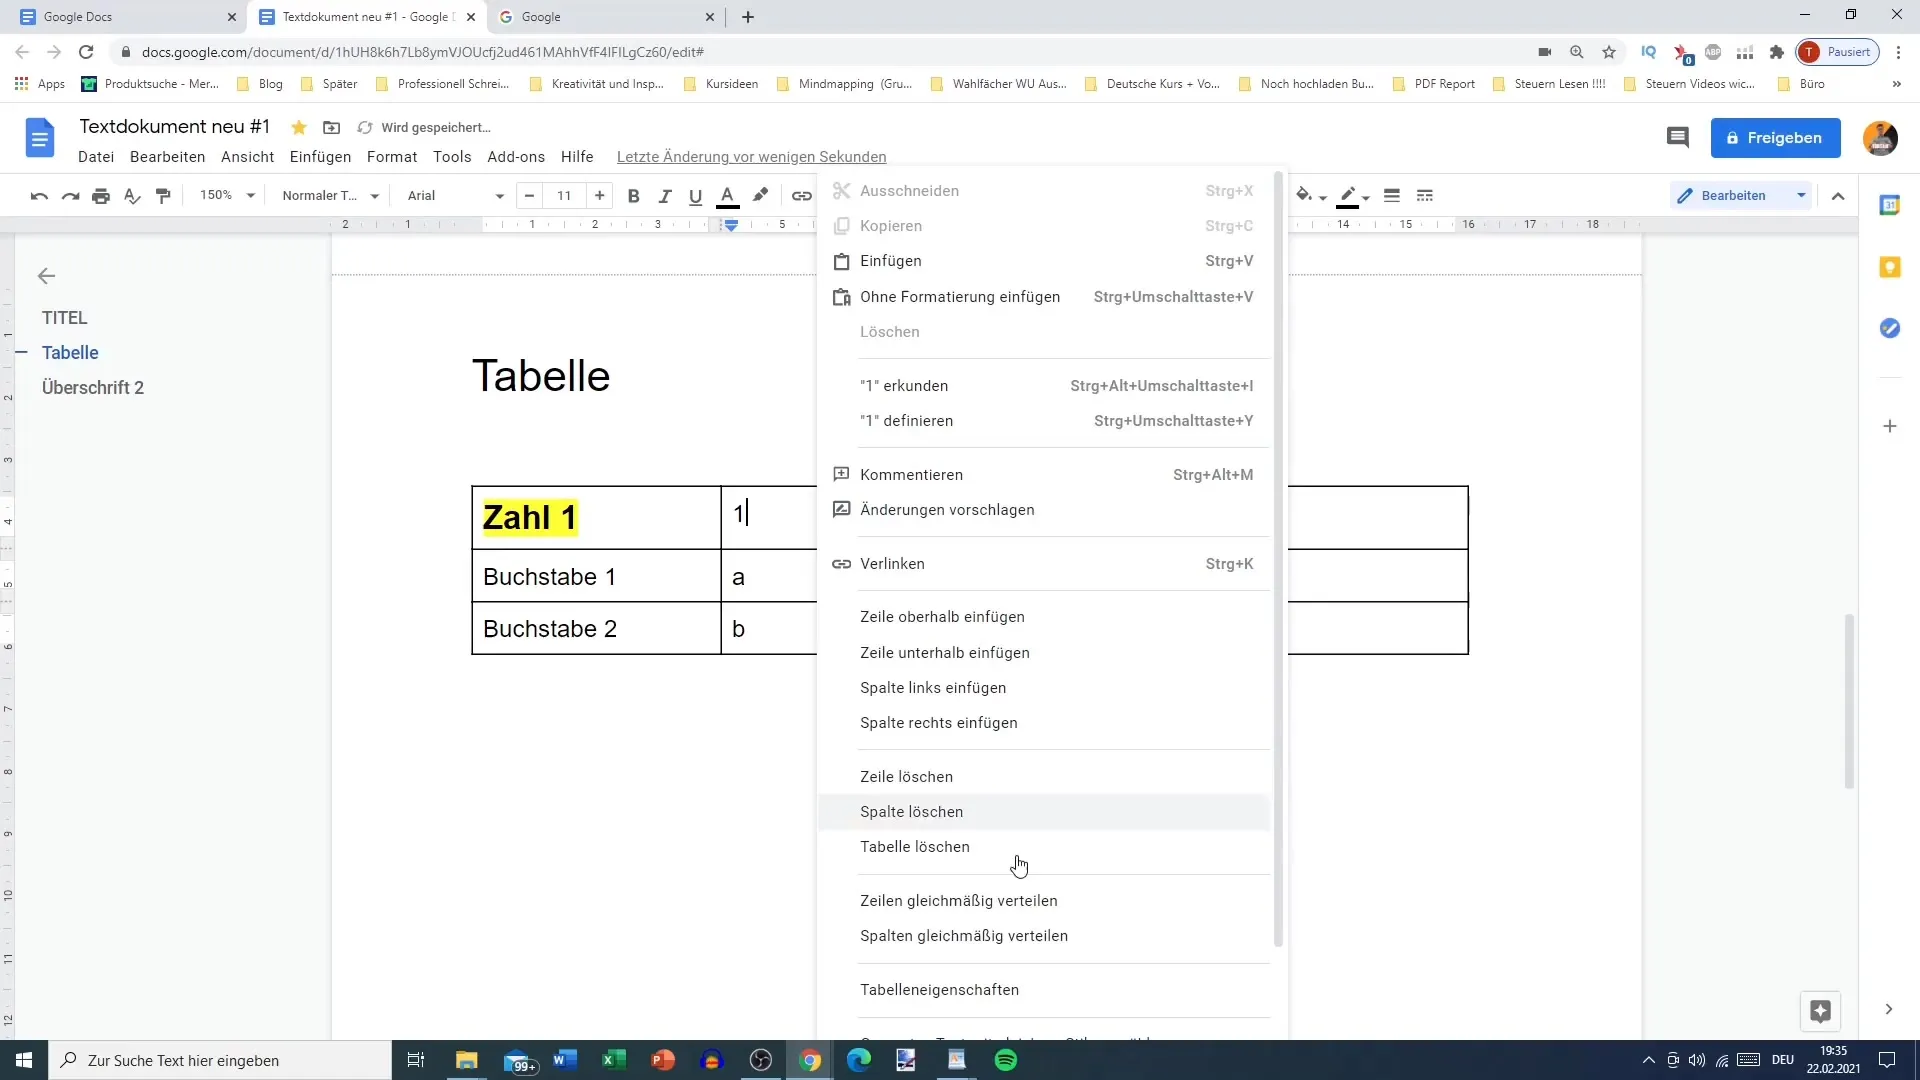
To delete a row or column, right-click on the row or column and select the option Delete Row or Delete Column. To add a new row or column, you can also right-click and use the options Insert Row Above or Insert Column to the Right.
Step 7: Manage Table
If you want to delete the entire table, click on a point within the table, then select the entire table area with the mouse and press the Delete key. Another option is to right-click on the table and choose the Delete Table option. This way, you can easily remove unwanted table remnants.
Step 8: Additional Options
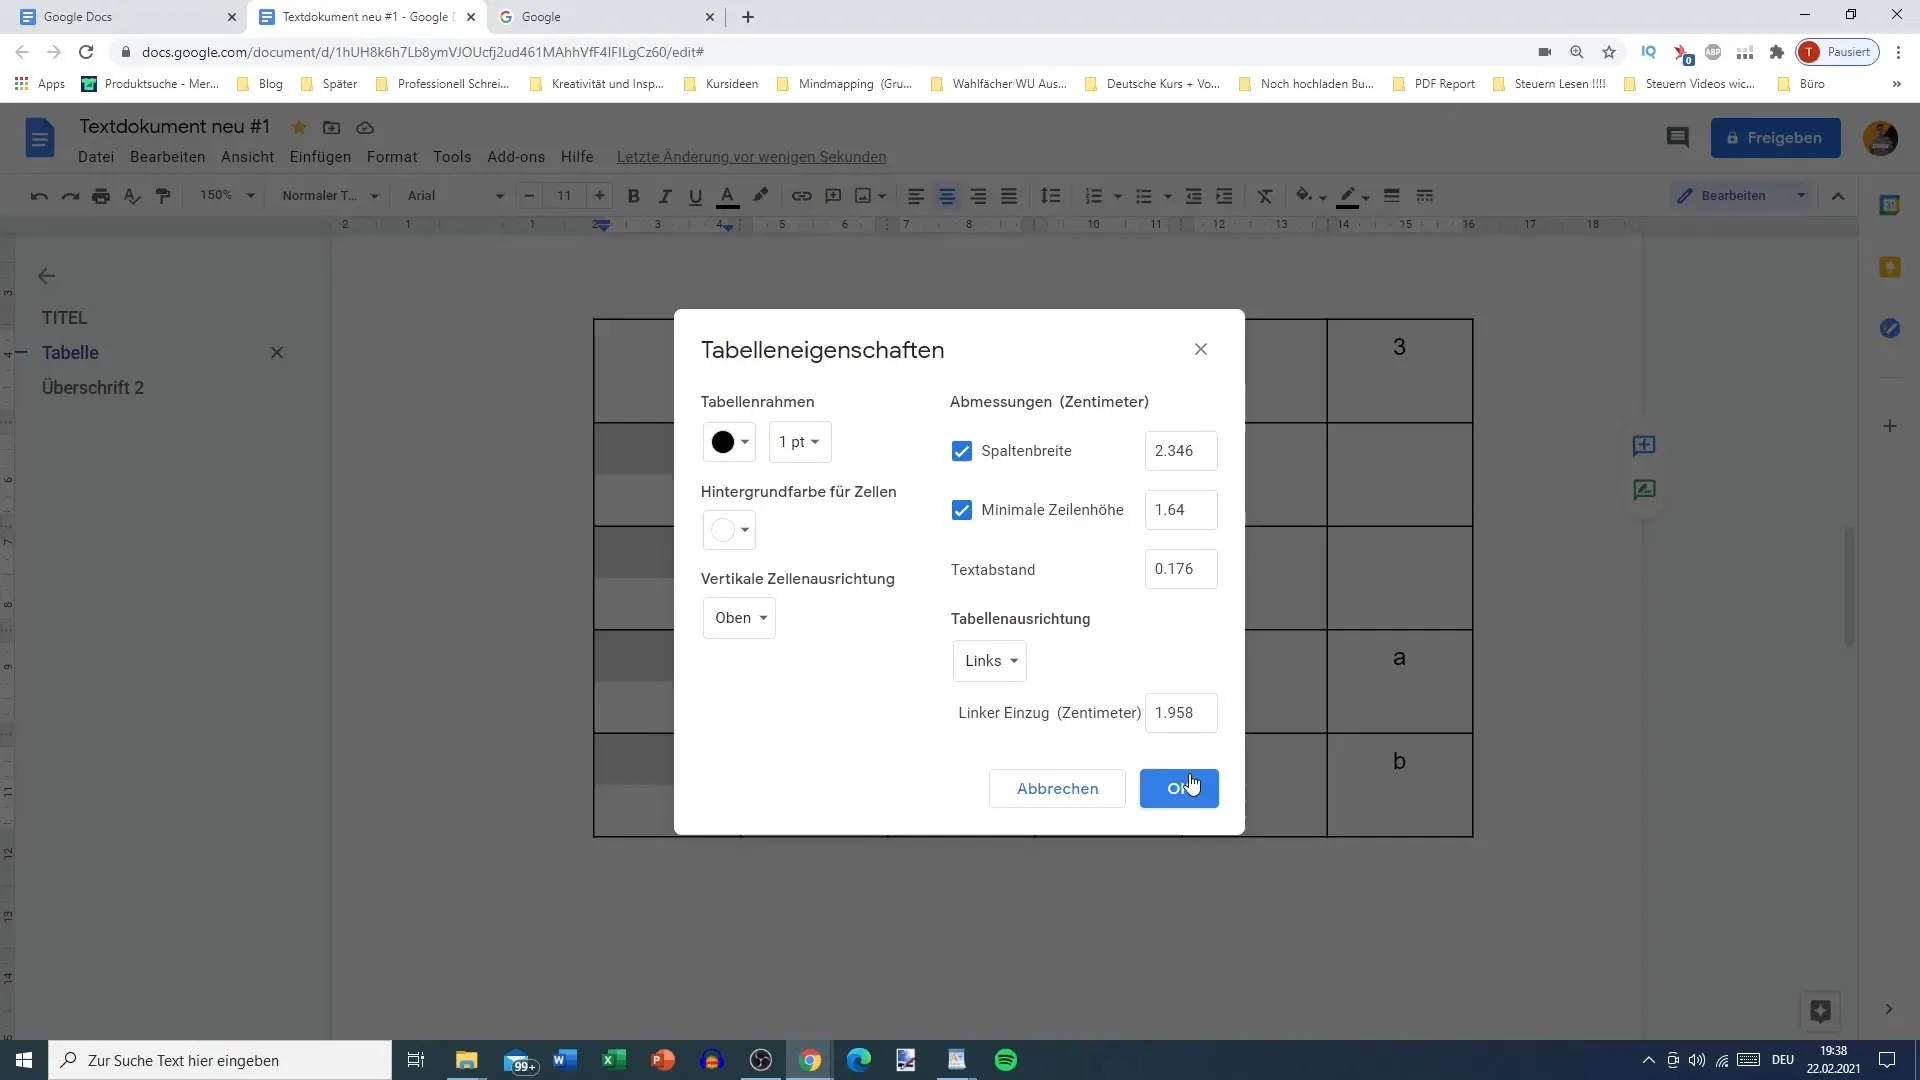
Google Docs offers many more options for customizing your table. For example, you can click on the downward arrow in the top menu bar to set additional parameters for the table. These include functions such as adjusting margins, changing the background, or defining table properties.

Summary
In this tutorial, you have learned how to insert tables in Google Docs, format cells, manage data, and make changes to the table. You have seen that Google Docs provides a user-friendly platform that allows you to present your data clearly and attractively.
Frequently Asked Questions
How do I insert a new row into an existing table?Right-click on the desired row and select "Insert row above".
Can I change the border color of the table?Yes, you can adjust the border color in the table properties.
How do I delete an entire column?Right-click on the column and select "Delete column".
Are tables in Google Docs printable?Yes, tables in Google Docs can be printed without any issues.


