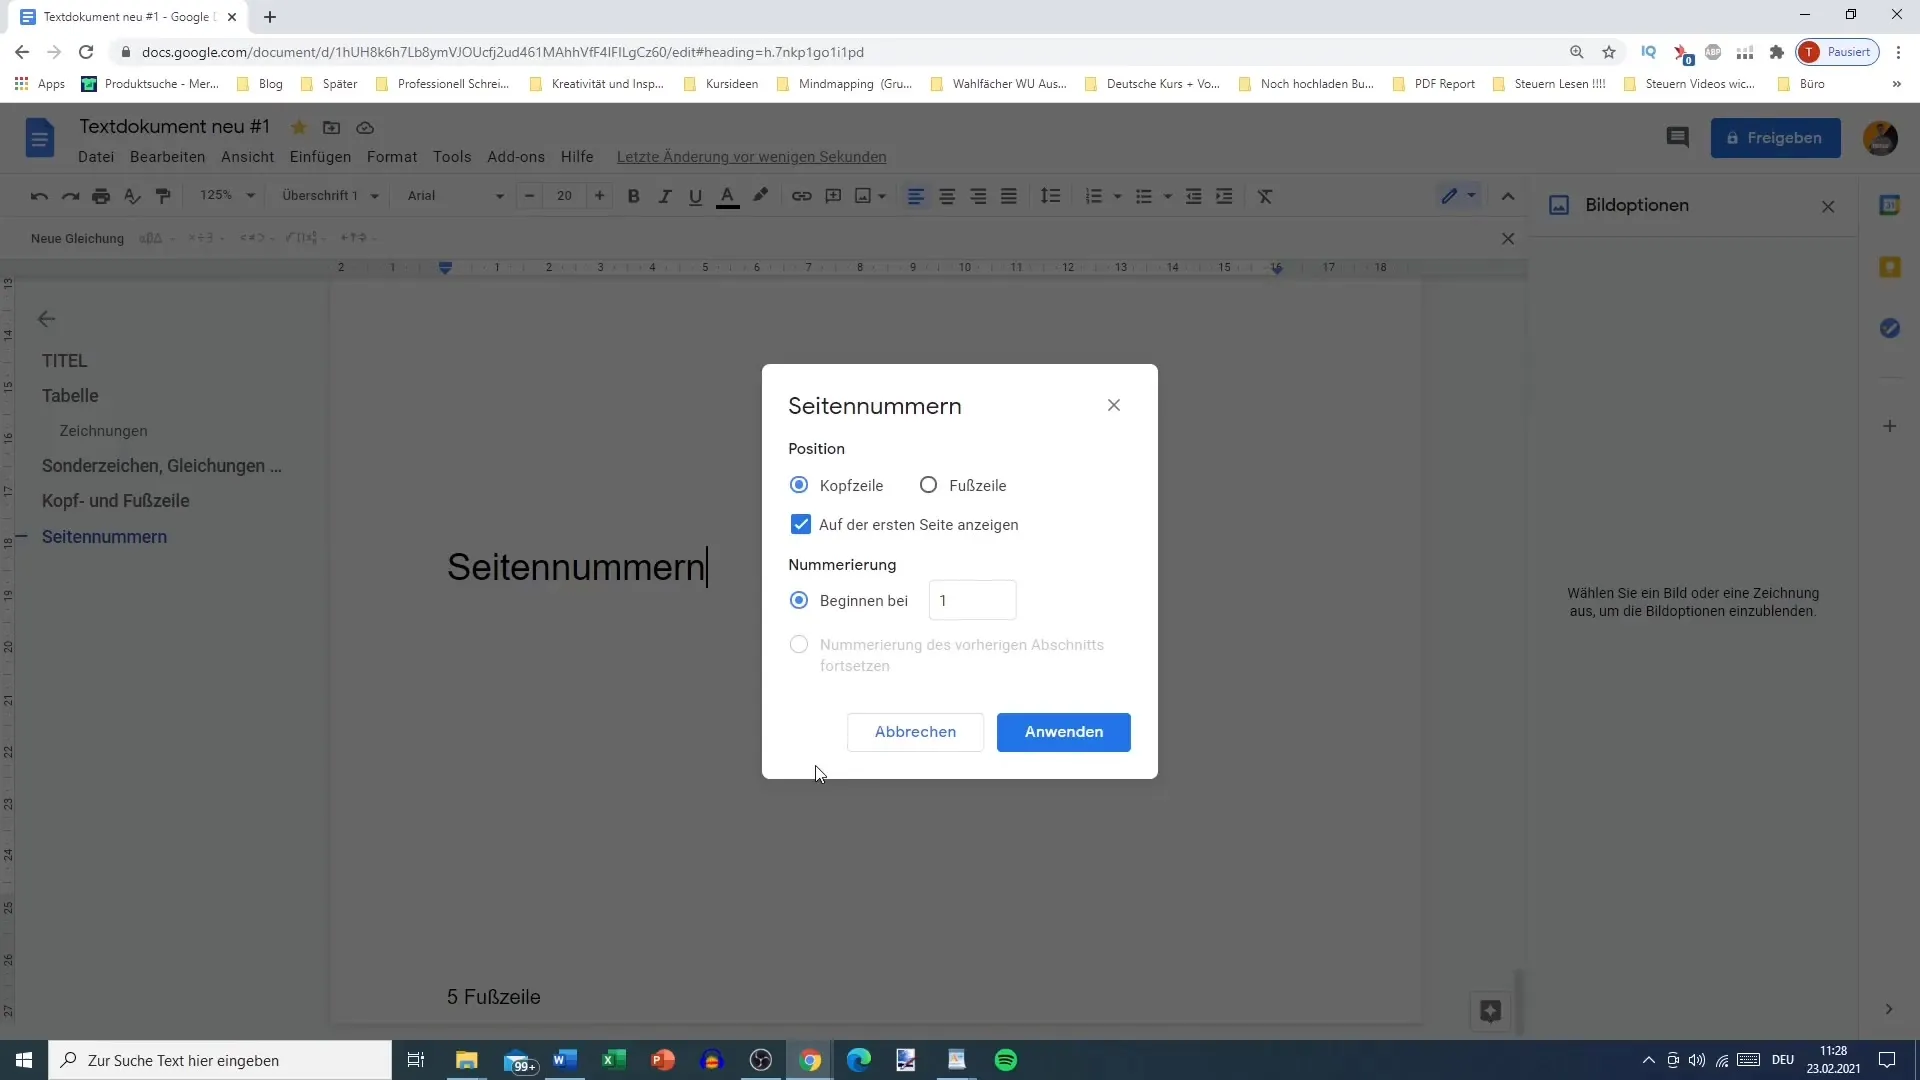
Adding page numbers in Google Docs is a simple but effective step to make your documents look more professional. Whether you're working on a report, a dissertation, or a creative story, the right placement and formatting of page numbers are crucial. In this tutorial, I'll show you how to effectively insert and customize page numbers.
Main Takeaways
- You can choose whether the first page should be numbered or not.
- You are free to set the position of the page numbers in the header or footer.
- You can also adjust the starting number for the page count.
Step-by-Step Guide
Step 1: Select Menu To start with the page numbering, place the cursor at the very top or bottom of your document. Then click on the "Insert" menu. Here you'll find the various page numbering options.

Step 2: Select Page Numbering Once you are in the "Insert" menu, scroll down to "Header & Footer" and select "Page numbers". This will open up the relevant settings for page numbering.
Step 3: Set Page Number Position You will see various options for positioning the page numbers. You can decide whether the numbers should be displayed at the top right, bottom right, or elsewhere. This flexibility allows you to place the page number exactly where you want it.
Step 4: Adjust First Page Here you can also choose whether the first page of your document should have a page number or not. This option is particularly useful if the first page is a cover page and you do not want numbering for that page.
Step 5: Choose Header or Footer Despite the many options, you should consider whether the page numbers should appear in the header or footer of your document. So you can choose between the two options, depending on what is best for your specific document.

Step 6: Set Starting Number You also have the option to choose the starting number for the page count. For example, you can choose to start the document with page 1, even if it is actually the second page when excluding the first page (the cover page).
Step 7: Immediate Application If you are not sure which position is best, you can also select the function "Insert" and then "Page number top right". This will automatically add the page number at the location you have chosen.
Step 8: Review Settings If you want to activate other settings such as displaying the total number of pages, make sure you select these through the appropriate menu. It can be helpful to see the number of pages in the document, but this is not necessary for every user.
Step 9: Final Adjustment Review all the settings you have made and make sure they meet your requirements. You can make changes at any time if you later decide you want to do something differently. Close all menus to confirm the changes.

Summary
In this guide, you've learned how to add and customize page numbers in Google Docs. Choosing the position, deciding on including the first page, and selecting the starting number are important aspects to make your document look professional.
Frequently Asked Questions
What are the first steps for page numbering?Select "Insert", then "Header & Footer", and finally "Page numbers".
Can I exclude the first page from numbering?Yes, you can choose the option to exclude the first page from numbering.
Where can I place the page numbers?You can place the page numbers in the header or footer, either top right or bottom right.
How do I start numbering at a specific number?You can adjust the starting number for page numbering, for example, to start with the number 2.
How can I display the total number of pages?You can select this in the page numbering menu when you activate the display of the total number of pages.


