Create foliage sheet
Introduction:
Hello dear PSD community. Nice to see you back at the start. Today's tutorial is about how to construct a beautiful foliage leaf with vectors relatively easily in Adobe Illustrator. (Figure 01). But now I don't want to keep you waiting any longer. Let's get straight to it ...
Step 1: Create basic shape
Once you have arrived in Adobe Illustrator, you first need to create a new workspace. To do this, go to FileNew in the menu bar and select an A3 landscape format in the following window.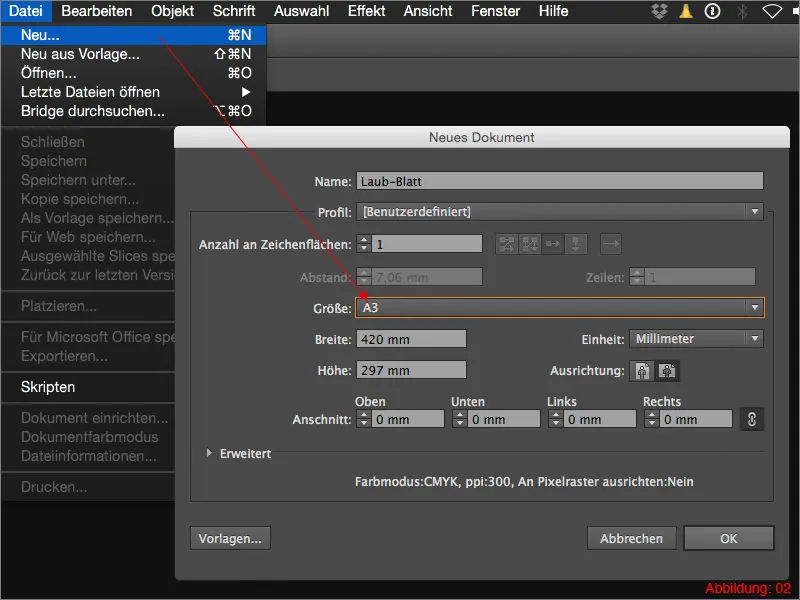
In the enclosed work files you will find a file with the name \"Template.jpg\". You must now insert this file into your workspace using FilePlace. (Figure 03).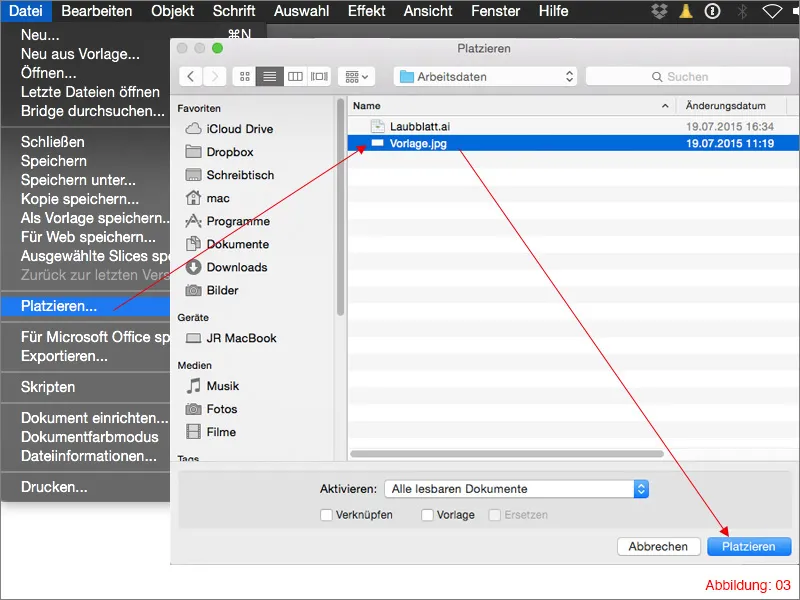
After you have placed the template, go to the layer palette and lock this layer. Double-click on the layer name to change the layer name. Simply call this layer \"Template\".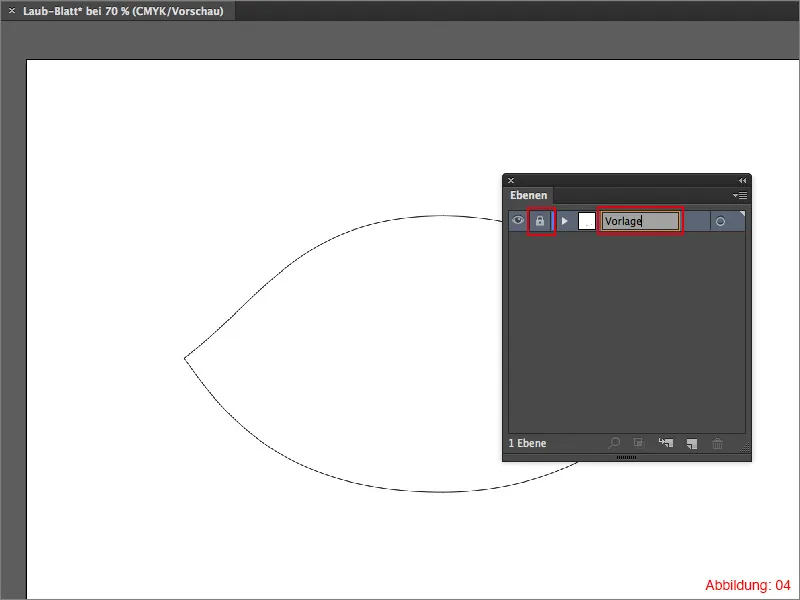
We create a new layer for our leaf using the small button at the bottom of the layer pal ette. (See Figure 05) Name this layer \"Foliage\".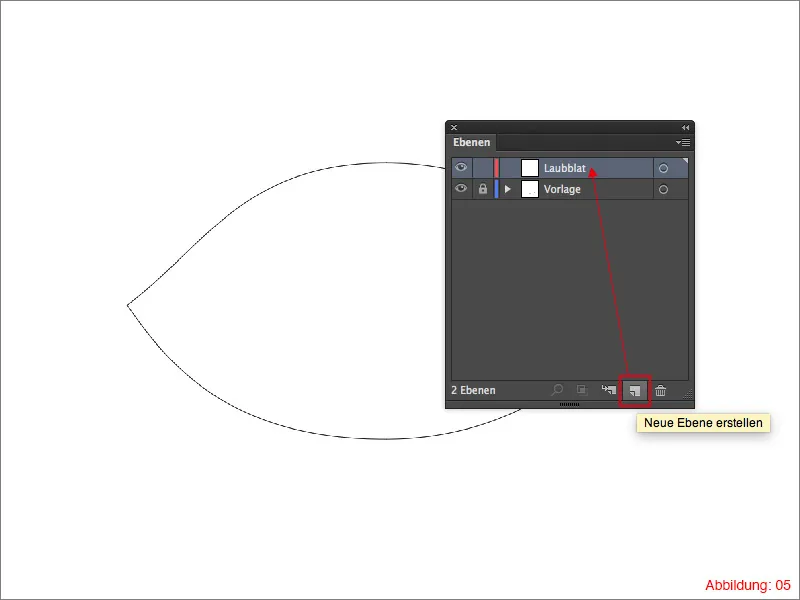
Now that we have prepared everything for the actual work, we can finally get started.
Grab the ellipse tool from the tool pal ette and click once on your workspace. This will open a dialog box in which you can enter the size of your ellipse. In this case, select a size of 260x140mm and confirm with OK. (Figure 06). (Select a blue outline so that you can better distinguish your ellipse from the placed template).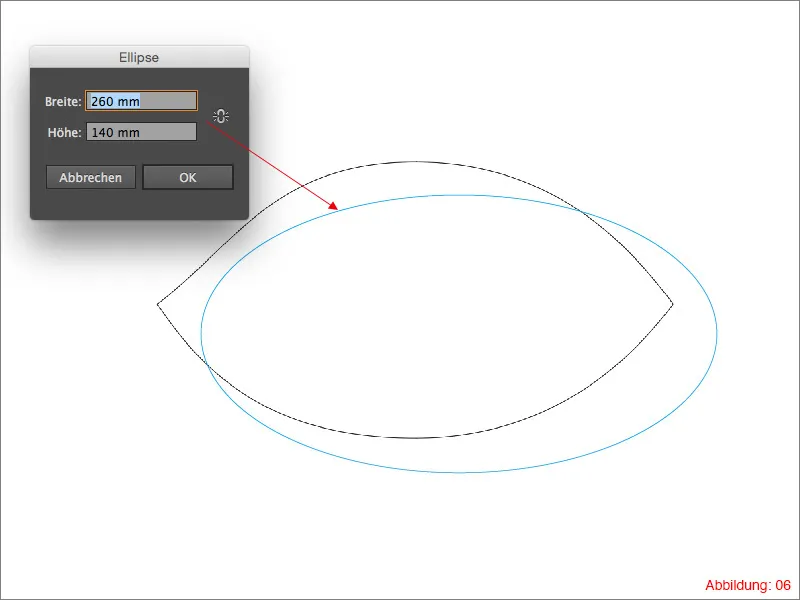
Next, take the pen tool and, holding down the Alt key, click once on the left and once on the right path point to create corner points.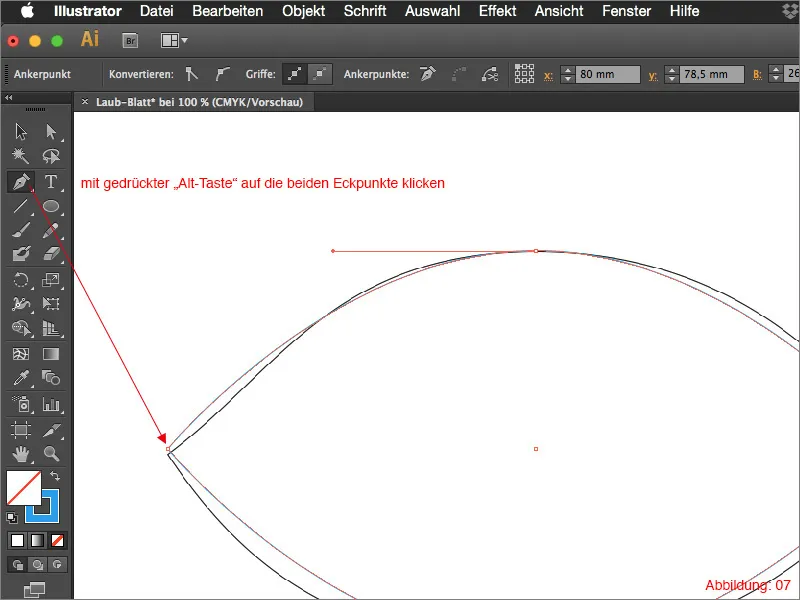
The whole thing should now look something like this. (See Figure 08).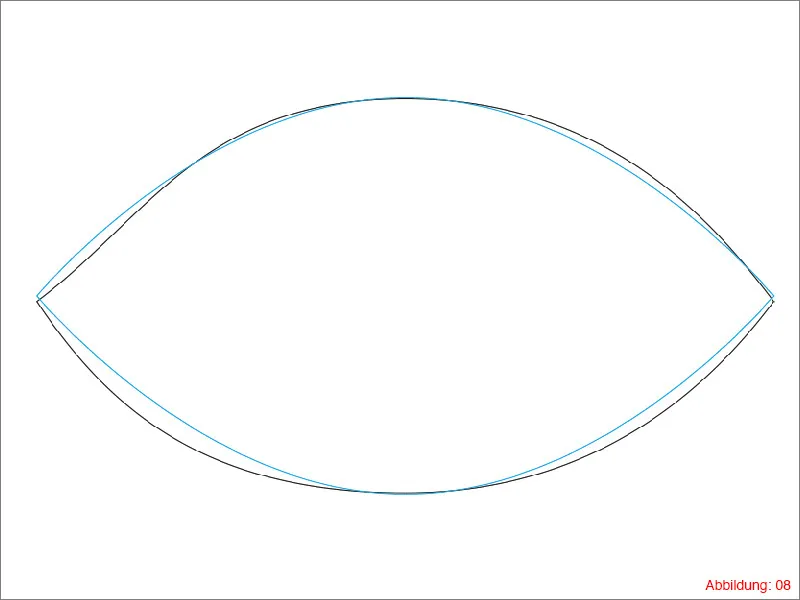
The next step is to adjust the shape of your ellipse to the template. Provided that you still have the pen tool activated, you can now hold down the Alt key and draw new handles from the corner points you have just created. (Figure 09).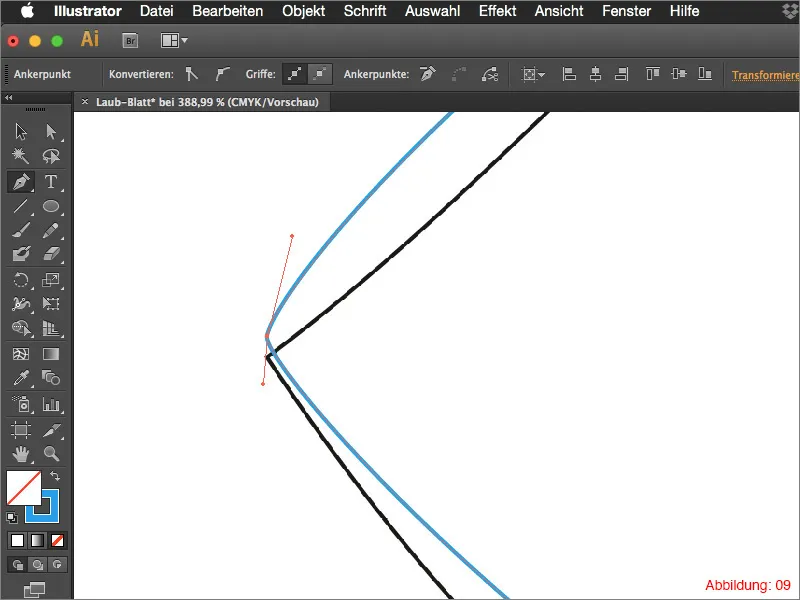
Now change the handles so that your ellipse ends up approximately congruent with the template. The same applies here: "Practice makes perfect" (see Figure 10).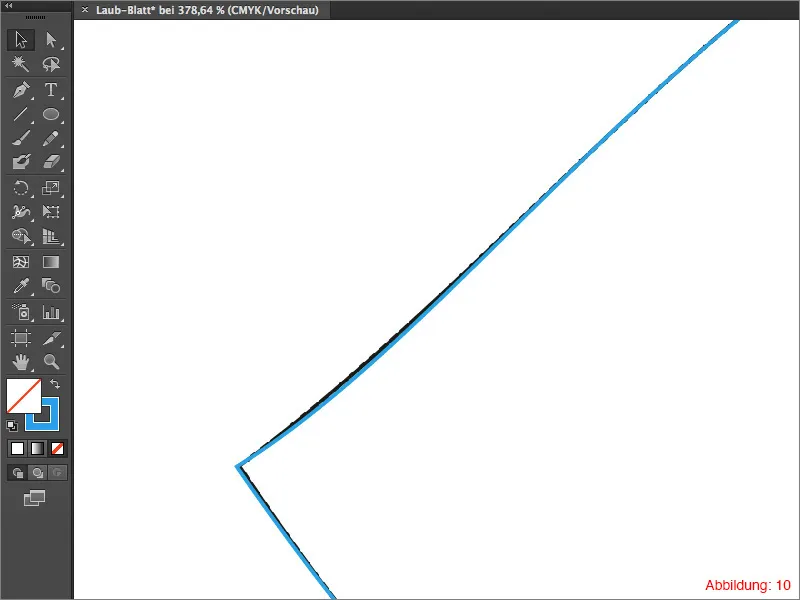
Mini tip:
You can use the direct selection tool to move an entire path point.
Once you have adjusted the ellipse to your satisfaction, you can now hide the template in the layer palette.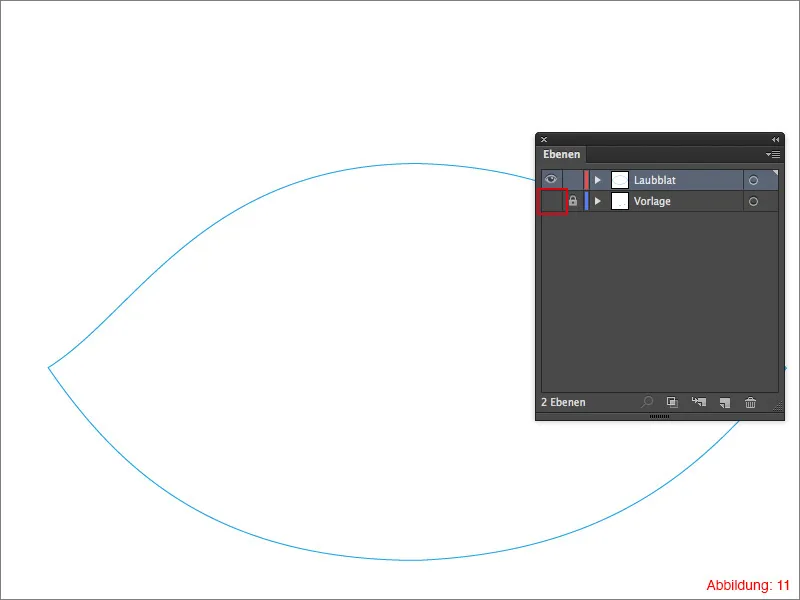
Step 2: Subdivide the basic shape
Now that the basic shape is finished, we need to divide it into two parts. First, you need the pen tool again. Use it to create a wavy line that divides your basic shape in the middle. (See figure 12).
Then select everything with Command+A (on PC - Ctrl+A) and click on Divide area in the Pathfinder. (You can find the Pathfinder via WindowPathfinder).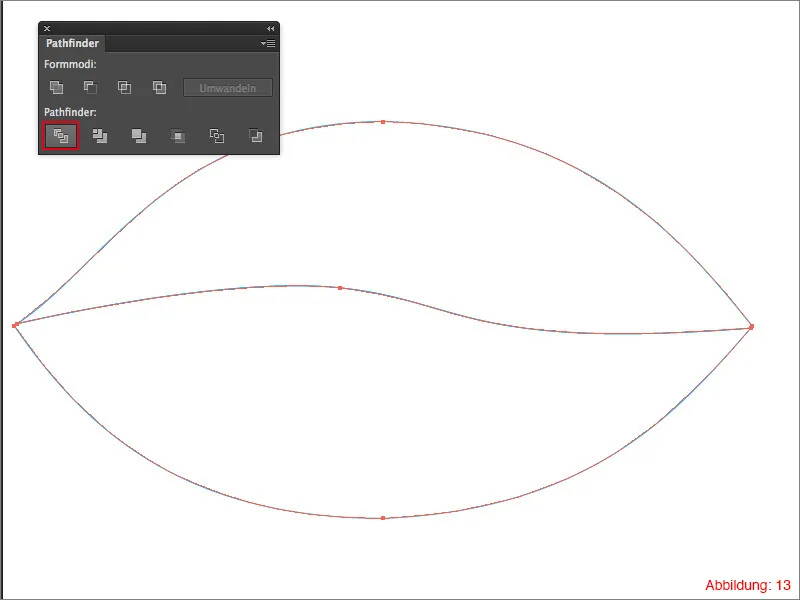
This action divides your basic shape into two parts along the wavy line. However, Illustrator creates a group containing the two parts at the same time. This group must now be removed so that we can edit both parts independently of each other. To do this, go to Ungroup object or use the shortcut Command+Shift+G (on PC - Ctrl+Shift+G).
You should then find two separate objects in your layer palette. (Figure 14).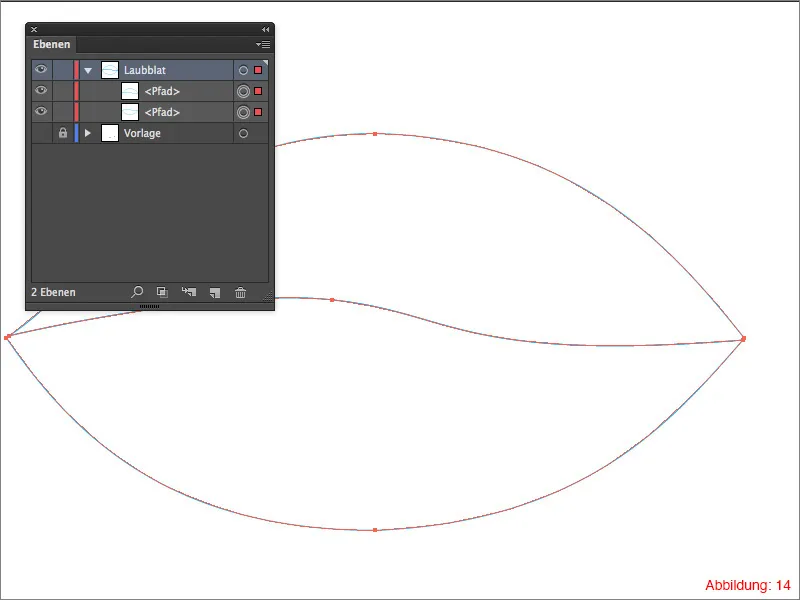
Step 3: Create and assign gradients
Now we have reached the point where it is time to bring color into play. First of all, Blender the gradient palette. If you haven't opened it yet, you can find it via Window history.
Select everything with Command+A or Ctrl+A and then click on the standard gradient in the gradient palette. (Figure 15).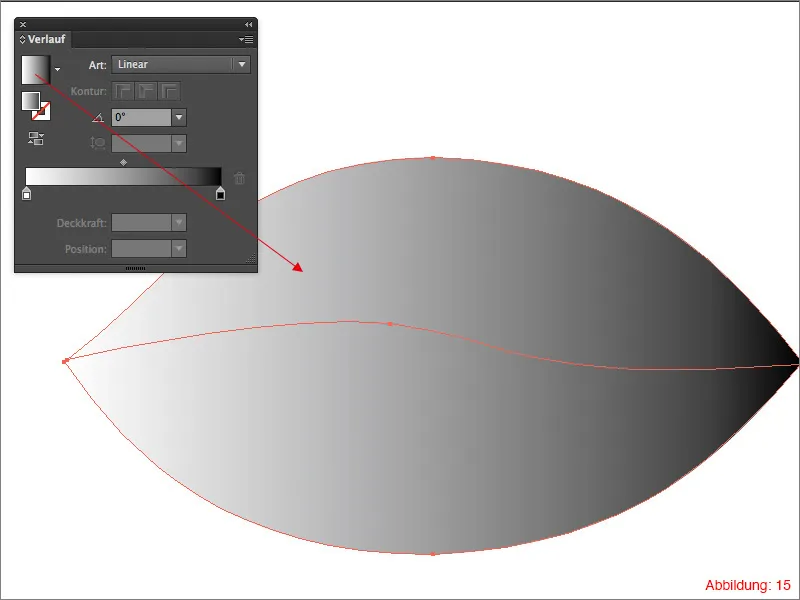
Now that you have selected the typical black/white gradient that is stored in Illustrator by default, it is time to select the appropriate colors. You need a lighter and a slightly darker green.
You are welcome to select your own color values to make your sheet unique.
For anyone who wants to create exactly the same sheet as in the preview image for this tutorial, here are the two CMYK color values I used.
- light green: CMYK - 50/0/100/0
- dark green: CMYK - 67/0/100/42
Now assign these two color values to your gradient by double-clicking on one of the color fields in the gradient palette.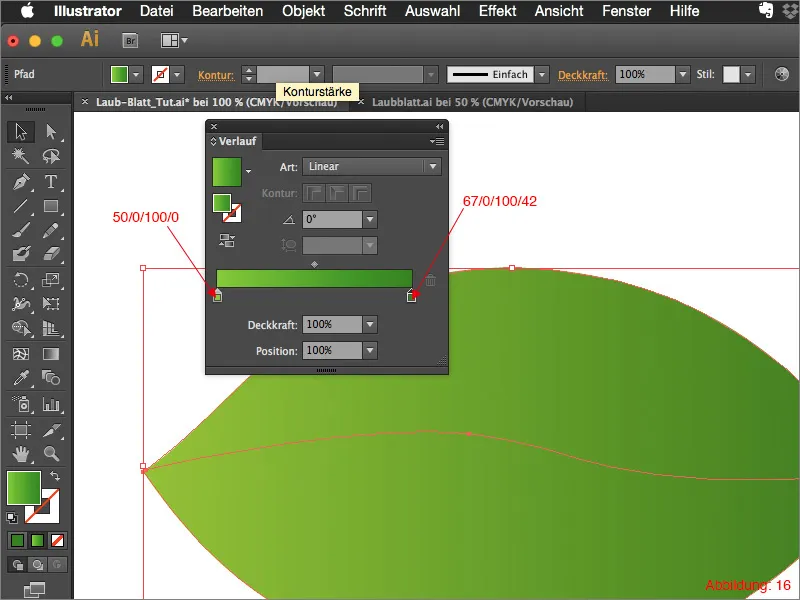
The whole thing should then look something like this. (Figure 17):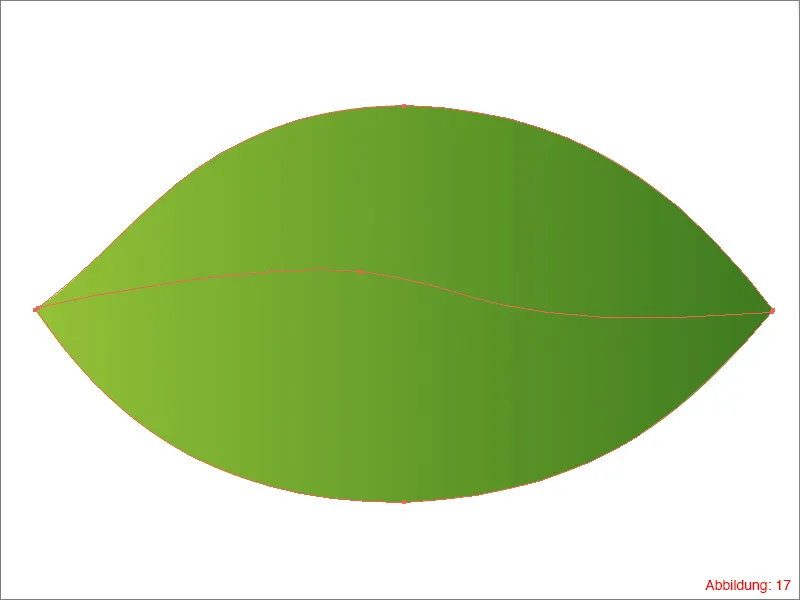
As I'm sure you can agree, we already have a pretty nice gradient, but we could have saved ourselves the trouble of splitting it into two objects.
Therefore, select the upper part of your sheet and enter an angle of 180° in the gradient palette. (Figure 18).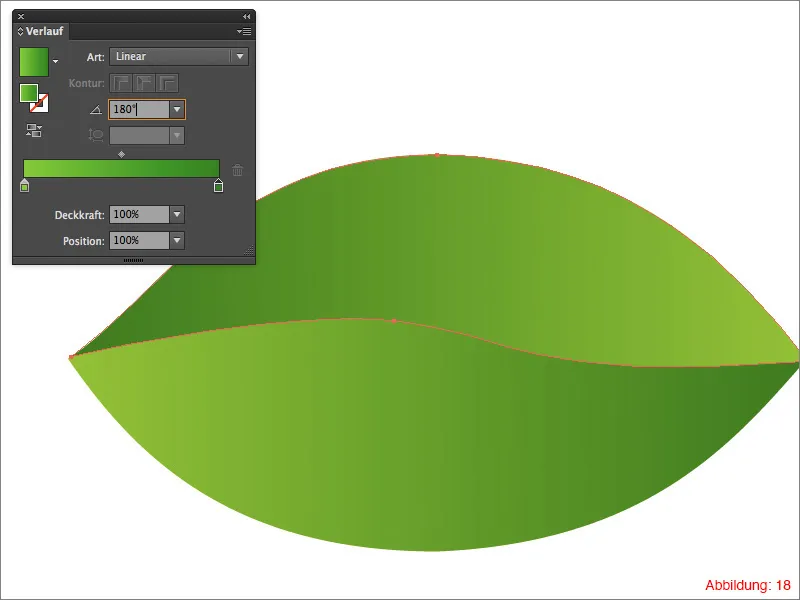
Step 4: Insert details
To turn the leaf-shaped object into a truly recognizable leaf, we need to add a few more details.
Let's just start with the main vein (since I'm not a botanist, I hope you'll forgive me for not knowing the correct technical term).
Now grab the pen tool from the tool palette again and create a line as shown in Figure 19 (line width: 20pt).
Now fill this line with a darker green. I have used a CMYK value of 90/30/95/30 for this tutorial.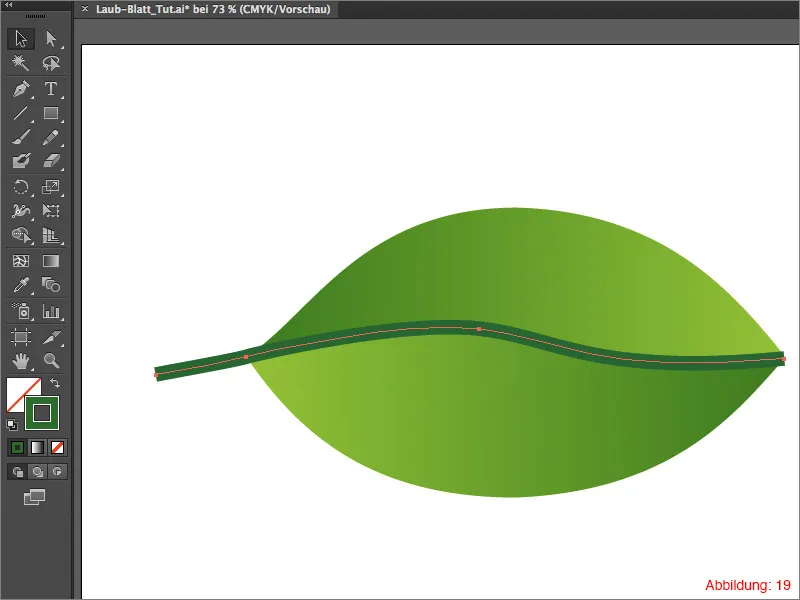
As a leaf vein never has the same thickness from start to finish, but tapers towards the end, we now need the contour palette. You can find this as usual via WindowContour. (Figure 20).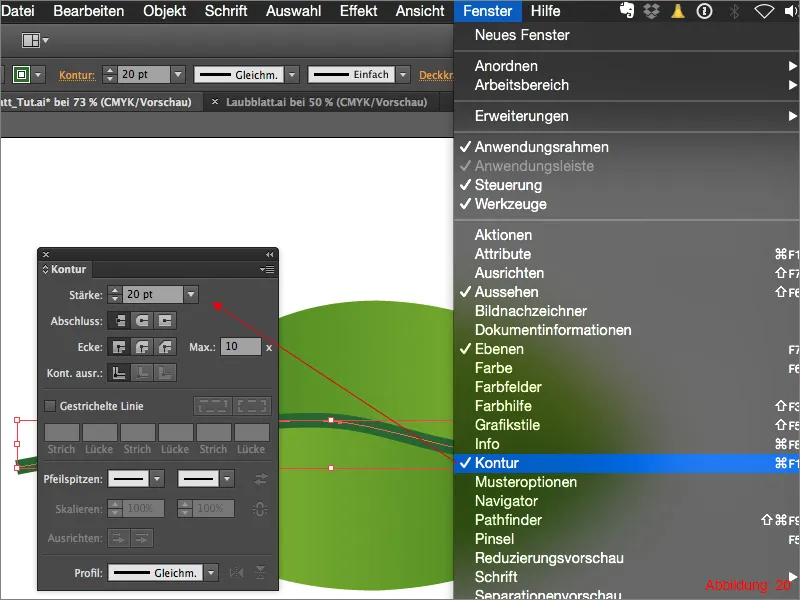
In the contour palette, you not only have the option of controlling the thickness of the contour, but you can also assign a so-called profile. In this case, however, no .icc color profile is meant, but you can use it to influence the shape of the contour.
In our case, select width profile 4. (Figure 21).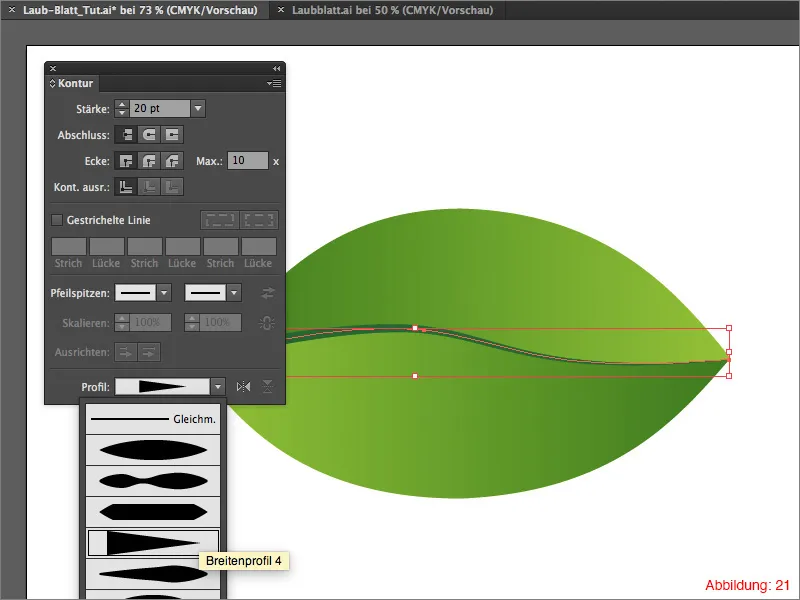
If you have ever looked at a foliage leaf, you will have noticed that many small branches branch off from the main vein you have just created.
To create these branches, you will need the pen tool again. Use it to create as many branches as you like. It is only important that you also set the width profile 4 in the contour palette. As a rule, Illustrator should have memorized this setting. (See Figure 22).
The basics of this leaf are now complete and can theoretically be considered DONE. However, if you want to take it to the extreme, you can create further and smaller branches based on the branches you have just created. The more detailed you are, the better your leaf will look later.
Further use?
Now that you have created such a (hopefully) Schick leaf, you will certainly want to put it to good use somewhere. I have a tip for you in the following section on how you can cleverly archive such self-designed objects.
Symbol libraries:
In this tip, I would like to draw your attention to the fact that it makes sense to save your own objects that you have built or designed in Illustrator as symbols. The advantage is quite simply that you can access them from any Ai file. You don't have to waste your precious time searching for the original file, opening it and then copying and pasting the object into the actual working file. Instead, you simply create your own symbol libraries that you can call up at any time. I will now show you how this works in detail ...
To create your own symbol library, the first thing you need is the Symbols palette. You can find this via WindowSymbols.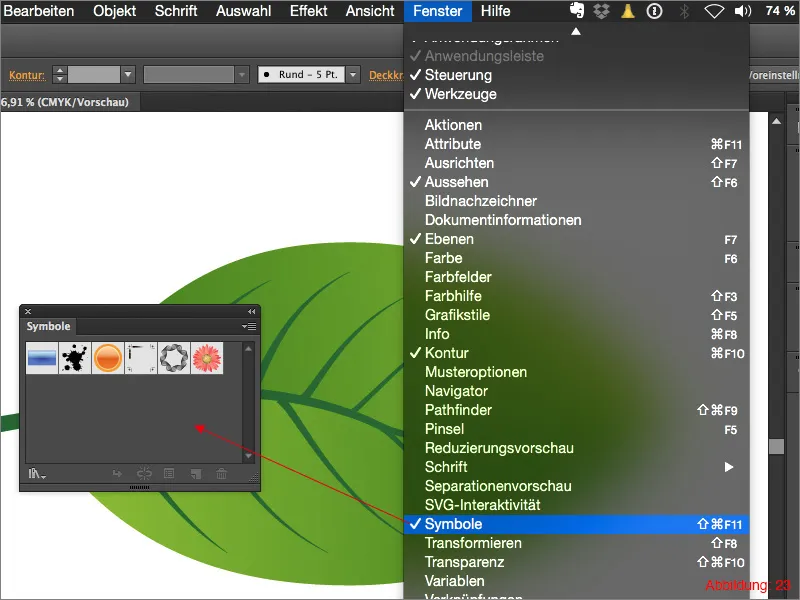
Then select the object you would like to save as a symbol and click on the small arrow in the top right-hand corner of the symbols palette. (See Figure 24).
Here you now have the option to click on New symbol ....
You can then enter a suitable name for your symbol and confirm with OK.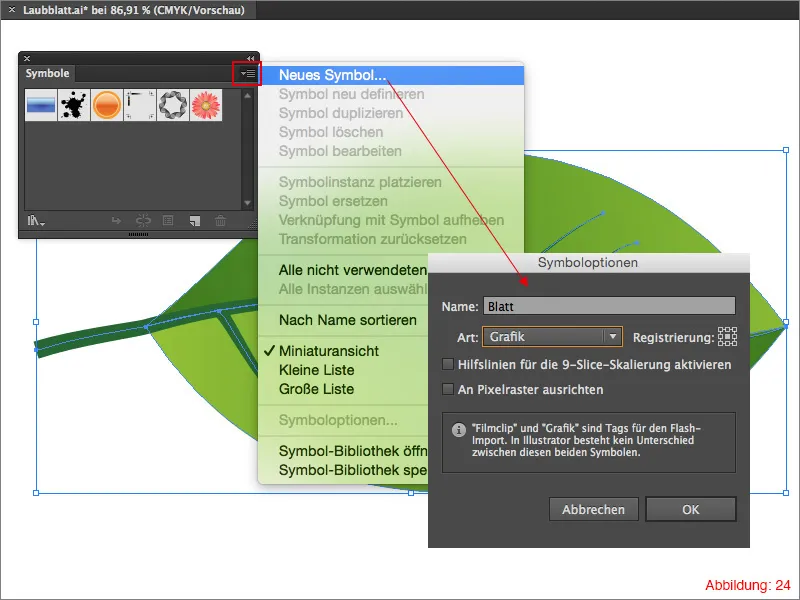
Before you save your own symbol library, I recommend that you delete the standard Illustrator symbols. You can simply hold down the Shift key and click on them to select them one by one.
Once you have selected them all, click on the small trash can in the bottom right-hand corner. (Figure 25).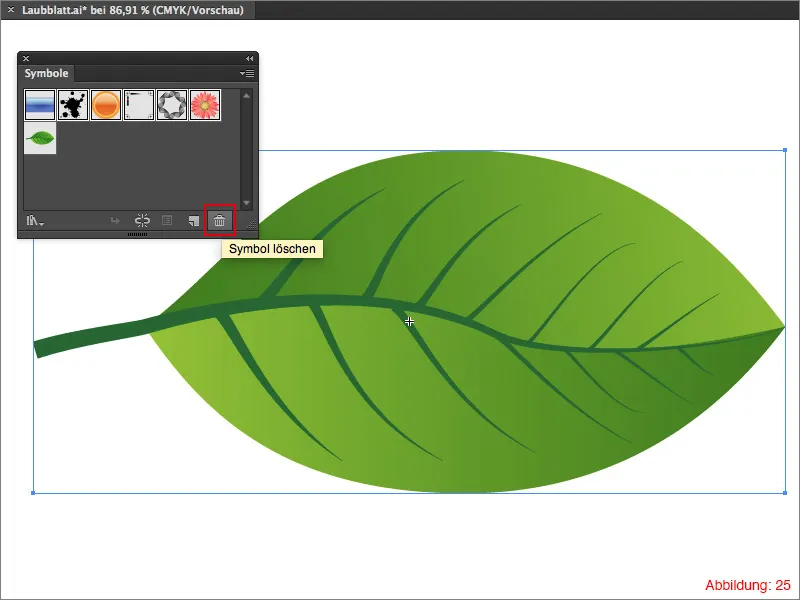
Only your own object should then be available in the symbols palette. (See Figure 26).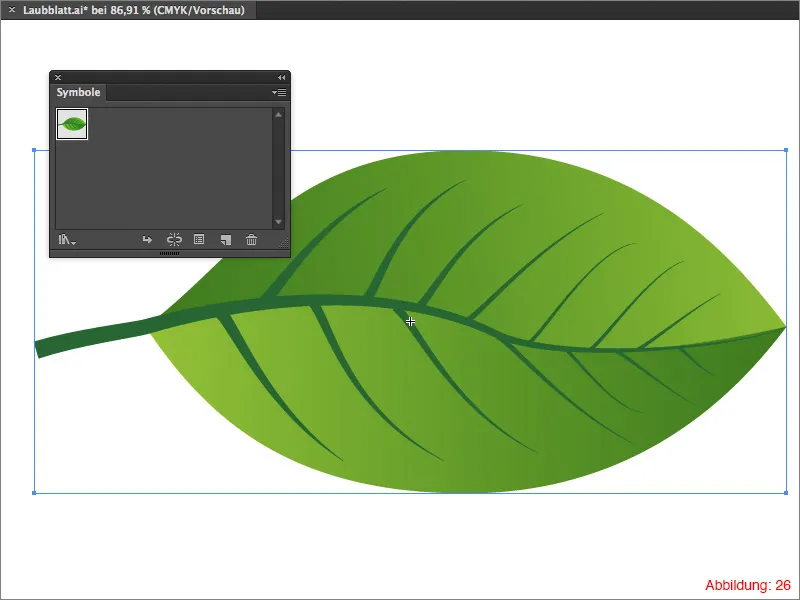
Now click again on the small arrow in the Symbols palette and on Save symbol library ... Here you can also select a suitable name for the library and confirm with OK.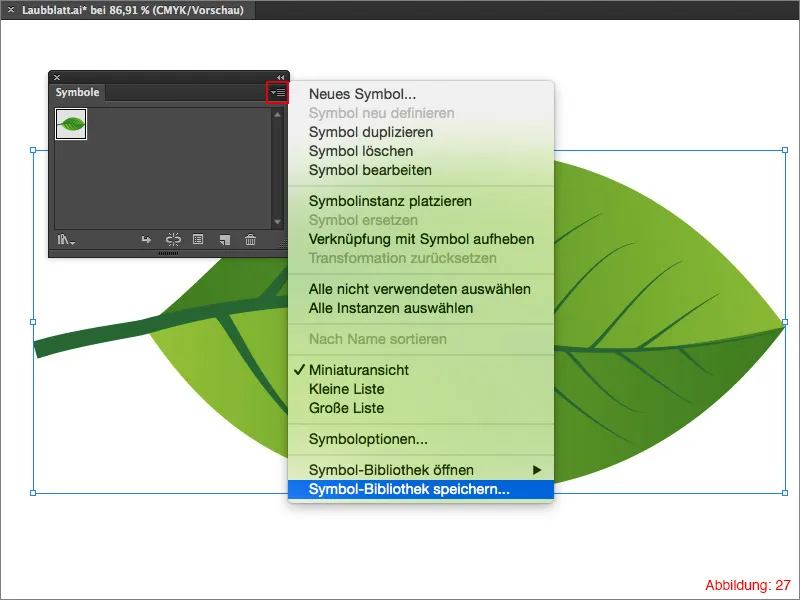
To open this library again at a later time (e.g. in another file), simply click on the small arrow in the symbols palette again and select Open symbol library. Here you will find the symbol library you have just saved. (Figure 28).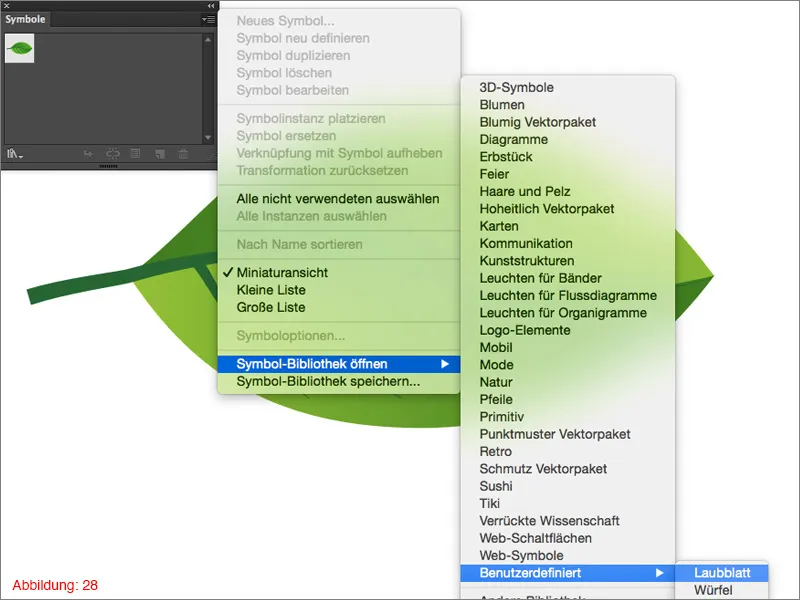
Final words:
And once again we have come to the end of a tutorial. As always, I was pleased that you were able to follow along and I hope that you were able to learn a thing or two. If you have any further questions on this topic, please feel free to write them in the comments below this tutorial. I will do my best to answer them as soon as possible.
Stay creative ...
Yours, Julian


