A table of contents is an important component in many publications such as books, magazines, or reports. With Adobe InDesign, you can automatically and professionally create a table of contents that dynamically adjusts to changes in your document. You use paragraph styles to define the structure and special functions to generate the directory quickly and accurately. In this guide, I'll show you step by step how to create, format, and update a table of contents. Let's get started and organize your project effectively!
The table of contents always refers to paragraph styles. Therefore, it is necessary to assign a specific paragraph style to the headings to be included in it. For the display of the table of contents itself, it is also recommended to create a dedicated paragraph style to better control desired adjustments.
To create the table of contents, click on the "Layout" menu and select the corresponding entry.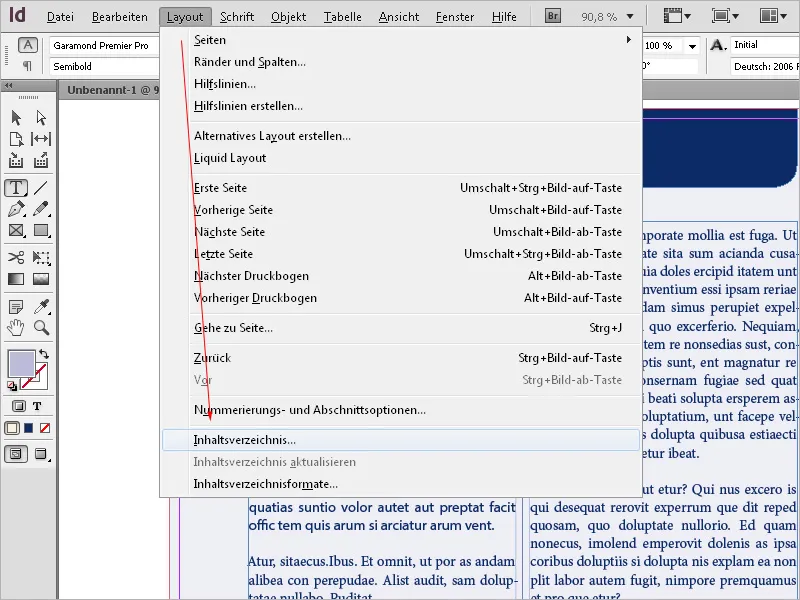
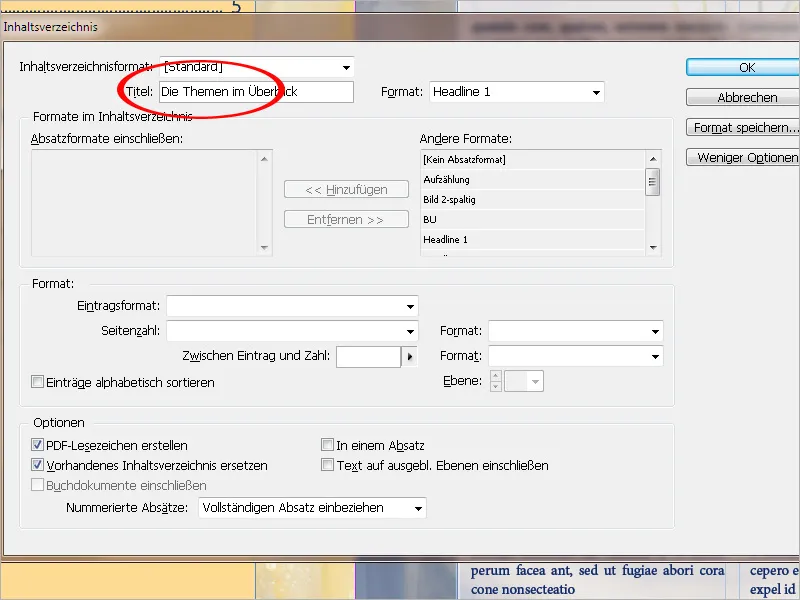
Enter a title such as Table of Contents or similar - this title will then appear on the page with the table of contents. You can assign your own paragraph style to this title or create a new one for it.
In the next step, you need to determine which paragraph styles the table of contents should be built from. To do this, select the relevant Heading Format in the "Other Formats" list and then click the "Add" button to add it to the "Include Paragraph Styles" section.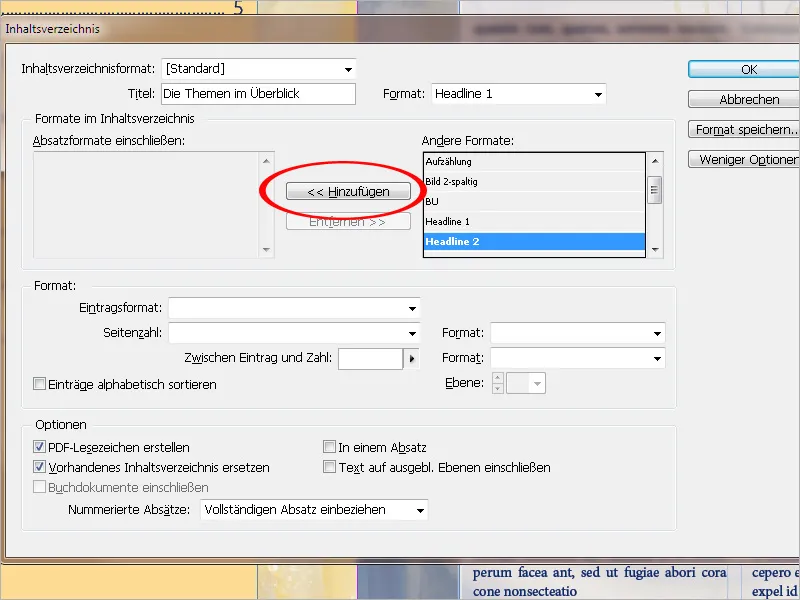
Now, in the "Entry Format" field, select the paragraph style to format the table of contents itself.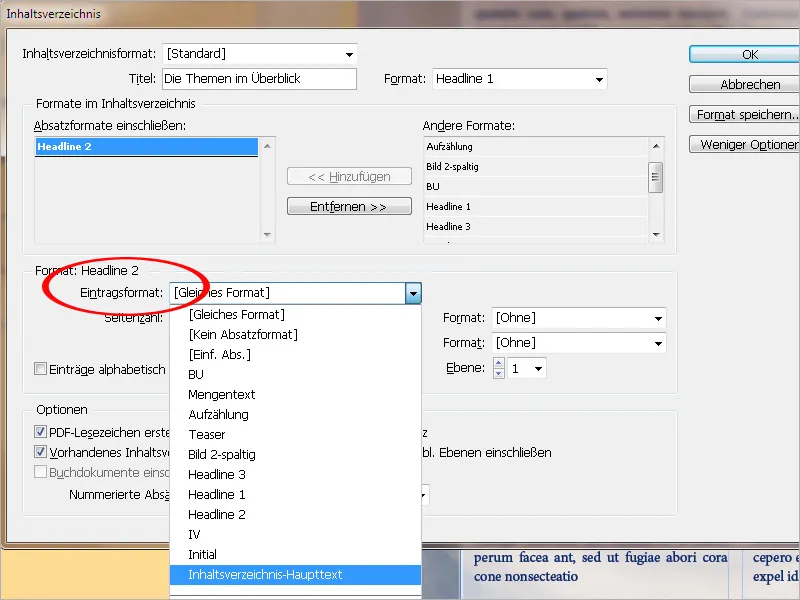
In the "Page Number" field, specify whether the page number should be displayed before or after the entry or possibly not at all.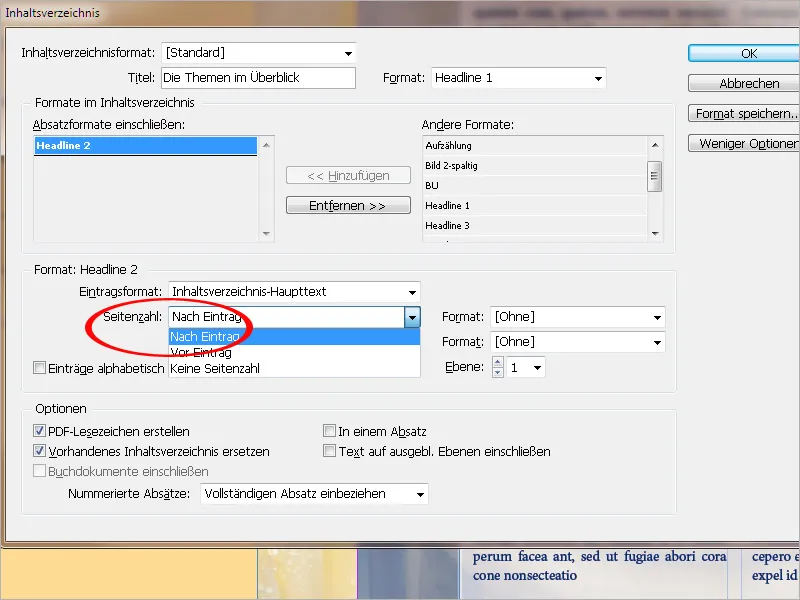
If needed, a custom character style can also be assigned to the page number.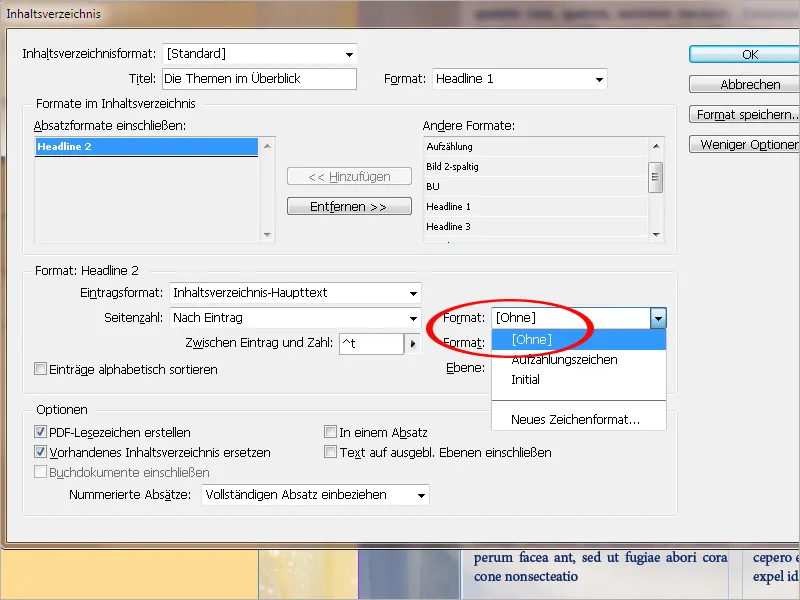
In the "Between Entry and Number" field, after clicking the small arrow, you can choose from a range of spaces, tabulators, and empty spaces. The default is ^t, which inserts a tab character in InDesign. If you select a specific entry from the menu, it will be added to the existing one. To remove an unwanted entry, click directly in the field and delete it.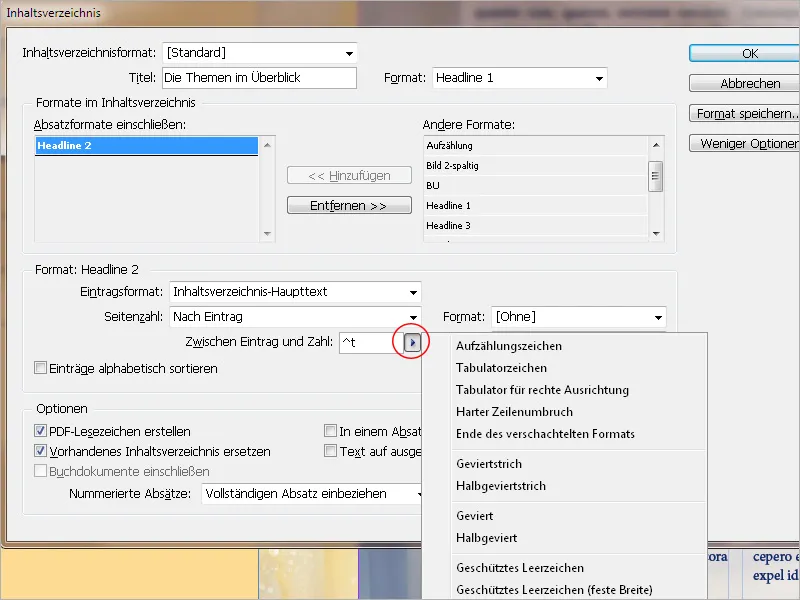
To insert punctuation spaces between the directory entry and the page number for easier visual orientation, the characters ^t^. must be in the field.
If necessary, a custom character style can also be assigned to these fill characters.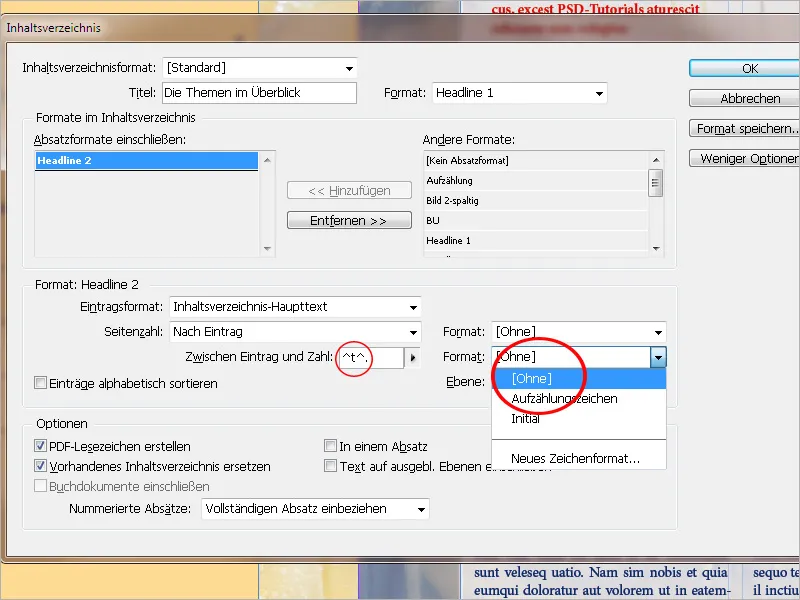
To create punctuation spaces after the directory entry and then a right-aligned page number, you also need to enter a right-aligned tabulator (slightly smaller than the column width) on the "Tabs" tab of the paragraph style assigned to the table of contents and enter a period as the fill character.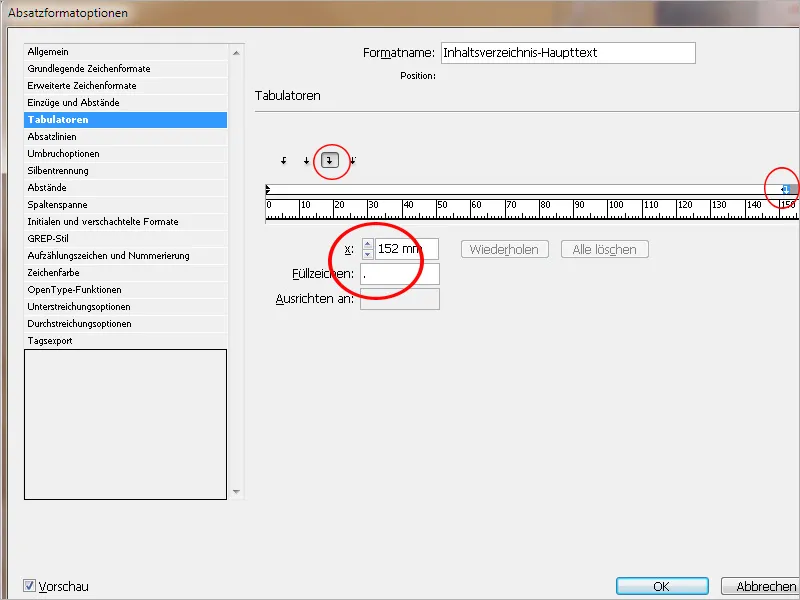
If the directory needs to be structured into multiple levels (such as 1.1, 1.2., 1.2.1., etc.), a specific paragraph style and the intended hierarchy number must be entered in the "Include Paragraph Styles" list for each level.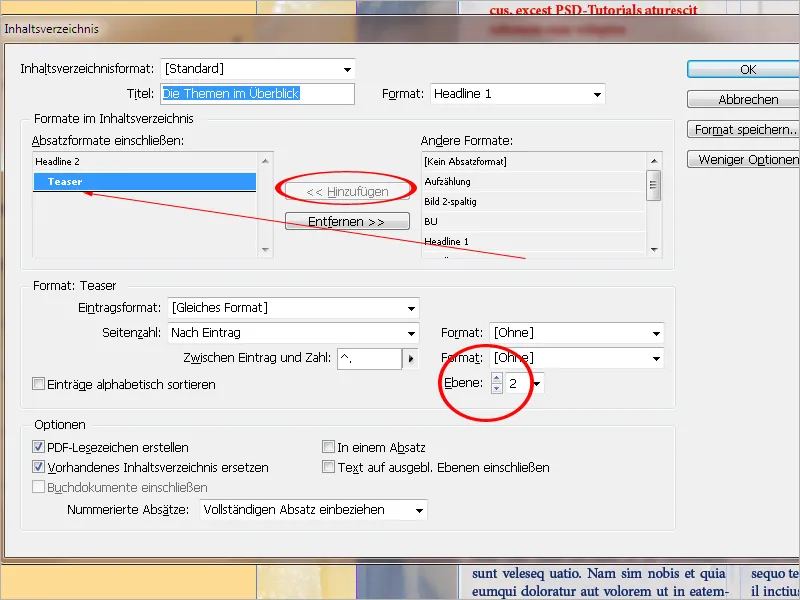
Under "Options," it is recommended to select Create PDF bookmarks. This way, when exporting the InDesign file later, a table of contents with bookmarks to the chapters will be generated in the PDF.
Replacing an existing table of contents does exactly what it says: it replaces an already existing one. If you want to create an additional list such as a list of figures alongside a table of contents, leave this checkbox empty; otherwise, the table of contents will be replaced by the list of figures.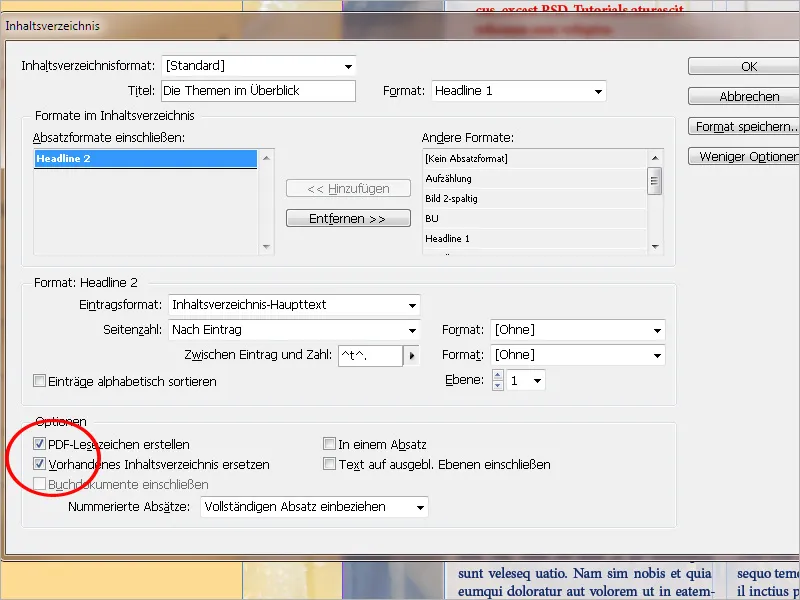
The option Include text on hidden layers offers an interesting additional option. For example, in addition to long chapter headings on one level, you can set short alternative headings on a second level and mark them with the corresponding paragraph style to be used in the table of contents later. This level will be hidden later.
By activating this option, InDesign still reads and includes these entries in the table of contents. You can also create an advertiser directory for ads or similar and capture the names of the advertisers at the corresponding locations on a second hidden layer.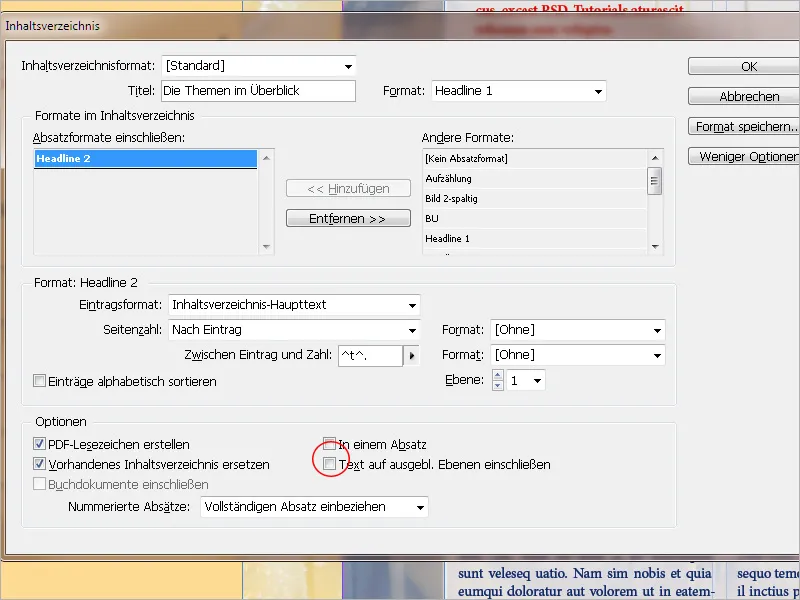
After completing all these settings, you can save the format under a unique name. This way, you can use it in other documents as needed without starting from scratch.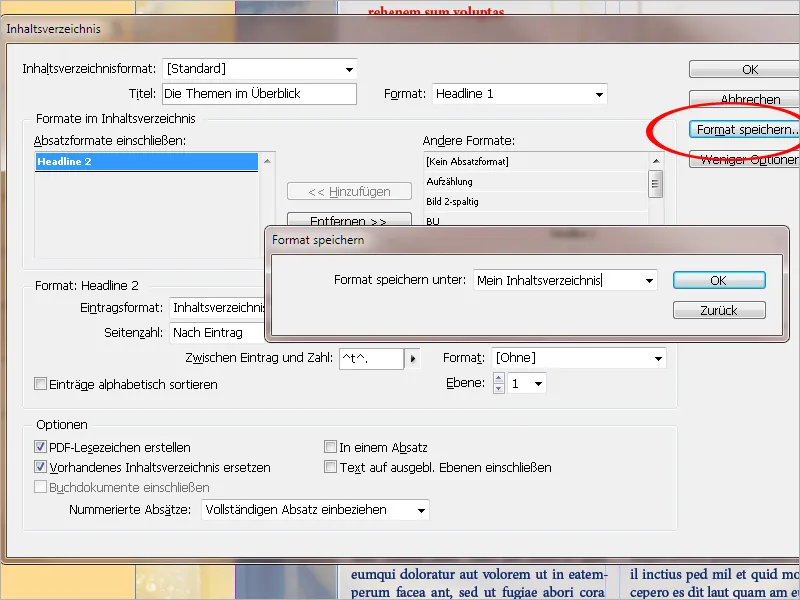
To import a saved table of contents format, click on Layout>Table of Contents Formats>Load and select it from the source file. It's essential that the paragraph styles in both documents match.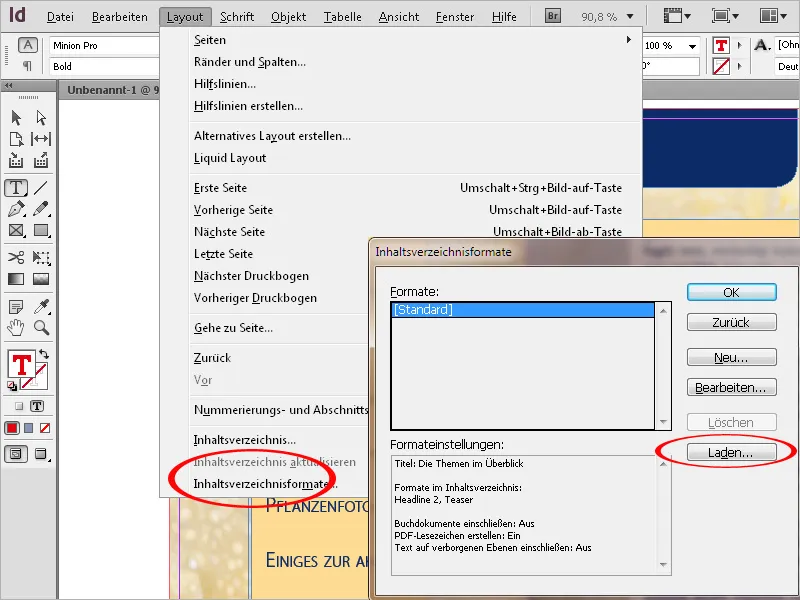
When all settings are completed, a cursor with loaded text will be displayed after clicking OK. Now you can switch to or create a new page designated for the table of contents without losing the loaded text. Click or drag the loaded text cursor on the page where you want to place the text section for the table of contents.
The table of contents will now be generated within this text frame according to the set specifications.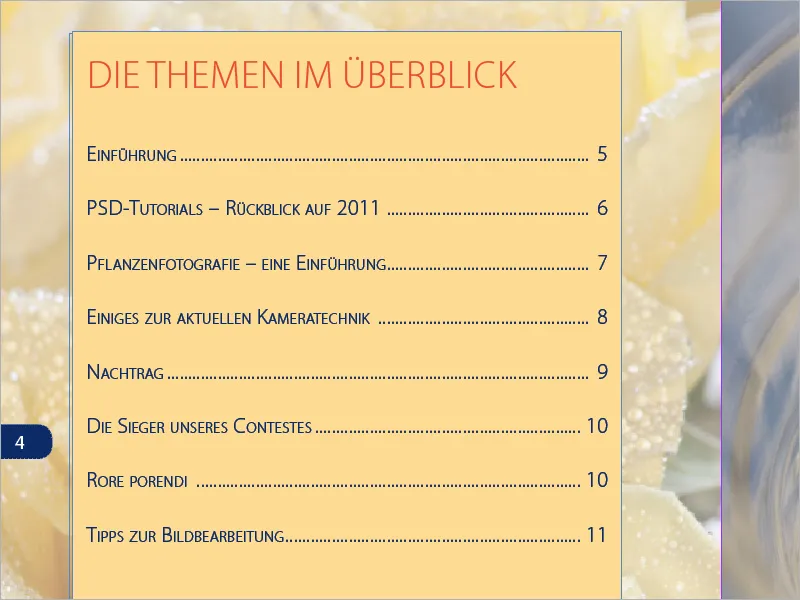
The table of contents frame must not be linked with other text frames in the document. Otherwise, when updating, the entire text section would be replaced by the updated table of contents.
If the document is further edited and text is removed or added, the chapters or images may shift to other pages.
An existing table of contents must therefore be updated. Click with the text tool in a paragraph of the directory and then select the entry Update Table of Contents from the Layout menu.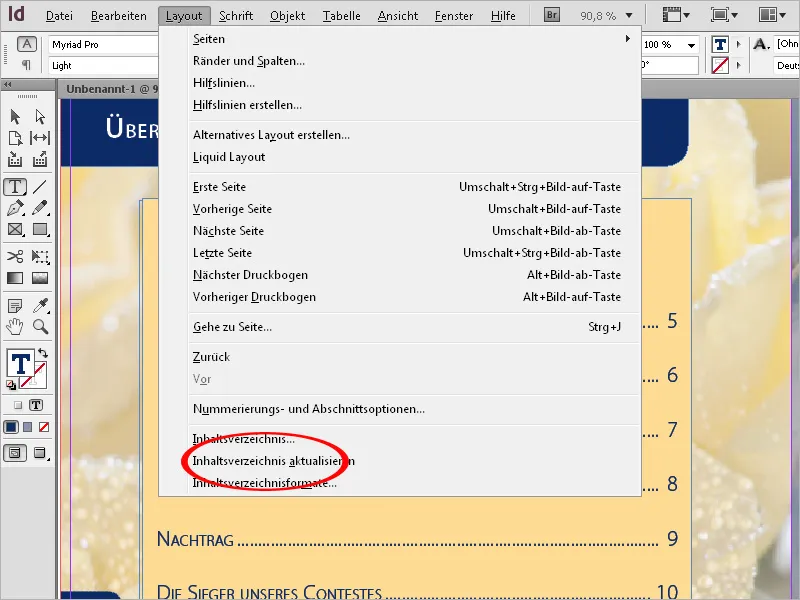
Now the page numbers will be updated and newly added or deleted chapters will be included or removed from the directory.
By editing the relevant settings, the table of contents can be adjusted at any time to changed preferences (menu Layout>Table of Contents or change the paragraph formats accordingly).


