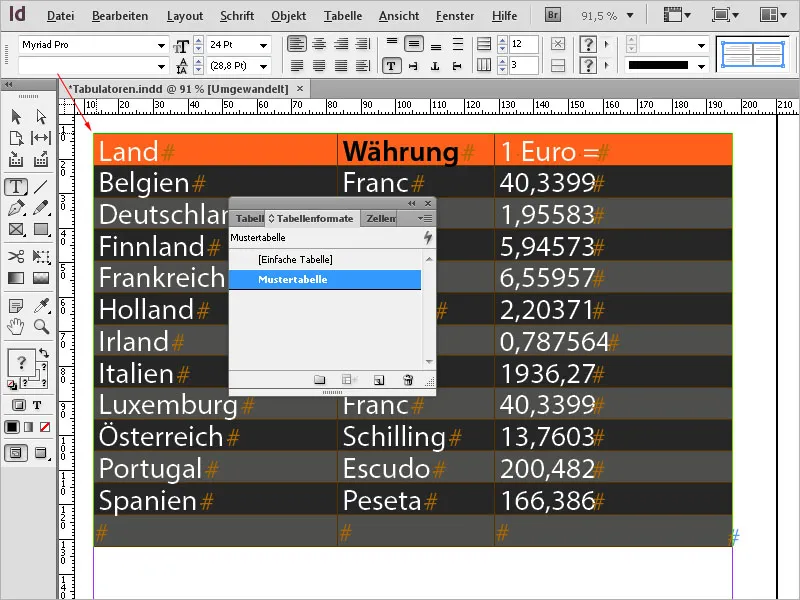
Tabs and tables are essential tools in Adobe InDesign to present data and content clearly and structured. Whether you want to create simple lists or complex tables - with the tabs and tables functions, you can create precise layouts. In this guide, I will show you step by step how to set up tabs correctly, create and customize tables to create professional and clear designs. Let's start and enhance your data perfectly!
1. Tabs
When copying a table, e.g. from Excel and pasting it into InDesign, the data is initially displayed unstructured only separated by tab stops and paragraph marks. To align them quickly and without much effort, use the Tab Stops Ruler. This can be displayed with the shortcut Shift+Ctrl+T.
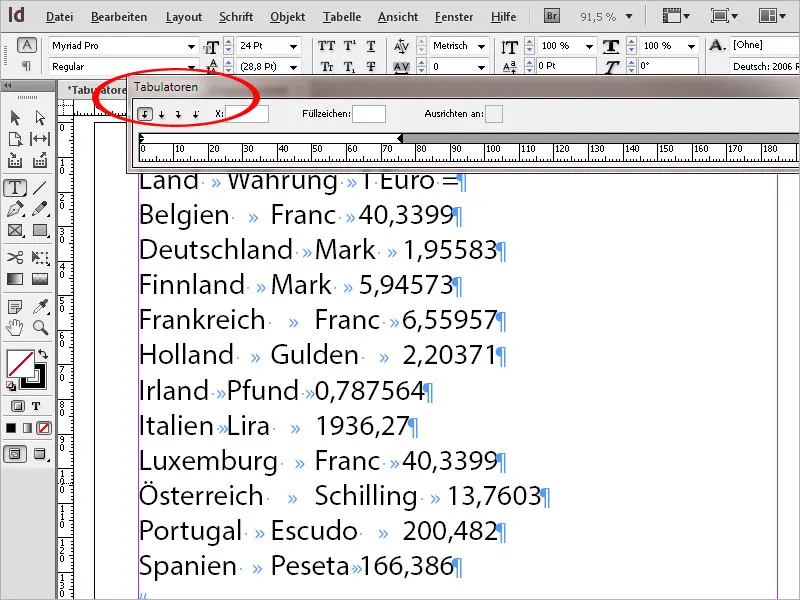
It is also useful to display the rulers for orientation (Ctrl+R). Additionally, show the hidden characters as well (Alt+Ctrl+I) so that you can identify the tabs between the words.
Now first select the inserted text. To estimate the beginning of the second column, orient yourself on the ruler. The measure for this is the rightmost word.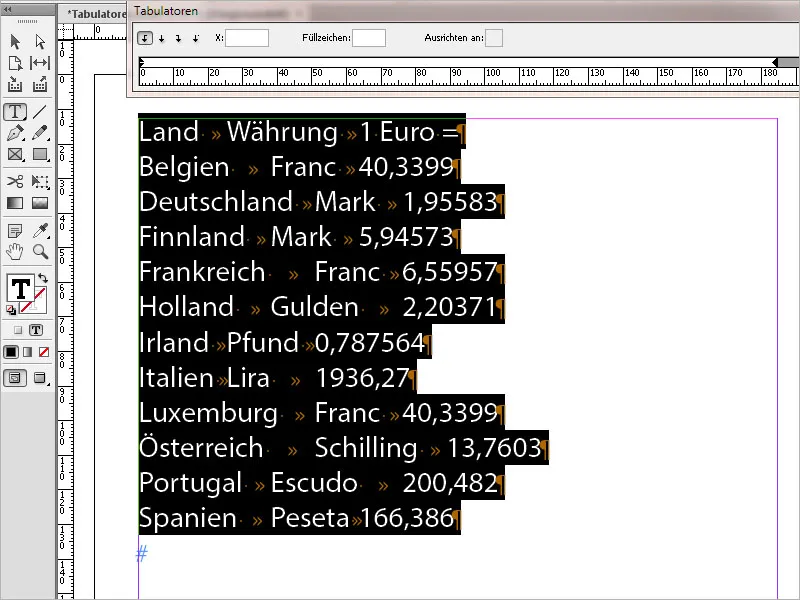
Now think about how the text in the second column should be aligned. The Tab Stops Ruler offers a left-aligned, a centered, a right-aligned, and a decimal tab stop (for aligning numbers after the comma). Click on one of them and then above the scale to the position with the approximate required distance to the first column.
The Tab Stops Ruler can be horizontally moved with a pressed mouse button since only a section of the measurements of the entire page is displayed therein.
For a better overview, you can also position the control panel directly above the text frame by clicking on the small symbol to the right of the ruler. For this, the top edge of the page must be visible on the screen.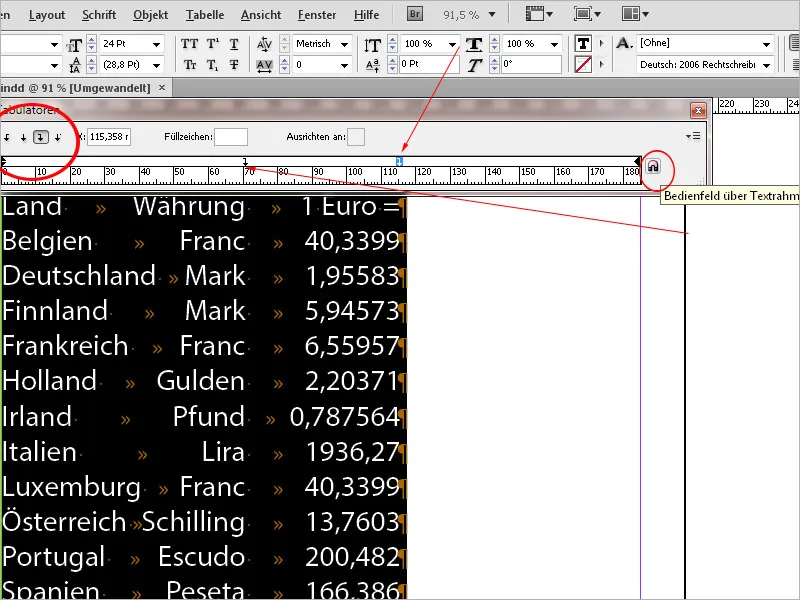
Now the value in the x field is displayed and can be finely adjusted there. The text will be aligned accordingly. The tab stop can also be moved with a pressed mouse button for intuitive adjustment, and the text aligns accordingly. With a mouse click, the tab stop is now set for aligning the next column, and so on.
Through the Control Panel menu or the context menu of the right mouse button, you can easily change the alignment of an already set tab stop afterwards (or by clicking on a tab stop aligned differently than the one marked). Furthermore, you can also delete or repeat one or all tab stops there (for the same distance).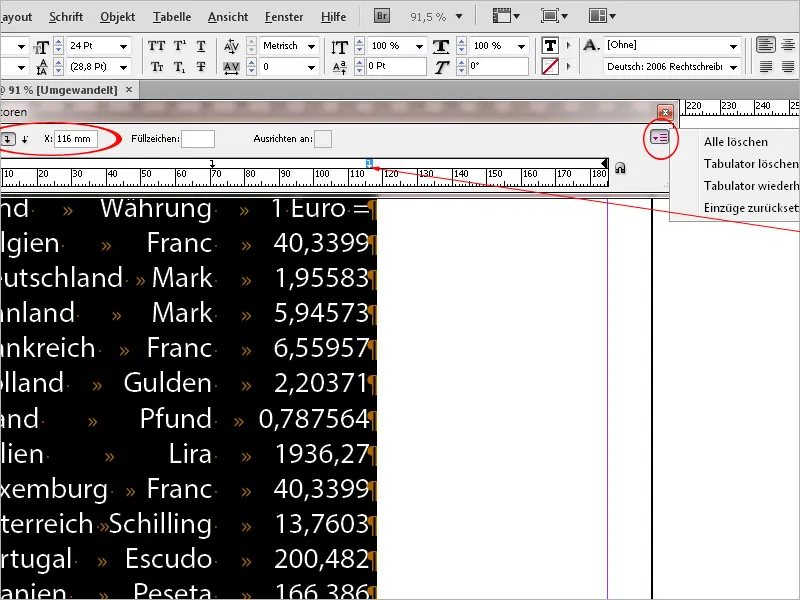
To create a visual connection between the entries of two columns, you can use a filler sign such as a dot or an underscore.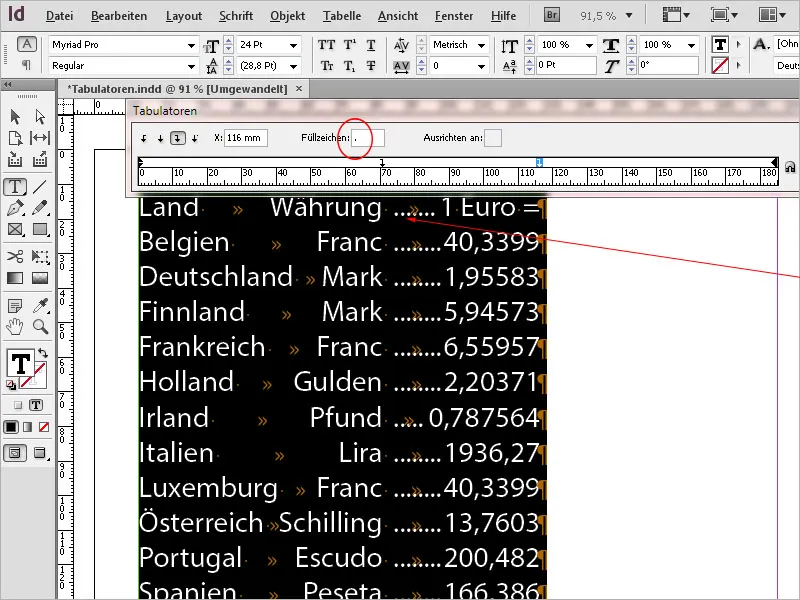
Instead of a comma, a different character such as a period or colon can also be specified as orientation for aligning in the decimal tab stop. Click into the Align to field and enter the corresponding character. After pressing the tab key, the column will be realigned.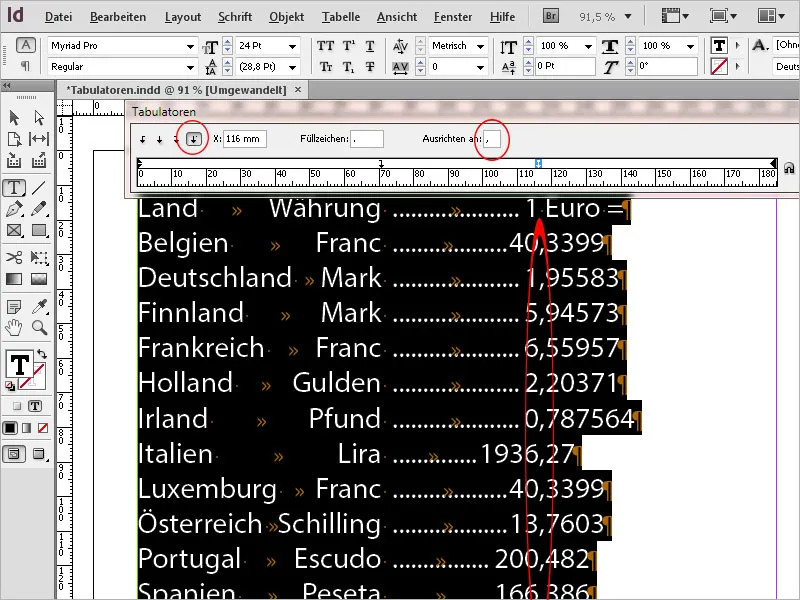
This way, text separated by tabs can be aligned quickly and easily. If you frequently need this scheme, you can also create a paragraph format with these settings, allowing new text to be aligned with a mouse click in the future.
2. Tables
If representing the data requires a table format, the inserted text separated by tabs can also be quickly converted into it.
So, mark and copy the desired range from the source file and paste it into a text frame in InDesign. Then mark it there as well and from the menu, choose Table and then Convert Text to Table.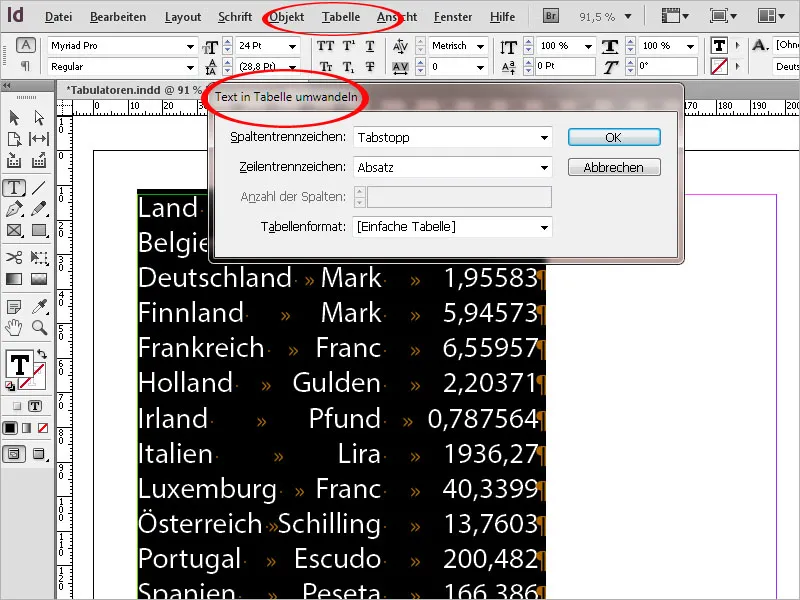
In general, tab stops are used as column separators; for comma-separated (csv) text files, a comma can alternatively be selected.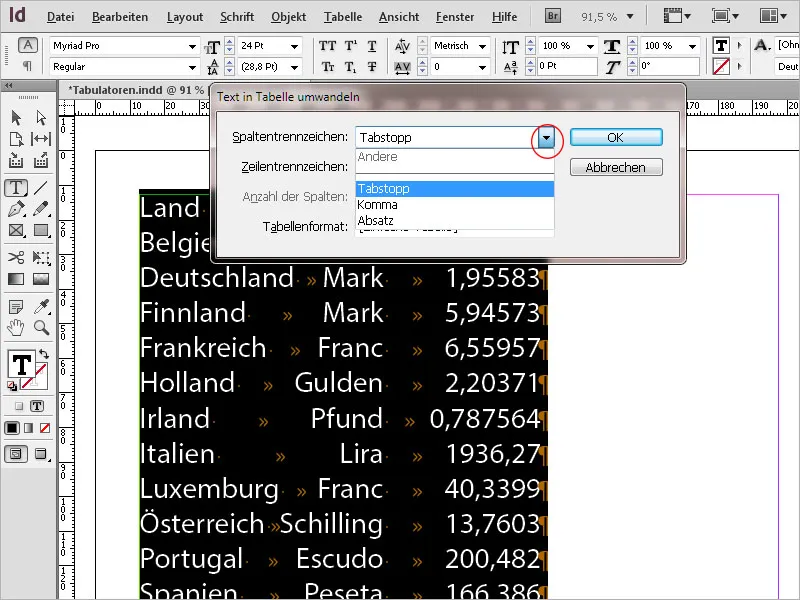
After clicking OK, the text will be nice and clean displayed as lines and columns with borders as a table. The position of the rows and columns can be changed by dragging with a pressed mouse button. To standardize different heights or widths, click on the column header of the relevant columns (multiple columns are marked with the Shift key pressed) and choose from the context menu of the right mouse button the option Evenly Distribute Rows/Columns.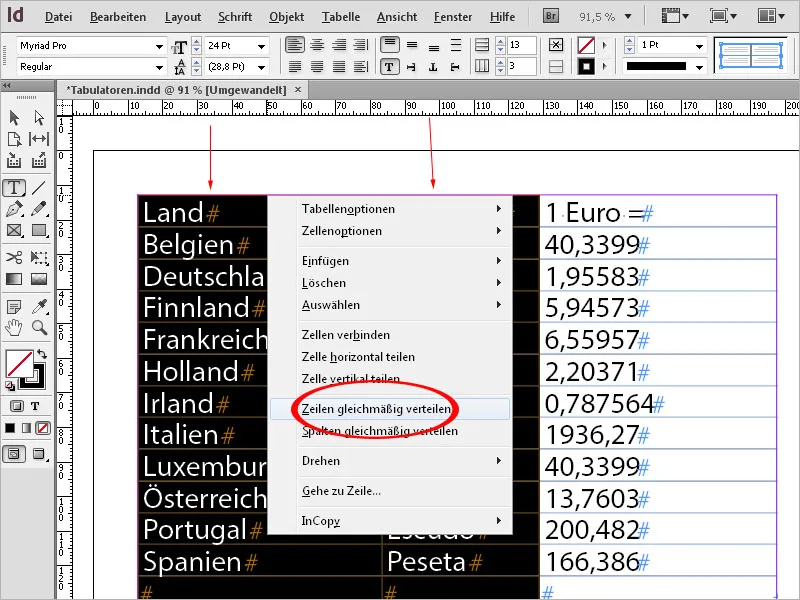
The alignment of marked columns (e.g. left or right-aligned or centered) is done in the Control Palette. For further settings, open the panel via the menu Window>Type and Tables or with the shortcut Shift+F9.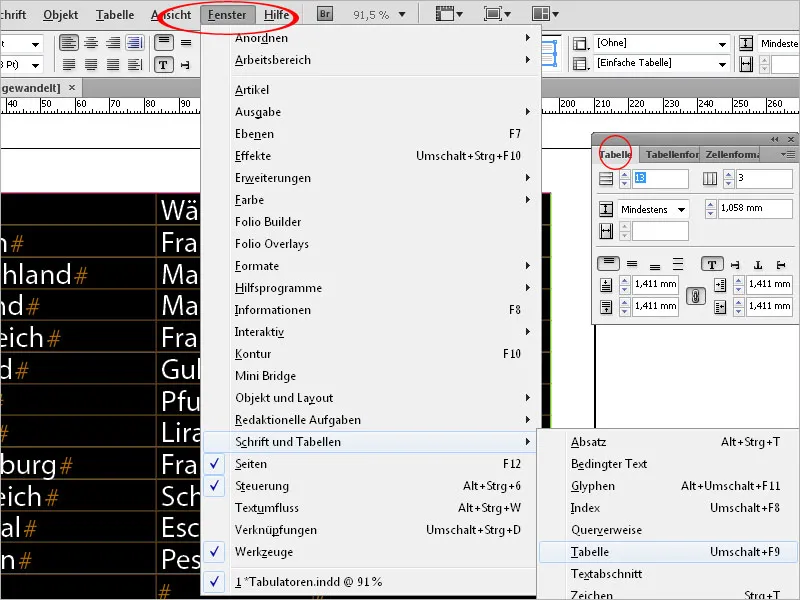
Here you can adjust the exact row height of the marked table, the vertical alignment, and the distances to the border lines.
If you want to interrupt a long table with other texts and then continue it or let it run over two or more pages, it is recommended to set up a header row that labels the columns at the top each time. Each time, the formatting such as font style, color, and background color is taken over. To do this, mark the top row of the table with the text tool and select the command Convert to Table Header Rows from the context menu of the right mouse button.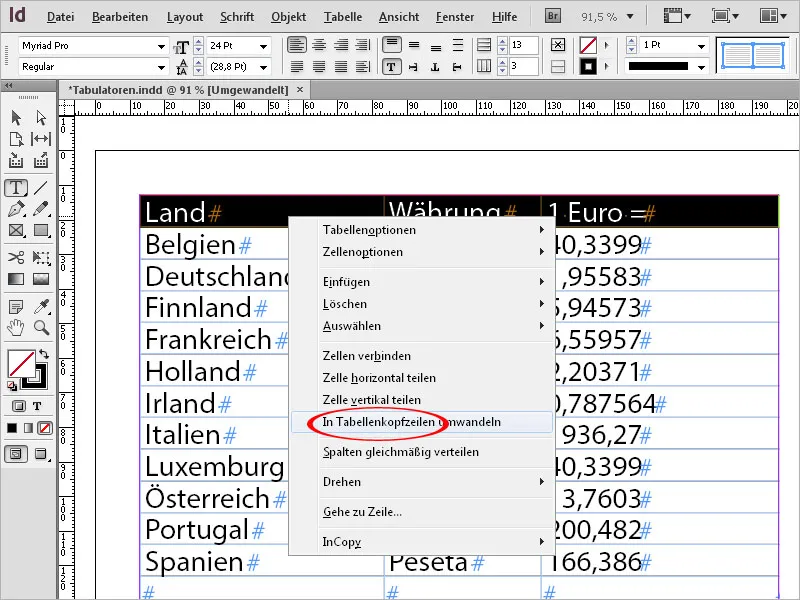
If you now reduce the height of the text frame enclosing the table so that overflow text is displayed, you can load this into the cursor with a click using the direct selection tool and then draw a new text frame elsewhere in the document using the text tool.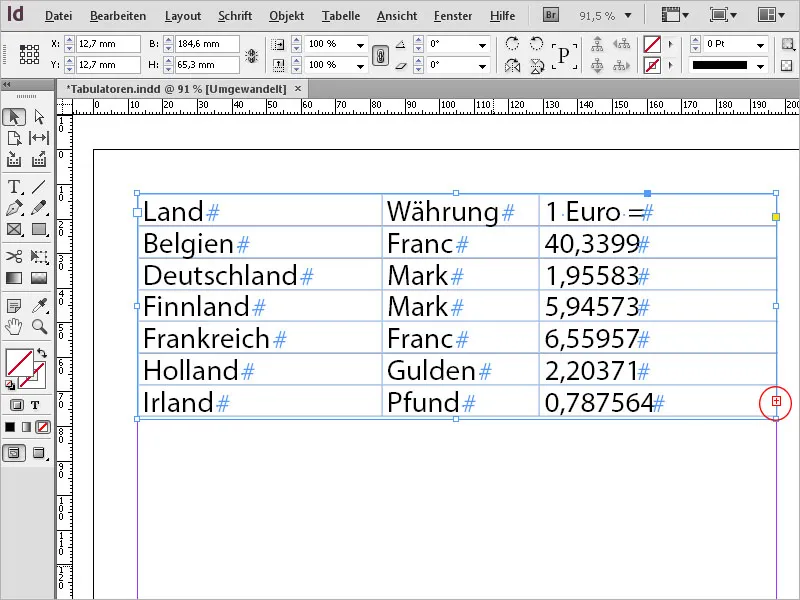
The overflow text now flows into the frame, including a new header, and dynamically continues the table. Even with later changes, the text flow adjusts accordingly.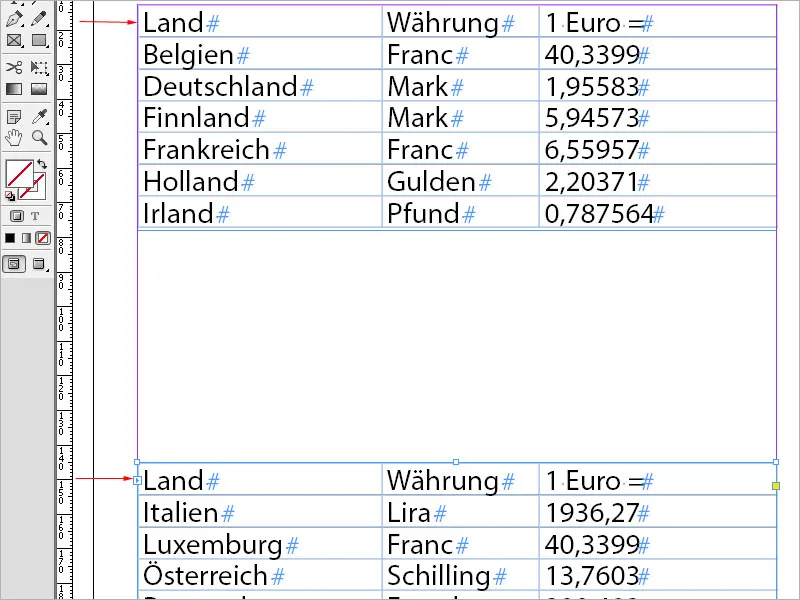
The same principle can be applied to footer rows: mark the last row of a table and select the command Convert to Table Footer Rows from the context menu of the right mouse button.
If the text frame is reduced so that the table no longer fits or continues on a new page, a table footer row will automatically appear in each table text frame. To make a table visually appealing and improve readability, InDesign offers the setting for alternating fill under Table Options in the context menu of the selected table.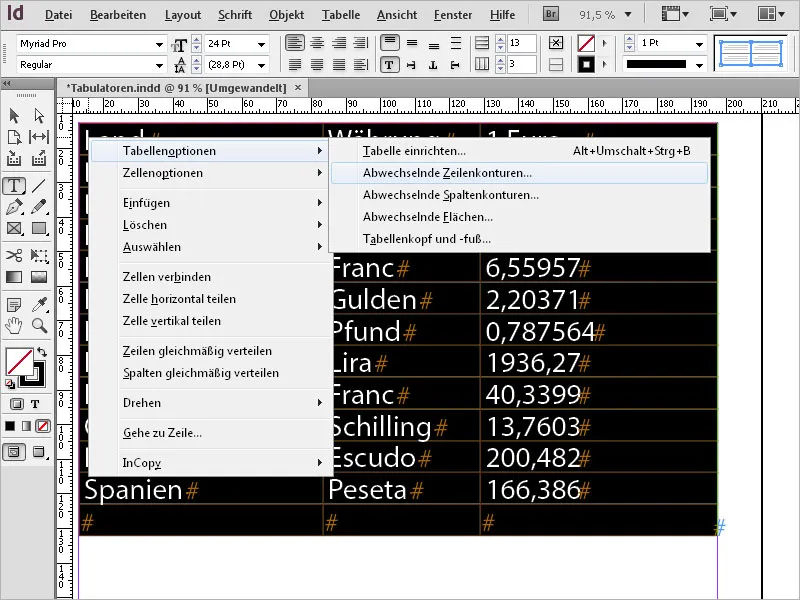
Here you can assign a different color to every second, third, or x-th line in an alternating pattern. Specify a color and then a color value for the first and the next line. Similarly, this can be set up for columns as well. Choose the desired setting from the dropdown menu under Alternate Pattern.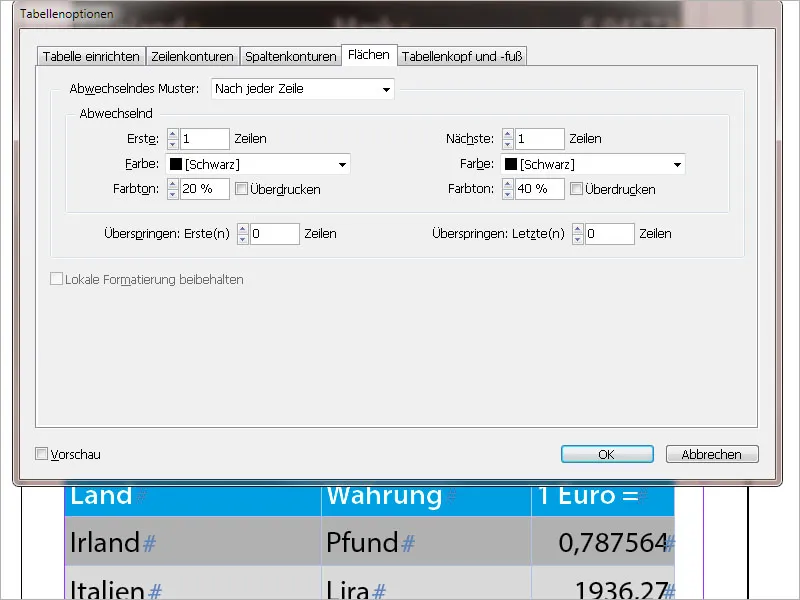
3. Cell and Table Formats
If a document requires a large number of tables to be created following the same pattern, with a header and footer row having the corresponding font and background color and uniformly structured body cells, it is recommended to use table formats. Prerequisite for this are previously created cell formats. To do this, select a cell and then open the corresponding panel via Window>Styles>Cell Styles.
Click on the button New Cell Style at the bottom, then open it with a double-click and make the necessary settings.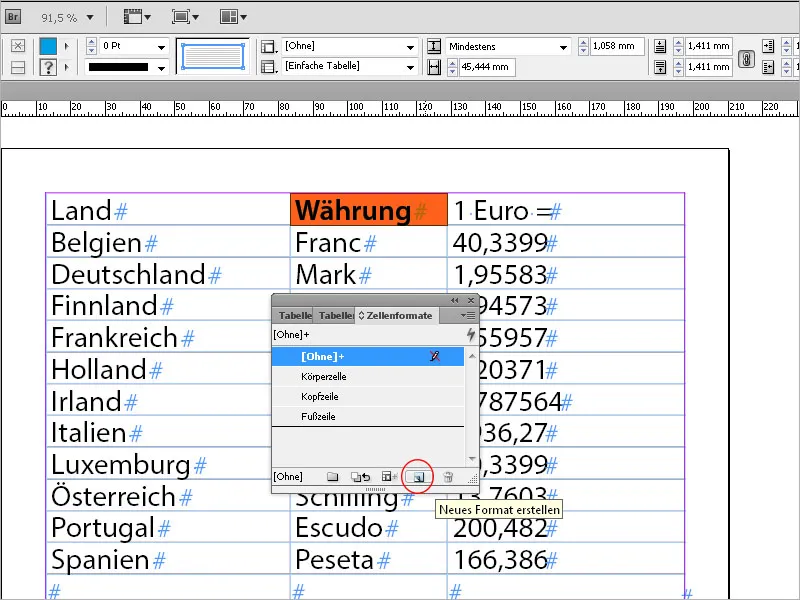
In this way, you create a format for the header and footer rows and the body cells respectively. To ensure the font is consistently formatted in the different cells, on the General tab of the Cell Style Options in the Paragraph Styles section, select an existing or create a new Paragraph Style with the desired typographic features. This will then be associated with the cell style.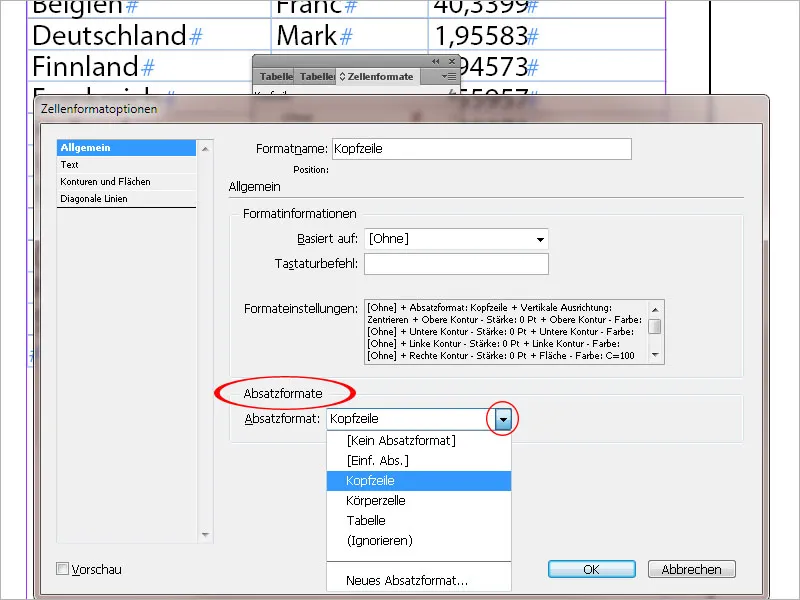
Once this groundwork is done, you can create a new table format through the menu Window>Styles>Table Formats by clicking the button at the bottom of the panel, and open it with a double-click.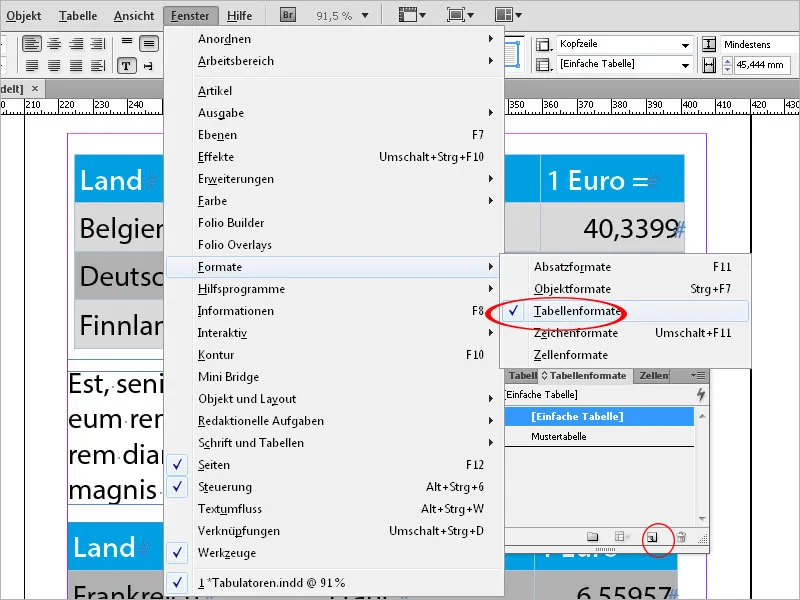
Name it first and then on the General tab, select the previously created formats for header and footer rows as well as body cells in the Cell Styles section. After reviewing and adjusting the remaining settings for row and column strokes as well as background colors and patterns with different hues, save the new table format by clicking OK.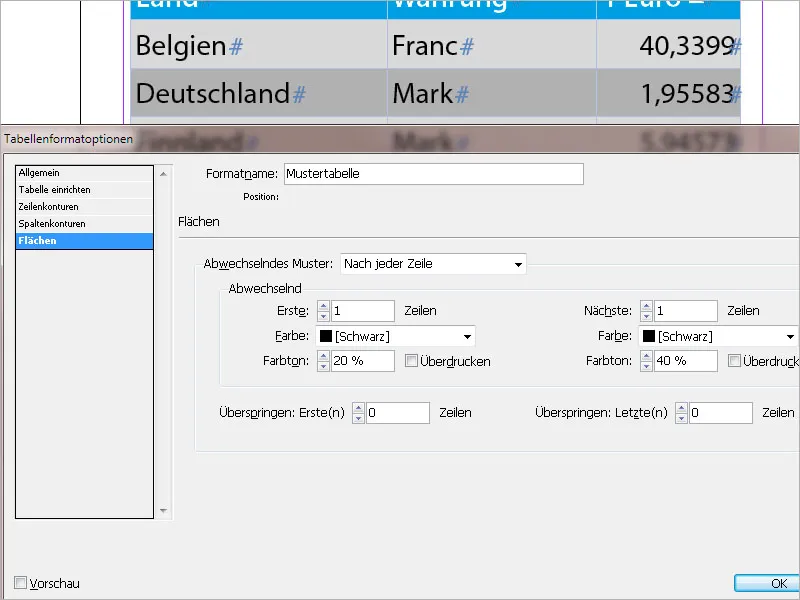
When placing new tables, you can now apply this format immediately. Initially, only the header and footer rows need to be assigned via the context menu, and the graphical and typographic styling will be based on the included cell- and paragraph styles.
To do this, click with the text tool in the upper left corner to select the entire table, and then in the Table Formats panel, click on the newly created table format.
If changes need to be made later, they will apply to all tables marked with the table format.