Splashes of water and water drops are perfect design elements to bring freshness and dynamics to your projects. Whether it's for posters, advertising banners, or digital art - with Photoshop, you can easily create this effect in no time. In this tutorial, I will show you how to quickly and easily create realistic water splashes and drops by combining brushes, layer effects, and textures. Let's get started and give your designs a refreshing look!
Step 1:
In order to be able to create the effect at any time with a simple button click, I record an Action. To do this, I open my Actions panel, click on the New icon, and name it "Water Drops".

Step 2:
I create a new image with a white background. The size doesn't matter. I'll use 800 x 800 pixels.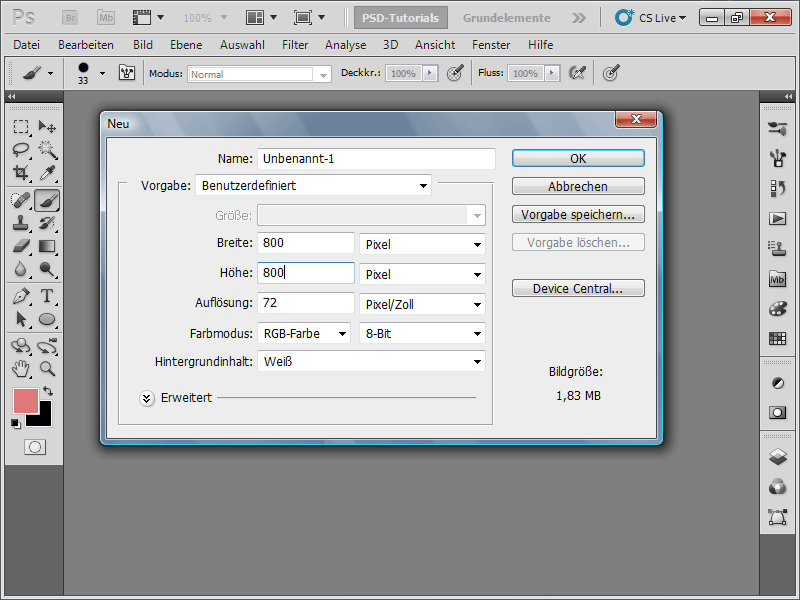
Step 3:
It's important that the foreground color is black and the background color is white. Now, I go to the menu and select Filter>Render>Clouds.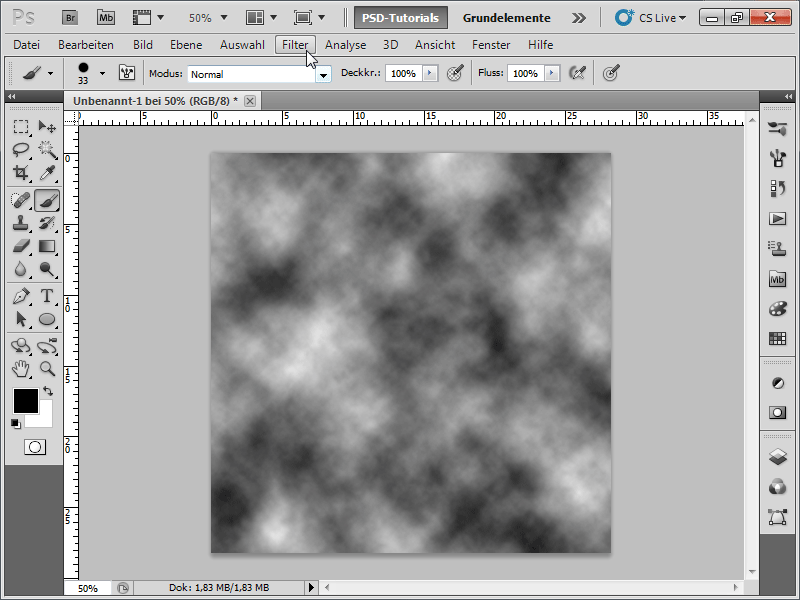
Step 4:
Next, I click on Filter>Stylize>Find Edges.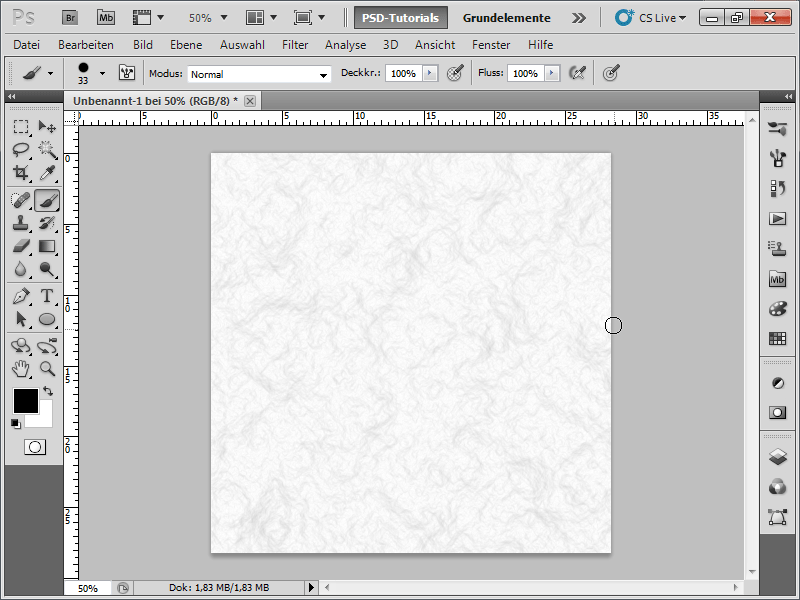
Step 5:
Then, in the menu, I go to Image>Adjustments>Levels and click on the Auto button.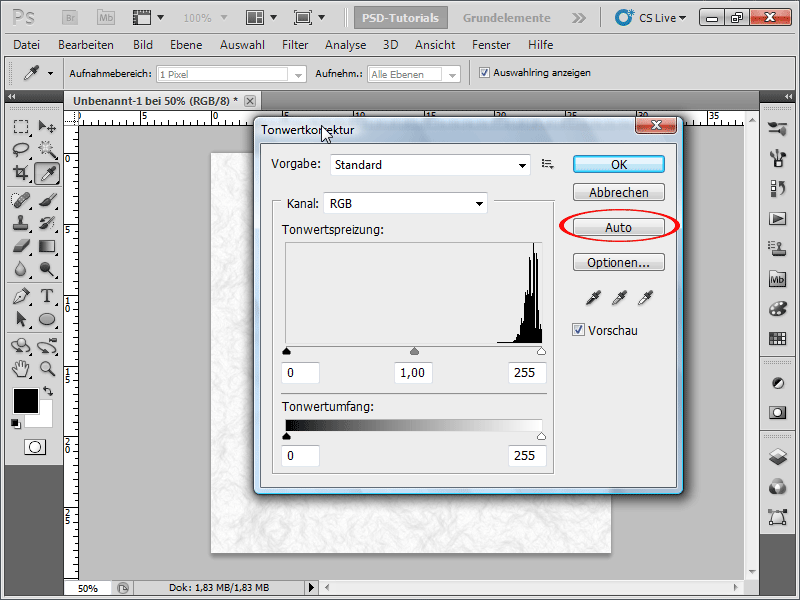
Step 6:
Now I apply another filter, specifically the Emboss Filter, which can be found under the Artistic Filters.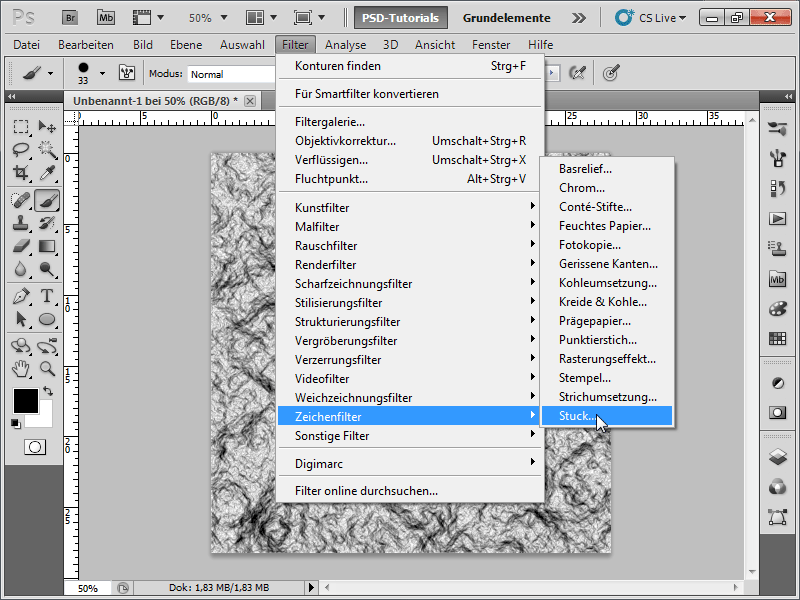
Step 7:
I make the following adjustments: Amount to 38, Smoothness to 15, and set Light to Top.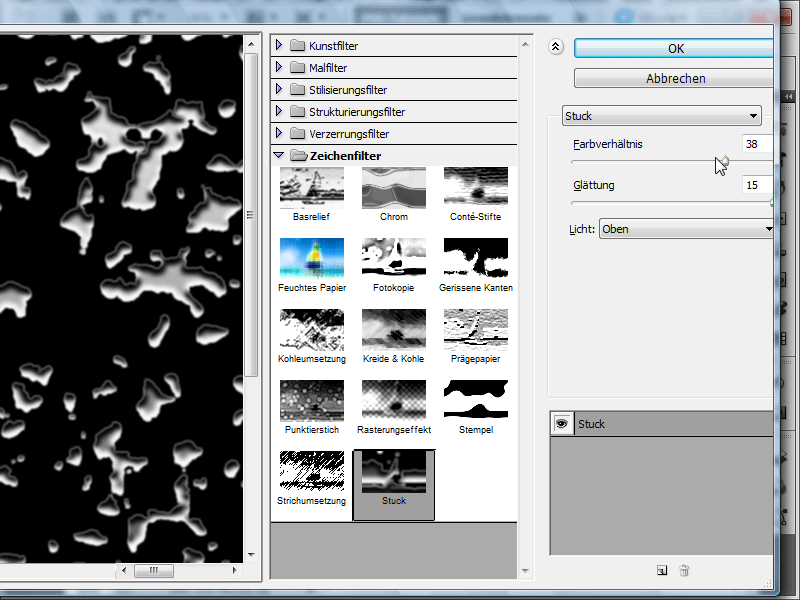
Step 8:
Now, by pressing Ctrl+M, I access the Curves and adjust them as follows: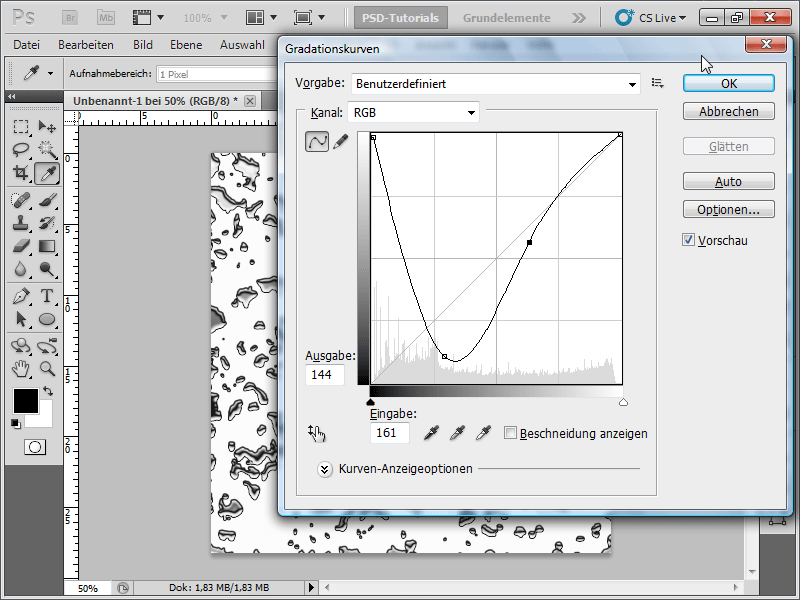
Step 9:
Using Ctrl+U, I open the Hue/Saturation settings, check Colorize, and adjust the values as follows: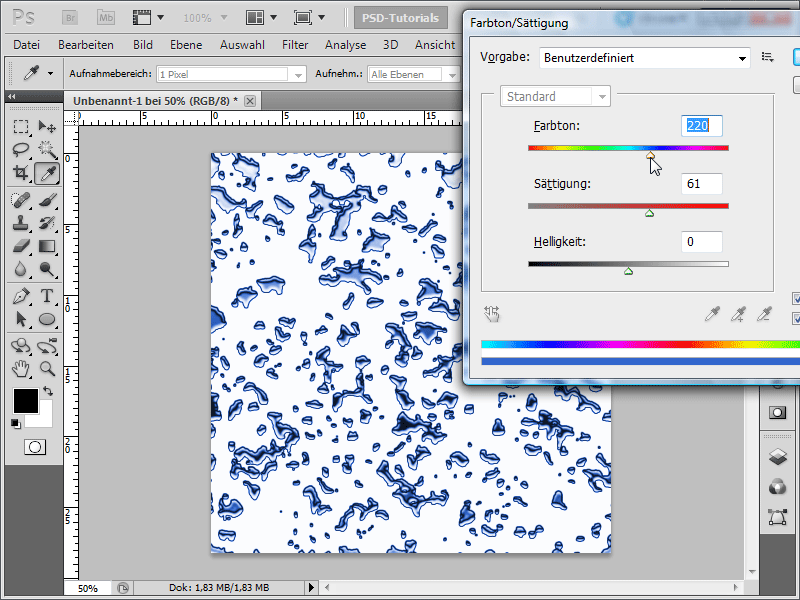
Step 10:
Now, I can stop recording my new action using the Stop button and then play it back at any time. For example, if I want to define the document size myself each time, I recommend checking the box for Toggle dialog on/off. This way, when playing the action, a dialog will appear each time where I can enter the document size myself, and then the action will continue running smoothly.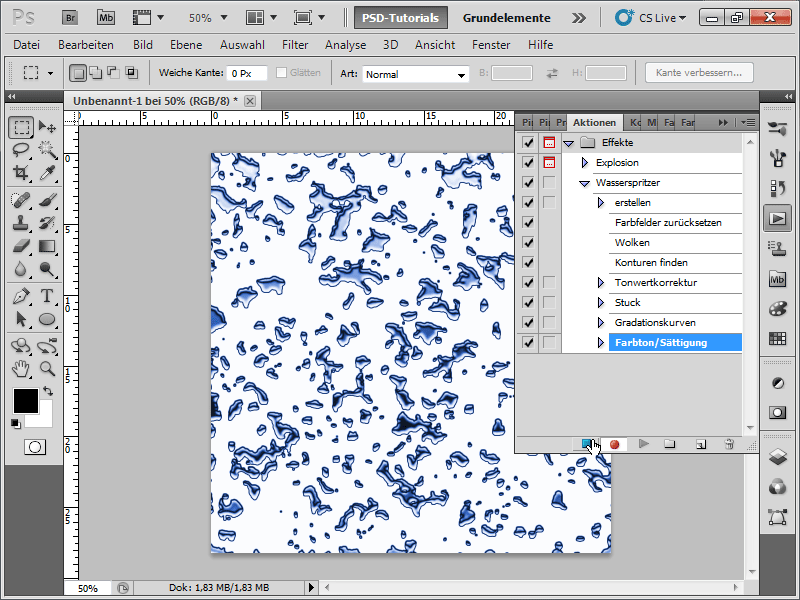
Step 11:
And this is how the water splashes look at 100% zoom: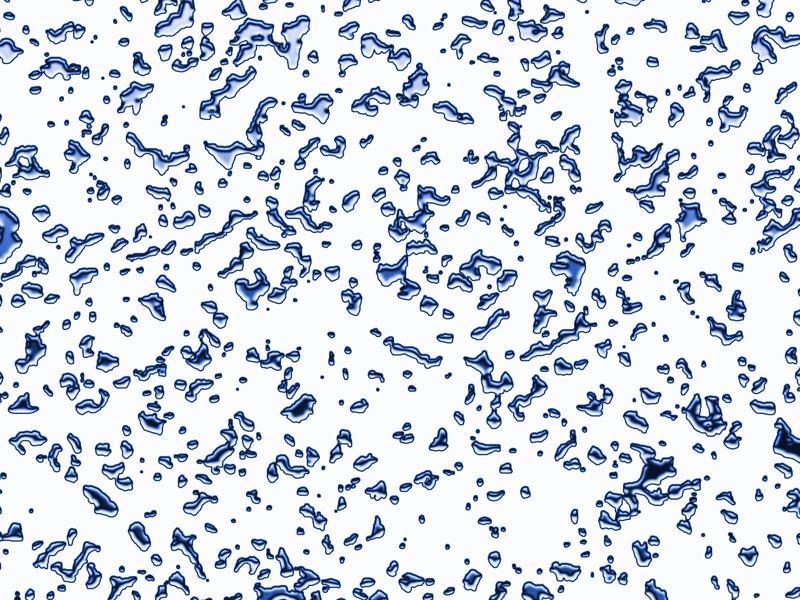
Step 12:
Now, I could do all sorts of things with this. For example, I could select everything, define the splashes as a pattern through Edit>Define Pattern, save it as a pattern, and then apply it as a layer style to text: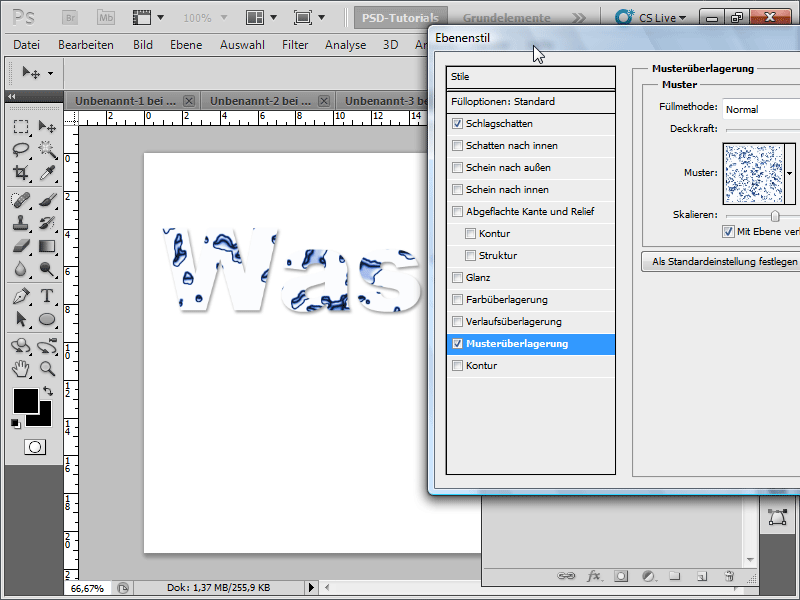
Step 13:
Or I could insert text onto my water splashes, then with Ctrl click on the text layer in the Layers panel to create a selection, and then click on the Mask icon in the water splashes layer. Now, I can expand/reduce the mask to enhance the appearance of the water splashes on my text. I have attached the action as a working file.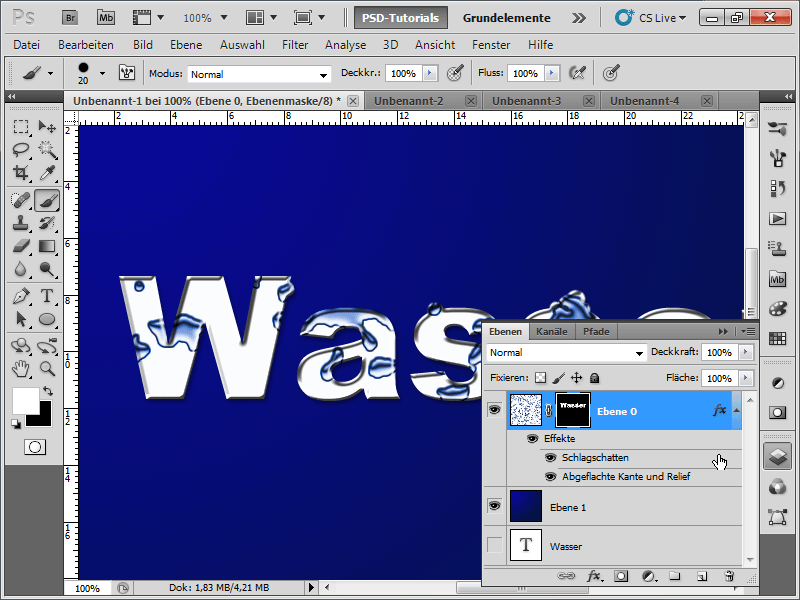
Step 14:
However, if I want to create realistic water drops, I recommend the following approach: I first create a new document, size doesn't matter. Then, I create a new layer on it, select my brush, and go into the Brush settings. In the Brush tip shape tab, I increase the Spacing.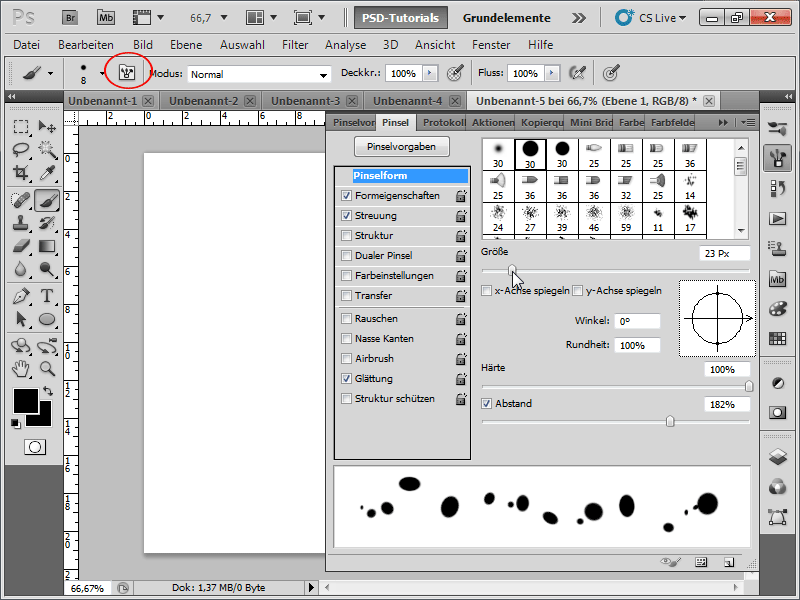
Step 15:
For the shape properties, I set these values: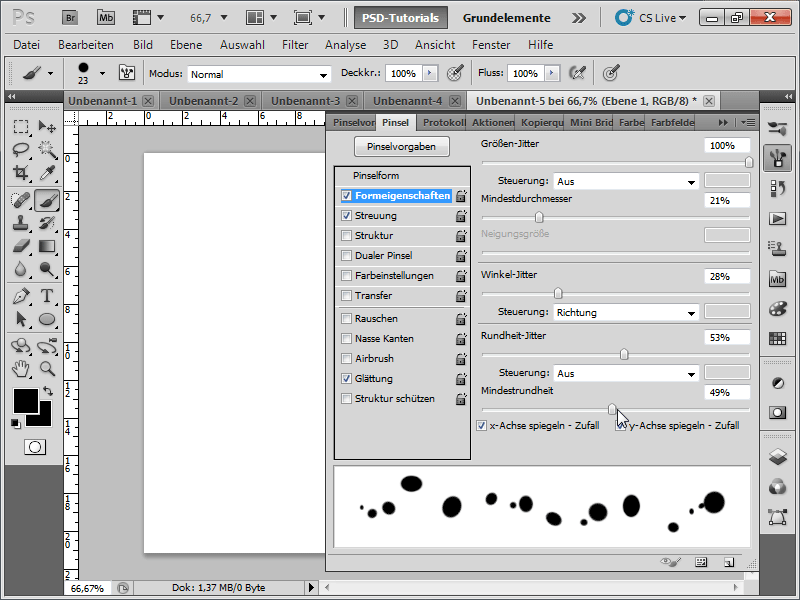
Step 16:
And for scatter, approximately these values (just try out values yourself):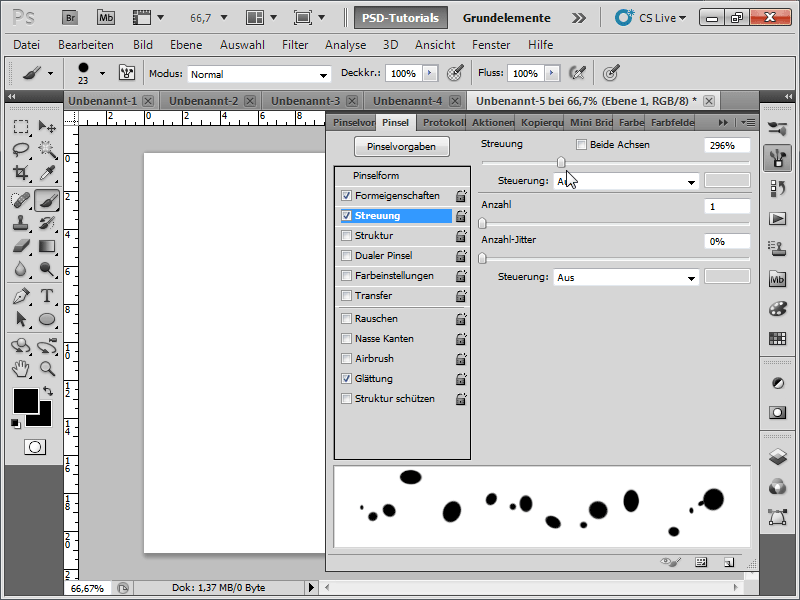
Step 17:
Next, I can click a few times on the image with the brush tool, occasionally changing the brush size. After that, I will insert a nice radial gradient in the background.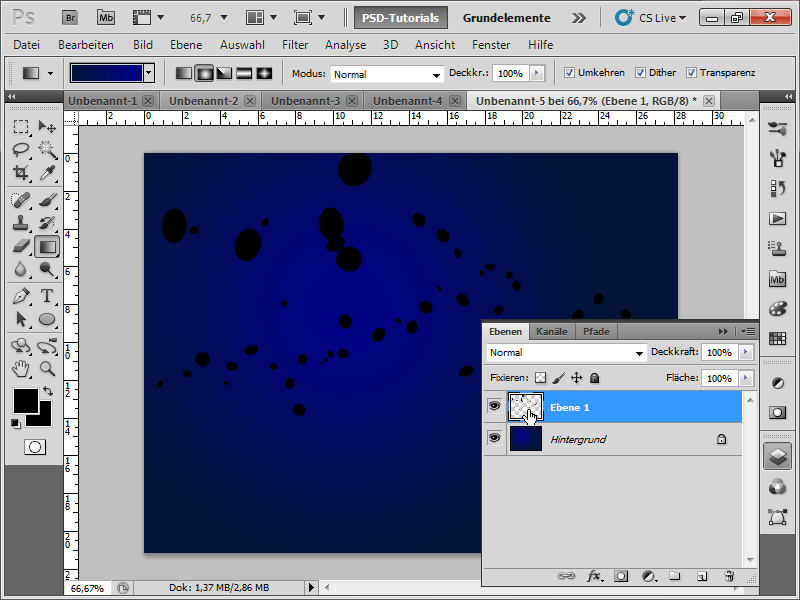
Step 18:
Next, I right-click on my Layer 1 and activate the fill options. Under advanced fill method, I set the opacity to 0%.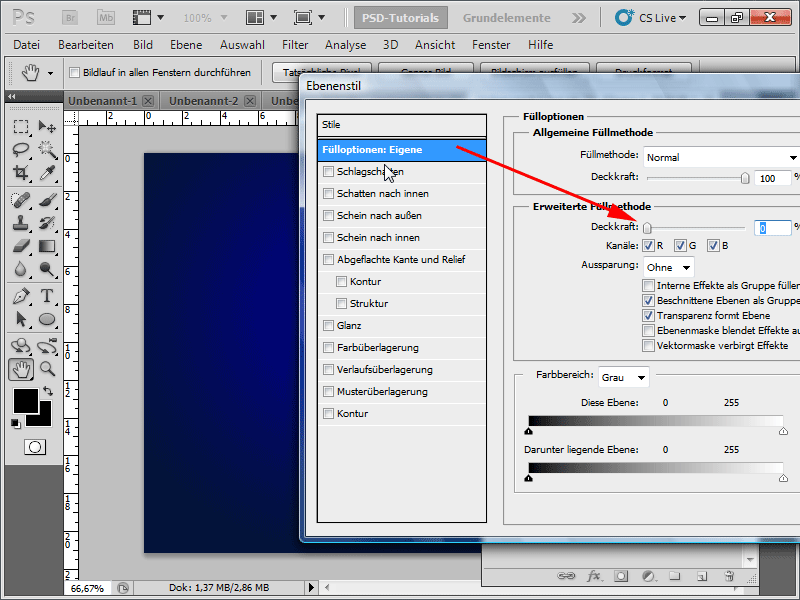
Step 19:
In the drop shadow options, I set the following values: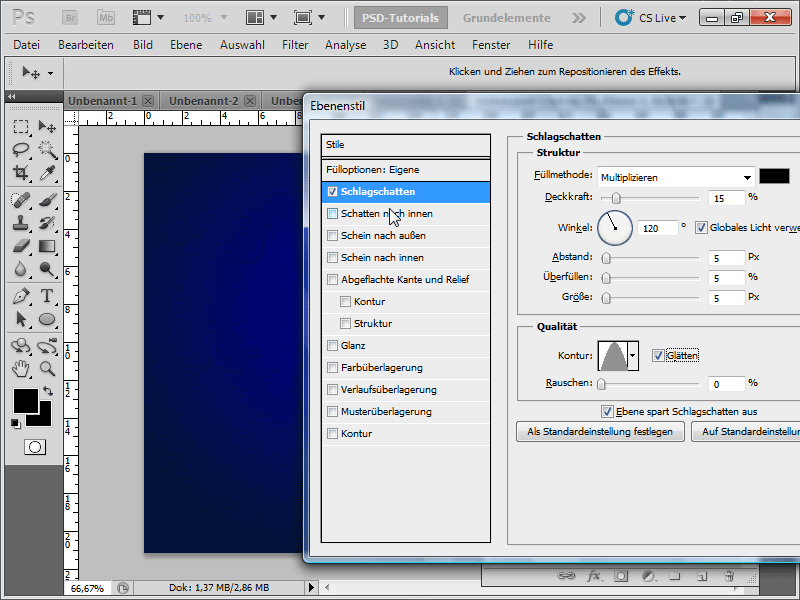
Step 20:
In the inner shadow options, I set the following values: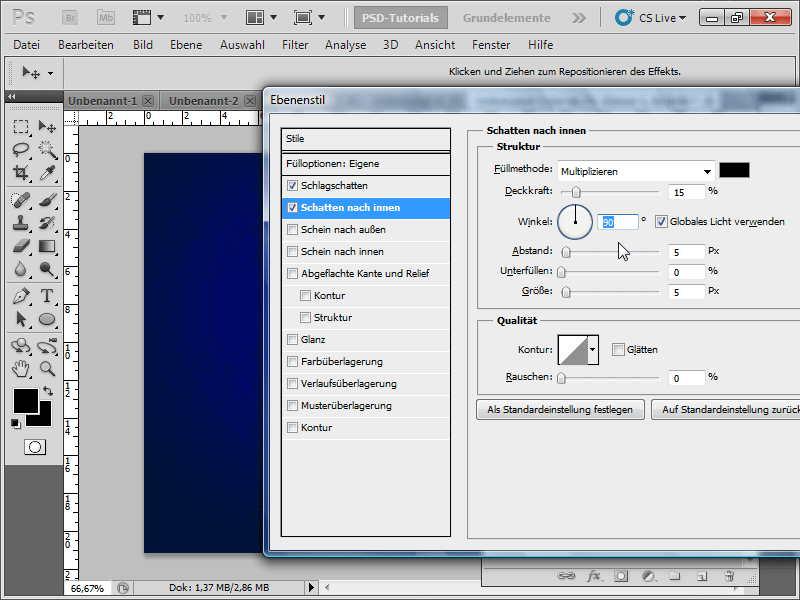
Step 21:
In the inner glow options, I set the following values: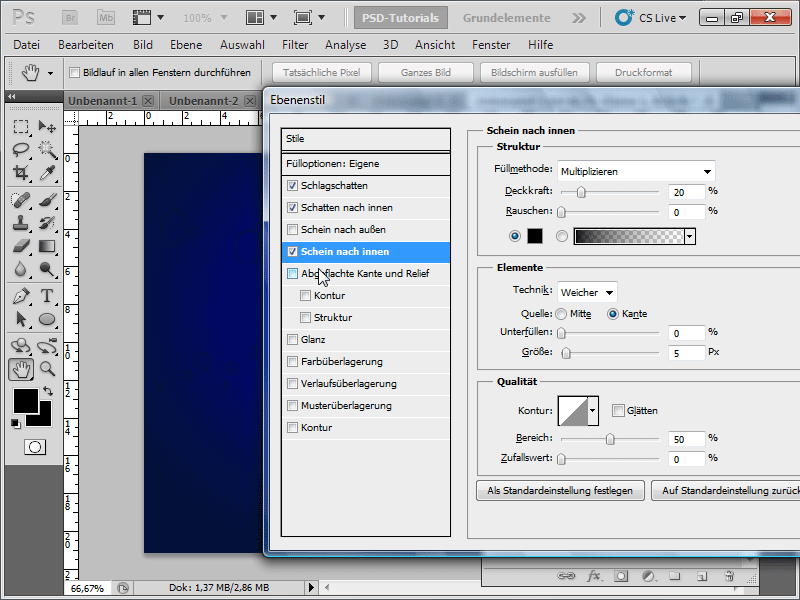
Step 22:
In the bevel and emboss options, I set the following values: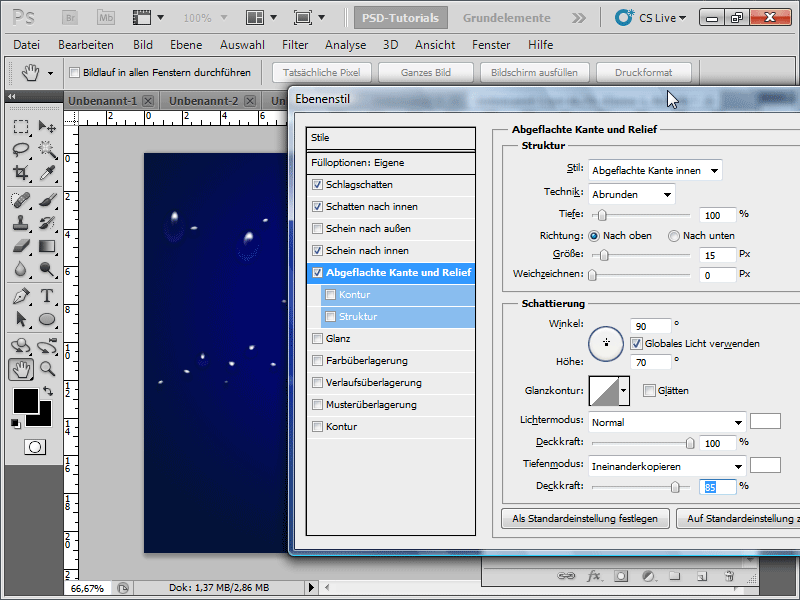
Step 23:
And this is the result: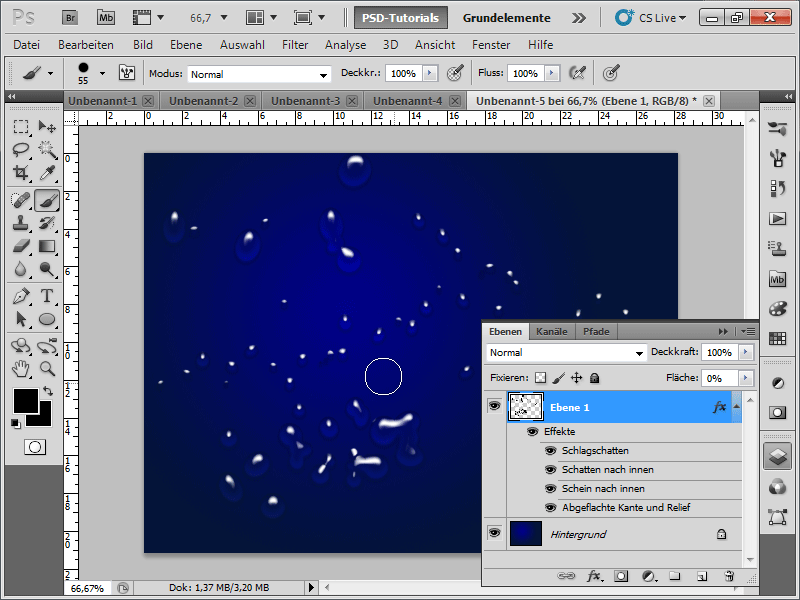
Step 24:
I could also create drops without a brush, for example, by using the ellipse tool for the layer. In my case, I should then have fill pixels activated at the top in the control panel.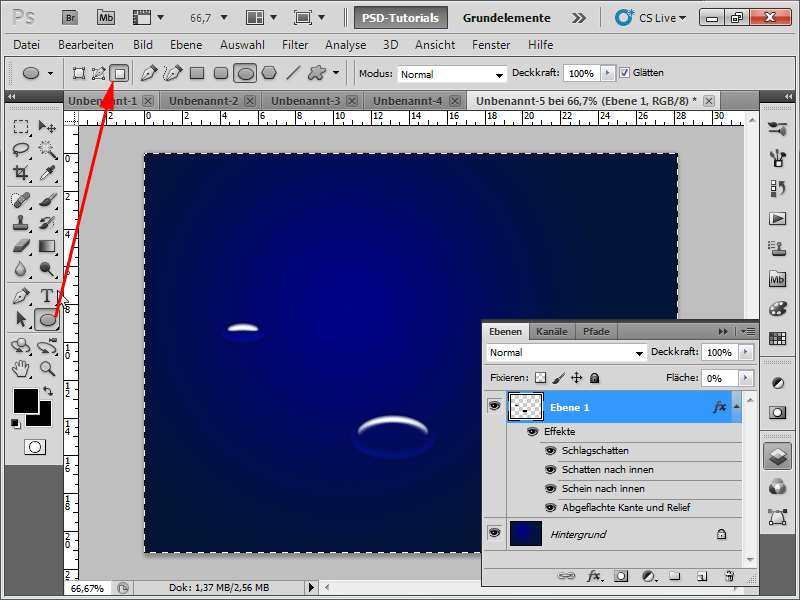
Step 25:
I can further optimize my drops with the smudge tool.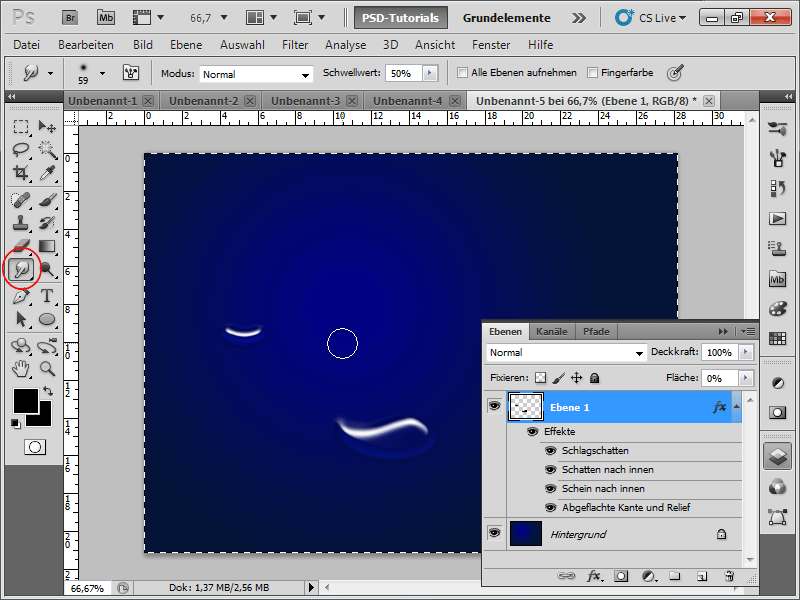
Step 26:
With a suitable background, the drops look much more realistic: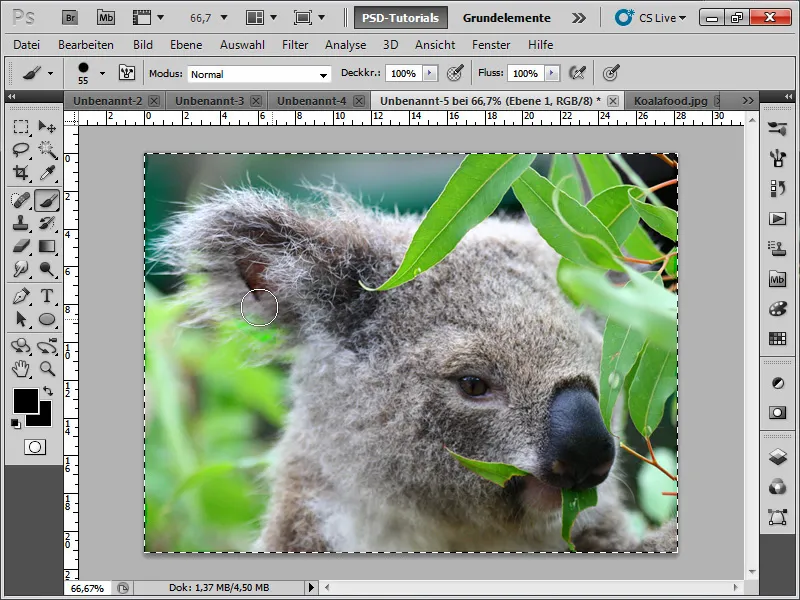
Step 27:
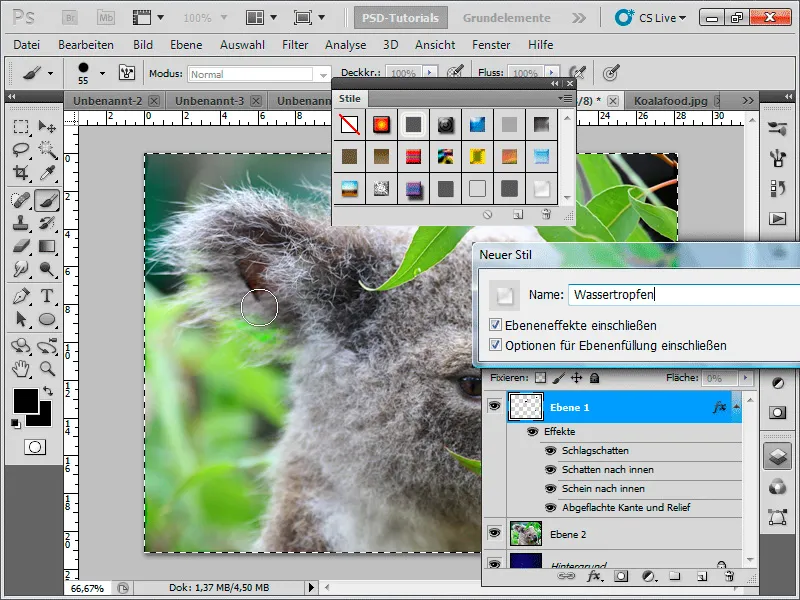
Tip: It's best to save the layer effect immediately as a style so that you can later apply it with a click of a button. The layer style is in the working file.