Create puzzle
Introduction:
Hello dear PSD-Tutorials.de community. I am pleased to welcome you again to one of my tutorials here on PSD-Tutorials. de. In today's tutorial you will learn how to create a puzzle in Illustrator. (Figure 01). Among other things, you will learn how to use the rectangular grid tool. But enough talk now. Let's get straight to it.
Step 1: Create basic grid
Before we can get started, you need to create a new workspace. To do this, go to File>New and then select a landscape format in DIN A3.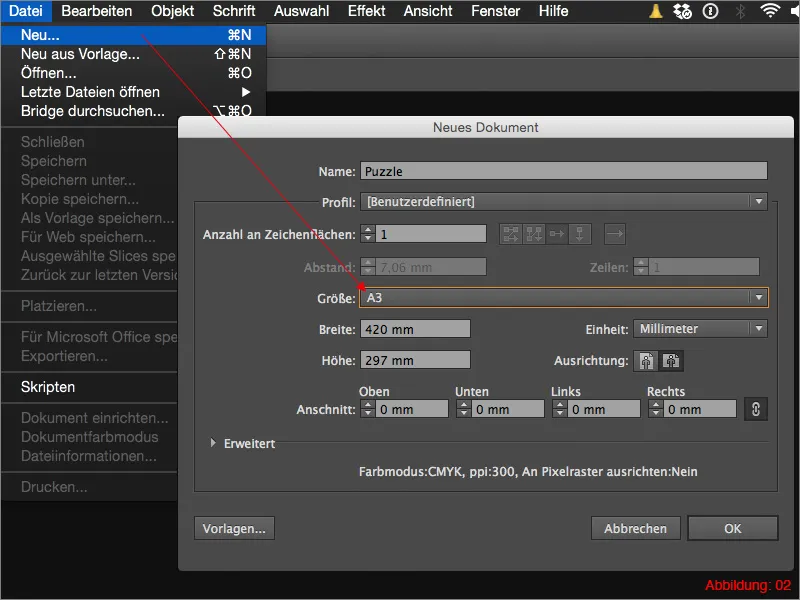
To create the basic grid for our puzzle, we need the so-called rectangular grid tool.
There is no such thing? Yes, there actually is. This tool is hidden under the line segment tool and can be called up by clicking on it for a long time. (Figure 03).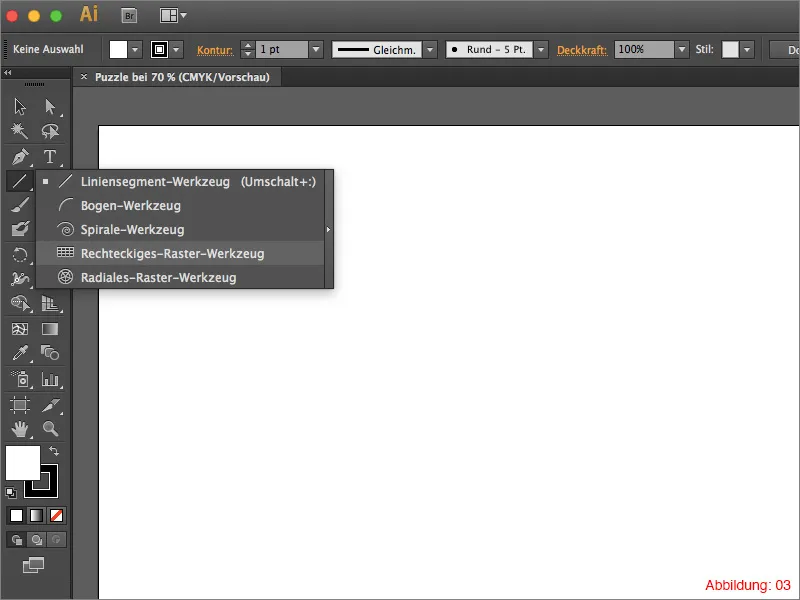
Click once with this tool anywhere on your workspace. A window will then open in which you can check the settings for the grid to be created.
For the standard size, select a format of 300x212mm. For Horizontal and Vertical divisions, you must select a number of two. Leave the asymmetry at 0%. (Figure 04).
Information in passing:
You can of course set the number of subdivisions higher, but this will require more work and make your puzzle more complex. So think about how many subdivisions you need when planning your puzzle.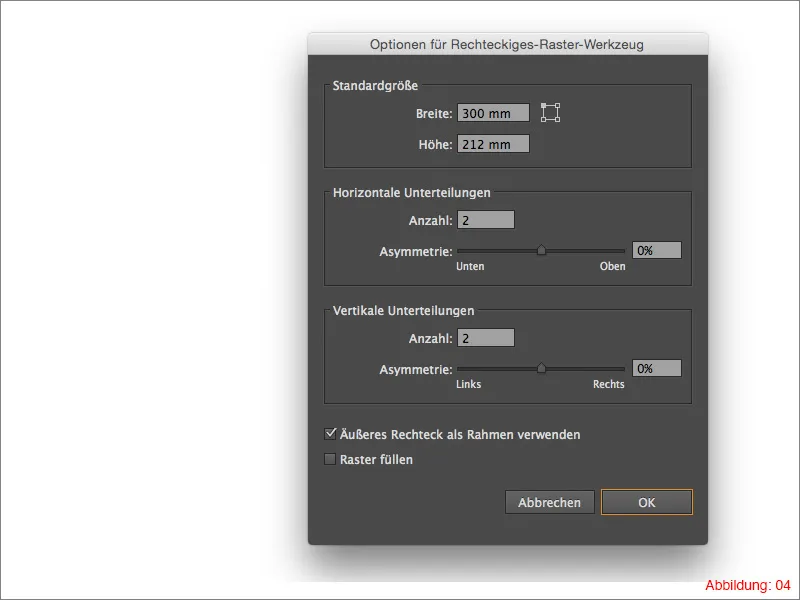
After you have confirmed with OK, the whole thing should look something like this (see Figure 05):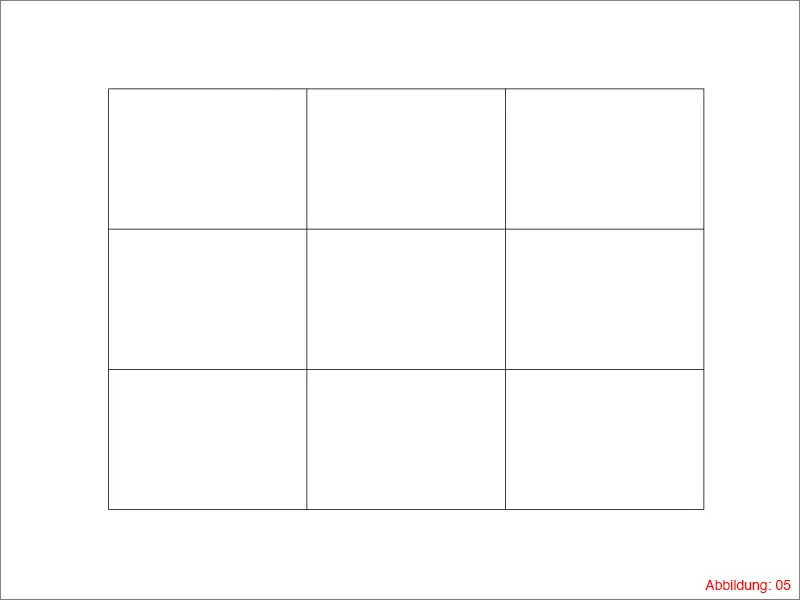
Step 2: Prepare the puzzle pieces
Next, you need to click once on the direct selection tool and then immediately select the pen tool. The simple reason for this is that you will need both tools in the next step. If you hold down the Command or Ctrl key in Illustrator, the previous tool will be activated. In this case, this is the direct selection tool as desired.
Select an inner line from your grid with the direct selection tool and create four new path points with the pen tool. These path points should be approximately in the middle of your puzzle piece. (See Figure 06).
Side information:
If you move your mouse pointer over an activated path with the drawing pen tool, a small "+" will appear next to the drawing pen icon. This means that you can insert a new path point at this point by clicking on it.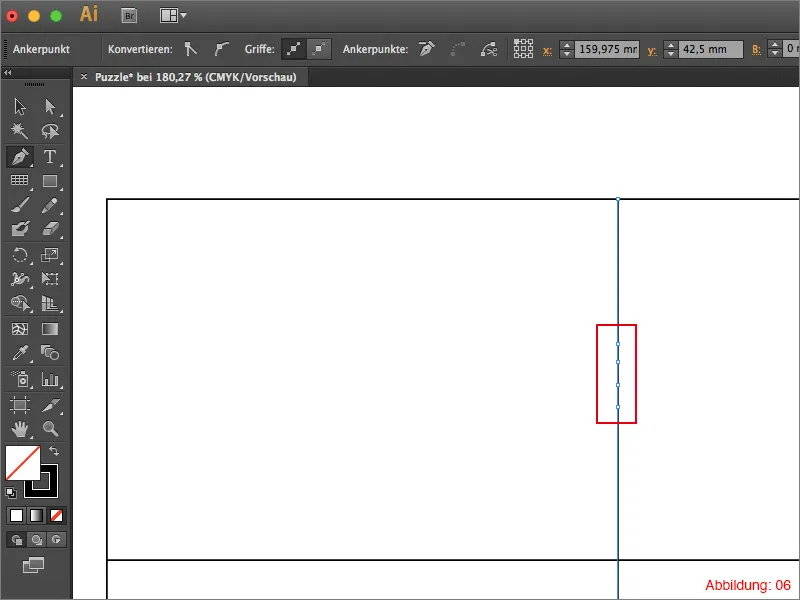
Now you literally have to do some hard work, because now you have to create these four path points in every cell of your grid. In the end, the whole thing should look something like this (see Figure 07):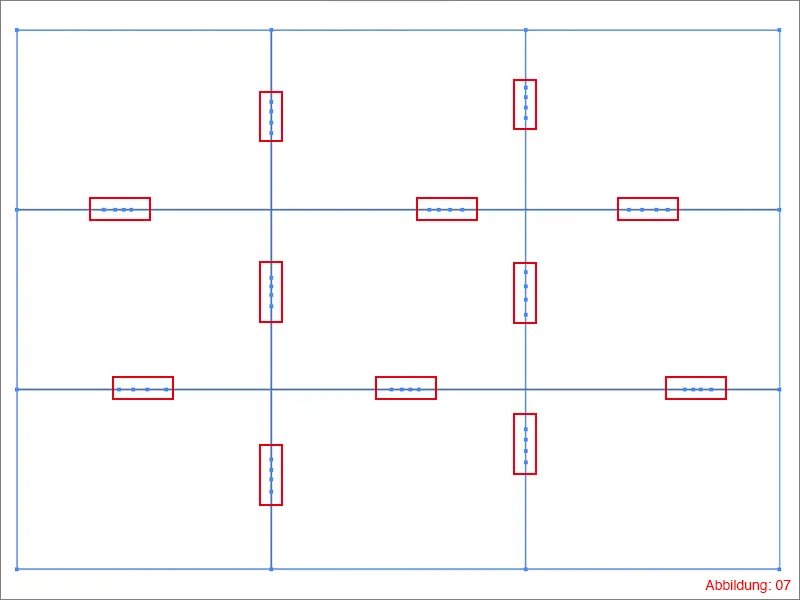
Once you have created all the path points, grab the direct selection tool again and move the path points you have just created so that they look like a bulge or indentation. (Figure 08).
At this stage, you do not need to work very precisely because you will certainly need to correct or improve one or two things later.
Information in passing:
When you move the path points, make sure that not everything looks the same. Vary the size, position and direction as you create the bulges or indentations.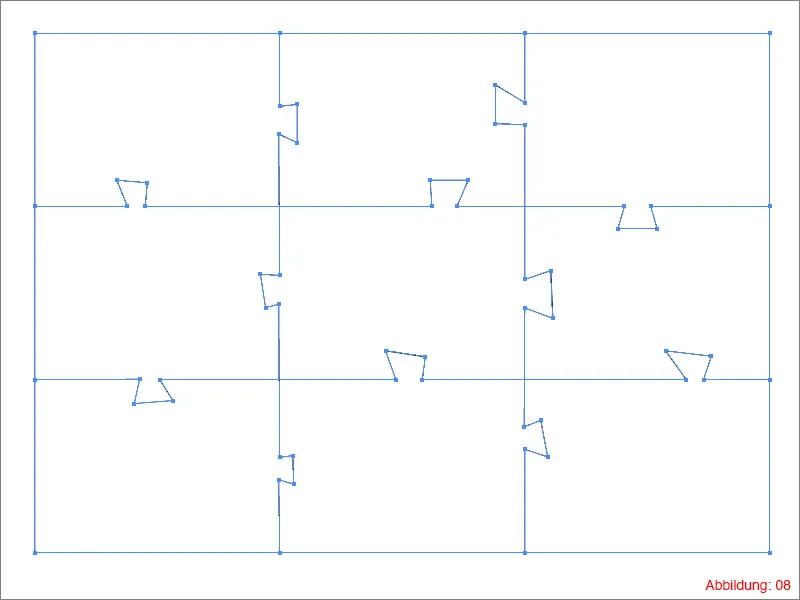
Step 3: Optimize the puzzle pieces
Now that everything is ready, we can optimize the puzzle pieces so that you can see the typical puzzle look.
Use the direct selection tool to select the inner paths (the outer frame must not be selected) and then go to Effect>Stylization filter>Round corners in the top menu bar ...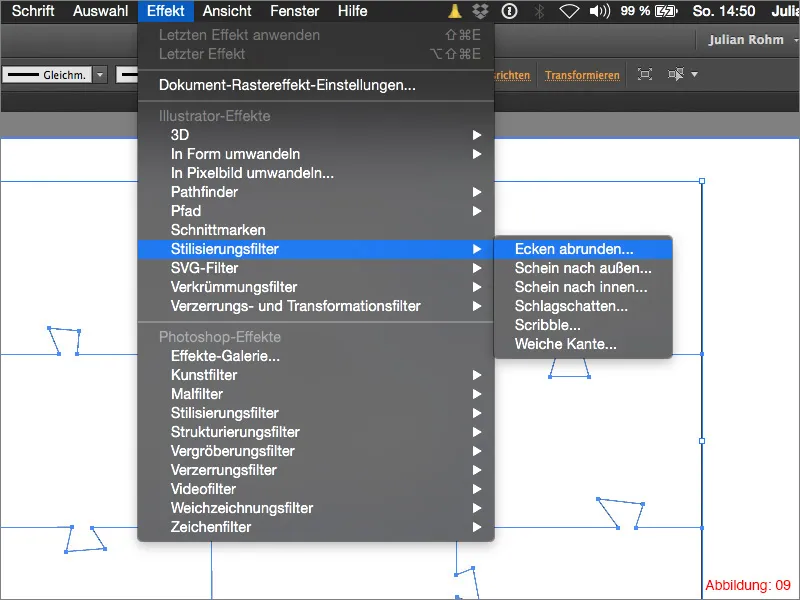
In the following window, select a radius of 3mm and confirm with OK.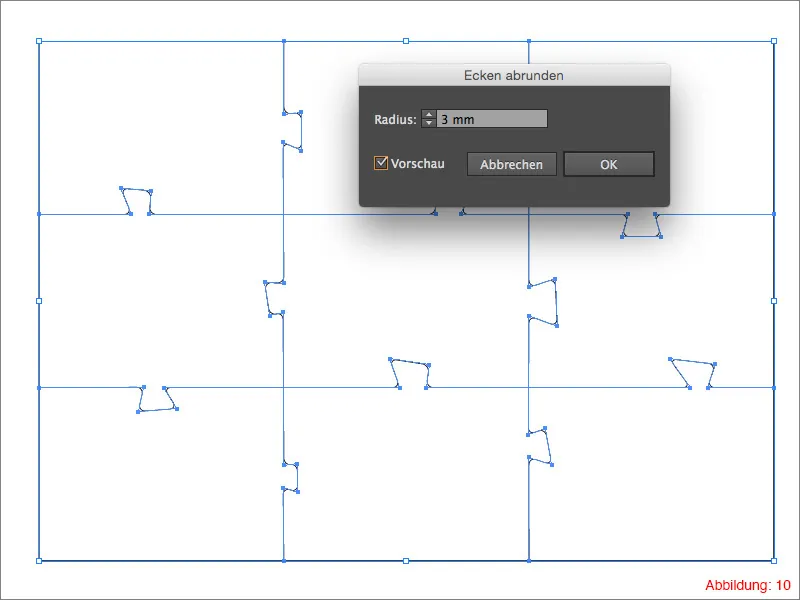
Now that you can see the effect of the rounded corners, you have all the options again to move your path points so that you get nice puzzle-like bulges or indentations.
In the end, the whole thing should look something like this (see Figure 11):
Your own creativity is also required here.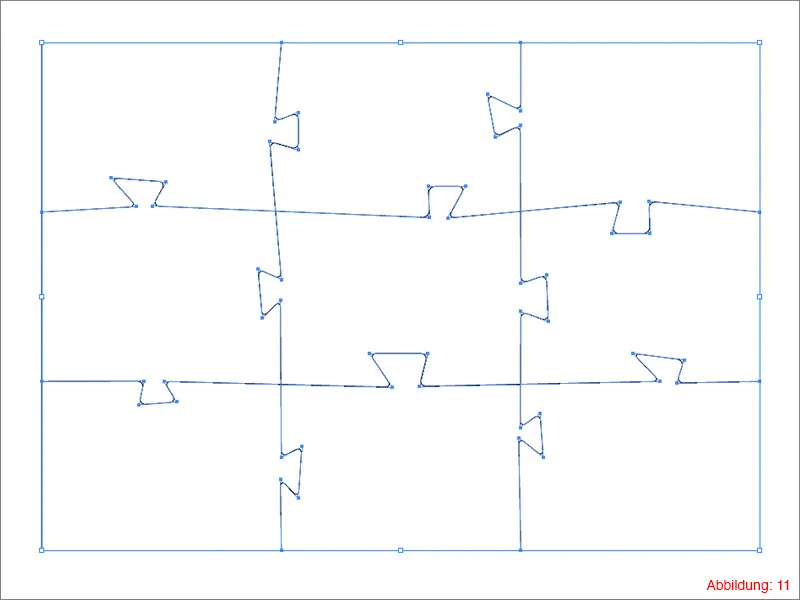
Then select everything with Command+A or Ctrl+A and go to Object>Convert Appearance.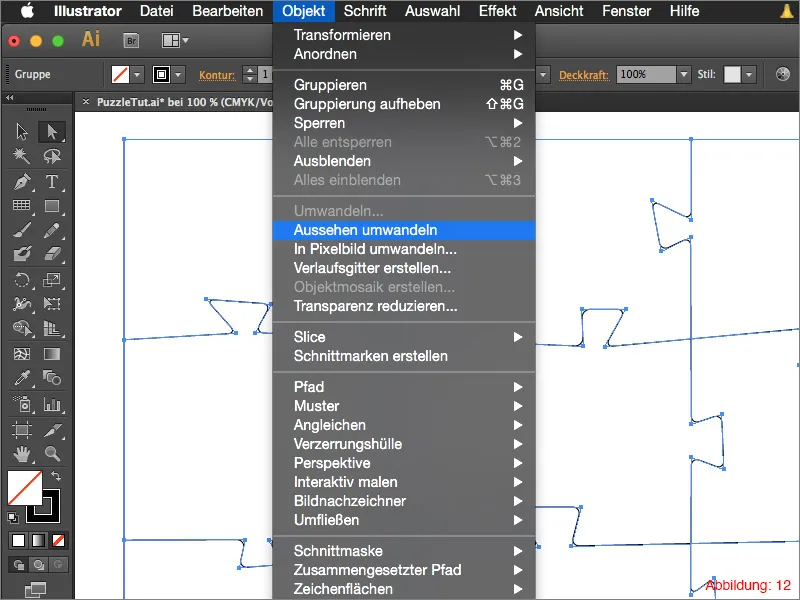
In this case, the Round corners effect is transferred to the path. New path points are created. (Figure 13).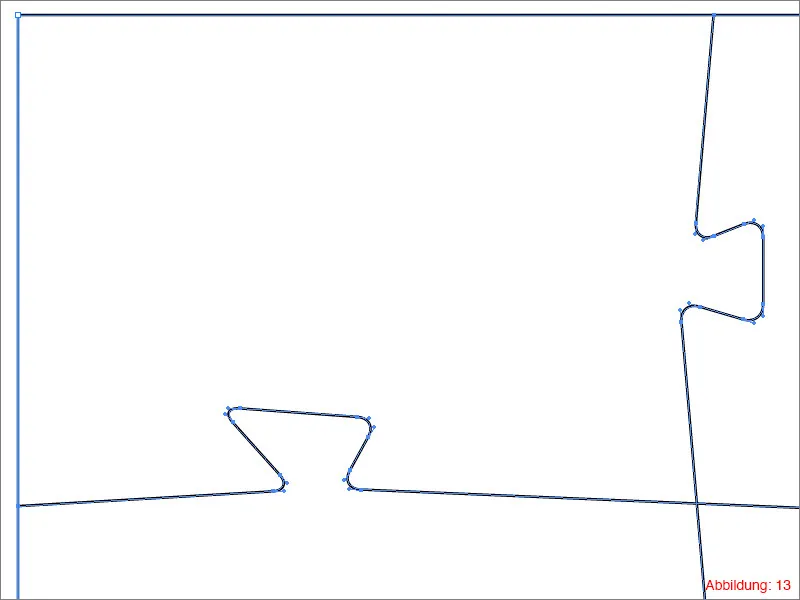
Now you need the Pathfinder. If you have not yet shown it, you will find it under Window>Pathfinder. (See Figure 14).
Select everything again with Command or Ctrl+A and click on Split area in the Pathfinder. (Illustration 15).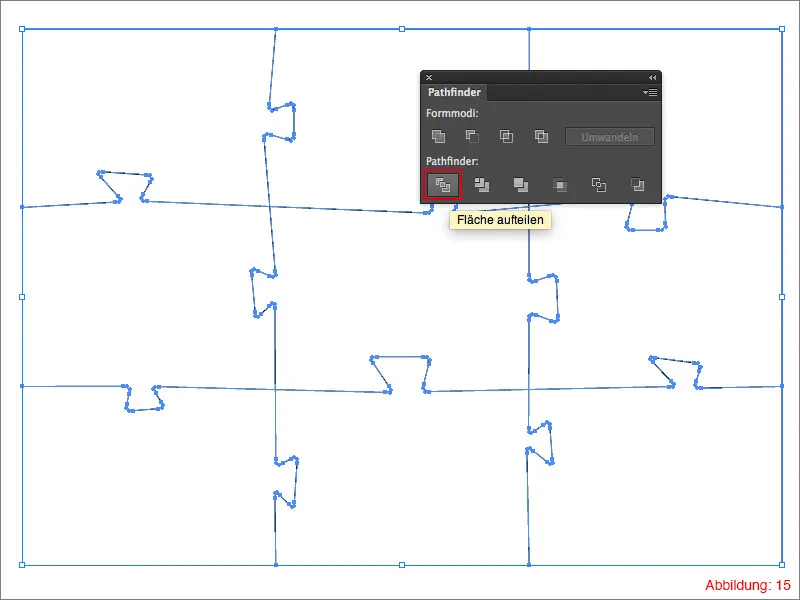
As Illustrator automatically groups all objects, you must ungroup them using the shortcut Command+Shift+G (on PC - Ctrl+Shift+G).
Nine different paths should then appear in the layer palette. (See Figure 16).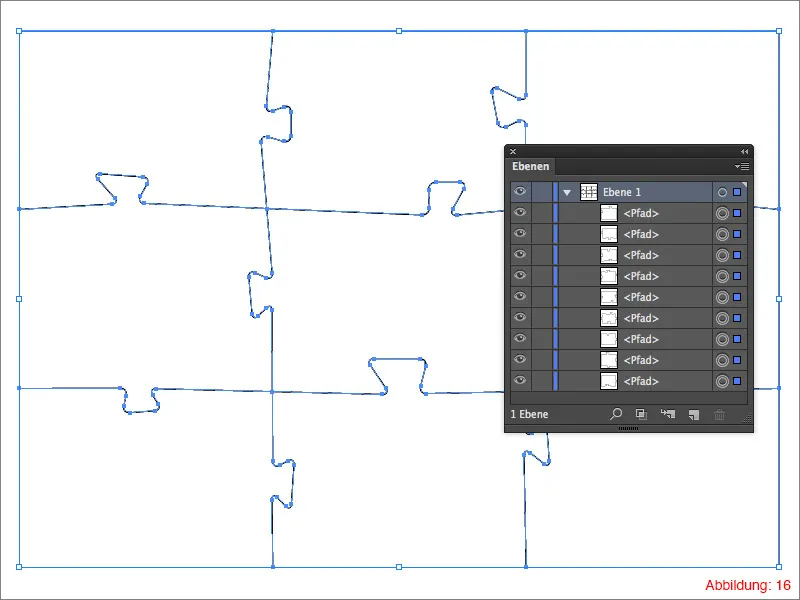
Step 4: Save the puzzle as a symbol and archive it
At this point, I would like to briefly move the current topic to the side and address another very important topic.
Especially with projects like the puzzle or other things, it can happen that you want to use them again for other projects at a later date. It is then an advantage to have a template saved so that you don't have to start again from scratch. That's why I recommend always working with symbols in Illustrator. This has the advantage that you can call up the template at any time, as it is stored centrally on your computer and Illustrator can access it without any problems.
To create your own symbols, the first thing you need is the symbols palette. You can find this via Window>Symbols.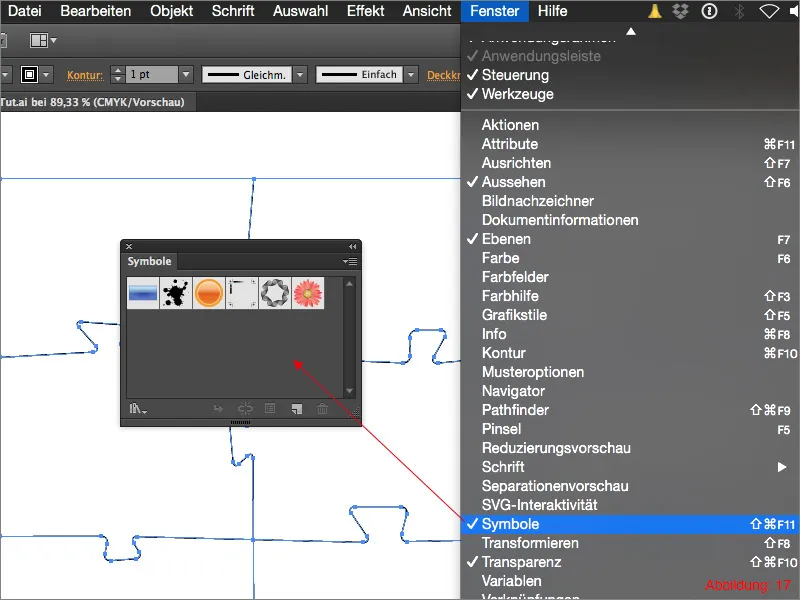
Then select the object you would like to save as a symbol (in this case the current state of your puzzle) and then click on the small arrow in the top right-hand corner of the symbols palette. (See Figure 18).
Here you now have the option to click on New symbol....
You can then enter a suitable name for your symbol and confirm with OK.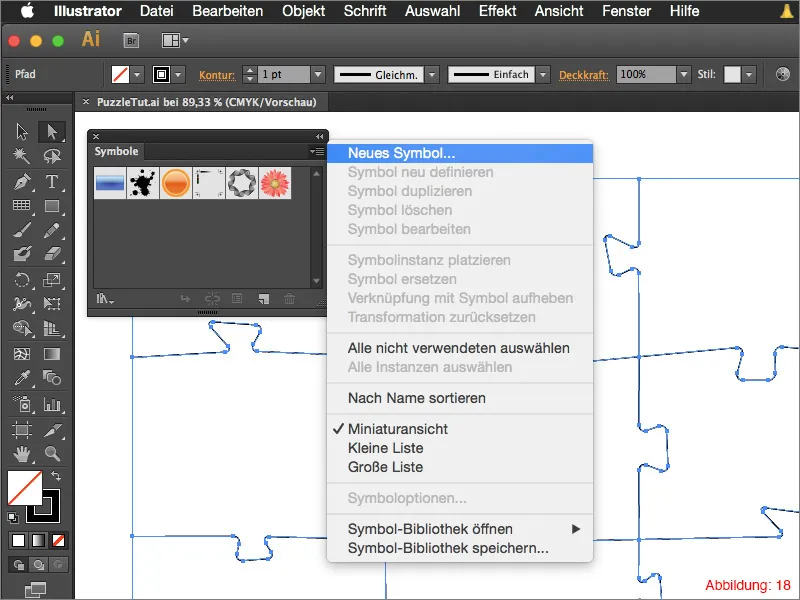
Before you save your own symbol library, I recommend that you delete the standard Illustrator symbols. You can simply hold down the Shift key and click on them to select them one by one.
Once you have selected them all, click on the small trash can in the bottom right-hand corner. (Figure 19).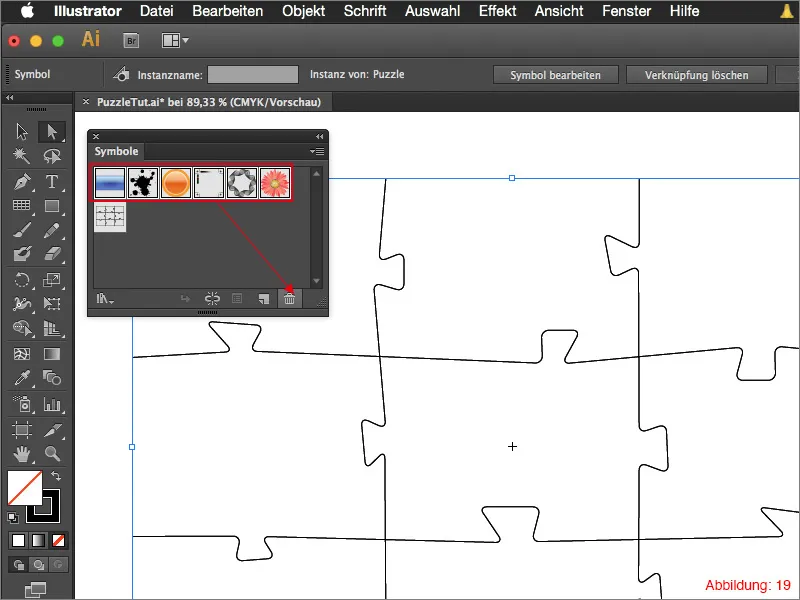
Only your own object should then be available in the symbols palette. (See Figure 20).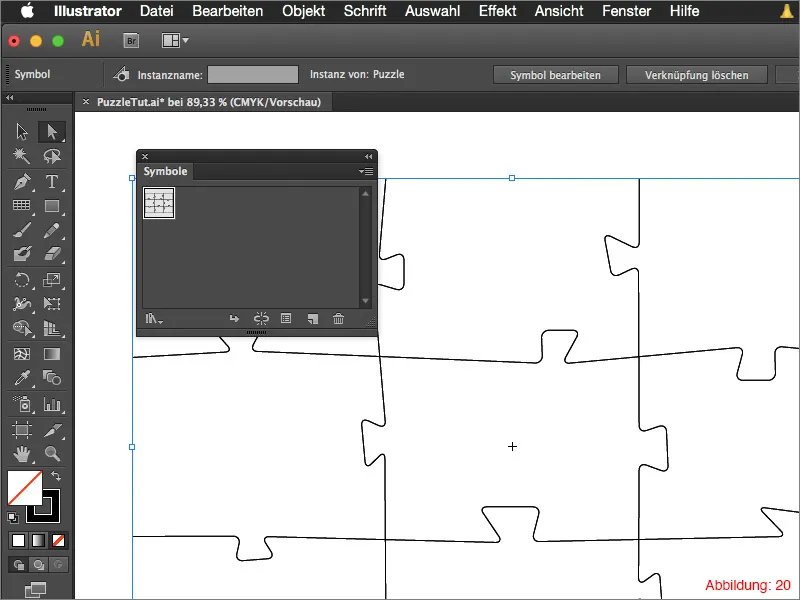
Now click on the small arrow in the Symbols palette again and then on Save symbol library ... Here you can also select a suitable name for the library and confirm with OK.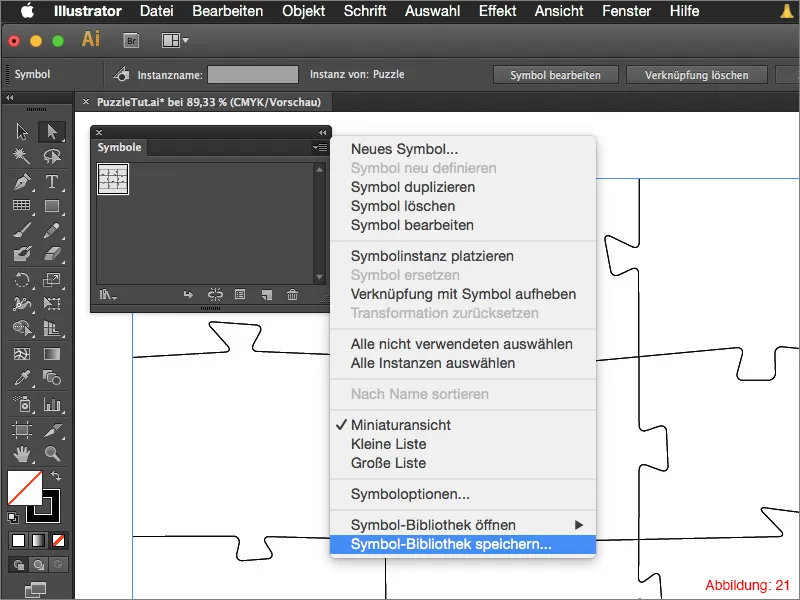
To open this library again at a later time (e.g. in another file), simply click on the small arrow in the symbols pal ette again and click on Open symbol library. Here you will find the symbol library you have just saved. (Figure 22).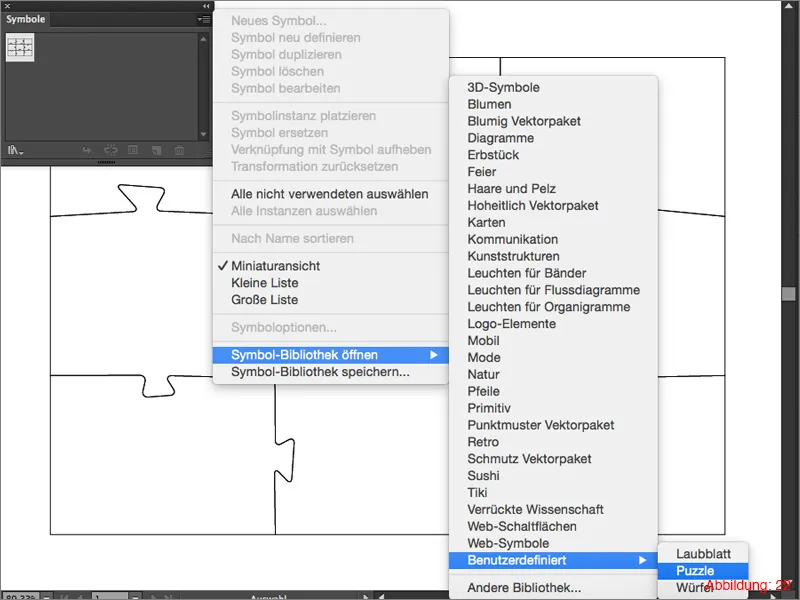
Step 5: Texturing the puzzle
After you have saved your current puzzle state as a symbol, we can now start to place a motif over the individual puzzle pieces. You will find a file with the name "Motif.pdf" in the working data enclosed with this tutorial. Open this in Illustrator and insert your puzzle file.
Then reduce the opacity to approx. 50% so that you can see the puzzle pieces shining through. (Figure 23).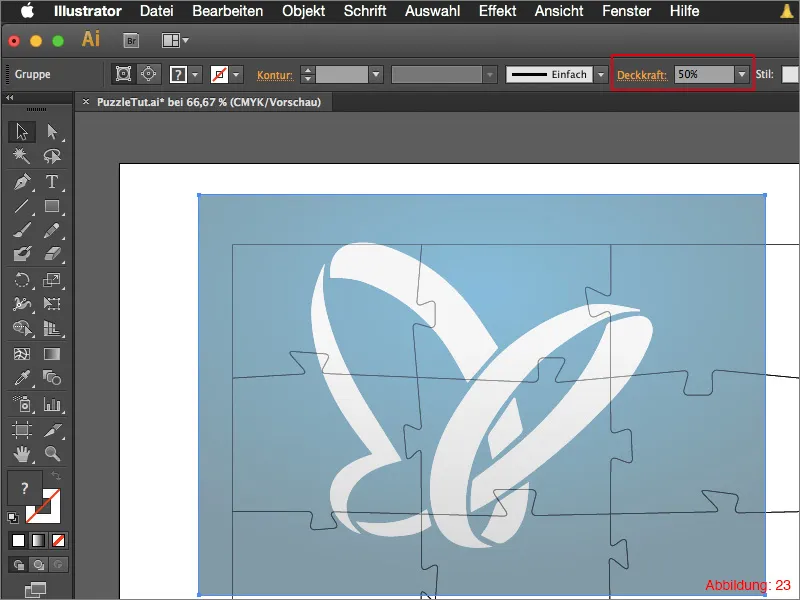
Move your motif so that it is exactly in the middle of your puzzle. Then you can set the opacity back to 100%.
In the next step, you need to create a copy of your motif for each puzzle piece. In my case, I have nine puzzle pieces and therefore also need nine copies.
Make sure that you place the copies of your motif under the puzzle pieces in the layer palette. (See Figure 24).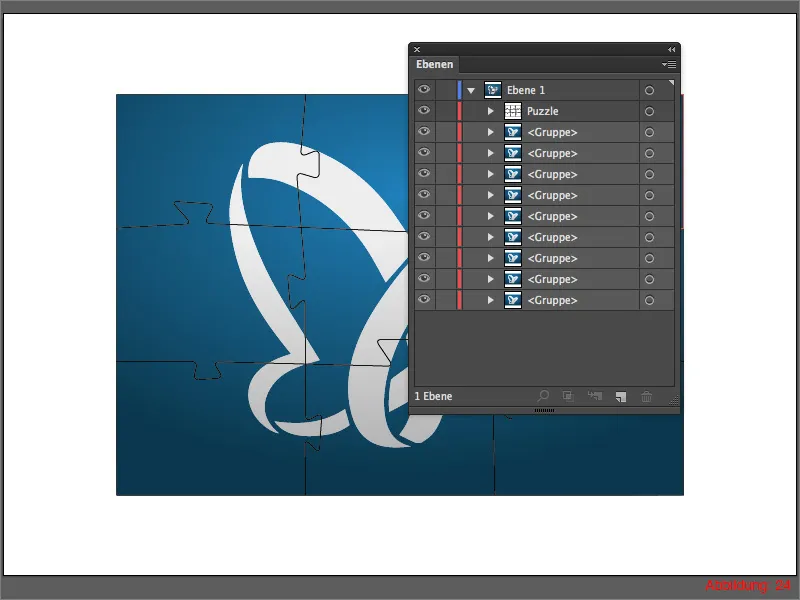
Now open the group with the puzzle pieces and drag them onto your main layer so that they are no longer grouped together.
Now select the first puzzle piece and a copy of the motif by holding down the Shift key and then go to Object>Cut mask>Create.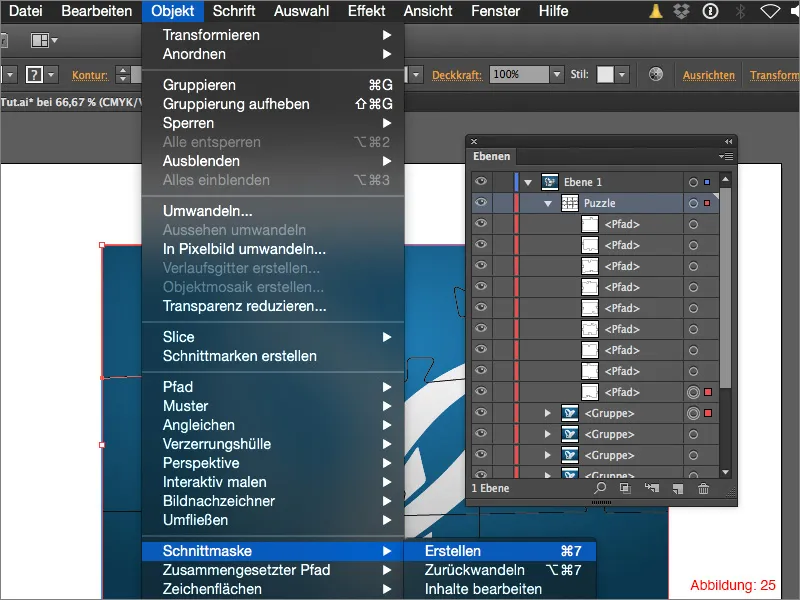
You then have to do the same procedure with all the other puzzle pieces. Always select a piece and a motif and create a clipping mask from them.
The whole thing should then look like this (Figure 26):
Step 6: Finishing touches
Once you have created a cutting mask for each puzzle piece, you are basically finished with your puzzle. However, as such a complete puzzle usually looks rather boring, I would recommend that you move some pieces slightly and perhaps even rotate them so that you can see that it really is a puzzle with different pieces. (Figure 27).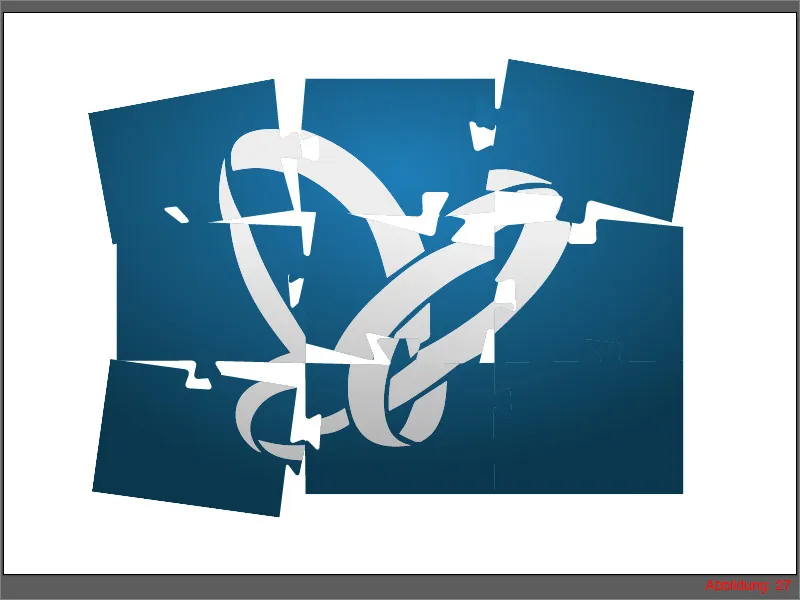
As you can hardly distinguish the pieces lying on top of each other in their current state, we will now add a drop shadow to the whole puzzle. To do this, select everything with Command or Ctrl+A and then go to Effect>Stylization filter> Drop shadow. Confirm the subsequent window with OK.
Your puzzle is finished. (Figure 28).
Final words:
Now we have come to the end of this tutorial. I hope you have had fun and can now create a nice puzzle. If you still have any questions, please let me know in the comments below this tutorial. I will do my best to answer these questions as soon as possible. Otherwise, I am of course also happy to receive general feedback.
Stay creative ...
Yours, Julian
