This is what the three-dimensional spiral looks like when it is wrapped around an object (see Figure 01). But enough talk now. Have fun with the tutorial ... :-.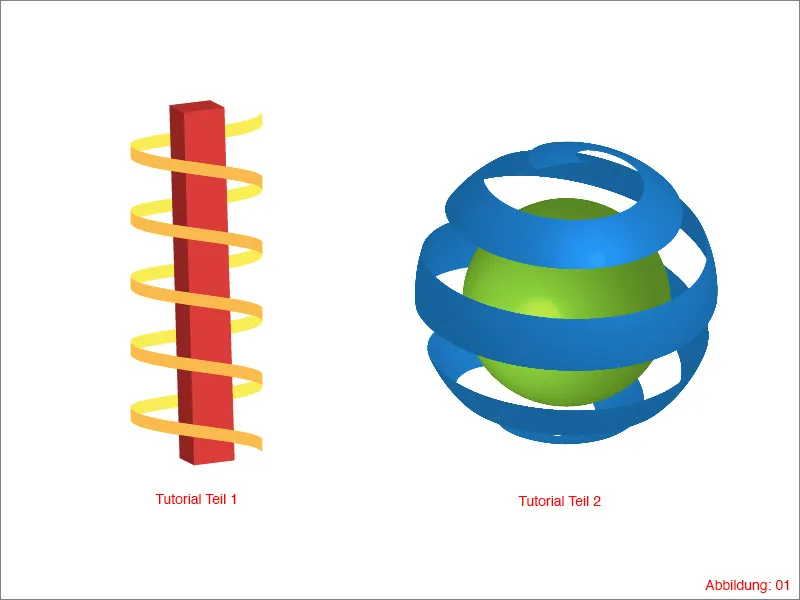
Part 1: 2D spiral
Before we start right away, you need to create a new workspace in Illustrator. To do this, go to File>New and select a format of DIN A3 in landscape format. Then confirm with OK. (Figure 02).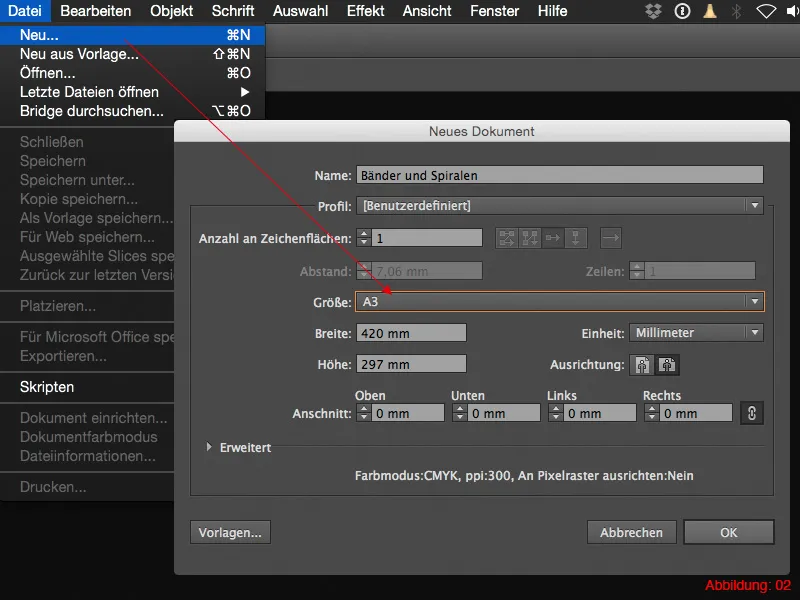
Once you have created a new workspace, the first thing you need to do is create a square pillar. The 2D spiral is then wrapped around this pillar.
Grab the rectangle tool and click anywhere on the workspace. This will open a window in which you can enter the size of your rectangle. Select a size of 17x140mm and confirm with OK. (Figure 03).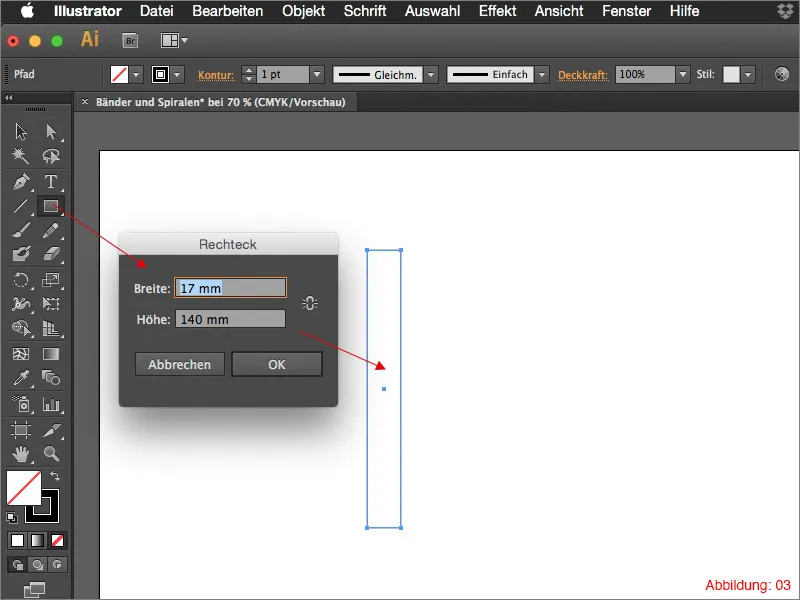
To turn this rectangle into a three-dimensional object, you must apply the Extrude commandto it. To do this, go to Effect>3D>Extrude and flattened edge ... (Figure 04).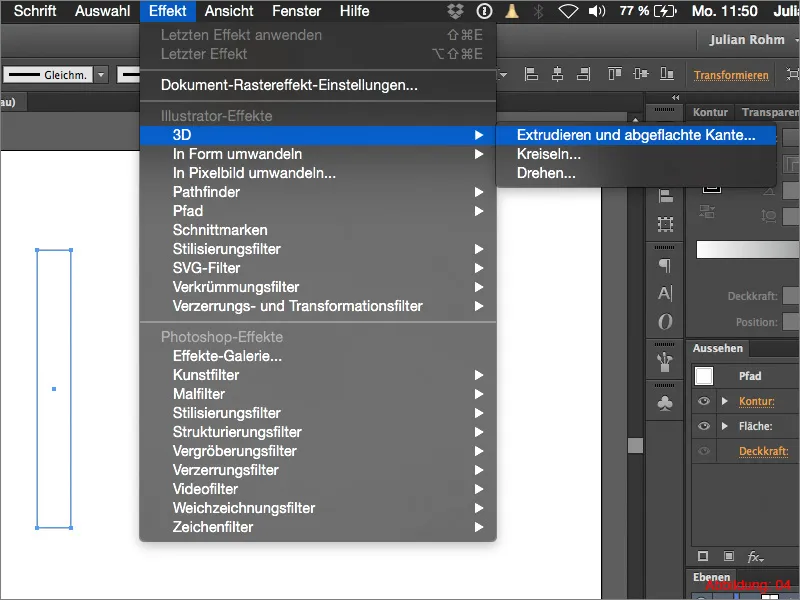
In the following dialog box, you can adjust all the settings for the 3D display. The most important setting here is the depth of the extrusion. Set a value of at least 50pt here. You can choose the angle relatively freely. You should just make sure that the pillar is still relatively straight at the top.
You can then confirm by clicking OK.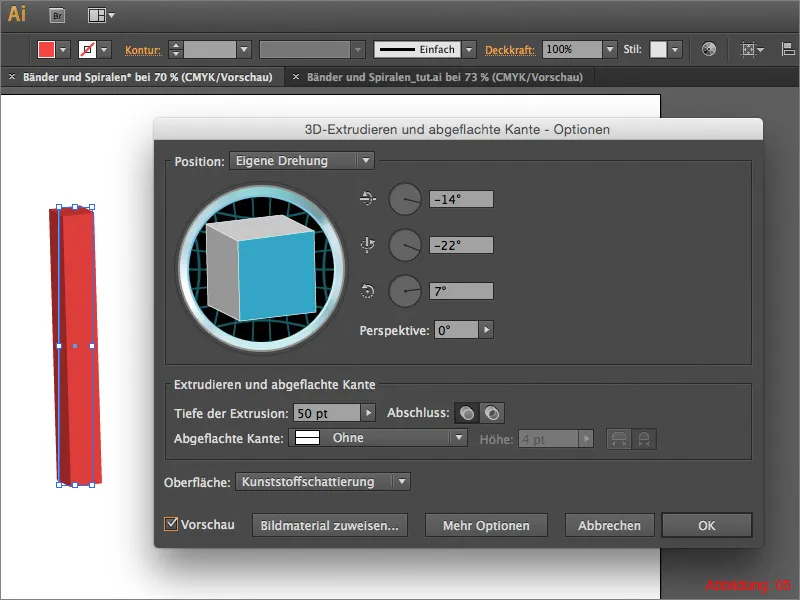
At this point, you can hide the 3D pillar you have just created in the layer palette or simply move it to the side. Now we will focus on the main element of the 2D spiral.
As we have to work very precisely in the next step to ensure that the spiral really fits, you will have to make use of a tool that many Illustrator users are often not yet familiar with or simply avoid, as it makes the workspace rather cluttered. We are talking about the so-called grid. You can activate the grid by clicking on View>Show Grid. Alternatively, you can simply use the shortcut Command+< (on PC: Ctrl+<).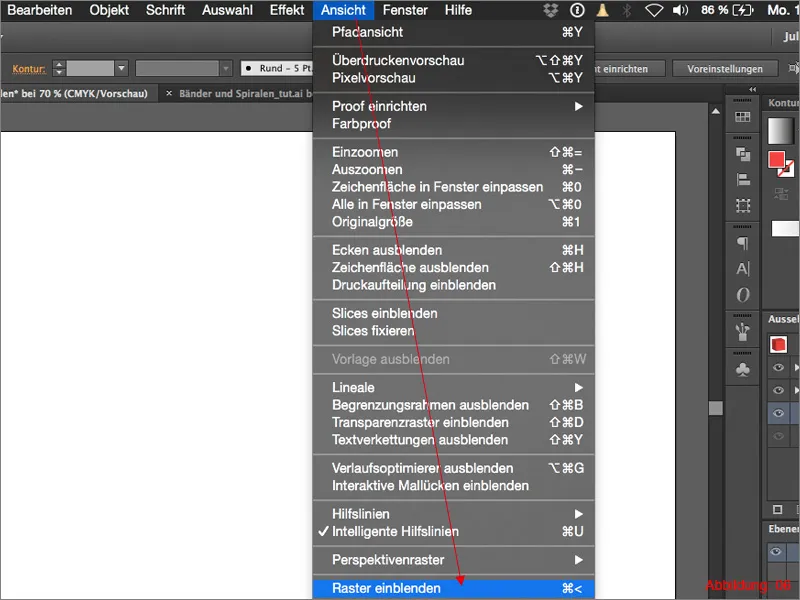
Your workspace should then look like this (see Figure 07):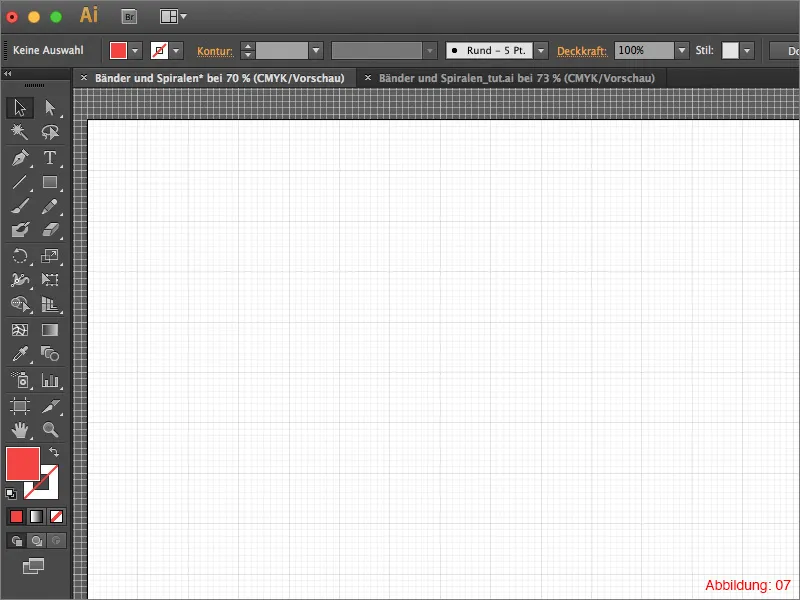
To increase precision even more when working with the grid, you should activate the Align to grid function. The best way to do this is via View>Align to grid. (Figure 08).
With this command, each subdivision in the grid is perceived as a separate object and the mouse pointer automatically snaps to it, similar to the intelligent guides .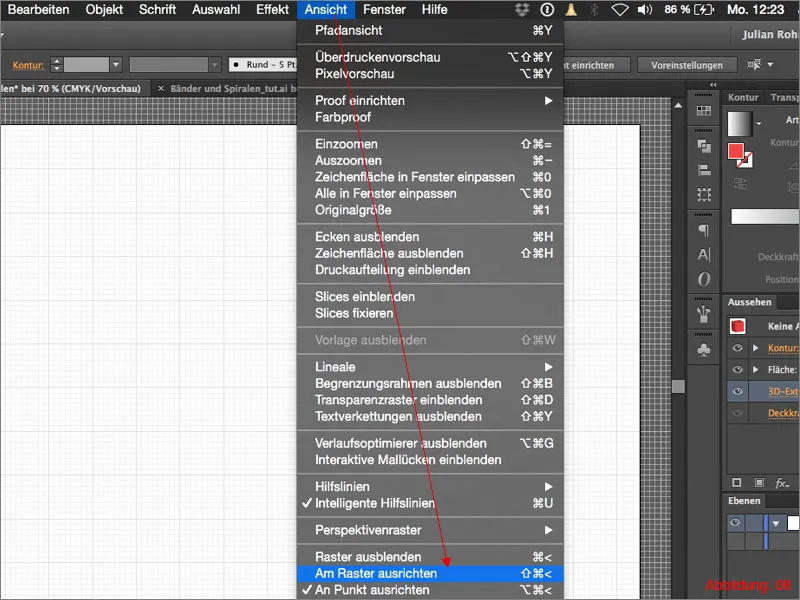
Using the pen tool, click on a corner point (top left) of a large tile in the grid and, holding down the mouse button, draw a vertical tangent that is four small boxes (see Figure 09).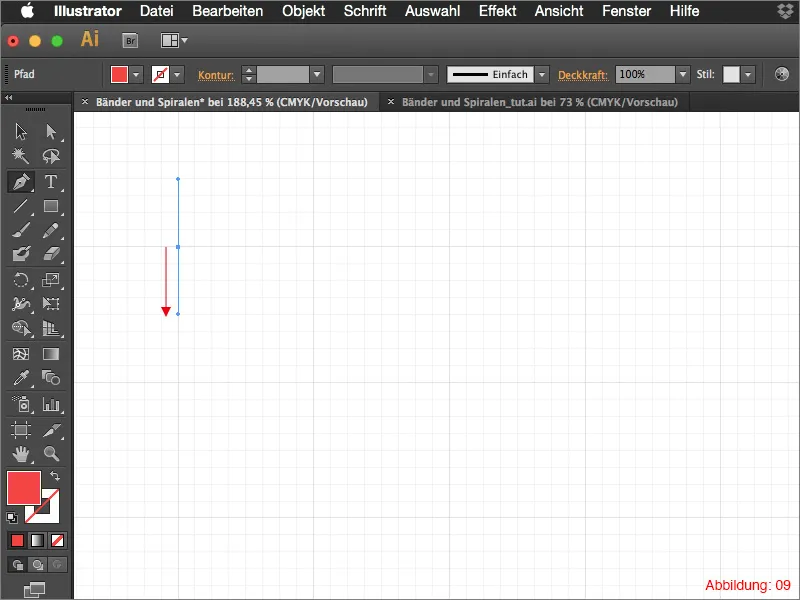
Then go three large squares to the right and draw another tangent there that is four small squares long. (This time at the bottom right). The whole thing should then look like this (see Figure 10):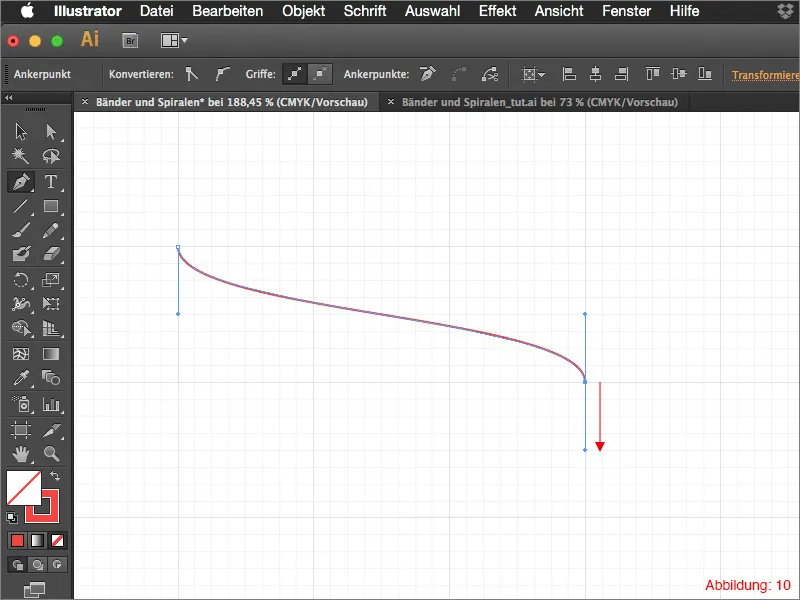
Next, grab the selection tool (black mouse pointer) from the tool palette and, holding down the Alt key, click on the path you have just created.
Drag this path exactly three small boxes upwards and release the mouse button. By holding down the Alt key, you have created a copy, while the original path has not been changed. The whole thing should now look something like this (see Figure 11):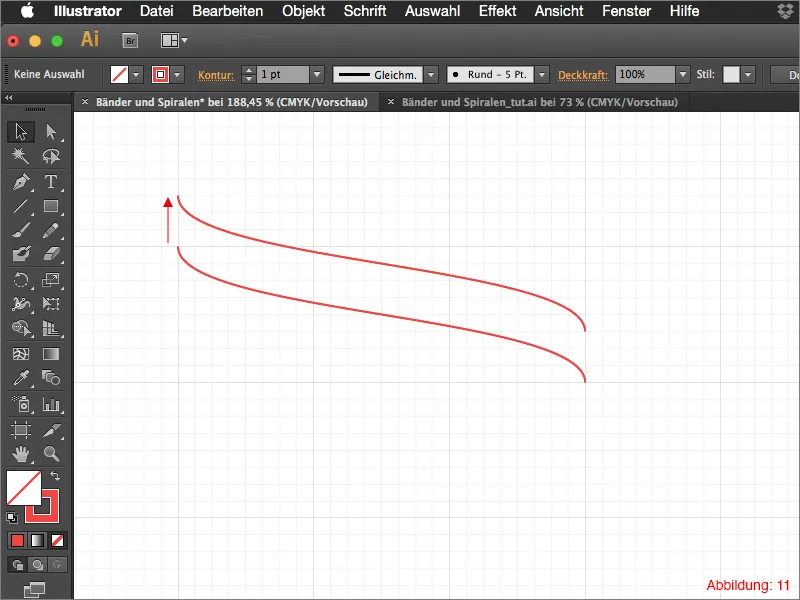
Now you need the direct selection tool again. Use it to select the two path points marked in Figure 12.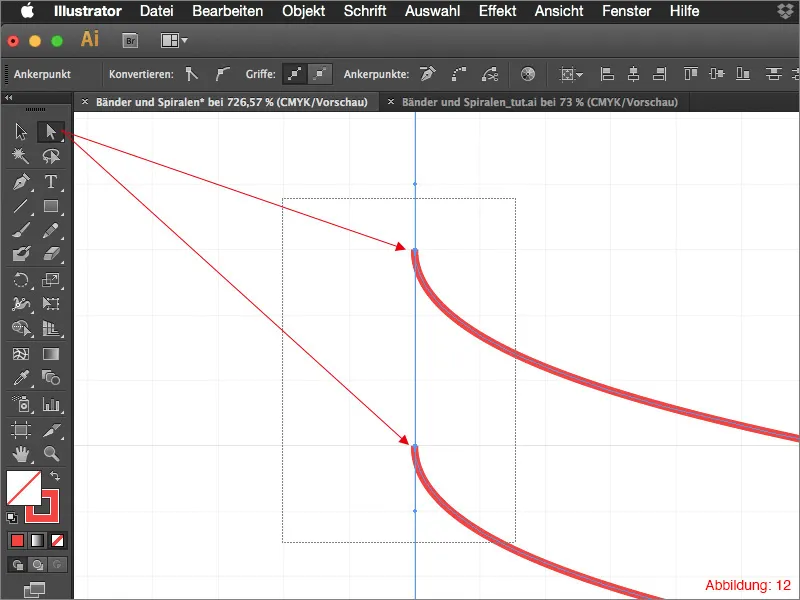
Then you only need to use the shortcut Command+J (on PC: Ctrl+J) to connect these two path points (Figure 13).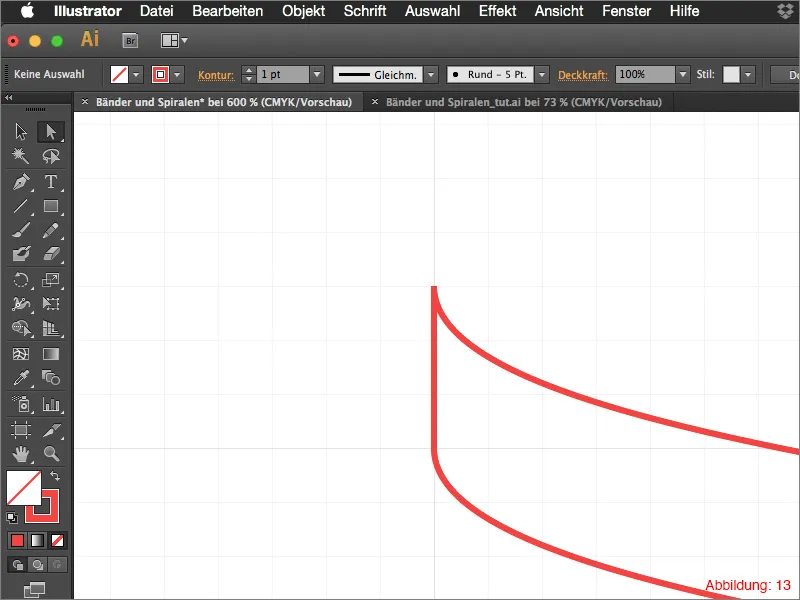
You now have to do the same with the other two path points. You should then have a completely closed path (see Figure 14).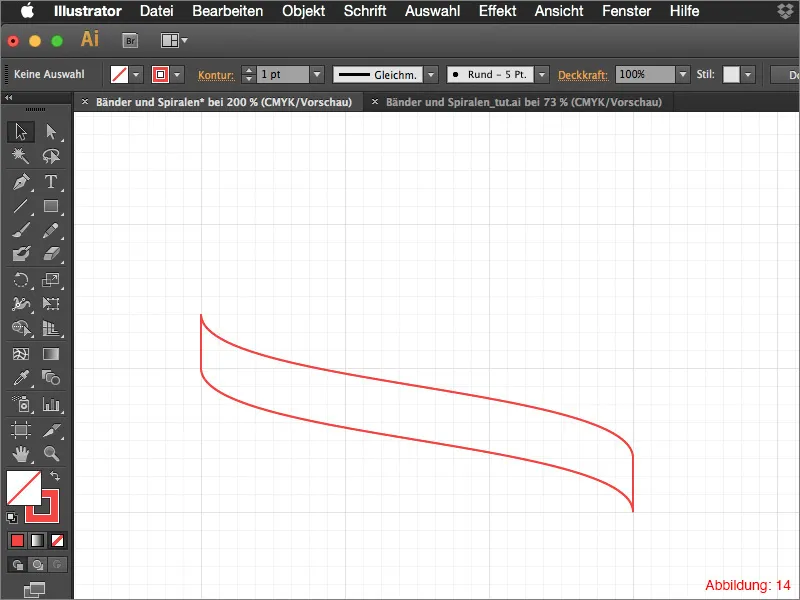
Select the path you have just created and move it up five small boxes by holding down the Alt key (to create a copy) (see Figure 15).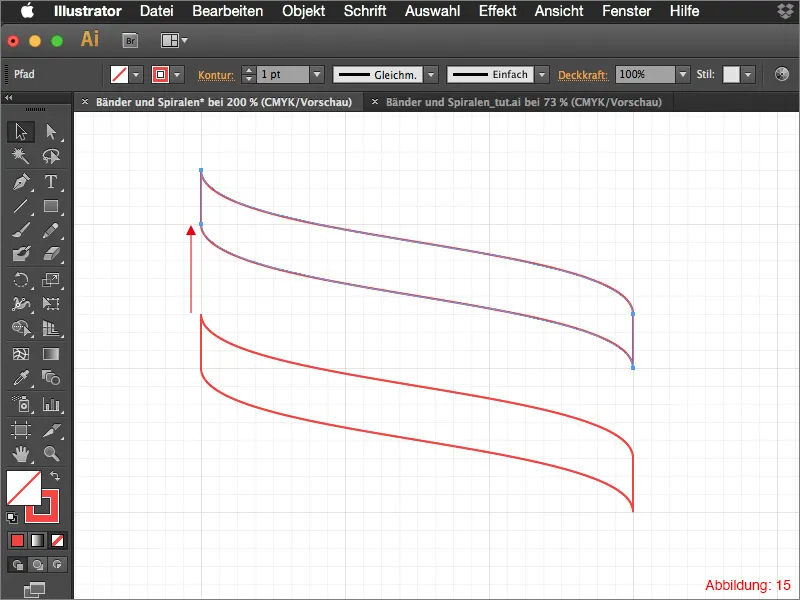
To finally turn it into a recognizable spiral, you only need to mirror your upper element once more. To do this, go to Object>Transform>Mirror... Select Vertical in the following window and confirm with OK.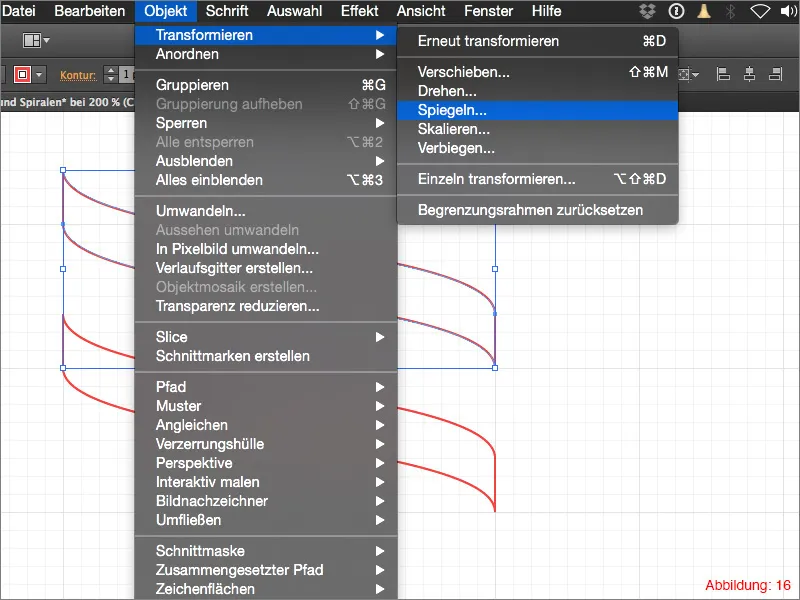
The whole thing should now look like this (Figure 17):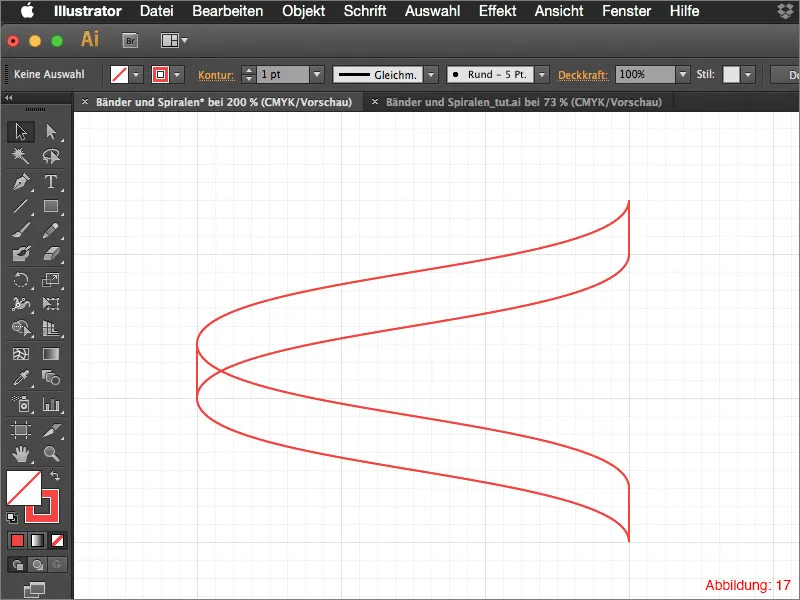
Now it's time to add some color to enhance the 3D character. I have prepared two CMYK values for this tutorial.
- Yellow: CMYK - 5/0/90/0
- Orange: CMYK - 0/35/85/0
Color your lower spiral element in the orange tone and the upper one in the yellow tone (see Figure 18). This color difference gives the whole thing a little more depth.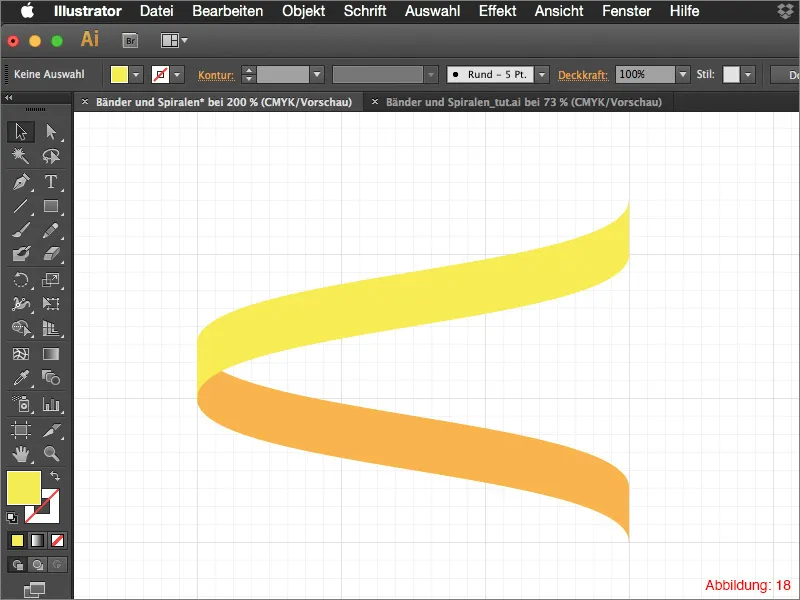
As the orange element is now most likely in the background, you still need to bring it into the foreground. The best way to do this is to right-click on the orange element and select Arrange>Foreground. (Figure 19).
Then select both elements and group them with Command/Ctrl+G.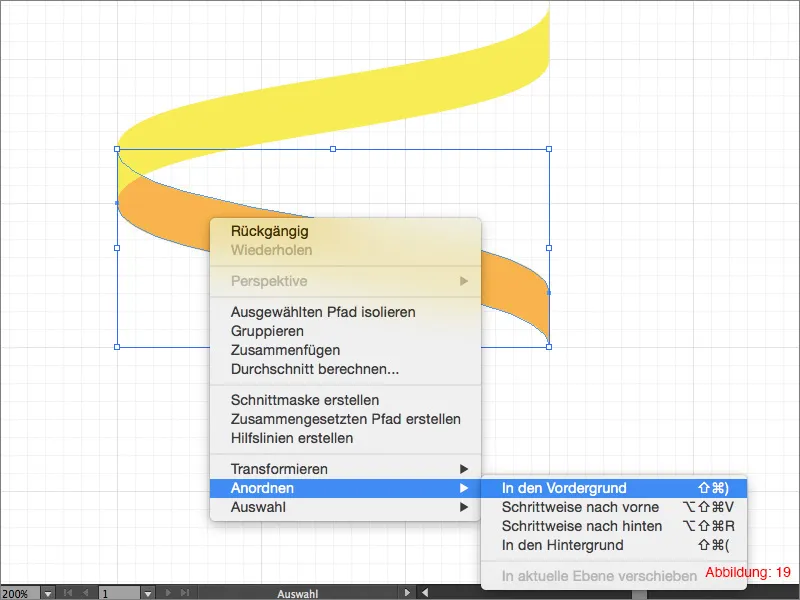
Next, move the entire group upwards using the selection tool. Hold down the Alt key again to make a copy of the group. Move so far that both groups complement each other exactly. As the elements snap into the grid, this should not be a problem.
Afterwards, the whole thing should look something like this (Figure 20):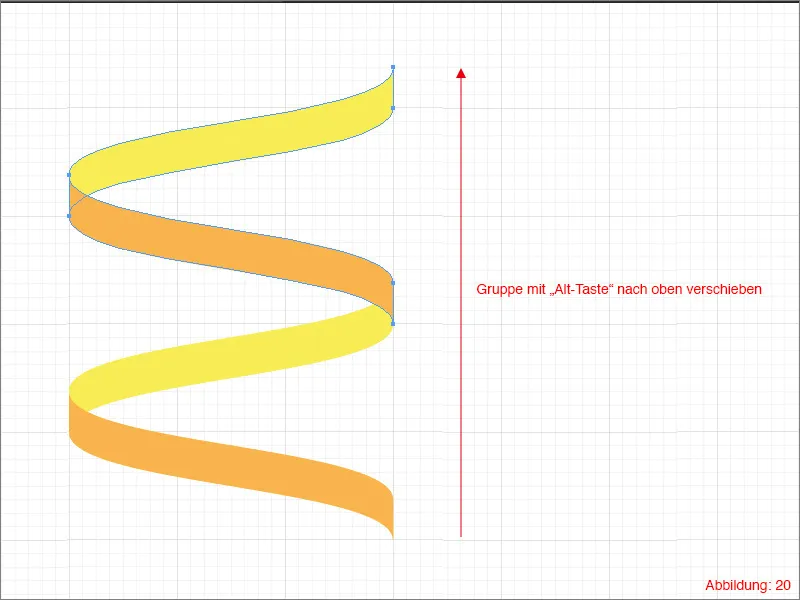
You can repeat the whole process three more times with the shortcut Command/Ctrl+D (Figure 21).
Your spiral is finished.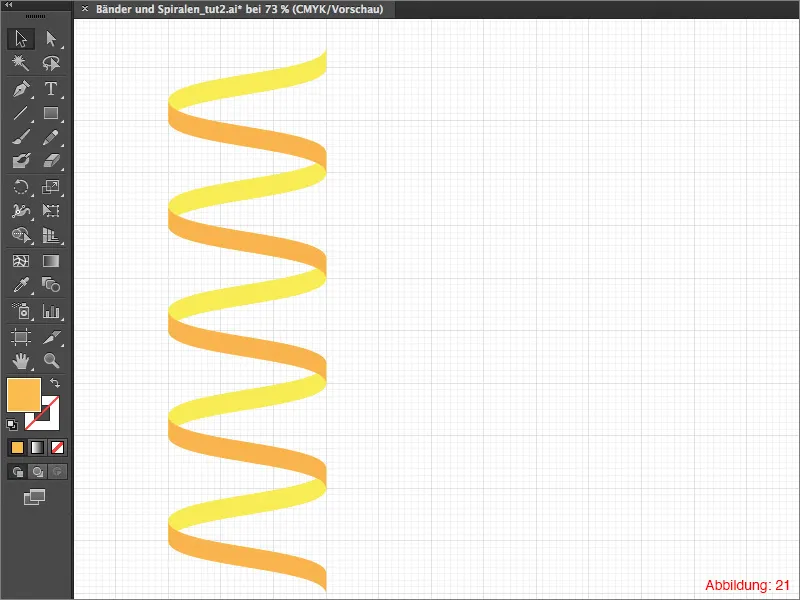
Now it's time to display the pillar you created earlier.
Place it approximately in the middle of your spiral (Figure 22). (You can simply scale the spiral smaller until you like it.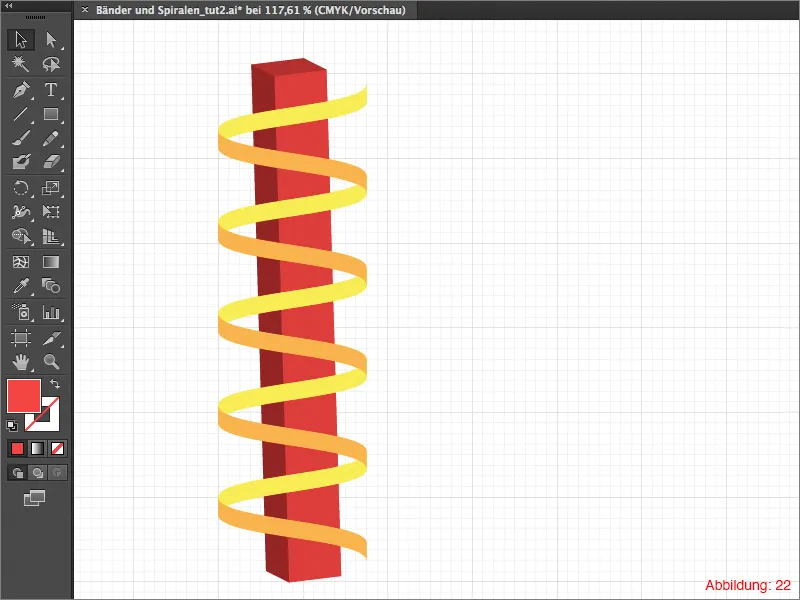
But how do you get this pillar into the spiral?
It's actually not that difficult ... First, select the entire spiral and use Command/Ctrl+Shift+G to remove all groupings. Finally, select all the yellow elements by holding down the Shift key and then use Object>Arrange>Into background to move them to the back.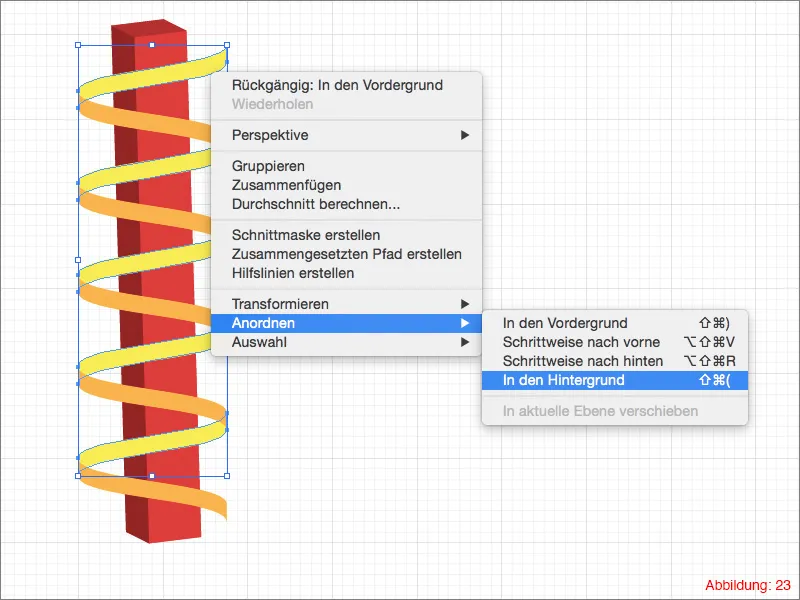
And poof ... your pillar is inside the spiral (Figure 24).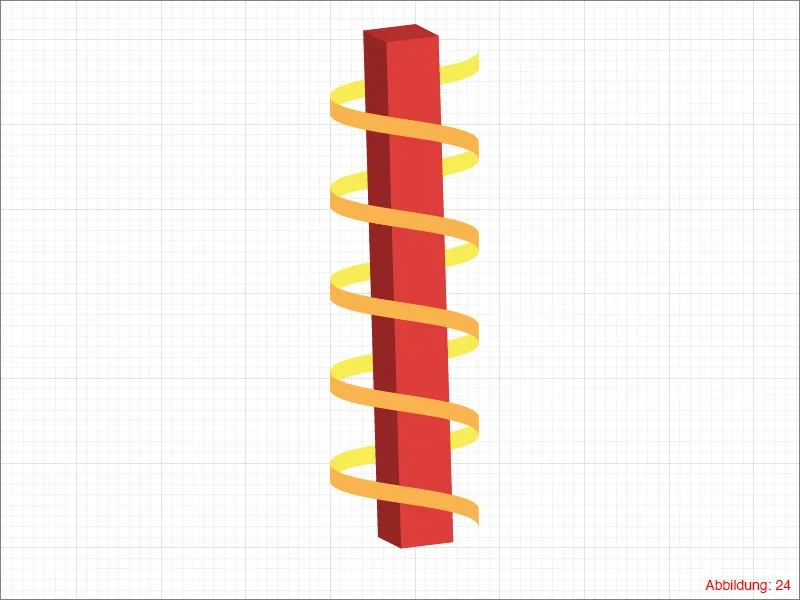
Part 2: 3D variant
After creating a three-dimensional spiral from 2D elements in the first part of the tutorial, I would now like to show you another effect using Illustrator's 3D functions in Part 2. You don't need to create a new workspace for this. All you need to do is create a new layer in Illustrator.
Grab the rectangle tool and create a rectangle that is three large squares wide and two small squares high. (In this case, I'm assuming you still have the grid from part 1 displayed). (See Figure 25).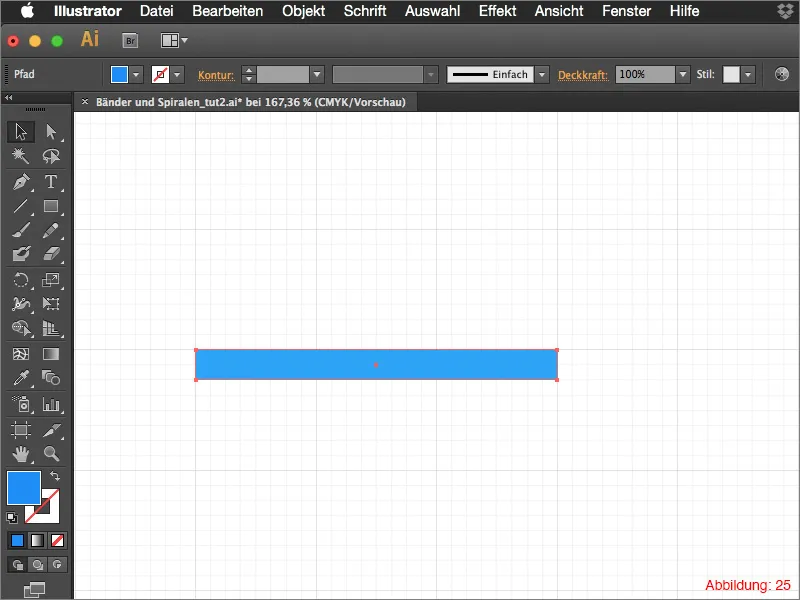
You now need to copy this rectangle four times and always stack them on top of each other with a distance of two small squares (see Figure 26).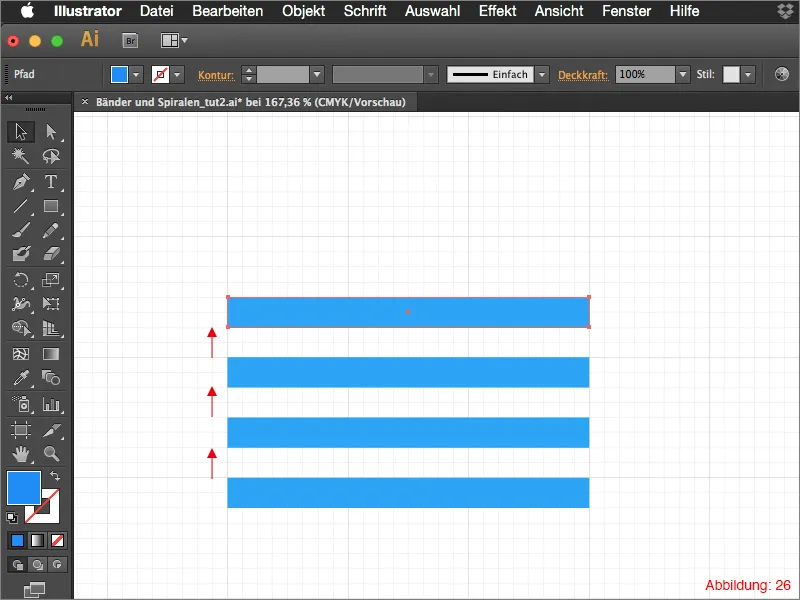
Next, you will need the direct selection tool. Use it to select all the path points on the right-hand side (see Figure 27).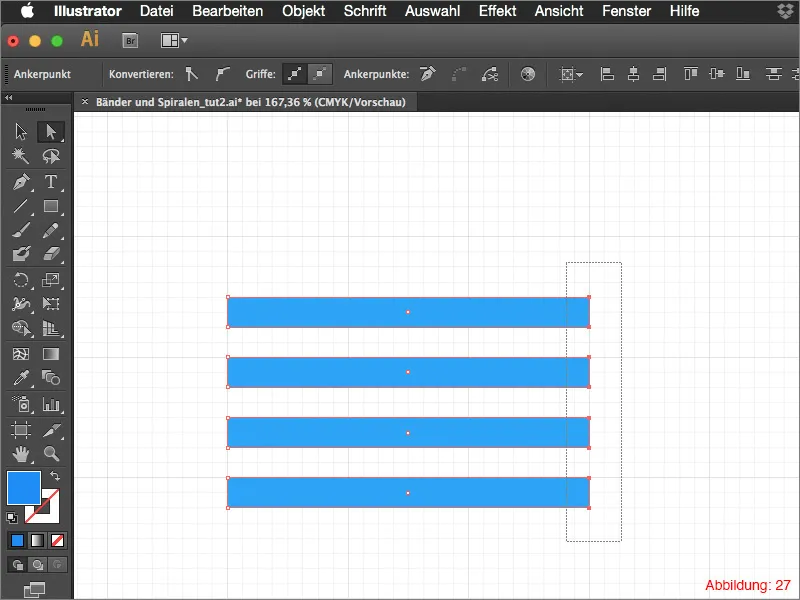
Move these path points up by four small boxes (see Figure 28).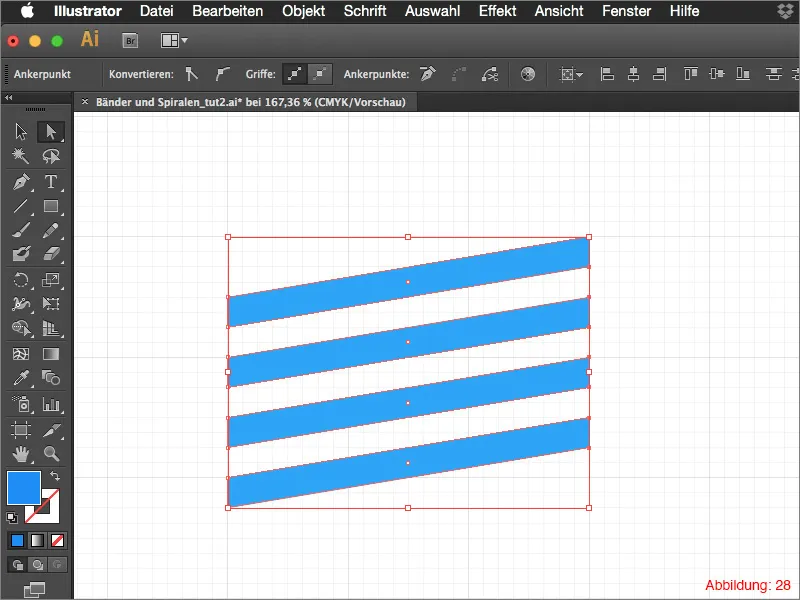
To be able to continue working with this entire construct, we need to save it as a symbol. To do this, Blender the symbols palettevia Window>Symbols.
Then click on the small arrow in the top right-hand corner and select New symbol ... (Figure 29).
Give it a name and confirm with OK.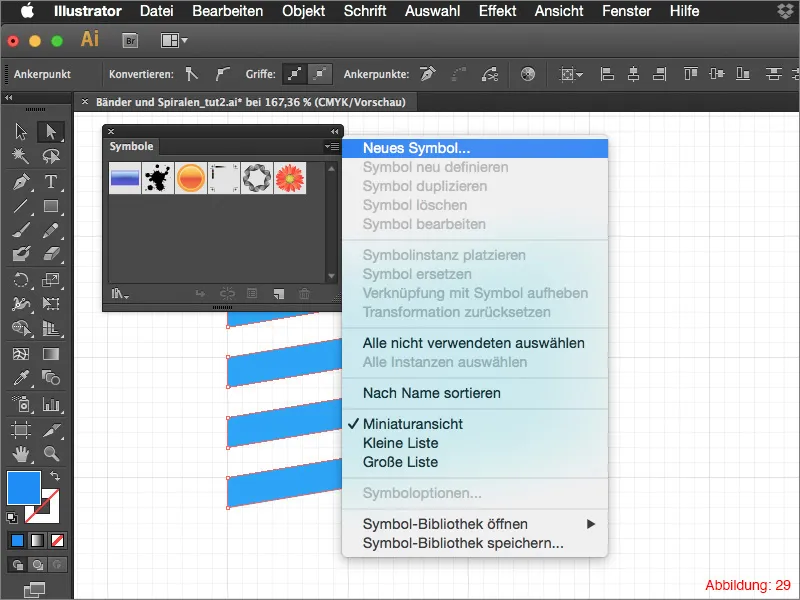
Now grab the Ellipse tool and use it to create an ellipse the size of four large squares (Figure 30).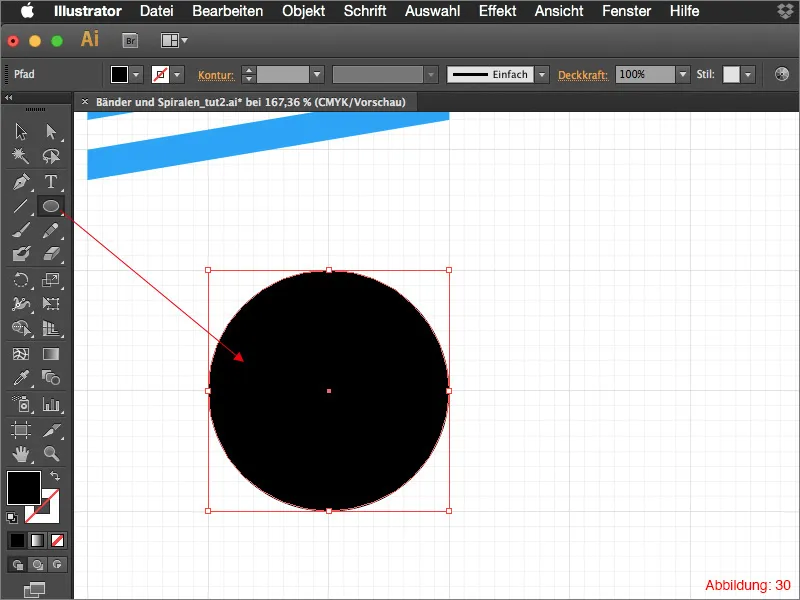
Use the direct selection tool to delete the right-hand path point so that you only have half an ellipse left (Figure 31).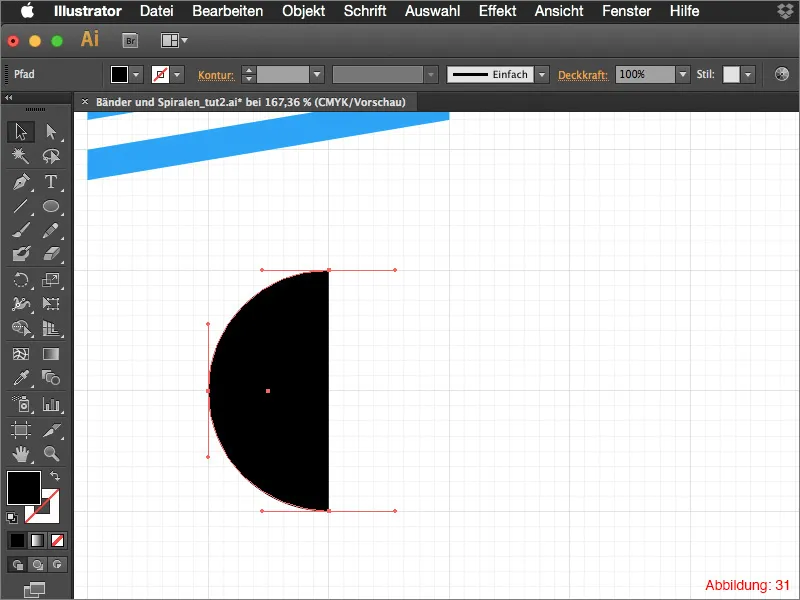
Next, go to Effect>3D>Gyro...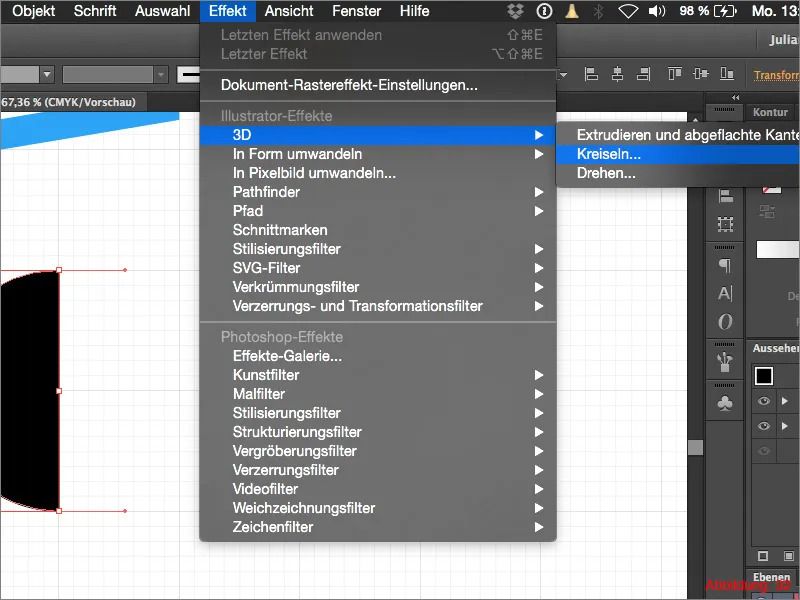
You can either copy the light settings directly from Figure 33 or simply change them to your liking.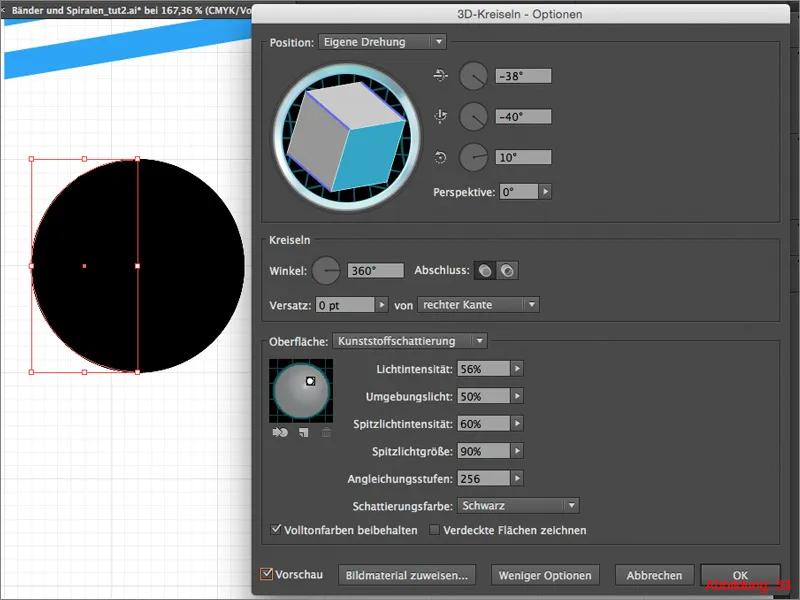
It is now important to click on the Assign image material button. In the following window, you can select the previously saved symbol and scale it to page size. However, the most important thing is to check the Shade image material and Invisible geometry boxes (Figure 34).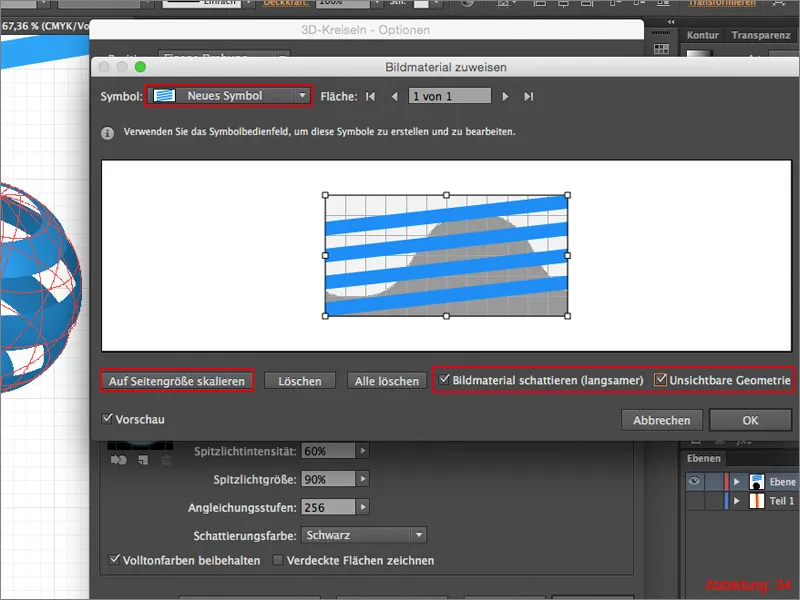
You can then confirm with OK.
Before we can place an object in this "cool" spiral sphere, we have to convert this 3D object. This can be done via Object>Convert Appearance.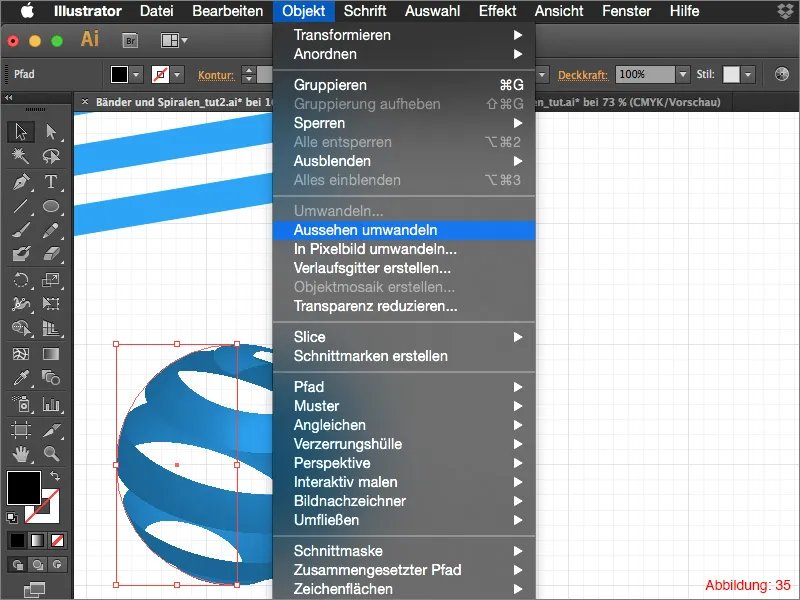
In the layer palette you will now find a group with the elements of the spiral sphere. If you now want to place an object there, all you have to do is simply move the object to this position (see Figure 36) in the layer palette.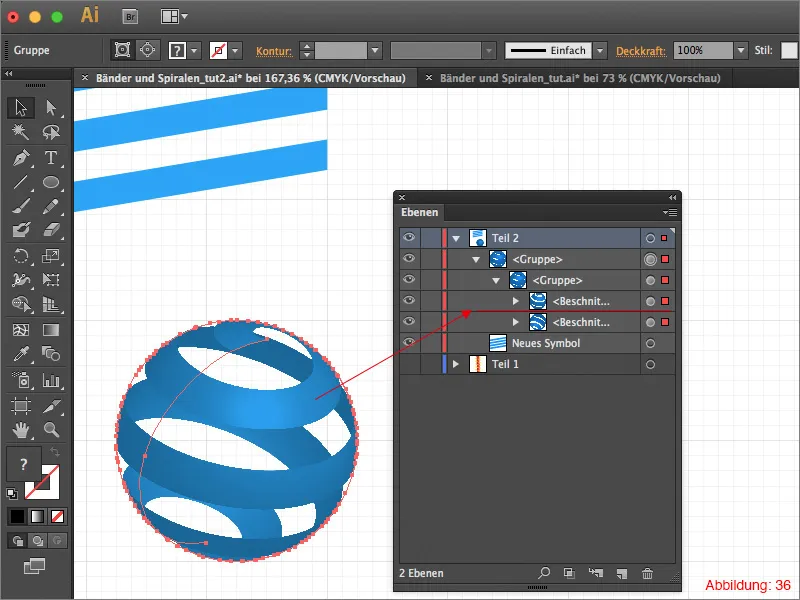
I no longer need to explain how to create such a sphere (Figure 37) ... just use the 3D spinning top effectagain.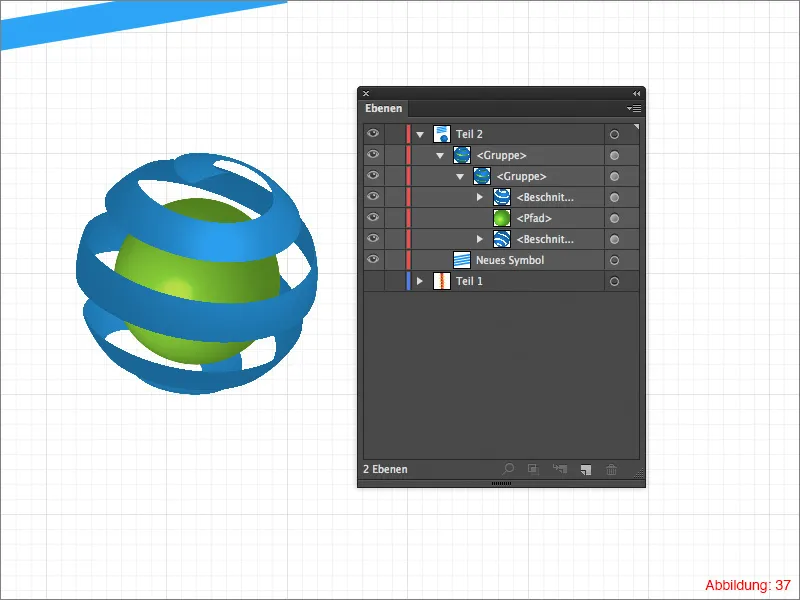
Final words:
We have now come to the end of this tutorial. I hope you enjoyed it and were able to pick up a tip or two.
If you have any further questions on this topic, please feel free to write them in the comments below this tutorial. I will do my best to answer them as soon as possible.
With this in mind ...
Stay creative.
Yours, Julian
