Customizing your stream alerts can have a significant impact on viewer engagement. There are many ways you can design your alerts to effectively engage your viewers with each follow, donation, or other actions. In this tutorial, I will show you how to easily download and incorporate pre-made alerts in Streamlabs into your streaming process.
Key Takeaways
- To use pre-made alerts in Streamlabs, you first need to create an alert box.
- You can find free and paid alerts and filter them by various criteria.
- Managing and customizing the downloaded alerts is straightforward.
- Alerts can also be integrated into other streaming programs.
Step-by-Step Guide
Step 1: Adding Alert Box
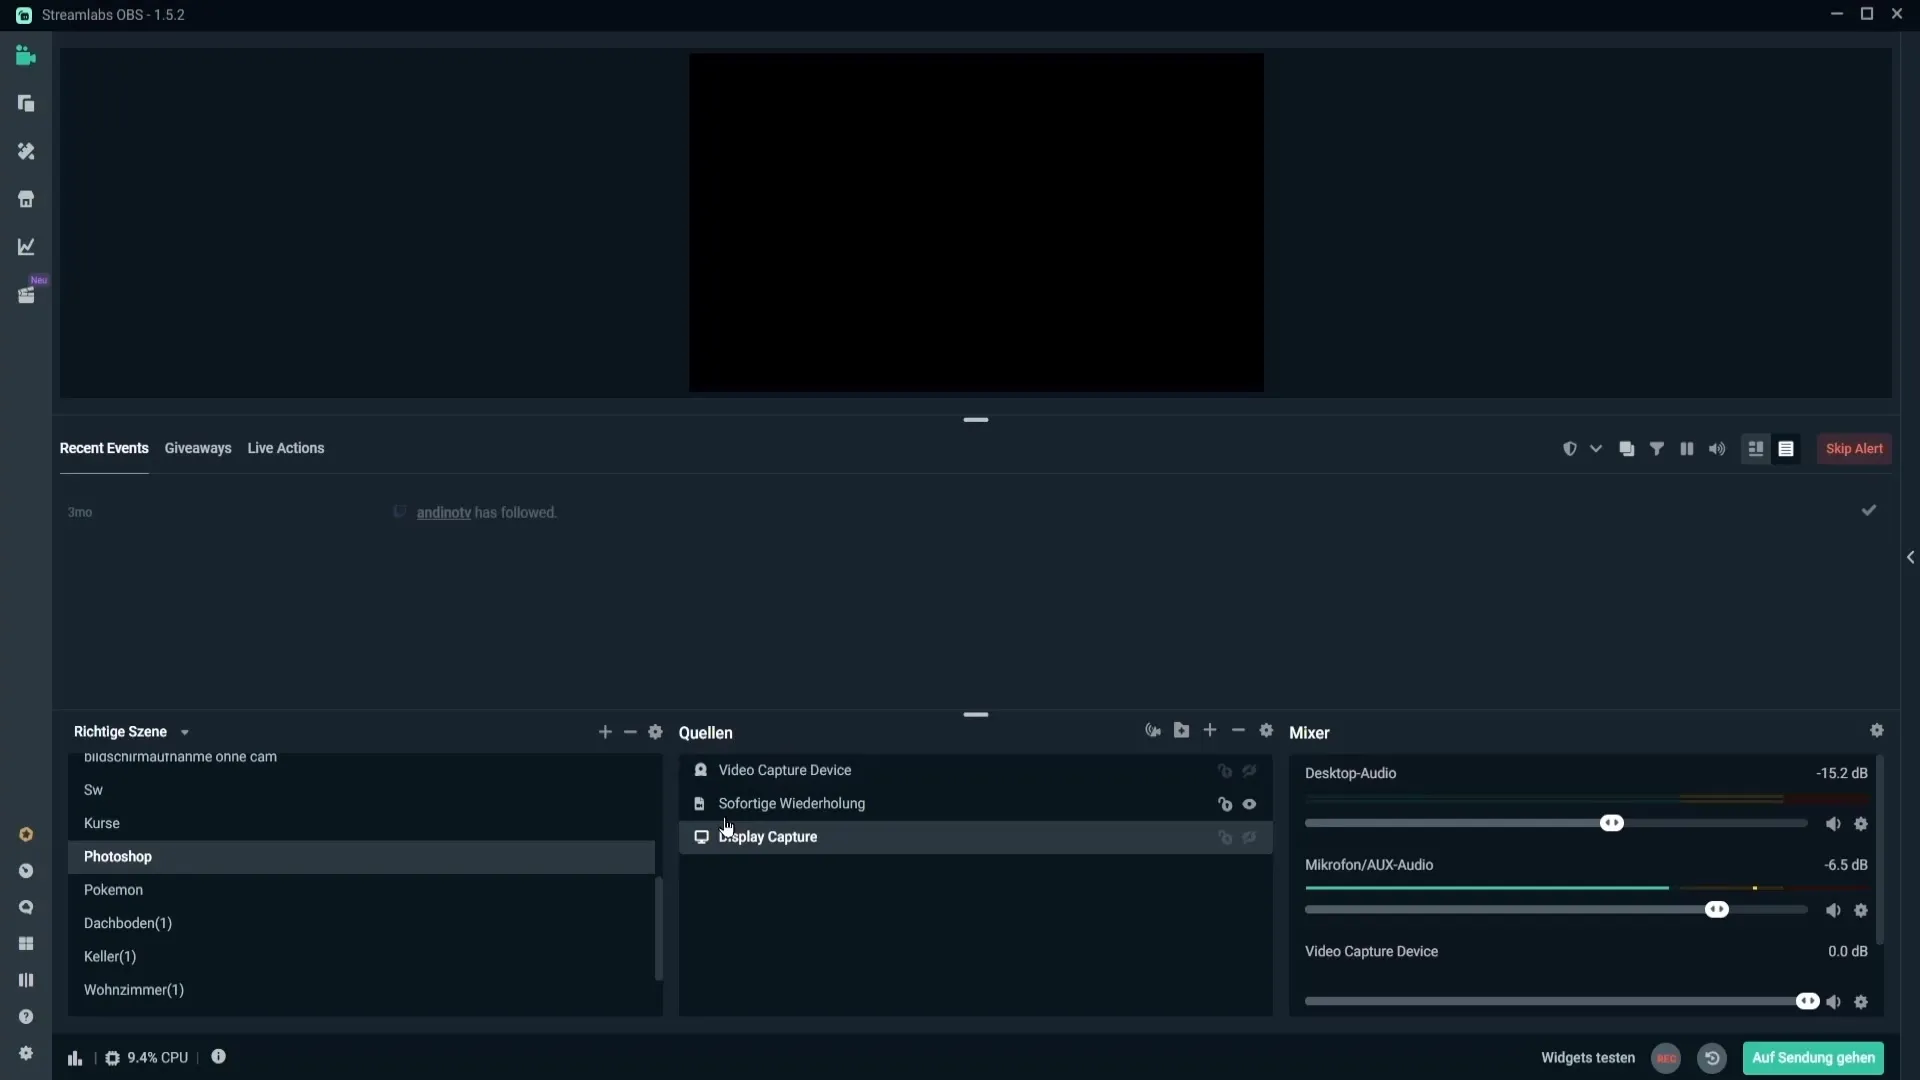
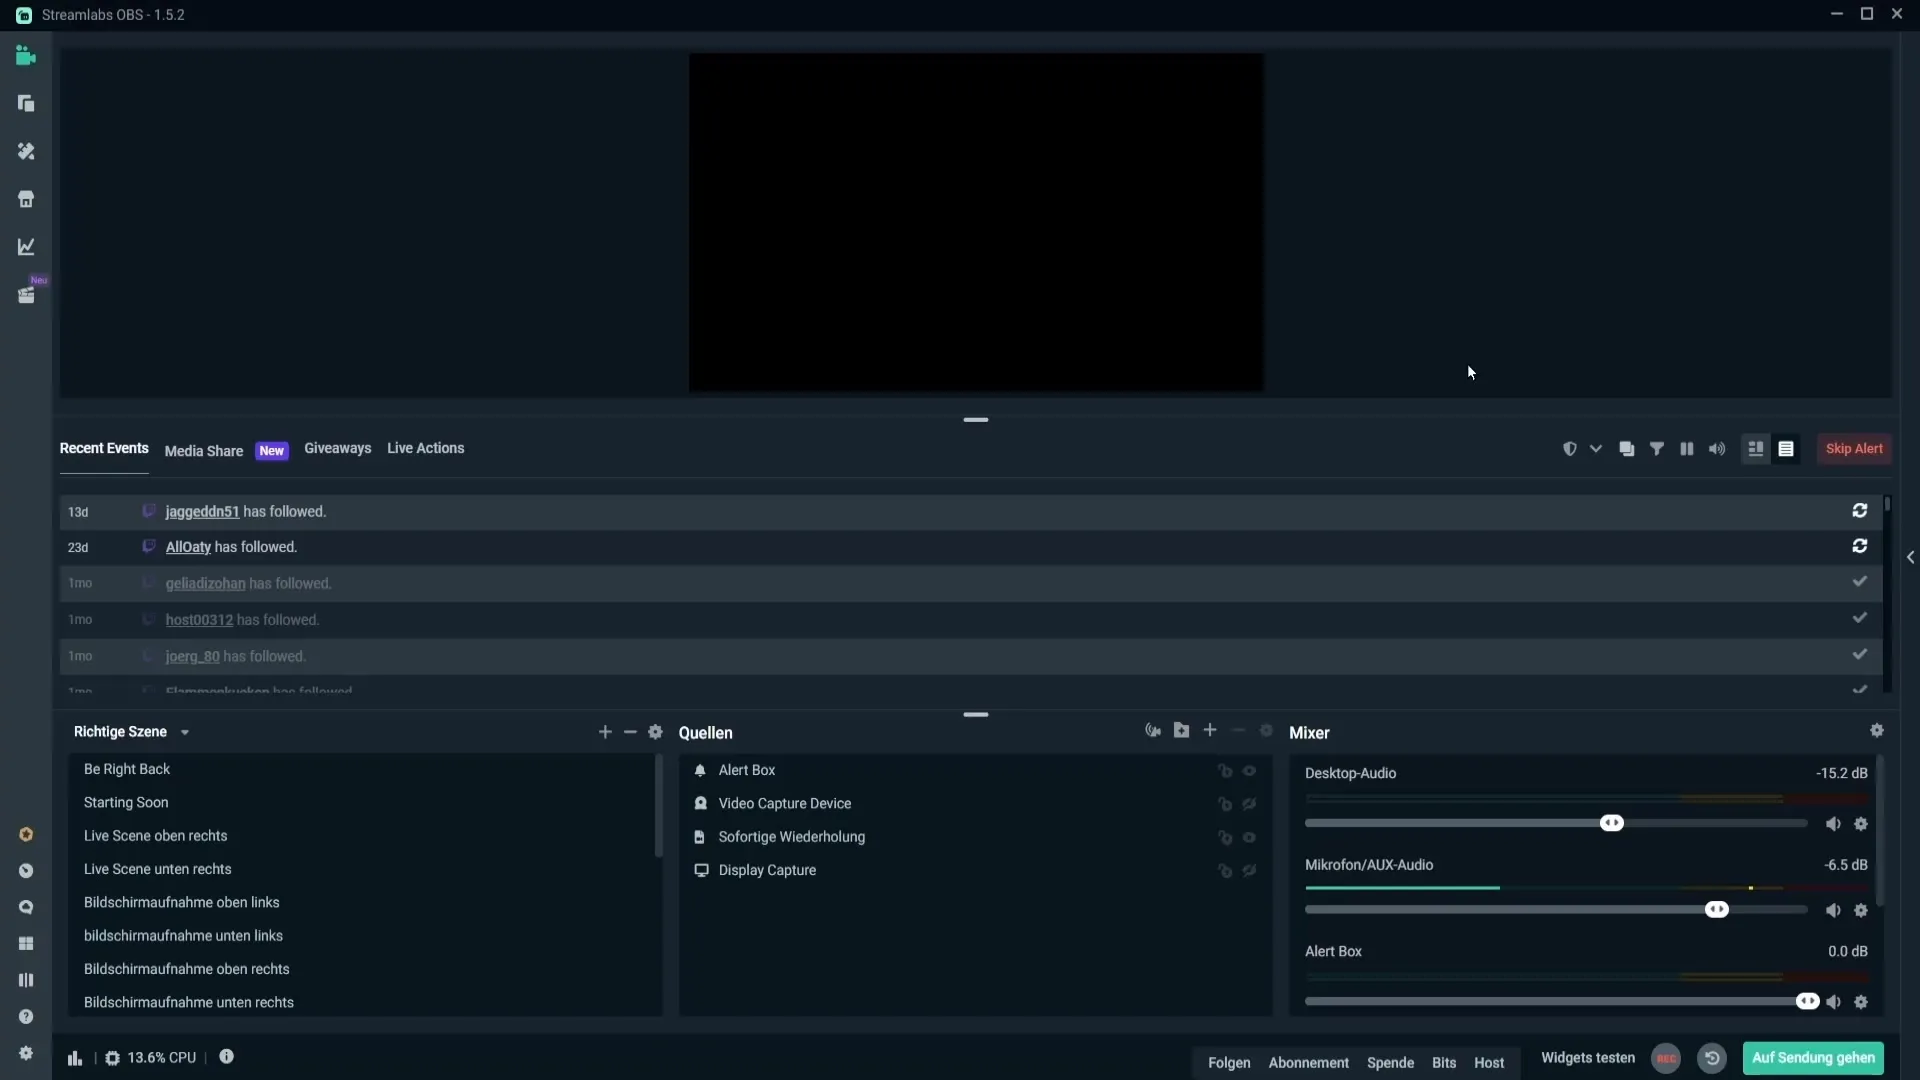
Before you can start downloading pre-made alerts, make sure an alert box is set up in your Streamlabs OBS. If you don't have one yet, you can easily do this by clicking on the plus sign in the sources list. Then choose "Alertbox" and add a new source. You will be prompted to give the source a name – you can do this as you like. After adding the alert box, you can adjust the size and position of the box. Make sure the box is prominently placed in your stream.
Step 2: Downloading Alert Templates
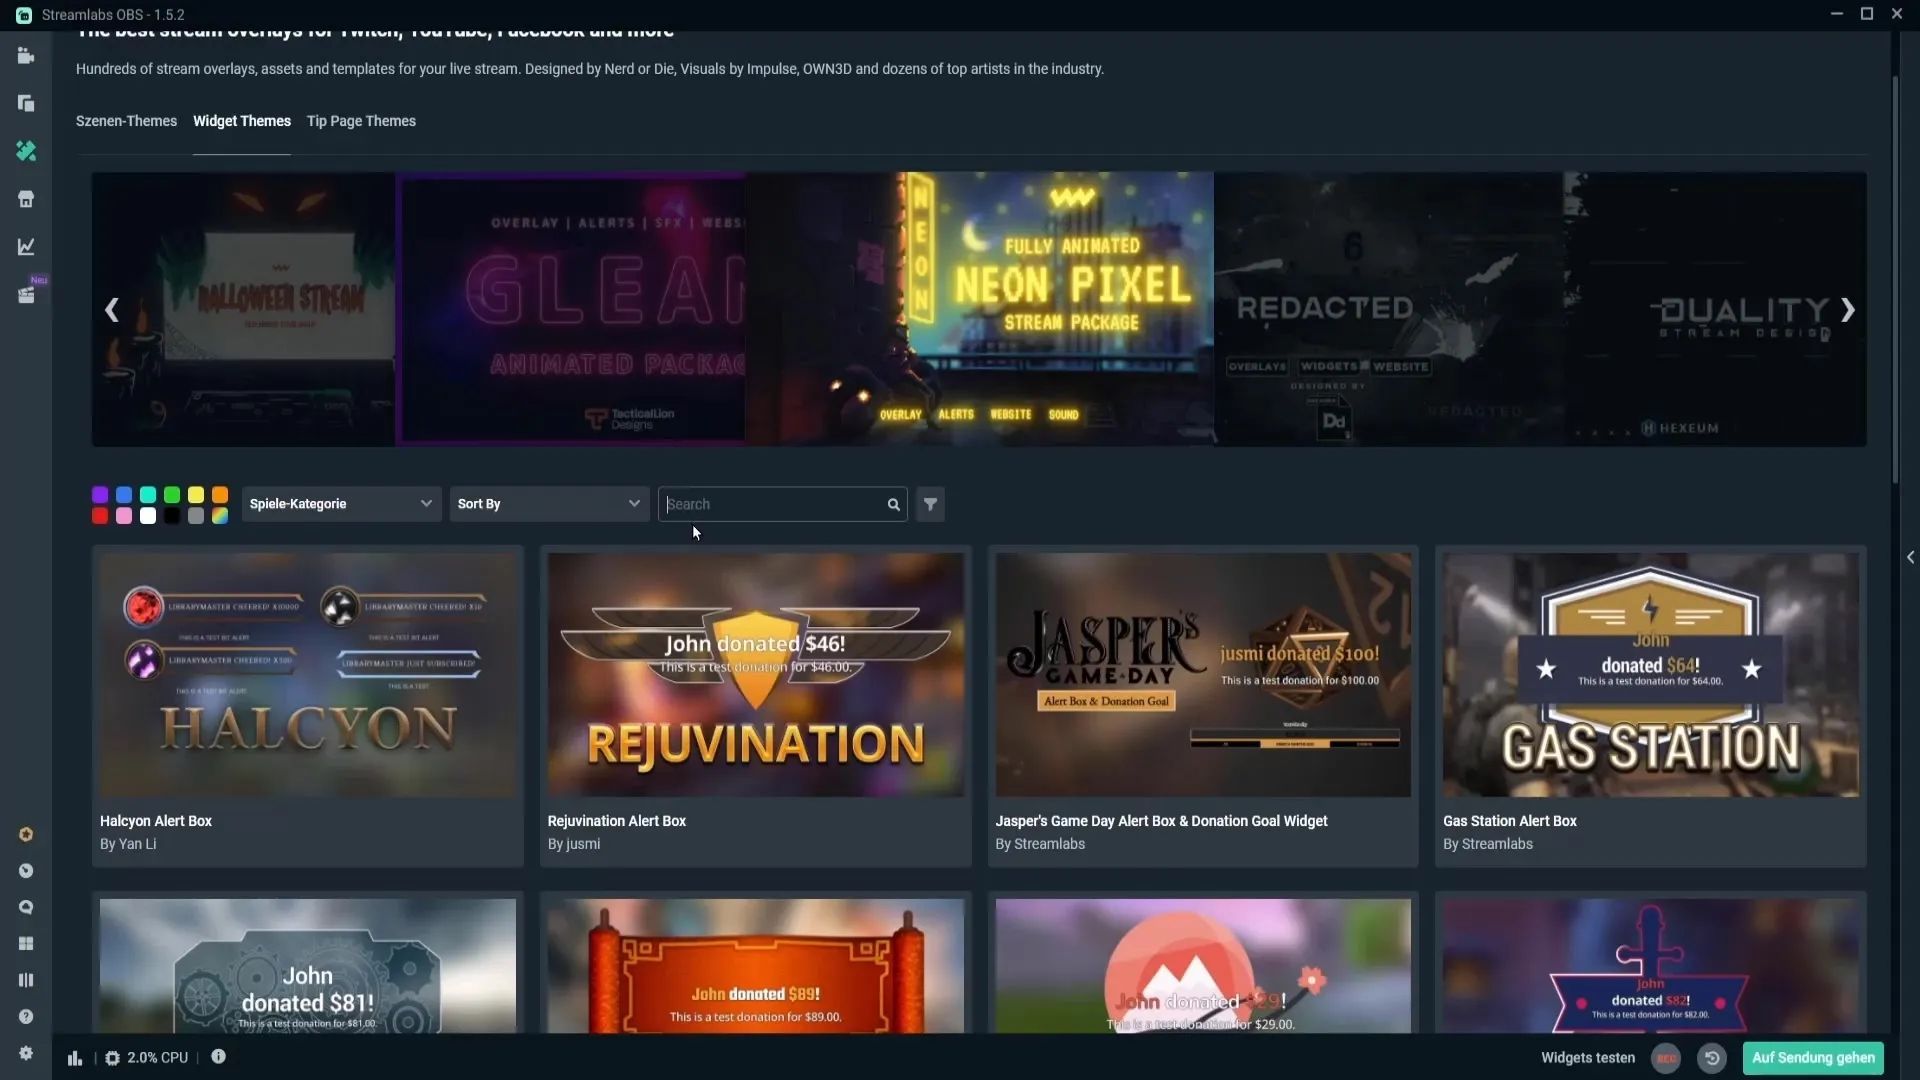
To find suitable pre-made alerts, go to the design menu in Streamlabs and click on the corresponding button. Here you will see the different widget themes available to you. You can also search for specific alerts by typing "free" in the search bar. This will show you only free alerts that you can use.
Step 3: Using Filter Options
On the left, you can activate various filter options. Here you have the option to display the most popular alerts or search specifically by game categories. For example, if you need an alert for an action stream, you can activate the appropriate filters. You can also select alerts based on colors. Simply click on the desired color option to find alerts designed in that color.
Step 4: Selecting and Installing Alerts
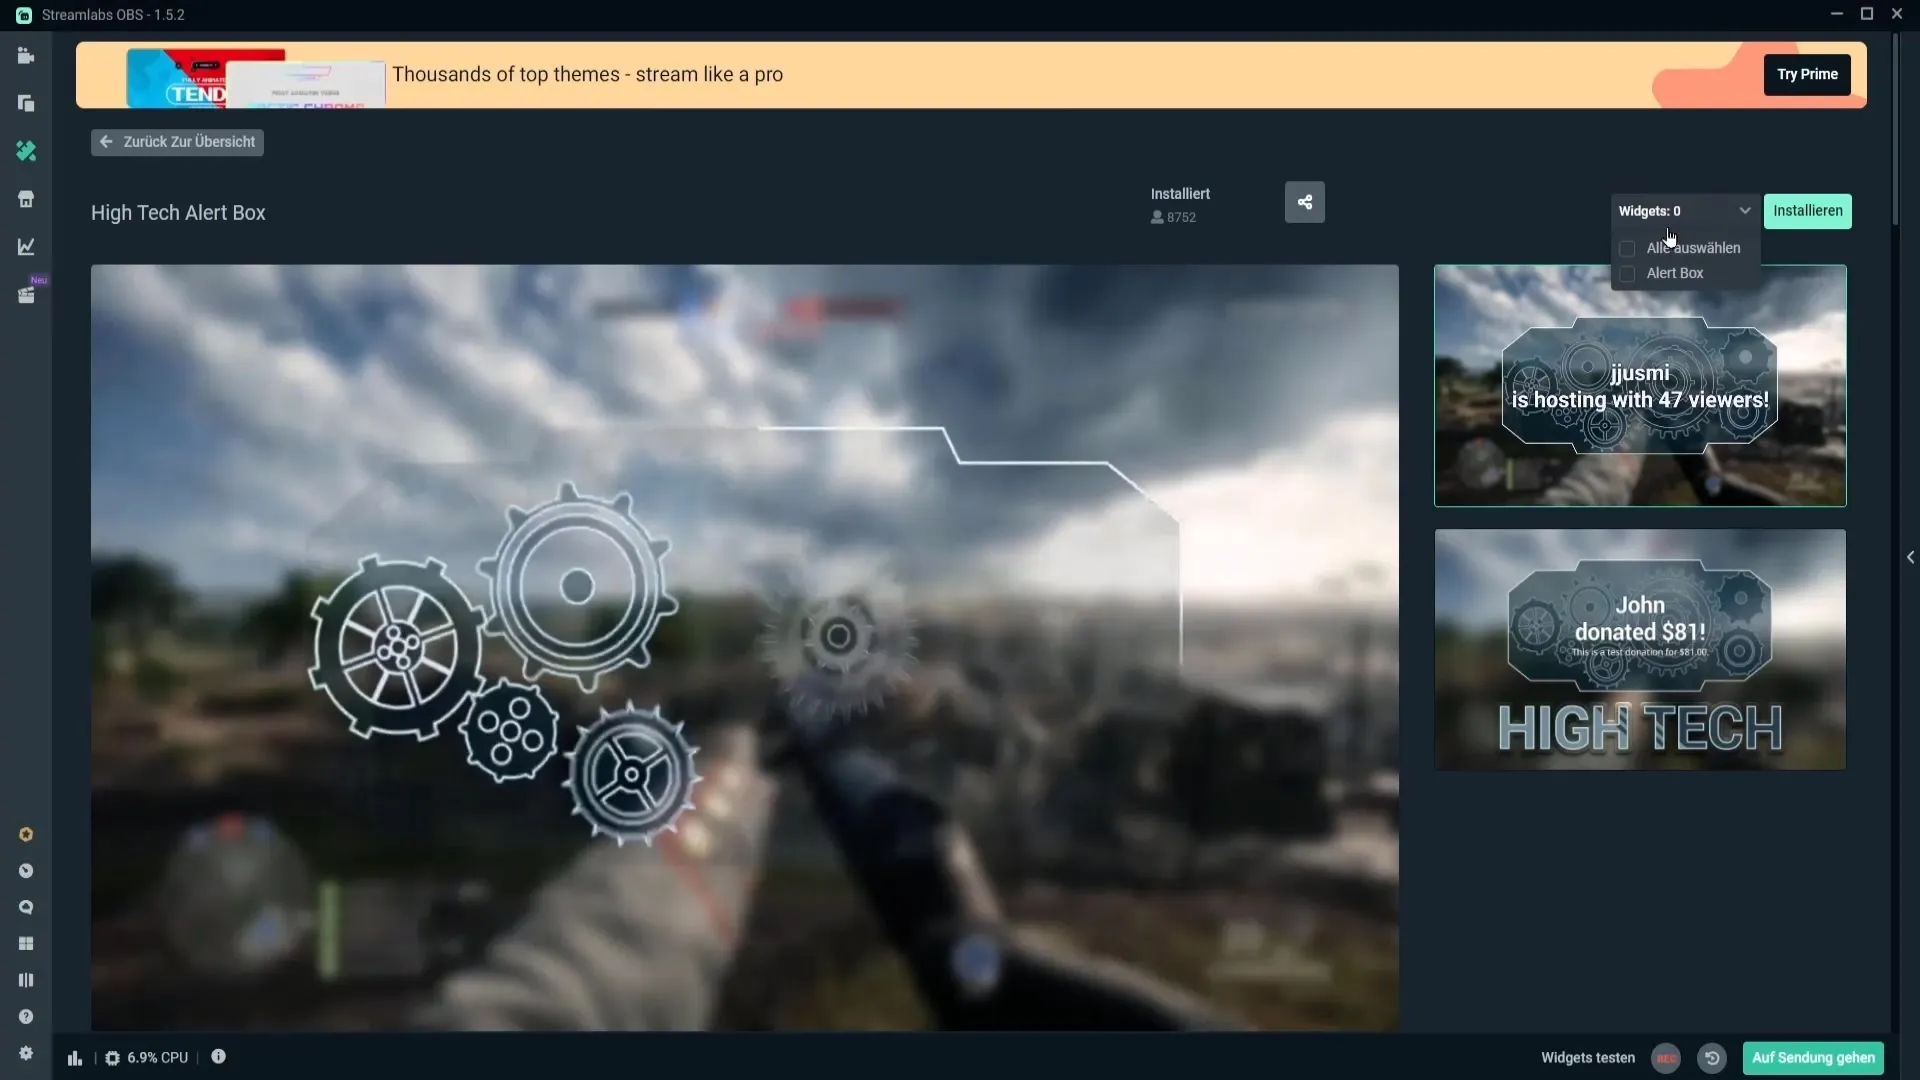
Once you find an alert you like, click on it to see it in a larger view. If you are satisfied with the design, check the box next to "Widgets" for the alert box and click "Install." The alerts will now be downloaded and immediately available for use in your stream.
Step 5: Testing Alerts
To ensure everything is working smoothly, test your new alerts. You can do this by clicking "Test" at the bottom of the dashboard page and then selecting "Follow." This way, you can verify that the alerts appear as planned.
Step 6: Managing Alerts
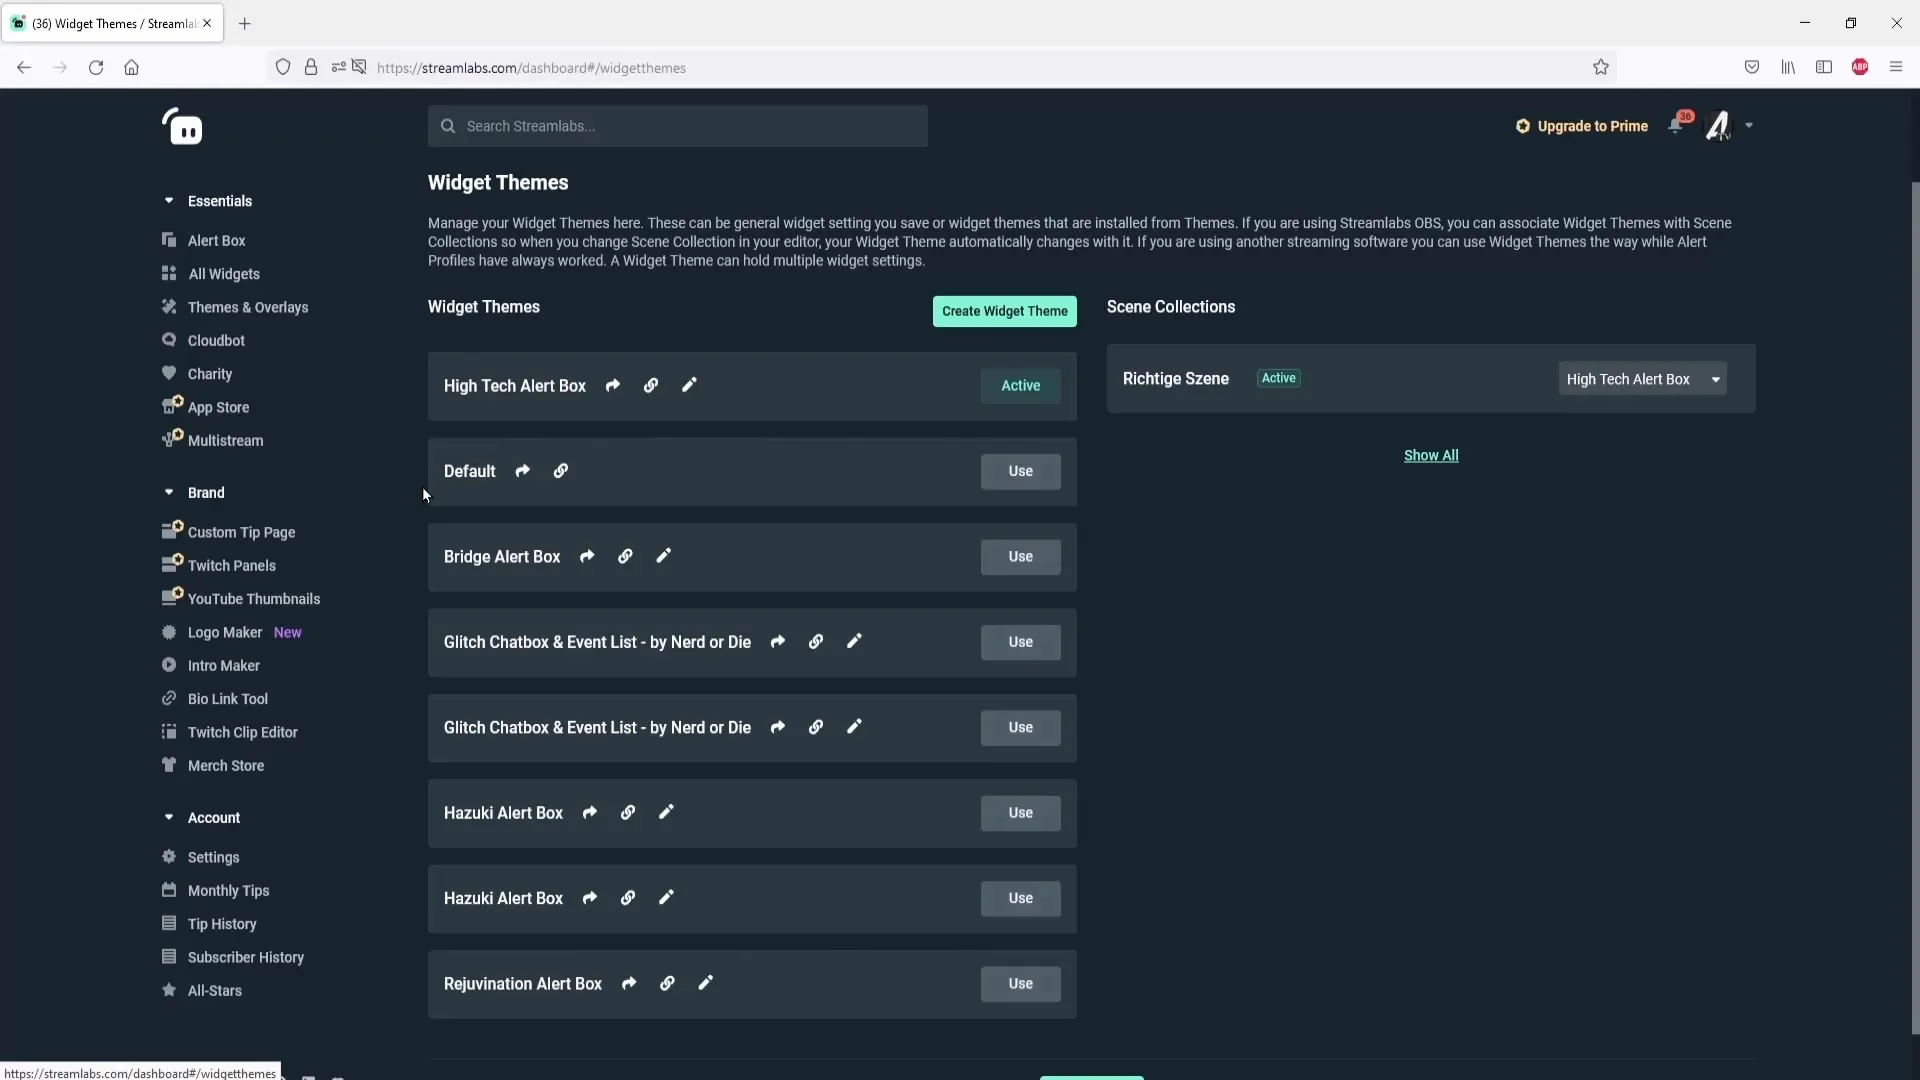
To manage your downloaded alerts, go to your dashboard and click on "Alertbox." Here you will find the "Manage Themes" button, which will show you an overview of all your downloaded alerts. The default alerts that come with Streamlabs are also listed here. If you want to delete an alert, you can do so by clicking on "delete."
Step 7: Switching Alerts
If you want to switch between different alerts at any time, you can easily do so. Select the scene for which you want to adjust the alerts. Click on the desired alert template and save the settings. This way, you can quickly and uncomplicatedly change the alerts currently in use.
Step 8: Using Alerts for Other Programs
If you also want to use the alerts in another streaming program like OBS Studio, go back to the design menu and copy the link to the alert box. In OBS Studio, you can add a "Browser Source" and paste the copied link. After clicking "Done," the Streamlabs alerts will be integrated into your new program.
Step 9: Test alerts and adjust settings
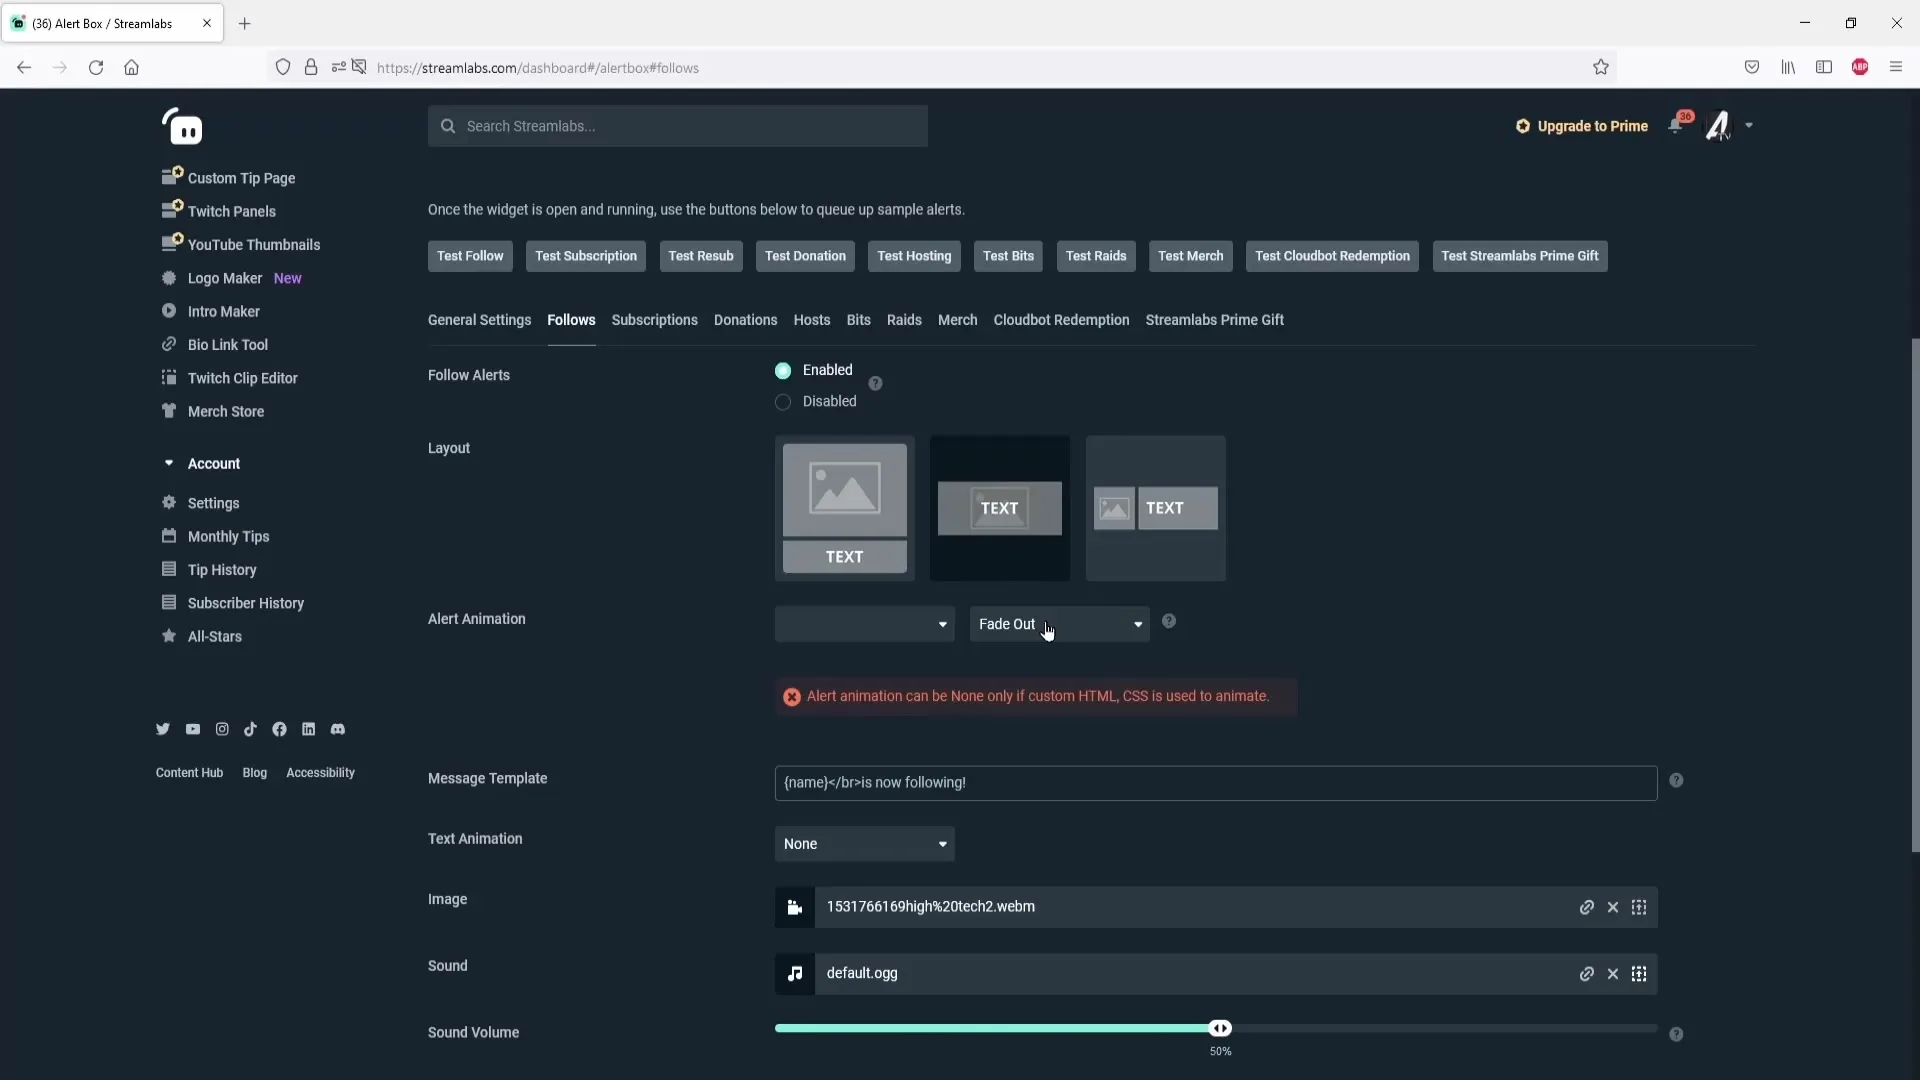
To ensure that everything is working correctly, you can test the area for the alerts at any time. You also have the freedom to test and adjust the alerts as you wish through the links to the various alert boxes. You will get to know the numerous options for customizing the alerts further in a future video.
Summary
With this guide, you have now learned the steps to install and manage pre-made alerts in Streamlabs. You can customize your selection of alerts and tailor them to your taste so they fit perfectly with your stream.
