The ability to interact with viewers during gameplay is crucial for streamers. When using only one screen, this can be a challenge. This is where the In-Game Overlay comes into play, allowing you to keep an eye on the chat and other important information while streaming - without viewers seeing this information. This text guide provides you with a step-by-step guide on how to set up the In-Game Overlay in Streamlabs OBS.
Key Takeaways
- The In-Game Overlay is ideal for all streamers with only one screen.
- The correct game adjustment (windowed mode) is crucial for the overlay to work.
- You can adjust the window position, visibility, and transparency of the overlay.
- There are shortcuts to quickly toggle the overlay on and off as well as move windows.
Step-by-Step Guide
To set up the In-Game Overlay in Streamlabs OBS, follow the steps below:
Step 1: Accessing the Overlay Settings
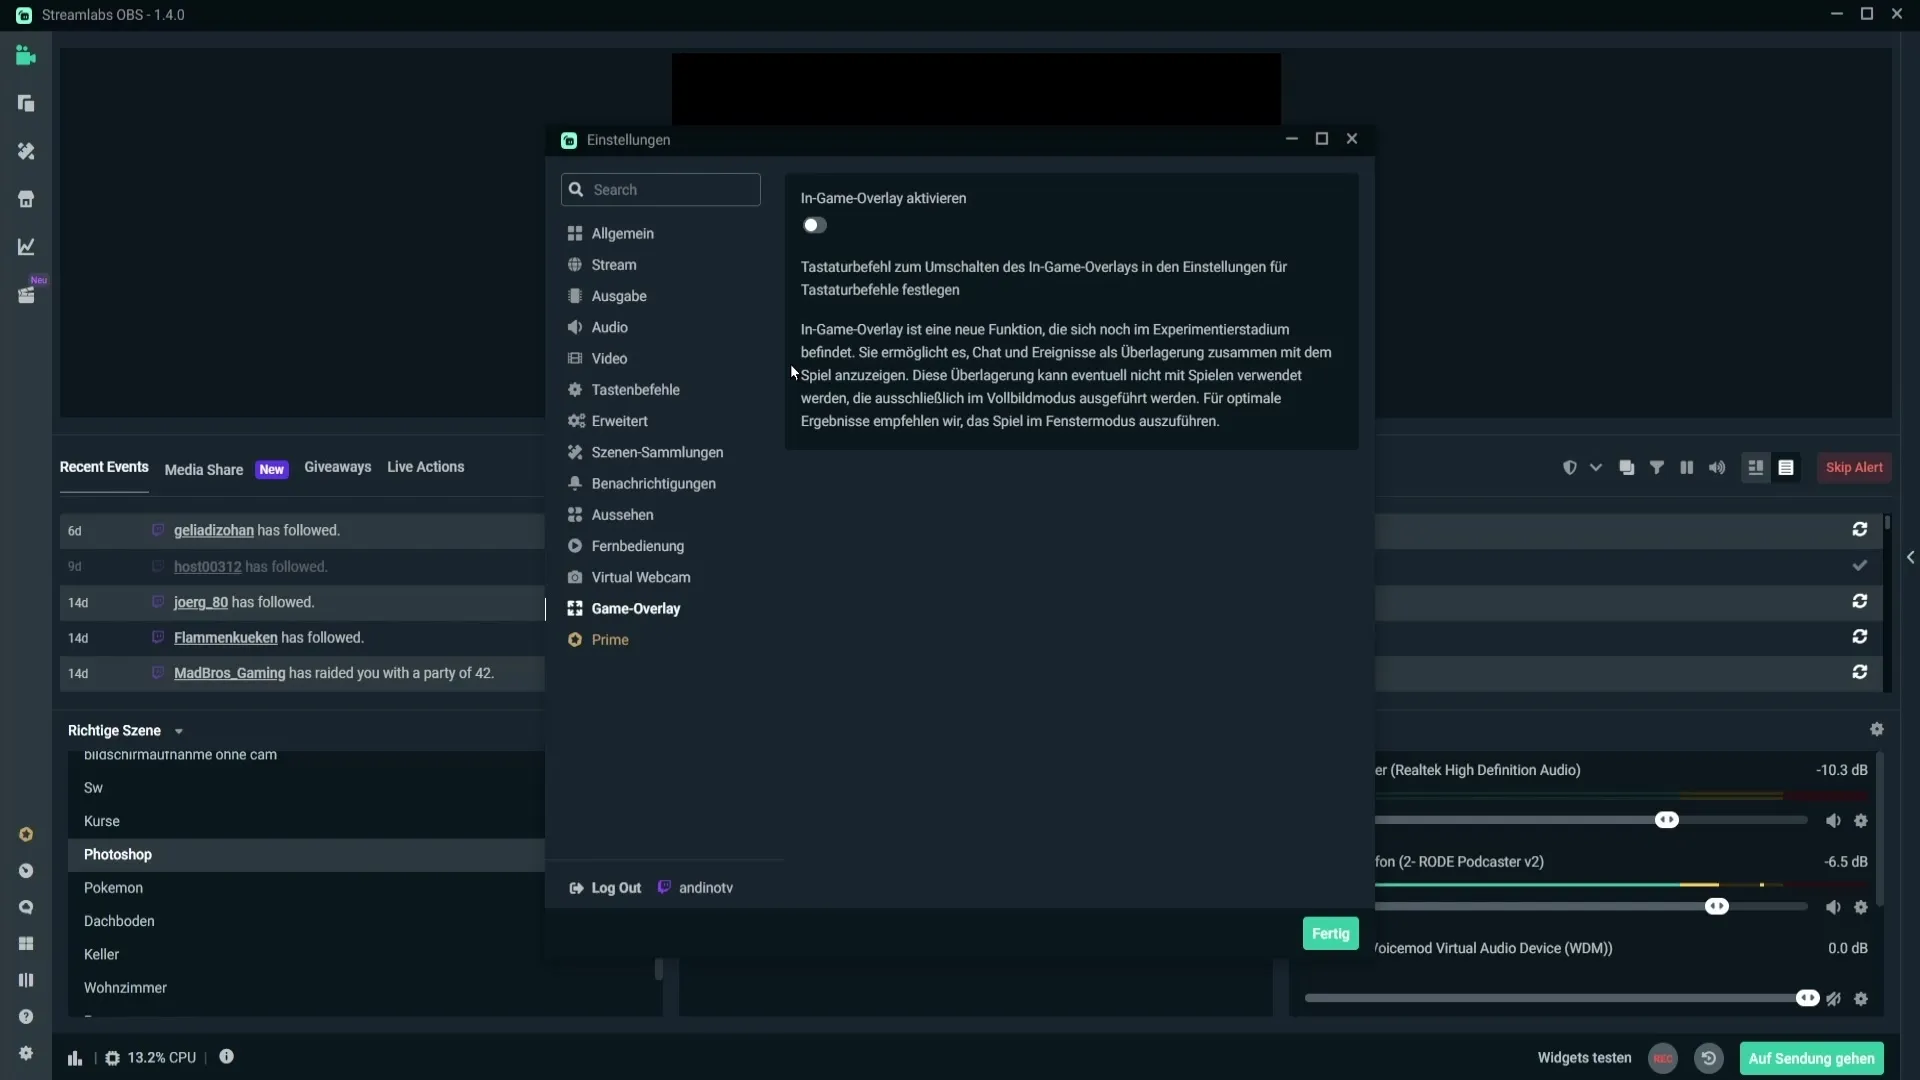
First, open Streamlabs OBS and click on the gear icon at the bottom left of the interface. Once you have opened the gear, select the "Game Overlay" option.
Step 2: Activating the In-Game Overlay
In the overlay settings, you can activate the In-Game Overlay. This feature is especially useful if you have only one screen and want to keep an eye on the chat or latest events while playing.
Step 3: Testing the Overlay
To ensure the overlay is working correctly, you can start a test recording. Click on the "REC" button and then switch to a game while Streamlabs OBS is running in the background.
Step 4: Adjusting Game Mode
If the overlay is not displayed correctly, it could be due to your game mode. Choose windowed mode in the game settings. This should make the In-Game Overlay visible.
Step 5: Activating Positioning Mode
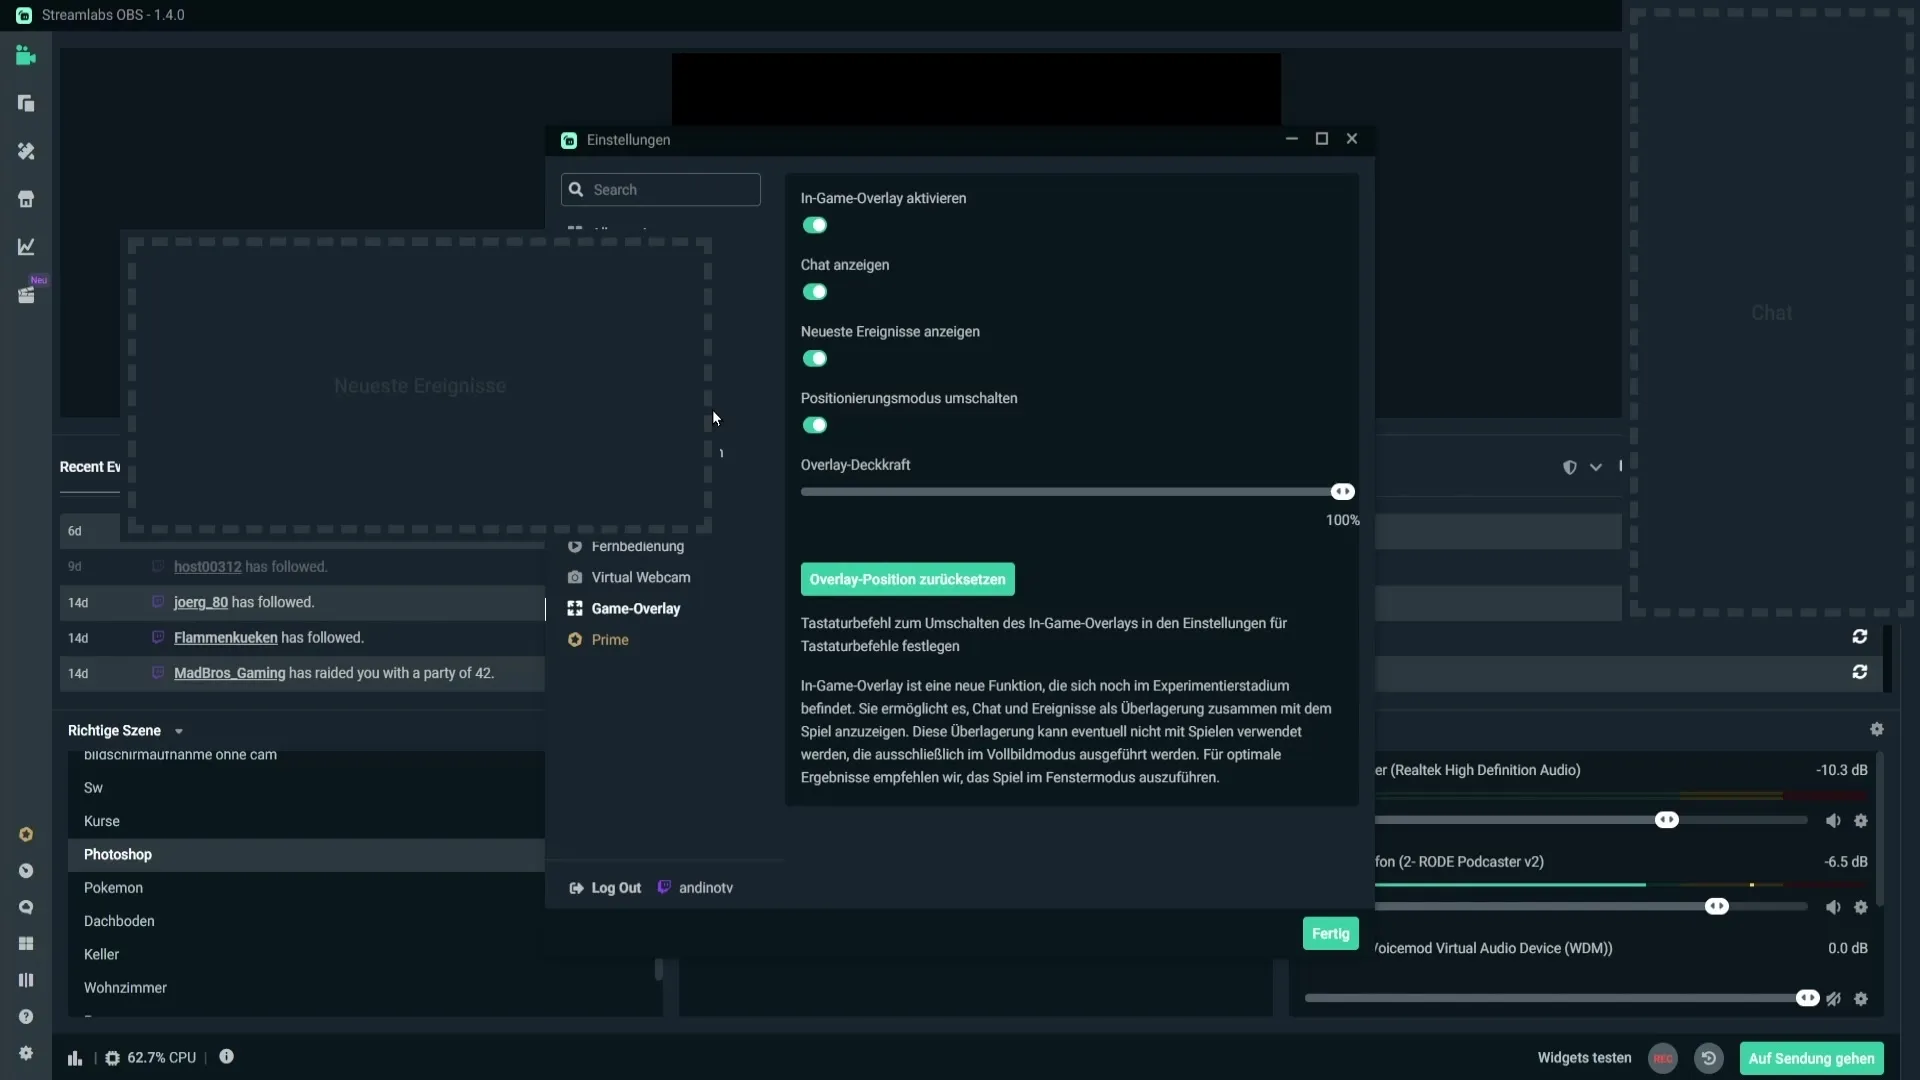
To position the overlay windows, you need to activate the positioning mode. Once this mode is on, you can arrange the windows for the chat and events as desired.
Step 6: Adjusting Windows
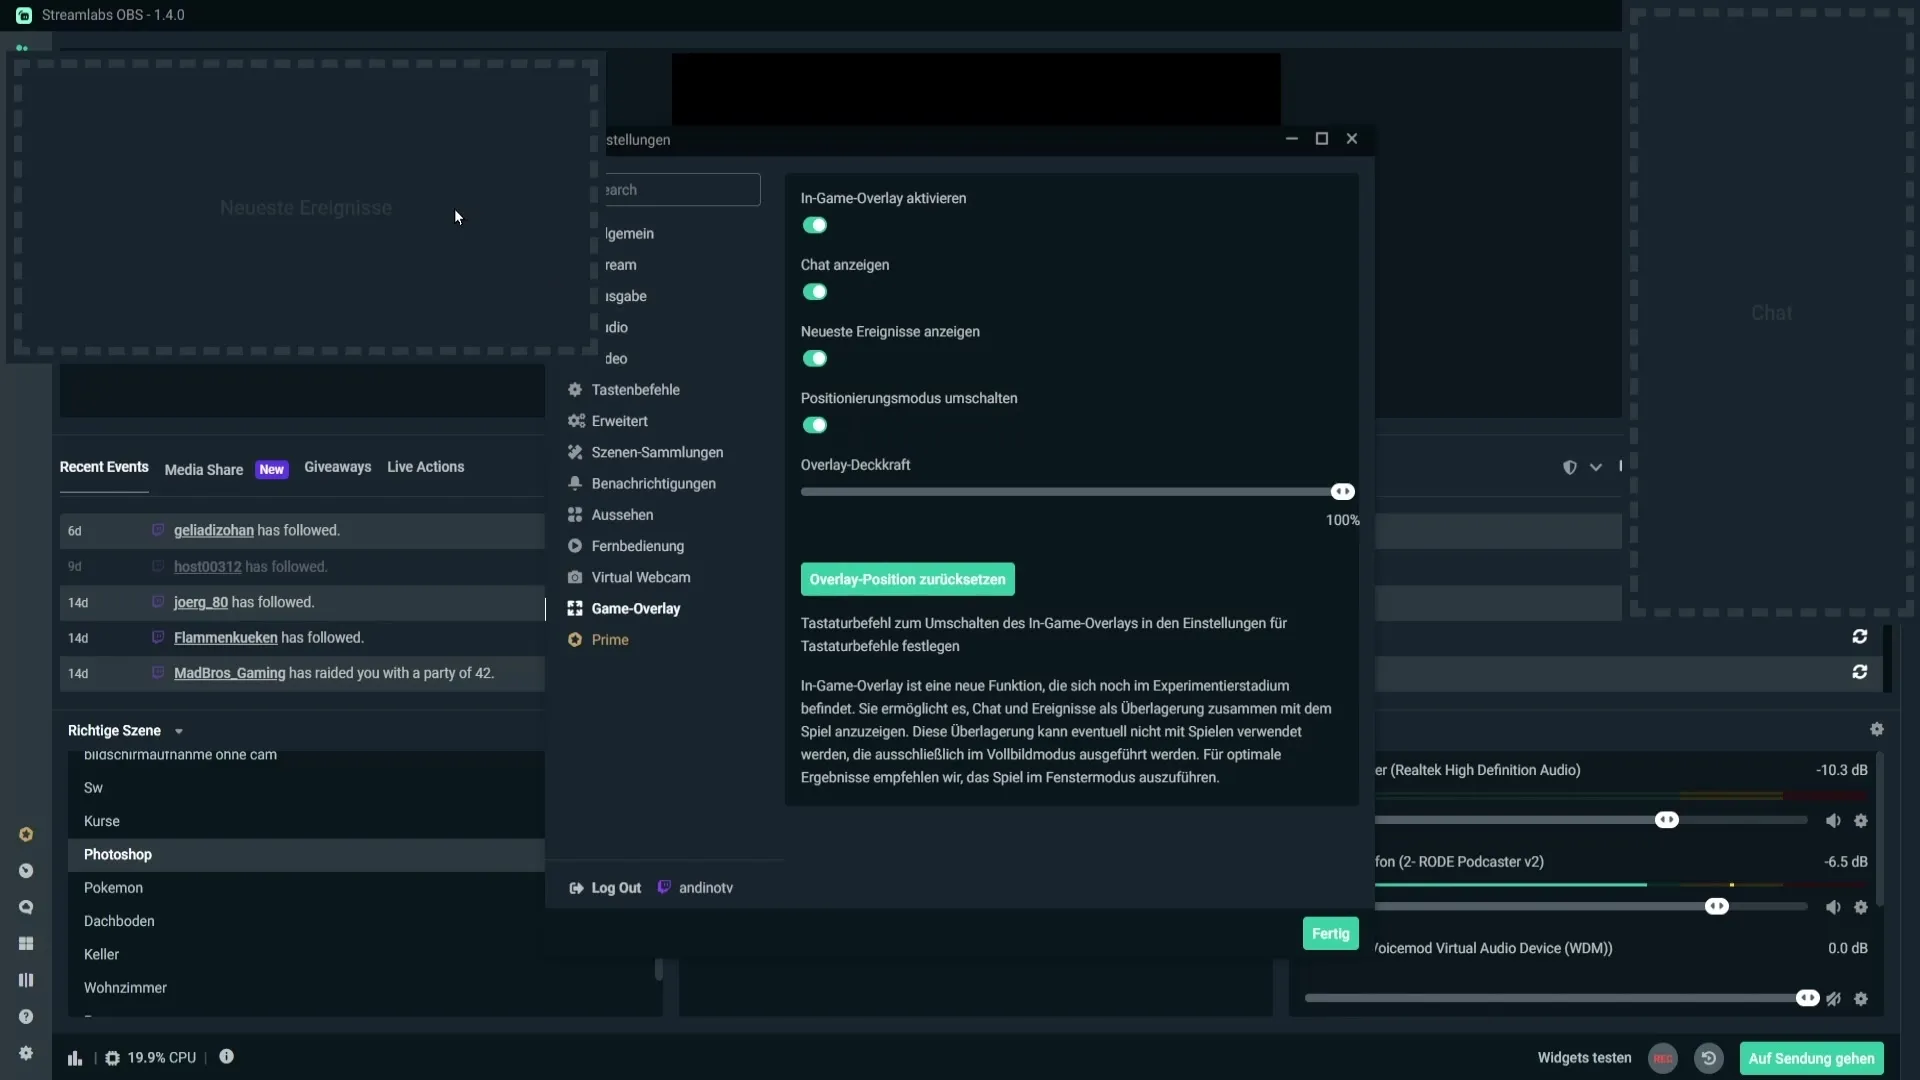
You can arrange the windows for the chat and events side by side or customize them to your preferences. Make sure these windows do not cover important areas during gameplay.
Step 7: Making Windows Visible or Invisible
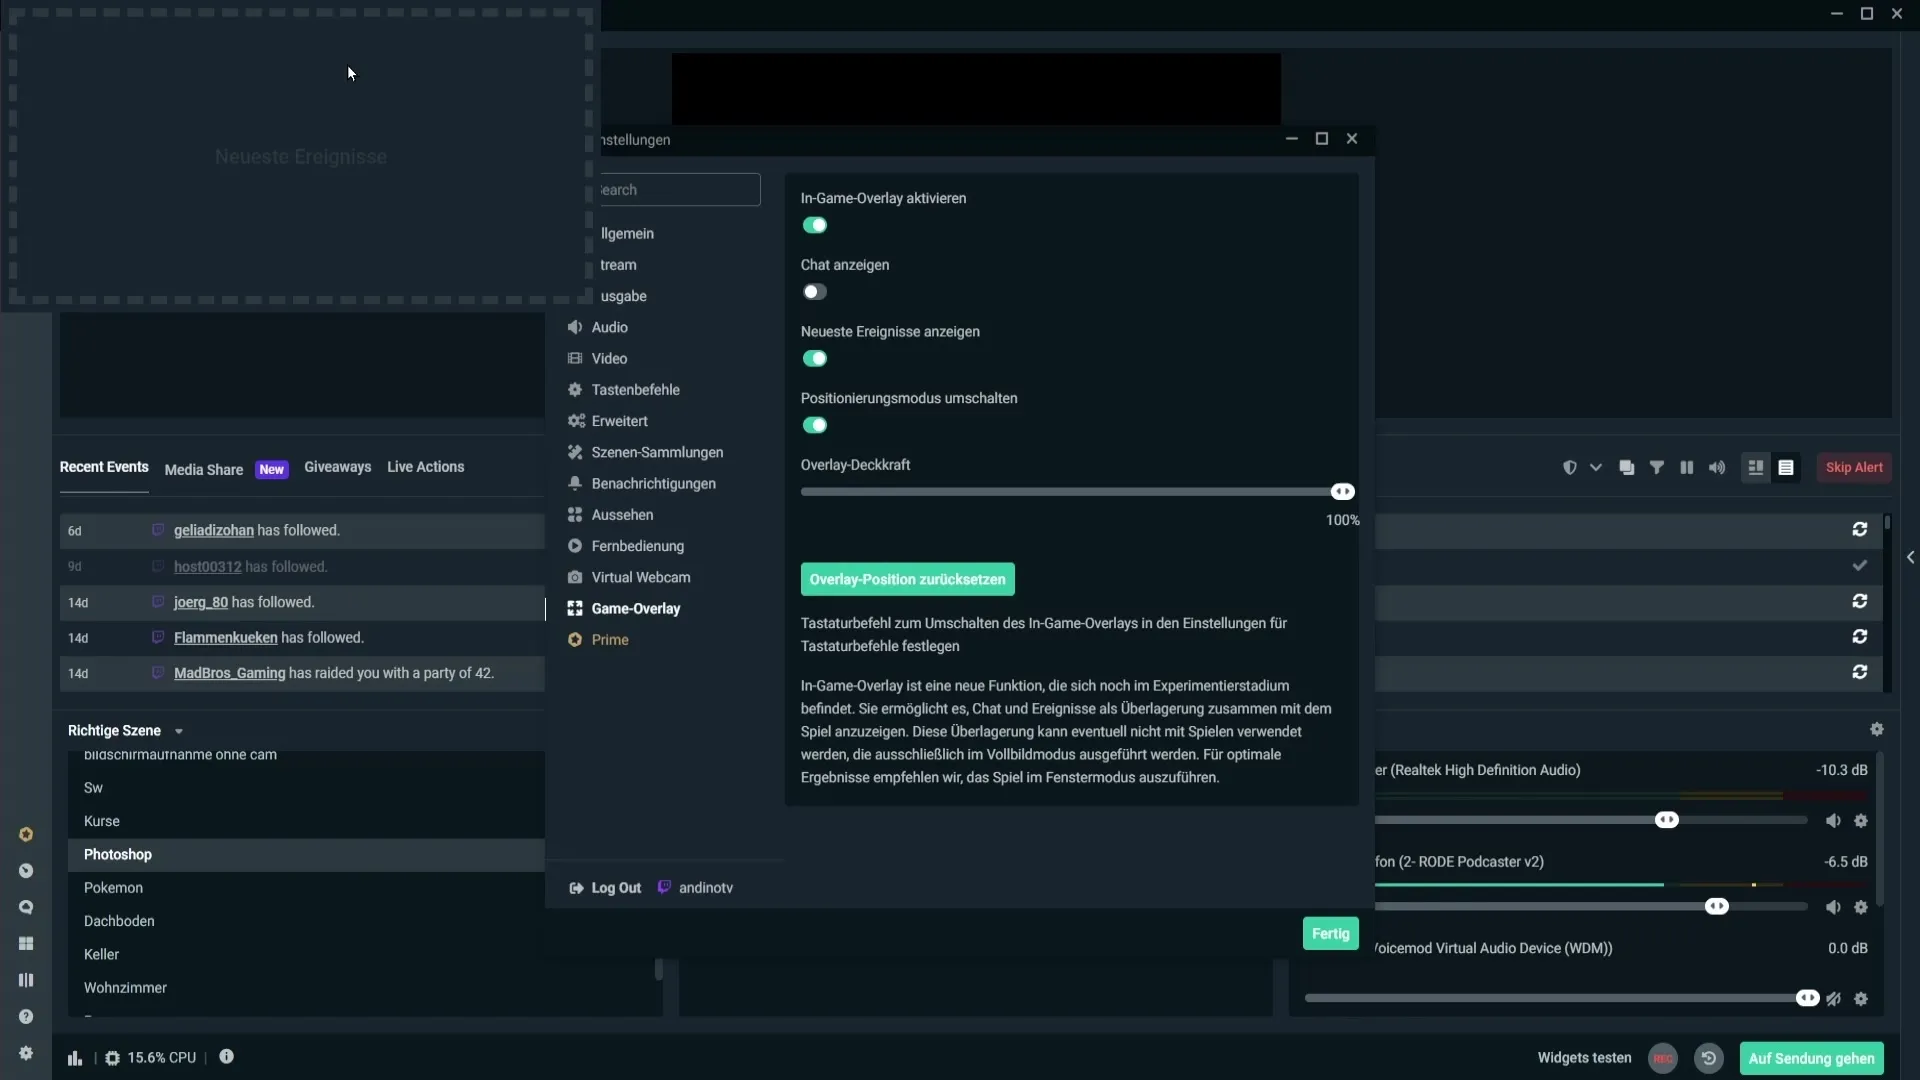
If you want to decide whether to display the chat window or the event window, you can simply use the corresponding buttons. For example, you can hide the chat and only show the events, or vice versa.
Step 8: Adjusting Overlay Transparency
Another useful feature is the ability to adjust the transparency of the windows. This allows you to make the game slightly transparent while still keeping the important information visible. Try setting a transparency value of about 50%.
Step 9: Saving Overlay Settings
Once you are satisfied with the position and transparency of the windows, you can save the settings and close the windows.
Step 10: Customizing Shortcut Settings
Finally, you should customize the key commands for the In-Game Overlay. Go to the "Key Commands" settings in Streamlabs OBS. You can set a shortcut to toggle the overlay.
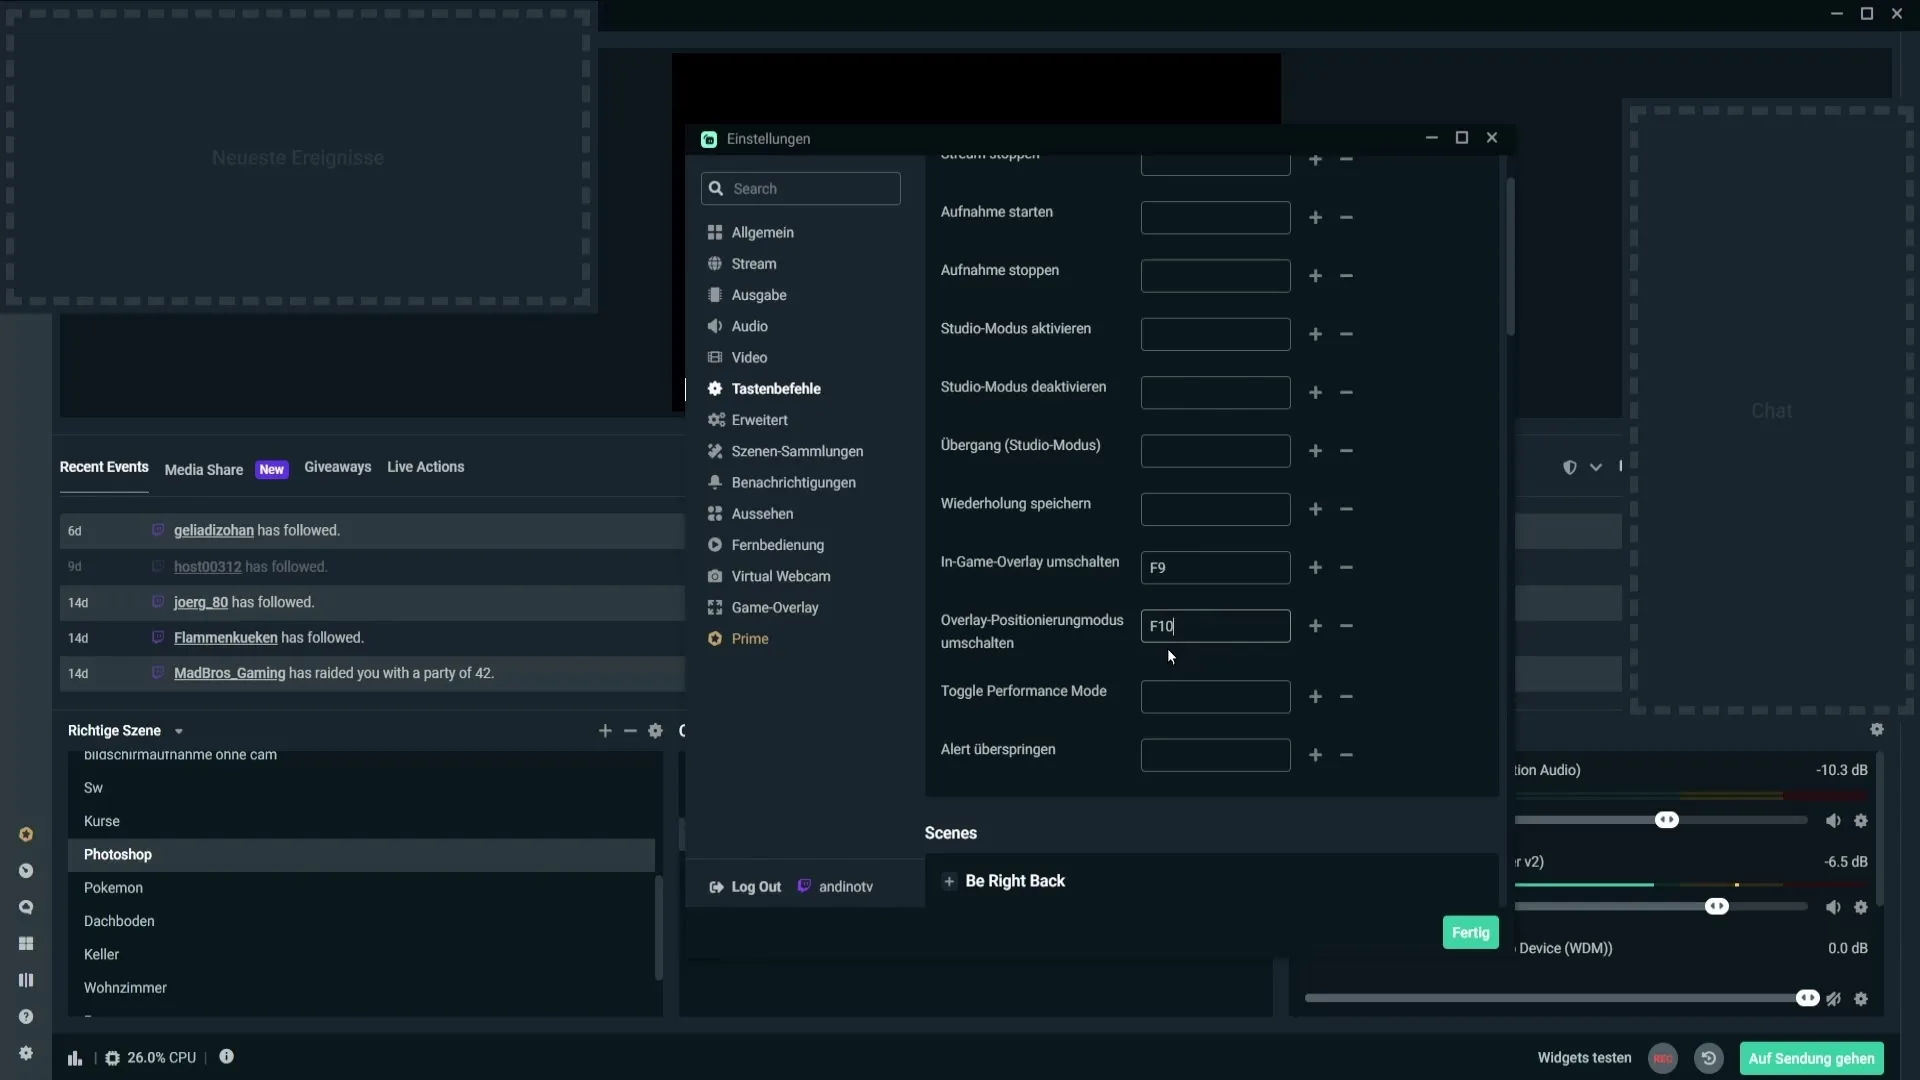
Step 11: Testing the Function
Now test the assigned shortcut in a game to ensure that the overlay is displayed as desired. With the key you have set, you can toggle the overlay on and off at any time.

Summary
With this guide, you can now set up the in-game overlay in Streamlabs OBS optimally. Use the transparency functions and corresponding shortcuts to not miss any important events during your stream, even if you only have one screen.
Frequently Asked Questions
How do I activate the in-game overlay?Click on the gear icon in Streamlabs OBS and select "Game Overlay".
What should I do if the overlay is not displayed?Make sure the game is running in windowed mode.
Can I change the window position of the overlay?Yes, activate the positioning mode to move the windows.
How do I change the transparency of the overlay?In the overlay settings, you can adjust the value for transparency.
Are there shortcuts for the overlay?Yes, you can set shortcuts for toggling the overlay and the positioning mode.
