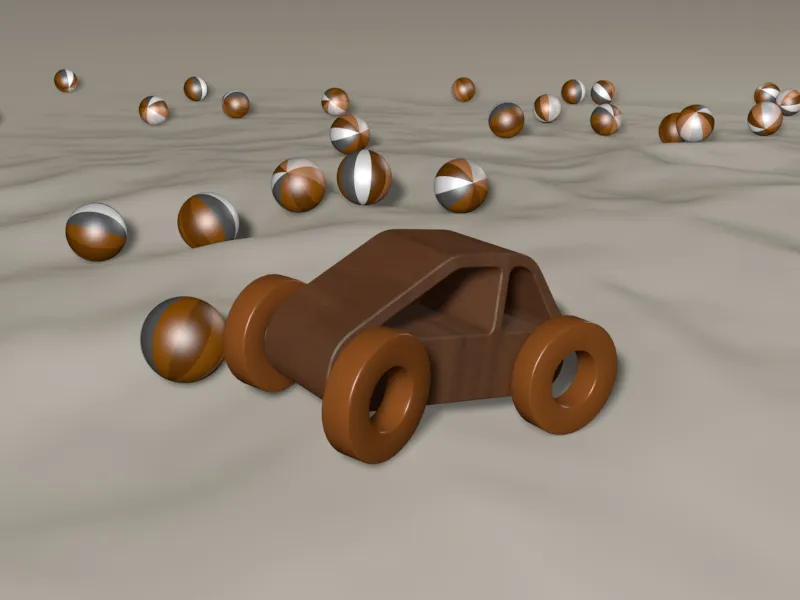
To get an impression of the result of this tutorial, it is best to watch the accompanying video.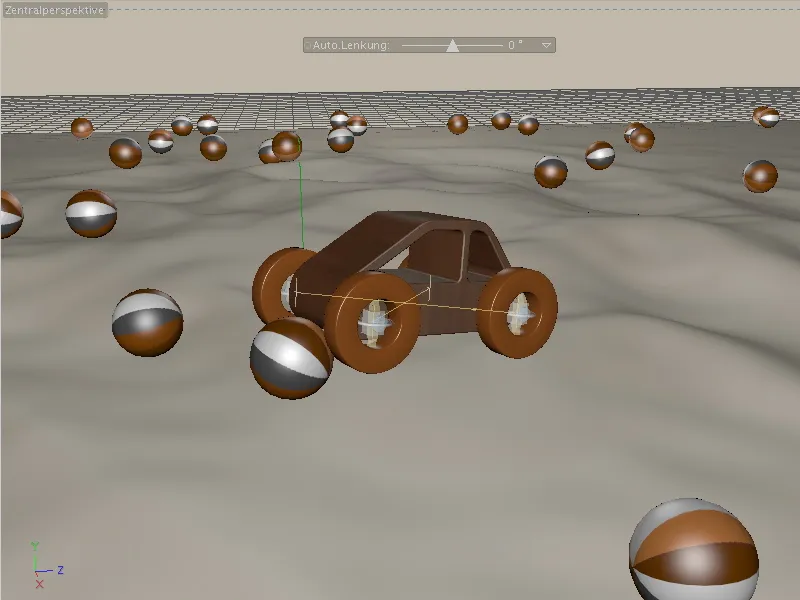
The most important elements of the scene are already prepared in the working file PSD_C4D_R12_Dyn_Motor_Auto_Start.c4d so that we can start working with Dynamics immediately. Because we are going to start with the expansion of the small toy vehicle, all disturbing elements of the scene are temporarily hidden using the traffic light switches of the Object Manager.
Setting up the scene
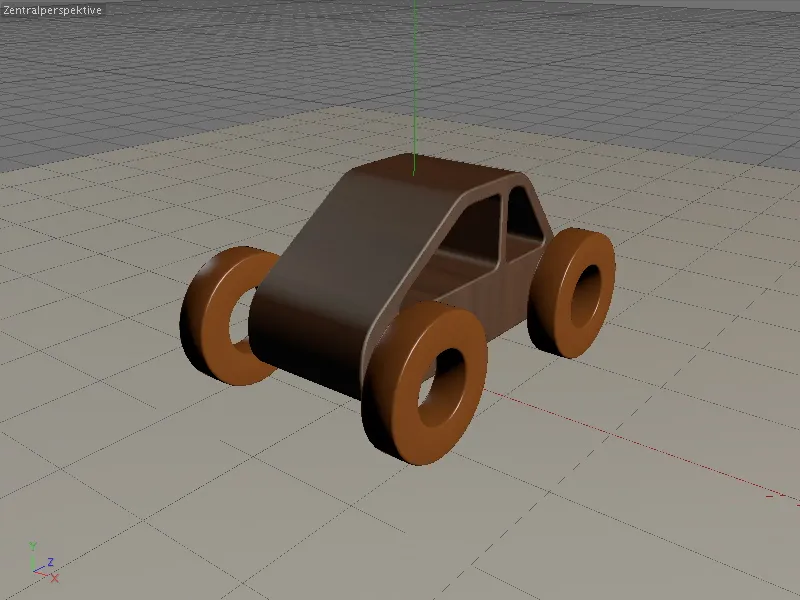
Let's take a quick look at the composition of the scene. In addition to the car, the scene also contains a sphere object as a later obstacle, a HyperNURBS object with an integrated landscape object as well as ground, sky and light objects for the surroundings and illumination.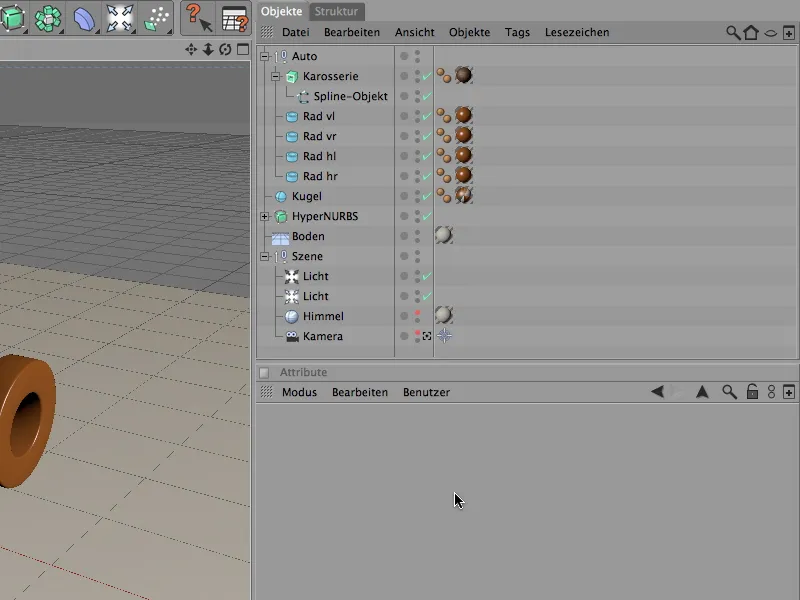
To make the construction of the vehicle as simple and comprehensible as possible, the car consists only of the body and the four wheels. A total of four tube objects act as wheels, which are aligned in the positive X direction and placed in the designated position on the car.
To make it easier for us to integrate connectors and motors later, each wheel has its position attached as an abbreviation (vl = front left).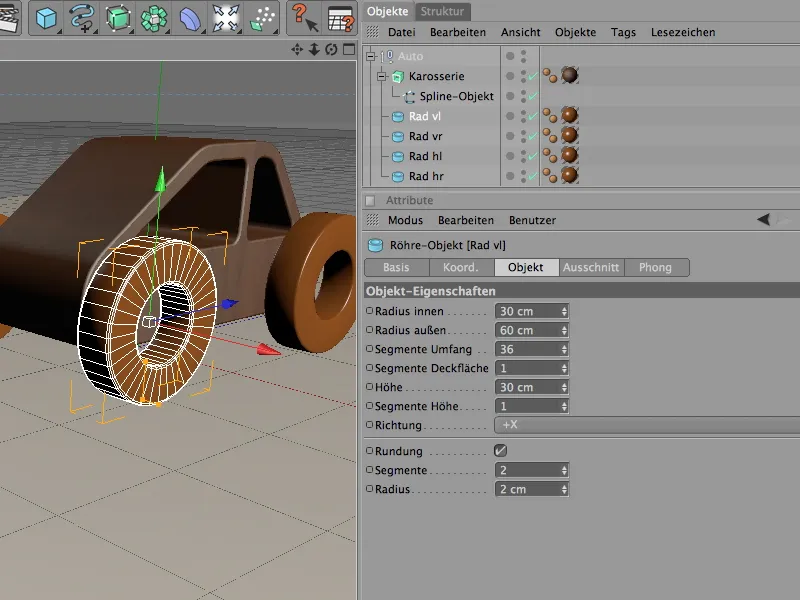
The car body generates an Extrude NURBS object from a spline. Of course, you can also use a different car or body; the only important thing later is the correct integration via connector or Dynamics body tag.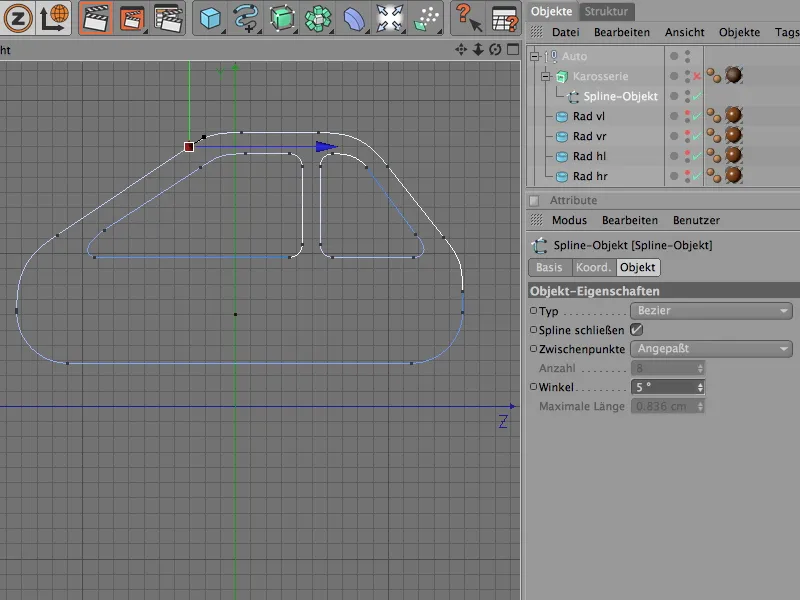
The width of our vehicle is stored in the settings dialog of the Extrude NURBS object. It results from the shift in the X direction during extrusion. The rounded edges of the body provide a natural, realistic look.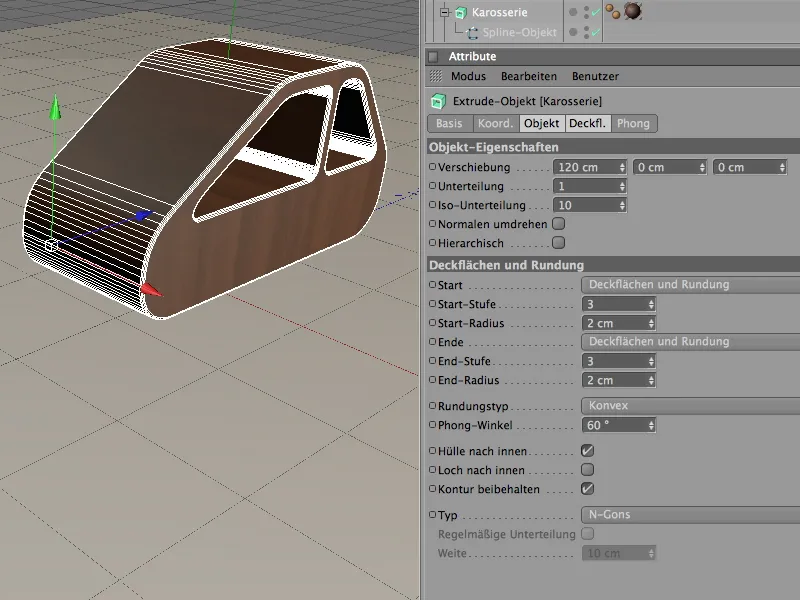
Hidden in the HyperNURBS object is a landscape object that provides us with a usable terrain for the car's off-road insert. Thanks to the HyperNURBS subdivision, we can save on the segmentation of the landscape without creating terrain that is too angular.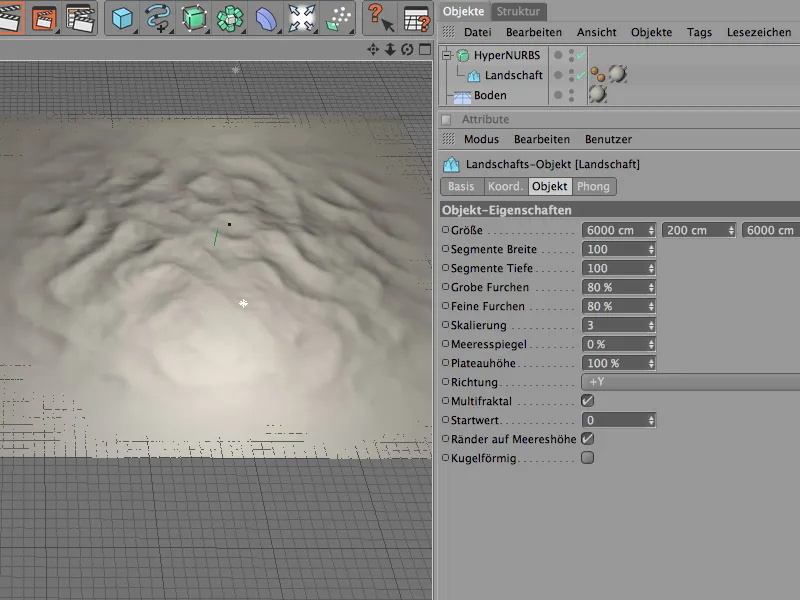
To add a little more action while driving through the terrain, we integrate a few obstacles. In my case, these are simple spherical objects with a 50 cm radius, which are later randomly distributed on the terrain or landscape object using MoGraph.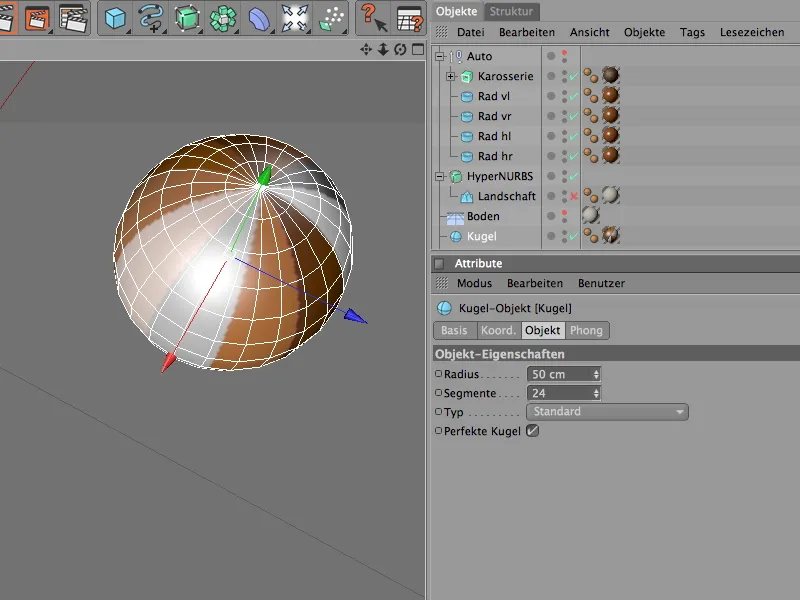
Setting up the vehicle with connectors and motors
Let's start by looking at the toy car. What functions does it need to fulfill for our purposes?
First of all, the wheels must be attached to the vehicle so that they can rotate; it also needs a drive on the wheels so that it can move automatically. And, of course, it has to detect collisions - starting with the fact that the wheels are on the ground.
In order for us to provide this functionality via CINEMA 4D's new Dynamics, the elements involved need Dynamics body tags so that they are accepted by the Dynamics engine in the first place.
We start with the four wheels, all of which we select in the Object Manager and define as rigid bodies via the Simulation>Dynamics menu.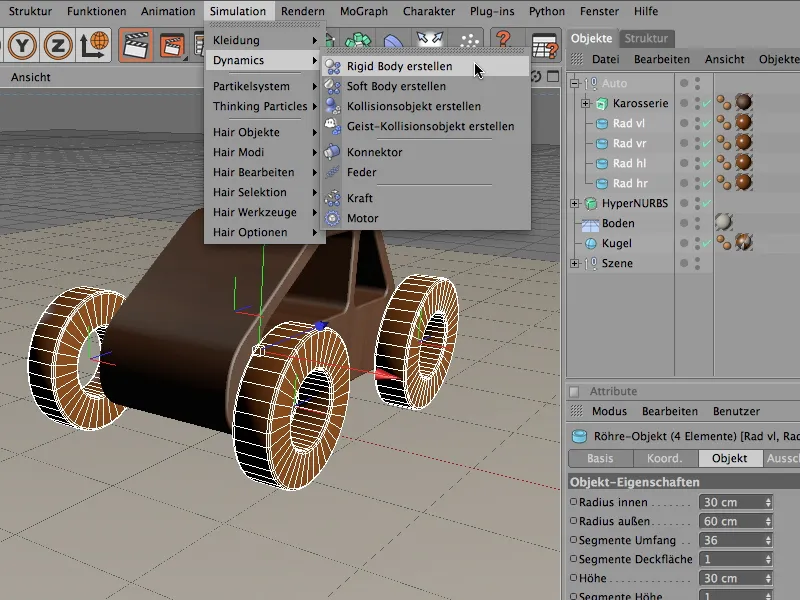
Because all four wheels naturally have the same dynamic properties, we leave the four Dynamics Body tags selected and set the desired parameters.
On the Dynamics page, we can accept the default settings. Immediate triggering is important so that the wheels immediately make contact with the ground.
On the collision side, we help the collision detection of Dynamics by setting the cylinder X-axis as the shape. This ultimately corresponds to the shape of the wheel and increases the performance of the Dynamics calculation. We set a slight elasticity of 10% so that the vehicle only bounces very slightly when it hits the ground. In return, we increase the friction to 120% so that the wheels can build up a good grip on the ground.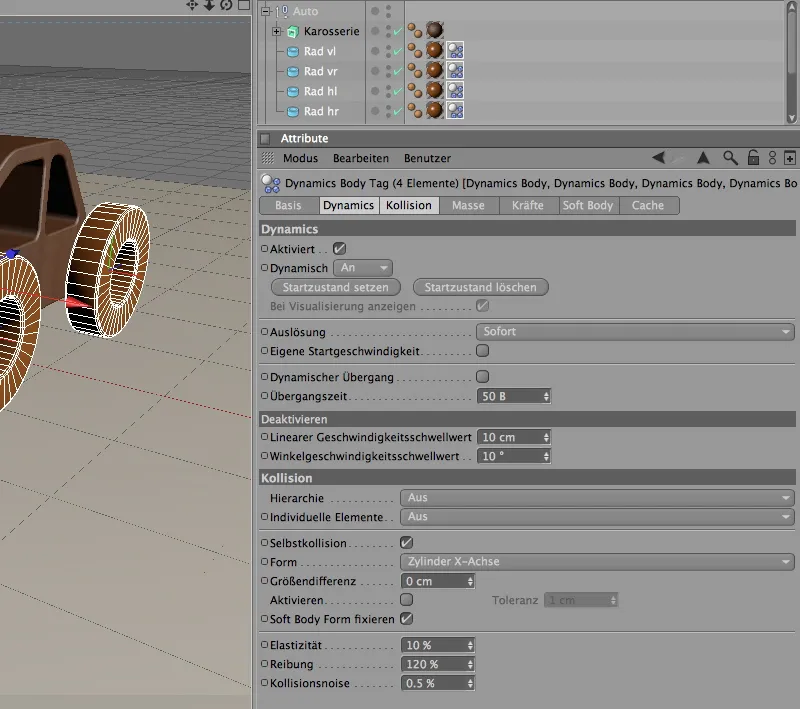
Let's move on to the next element of the vehicle, the body. Unfortunately, the Extrude NURBS object is not suitable as a reference point for the car body due to its unfavorable axis position, so we simply let the parent null object Car step in. Its axis lies in the center of the car.
We therefore assign a Dynamics Body tag as Rigid Body to the null object Car via the Simulation>Dynamics menu.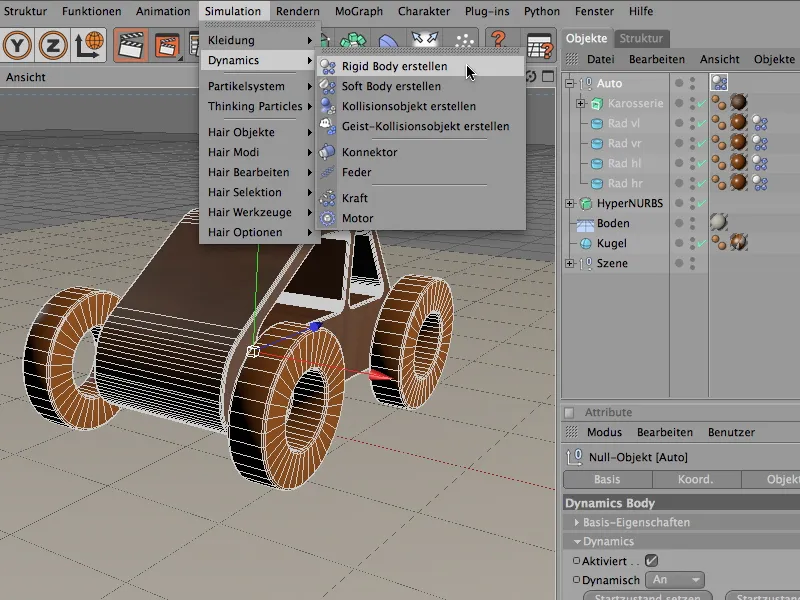
In the settings dialog of the Dynamics Body tag, we also start the triggering for the car immediately.
On the collision page, we have to take the hierarchy of our vehicle into account so that the body can be recognized at all. To do this, we set the hierarchy to Composite collision shape and select the convex hull or the moving mesh as the best shape.
The other collision properties can remain the same; after all, the vehicle will essentially be standing on its four wheels and will not necessarily roll over.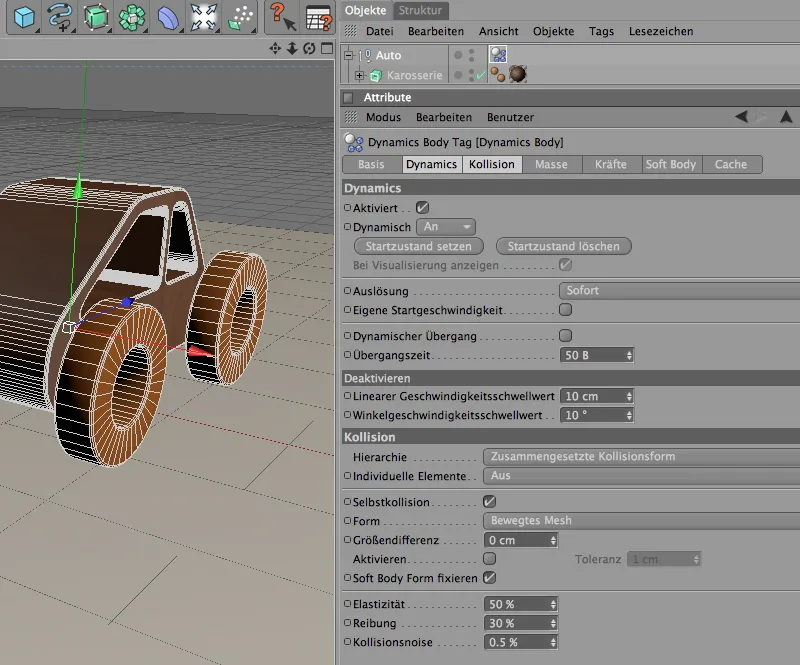
To ensure that the desired axle is used as the center of gravity for our vehicle, we need to switch briefly to the mass page.
Here we activate the option Own center of mass - however, as we do not want to deviate from the defined axis, the X, Y and Z offset values remain at 0.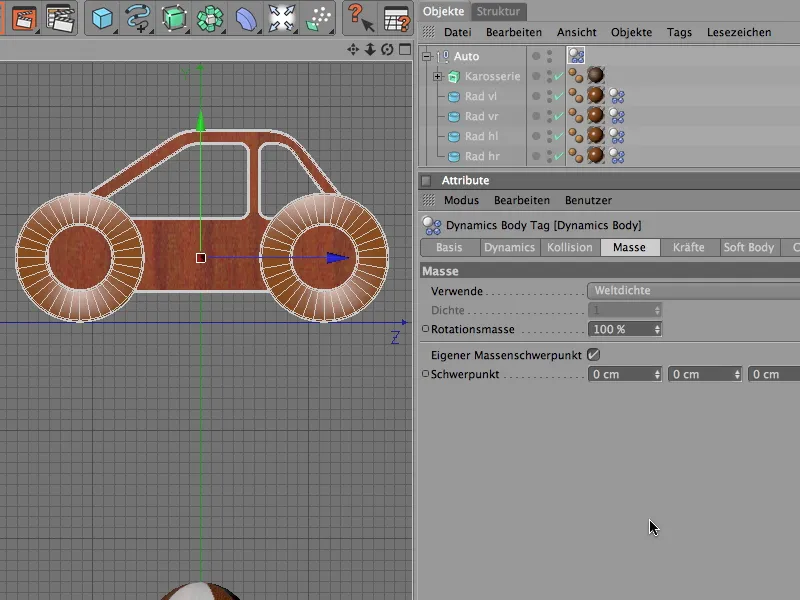
If we were to start the animation now, our vehicle would simply collapse. This is not surprising, as we have only defined five Dynamics bodies and CINEMA 4D does not (yet) know anything about the constructive relationships.
We are now changing that with connectors. Firstly, we use them to attach the wheels to the vehicle, secondly, we enable rotation around the wheel axis and thirdly, we simultaneously implement a suitable wheel suspension for the path through the terrain.
Let's get the first connector from the Simulation>Dynamics menu.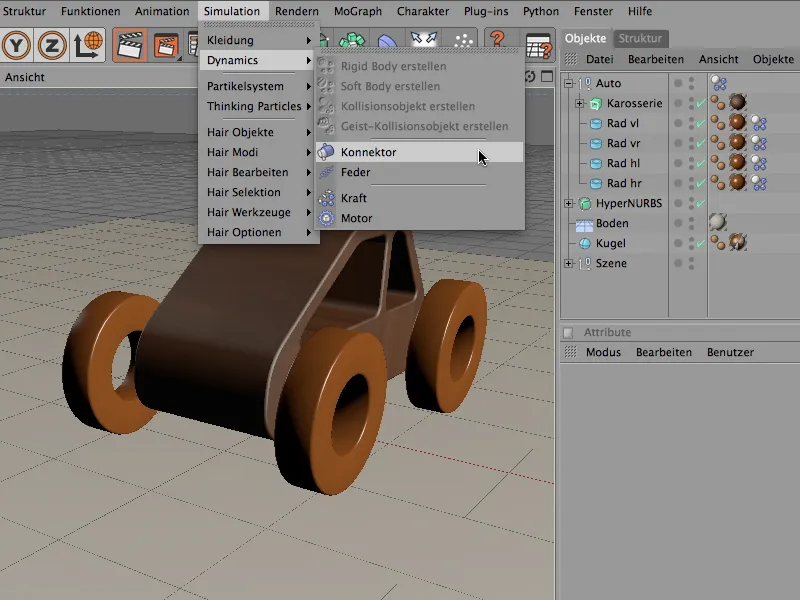
Each wheel gets its own connector. We start with the front left wheel and rename the newly created connector accordingly. To ensure that the connector takes over the position of the wheel, we activate the Transfer tool from the Functions menu and drag the wheel vl into the object field for the transfer.
After clicking on the Assign button, the connector is in the same position as the specified wheel.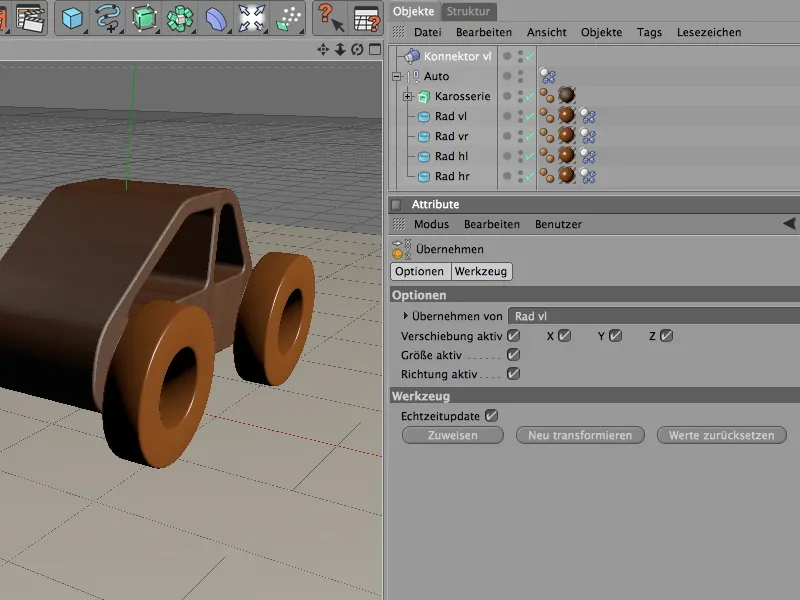
We create the next connector in the same way; this time for the front right wheel. We also assign the position of the corresponding wheel to this connector using the Apply command.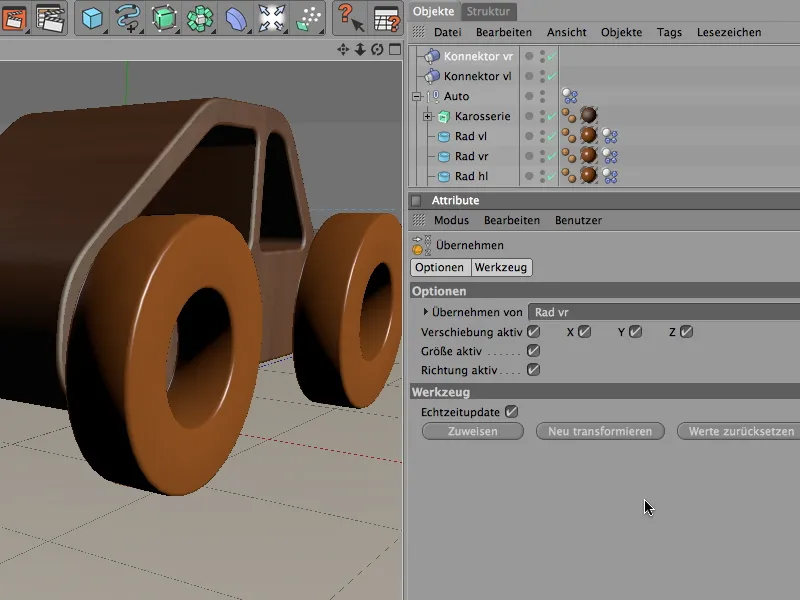
Before we continue with the rear wheels, we align the connectors on the front wheels correctly. To do this, we select the connector and rotate it outwards using the heading angle in the Attribute Manager with the yellow hinge part. This results in an angle of 90° for the right front wheel and an angle of -90° for the left front wheel.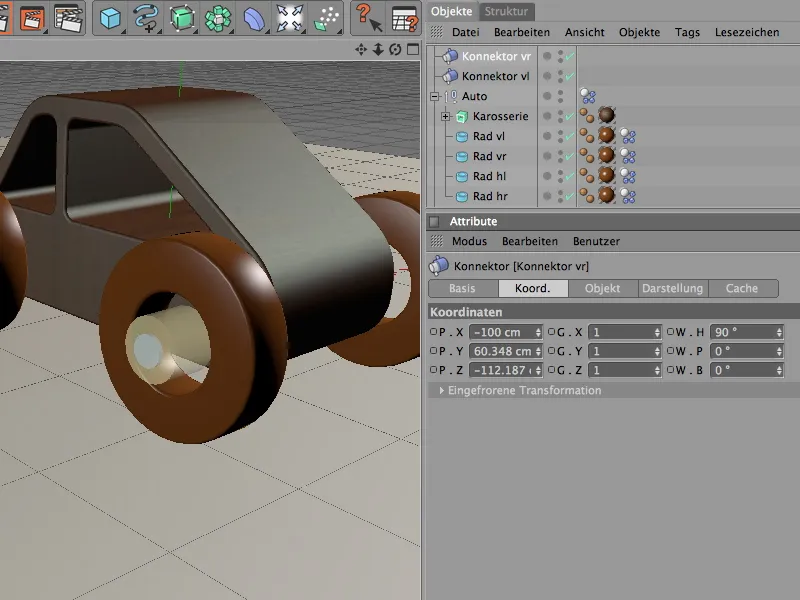
Using the same procedure, you can now also equip the two rear wheels with connectors in the correct position and set them up with the correct rotation. The illustration below shows the four placed connectors as seen from above.
To make the connectors visible even if they are not selected, simply activate the Always visible option on the display page of the connector settings dialog. Reduce the size of the connectors slightly so that they fit the vehicle better.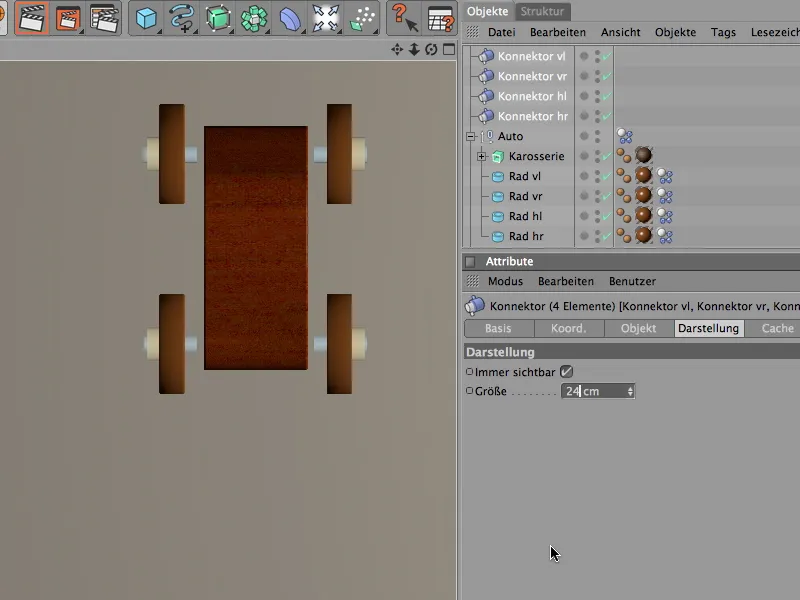
Now we should finally determine the correct function for the connectors; after all, we want sprung axles and no hinges on the car. This is done on the object page, where we define the type of wheel suspension for all four connectors.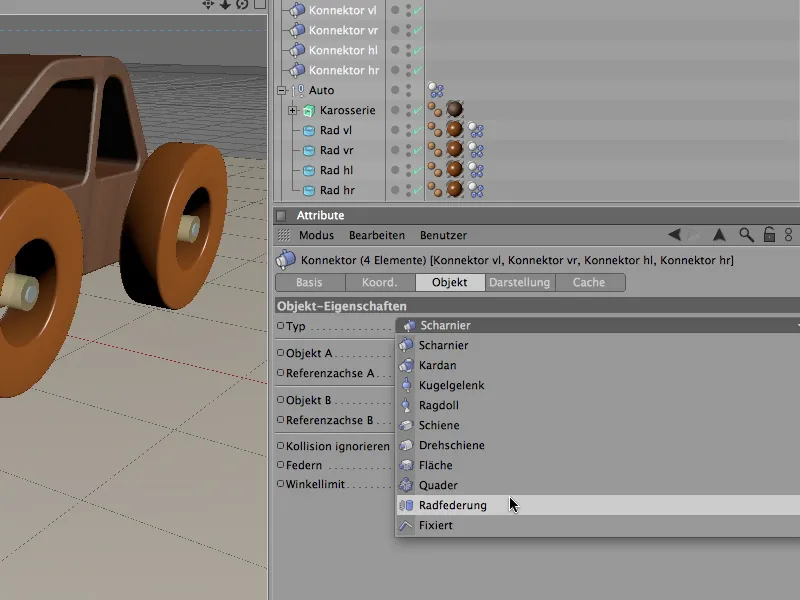
We leave the four connectors selected, as we can also make the next settings for all four wheel suspensions. As the first object for binding the connectors, we drag the null object Auto as object A into the field provided.
We select a value of 20 for the spring hardness and a value of 20% for the spring damping, i.e. the speed at which the spring returns.
We activate the lower and upper limit in the Y direction, with an offset of 20 cm in each case. Although it is unlikely that our vehicle will reach these limits, the scene will become clearer as a result.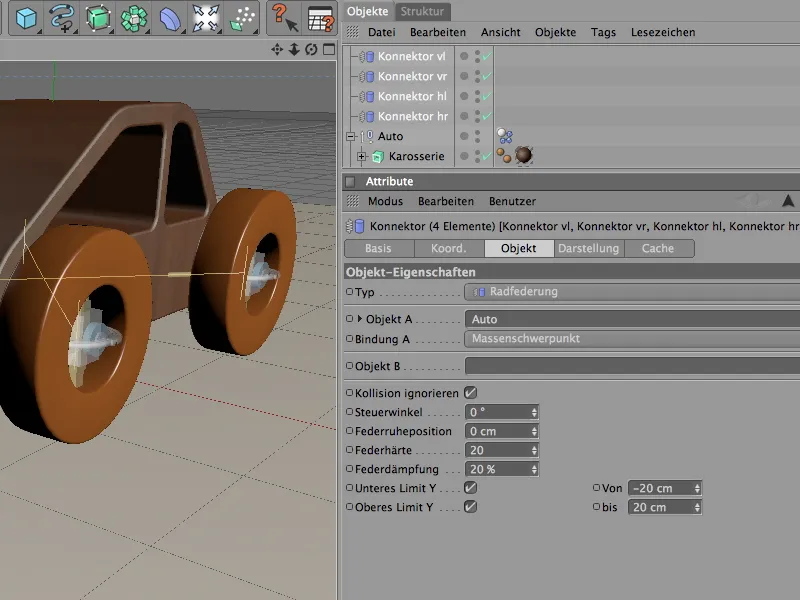
Now we take care of the individual connectors or wheel suspensions. The only adjustment we still need to make for each connector is the second object for the binding. To do this, we drag the wheel belonging to the respective connector into the Object B field.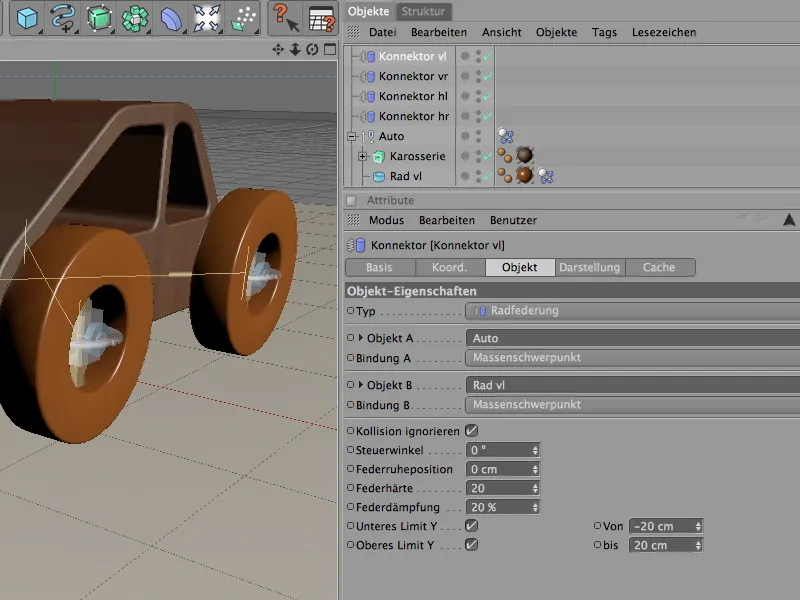
Once we have set up all four connectors or wheel suspensions, we also integrate them into the vehicle in the object hierarchy. We place them near the wheels as a sub-object in the null object "Car".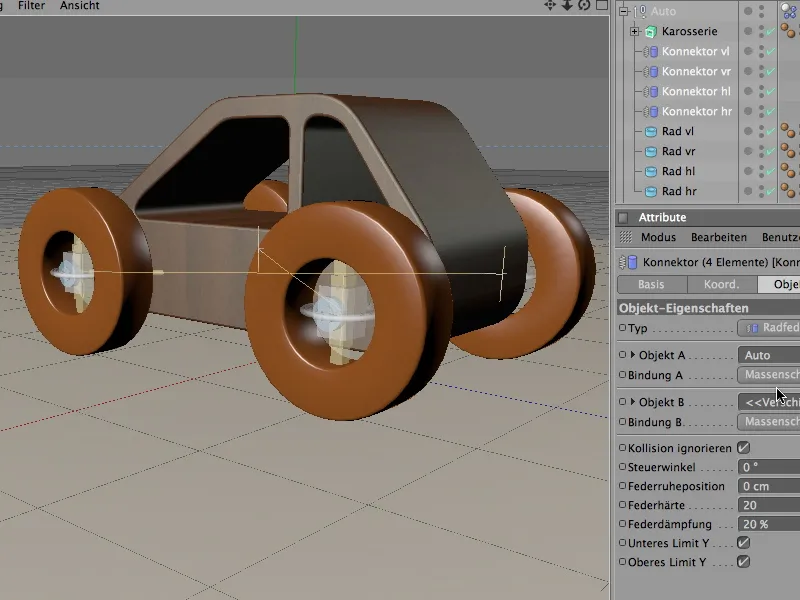
What our toy car is still missing is the drive so that it can move on its own. All-wheel drive would be desirable for the terrain, but in our example only the two front wheels are to be driven by motors. Two motors because the power transmission to the individual wheels is then more physically correct.
We add the first motor to the scene via the Simulation>Dynamics menu.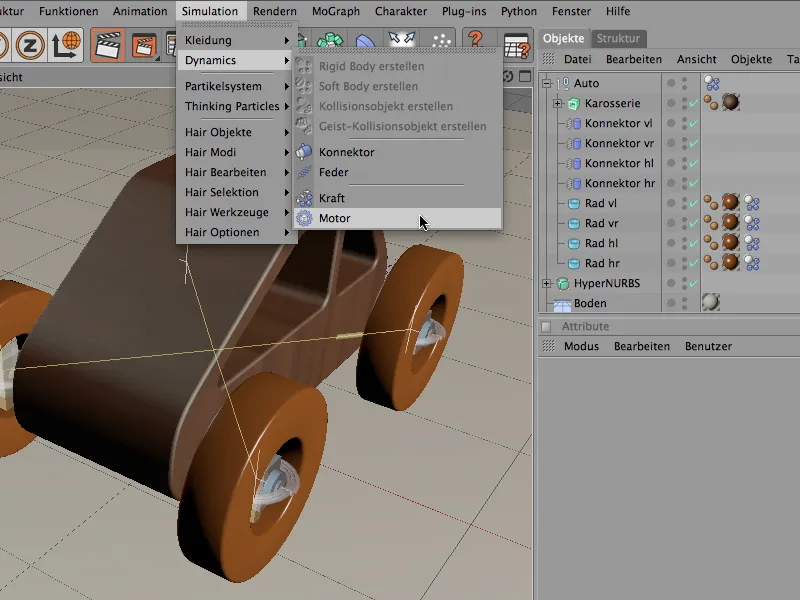
Analogous to the connectors, we also rename the motor to match the driven wheel. Here, the motor is to drive the left front wheel.
Using the Apply tool from the Functions menu, we let the motor take over the position of the wheel. After clicking on the Assign button, the motor is in the desired position and only needs to be aligned.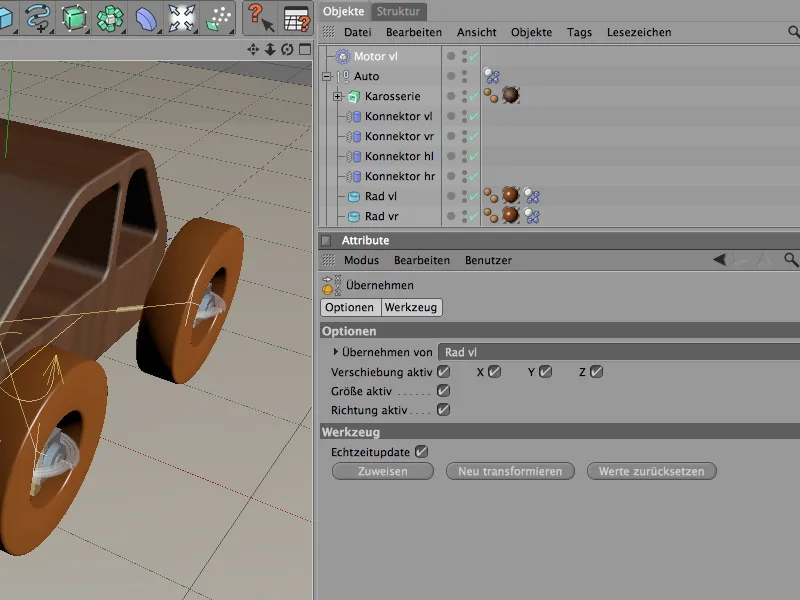
We do this using the Attribute Manager on the coordinates page. We rotate the motor using a heading angle of 90° so that the yellow direction of rotation matches the direction of rotation of the wheel.
The motor is bound by the object fields in its settings dialog. In our case, we drag the front left wheel into the Object A field. For the drive, we give the motor an angular target speed of 400° and a torque of 50.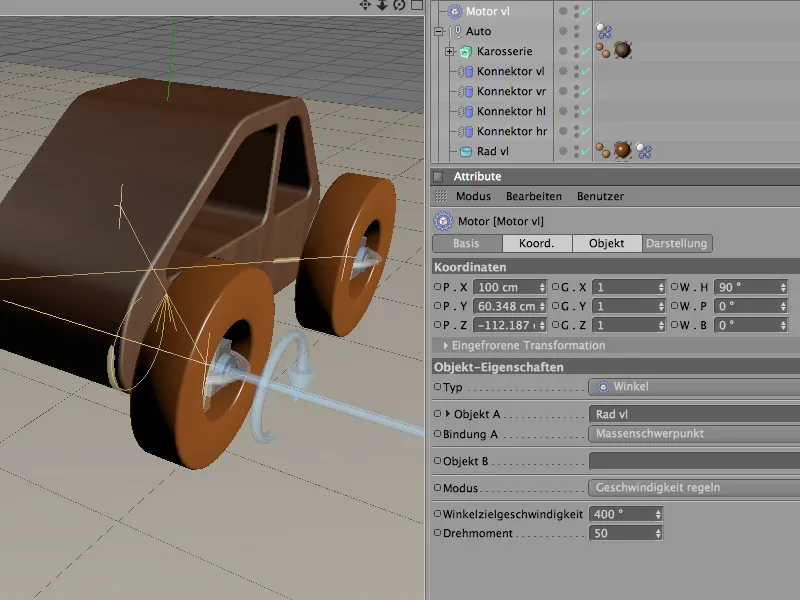
In the same way, we now add another motor to drive the front right wheel. We rename it appropriately and again transfer the position of the corresponding wheel to the motor using the transfer tool.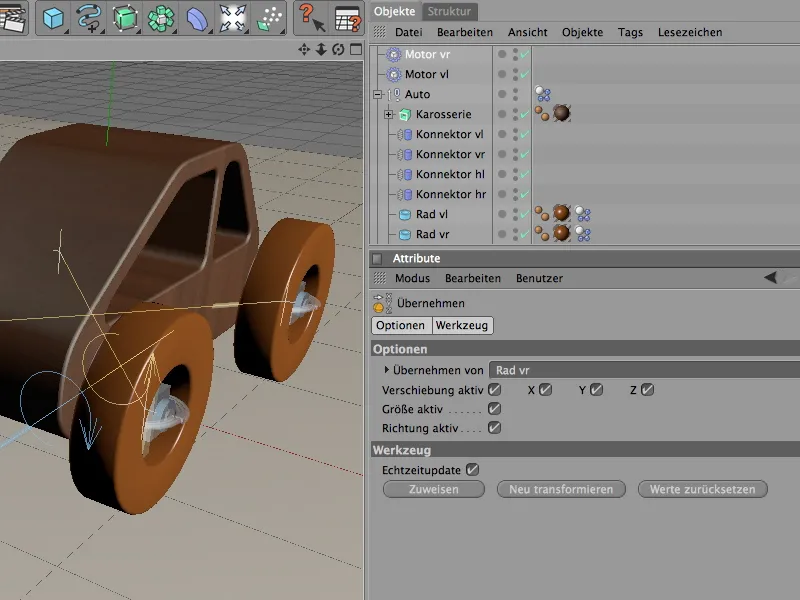
We also rotate the second motor in the correct direction using the attribute manager and this time transfer the front right wheel as object A.
The second motor naturally receives the identical parameters for the angular target speed and the torque.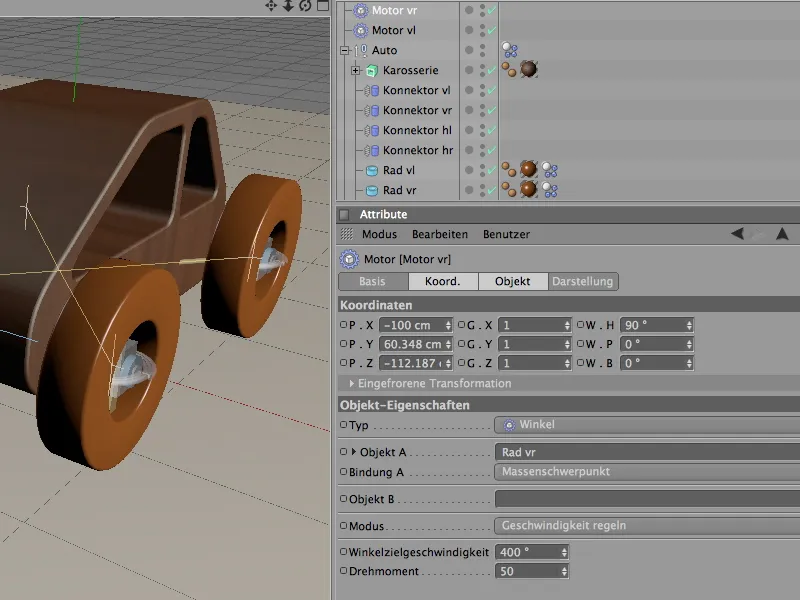
This means that the drive is now correctly installed in the vehicle. I recommend including the motors as sub-objects in the vehicle's object hierarchy so that the editor remains clear during the simulation.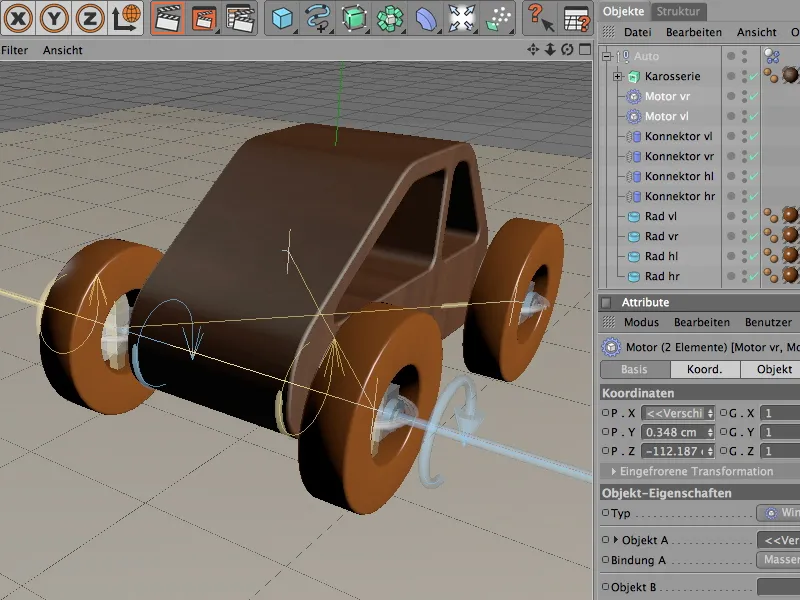
Before we can finally let our car drive off, we still need a stable surface, because up to now the toy car would simply fall into the void.
For our first test and as a base layer for later, we turn the floor into a collision object. To do this, we select the floor object and assign the corresponding Dynamics Body tag to it via the Simulation>Dynamics menu.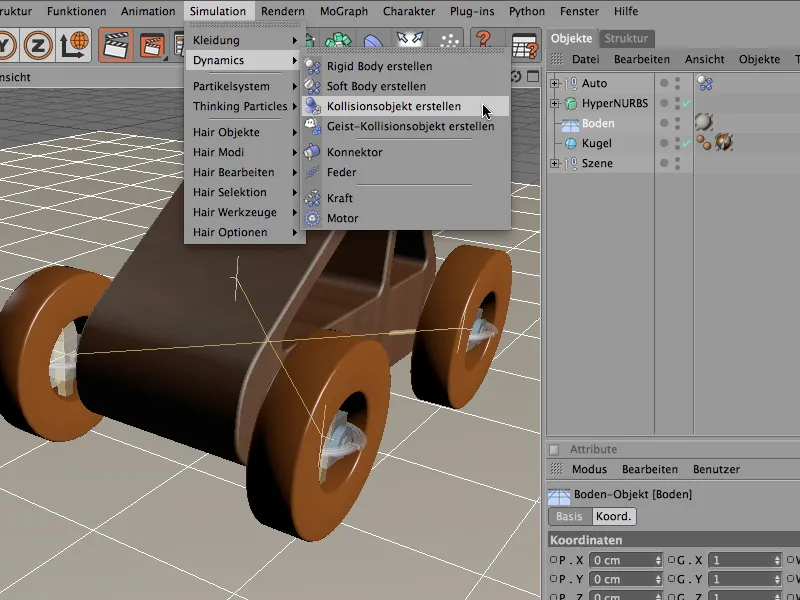
As is usual with a pure collision object, the settings dialog is quite straightforward. We are primarily interested in the friction value. We set it to 100% so that the wheels can quickly find their footing and accelerate properly.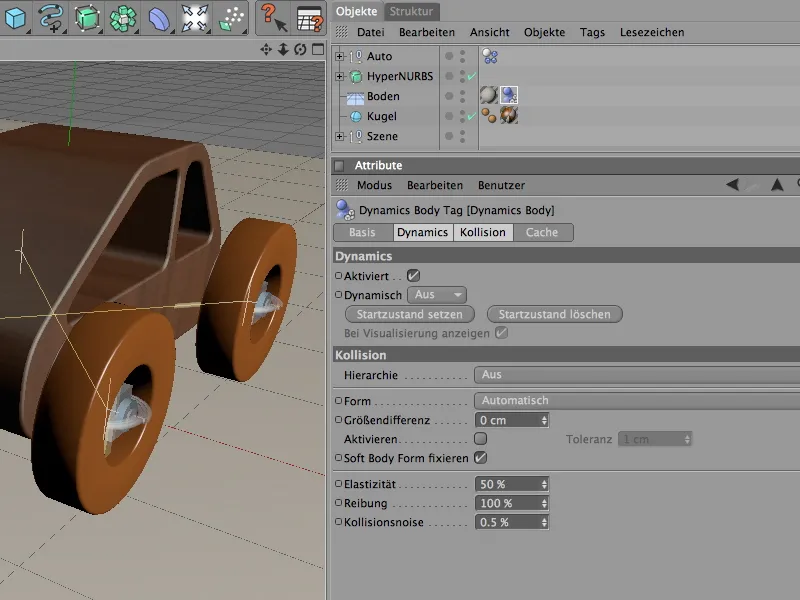
If we now press the play button, the toy car drives off by itself. We will add a small control system to the car later, but for now we'll take care of the terrain.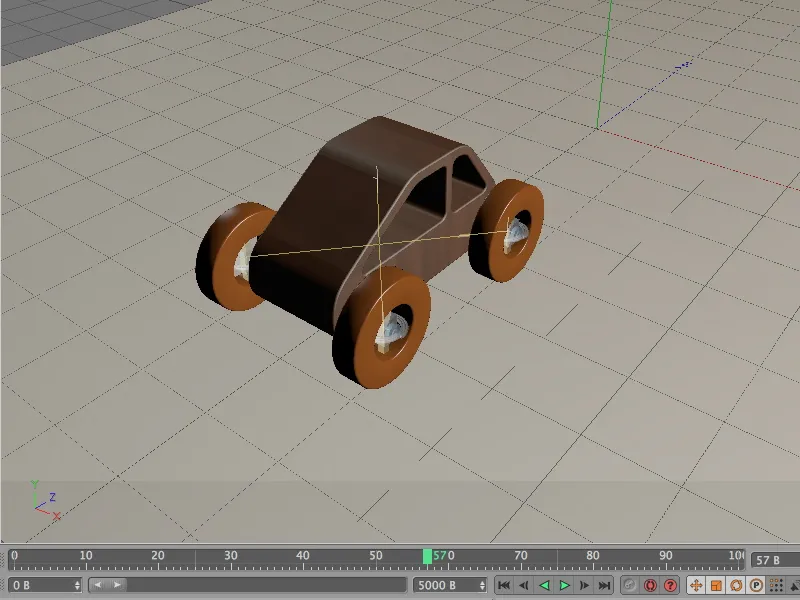
Expanding the scene with Dynamics and MoGraph elements
Previously invisible because it was deactivated as a parametric object via the Object Manager, the landscape object is now to be used as hilly terrain. As with the ground object, we must first define the terrain as a collision object. To do this, we assign a Dynamics Body tag as a collision object to the superordinate HyperNURBS object via the Simulation>Dynamics menu.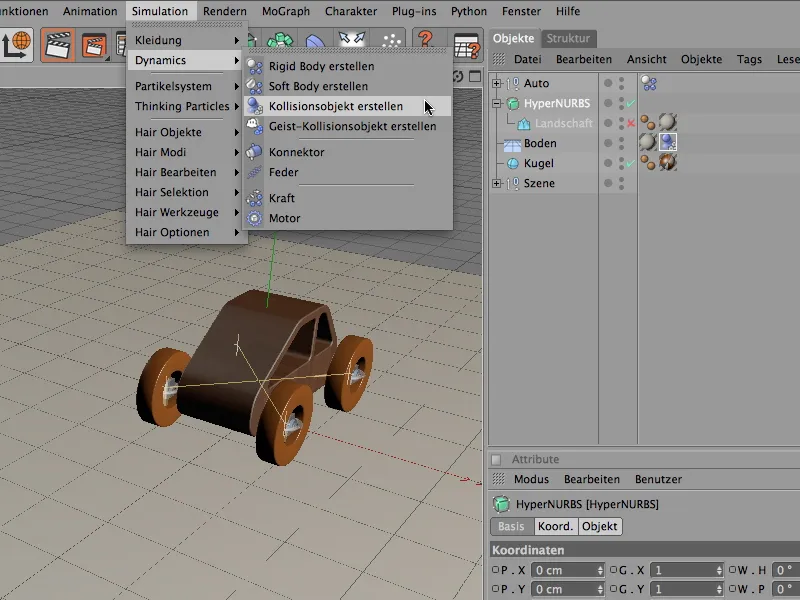
The collision page of the settings dialog is also of particular importance for this collision object. Here we need the static mesh as the collision type so that the car can later recognize every bump on the surface. As with the ground object, we also assign the high friction value of 100% here.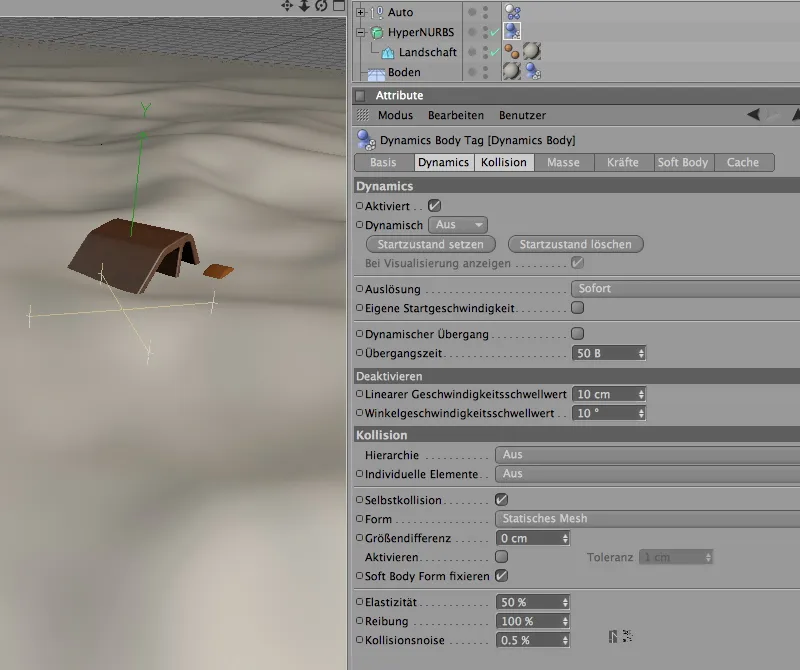
Let's test how our car copes with the terrain. To do this, we first move the entire car group to 3000 cm using the Z coordinate in the attribute manager. The car is now ready in the direction of travel and can head towards the terrain with momentum.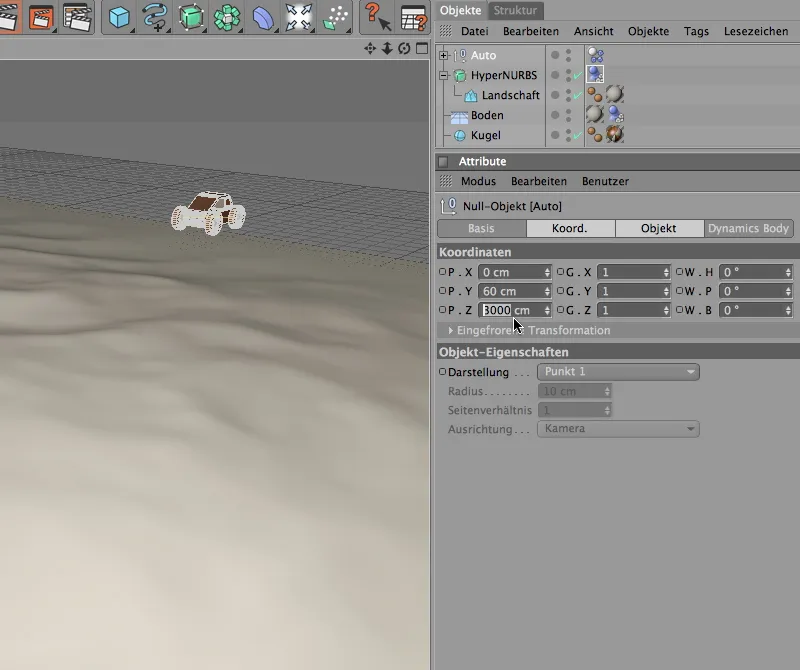
After clicking on the play button, we can watch as our toy car bravely makes its way through the hilly landscape. To spice up the scene a little more, we also distribute obstacles.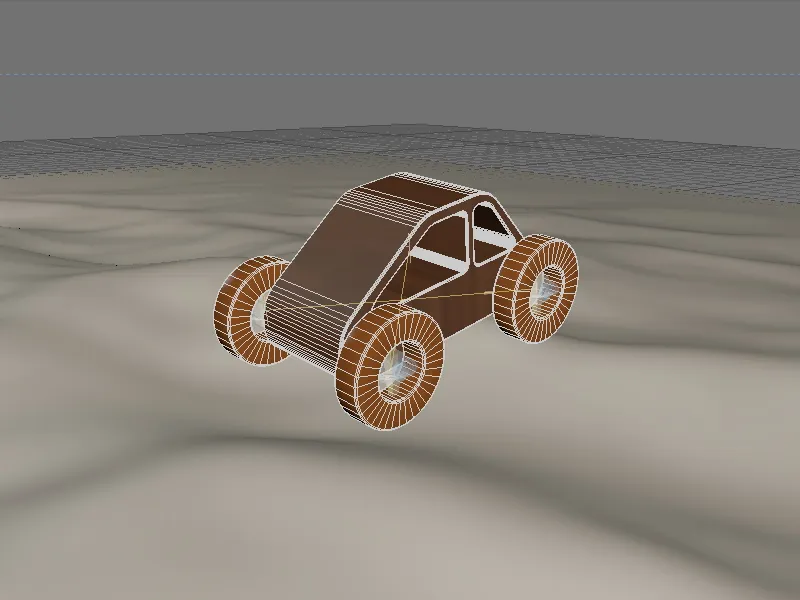
The starting point for our obstacles is already available in the form of the sphereobject. To ensure that the cloned spheres not only get in the way of the car later on, but are also pushed away, we need to define them as rigid bodies. In principle, it does not matter whether the sphere itself or the clone object is assigned the Dynamics Body tag. You are more flexible with the first variant, as you can give each clone type its own dynamic properties.
So let's assign the required Dynamics Body tag to the sphere object as a rigid body; as usual, we can find it in the Simulation>Dynamics menu.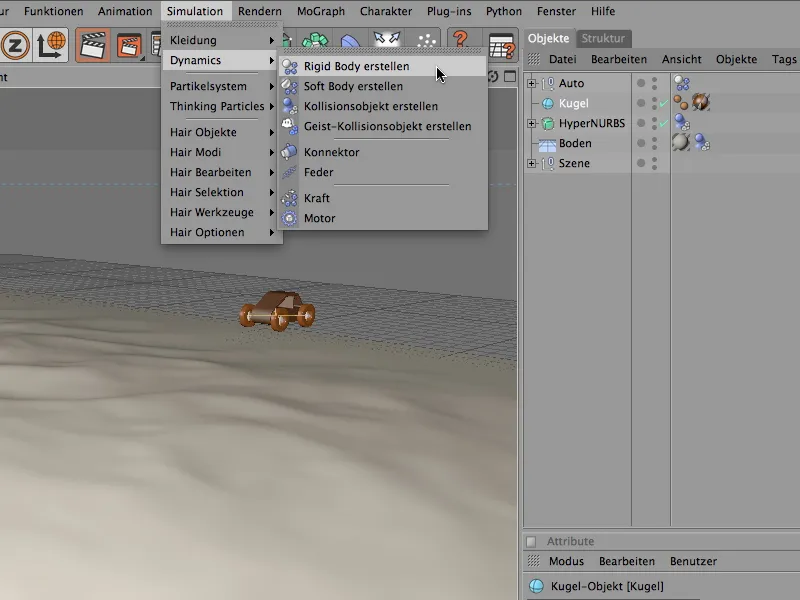
In the settings dialog of the Dynamics Body tag for the sphere, we set the triggering to On collision on the Dynamics page. This means that the balls do not set themselves in motion undesirably, but only react when the car or another ball triggers a collision.
Due to the simple shape of the object, we rely on automatic collision detection; an increased friction of 80% keeps the balls on the ground as far as possible so that they simply roll over the terrain without any unwanted bouncing.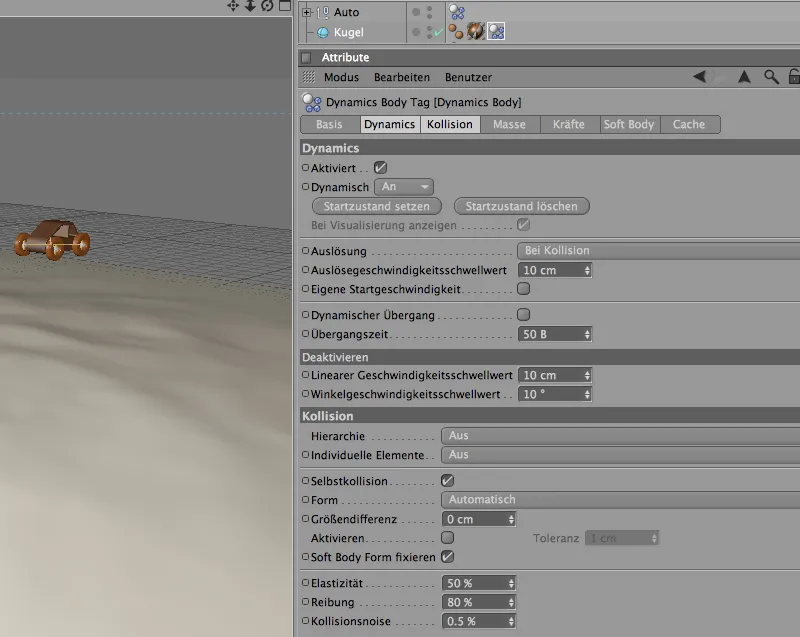
Now the ball is given dynamic properties so that we can distribute it over the terrain. To do this, we use a clone object from the MoGraph menu.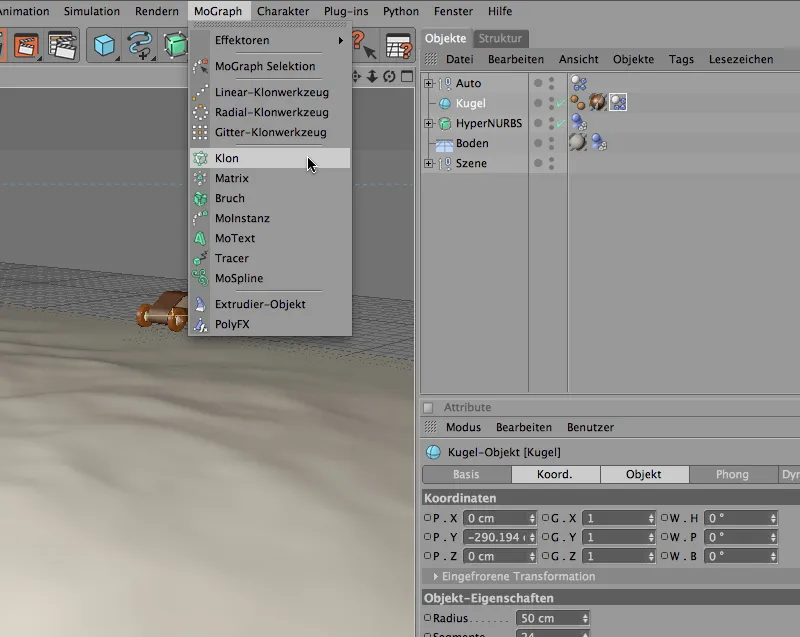
Using the Object Manager, we assign the sphere object to the clone object as a clone. Because we are using a parametric sphere that uses the center of the sphere as a reference point, placing the sphere clones at the moment would mean that half of the clones would be stuck in the terrain.
To prevent this and to move the spheres upwards by the radius accordingly, we find the option to set an offset on the transformation page of the settings dialog. We move the spheres in the Z direction by 50 cm, i.e. the radius of the sphere.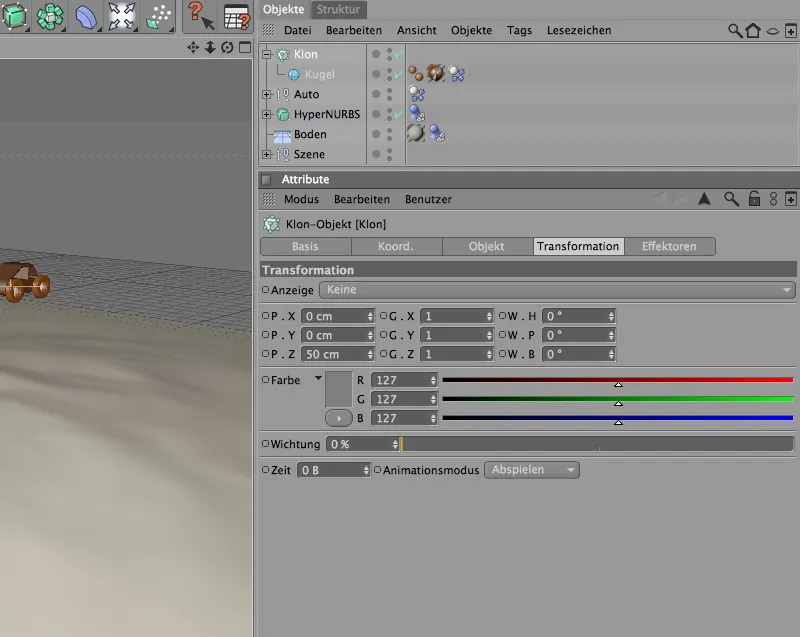
We make the actual settings for the duplication and distribution of the clones on the Object page of the settings dialog.
First, we select the Object mode ; after all, we want to use the Landscape object for the distribution of the clones. We then drag the aforementioned landscape object into the Object field provided for this purpose.
The clones should be distributed on the surface of the object; you can of course determine the number yourself. So that the car does not have to clear an unnecessarily large number of balls out of the way, a maximum number of 80 is recommended.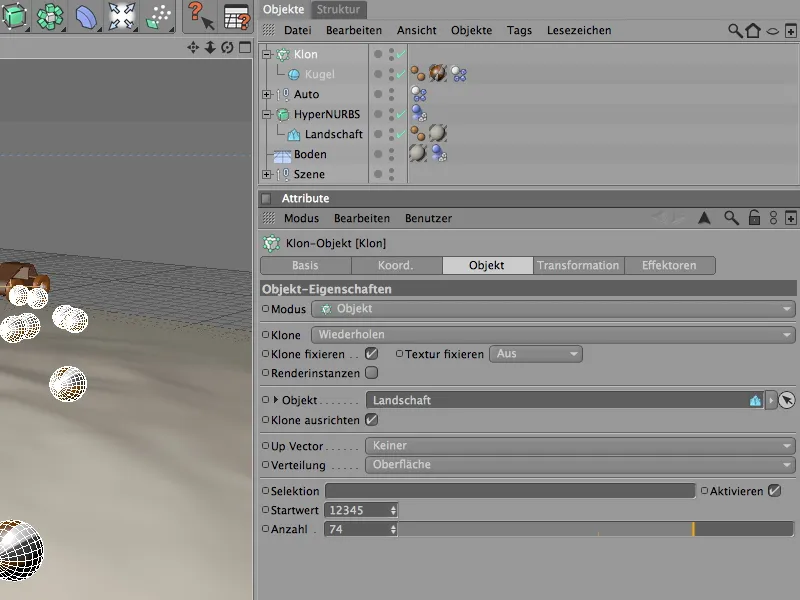
In the picture below you can see the current state of the rendering. The balls are well distributed on the landscape object, but still all point in the same direction. However, this small problem can be quickly solved with a random effect.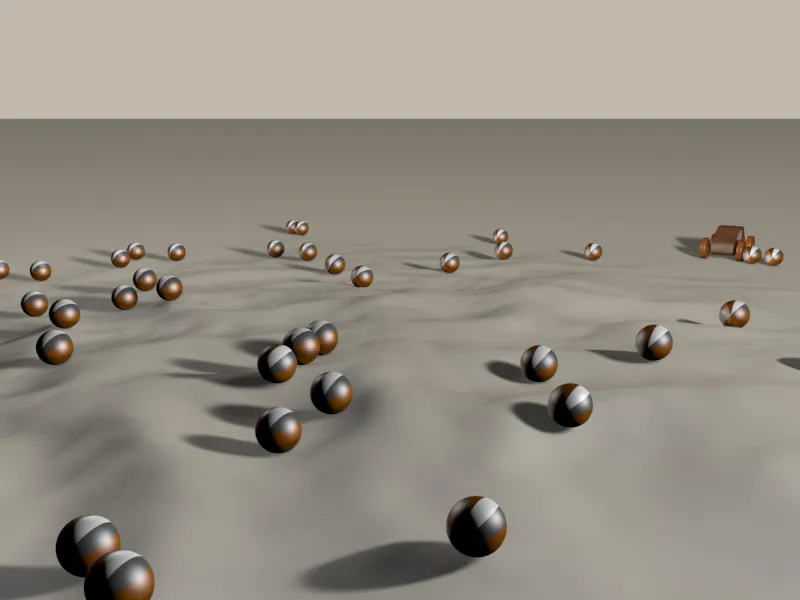
We select the clone object in the Object Manager so that we can assign the random effector to the clone object as a place of action as soon as we integrate it into the scene, before we get the random effector from the MoGraph>Effectors menu.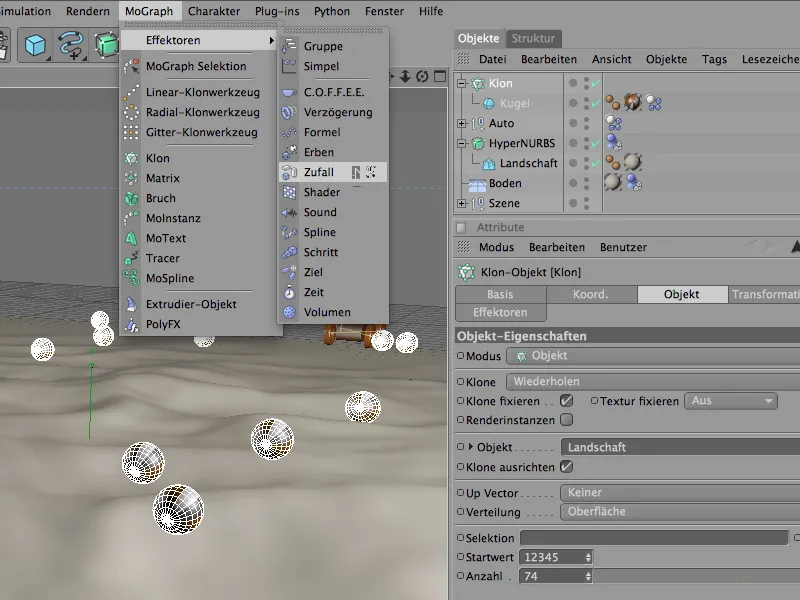
In the settings dialog of the effector, we find the transformation parameters on the parameters page. As the spheres are only to be rotated along all axes, we only need to change the angle parameters. An angle of 90° is sufficient to provide enough leeway for a wide range of rotations.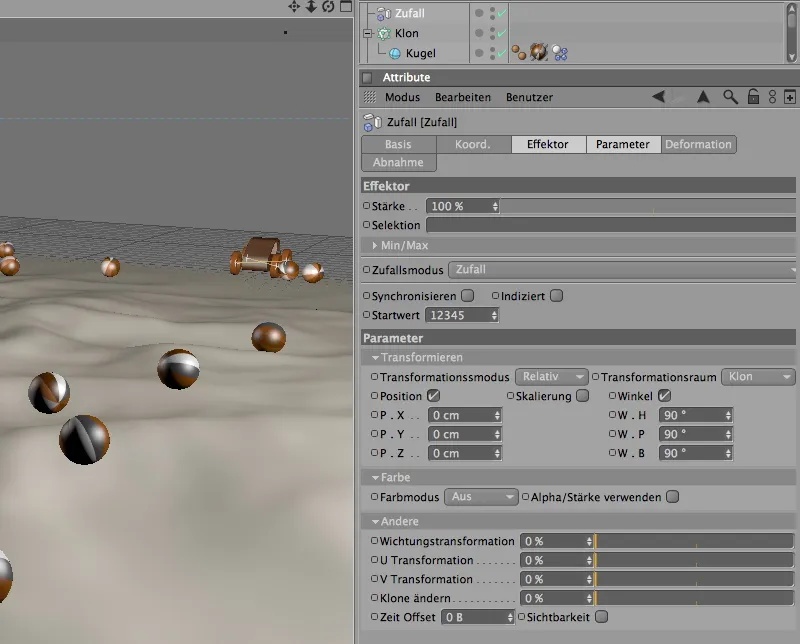
A test rendering shows that the spheres are now distributed randomly across the landscape thanks to the random effect.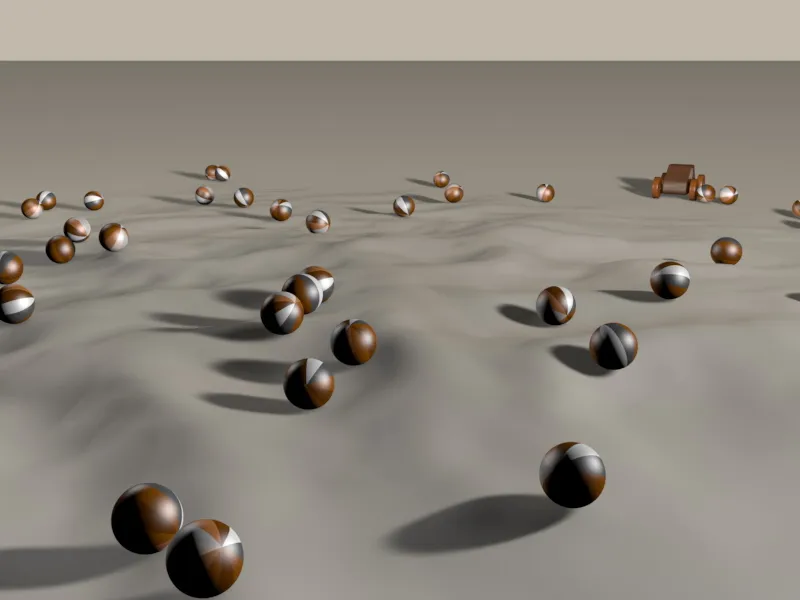
Now it's high time to let our toy car loose on the obstacles. As we have to expect a few more collisions in the future, it is worth taking a look at the Dynamics settings under the Document settings, depending on the size or scaling of the obstacles.
As the size of the balls, wheels and also the toy car are very close to the specified scaling or get along well with the collision tolerance, no adjustments are necessary here in my example.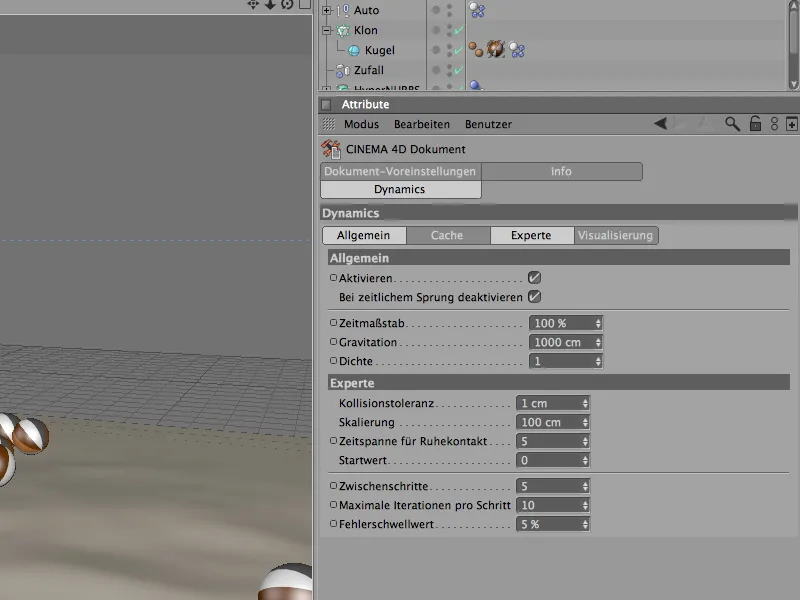
To ensure that the toy car does not simply disappear from view shortly after starting, you will also find a target camera under the scene elements in the Object Manager, which automatically aligns itself with the car. Its alignment expression states that it must not lose sight of the car object.
We activate it by clicking on the white viewfinder icon in the Object Manager.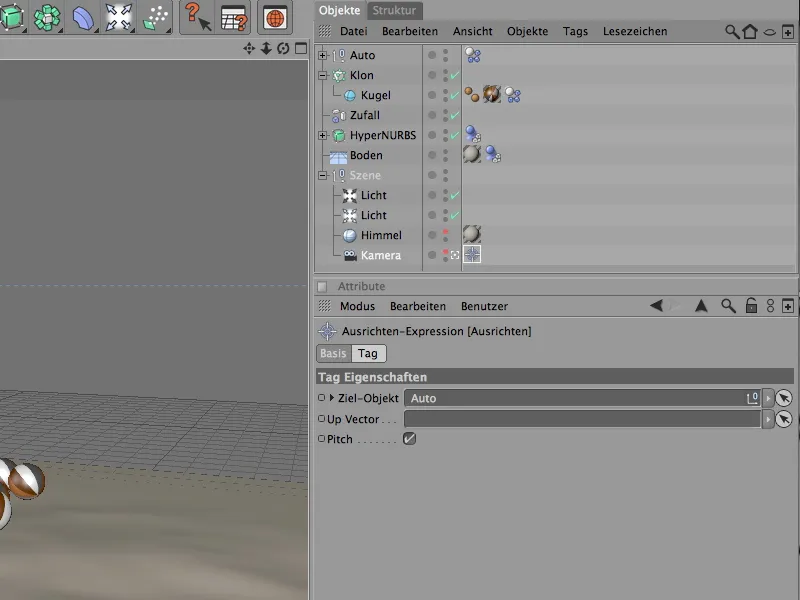
Now you can press the play button and watch the car drive through the obstacle-filled terrain.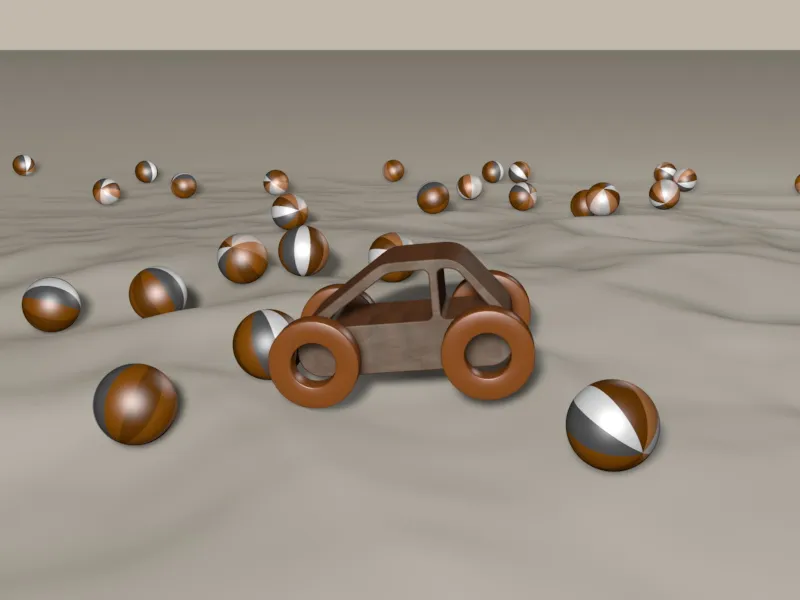
Installation of a simple control for the car with XPresso
Of course, it would be nicer if the car didn't just drive straight through the terrain, but if we as users also had a control option.
For our example, a simple steering option to the left or right via a slider should suffice. As we would actually have to control two objects (the wheels or connectors), but only want one convenient controller, we simply integrate our own control parameters in the form of user data.
To do this, we select the auto group and add our own user data via the User menu in the Attribute Manager.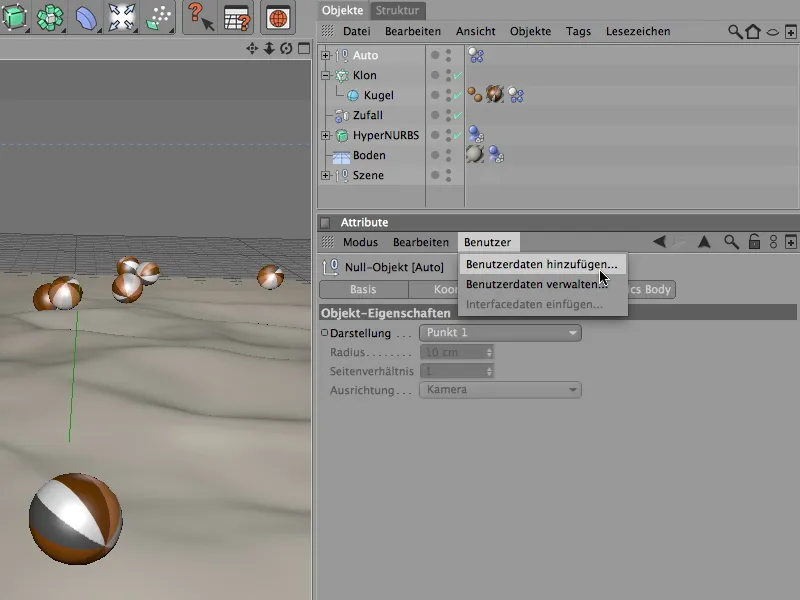
The Manage user data window opens. All individual user data belonging to the carrier object can be found here. We rename the newly created entry to Steering and also use the Properties field to specify what the parameter should be.
We select a floating point slider in degrees as the interface. To ensure that we are dealing with clear steps, we select a step width of 1°.
To prevent the wheels from being turned too far and overlapping with the vehicle, we limit the minimum deflection to -30° and the maximum deflection to 30°. The default value of 0° ensures that the wheels are straight at the start.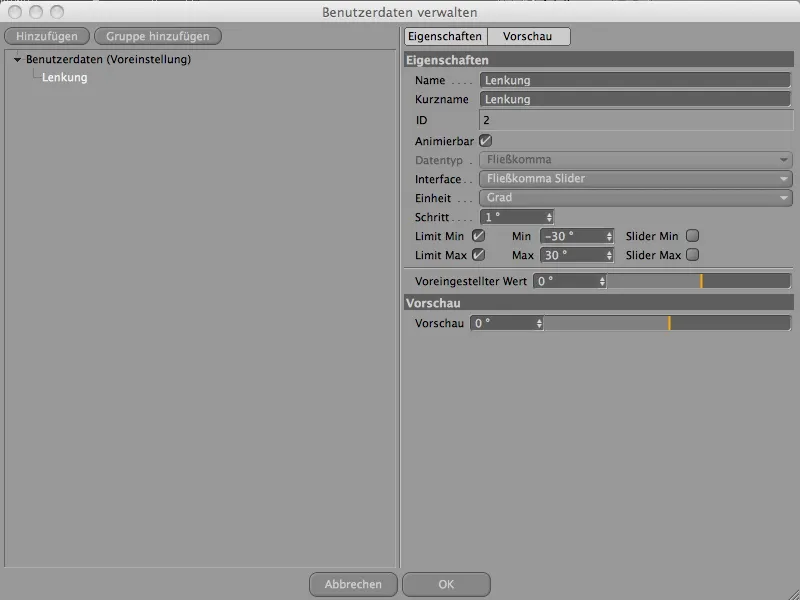
After we have closed the dialog with OK and the user data has been created, we find the steering parameter we have created on the user data page of our car , as desired as a slider.
We have now created a way to control our own parameter. Now we just have to forward it to the right place in our vehicle body.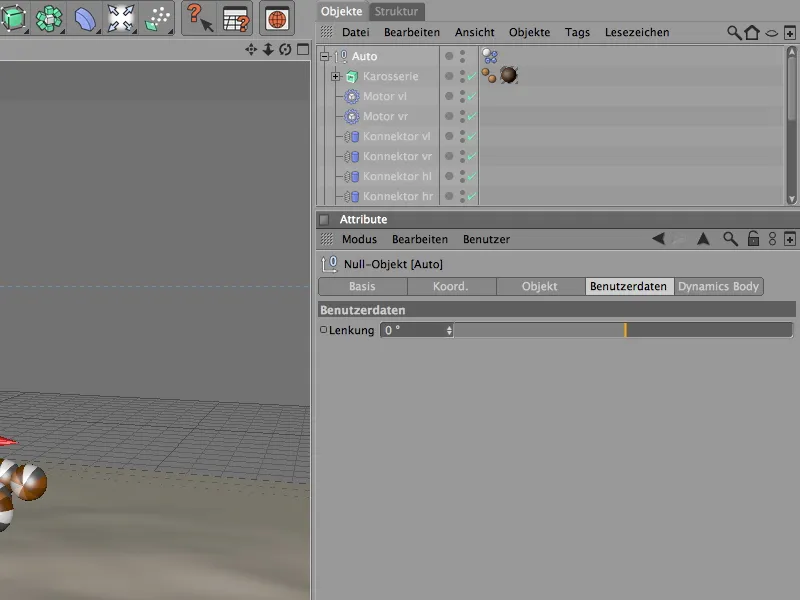
A prime task for XPresso. To do this, we first need an XPresso tag, which is easiest to assign via the context menu with the right mouse button in the CINEMA 4D Tags submenu.
Of course, our Auto group is an excellent carrier for this expression.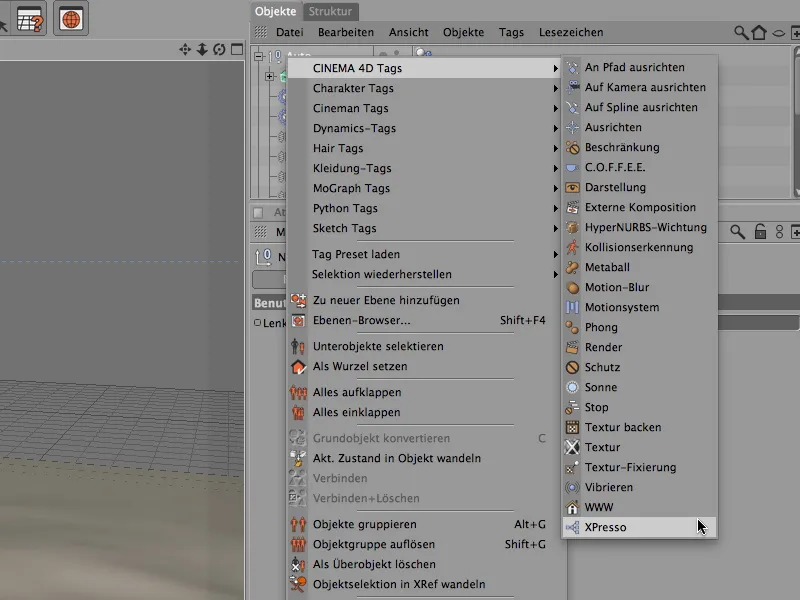
Double-click on the XPresso tag to open the XPresso editor. As the first entry or node, we drag the null object Auto from the Object Manager into the XPresso editor window.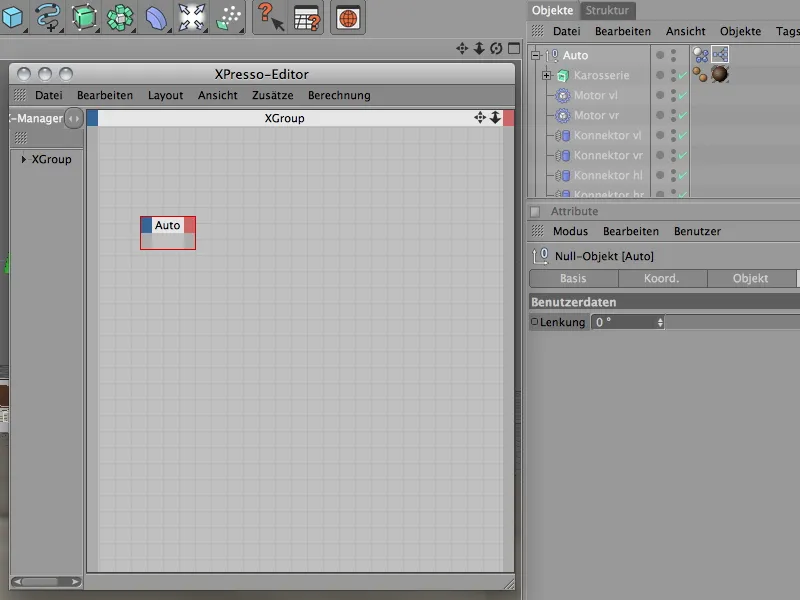
To make our self-created parameter available as a port for linking, we click on the red button of the output ports and select the Steering port from the User data submenu.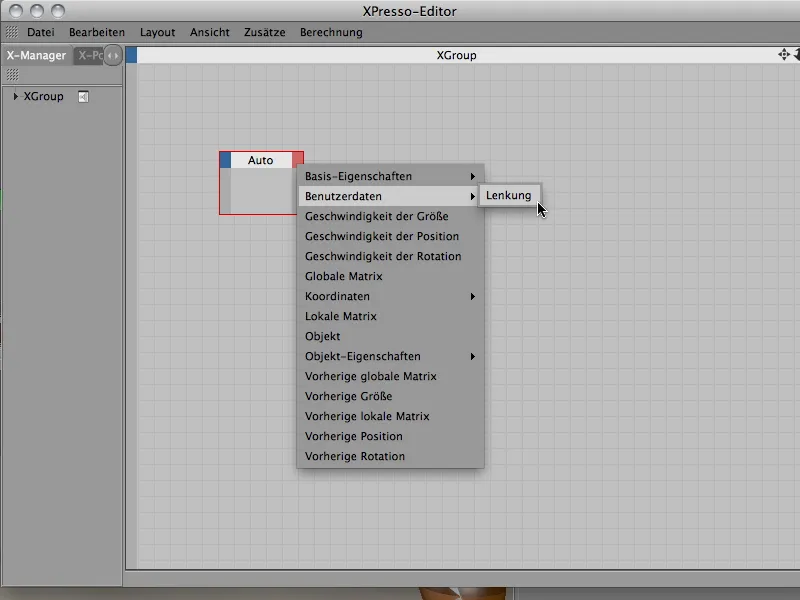
We want to use our steering parameter to influence the steering angles of the wheel suspension connectors. So that we can access these parameters in the XPresso Editor, we look for the two connectors of the left and right front wheel in the Object Manager and drag both objects into the XPresso Editor.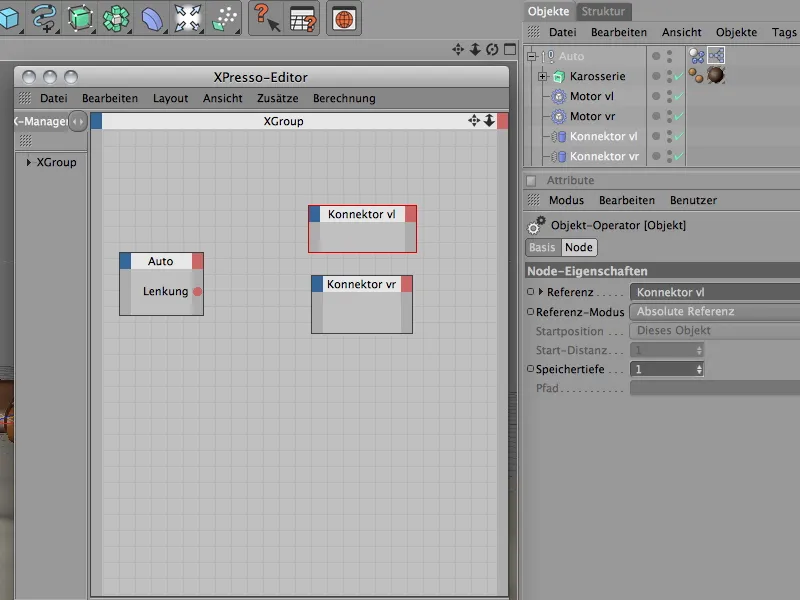
As we want to transfer a value to the two connectors, we need the control angle parameter at the input port. To do this, we click on the blue button for the input ports of the connector nodes and select the control angle port in the Object properties submenu.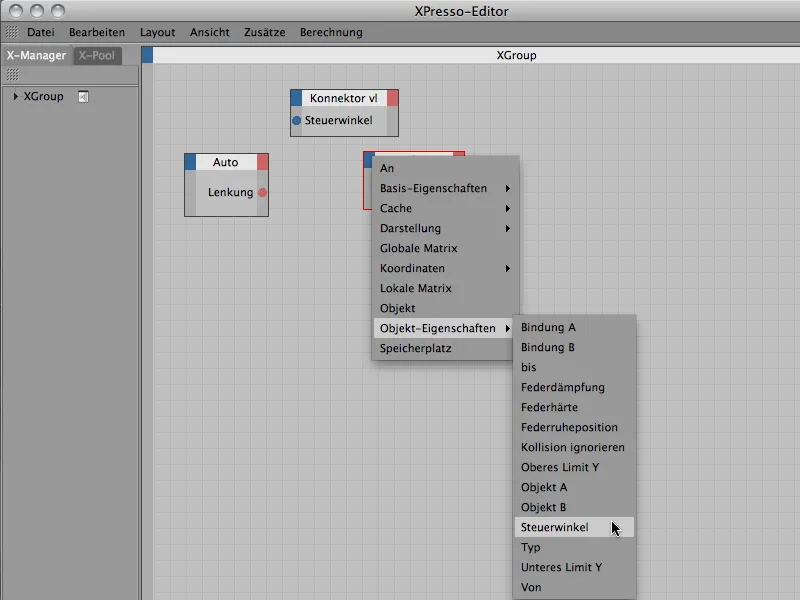
Now we just need to connect the two steering angle ports to the car's steering port. To do this, we simply hold down the mouse button and drag from one port to the other.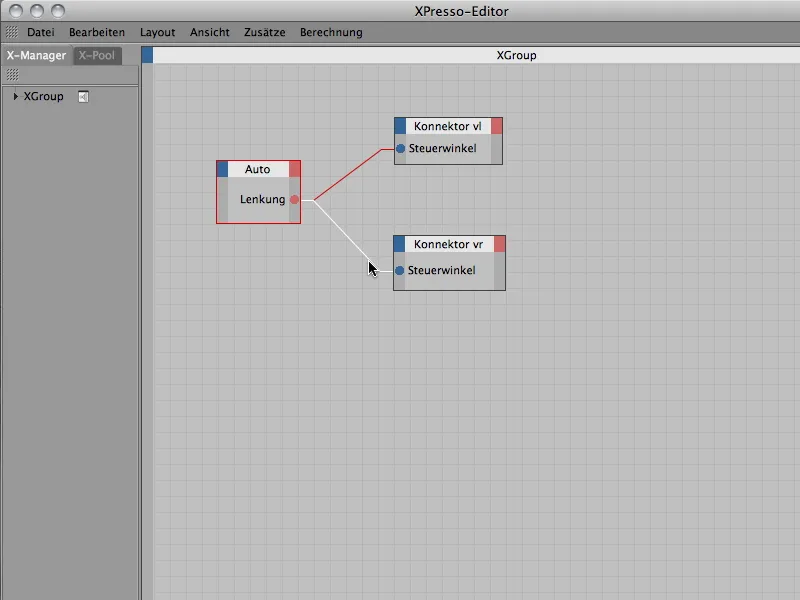
Our little excursion into XPresso is unfortunately already done, so we can close the XPresso editor. So that we don't have to constantly search for the null object and its user data entry to control the car, we simply integrate the slider control into the head-up display (HUD) of the editor window.
To do this, we right-click on the Steering parameter entry in the Attribute Manager and select the Add to HUD command from the context menu.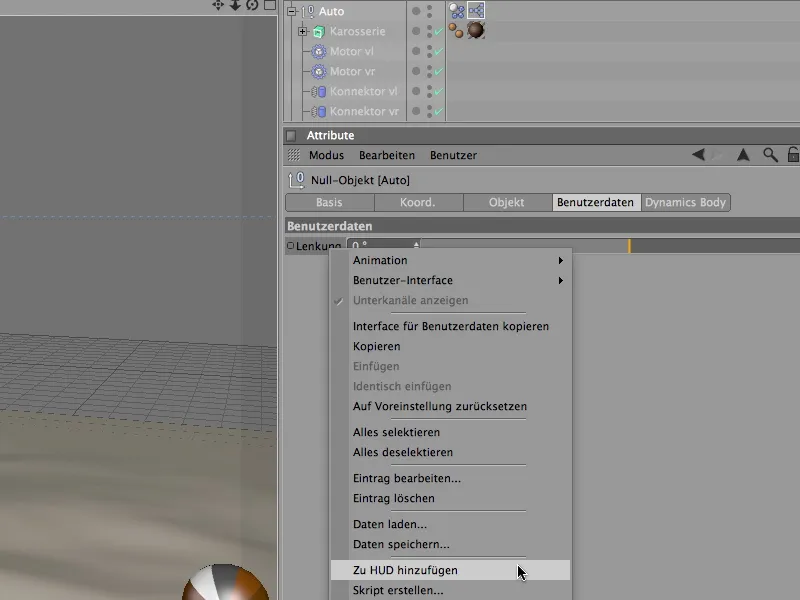
To move the HUD entry in the editor, simply click on the HUD element while holding down the ( Ctrl) key and move it to a suitable position with the mouse.
To ensure that the HUD element is not only visible when our vehicle is selected, we call up the corresponding context menu by holding down the right mouse button and select the Always option in the Show menu.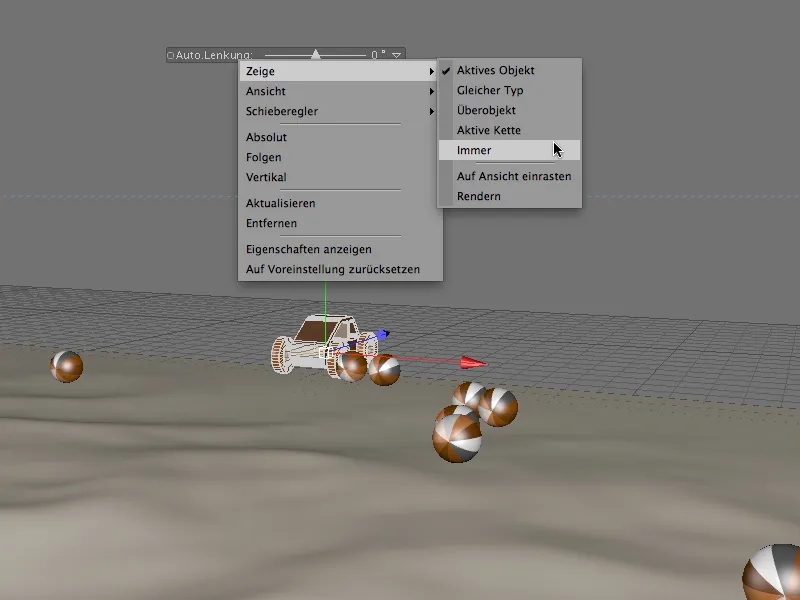
Now you can click the play button and use the slider to send the car through the terrain as desired. Make sure that you reset the steering at the start of each drive to prevent the car from overspeeding.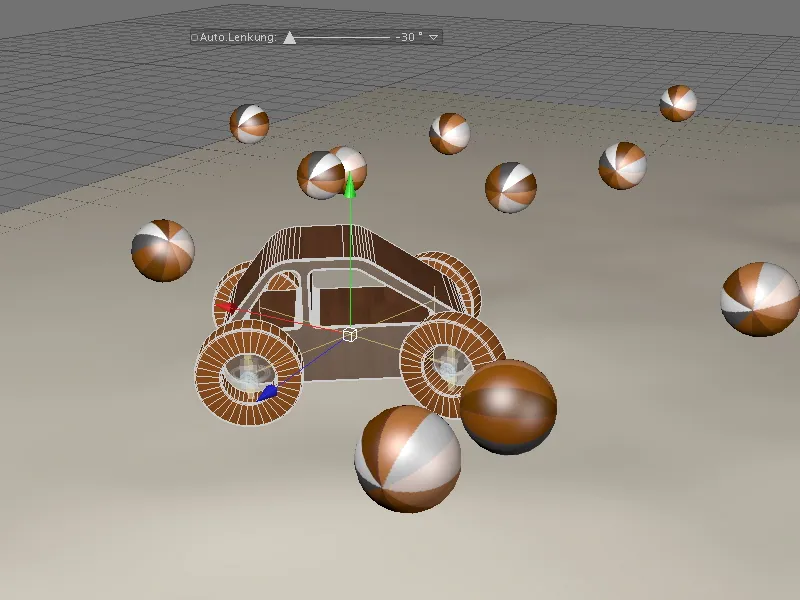
If you want to render the adventurous drive into an animation later, simply record keyframes for the respective steering value at the important control points. Have fun driving through the terrain!