If you have ever tried to cut out a person or object from a video, you know how difficult and time-consuming it can be. However, with the Roto Brush Tool in After Effects, this process is significantly simplified. In this tutorial, I will show you how to effectively use the Roto Brush Tool to cut out a person from a video and refine the results. We will guide you through each step in detail, so you will gain a solid understanding of the tool.
Key Insights
- The Roto Brush Tool allows for precise extraction of moving objects.
- Version 2.0 of the Roto Brush Tool offers significant improvements through machine learning.
- Details such as adjusting the brush size and using the edge refinement tool are crucial for good results.
- After cutting out, you can add additional creative effects, such as text overlays or color corrections.
Step-by-Step Guide
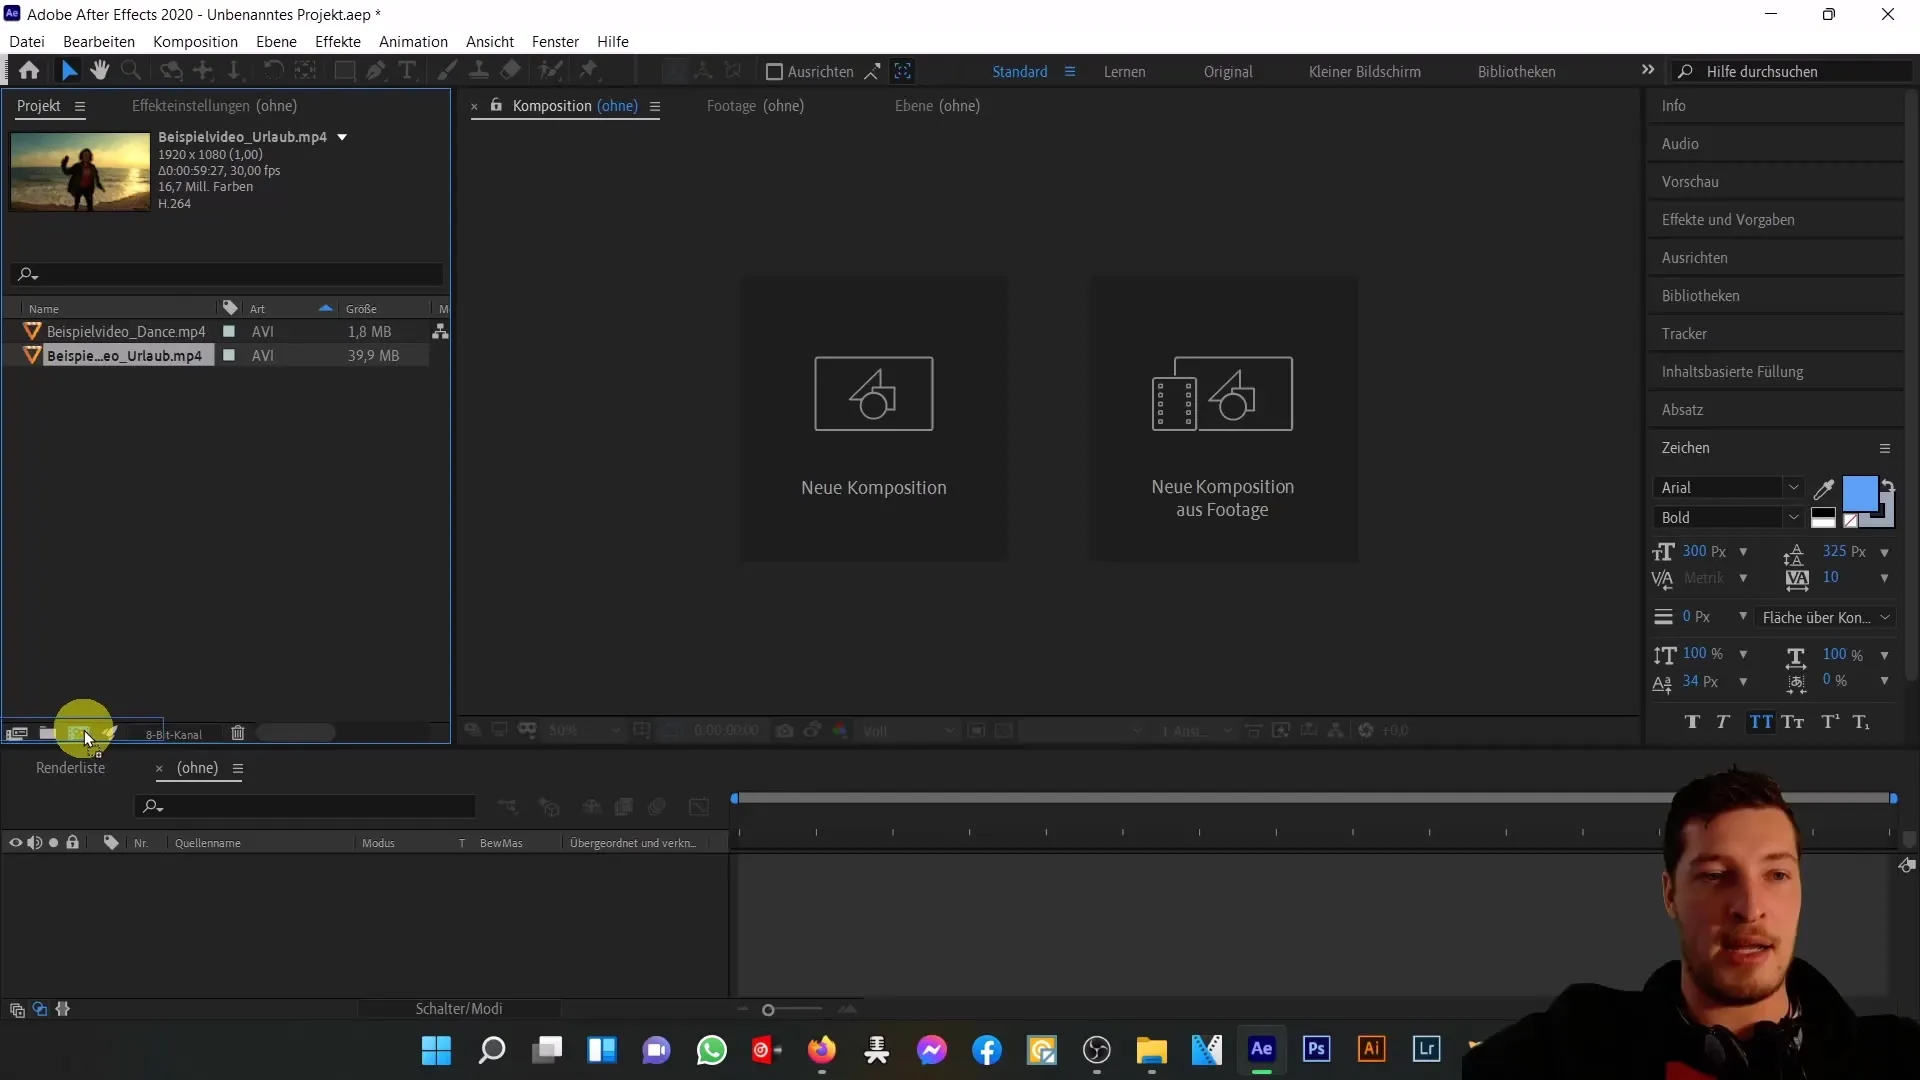
Start by creating a new project in After Effects. Go to "File" and select "New" from the menu.
As the first step, import your desired video that you want to use into the project media. You can do this by right-clicking on the video and selecting "Import".
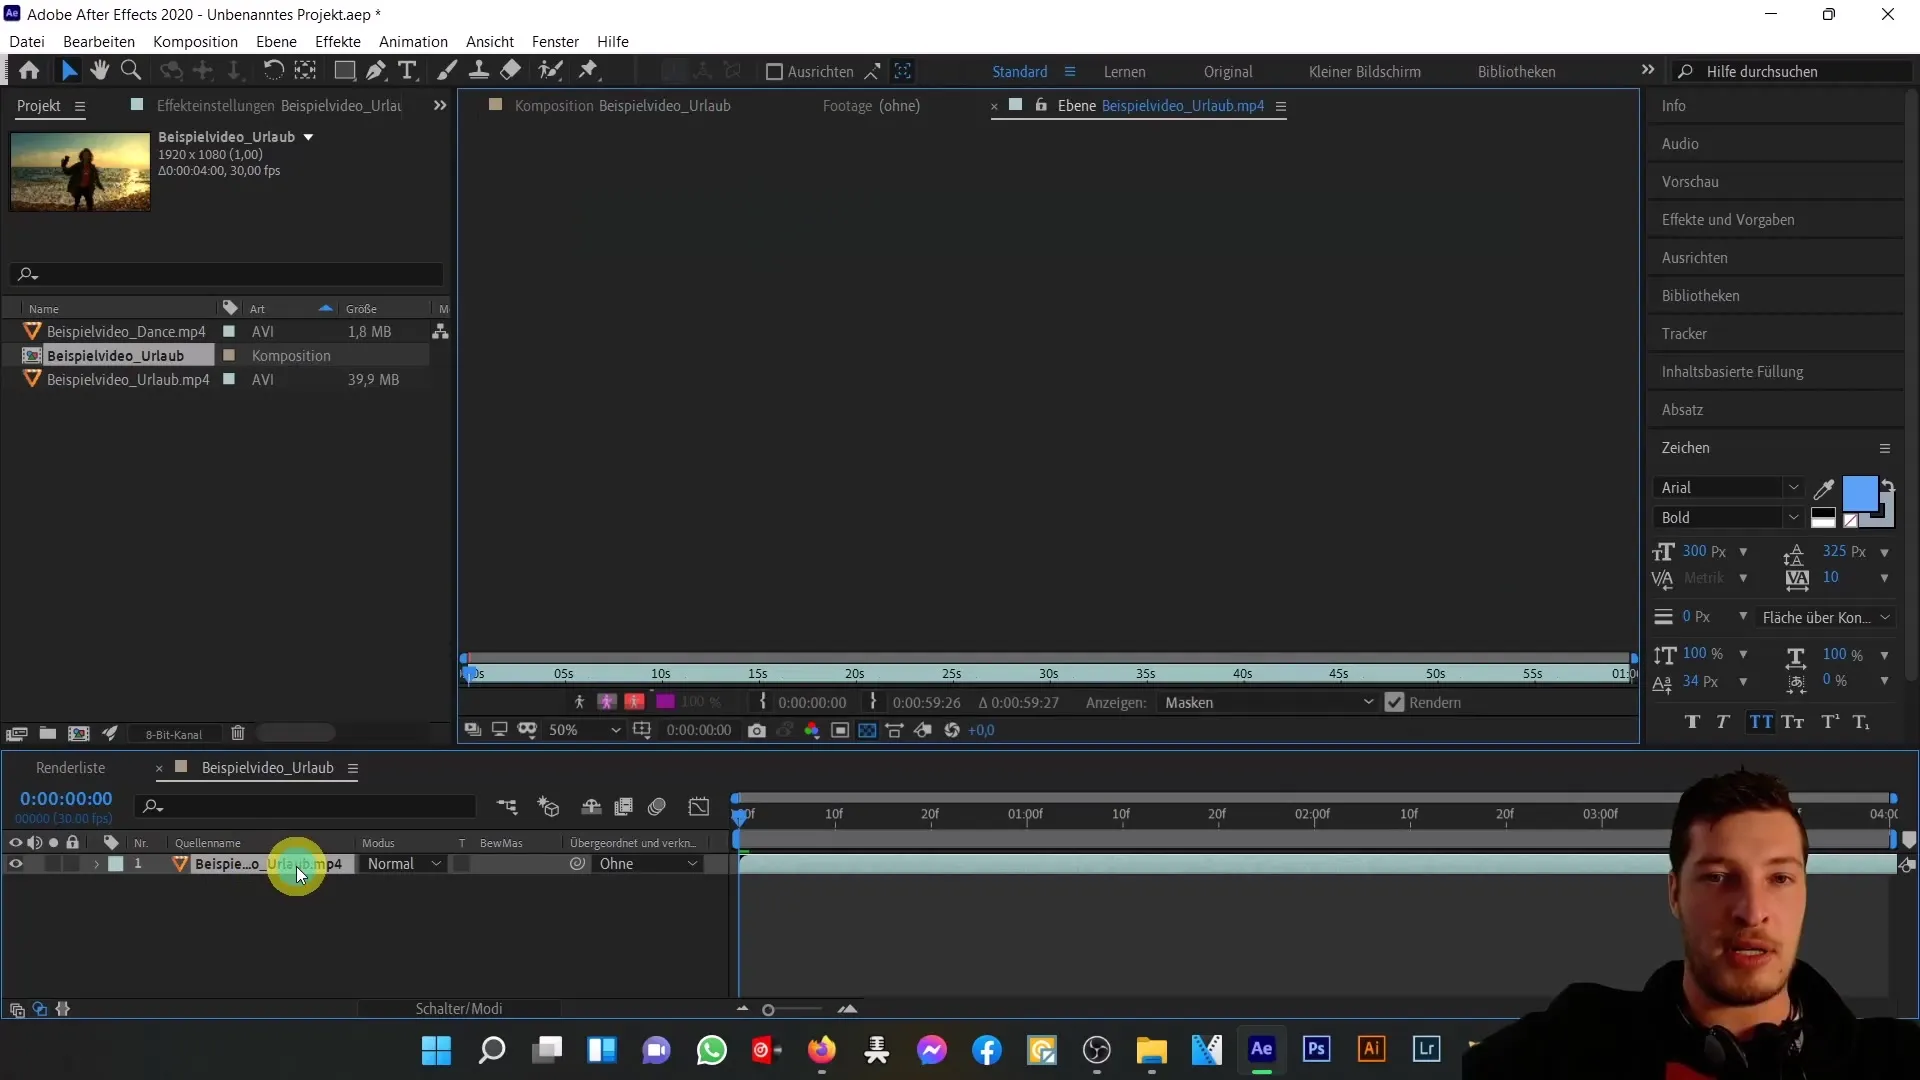
After importing your video, drag it into a new composition. Make sure to reduce the composition length to about 4 seconds as the Roto Brush Tool is computationally intensive, and shorter clips are much more manageable.
Now that you are in the composition, double-click on your video to access the layers tab. Here you will find a range of editing options.
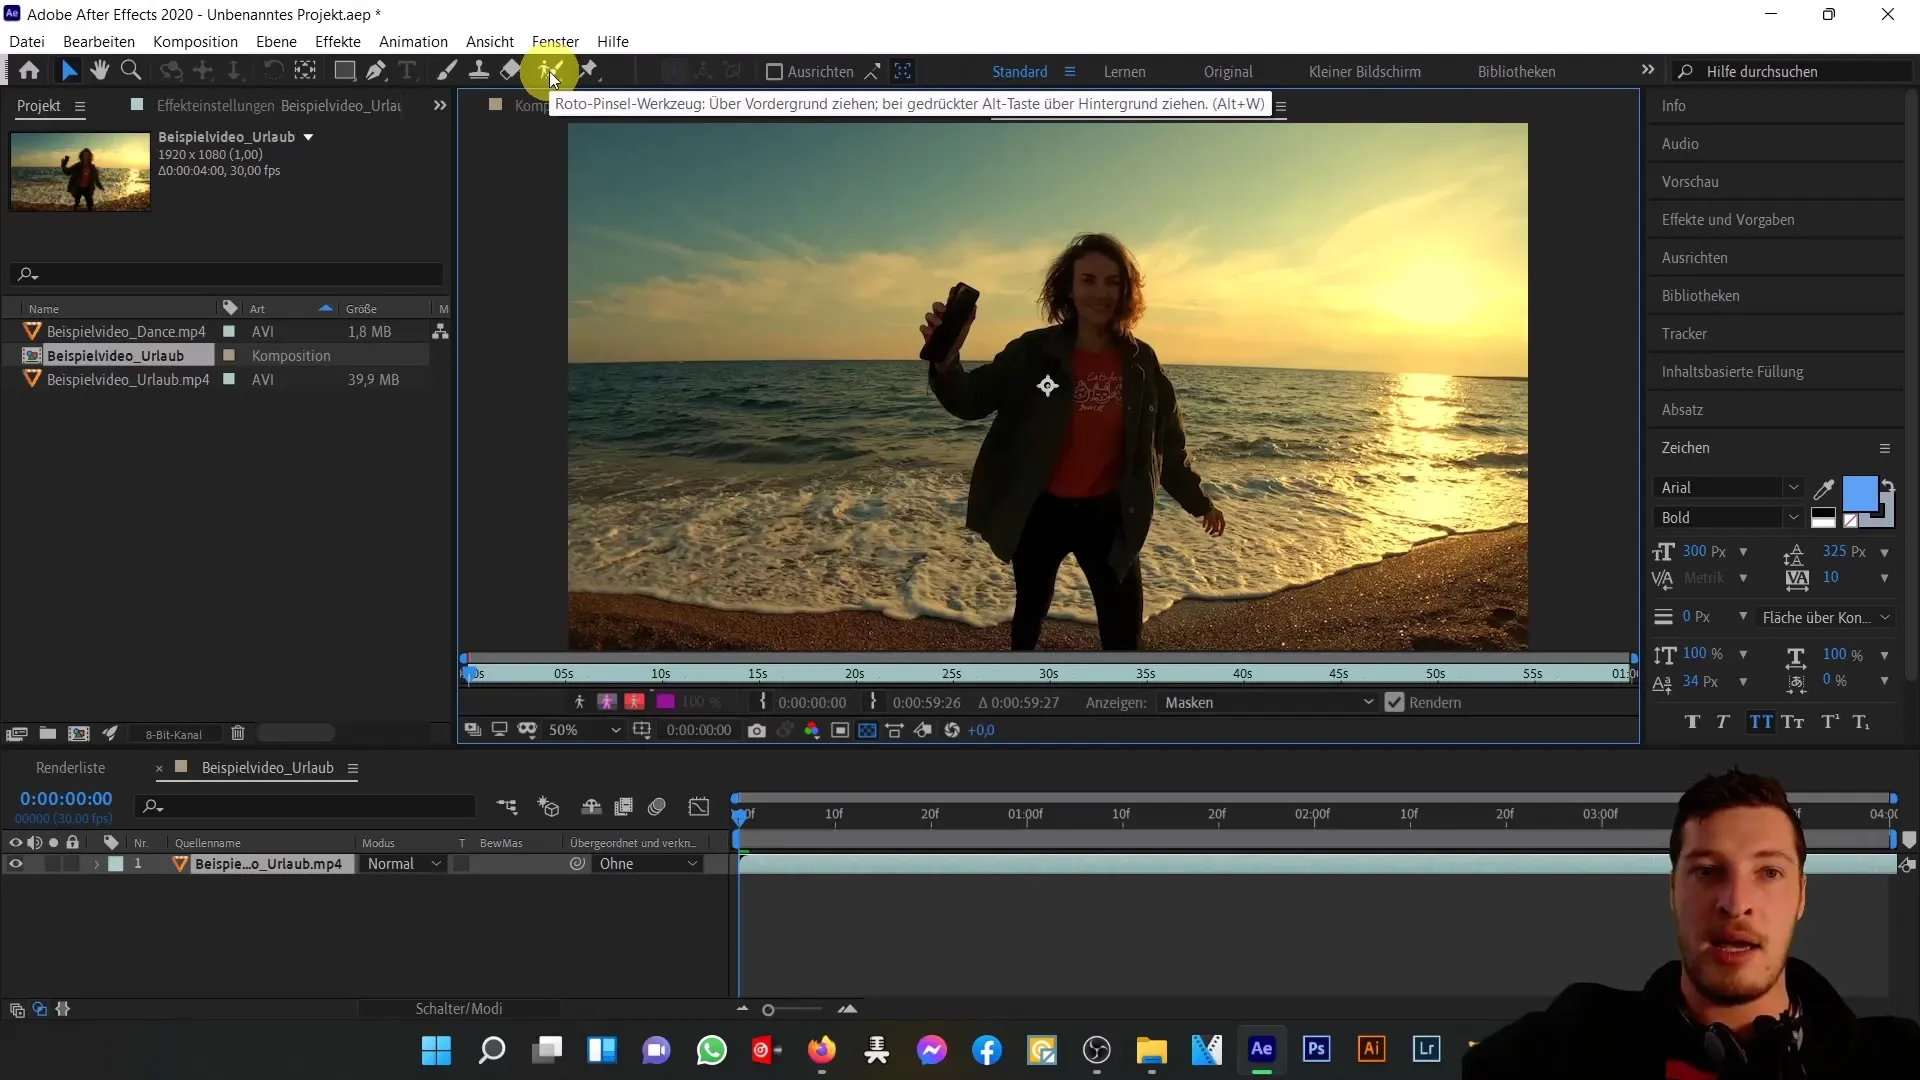
Now select the Roto Brush Tool from the toolbar. You will see the cursor change into a brush. Start by painting over the areas of the image that you want to add as selections. Keep the left mouse button pressed while doing so.
If you want to adjust the brush size, hold down the Ctrl key (or the Cmd key on Mac) and move the mouse up or down to change the size of your brush footprint.
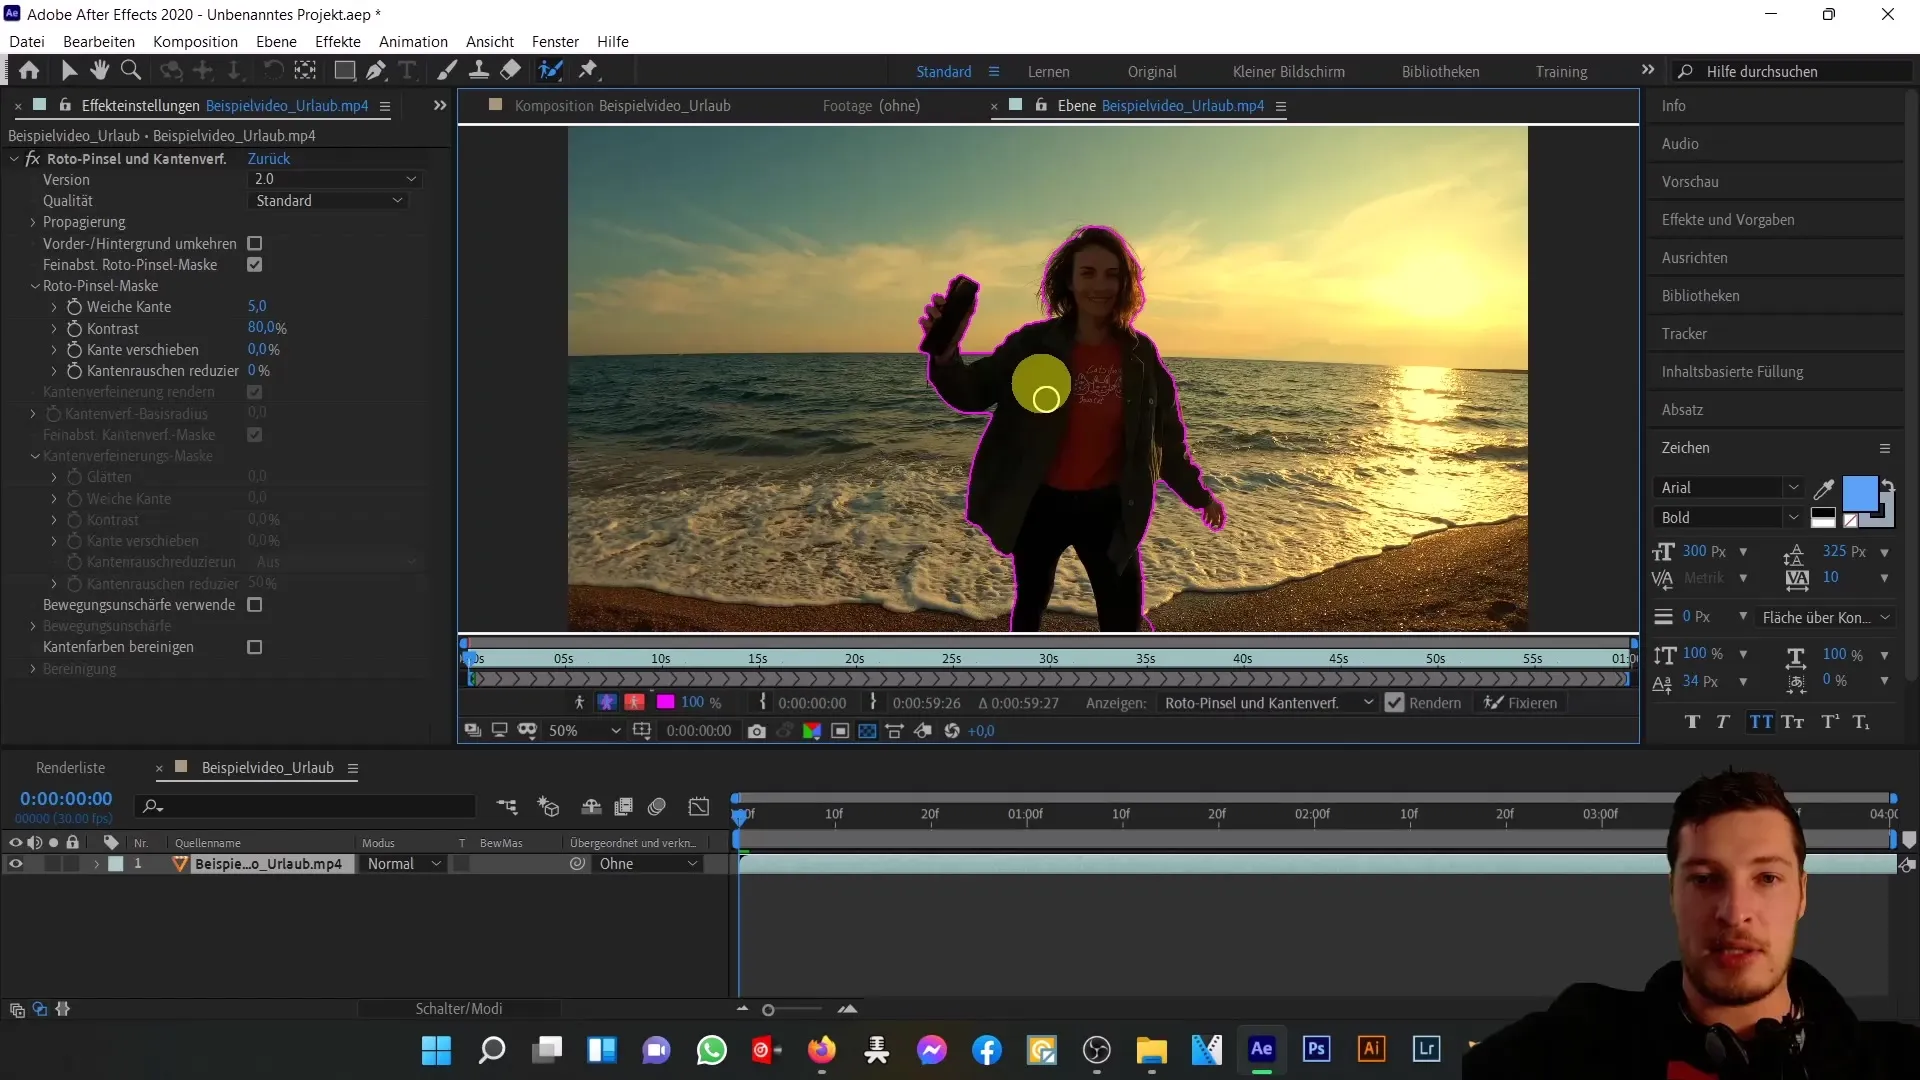
Additionally, you can subtract selection areas by holding down the Alt key (or Option key on Mac), i.e., you can remove unwanted parts. This feature is particularly useful when you want to work more precisely.
For version 2.0 of the Roto Brush Tool, there are numerous improvements. In older versions, you often had to readjust manually, which was time-consuming. In this new version, the tool works with the help of machine learning, resulting in much more precise outcomes.
Take time to thoroughly define the selection in the first frame. The more detailed you work here, the better the automatic tracking will be in subsequent frames.
Now, examine the edge between the cut-out object and the background. To smooth the edges, switch to the edge refinement tool by holding down the left mouse button and selecting it.
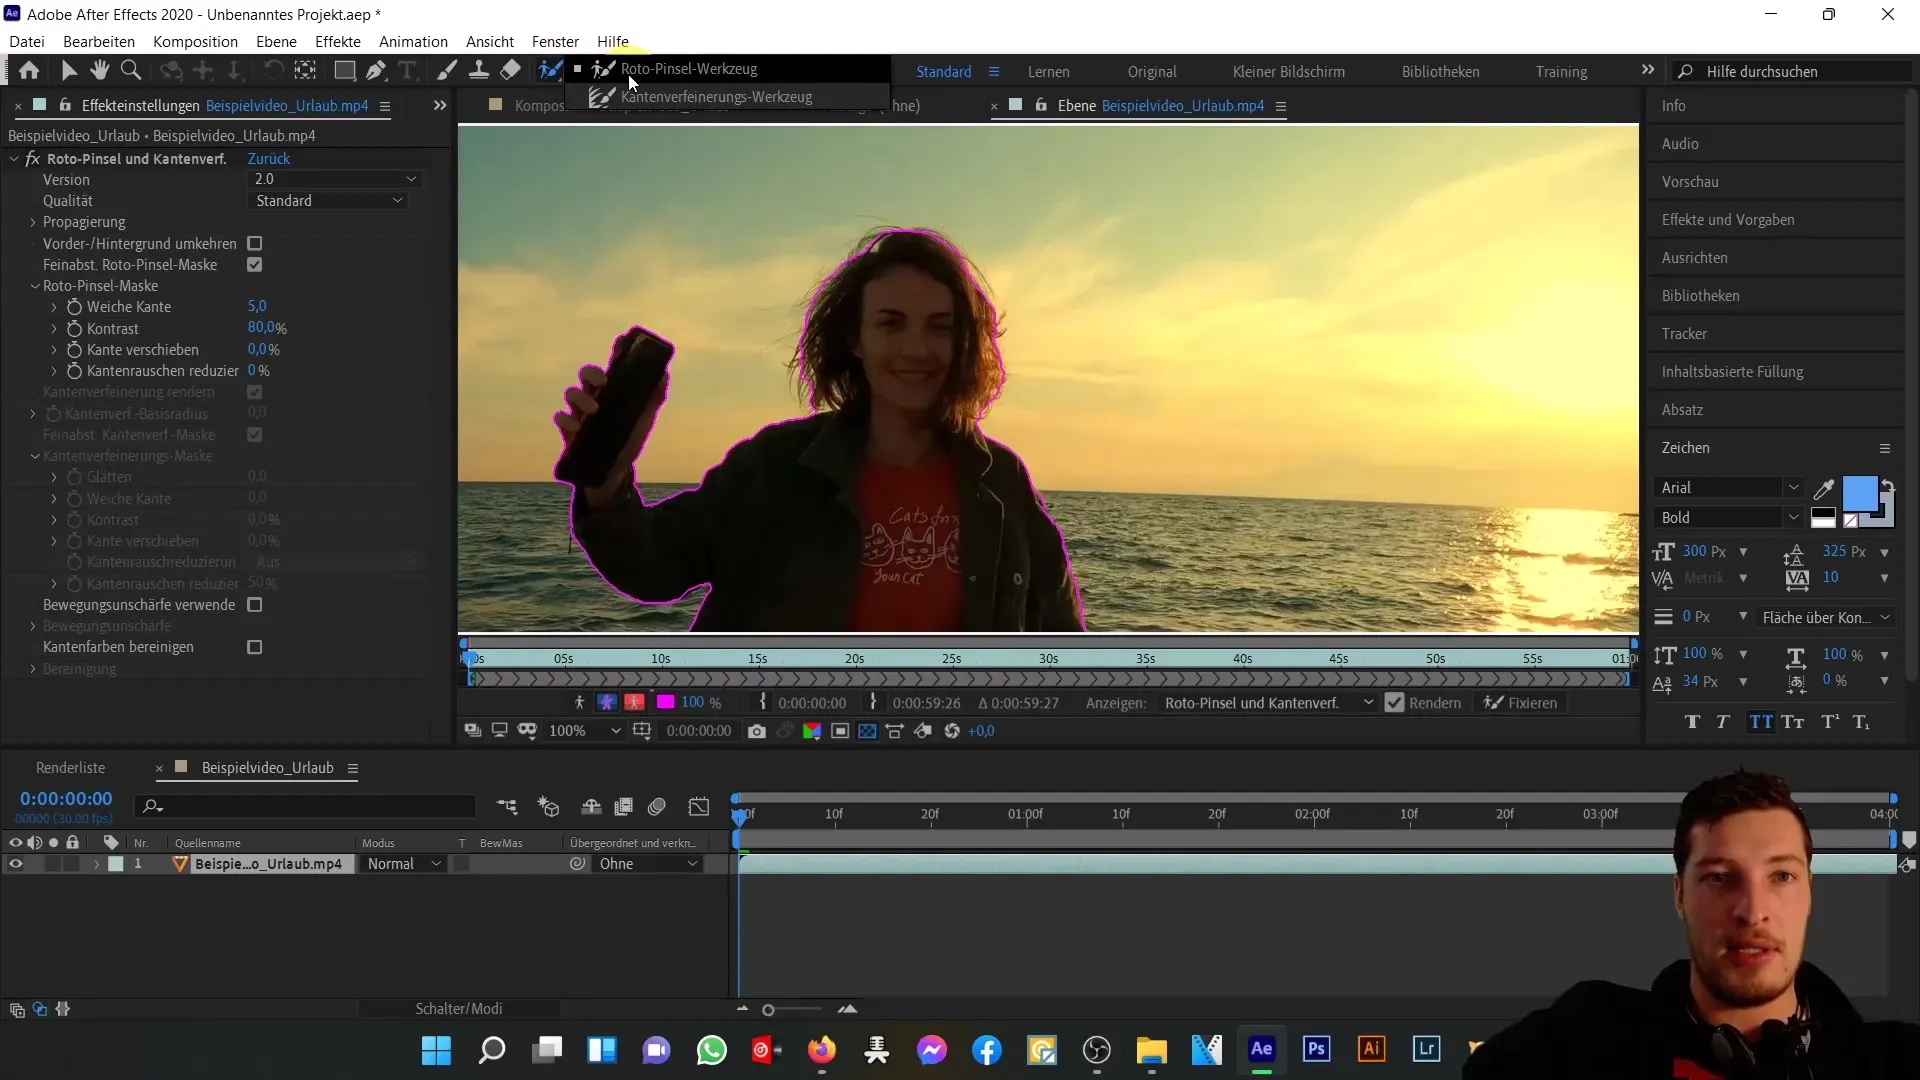
With this tool, you can further refine the edges, for example, by activating the soft edges or adjusting the strength. This has a positive impact on the overall quality of the selection.
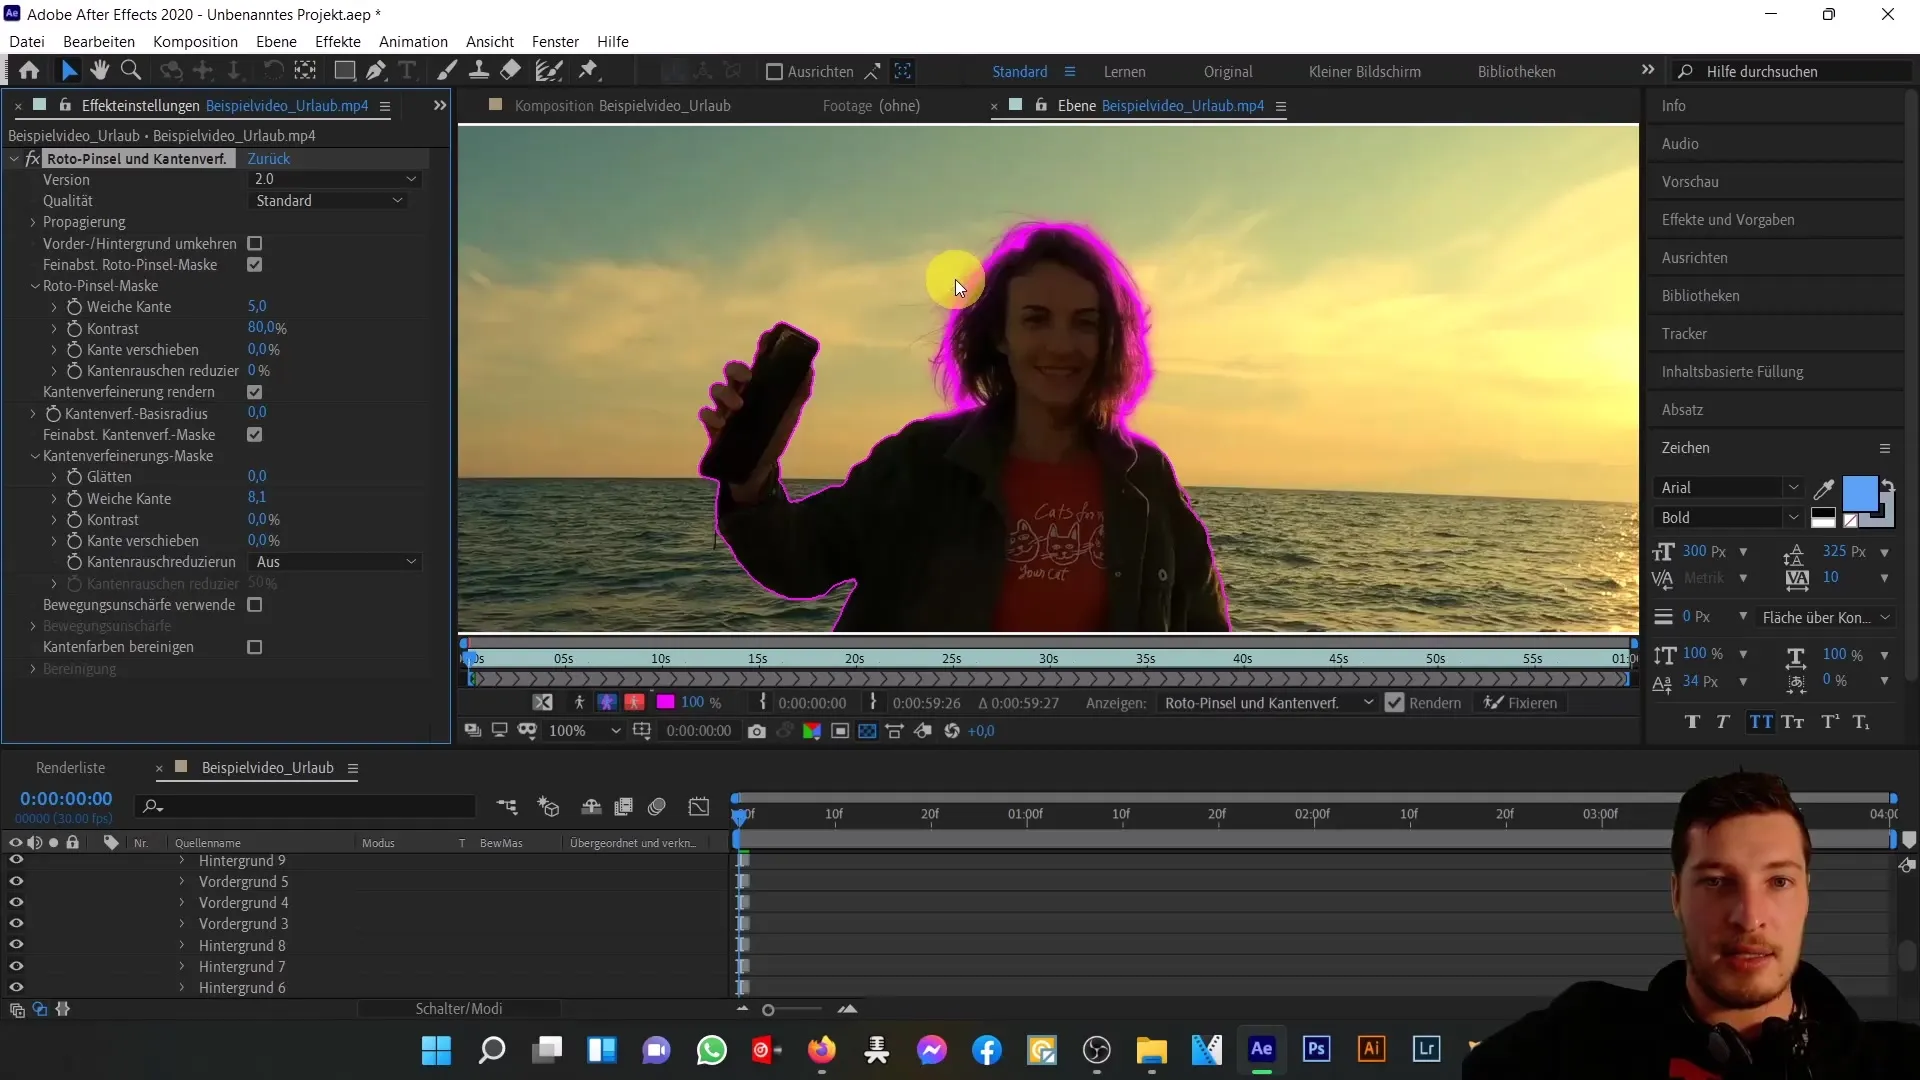
You also have the option to switch between different views. You can enable the alpha channel to see which areas still need refining or choose a custom background color to better discern contrast.
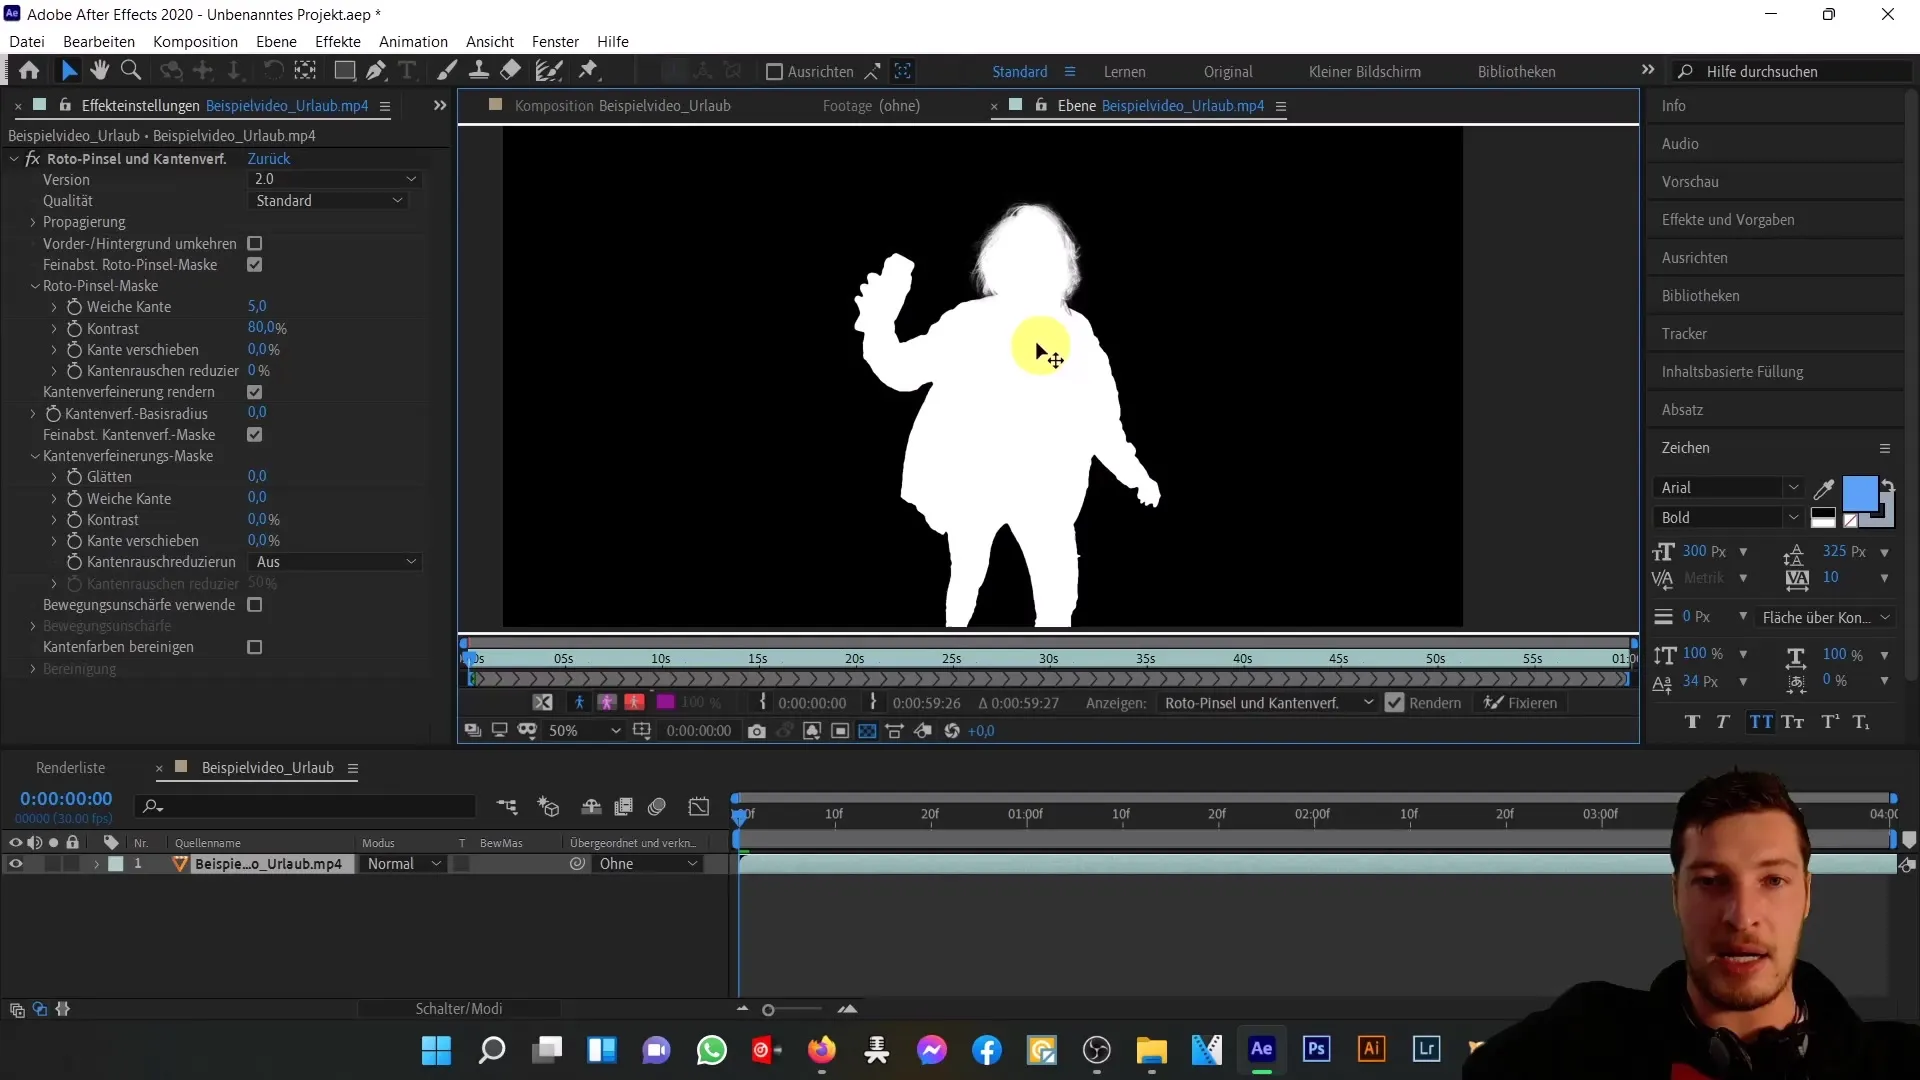
After refining the edges, move on and apply the desired effects to give your excavation the finishing touch. If everything looks good, create a copy of the layer to be able to undo the changes if necessary.
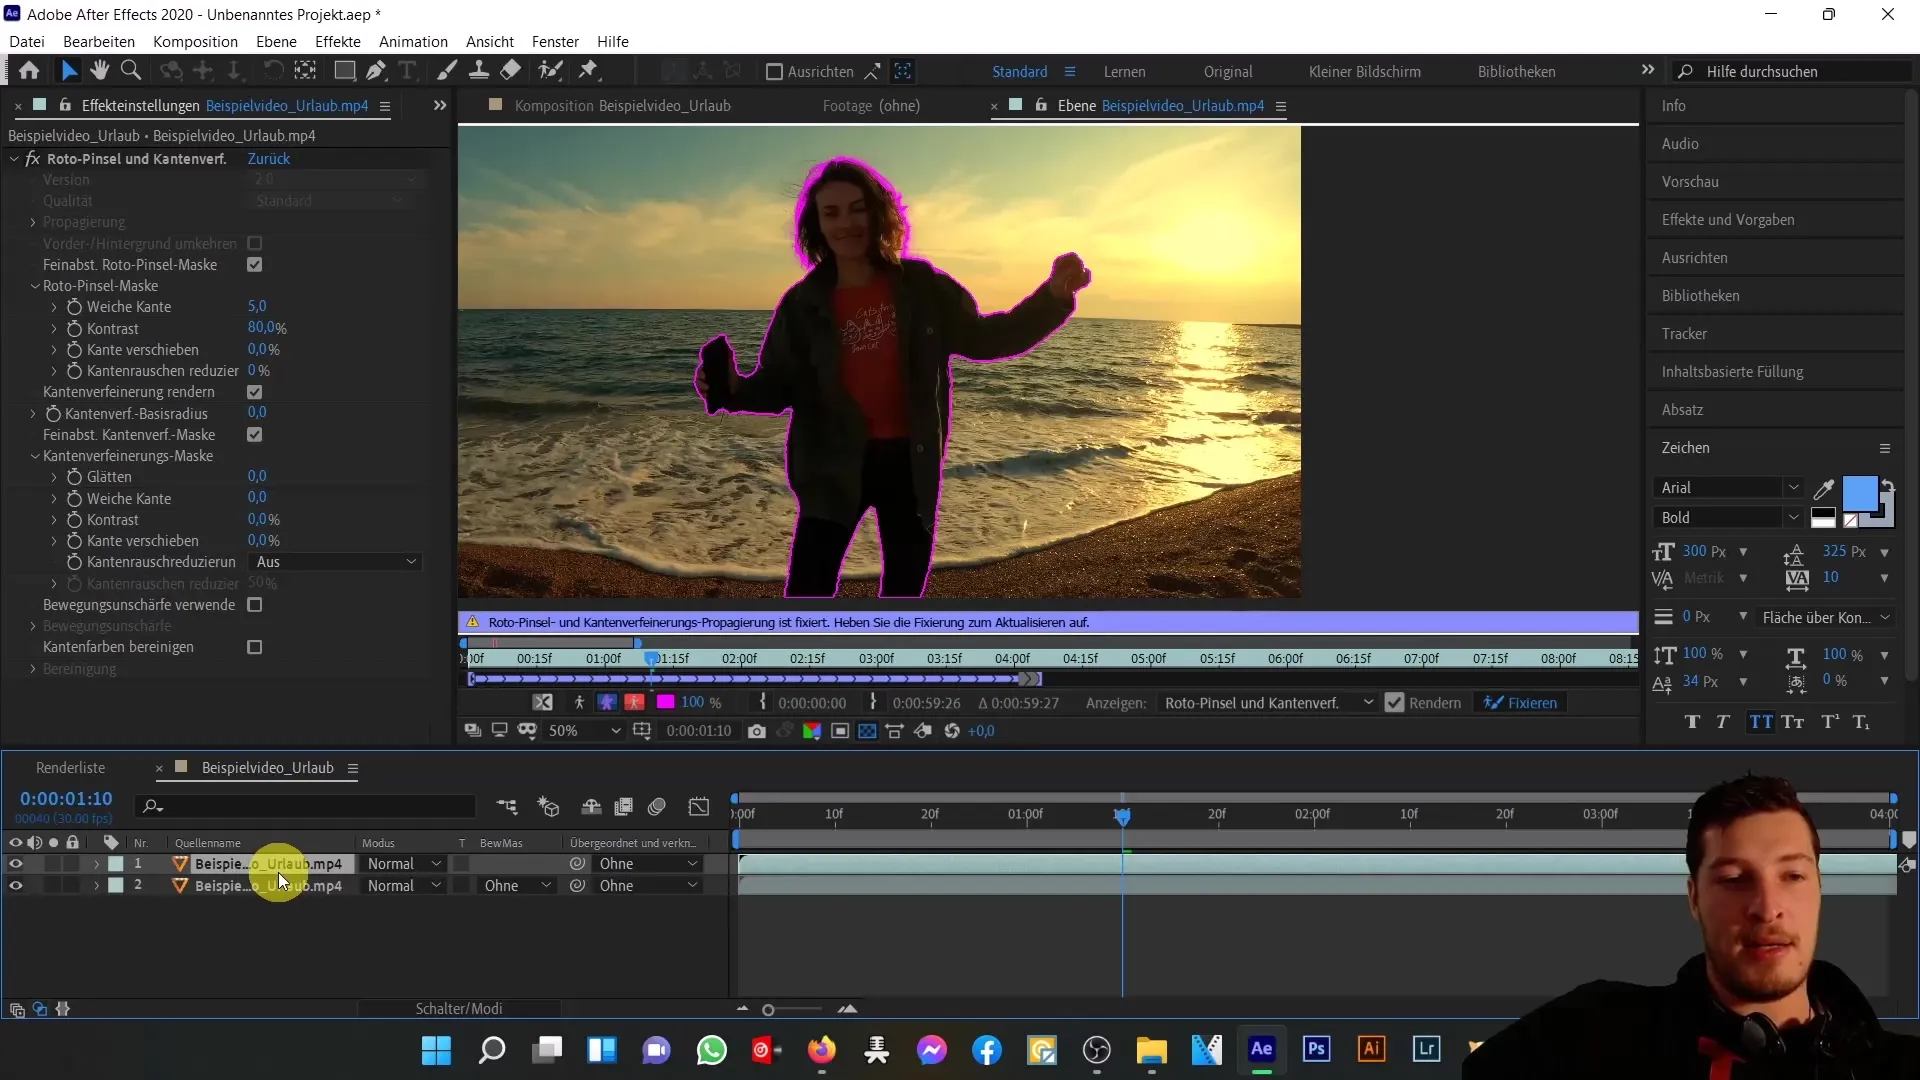
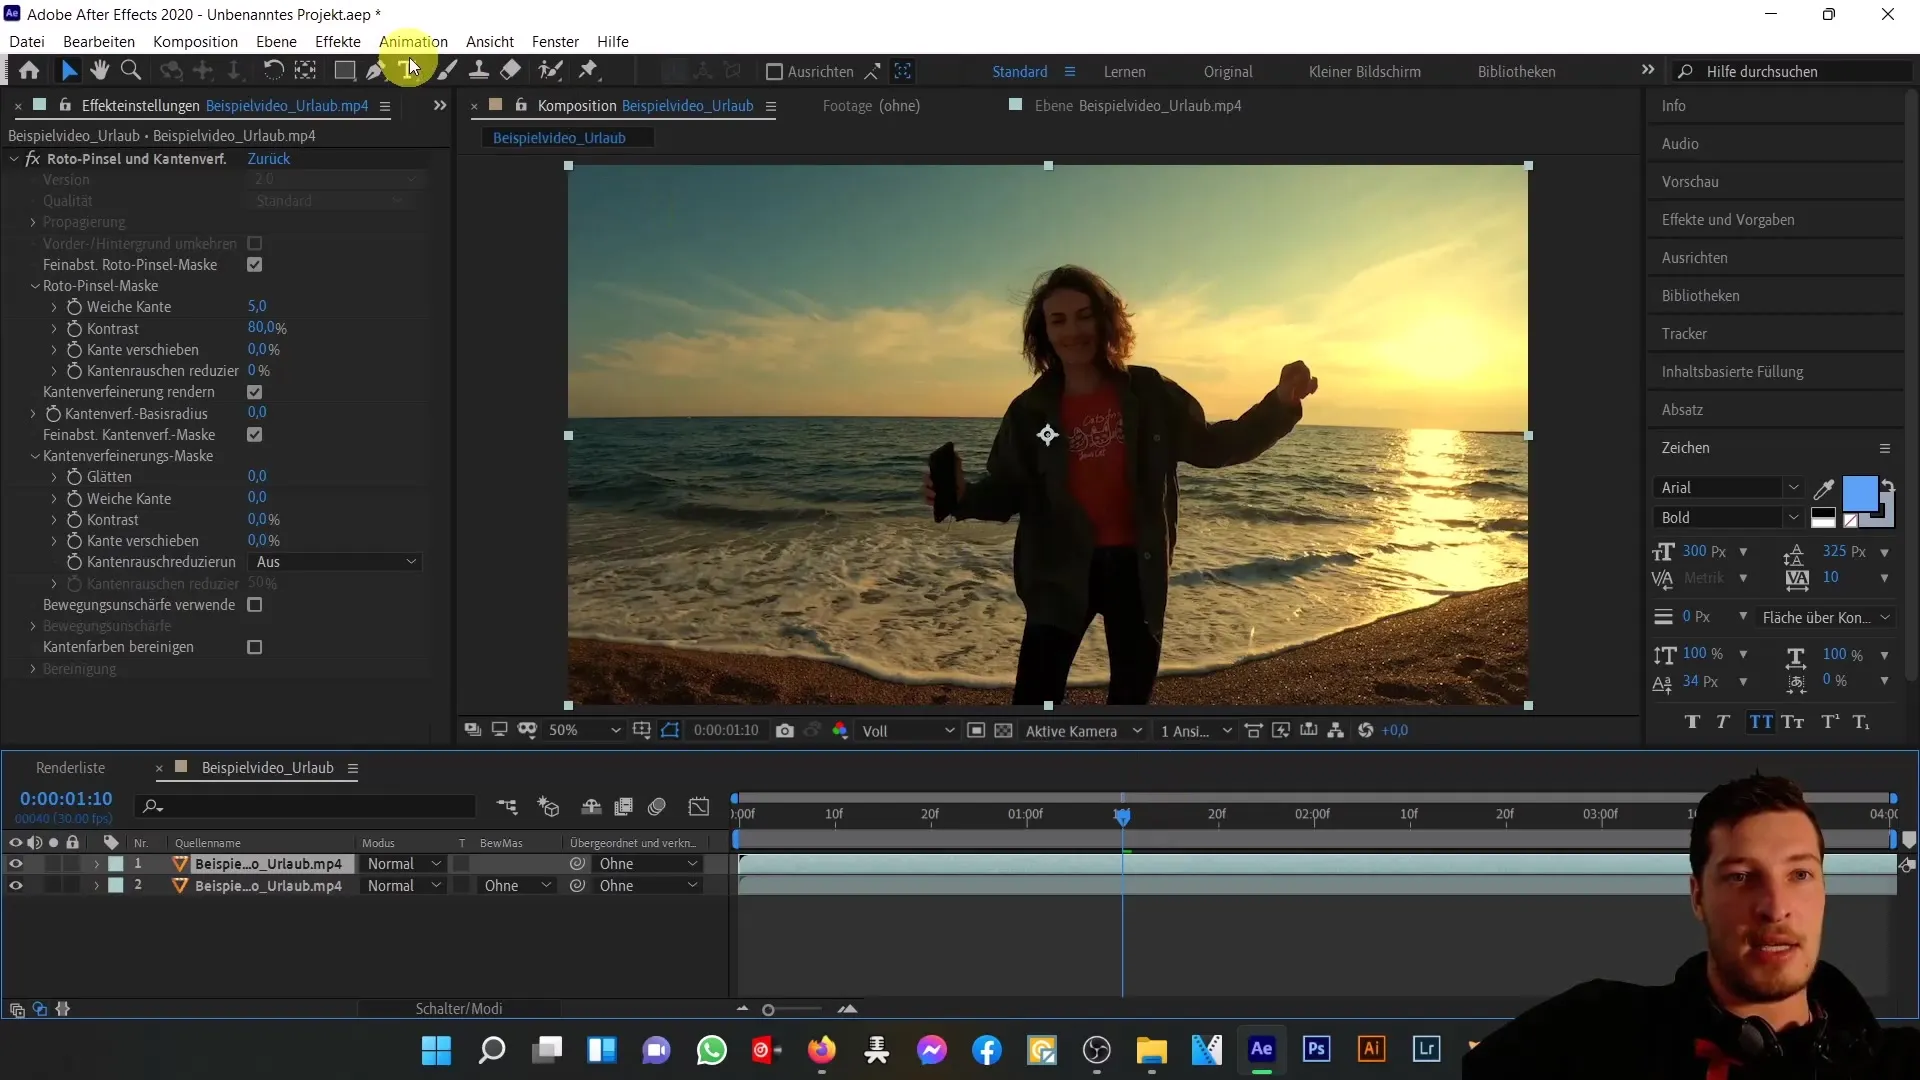
Now duplicate your layer and disable the Roto Brush Tool and the edge refinement tool on the lower layer. This allows you to use the lower layer while the upper edited layer remains visible.
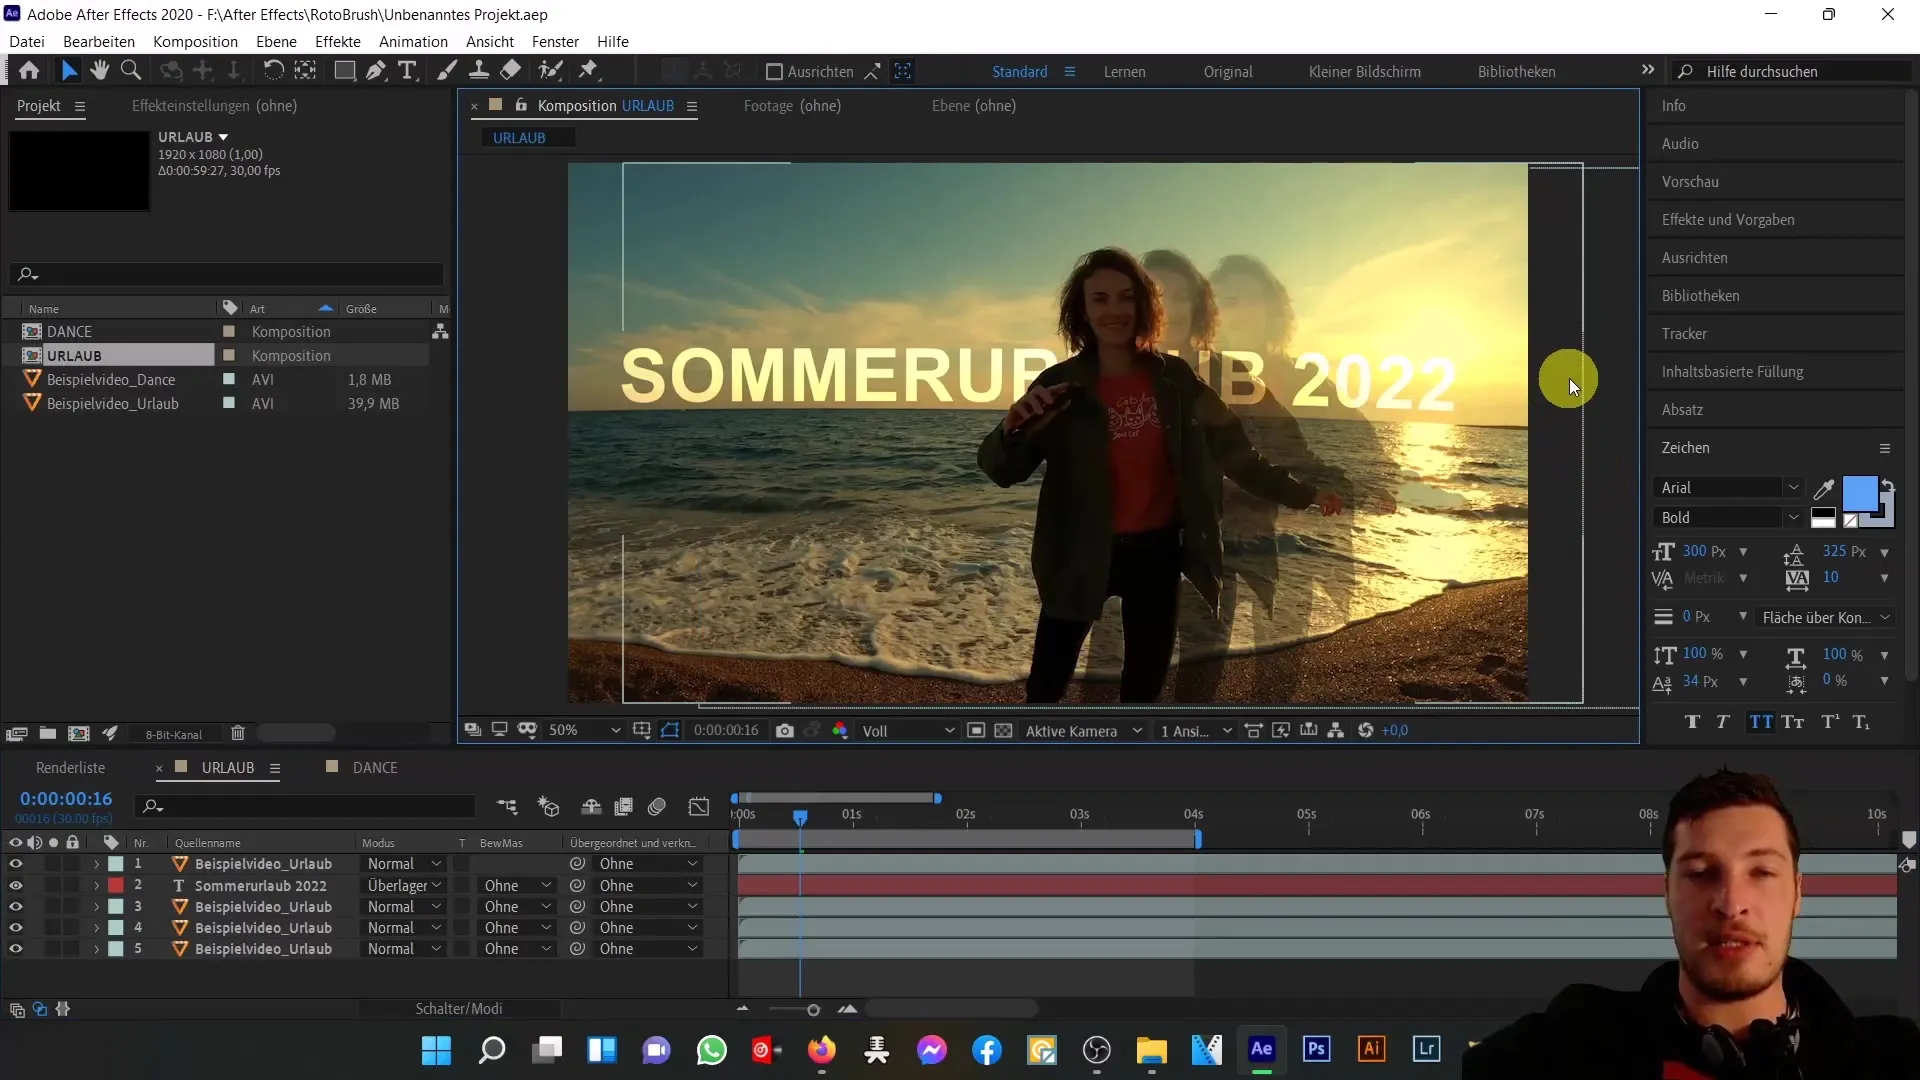
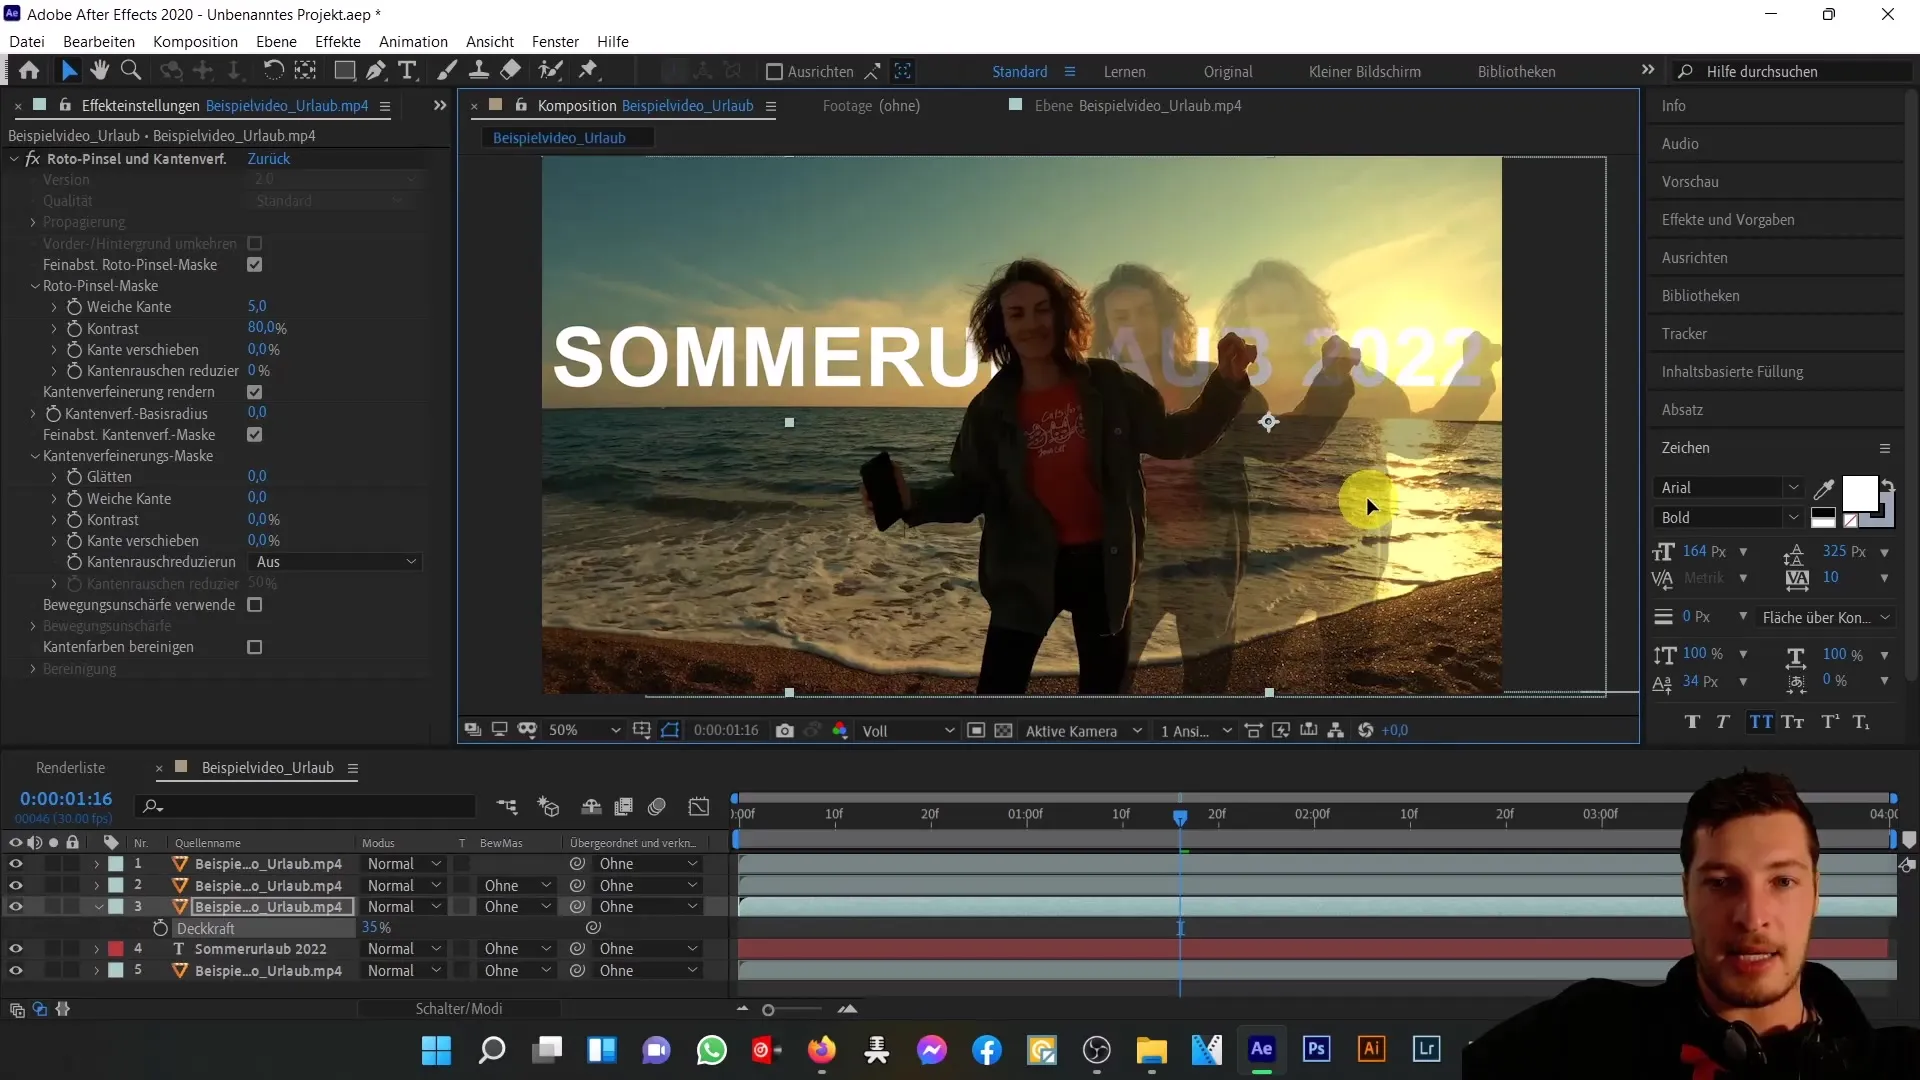
Now you can start adding text. Position the text behind your cut-out object. In this example, we add the text "Summer Vacation" and position it to sit behind the cut-out area.
To further enhance the visual quality, you can duplicate the lower layer, reduce the opacity, and move it to the right. The color mode can also be changed to achieve a harmonious color result.
Also, use the pen tool function to create masks for text animation. This gives the text an animated movement along the horizon, adding more dynamism to the entire project.
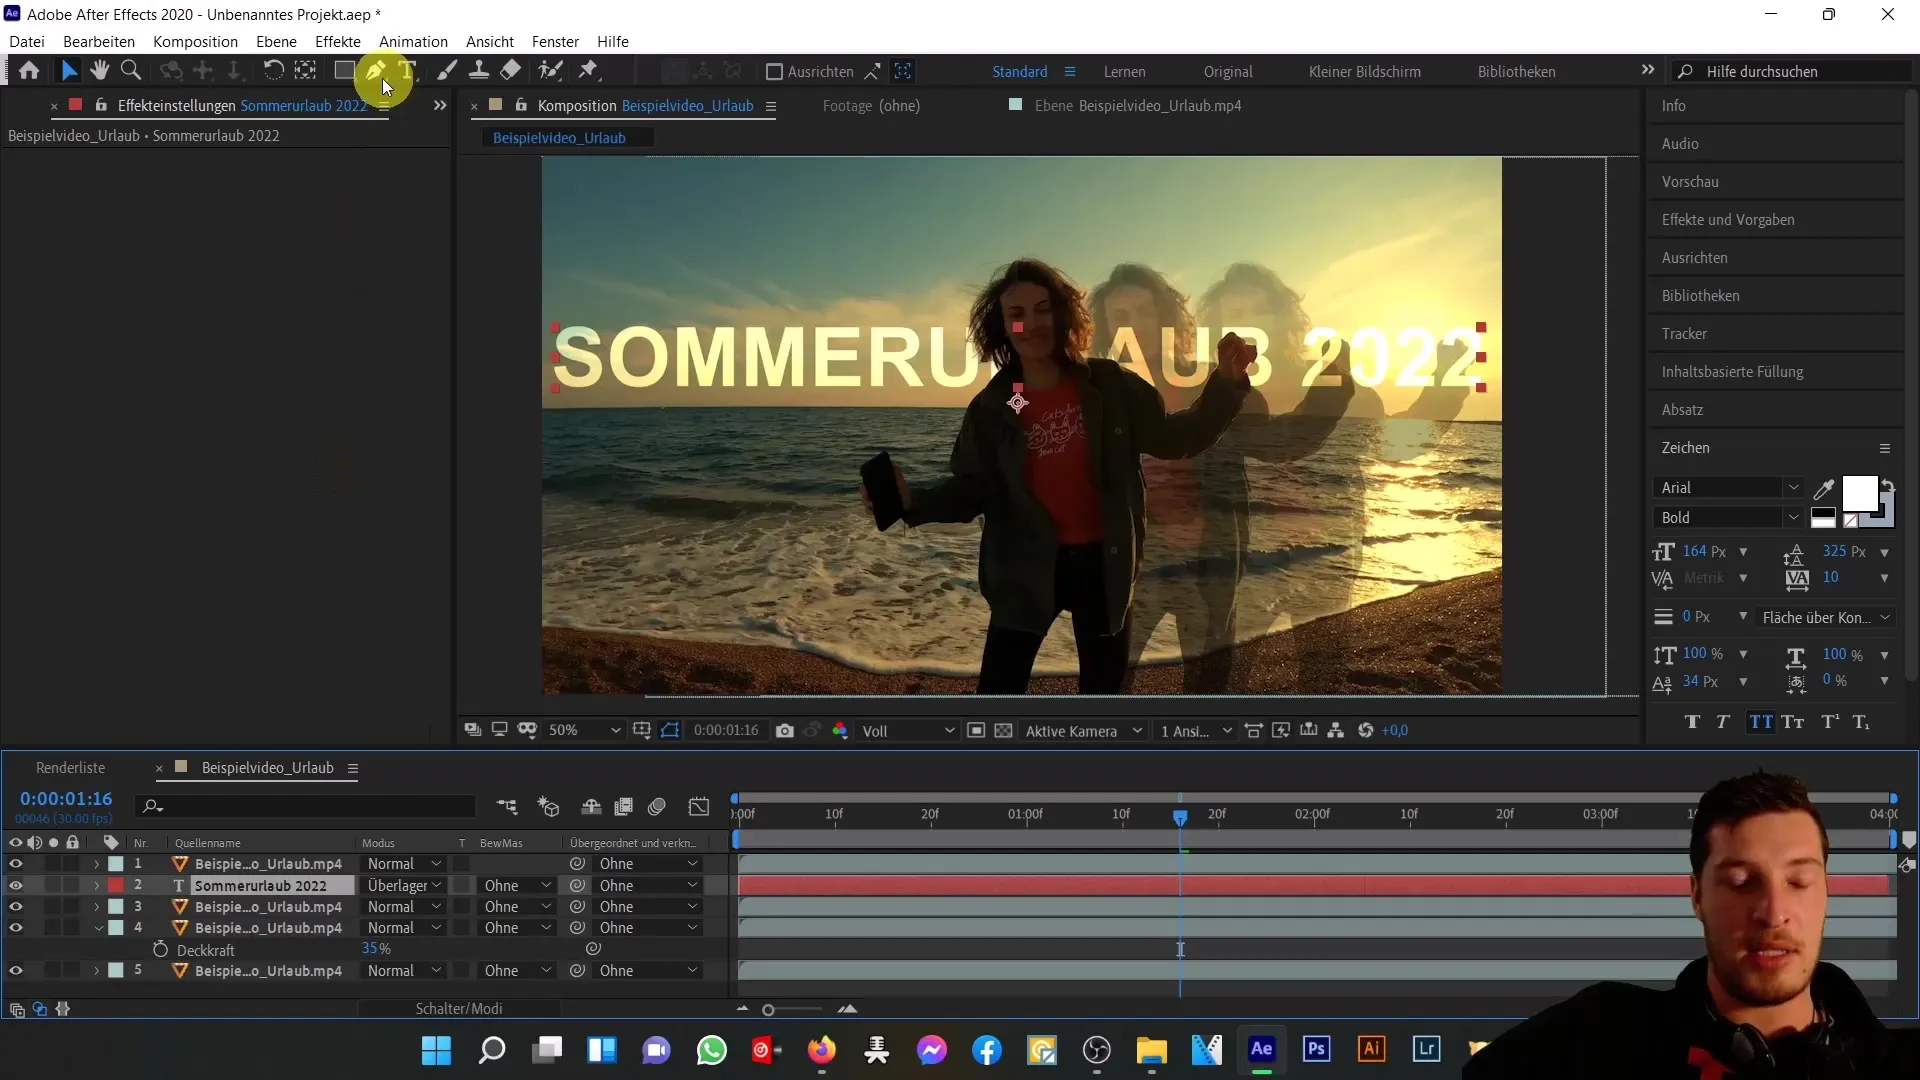
To complete the project, animate the position of the text so that it moves over time. This helps make the presentation more appealing and professional.
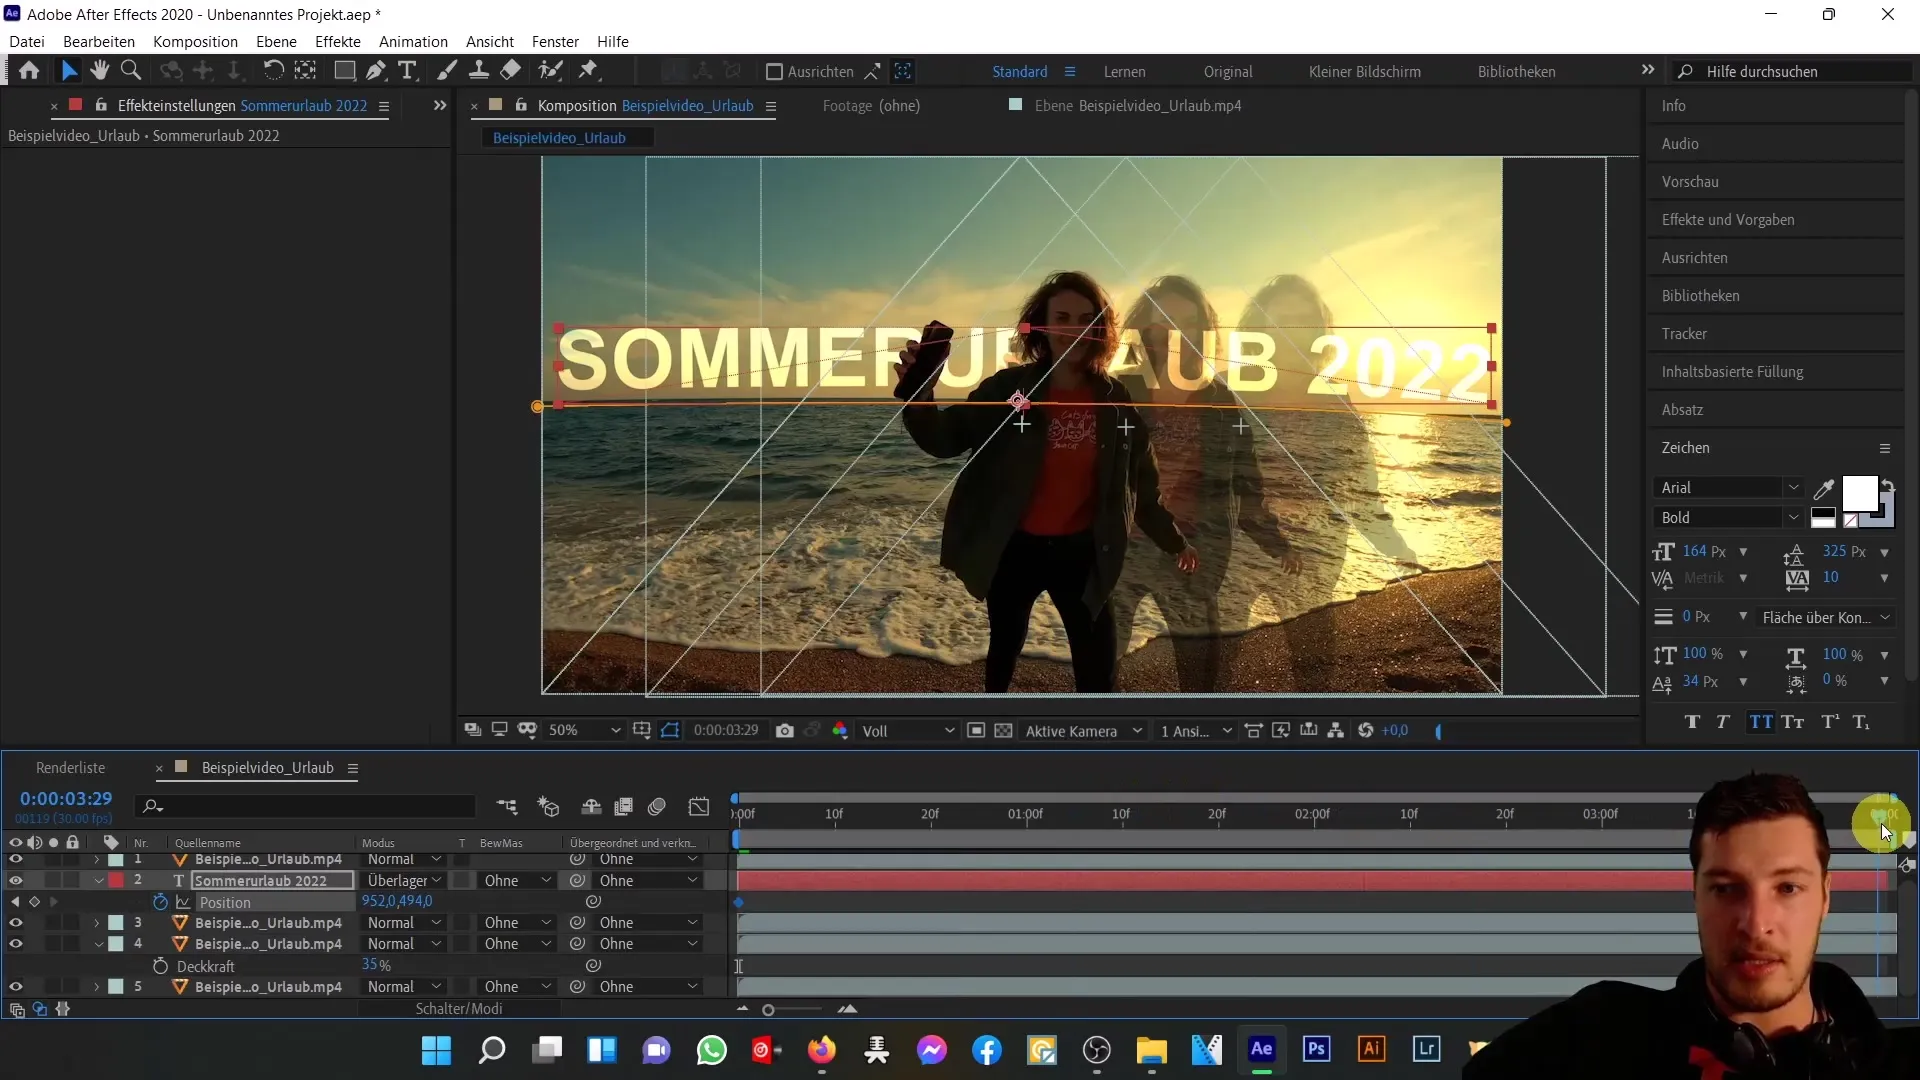
Finally, enjoy the end result! You have successfully used the Roto Brush Tool to make a precise selection and creatively enhance your project.
Summary
In this tutorial, you have learned how to effectively use the Roto Brush Tool to precisely cut out moving objects. Don't forget to consider the settings and nuances to achieve the best results. Version 2.0 offers powerful features to bring your creative ideas to life.


