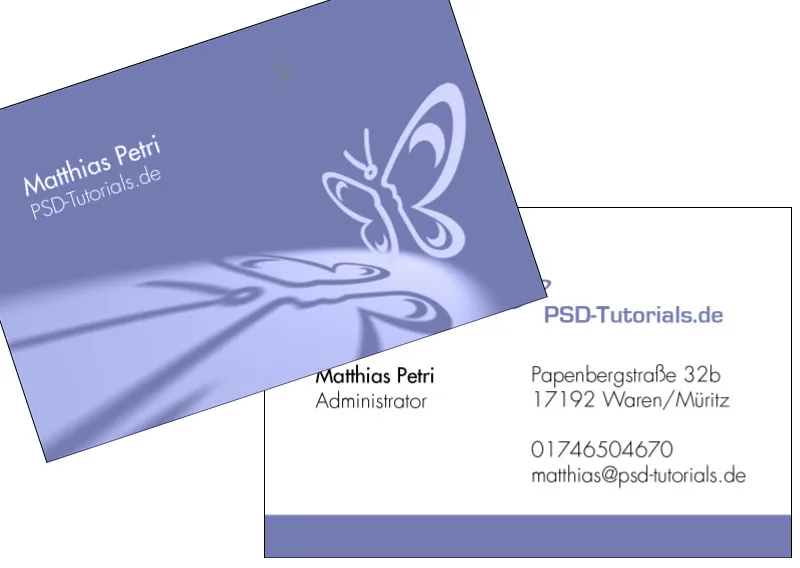
In this tutorial, I would like to create a 3D light and shadow effect for a business card using Photoshop only. The effect is particularly suitable for logos and initials of a person. The front of the business card is simple but beautiful, not too playful and yet modern in a pleasant way. The background is used for the contact and address data.
The 3D user will say about this effect: Very simple, no problem. But this effect should be displayed in Photoshop. At first glance, you might assume that the drop shadow was simply created as a separate layer and then transformed. However, I would like to show you a way using the 3D functions that also shows the shadow realistically and leaves much more scope for viewing angles. Replacing the logo or changing the initials will be very easy with the 3D functions - unlike with a variant using transformations.
A business card has a standard format of 85 x 55 mm. If you are unsure, it is best to simply visit an online print shop where you can have business cards printed. There you will find helpful tips on size, format etc. For example, at Flyerpilot under Business cards>Templates: I create a new document with Ctrl+N in the dimensions 89 x 59 mm. A 2 mm bleed is taken into account on each page from the outset. The mode is RGB for the time being. The effect can only be created in this color space, and only with Photoshop CS4 Extended Version.
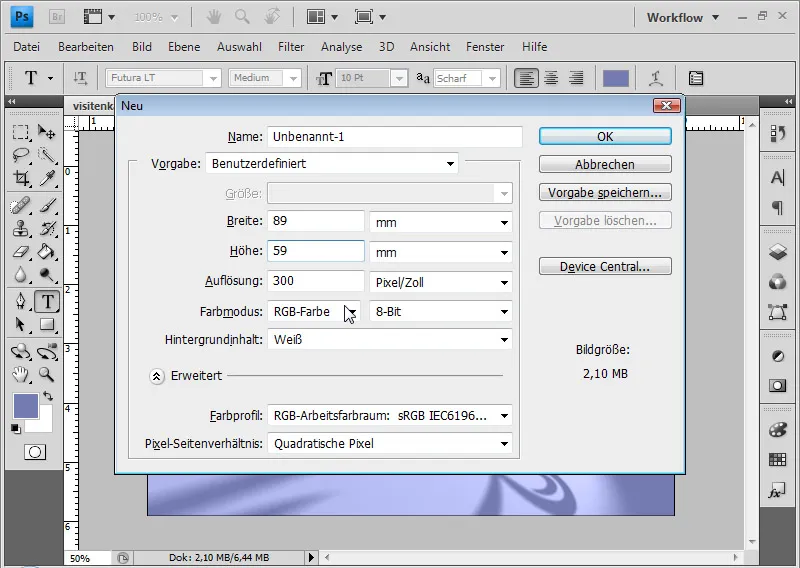
The ruler is set to cm. If I prefer a mm setting, I can set this in the preferences. To do this, I select Ctrl+K and Ctrl+7.
I now set up the bleed area on the ruler with the help of guide lines so that I can easily judge how my business card will look at the edges at any time. If the ruler is not displayed, I can show it by pressing Ctrl+R . Now I use the mouse to draw an auxiliary line from the ruler, which I place at a distance of 2 mm from the edge. By holding down the Shift key, I can place the guide line very precisely in mm increments. I do this for all pages.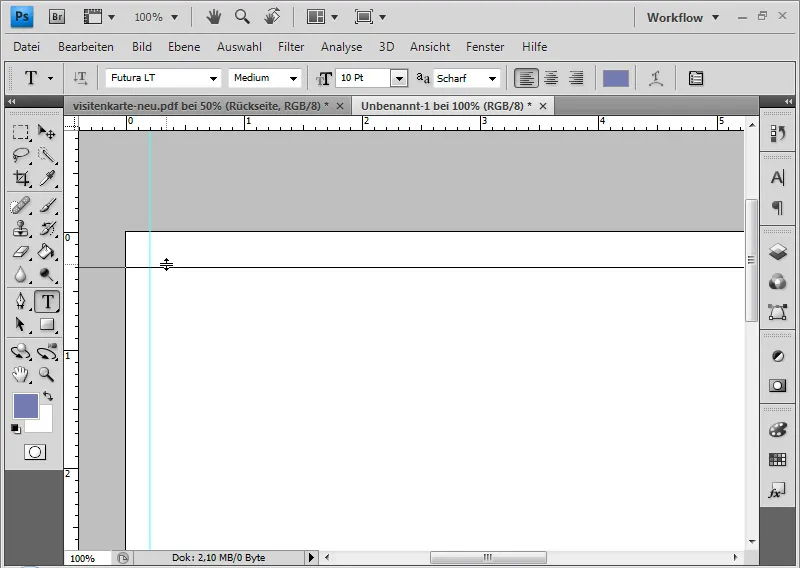
If the guides interfere with the layout assessment, I can hide them by pressing Ctrl+H. But then transformation controls, selections etc. are also hidden. I create a new layer and fill it with a 50 percent gray. The quickest way to do this is to use the keyboard shortcuts Ctrl+Shift+N and Shift+Reset.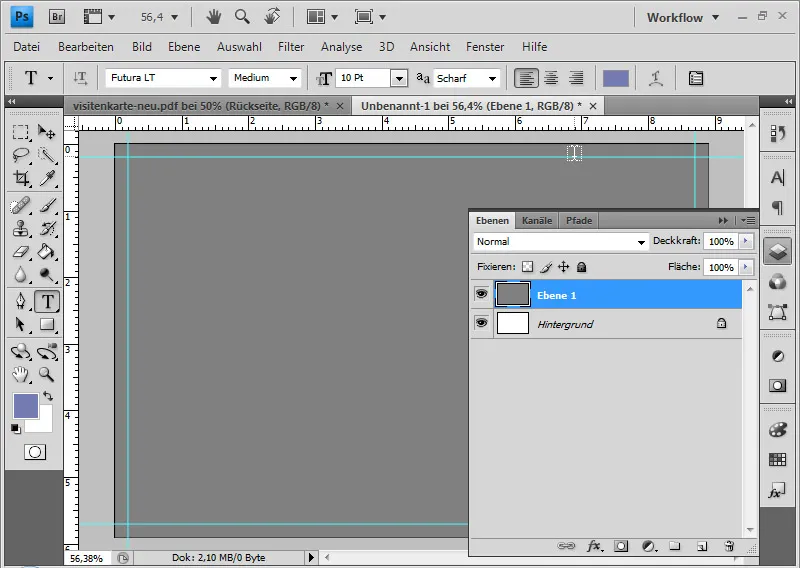
I place my desired logo, in this case the PSD butterfly, in a new layer. The logo is inserted into the document as a smart object. I enlarge the butterfly so that it just fills the space. I turn the gray layer and the logo layer into a 3D layer. The relevant layer is selected and converted into a 3D layer via the 3D>New 3D postcard from layer menu.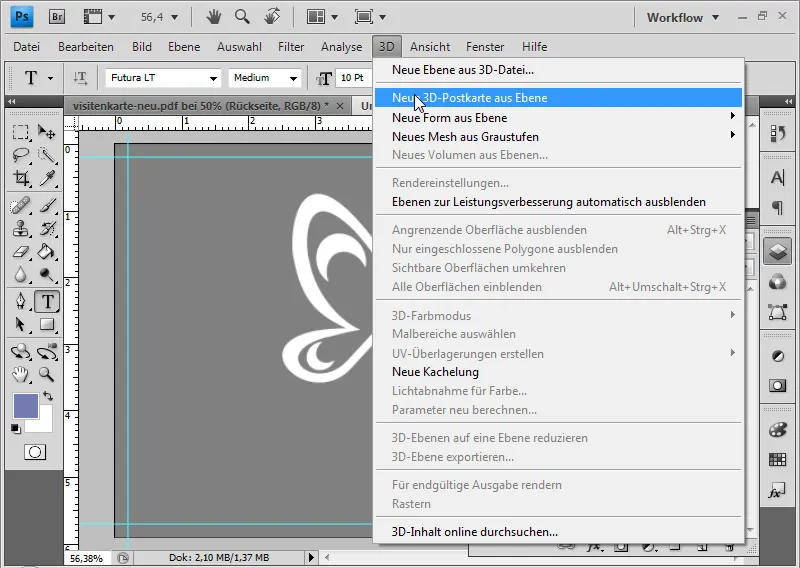
The two layers now have a small icon at the bottom right - similar to a smart object.
I call up the 3D object rotation tool K. 3D setting options are activated in the menu bar. There I set the orientation of the x-axis to -90. Now it becomes spatial. The gray layer becomes the floor on which the logo stands. The gray is now arranged like a floor to the document view and is therefore not displayed.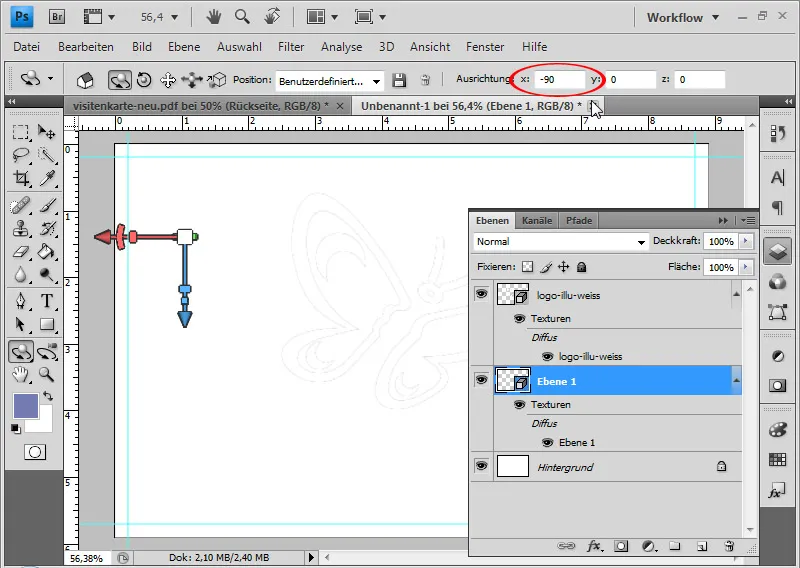
I can only see what has happened spatially when I rotate the objects at an angle.
Before I do this, however, I select both 3D layers and reduce them to one 3D layer. Unlike the Edit menu, I do this via the 3D>Reduce 3D planes to one plane menu. The layer contents can still be edited individually. I select the gray 3D layer and call up the 3D control panel via the Window menu. I filter the view for meshes and call up the 3D layer with the gray surface. Using the mesh drag tool, I drag the gray layer down so that it is placed where the butterfly ends. As a result, the butterfly will rest on the gray layer or fly just above it.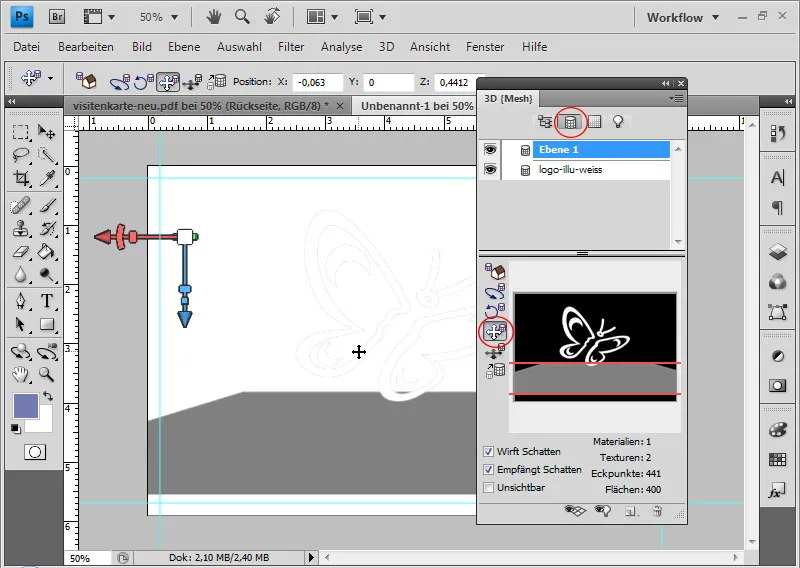
If I now change the viewing angle with the 3D object rotation tool, I slowly get a feeling for the 3D dimensionality.
With the Mesh Scale tool in the 3D control panel, I can enlarge the gray area. I simply drag the area upwards intuitively until I can no longer do so. This is important because a light source is placed in the next step and the light and shadows need enough area to be fully effective.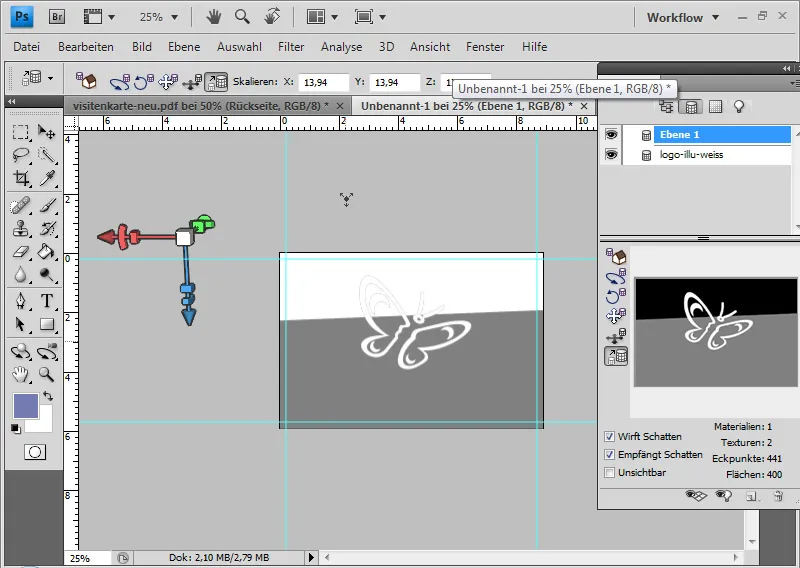
If there are still white areas in the image, I simply create a new layer and fill it with the 50% gray or fill the background layer with the gray.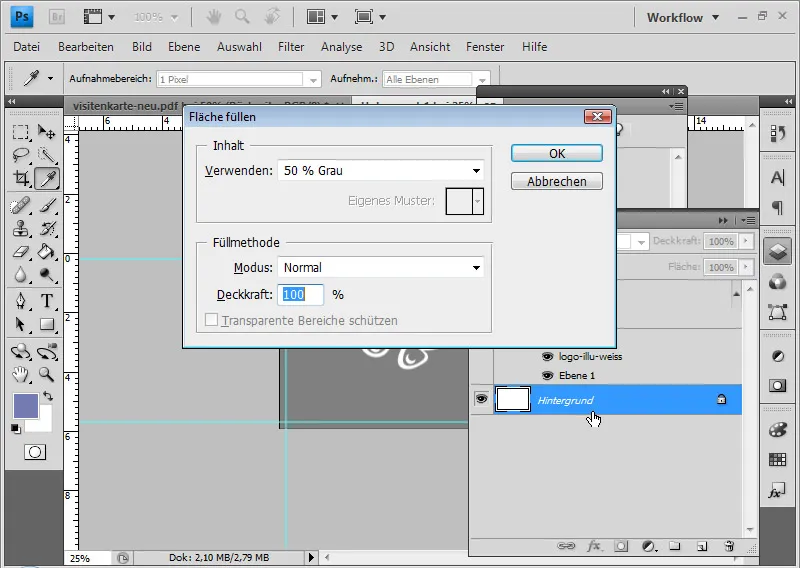
It is advantageous to place the butterfly now as it should be later in the picture. I use the 3D object rotation tool to rotate the butterfly into the correct position. I use the Move toolto move the butterfly to the right-hand edge of the picture.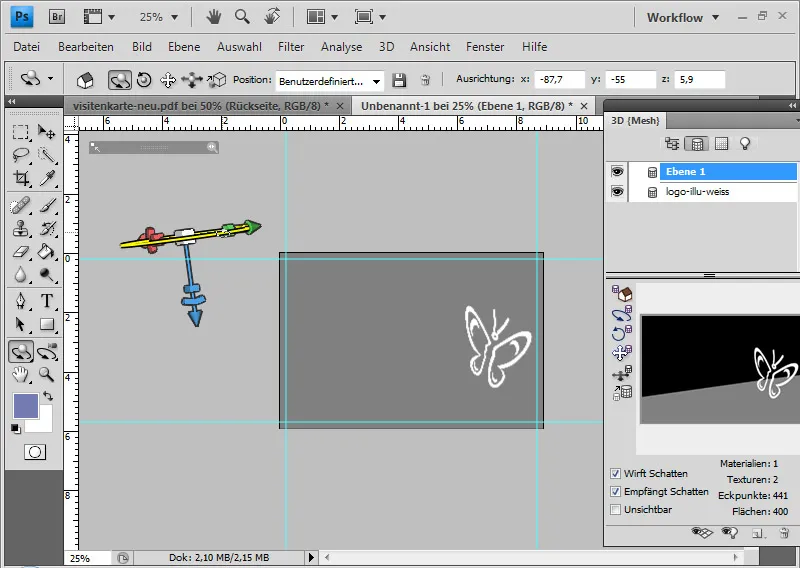
I now filter for light sources in the 3D control panel. I select New spotlight in the operating menu.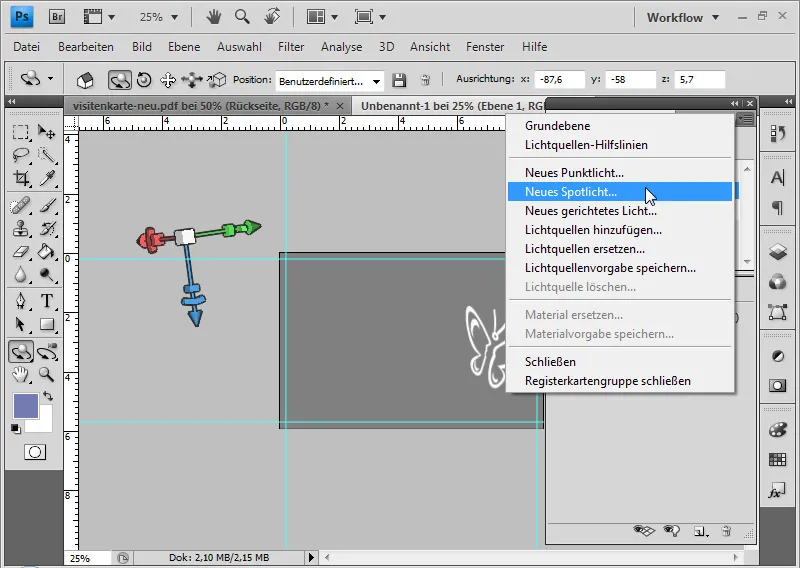
I then activate the light sources in the footer of the 3D control panel.
Now I place the light source at the top right behind the butterfly so that the butterfly is illuminated from behind and the shadows and the light on the left are placed on the floor in front of the butterfly. To do this, I use the three tools for rotating, dragging and moving the light source.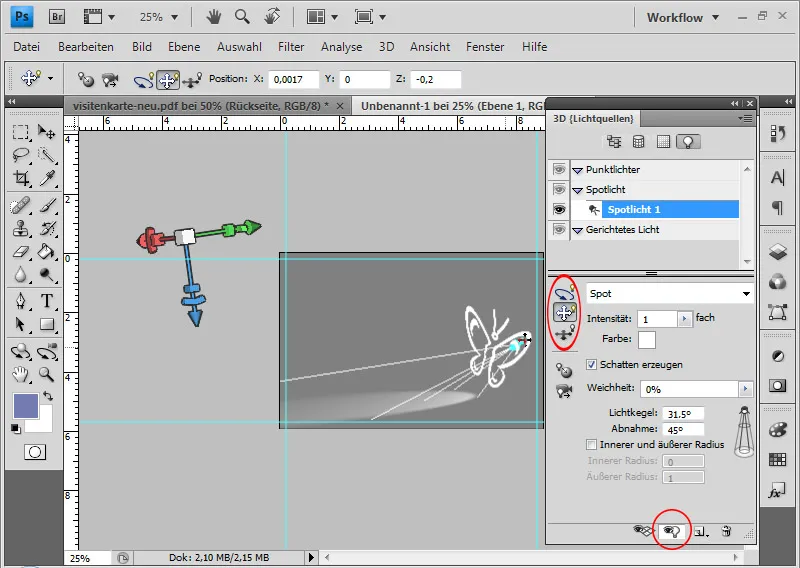
If the wireframe model of the light shows the correct path, I can filter the entire scene in the 3D control panel. I set Raytraced as the default and the light and shadows are rendered.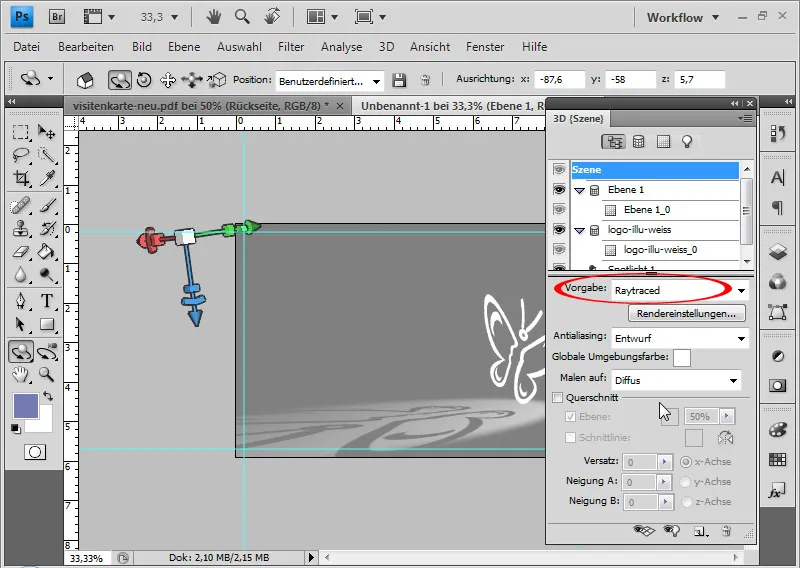
Now I can fine-tune the incidence of light or add another light source to the image.
A new layer in Color mode gives the business card a beautiful lilac tone.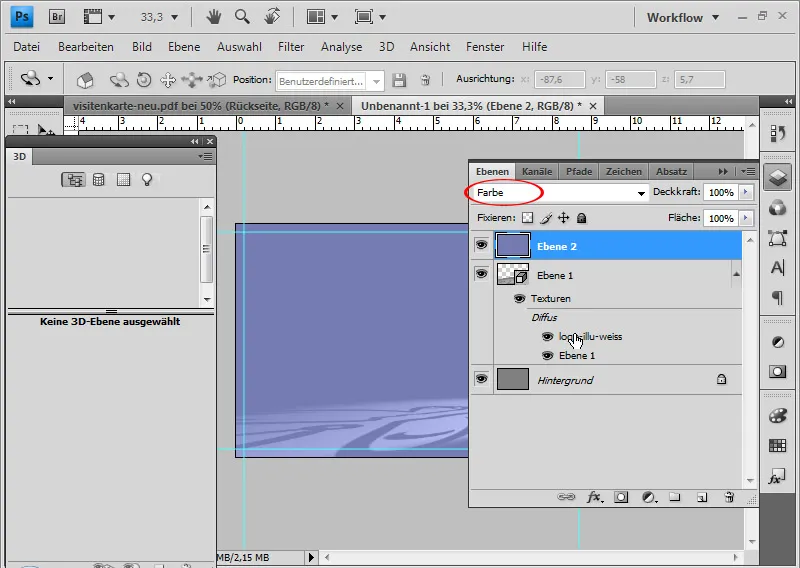
I double-click on the butterfly layer within the 3D layer so that it blends in perfectly with the butterfly. A PSB file opens for editing the smart object original. There I set a color overlay with my desired color for the butterfly in the fill options.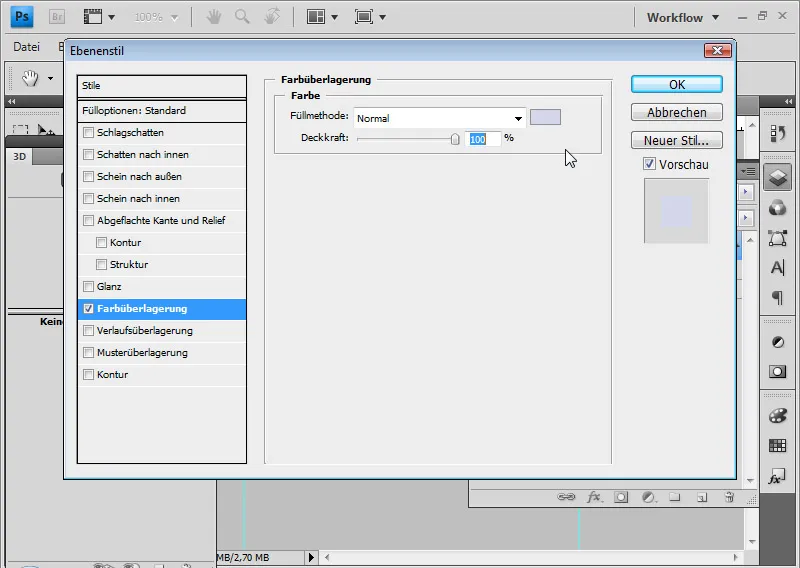
Saving the PSB file also updates the PSD file.
The shadow still looks a bit harsh on the left edge. I therefore set 10 percent softness in the 3D control panel to make the shadow look more realistic.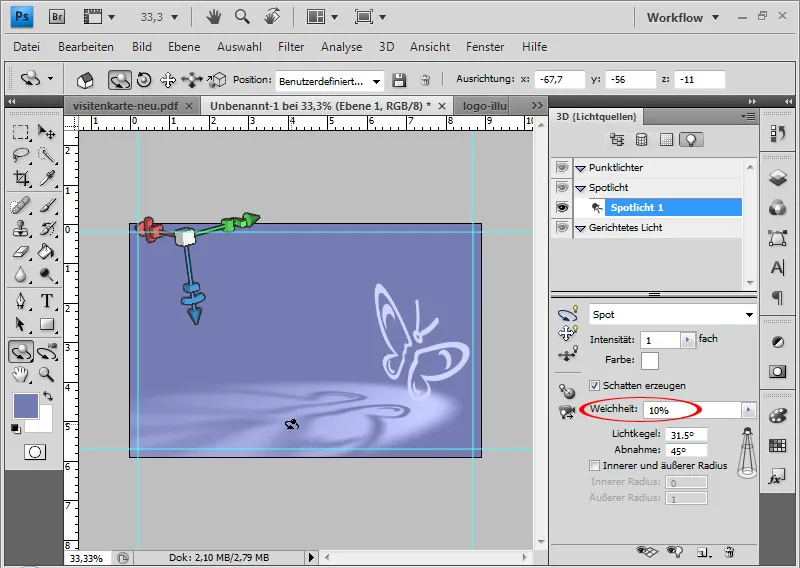
In the last step for the front, I create a text with a white font color in the Futura LT font. The upper font has a font size of 14 and the lower 11.
The front - and thus the 3D light and shadow effect - is finished.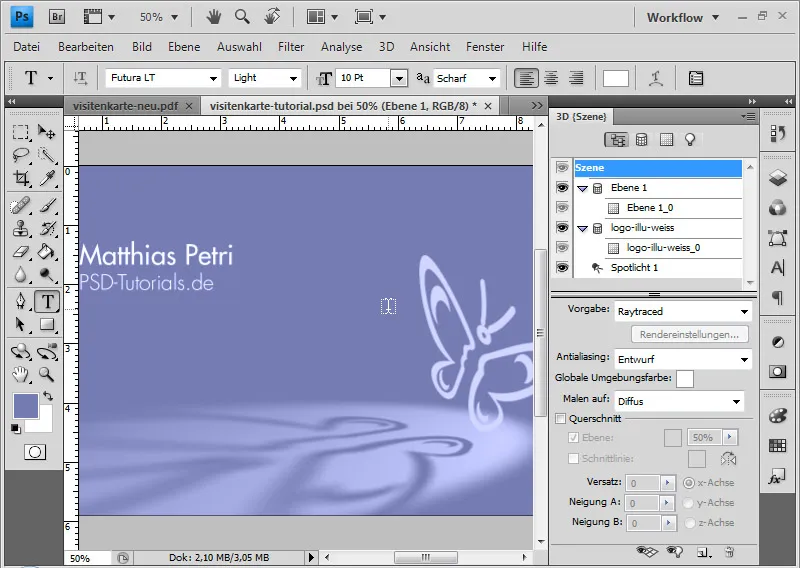
The advantage of this approach is that I can now simply continue to edit my logo in the PSB file . The original is automatically updated with every change. For example, if I now hide the logo and create a text layer with my initials "MP", I get a 3D light and shadow effect in my file.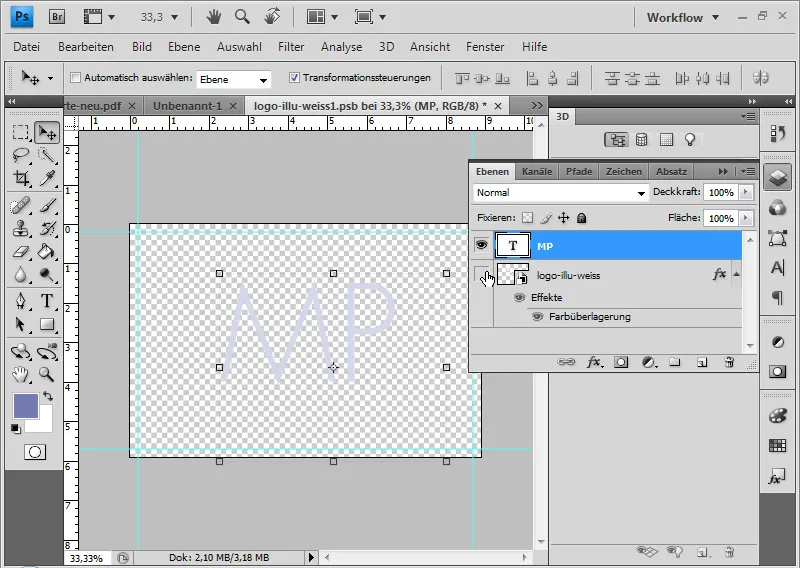
The initials now have the 3D light and shadow effect.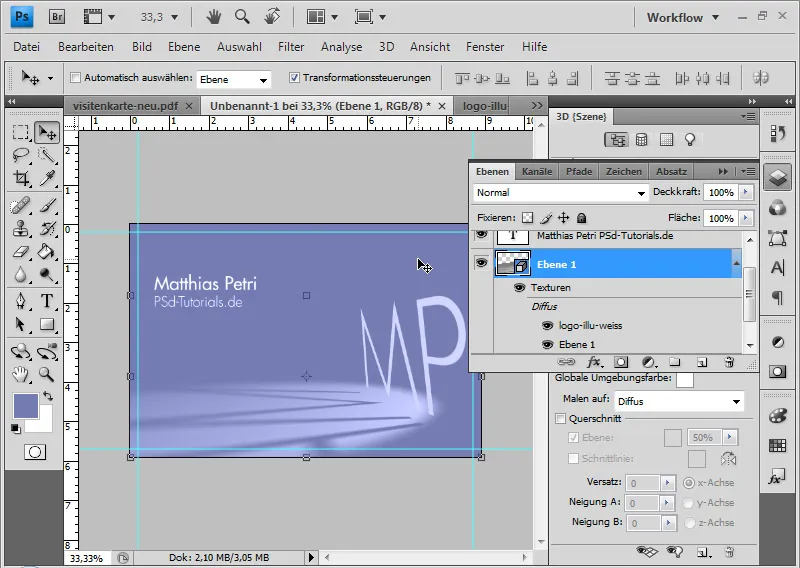
I merge all the layers into one group and call this the "front". Another group is created for the back. At the bottom, I use the rectangle tool to create a lilac-colored frame that carries the lilac of the front for the back. The logo is placed and also highlighted in this lilac shade. The last step is to add the contact and address details.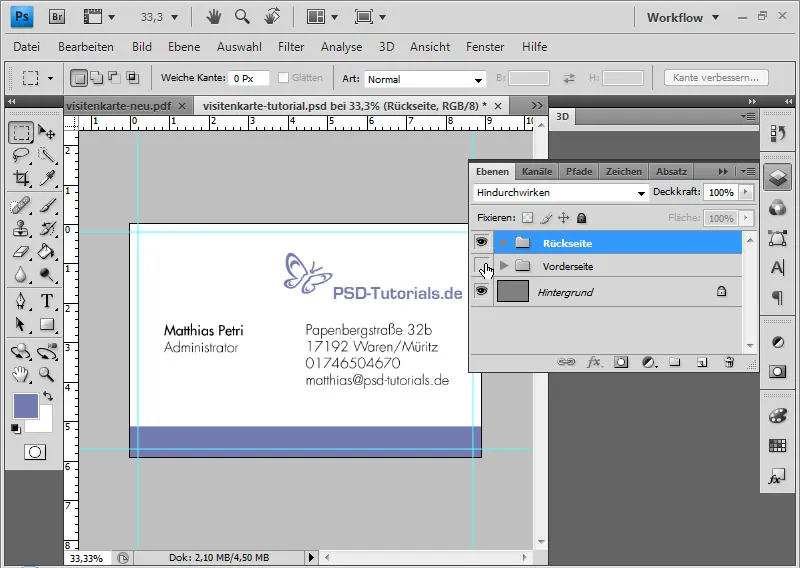
Important: Before the document is converted to CMYK, save it as a PSD so that changes can be made at any time, especially to the front. Only then convert the document from RGB to CMYK via the Image>Mode menu. Then output the document as a PDF file. Now go to Saveas, select the PDF format and give the file a name. For printing, it makes sense to export the file as a PDF in the PDF/X-4 standard.
Many print shops also provide instructions on what to look out for in the print files. For example, Flyerpilot.de, an online printing company, provides an overview in the form of a checklist for business cards on what to look out for when exporting: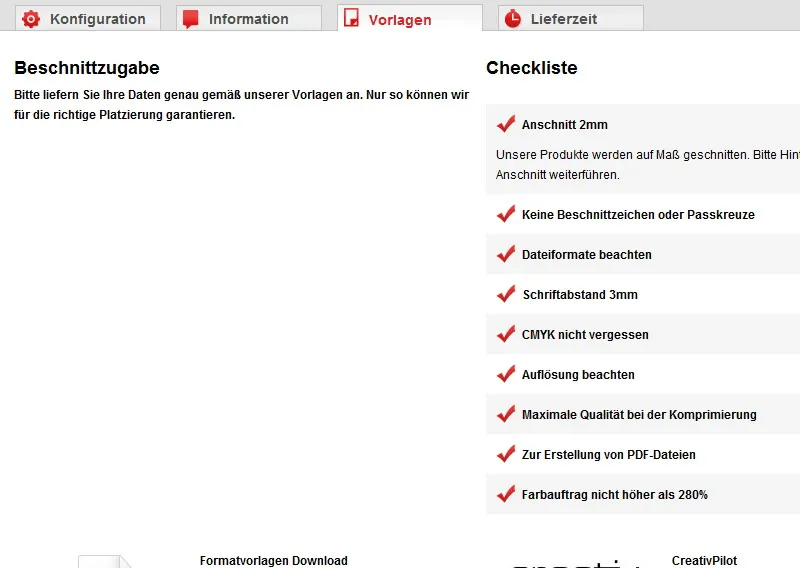
It makes sense to ask whether the print shop has problems with transparencies. This is particularly important if vector graphics and fonts with effects (drop shadows) are used. For example, I see in the checklist that the ink application must not exceed 280 percent. Unlike Adobe InDesign, which should be the preferred program for layout work, Photoshop cannot retain color values. If I change from RGB to CMYK, I do not get pure black for my black font, but a four-color output. In Acrobat under the menu item Advanced>Print Production>Output Preview... I can see that my black has a higher color application.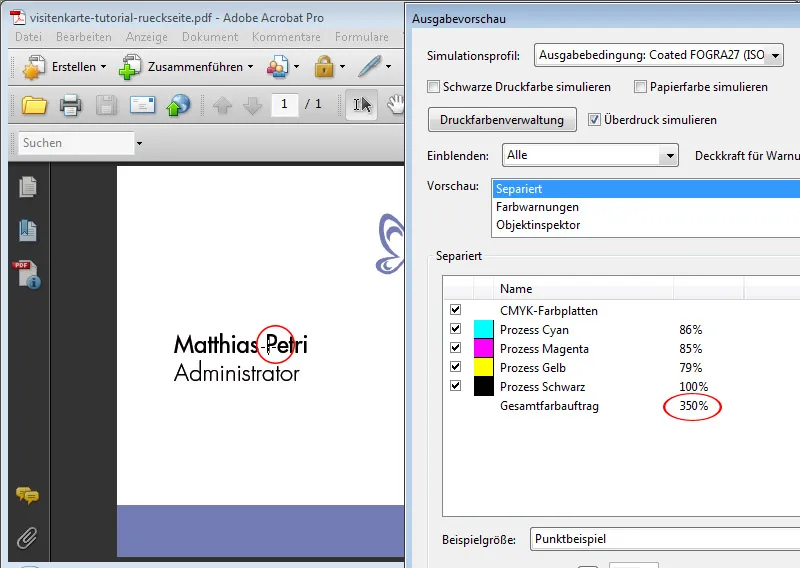
It therefore makes sense, if you are not laying out in InDesign, to set the font only after the color mode change or to clean it from the CMY color values afterwards. I can do this by simply zeroing the black font in the CMY values in the color selector.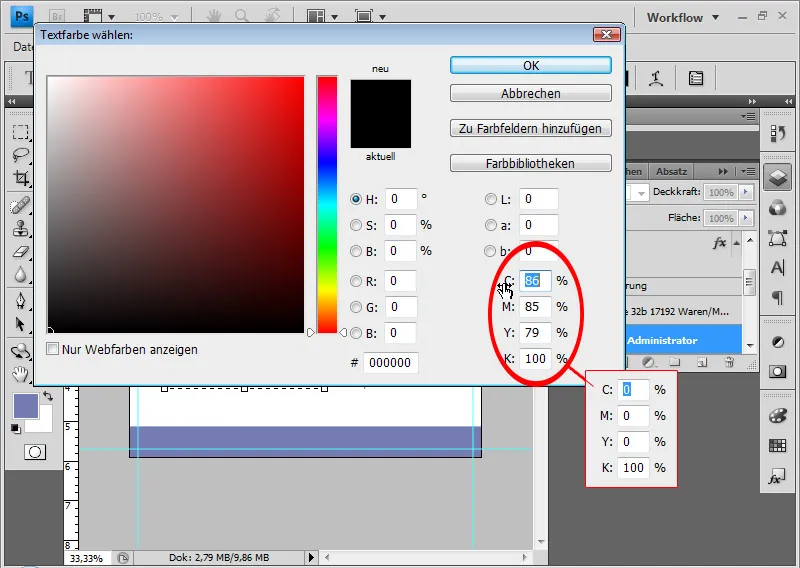
The advantage of an online print shop is that I have a real-time calculation with changing inputs (paper/number etc.). The payment options even include PayPal!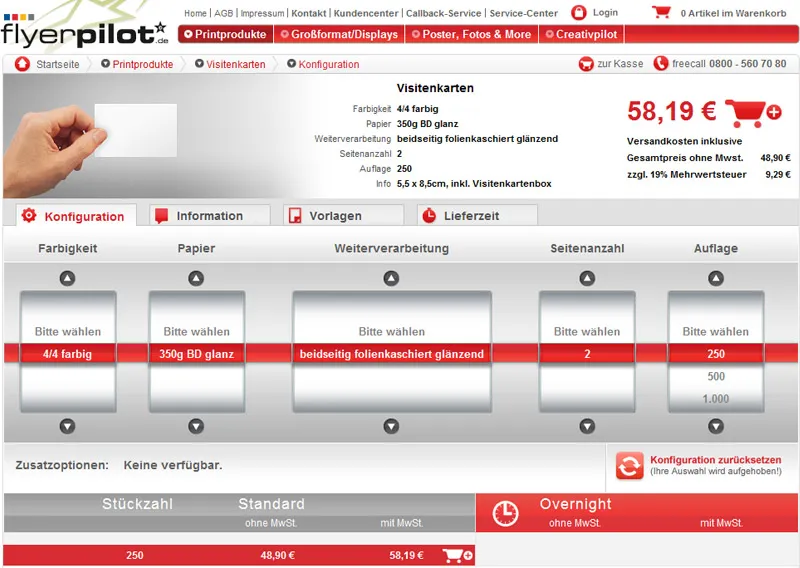
On request, I can also have a proof of the file to make sure that everything is in order.
Final result - with bleed: