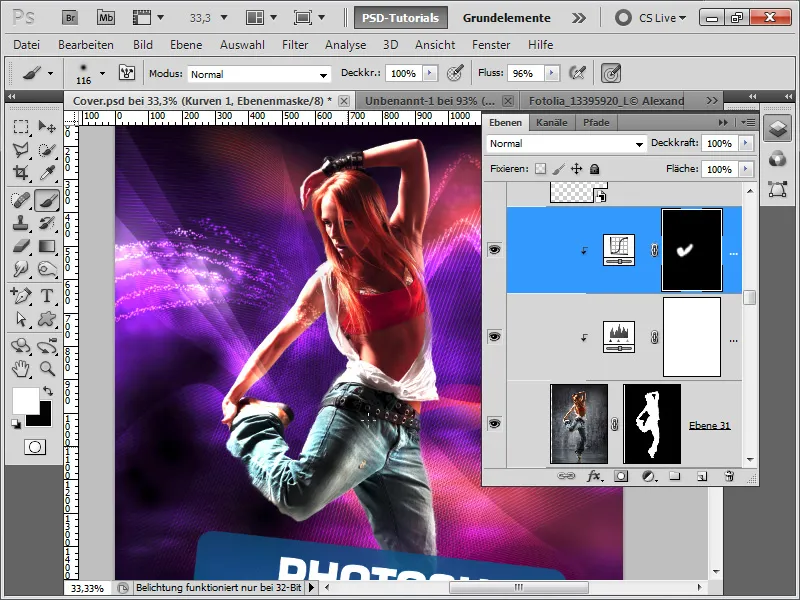
An impressive cover design is created by combining creative elements such as dynamic squiggle lines, futuristic Sinedots, and a perfectly cut-out model. With Photoshop, you can quickly and efficiently implement these elements to create a modern and appealing cover. In this tutorial, I will show you how to create squiggle lines and Sinedots and cut out a model with just a few clicks to create an impressive design. Let's get started and unleash your creativity!
Step 1:
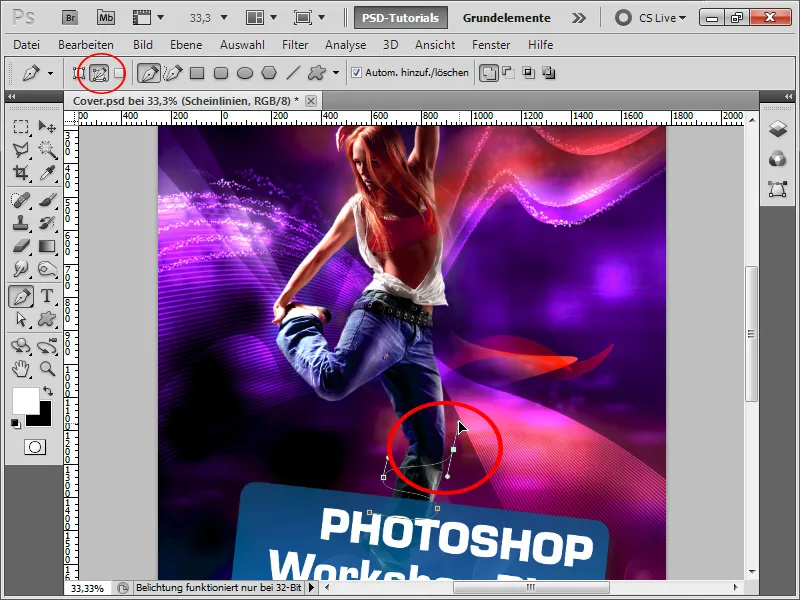
Now I simply open the finished cover, hide the glowing line, and create a new layer above it. Then, I grab the Pen Tool and create a new path. It is important to have Paths selected in the Control panel. Next, I create a point at the bottom left of the leg. Another click a little to the right, this time without releasing the mouse button. I can now adjust the curve by dragging with the left mouse button that I keep pressed.
Step 2:
With the Direct Selection Tool, I can influence the curves and anchor point positions afterwards. I can also create new anchor points on the existing path using the Add Anchor Point Tool.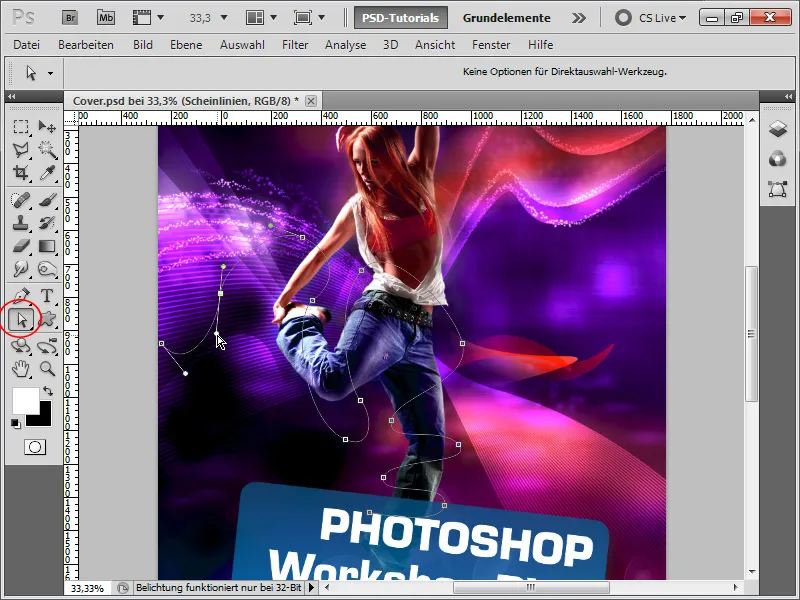
Step 3:
Next, I take a round brush with full hardness and white color. Now, into the Paths panel, and then, I right-click on my path and select Stroke Path. It is important to check the box for Simulate Pressure, as this will fill the tip of the path thinly and the center thickly.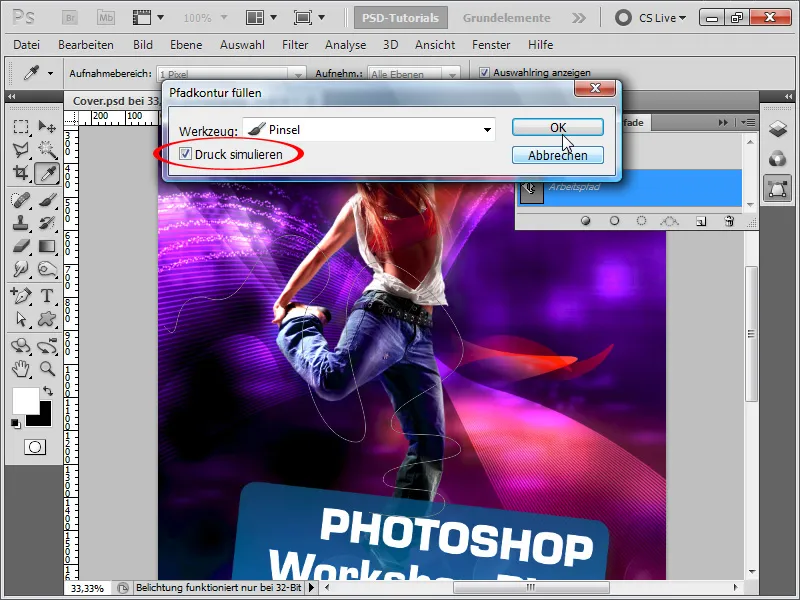
Step 4:
After that, I activate some blending options to make the line glow beautifully.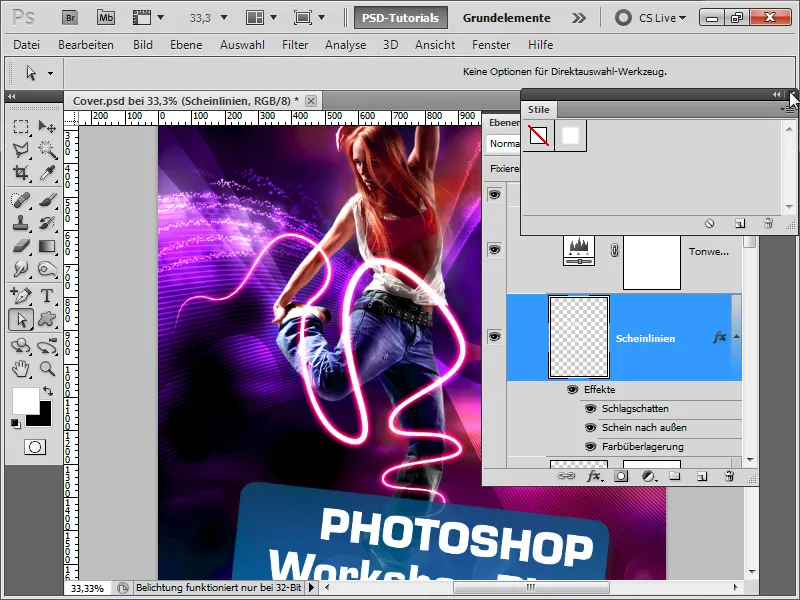
Step 5:
Basically, only the Drop Shadow is important:
Step 6:
And Outer Glow (Color Overlay is not important, unless the stroke color was not White, then you can quickly correct it with this):
Step 7:
Now I add a layer mask to my layer and use a brush to hide certain areas, creating the effect that the line goes around the body.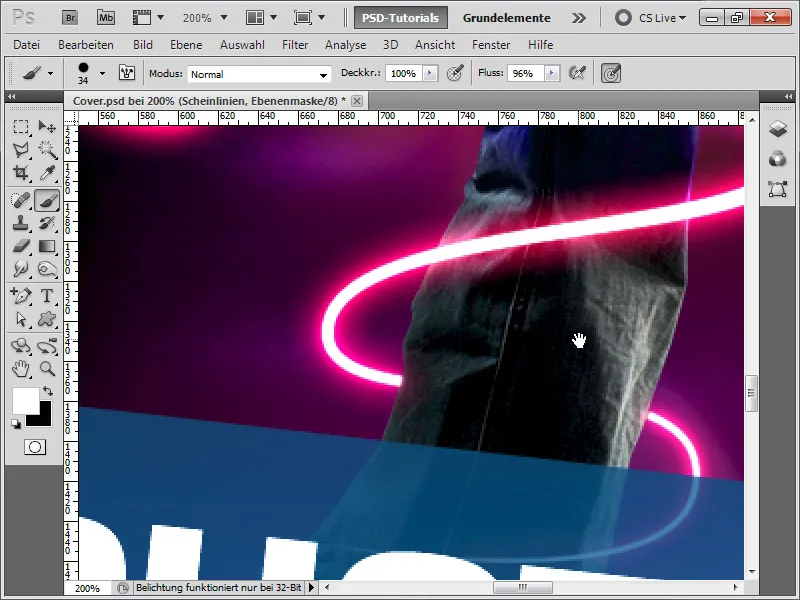
Step 8:
The genius part is that I only need to change the color in the Drop Shadow+Outer Glow from Red to Blue, and then my result looks like this: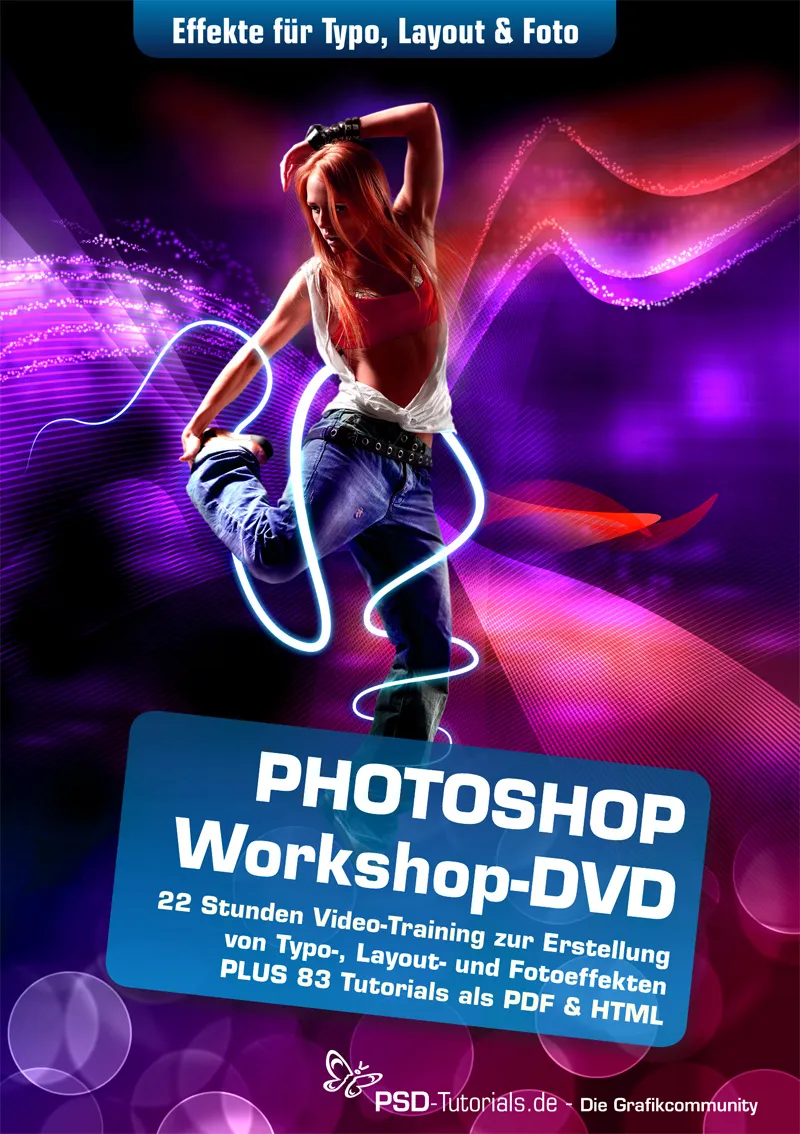
Step 9:
In the next step, I want to show how the Sinedots (dotted lines) were created. I create a new document in 1x10 pixels, convert the background layer to a regular layer, and fill only the two top pixels with white. Then, I press Ctrl+A and save it as a pattern.
Step 10:
Now I go back to my document and apply my pattern on a new layer using the Fill Tool. I convert the layer into a Smart Object.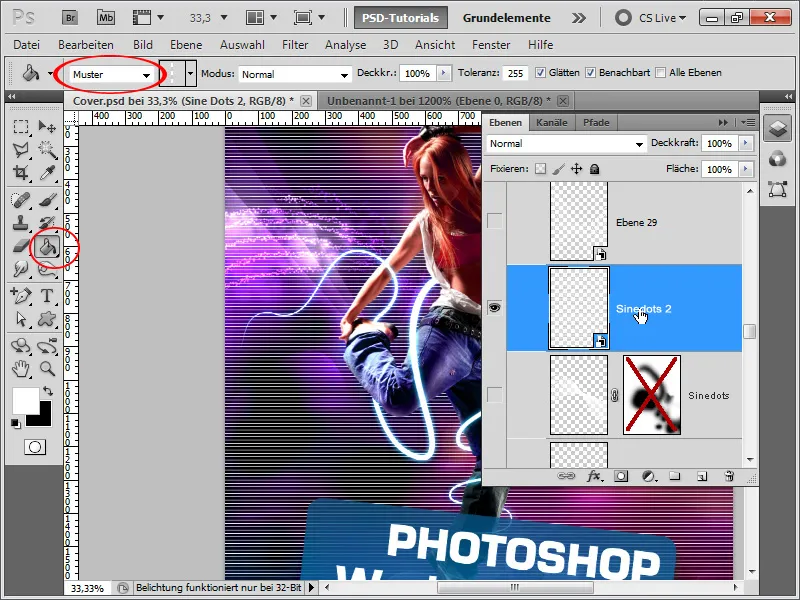
Step 11:
Next, I press Ctrl+T and right-click>Warp. Then I drag the upper right point to the lower left corner and the lower left corner to the upper right corner.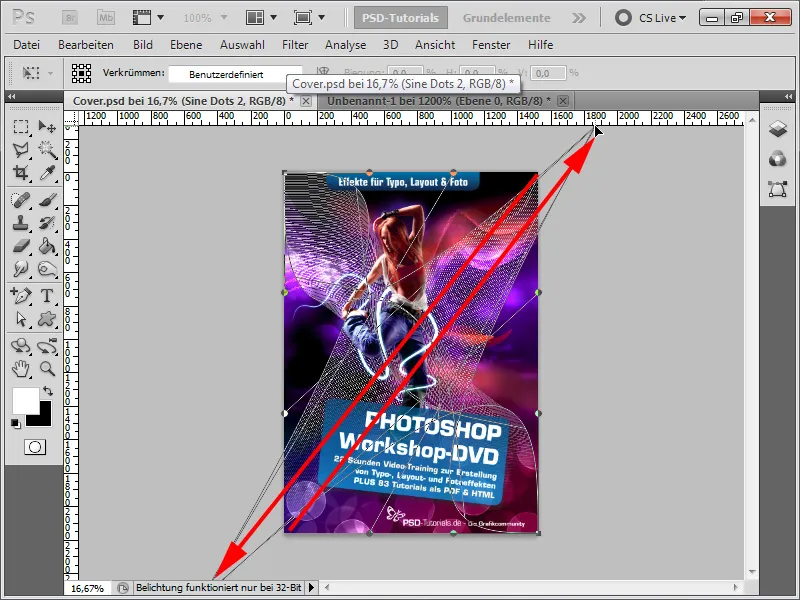
Step 12:
The result is already quite good.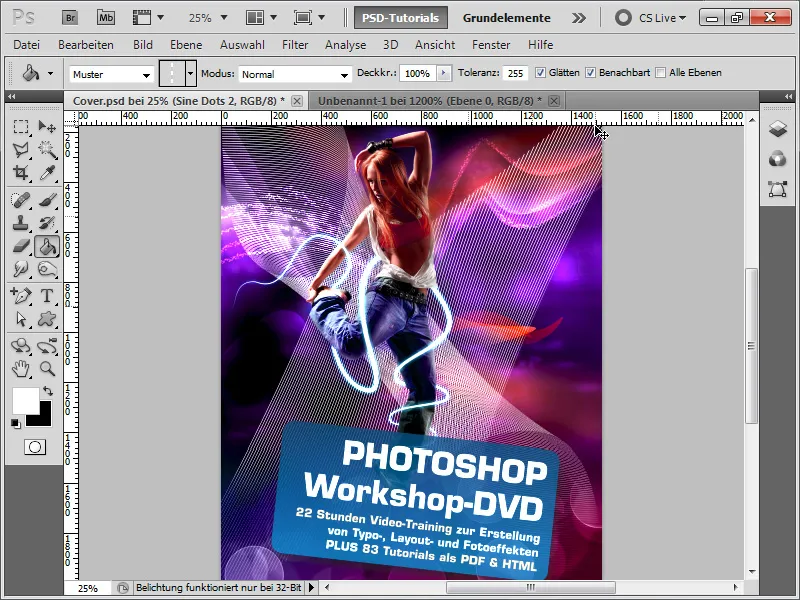
Step 13:
However, I set the fill method to overlay, so that the colors adapt to the background. Additionally, I duplicate the layer, rotate it slightly, reduce the opacity a bit, add a layer mask, and hide a few areas. The result looks like this: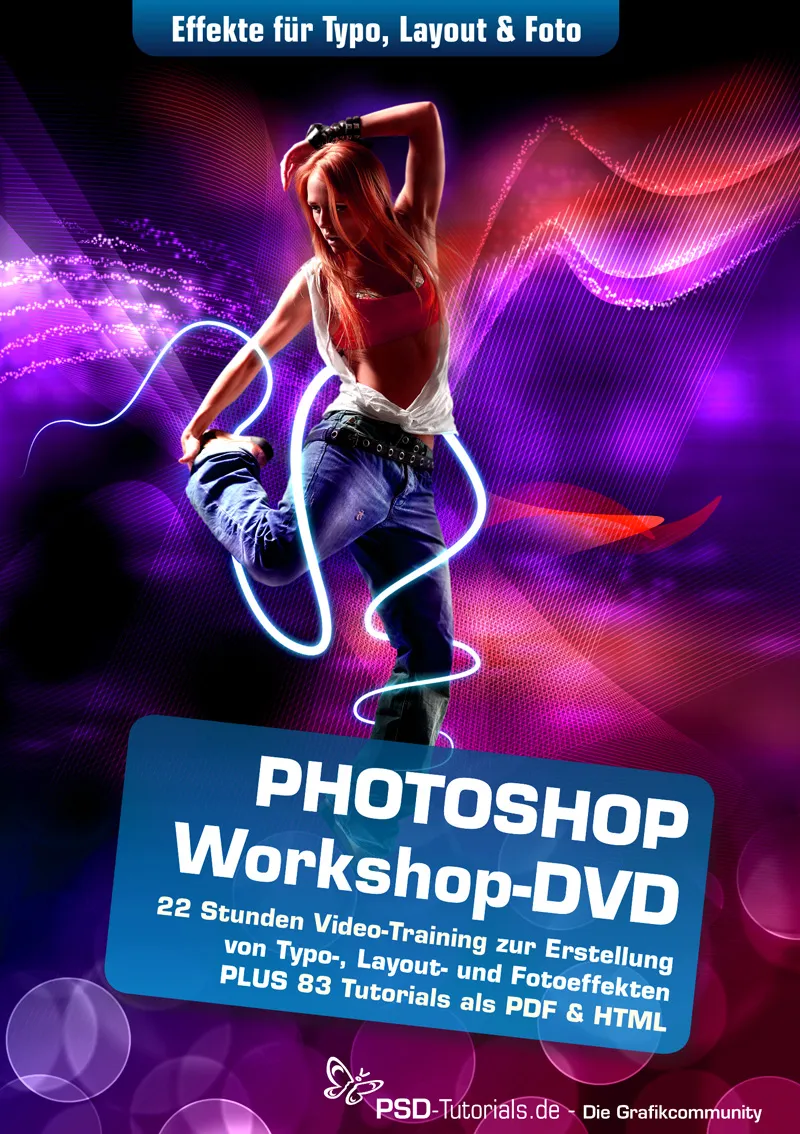
Step 14:
In the final step, I want to give a few tips on how to extract the model: I select it using the quick selection tool and then click on refine edge.
Step 15:
This way, I can perfect the selection. I have various sliders available for this. To better extract hair, I use the radius refinement tool and simply paint the area where the hair is located. After I finish, I select output to: layer mask.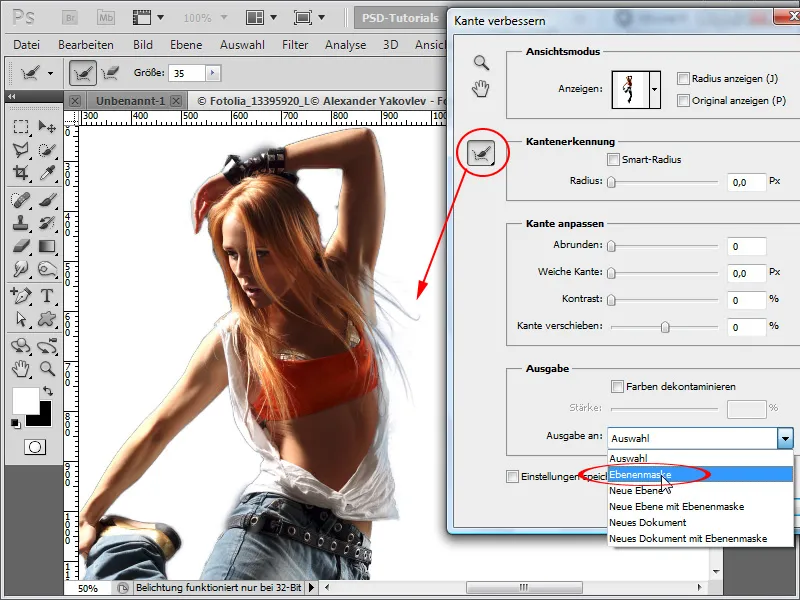
Step 16:
The result is impressive for the few seconds I invested: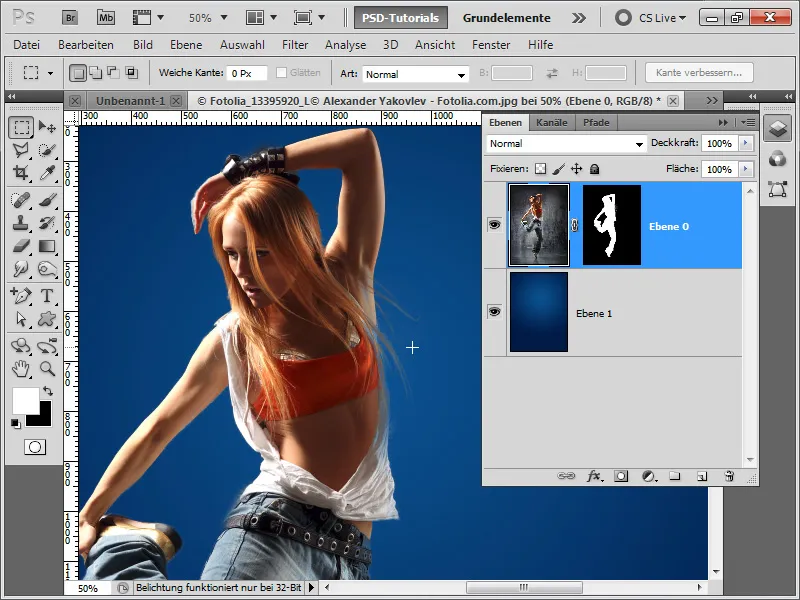
Step 17:
My tip at the end of the tutorial: I always use adjustment layers and press Ctrl+Alt+G to create a clipping mask from it, so that the adjustment layer only affects the underlying layer. This way, I can quickly improve my image with the levels adjustment as an adjustment layer without changing the background as well. I can also, for example, darken/lighten only certain areas in the curves adjustment as an adjustment layer by using the layer mask that is automatically included.