Tight deadlines and projects that are tightly scheduled from the outset always force us to work effectively.
It's fun and a challenge, but every now and then there are tasks that we can't avoid. One such task is rendering - and rendering, as we all know, can take quite a while.
To avoid this - and to be able to use the time during rendering effectively - there is the option of rendering the compositions externally. This was already possible from CS6 and now - in the CC version - the Media Encoder is perfectly integrated into After Effects.
The most convenient way in After Effects is of course to simply add the composition to the render list.
However, we can't do anything in the program during render time. The whole program blocks during rendering.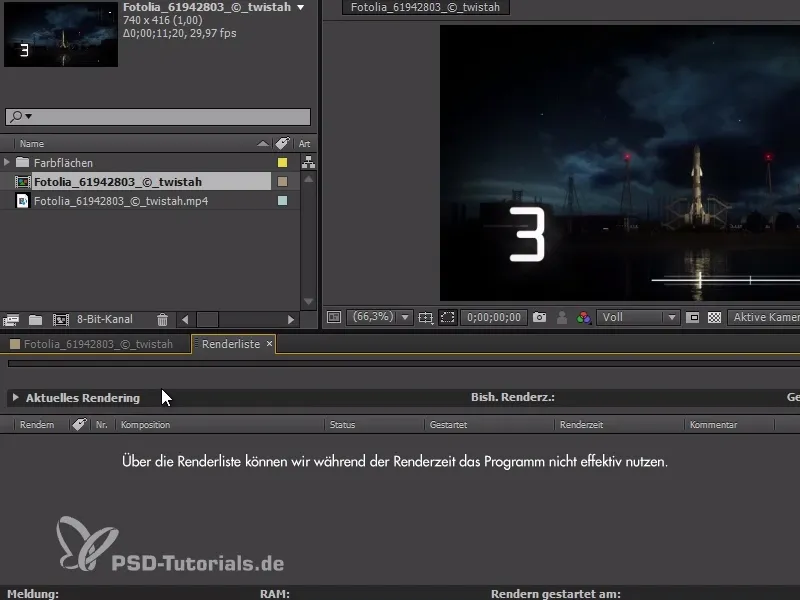
The Media Encoder is great - it's a program that comes with the Creative Cloud and is only for rendering After Effects and Premiere Pro files. Of course, it can also convert videos, because that's what it was actually designed for.
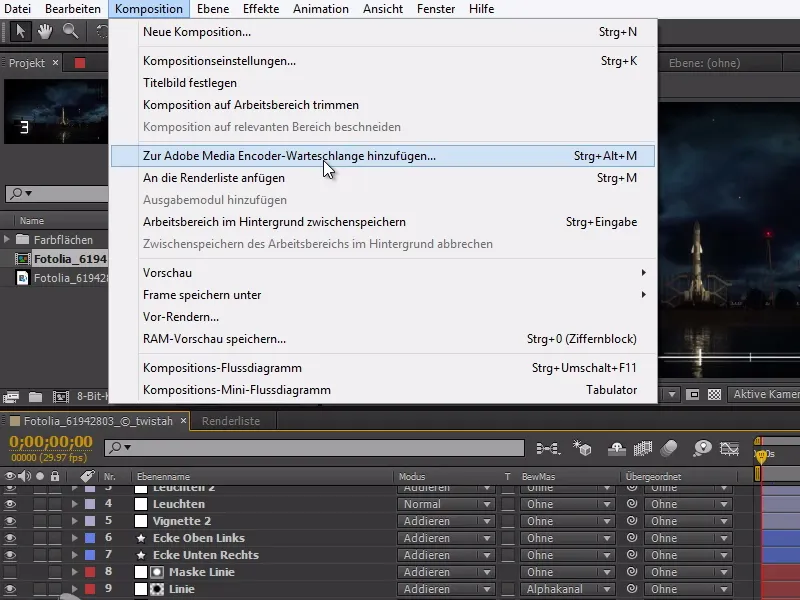
We can find the option under Composition>Add to Adobe Media Encoder queue...
This leaves After Effects as it is and only the Media Encoder starts.
In the Media Encoder window, we can now simply make the render settings and select the format, just as we are used to in After Effects.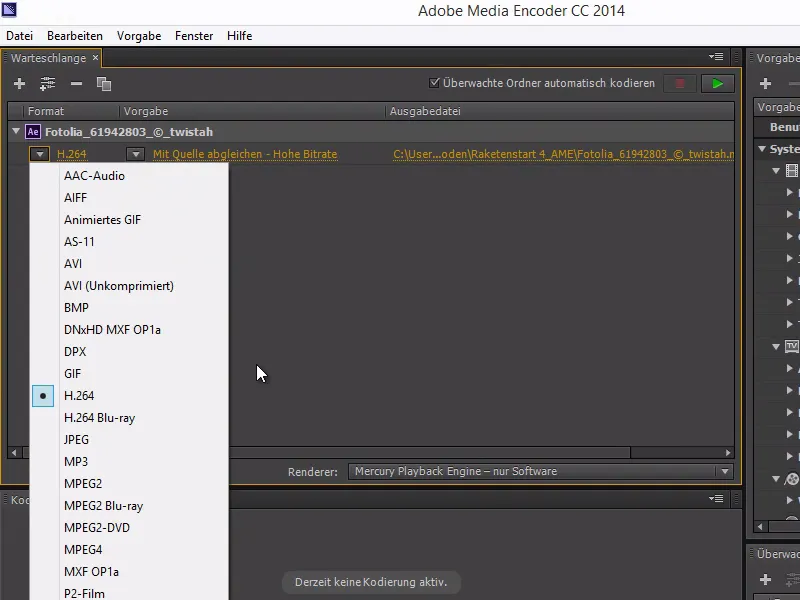
If we click on Compare with source, we get to the export settings.
Here we also find some of our familiar settings, such as some video and audio settings.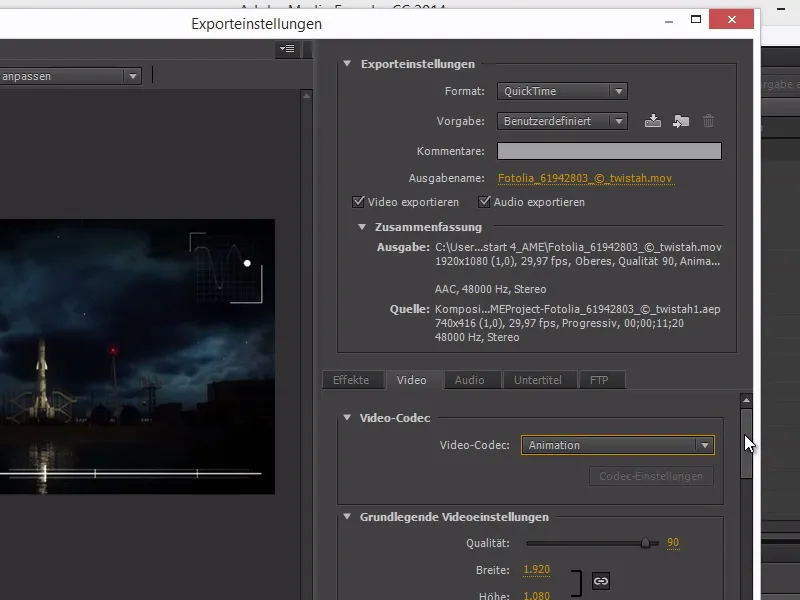
We also have the option of adding a watched folder or a few watched fol ders.
In these folders, all files that end up there are automatically processed by the Media Encoder.
This means you can save After Effects files or videos here and they will be converted.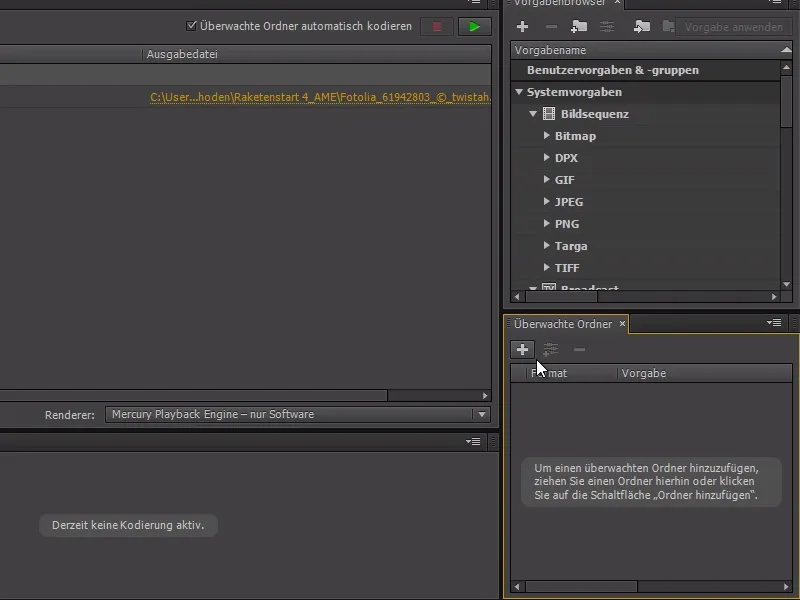
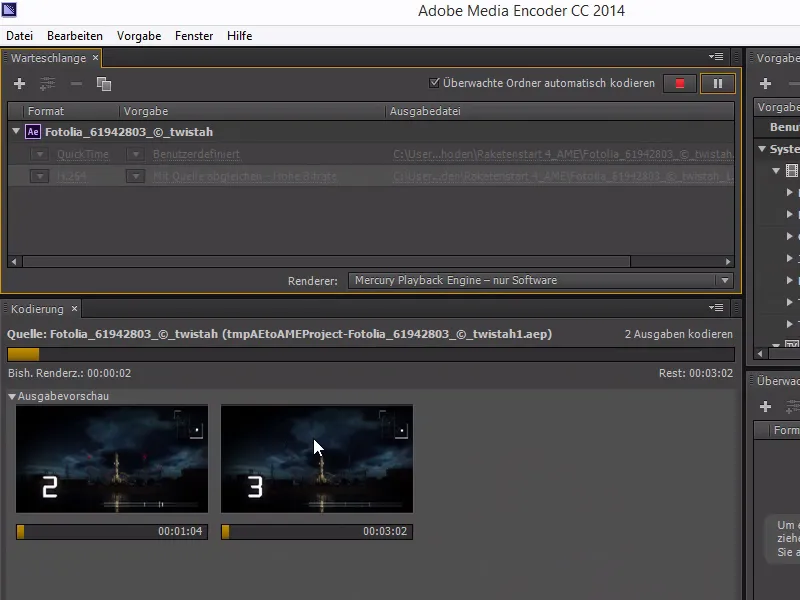
It is also possible to work with two output modules.
With Ctrl+D we can duplicate the output module and thus, for example, render out the After Effects file in several formats.
In the example I use an MP4-H.264 version and in the templates I recommend the Vimeo resolution. It is quite high quality with a good bit rate.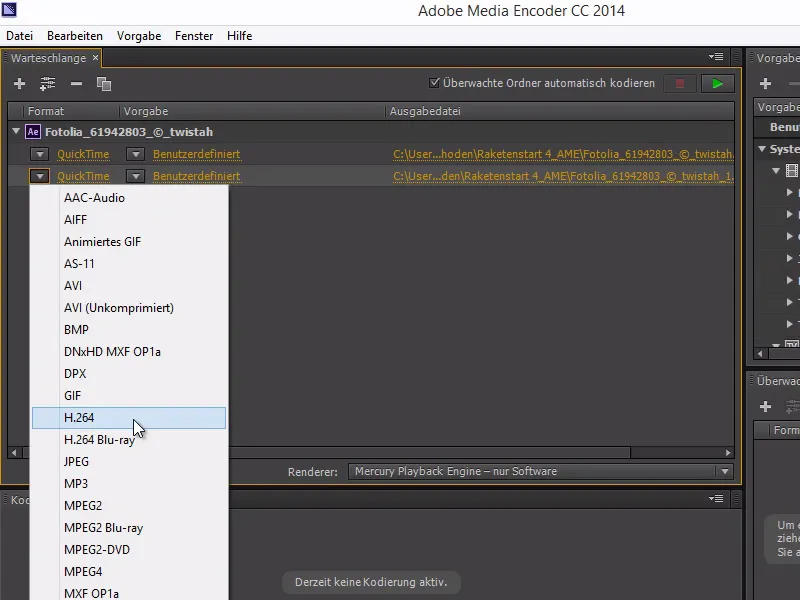
If we now click on Play, we can see live below how much progress has been made.
Both outputs are now encoded at the same time and we will have a master file later.
But the best thing about it - we can continue working in After Effects without any delay.