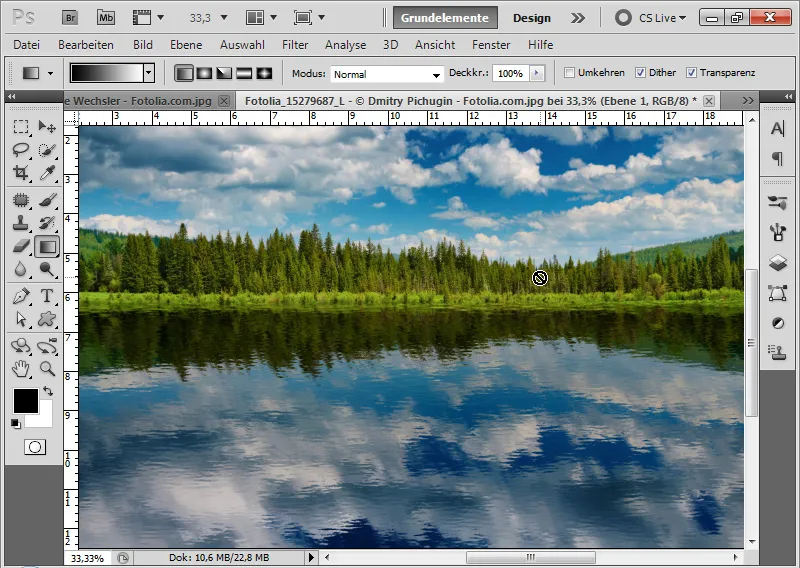
Reflection effects give depth and realism to your designs – whether for shiny objects or a perfect reflection on water. With Photoshop, you can implement these effects precisely and create both realistic and creative reflections. In this tutorial, I will show you step by step how to create reflection effects for different surfaces, from sharp object reflections to gentle water reflections. Let's get started and give your designs more dimension!
Simple and quick reflection for flat objects
In the first example, I used a filmstrip template with several images already placed. Since the template is straight, I have optimal conditions to create a reflection. The filmstrip is a Smart Object in the Layers panel.
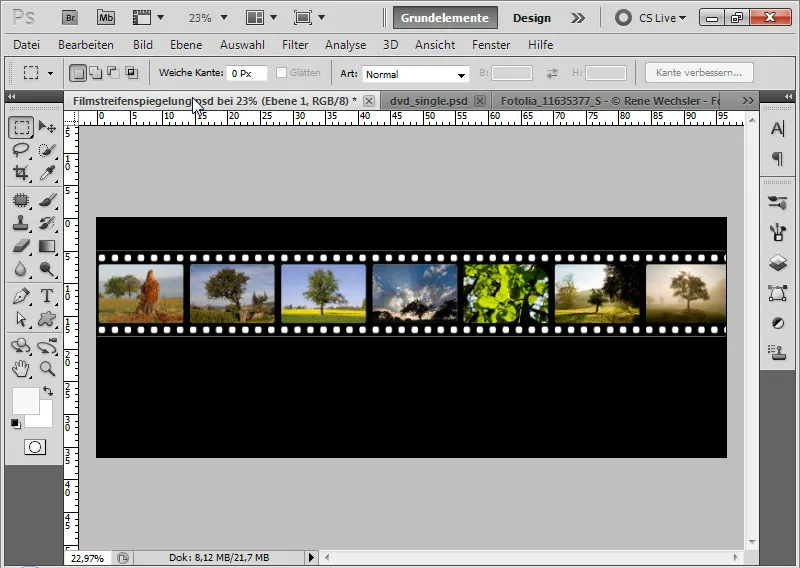
Step 1: Creating the reflection
I duplicate the Smart Object using the shortcut Ctrl+J and use the shortcut Ctrl+T to transform it. I grab the top anchor point and drag the filmstrip template downwards to create a reflection. Alternatively, I can simply choose Flip Vertical.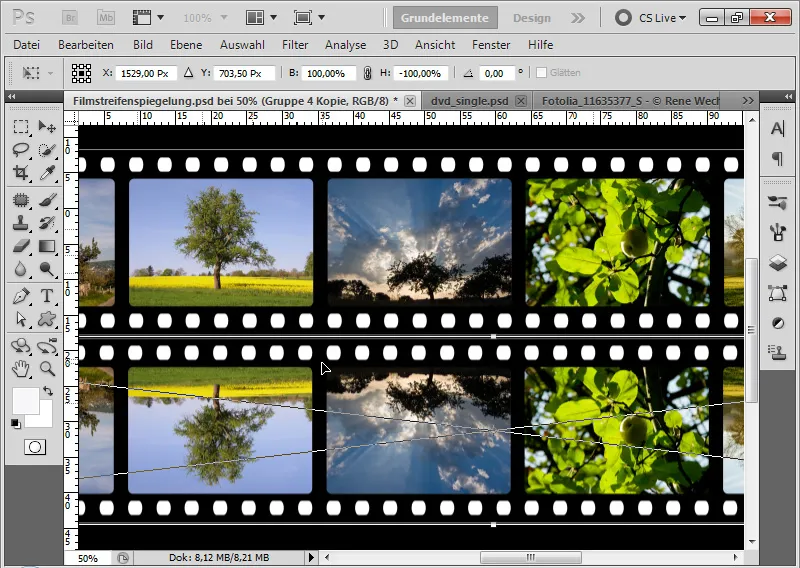
Step 2: Reducing opacity
I reduce the opacity of the duplicated Smart Object layer to 40 percent.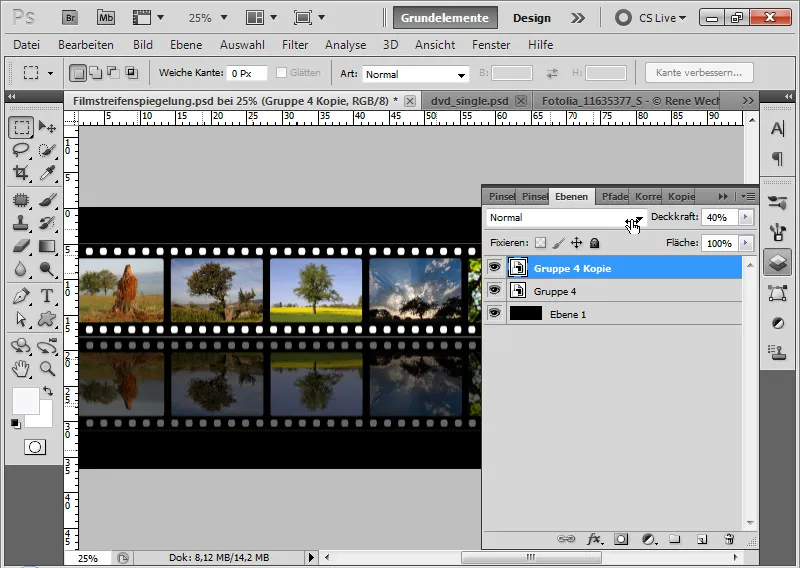
Step 3: Masking the reflection gradient
I add a layer mask to my Smart Object duplicate and select the Gradient tool with black-white color. Now I mask the lower area to create a soft transition in the reflection.
Note: Depending on the background color, I may need to adjust the opacity and the gradient. A white background will hide image parts much more than a black background.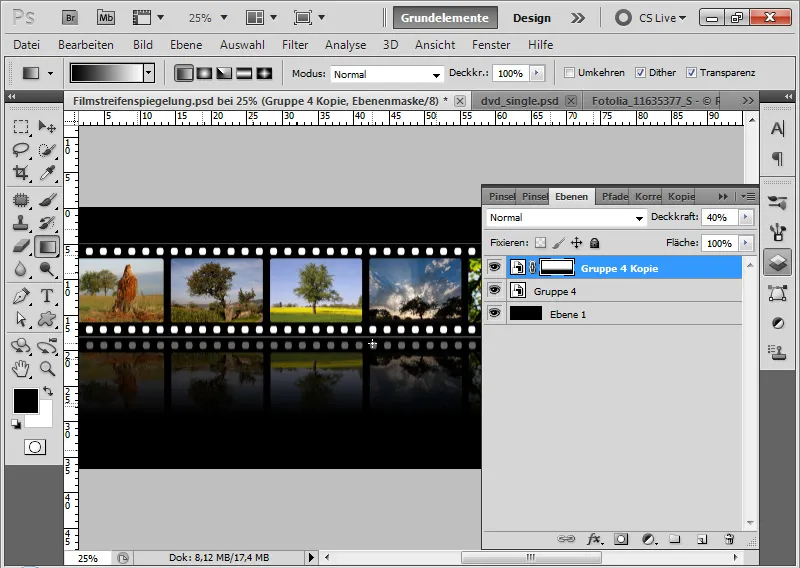
Step 4: Transforming the filmstrip and image exchange
With Ctrl+T and Right Click, I can select various transformation settings and transform my filmstrip with both selected layers. This makes the reflection less realistic, as it simply continues in line with the filmstrip images. From a design perspective, however, this reflection effect has its justification!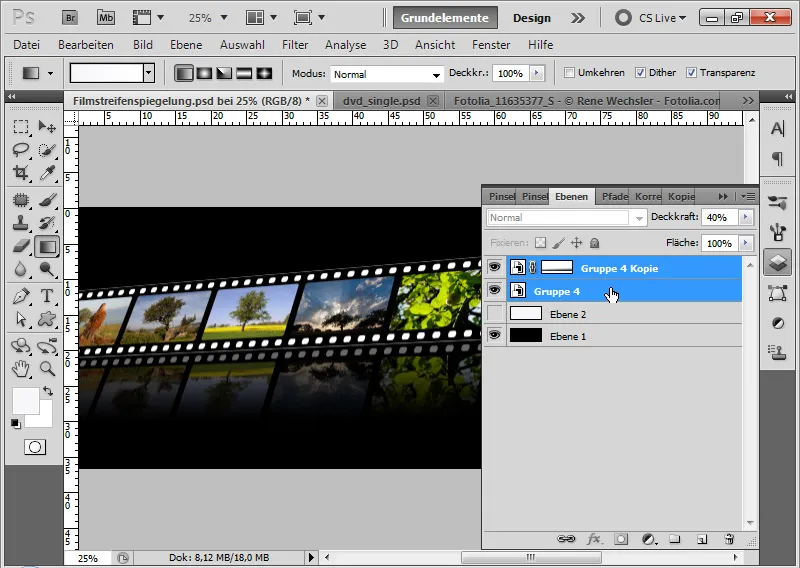
Now I want to use a different image in my filmstrip, which has already been transformed. So I double-click on the Smart Object thumbnail of the original (not the reflection!) and replace the image. Instead of the tree image, I place a poppy image. I confirm my change by Save.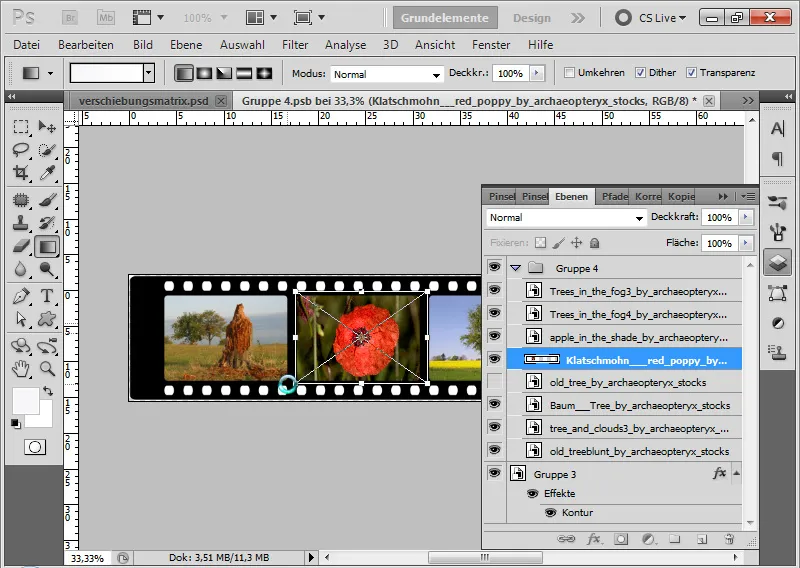
The image exchange takes into account all transformations and effects.
What we have now is a photo filmstrip that can be easily modified. And all changes are automatically reflected in the reflection!
If I transform my filmstrip again, it will always be recalculated from the original in the PSB file. This allows me to modify my image even after 20 transformations without any loss in calculation.
This effect is based on the Smart Object. By duplicating the original Smart Object, an instance to the original was set in the duplicate. Therefore, changes in the original also affect reflections. This technique is particularly suitable for design products that are regularly updated/changed. Hence, Smart Objects should be used for reflections wherever possible. It greatly simplifies the work!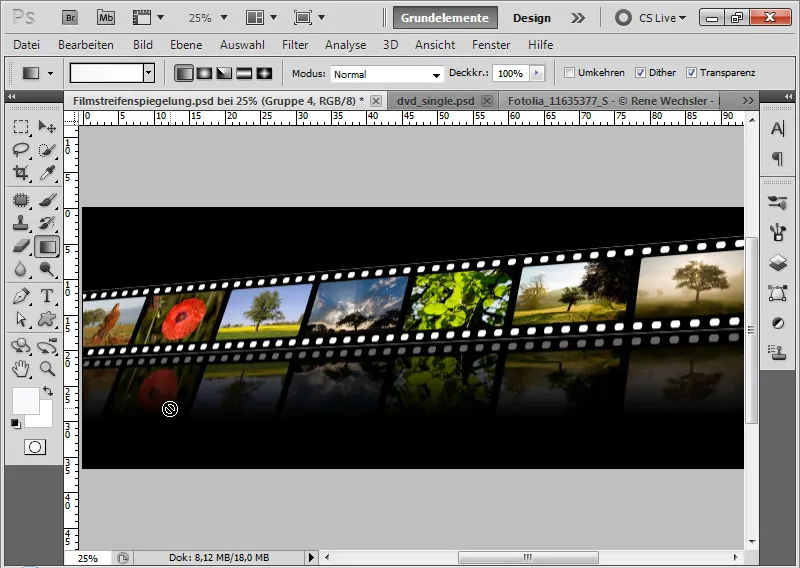
Reflection on objects with perspectival inclination
In the first example, the reflection was created from a flat object that stood at right angles to the floor.
It gets more complicated, however, when the object is not exactly facing the viewer and has possibly been transformed in perspective. For this case, I have chosen a more complex motif that ruthlessly exposes editing errors: our cover of the Photoshop Workshop DVD – Basics & Tricks.
Key points here:
• Object viewed at an angle to the viewer
• Two layers: Front cover and rear area with inlay
• Motif has connection points that must seamlessly transition into the reflection in any case (power pole and power cables)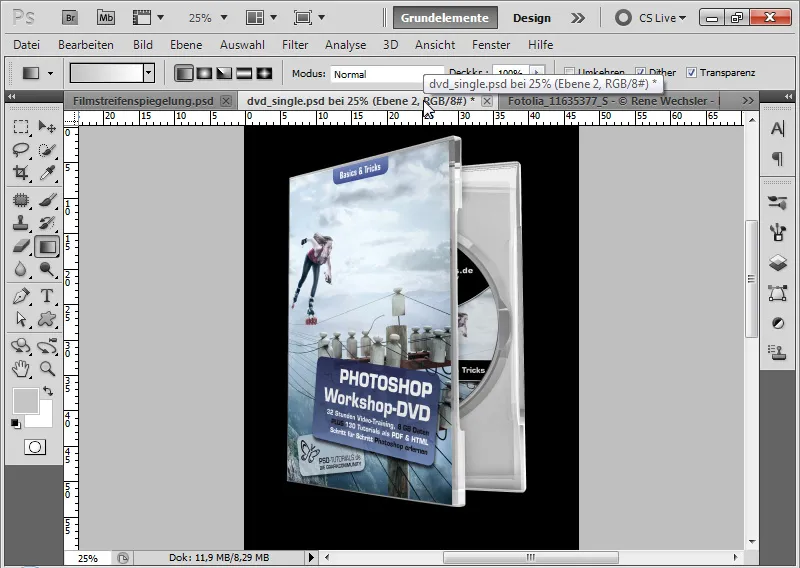
Step 1: Duplicating and vertically flipping Smart Object/group
In the first step, I duplicate my Smart Object and flip it vertically using Ctrl+T>Flip Vertical. I position the vertical reflection at the bottom edge of my document. I duplicate the reflection again and temporarily hide the duplicate reflection.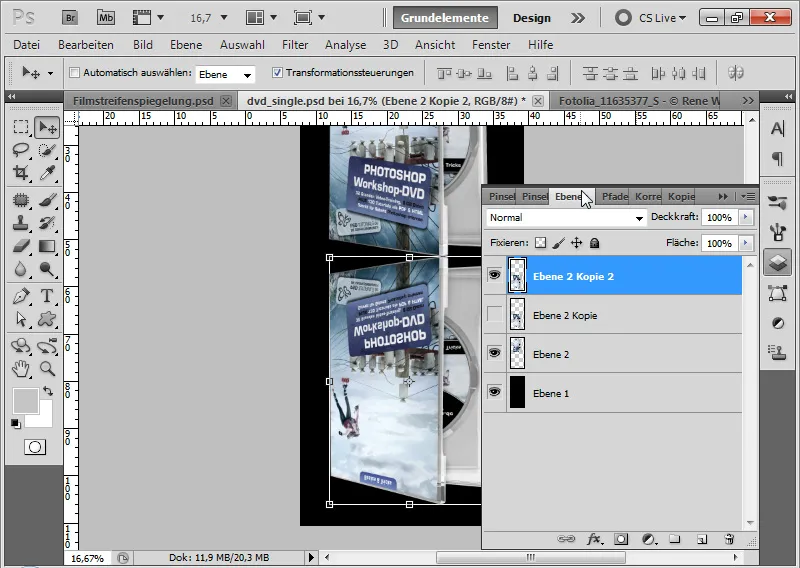
Step 2: Free transform
Already at this point, the first problem arises. If my DVD cover is supposed to stand upright on a reflective surface, I cannot simply ignore the perspective, as it would result in a completely wrong angle.
To connect the reflection as precisely as possible to the object, I transform my reflection with the Move tool (V) activated and drag the left anchor point with Ctrl+Shift upwards. I pull the anchor point up so that the upper reflection line is parallel to the lower cover line.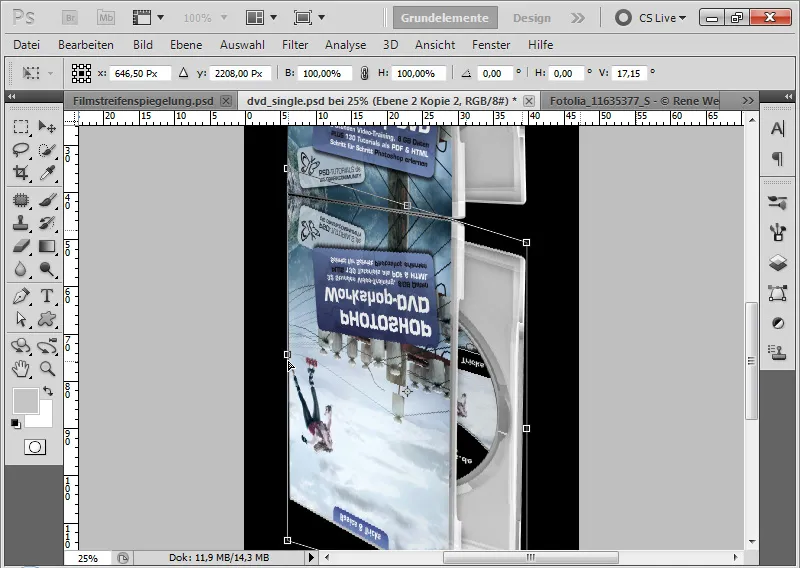
Step 3: Fine-tuning
If some reference points in the reflection are not quite accurate yet, I can further transform the reflection using the corner and side points. It is helpful to also apply the Warp Command via the Transform menu Ctrl+T if necessary.
If the reflection on the front cover is okay so far, I can confirm my transformations by pressing Enter.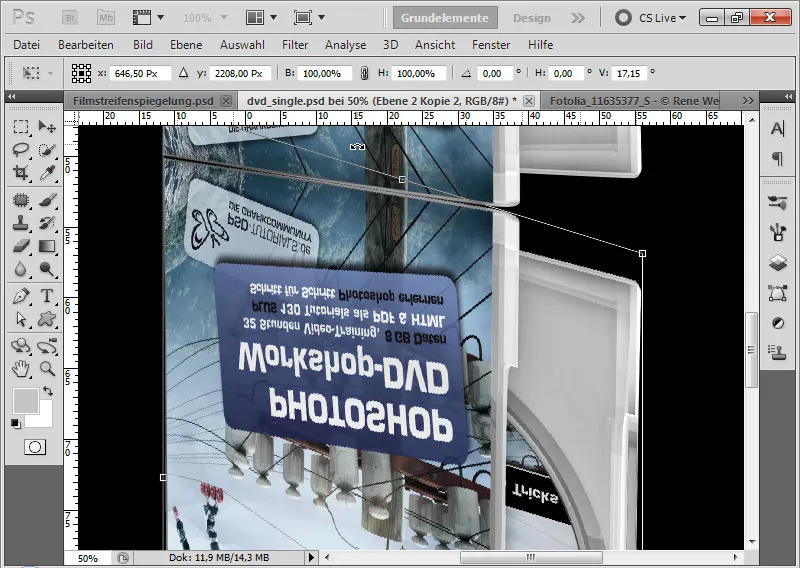
Step 4: Connect Inlay Cover
First, I add a layer mask to my Smart Object and roughly mask the upper area of the inlay cover. I can use the Quick Selection Tool to select the respective area and paint it black in the Smart Object Mask.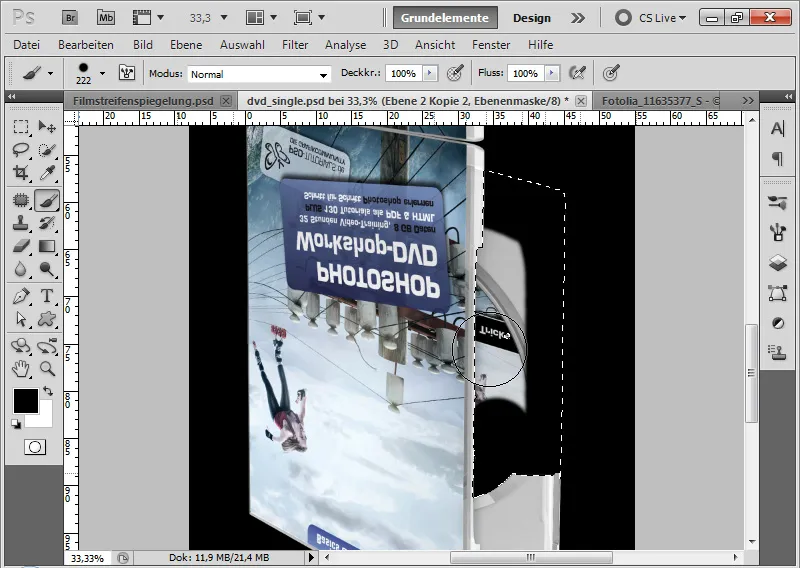
Now I reveal my previously duplicated reflection again.
Since my object has two layers - one for the front cover and one for the inlay cover - in this layer, I connect my inlay cover.
I move my layer close to the top edge of the inlay. Using Ctrl+T and Ctrl+Shift over the left anchor point, I scale my reflection object so that both lines connect parallel to each other.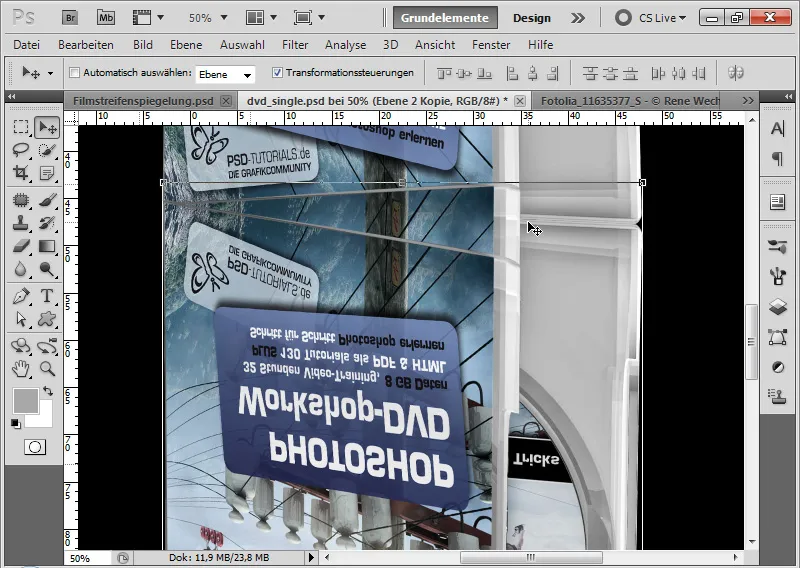
In the layer masks of the reflection layers, I now just have to align both reflection layers so that the front cover is displayed in one and the inlay cover in the other layer. I can somewhat neglect the bottom area in the document as it is in the fading part of the reflection.
Now, the black background is still visible at the point where both front covers meet. I create a new layer and place it between both reflection layers. With the brush tool activated, I can pick the gray tone of the inner cover with Alt and paint over the black background.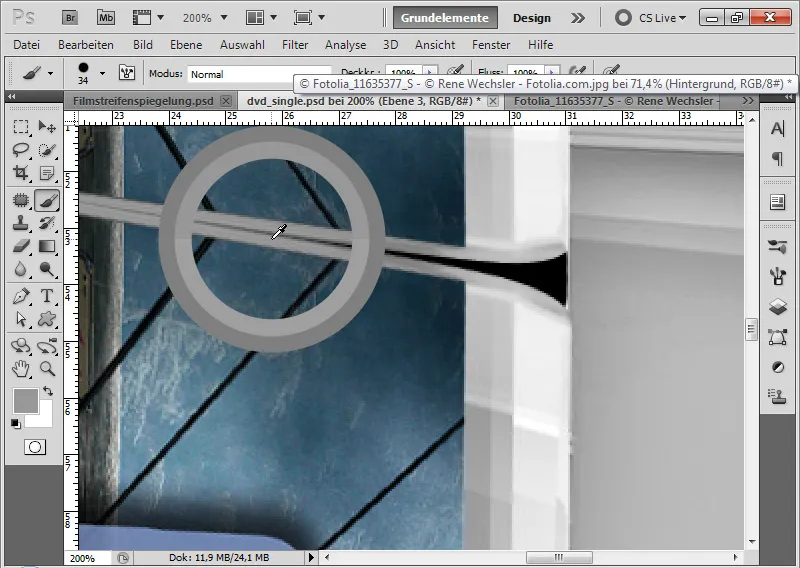
Step 5: Fade out the reflection
I merge both reflection layers and the layer that covers the black background in the transition area using the shortcut Ctrl+E into one layer. I set the opacity of this layer to 40% and add a layer mask to it.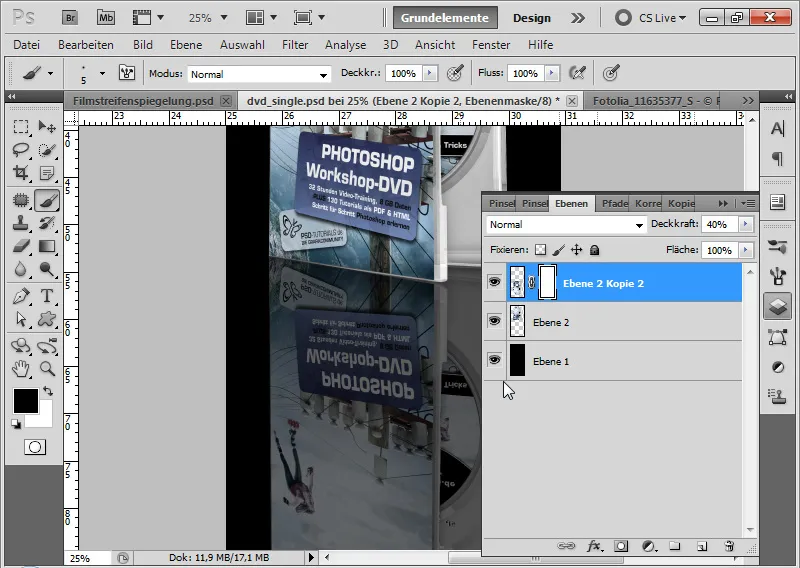
In the layer mask, I add a black to white gradient so that the reflection fades out towards the bottom.
Now a reflection has been created from rather challenging initial conditions.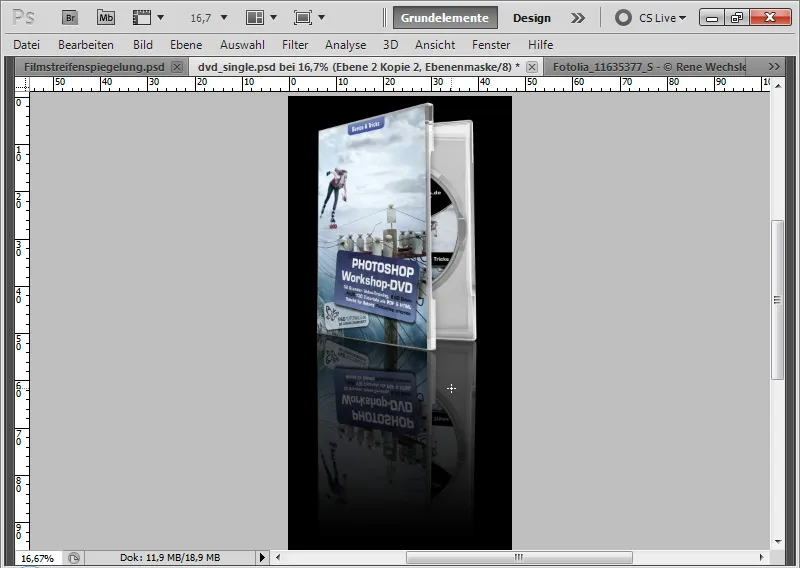
Final Note: Not all objects can be simply mirrored
In the first two examples, the reflection was still quite simple. It is important that even with a generated reflection, I pay attention to whether the object's properties go against it.
As an example, consider the following picture:
(Image source: Rene Wechsler - Fotolia.com).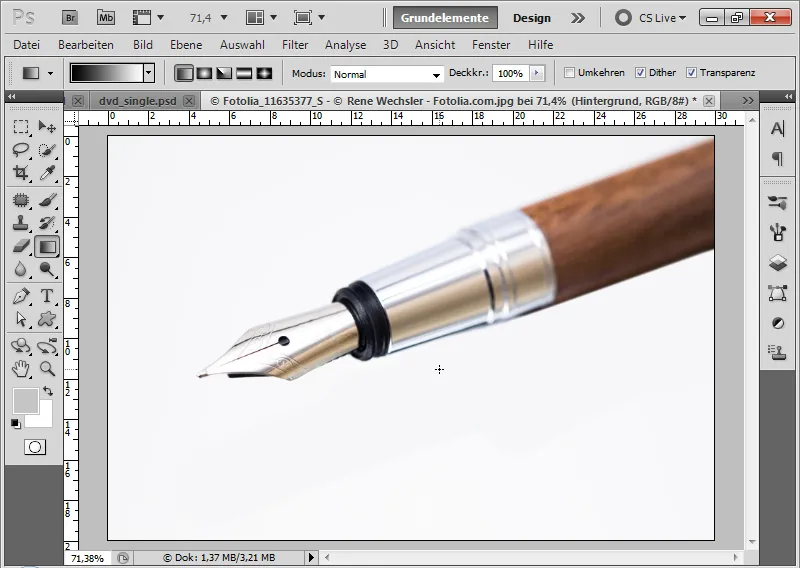
What I mean is demonstrated by the real reflection of a fountain pen. If I were to simply mirror the pen vertically in Photoshop, I wouldn't see the bottom view of the nib. Thus, my reflection would be unrealistic.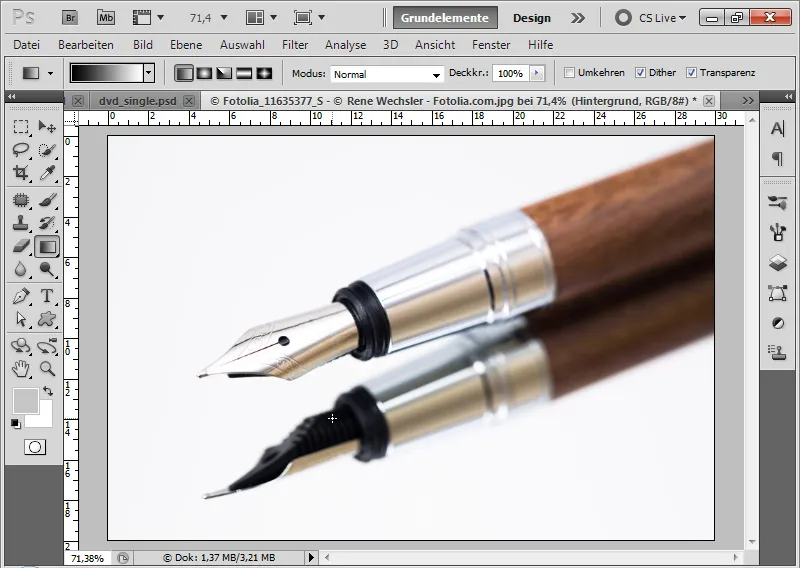
Simple Water Reflection Effect on the Calm Lake
To create a simple water reflection, I can use the same technique as in the previous examples. In this example, I show how a forest meadow transforms into a forest lake.
(Image source: Dmitry Pichugin - Fotolia.com)
Step 1: Select Reflection Area
Using the selection tool, I select the upper area in the image up to the edge where my forest lake should begin.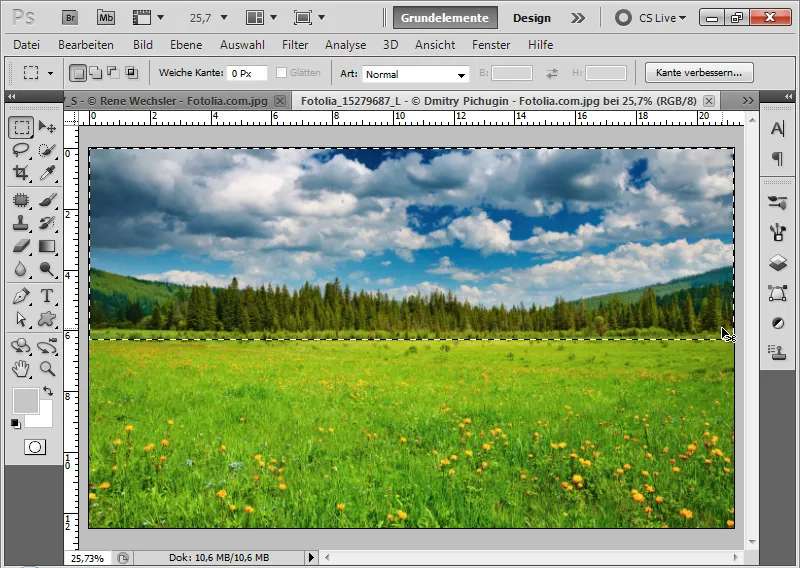
Step 2: Copy, Paste, and Vertical Mirror
Using the shortcuts Ctrl+C and Ctrl+V, I paste the copied selected area into a new layer in my document.
Using the shortcut Ctrl+T then Vertical Mirror, I mirror my image part and position it at the bottom of the image.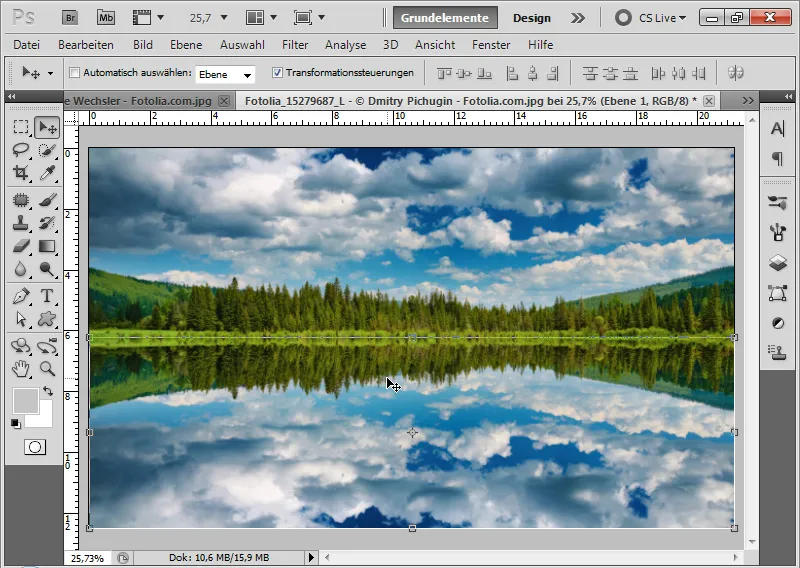
Step 3: Add Authenticity
I create a levels adjustment layer as a clipping mask to my reflection layer.
I move the mid-tone slider slightly to the right and the highlight slider slightly to the left. This creates a slight darkening in the reflection, adding more authenticity to the effect.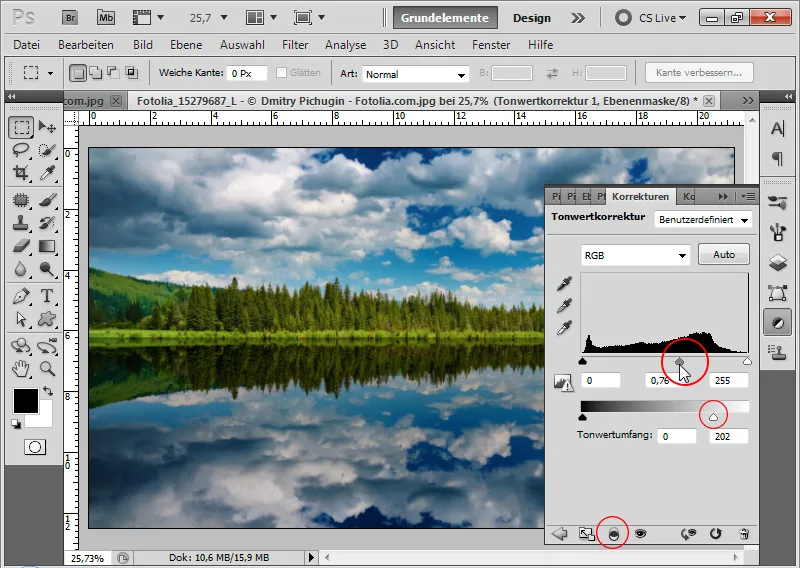
Step 4: Soft Edge Transition
I add a layer mask to my reflection layer.
Using a soft black brush, I paint along the top edge of my layer to create a smooth transition.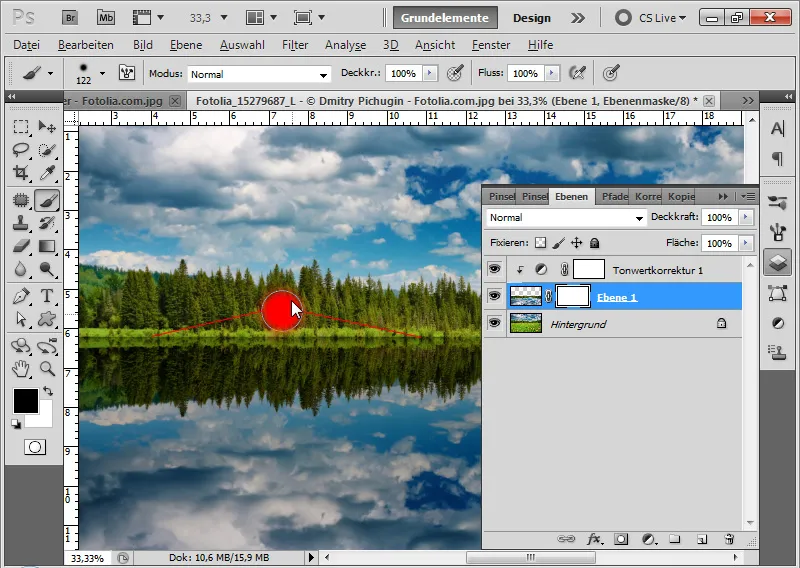
There you have it - the simple water reflection effect!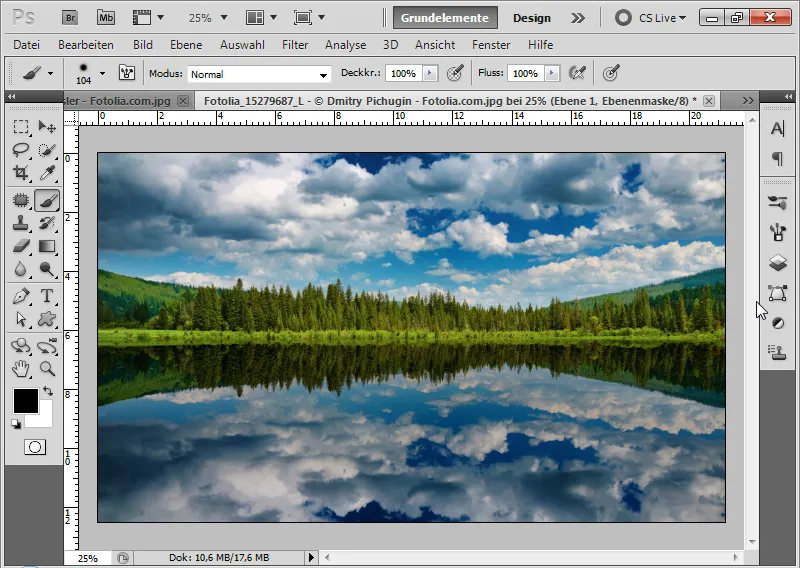
Advanced Water Reflection with Displacement Matrix
The result of the simple water reflection effect is convincing and acceptable, but it adheres to the motto: "Still waters run deep." If you want to give the water a bit more movement, the water reflection needs a little extra treatment. One helpful technique is to apply a displacement matrix.
Pre-Step: The quick alternative - Ripple Effect
To avoid all the steps I am about to explain, you can simply apply the Ripple distortion filter at around -100 Strength. This will give the water some movement and can produce satisfactory results. However, the surface texture of the water may not look completely authentic yet.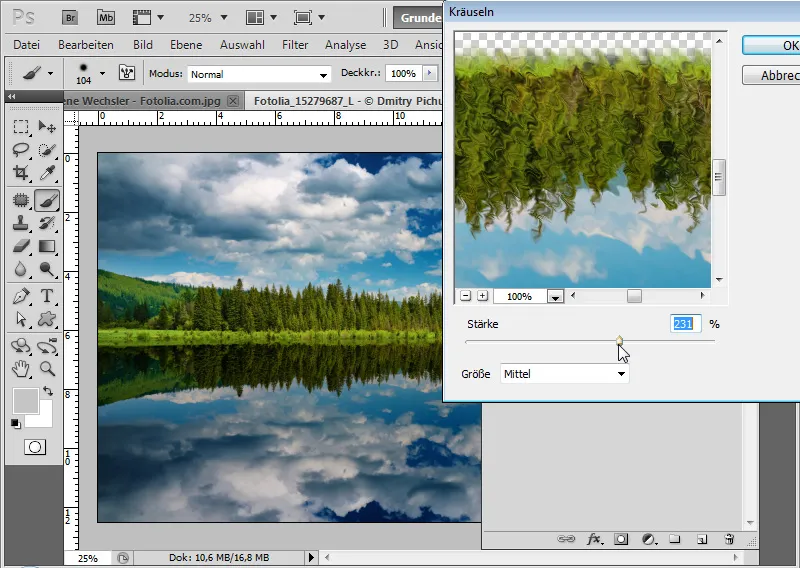
Step 1: Creating a New Document for the Displacement Matrix
Using the shortcut Ctrl+N, I create a new document sized 2000x1000 pixels.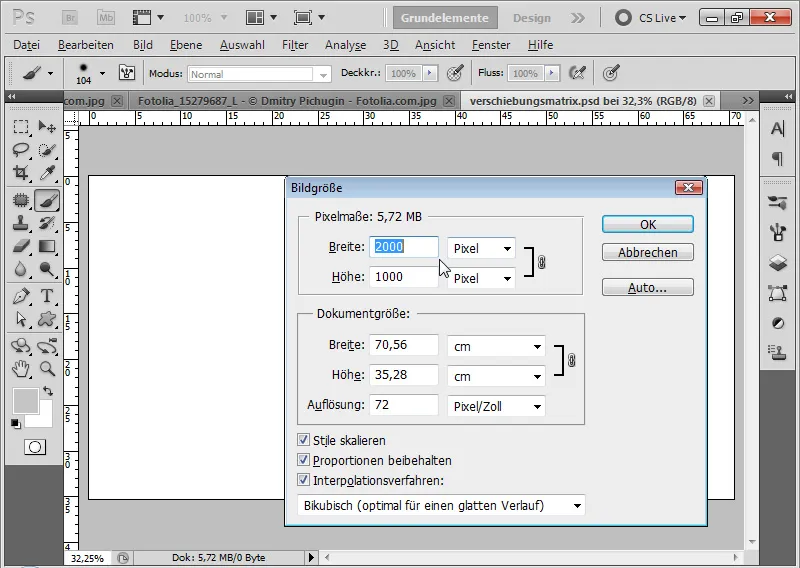
Step 2: Applying Noise Filter "Add Noise"
From the menu Filter>Noise Filter, I select the Add Noise filter. The filter is executed with the following settings:
• Strength: 400 percent
• Gaussian Distribution
• Monochromatic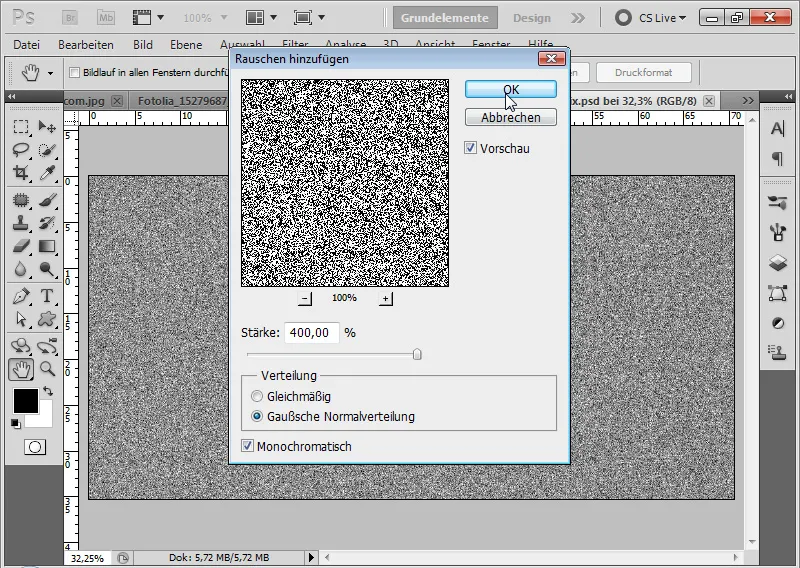
Step 3: Applying Stylize Filter Emboss
It is recommended to convert the layer into a Smart Object at this stage.
From the menu Filter>Stylize Filter, I apply the Emboss filter as a Smart Filter with the following settings:
• Angle: 90 degrees
• Height: 1 pixel
• Strength: 500 percent
The Emboss filter creates a coarser texture from the noise in the image.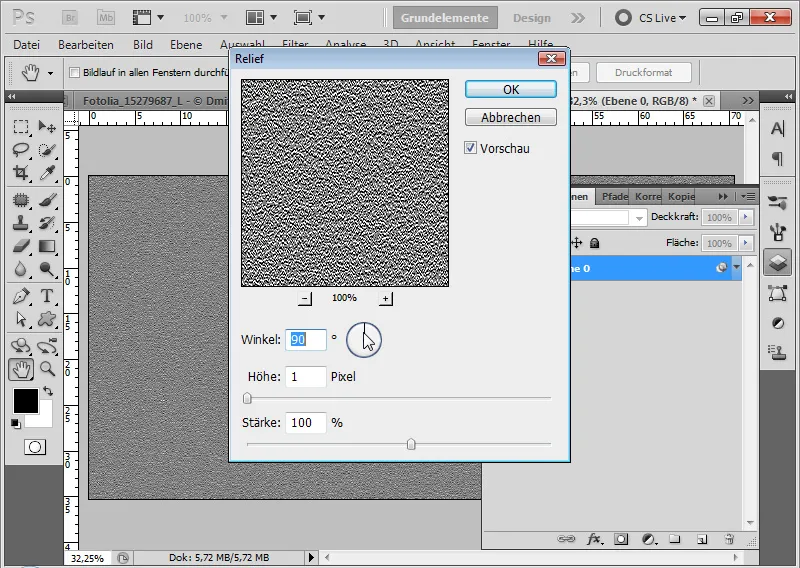
Step 4: Transforming Perspective
Since the water movement needs to decrease towards the horizon, I must consider perspective when creating the displacement matrix. Using the shortcut Ctrl+T>Right Mouse Click>Perspective, I can add more depth to my matrix from a lower anchor point.
Step 5: Motion Blur
Next, I apply the motion blur filter Motion Blur with an Angle of 0 degrees and a Distance of 25 pixels.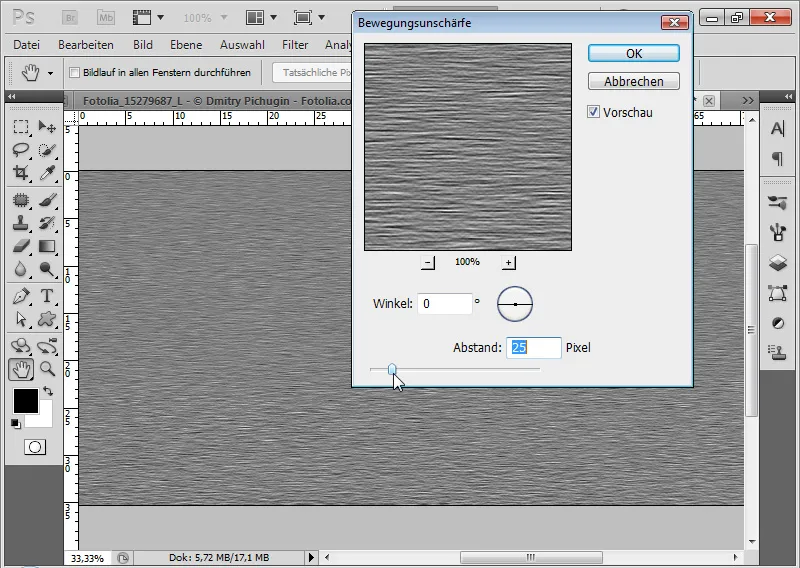
Step 6: Saving as PSD Document Since the filters were applied as Smart Filters, I can still make changes and vary the wave patterns in the water reflection.
I save my displacement matrix as a PSD file.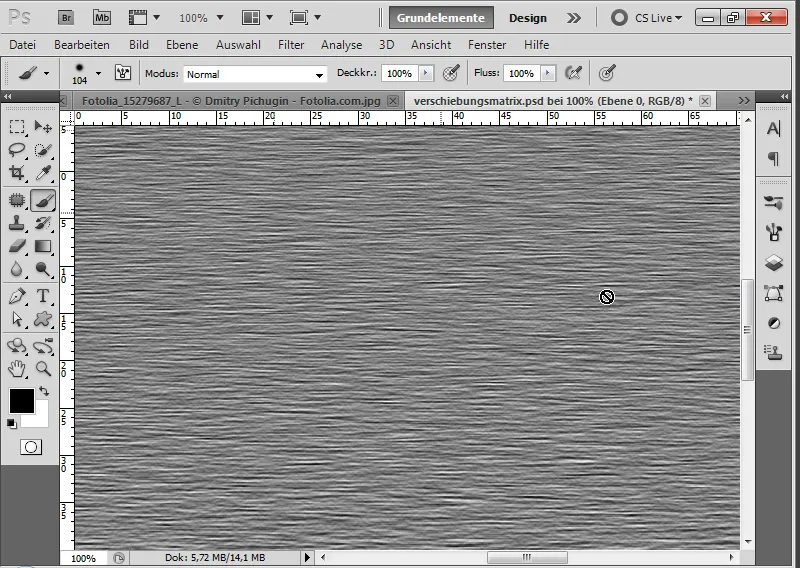
Step 7: Applying Displace Filter
I use my existing layer with the vertical reflection. First, I also convert this layer into a Smart Object.
From the menu Filter>Distort Filter, I access the Displace Filter.
In the dialog box that opens, I set the following:
• Horizontal Displacement: 10
• Vertical Displacement: 20
• Active Radio buttons: Scale to Fit, Repeat Edge Pixels
The Scale Input can be up to 100 percent. 100 has the effect of a displacement of 128 pixels.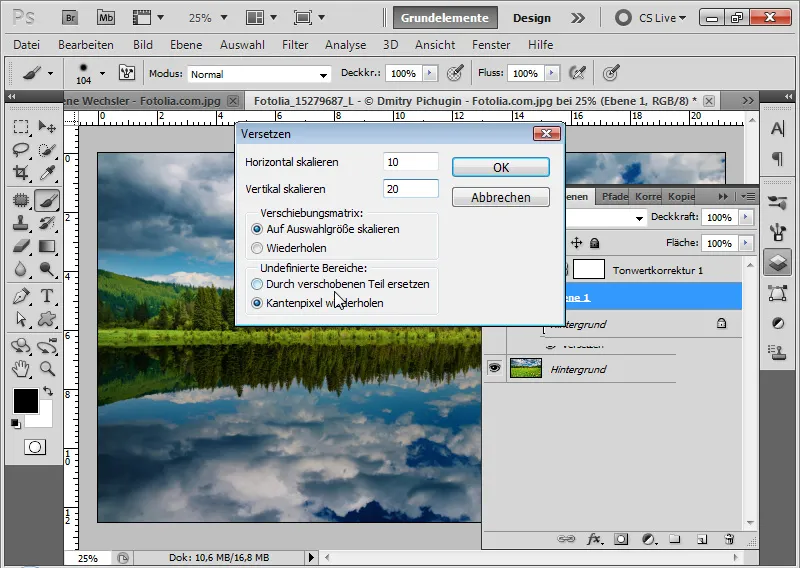
Unfortunately, the Displace Filter is not as intuitive to use as other Photoshop filters. Nevertheless, by applying a displacement matrix, I can create great effects, especially for surface textures with elevations and depressions.
By using a displacement matrix, I distort the main image, in this case my water reflection, by shifting image parts based on brightness differences. Therefore, I first create the displacement matrix and adjust it according to the brightness for the displacement effect.
In the file browser that opens, I assign my previously created displacement matrix to my Displace Filter.
My effect is complete: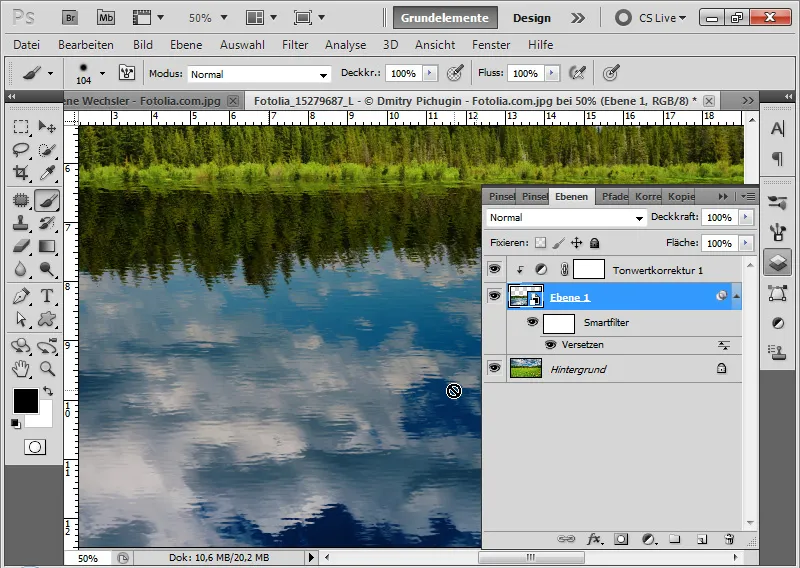
Step 8: Finalizing Water Reflection with Motion Blur
To further enhance the water reflection, I apply a Motion Blur of 15 pixels at an Angle of 90 degrees. In the Smart Filter hierarchy, the Displace Filter must be on top! If the Motion Blur Filter is on top, I can drag it down using Drag & Drop.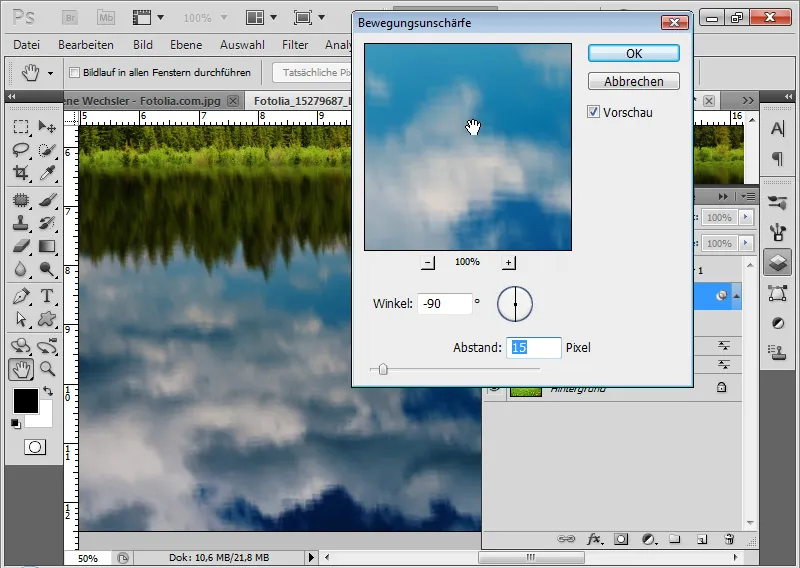
Step 9: Limit filter display
With a black-and-white gradient in the Smartfilter mask, I mask the upper area of the filter display. This way, the wave motion in the upper part of the reflection fades away in a pleasant manner.
My realistic water reflection is finished: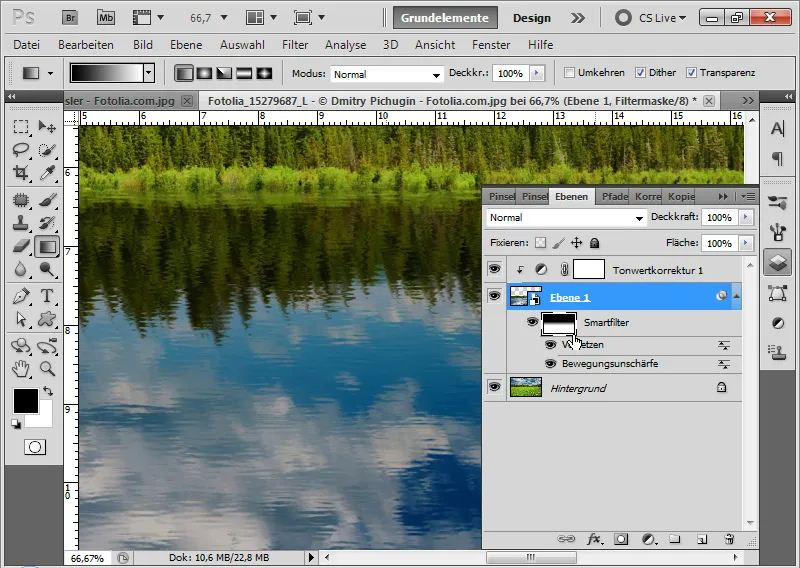
Step 10: Variations in wave optics
Returning to my Displacement Matrix document, I can significantly control the wave optics by adjusting the intensity of the motion blur.
If I want a more rippling wave effect, I simply increase the Height value in the Smartfilter Relief. If I want the wave effect to be smoother, I just need to intensify the motion blur.
Then I save the Displacement Matrix as a PSD document and assign the new matrix to the Offset filter. I can also increase the horizontal and vertical scaling in the Offset filter to give a little more movement to my forest lake.