The PDF export in Adobe InDesign is the final step to save your layout ready for printing or digital use. Whether for professional printing, interactive PDFs, or web content - InDesign offers a variety of export options to output your project optimally. In this guide, I'll show you step by step how to export your document as a PDF, choose the right settings, and avoid common mistakes. Let's get started and export your projects perfectly!
Before outputting the InDesign document as a printable PDF file, you should double-check that the color management settings are correct (this should actually be done right at the beginning, but - better safe than sorry).
To do this, open the Edit menu, go to Color Settings, and check if the correct profiles are set for both on-screen display (eciRGB v2) and print output (ISO Coated v2 ECI for coated matte paper) as working color spaces.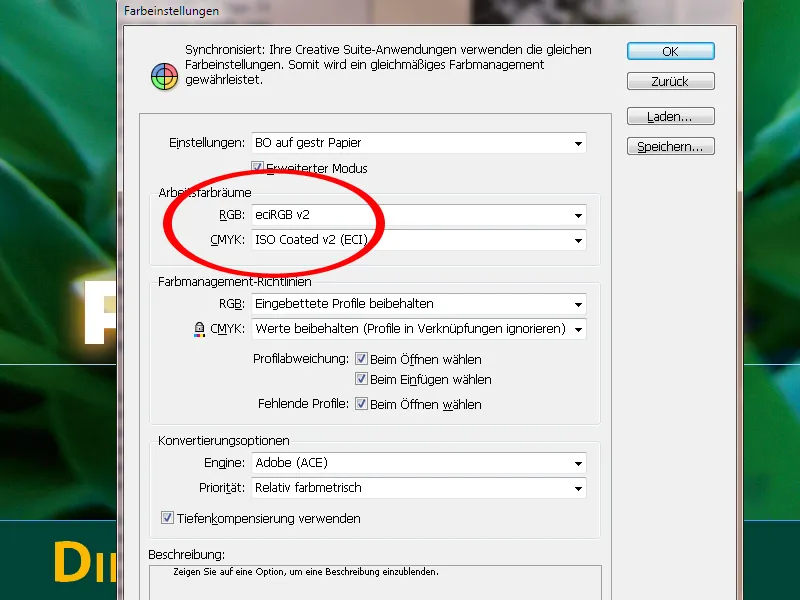
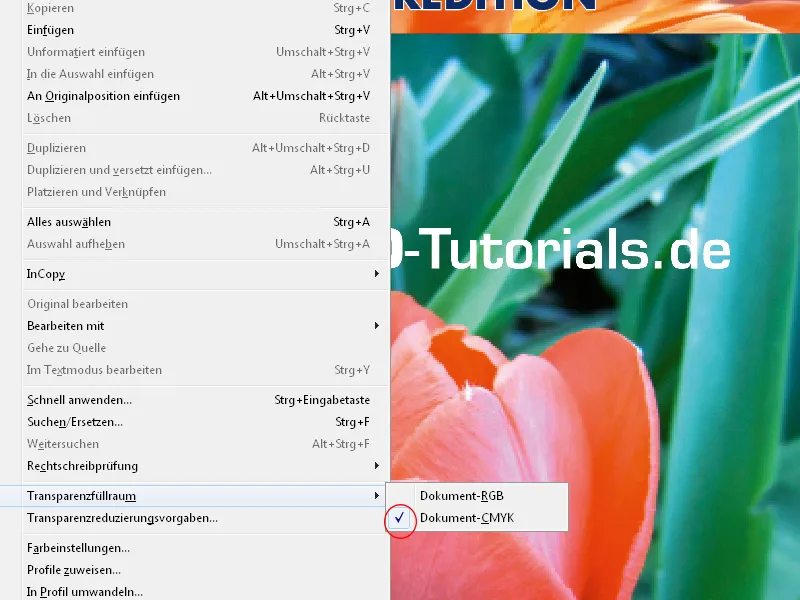
Also, check through the Edit menu to ensure that the Transparency Blend Space is set to CMYK. This ensures that overlapping or touching transparencies (e.g., an object's drop shadow on a transparent surface) as well as the objects themselves are in the same color space.
You can now initiate the export through the File menu or faster with the shortcut Ctrl+E. In addition to the name and destination folder, make sure that the File Type selected is PDF for printing, as elements of interactive PDF documents cannot be interpreted by a printing company's imagesetter, not to mention the resolution relevant only for the monitor.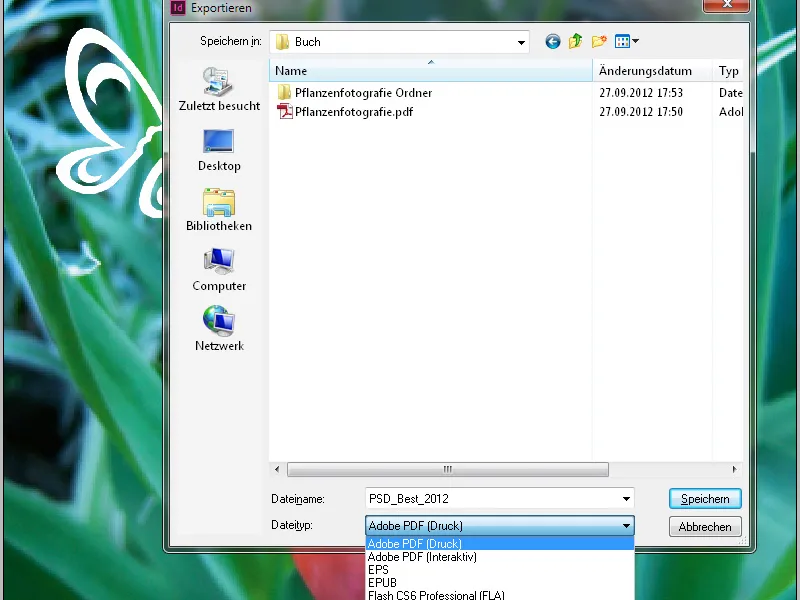
After clicking Save, the PDF export dialog opens. The settings to be made here are crucial for the output result. Different settings are required for different purposes.
So that you don't have to adjust the multitude of options each time to the desired output purpose (e.g., for screen or print output), Adobe provides different settings in the form of profiles by default. You can find these in the drop-down menu of the PDF Preset line. Fortunately, there are also two for print output.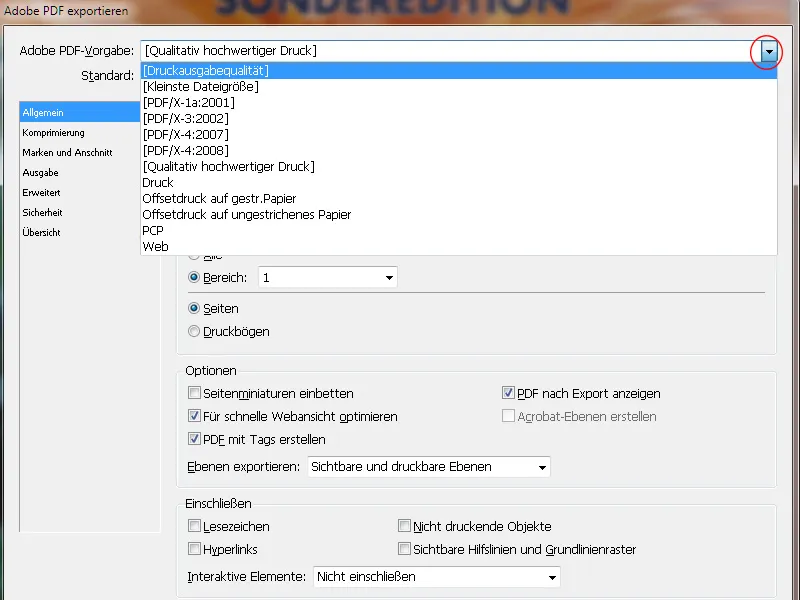
Choosing one of these export profiles is a good start, but for our requirement, it still leaves room for improvement, which is why the settings should be further customized and then saved under a new name as a custom profile for offset printing for future use.
First, change the Compatibility setting to Acrobat 4 (PDF 1.3). The reason for this is that this version of Acrobat does not support transparencies.
And even the imagesetter software in the printing house, which converts the file into raster data using the PostScript page description language, does not support transparencies. Therefore, these need to be reduced during output. This will only change when the PostScript successor, the Adobe PDF Print Engine (APPE), has become widespread in printing houses. As nice as the file looks on the screen, the true test always comes at the imagesetter.
To maintain full control in the output settings later on, no PDF-X-whatever standard should be selected.
In the Description field, you can add some important keywords for later reference of the settings made.
In the Options of the General tab, have the file displayed after export and make sure that visible and printable layers are included.
In the Include section, nothing should be activated, not even interactive elements.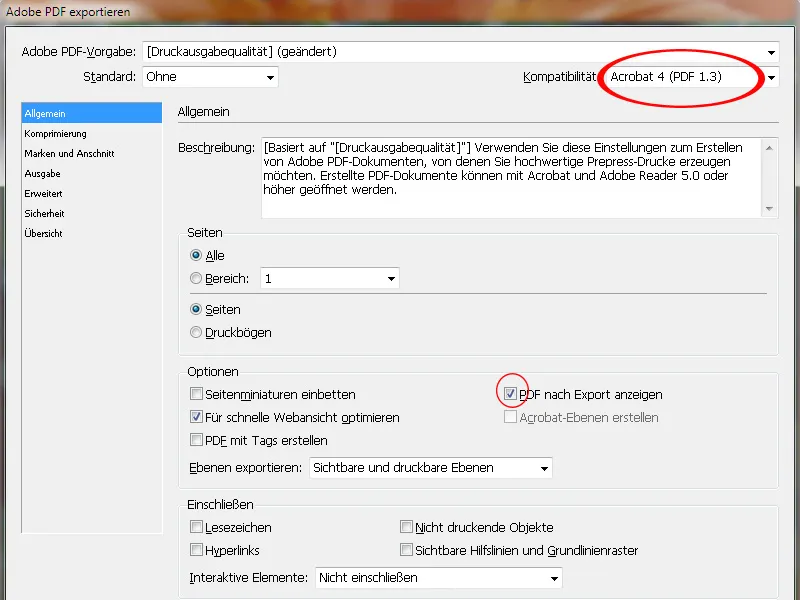
In the Compression tab, the settings of the Print Output Quality Profile for output in a 70-line screen (standard in offset printing) can be adopted with a minor adjustment, i.e., compressing to 300 ppi for images with a resolution of over 350 ppi (more is unnecessary and only enlarges the file) or 1200 ppi for line drawings with resolutions above 1800 ppi.
This may quickly occur, as seen in the Links palette, simply by fitting images in the layout into smaller image frames. The resolution will multiply accordingly, as well as the file size and processing times at the imagesetter. Therefore, the image data should also be cropped to the frame by checking the checkbox.
Compression should be done automatically through JPEG with maximum image quality.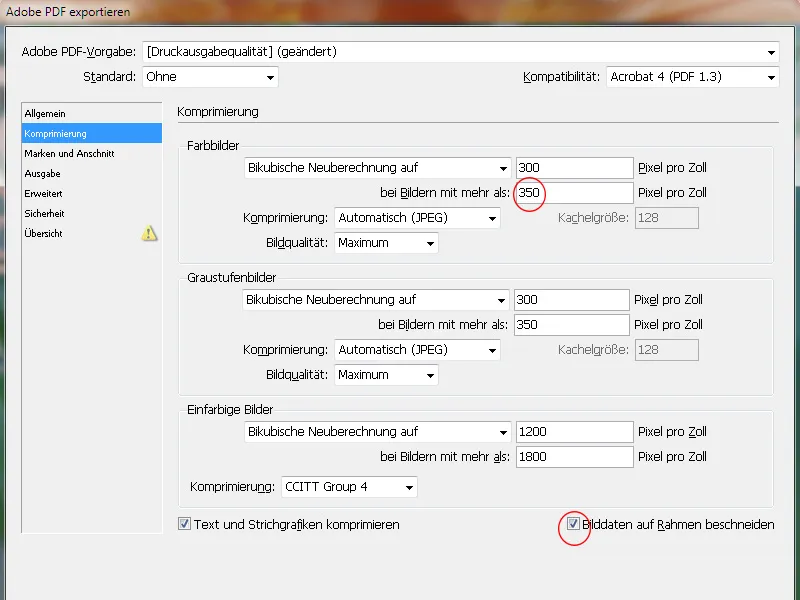
In the Marks and Bleeds tab, only use the Document Bleed Settings (usually 3mm).
The pages of the document will be automatically arranged with imposition software by the printing house following the logic of page order, taking into account any spine allowance for brochures on the press sheet and adding necessary crop and registration marks as well as color control strips. Marks created in the PDF will only cause confusion and disruption later on.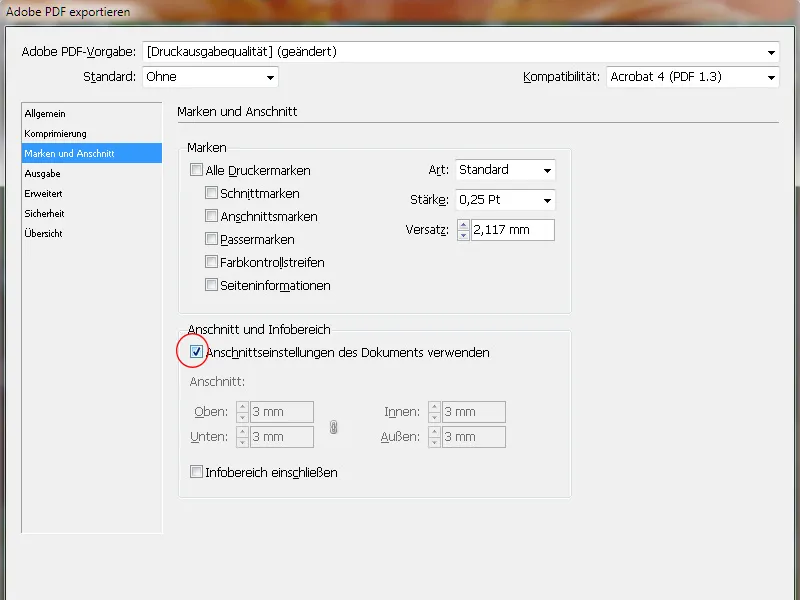
On the Output tab, under Color Conversion, the entry Convert to Destination (Preserve Numbers) must be selected. This means that RGB images will be converted to the target color space (CMYK), but not CMYK images, which will retain their native values.
The target is logically initially the CMYK color space, but the exact profile depends on the printing material. For coated (offset printing) paper, it would be ISO Coated v2 (ECI) - for newspaper printing, it would be a completely different one.
If in doubt, it's best to ask the printing house in advance.
Embedding profiles is not necessary. In some printing houses, this could lead to unwanted color conversions, so it should not be used.
A final check in the Ink Manager should ensure that only the color channels intended for printing are output.
Since InDesign CS6, it's also possible to export a file for monochrome printing. To do this, select Dot Gain 15% as the target profile. The PDF file no longer needs to be converted to a grayscale PDF using sophisticated tricks.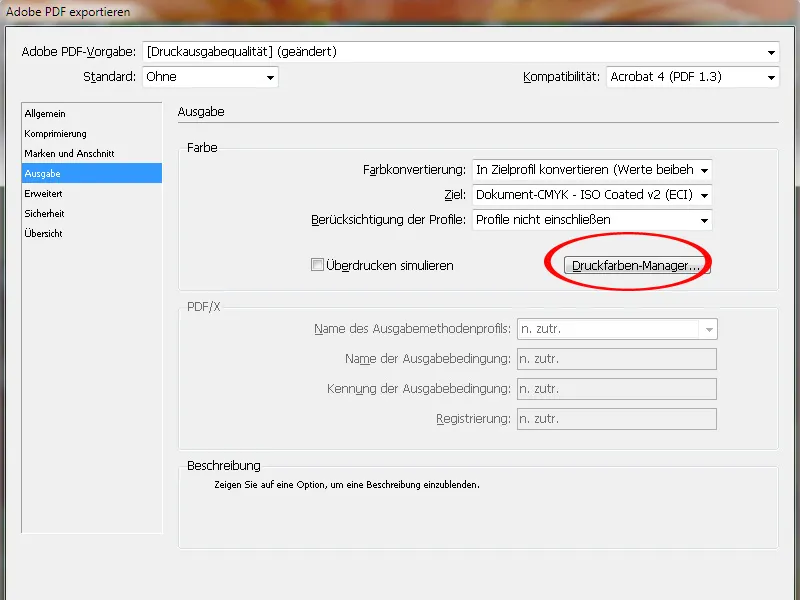
On the Advanced tab, start by setting the transparency flattener to High Resolution. This will convert formerly transparent objects into a combination of vector and image data with sufficient quality.
A checkbox below ensures that any deviating settings on the InDesign document's print sheet (can be set differently in the InDesign Pages palette for the print sheet) will be ignored.
Also important is embedding fonts in the PDF document. The default value of 100% suggests a misleading message: it does not embed 100% of the fonts used, but only if 100% of all characters present in the respective fonts were used in the document. Since this rarely happens, it means that only the characters used in the document will be embedded.
This may complicate any necessary minor text corrections in the PDF file later on if the required character is not present in the document.
Therefore, edit the value to 20%. This way, for small, simple documents, only the used characters will be embedded, and for more complex ones, the complete font will be embedded.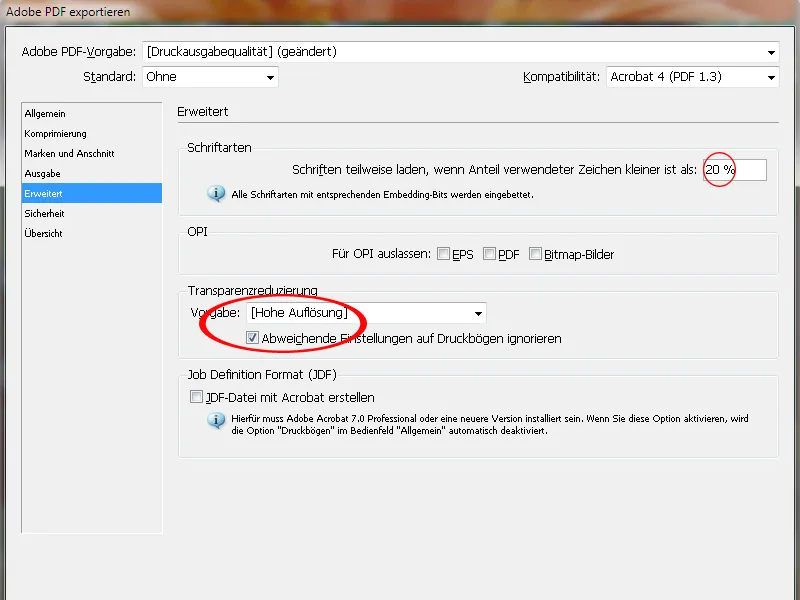
On the Security tab, no passwords should be set, as otherwise the workflow would be aborted at this point in the platesetter.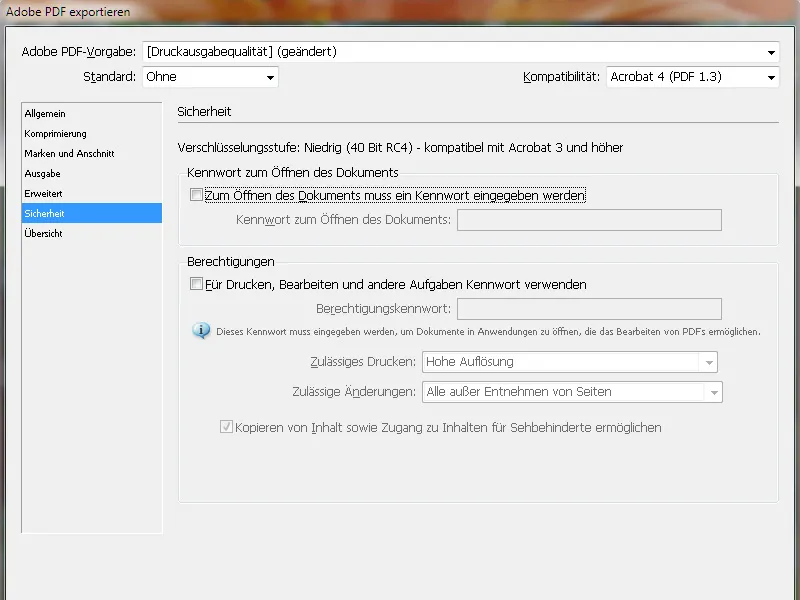
Finally, save these settings under a catchy profile name for later use and click on Export.
InDesign now begins the conversion process, which depending on the document size, image resolution, and computer capacity, may give you time to glance out the window, walk to the coffee machine, or call mom.
The only small indication that InDesign is doing what it should is a small icon in the menu bar that only appears during this export process: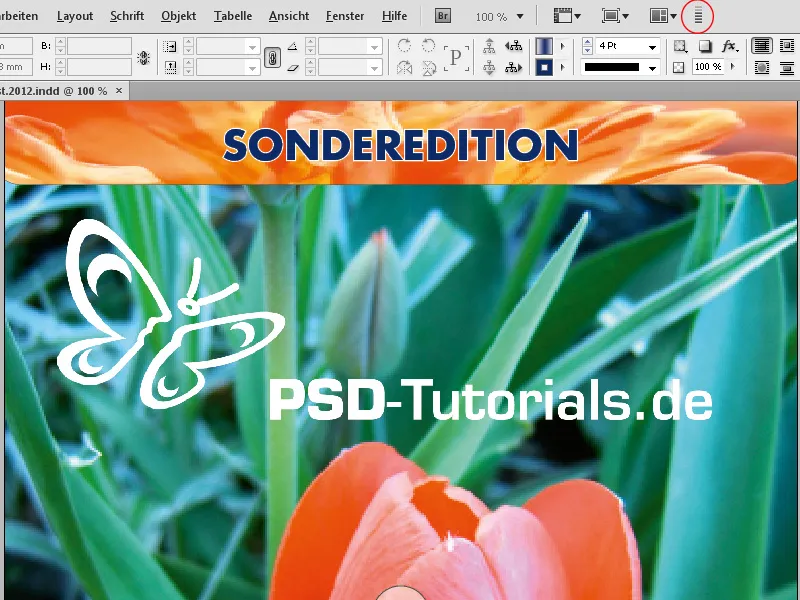
But then (of course, only if the correct checkbox was set in the right place), the result of all the preceding efforts will open - the PDF file.
In a sophisticated working environment, the full version of Adobe Acrobat is now available, which brings a range of profiles for analyzing the generated document for its suitability for output on the printing plate exposer.
However, a prior critical glance should be given to the bleed. To see the exact extent of the bleed, you need to display it. To do this, open the Preferences in Acrobat (Ctrl+K) and on the Page Display tab in the Page Content and Information section, check the box that says Show Crop, Trim & Bleed Boxes.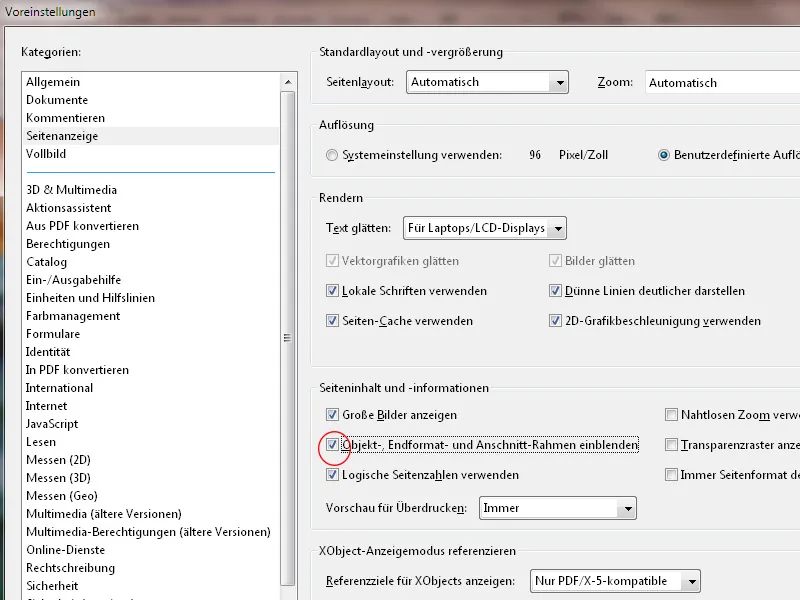
Now you can see exactly whether the bleed elements extend far enough into the bleed area.