Cross-hatching gives your designs an artistic, hand-drawn look. It is particularly exciting if you create this effect yourself without the use of filters. Photoshop allows you to work specifically with brushes, layers and line tools to create an individual and authentic hatching. In this tutorial, I'll show you step by step how to create a crosshatch manually and give your projects a unique style. Let's get started and get creative!
Overlapping lines that darken areas, revealing highlights and shadows, are characteristic of cross-hatching. The denser the lines, the darker the image area becomes.
In my example, I would like to explain how to create cross-hatching using a sculpture showing "Alter Fritz".
Step 1: Open the image and convert to grayscale
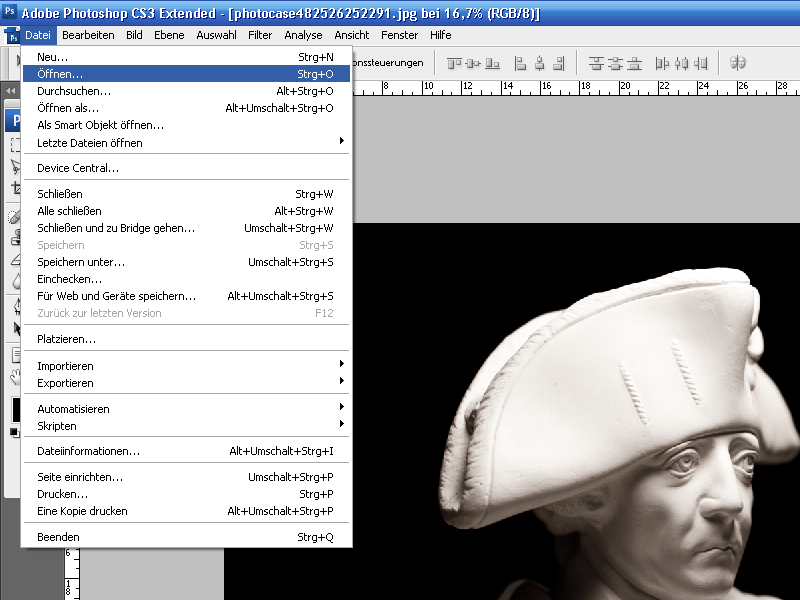
First, I open the image in Adobe Photoshop. To do this, I go to File>Open (Ctrl+O). In the file browser that opens, I select the image I want to edit.
Now I select Image>Mode>Grayscale from the menu. This is particularly necessary if the image contains some color elements.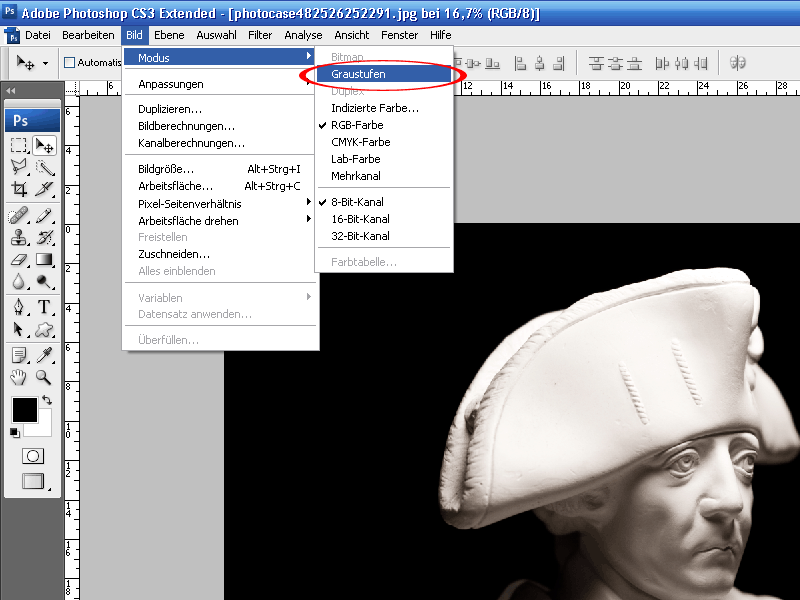
Step 2: Blur and tone separation
The image is now blurred. This is necessary so that the edges are smoothed during the subsequent tone separation. I select a radius of 2.5 pixels for the Gaussian blur. To do this, I select Filter>Blur Filter>Gaussian Blur from the menu.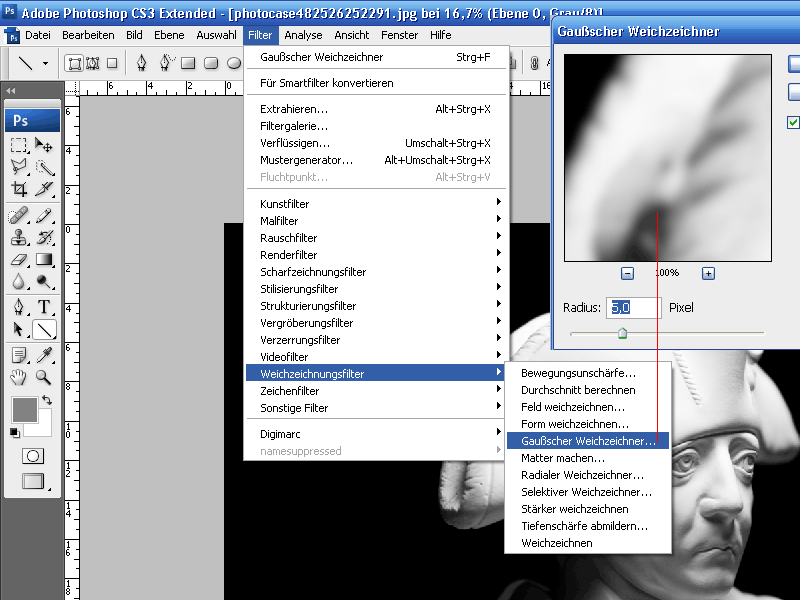
Now I select Image>Adjustments>Tone separation in the menu. The blur applied beforehand makes the separation levels really clear. I select 7 separation levels.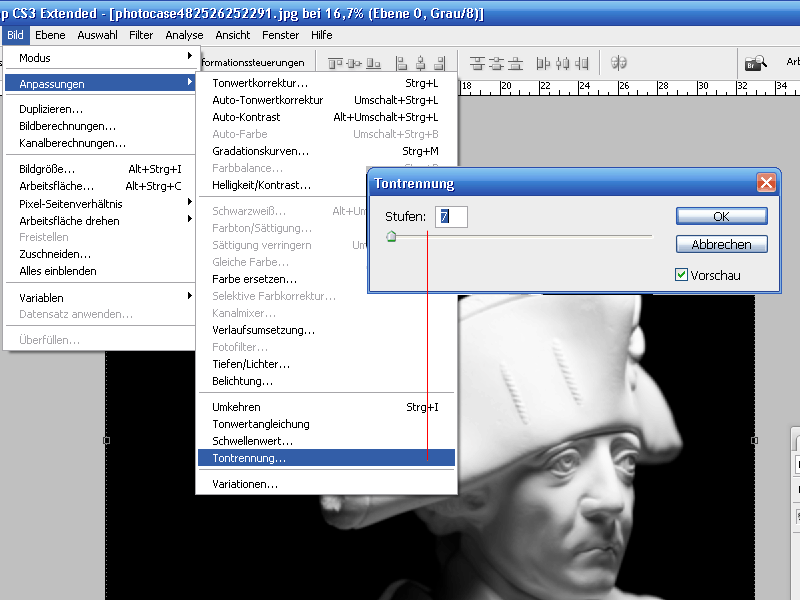
The "Old Fritz" remains clearly recognizable. Each step will then represent a line layer. The more of them on top of each other, the shadier/darker the area becomes. If the steps do not separate sufficiently, manual retouching can also help.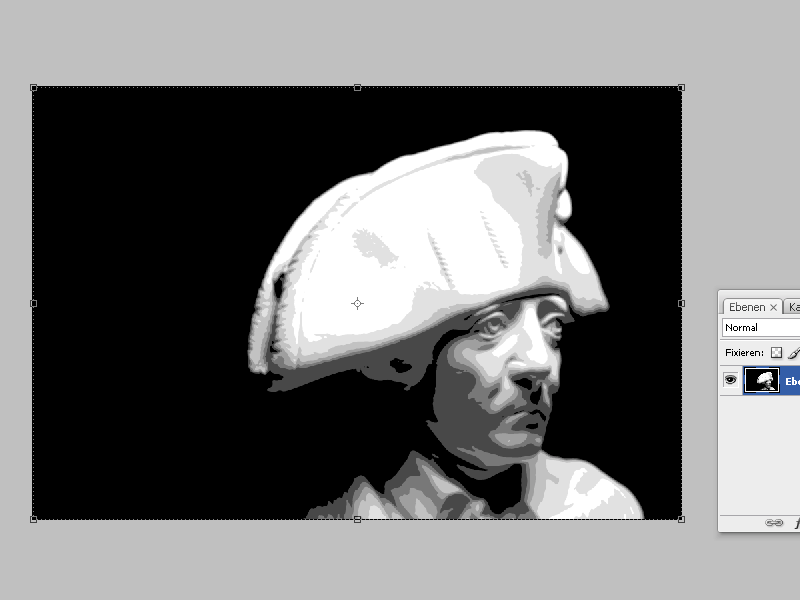
Step 3: Image enlargement and layer assignment
It is important that the resolution is quite high due to the output of the line grid generated during bitmap conversion and that the lines are displayed finely. To do this, I go to Image>Image size (Alt+Ctrl+I) in the menu. I increase the resolution from 300 to 600 pixels/inch.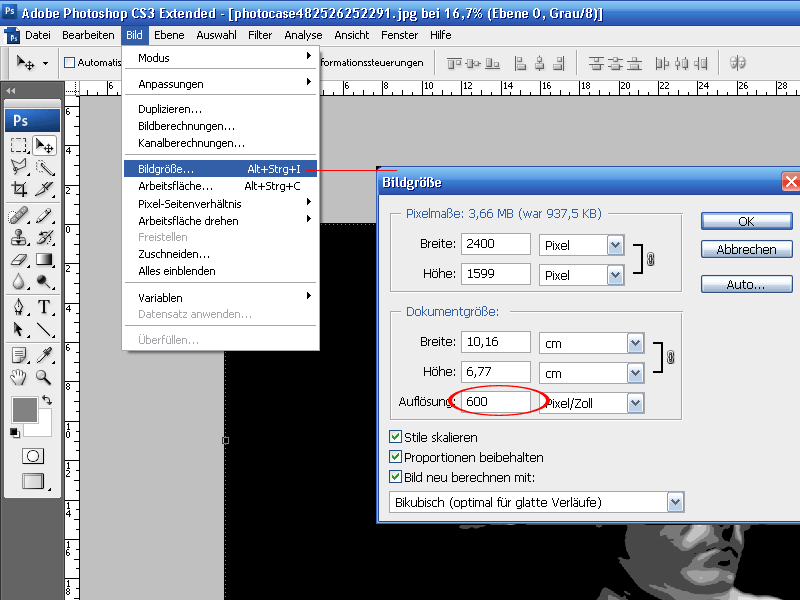
Now the gray tones are assigned to individual layers. I do this using the color range selection. I go to Selection>Color range in the menu. In the dialog box that opens, I select the selection: Captured colors with a low tolerance of 10 for the selected image mode.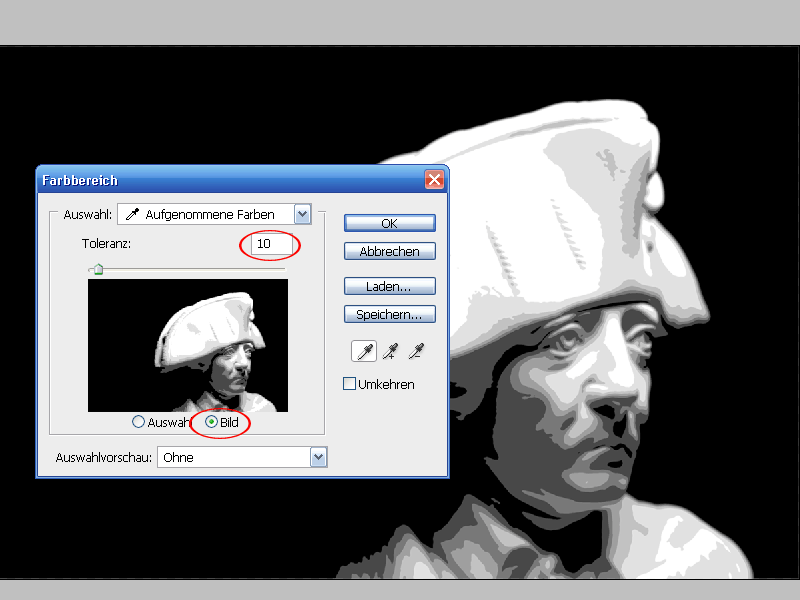
Using the eyedropper tool, I now click on all gray tones except for the lightest one while holding down the Shift key. These are now selected.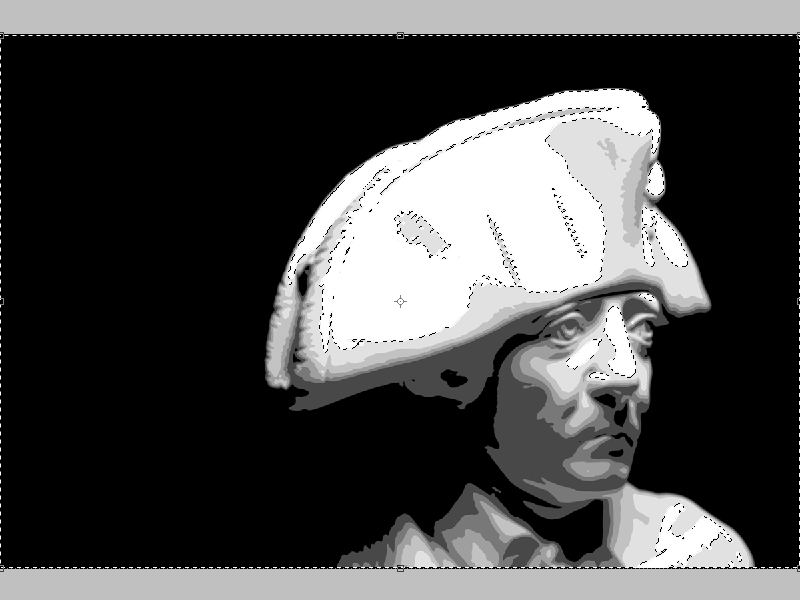
I copy the selection to a new layer. I can do this by creating a new layer, copying the selection and pasting it into the new layer. The quickest way to do this is via the menu Layer>New>Layer by copy or the keyboard shortcut Ctrl+J.
The areas that were not selected remain transparent. Now it looks like this: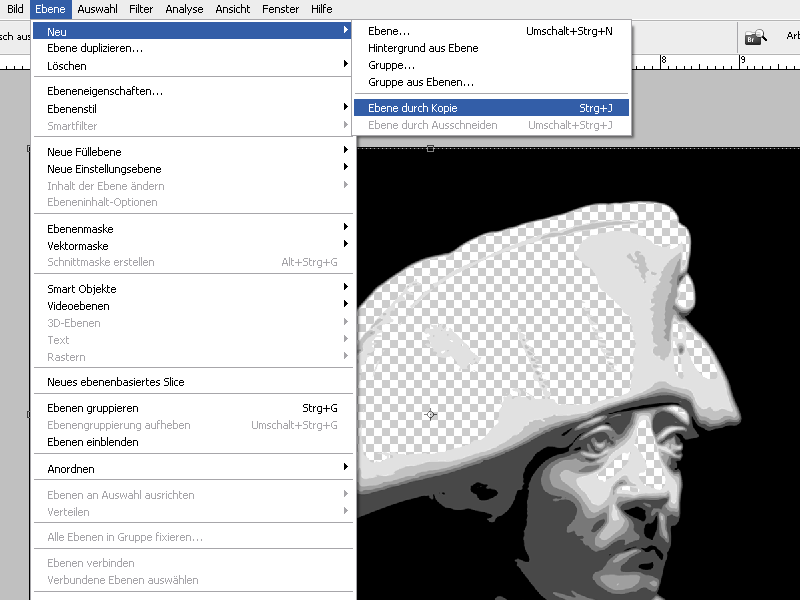
The next layer is created in the same way using the color range selection , except that I now cut out the second lightest with the lightest color range. I then create another new layer from this color range selection with Ctrl+J.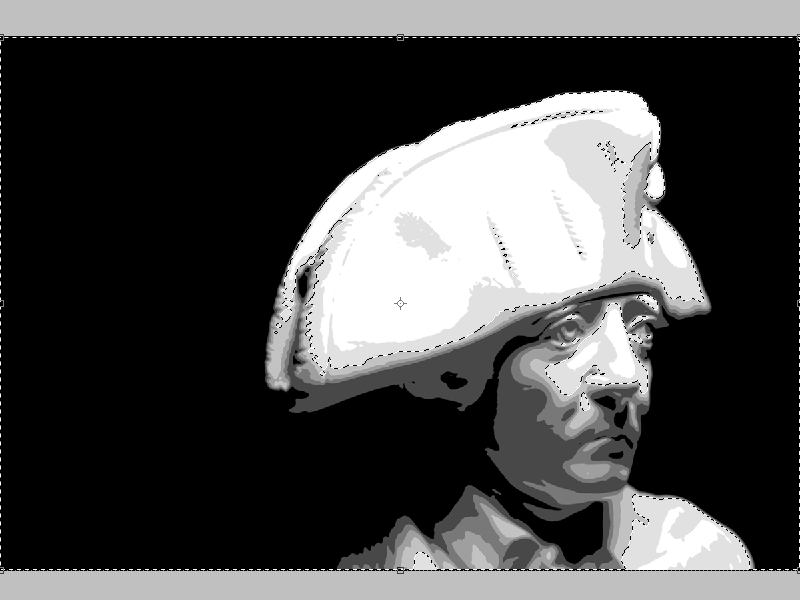
I repeat this step until I have created a separate layer for all the levels. I now have a total of 6 step layers and a white background layer. The layer from which I selected the color areas is no longer needed and can be hidden.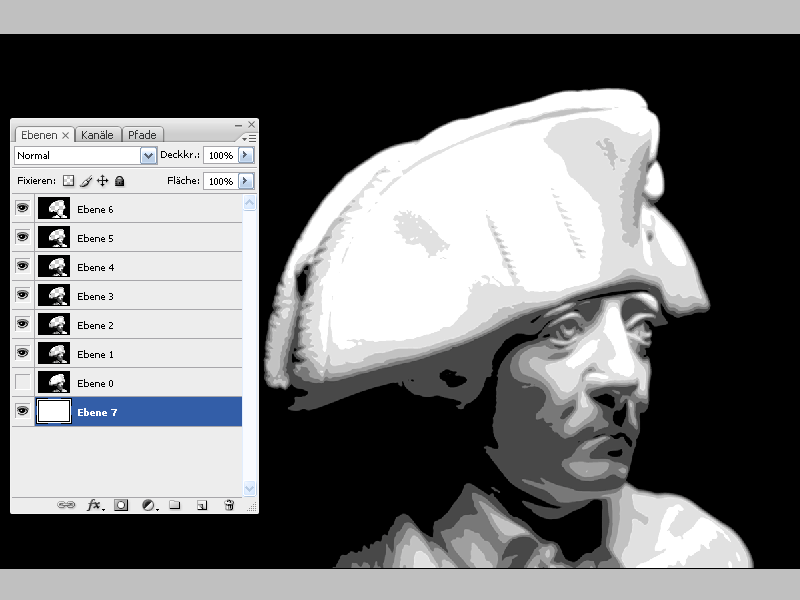
Step 4: Defining the shade of gray
Now comes the essential step that is crucial to the success of the cross-hatching.
I create a new file using Ctrl+N with the same dimensions as the previous working file. I fill the layer with a black and white gradient.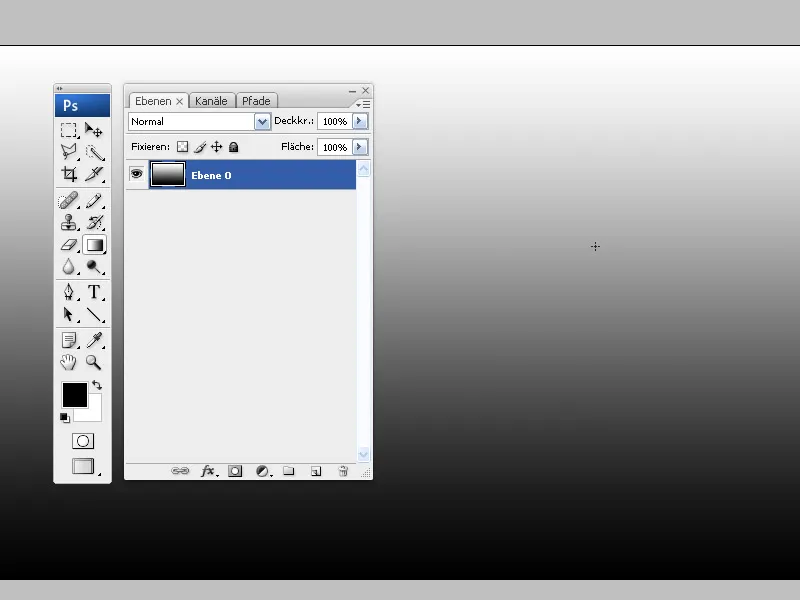
I duplicate the file with the gradient and change one of the two files to grayscale mode, then to bitmap mode. When converting to a bitmap graphic, Photoshop converts the gradient and uses a raster. I select the settings halftone raster, line with 30 lines/inch at 600 pixels/inch.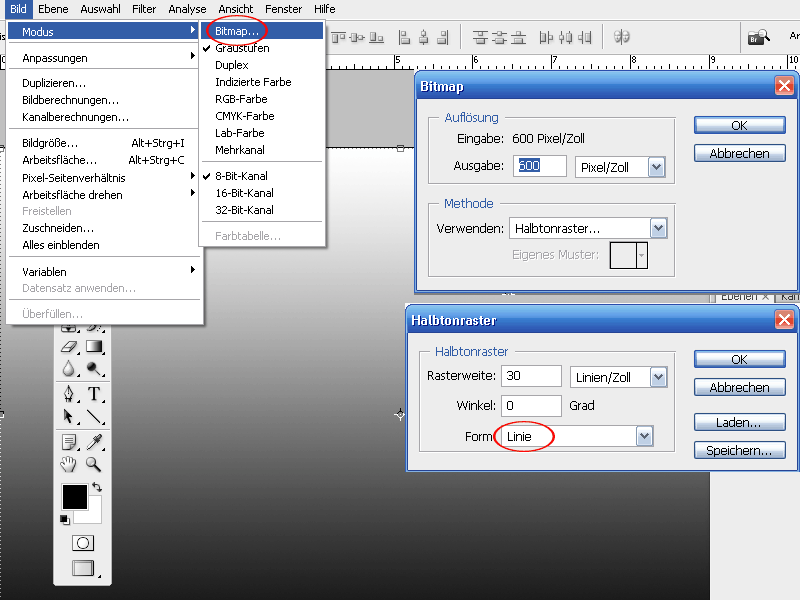
Now the gradient is reproduced in various horizontal lines. I change the mode to grayscale again and insert this layer into the previously duplicated layer with the gradient.
From the grid, I select the line that will later be used for my cross-hatching. This is the point that I need to fix for my pipette. This color will later form the grid lines of the cross-hatching. I first Blender in the layer with the grid, fix the point, Blender in the gradient layer and select this point with the eyedropper . Now I have the color key for this gray value. In my case, it is the value e5e5e5.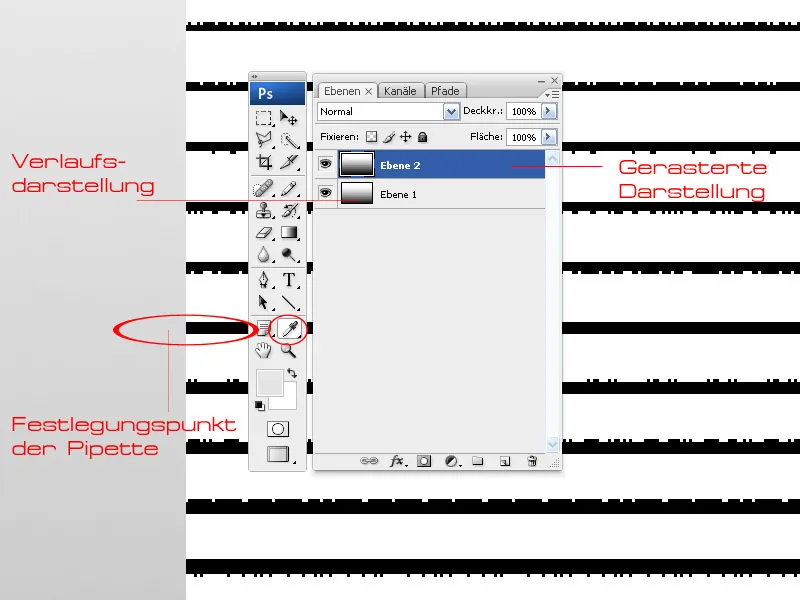
Step 5: Color overlay of the individual layers and overlay with lines
Now I go back to the original working file and start with my white background layer. I fill the layer with the color e5e5e5 using the fill tool . There I select the fill options>color overlay by clicking the right mouse button and enter the color value e5e5e5.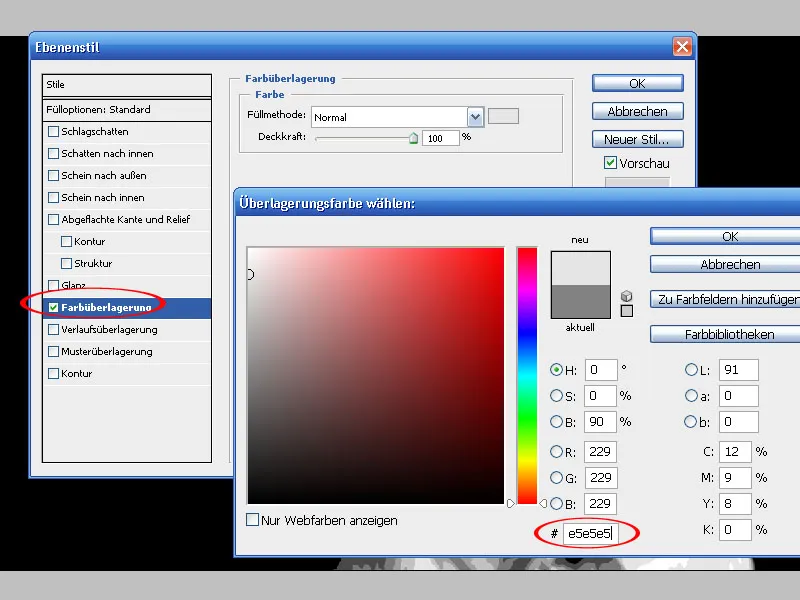
The layer now looks like this: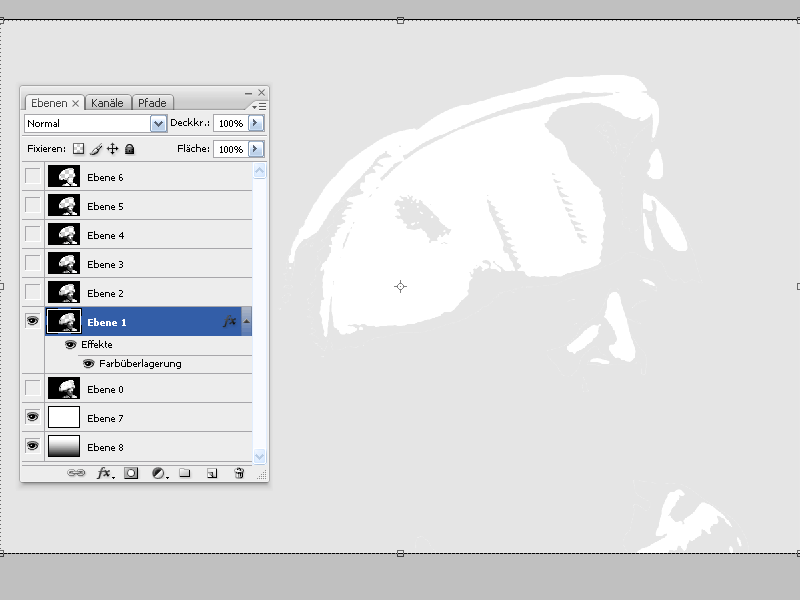
I duplicate the file via the Image>Duplicate menu. I now convert the copy of the working file into a bitmap. I keep the settings again: Halftone screen with lines, 600 pixels/inch with a screen ruling of 30 lines/inch. The angle of this layer will be 30 percent.
The image now looks like this: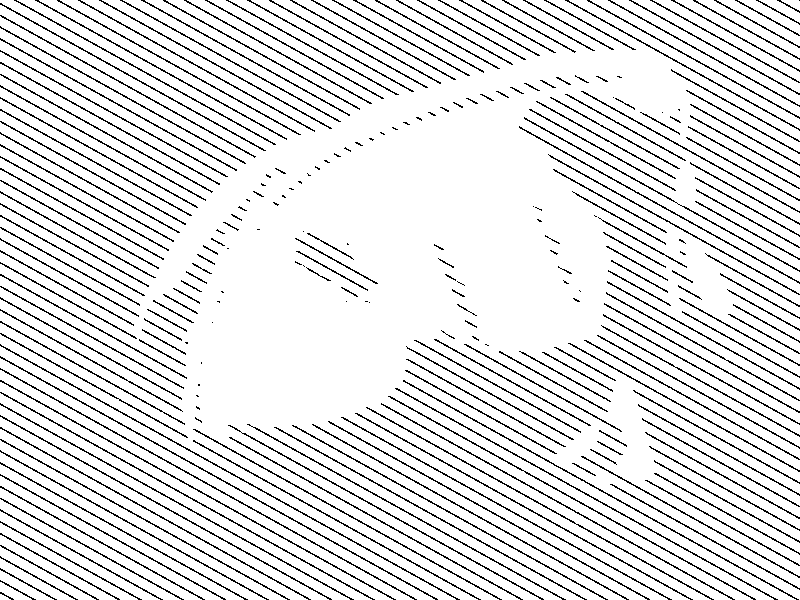
I now convert the image back to grayscale and move the layer back to the original working file or a new file. In the working file, I have created a set for the images that are already finished using the layer manager.
I now proceed in the same way with all the other layers: Duplicate image, convert to bitmap, settings remain the same except for an angle change of 30 degrees each (60/90/120/150), convert back to grayscale and paste layer into working file.
(If the resulting lines become too much for me when overlaying the image in Multiply mode, as there are currently 6 levels, I can also omit an image. In this example, I will leave out layer 3).
I also filled the white background layer with the gray tone and then added horizontal lines (angle 0 degrees).
After applying the steps, the result should look like this: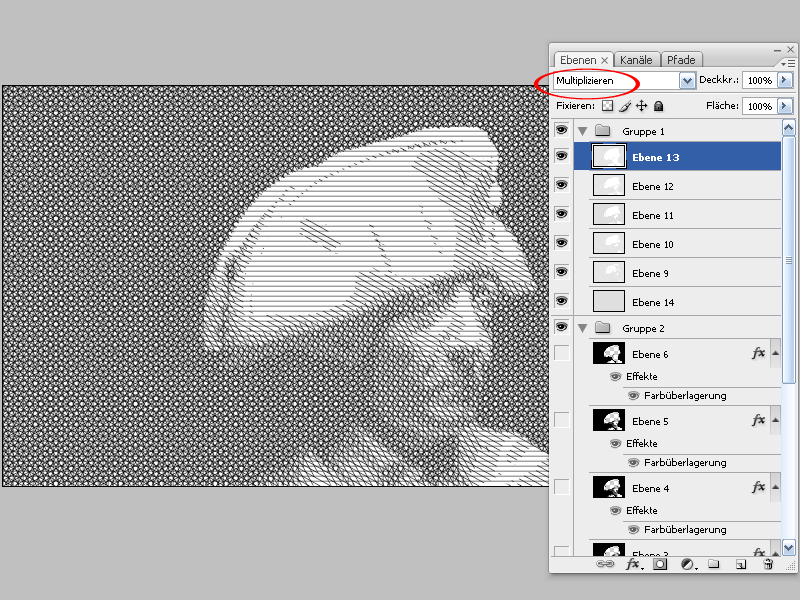
These are the individual layers: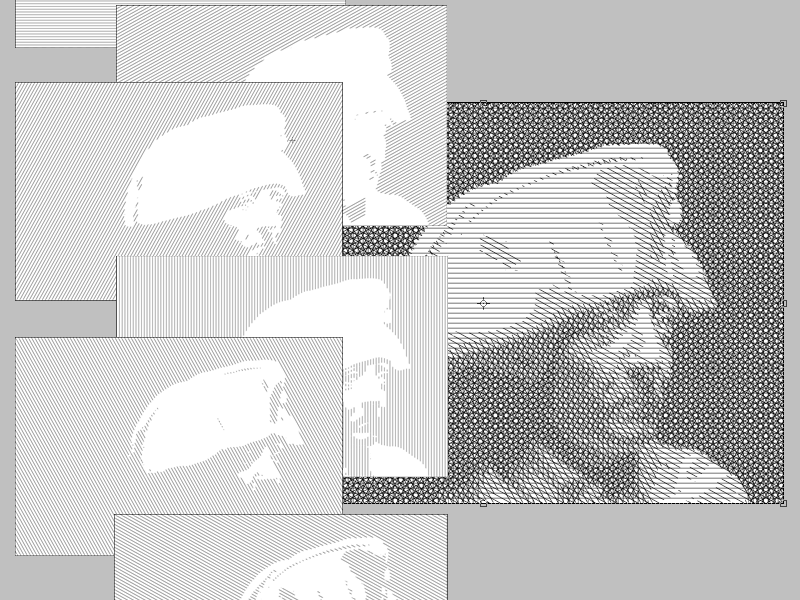
And this is what it looks like when one of the layers is added at a time: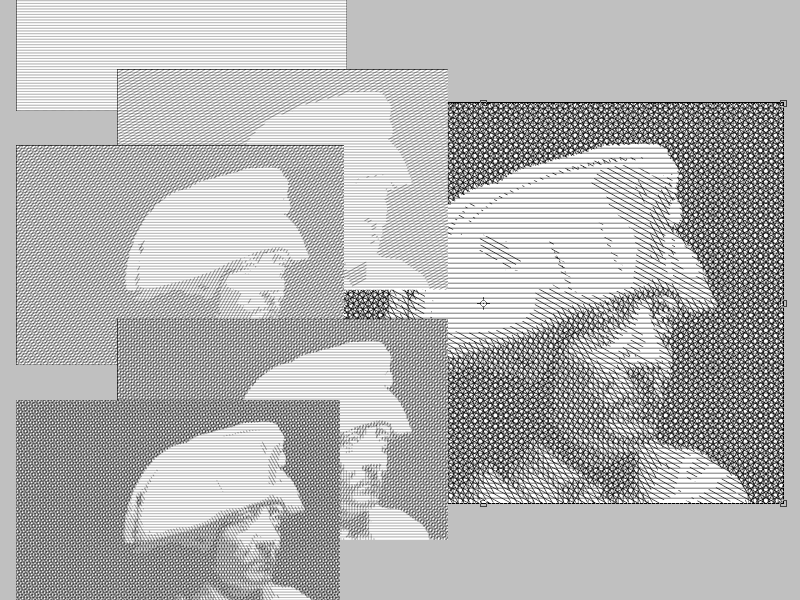
If the lines are too thick, they can be adjusted during bitmap conversion by setting 20 or fewer lines instead of 30 lines/inch. Certain effects can also be achieved through graining, oscillation, reduced opacity, etc.
The original image: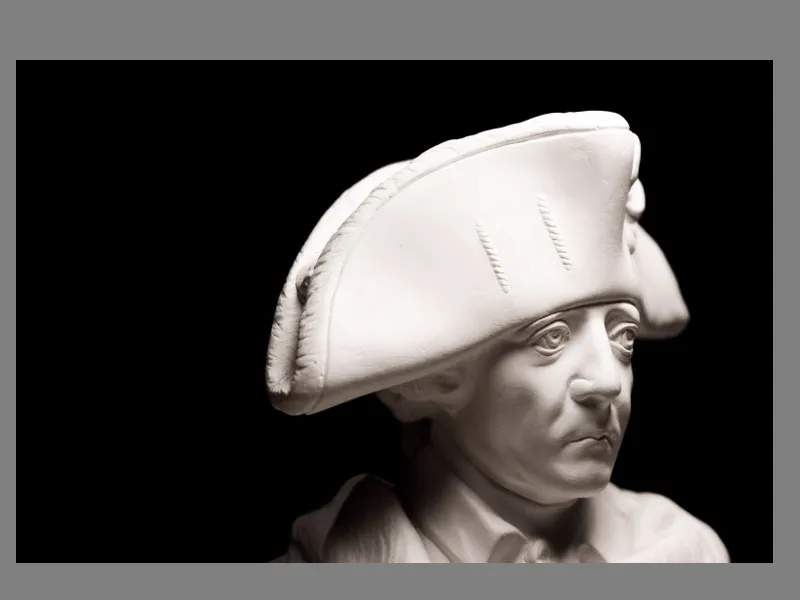
The original image with Photoshop's cross-hatching filter applied: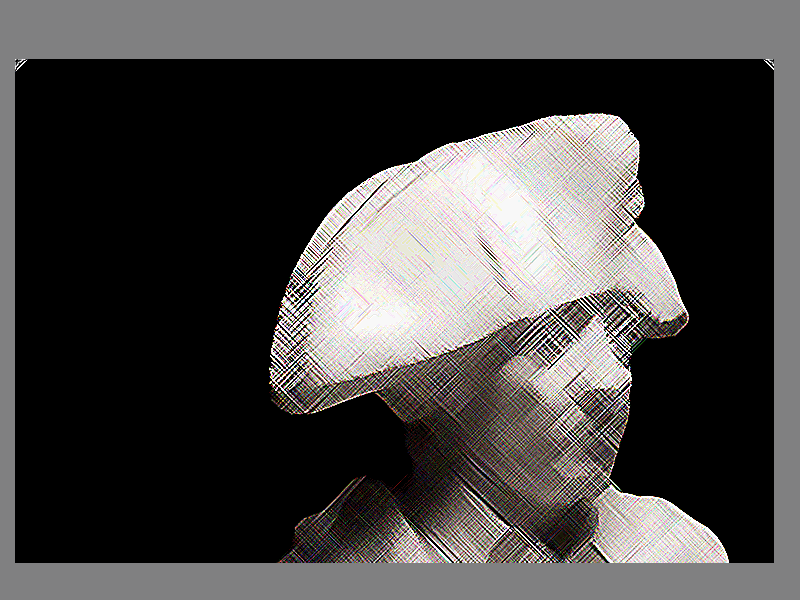
The finished image in cross-hatching style after this tutorial: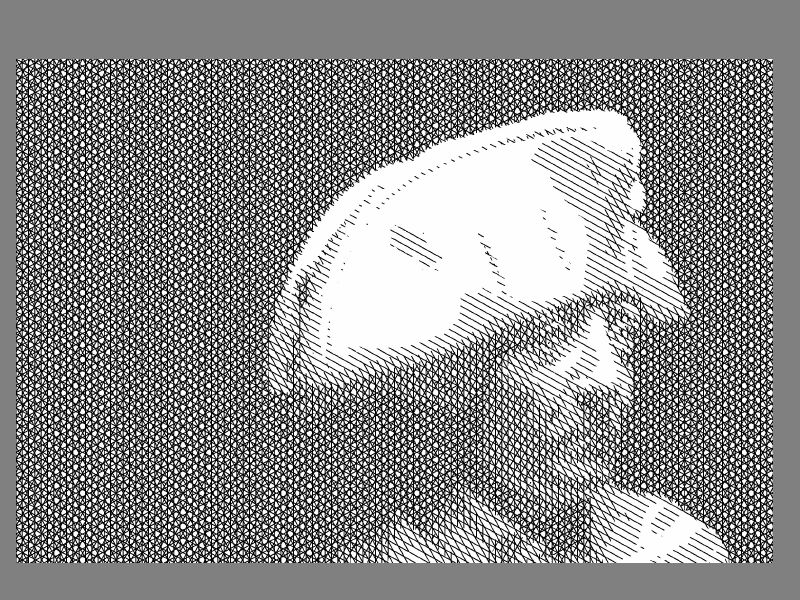
In this example, the background is black, so the visual effect is limited by the superimposed lines and mainly focuses on the "Alter Fritz", where otherwise the background would also have a stronger effect due to structure. The technique is definitely worth using and produces better results than the cross-hatching filter. Further effects can be added by using colored background layers or lines in white, which further enhance the effect of the image.
The effect of the image is of course dependent on the subject. I think Frederick the Great can certainly be recognized.


