The Pagepeel - or image flipping effect is a great technique to give your designs dynamism and tension. Whether you want to fold a realistic corner, create a dramatic 3D effect, or a creative interpretation - with Photoshop, the possibilities are endless. In this tutorial, I will show you three variants of the Pagepeel effect, perfect for posters, websites, or digital presentations. Let's get started and enhance your designs with this fascinating effect!
Step 1:
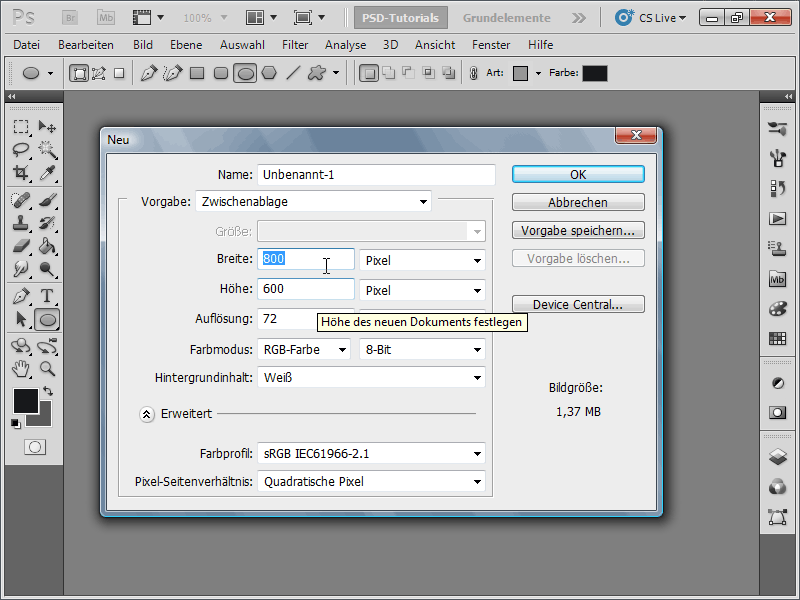
First, I create a new document; the size does not matter. I choose a very small size of 800x600 pixels. If you want to print this effect, change the unit from pixels to cm and the resolution from 72 to 300 pixels/inch. I can also directly load the photo that will receive the Pagepeel effect. However, for this workshop, I deliberately choose a lower resolution so that the effect is better visible in the screenshots.
Step 2:
Now, when I load my photo or use an existing photo, I can transform my photo layer with Ctrl+T (If I load a photo directly, then be sure to convert the background layer to a regular layer by a double click in the Layers panel). Now, right-click and select Warp. After that, I can move a point directly from the bottom left to the top with the left mouse button via Drag & Drop. It already looks like flipping the photo.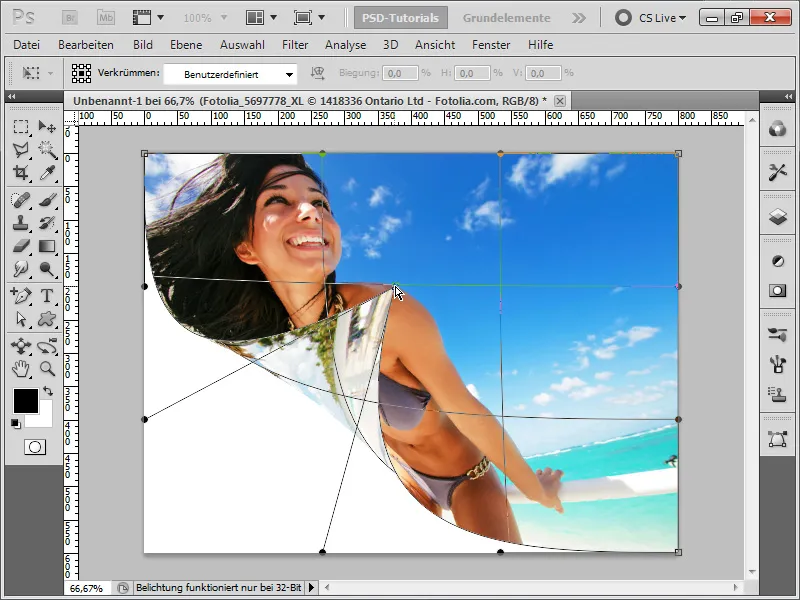
Step 3:
If I don't want to sacrifice too much space for the flipping effect, I simply make a selection with the Rectangular Marquee Tool, and then warp that area.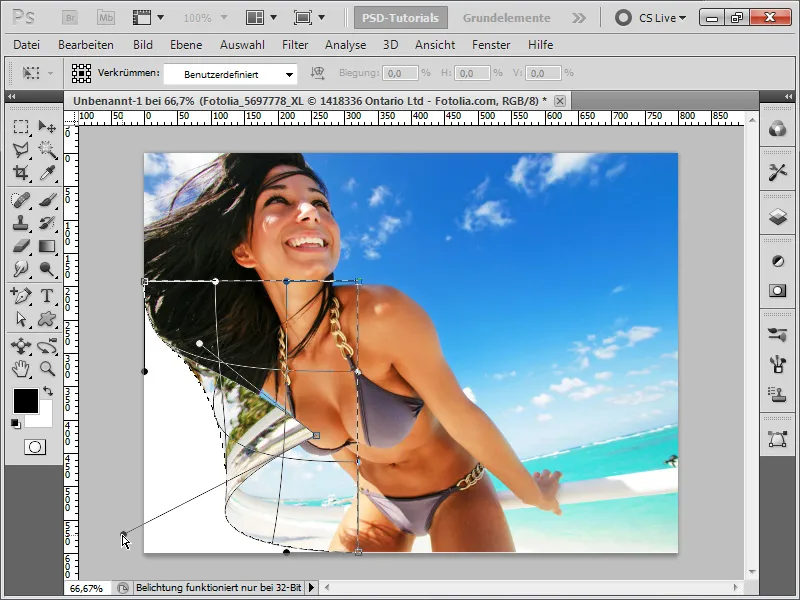
Step 4:
Now, I add a Drop Shadow in the Layer Style options.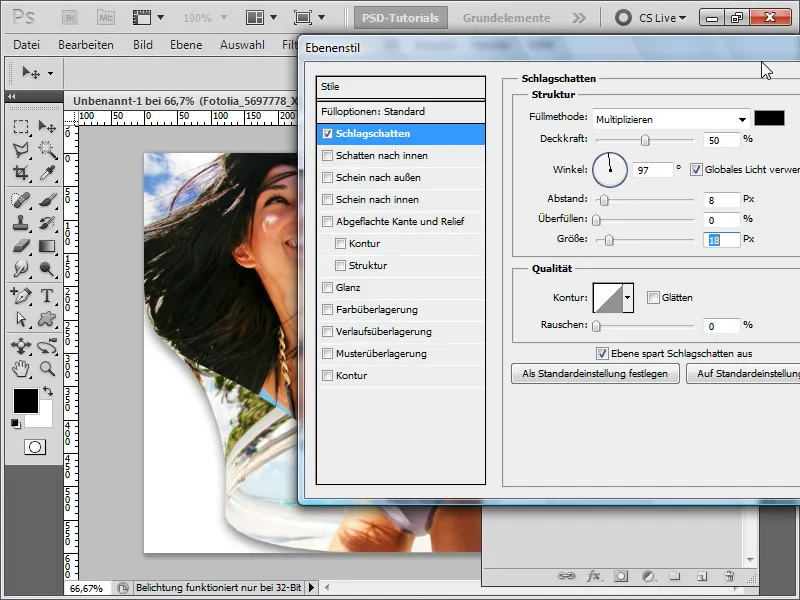
Step 5:
Since I don't see a background when turning a photo, I want the extended area to be white. To achieve this, I draw the area as a path using the Pen Tool and try to shape the curves precisely with the handles.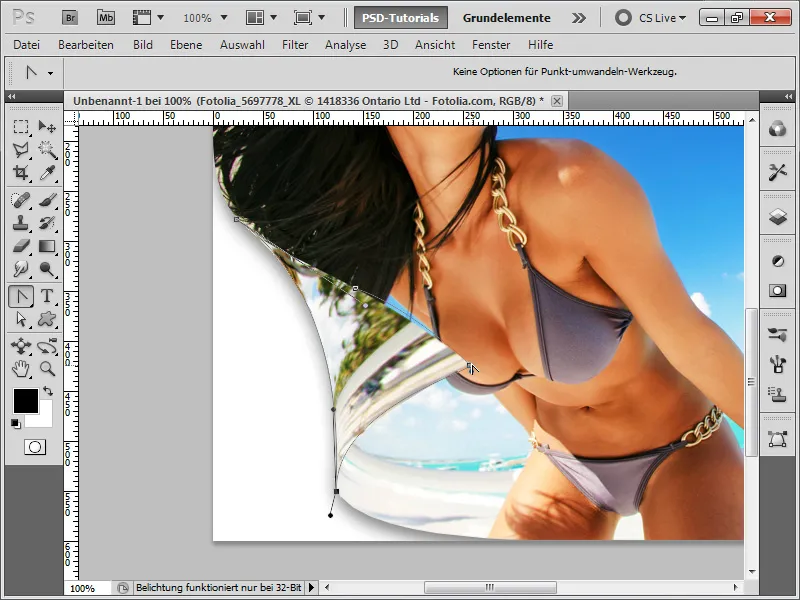
Step 6:
Now, I create a new layer and right-click on my work path in the Paths Panel to select Fill Path.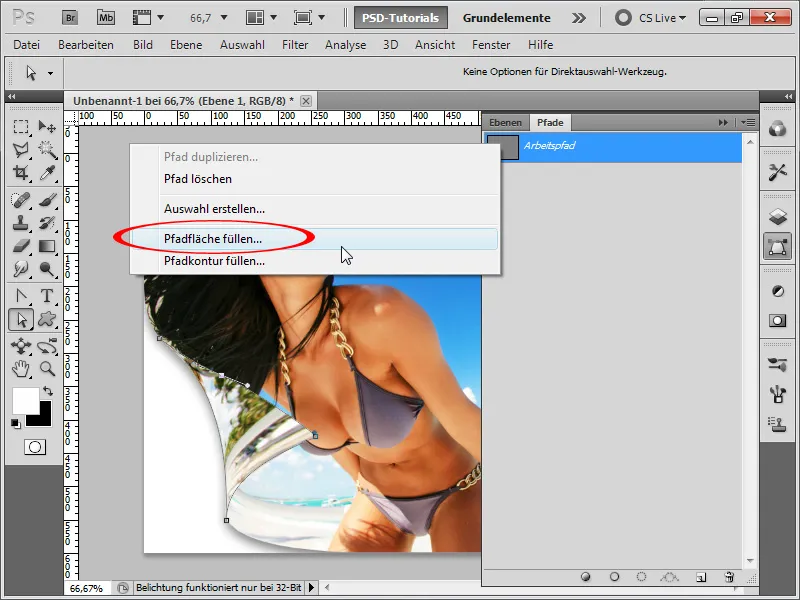
Step 7:
Then, I lock the transparent areas of my new layer and can now paint the shadows into it using a black Brush with about 15% Opacity.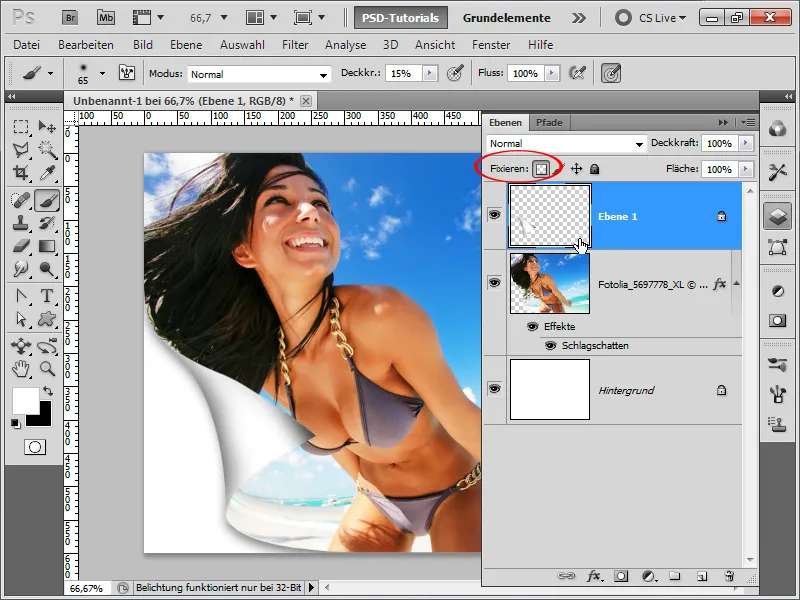
Step 8:
I could further refine the shadows at the fold in my photo with the Burn Tool. Unfortunately, this method is destructive, and the areas will be permanently altered.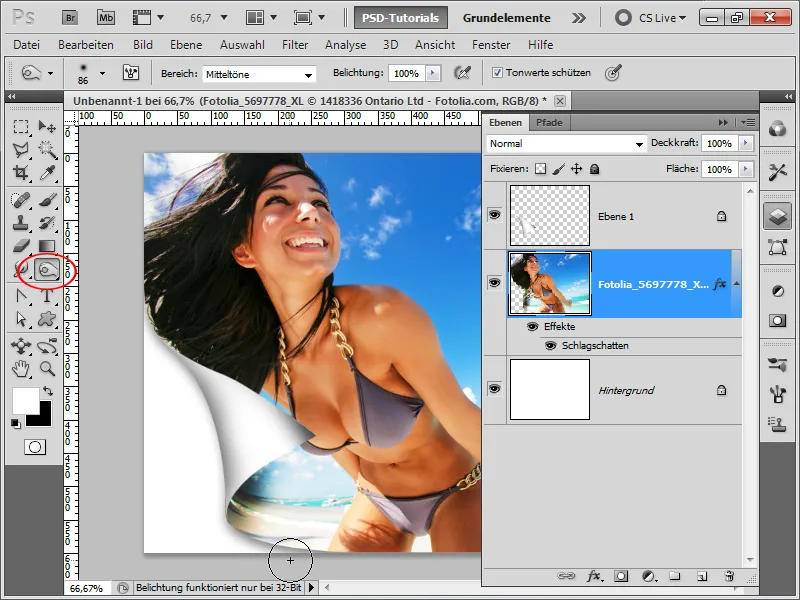
Step 9:
Instead, I create a new layer and make a selection from the photo with the Ctrl key, so I only paint the shadows within the photo. Now, I can add the shadows using a soft black Brush with 15% Opacity.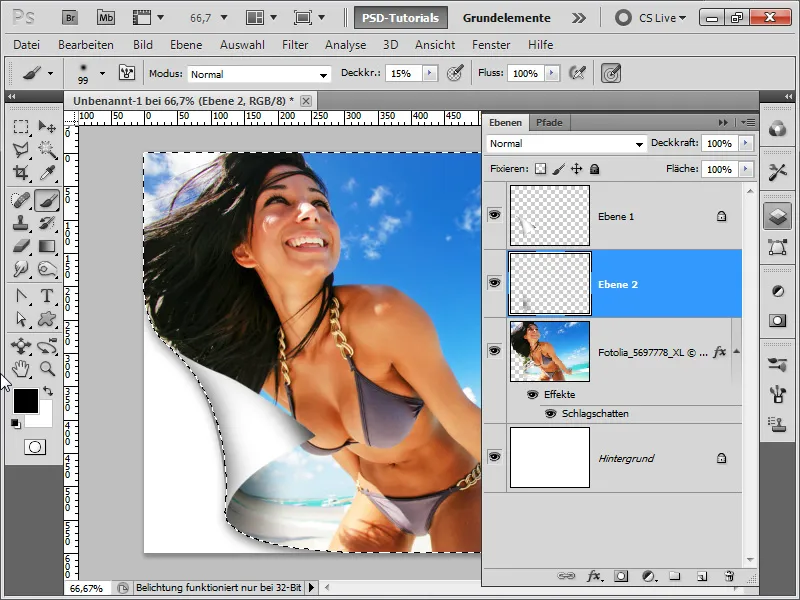
Step 10:
The result is quite impressive:
Step 11:
And if I slightly reduce the Opacity of my white layer, the flipping effect looks like a film, as long as at the very beginning, I thought of duplicating my photo before applying the Warp and then apply a mask on it.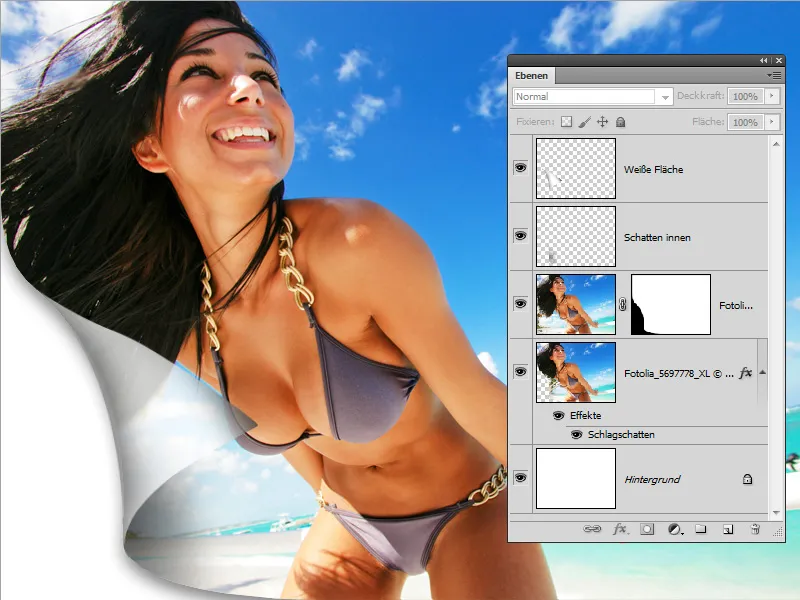
Step 12:
And here, I would like to show the second method of how a Pagepeel can be created. First, I open the photo, convert the background layer into a regular layer, and add another layer with white color in the background. Then, I take the Polygon Lasso Tool and draw a triangle, with two corner points precisely at the edges.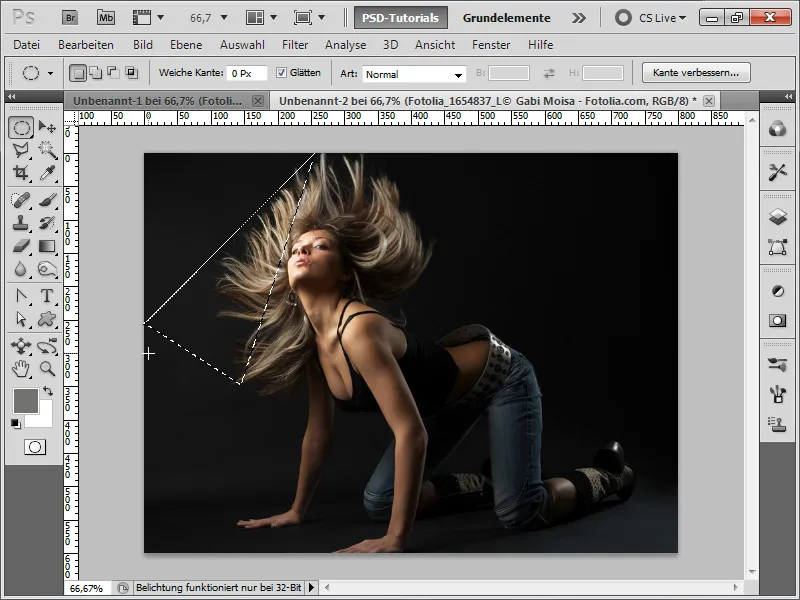
Step 13:
Next, I grab the Ellipse Selection Tool and place the circle exactly so that I subtract a crescent-shaped area from my selection while holding the Alt key and Spacebar.
Strictly speaking, the area should be filled with black, as that's where the "back" of the image appears. Here I have omitted that once - this creates a kind of film effect in the next steps, as in the previous example.
Step 14:
Now I create a new layer and set the Opacity to about 60%. Then I grab the Gradient Tool and draw a Black-White-Black gradient as follows: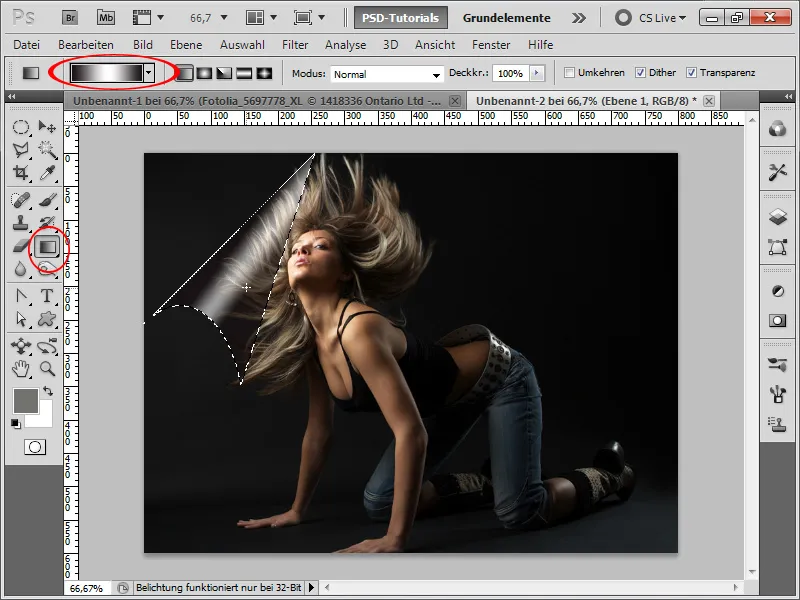
Step 15:
I make a quick selection (I could use either the Magic Wand or the Polygonal Lasso Tool) and create a mask for my photo.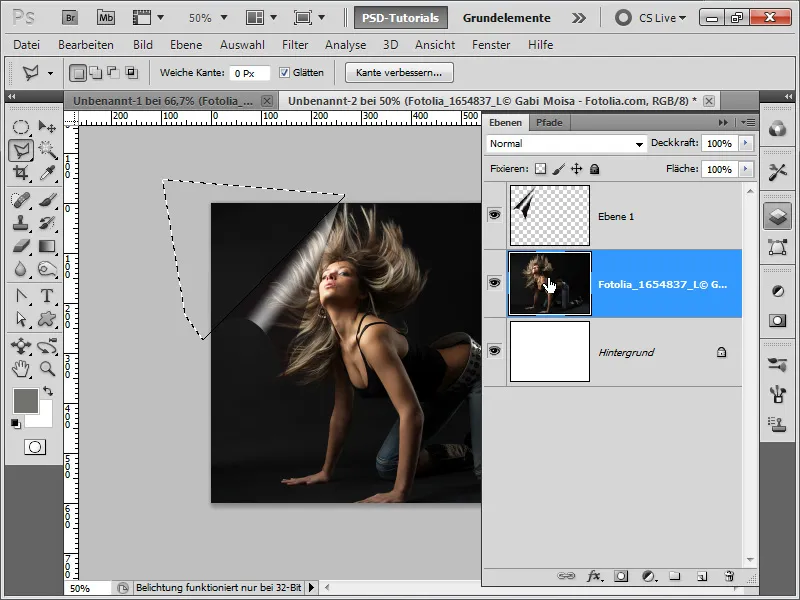
Step 16:
In the Fill Options of my photo, I also set a Drop Shadow.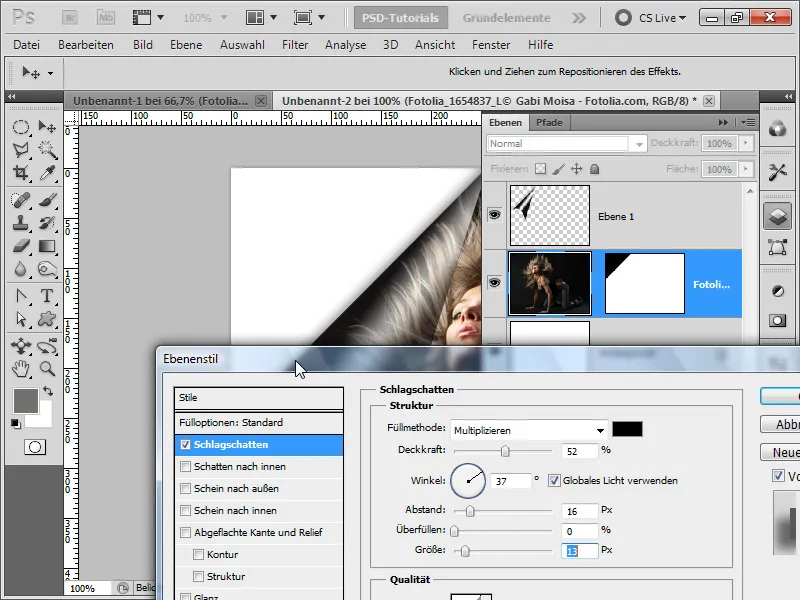
Step 17:
Now I can also add more shadows with the Burn Tool. However, these are hardly visible on the very dark background.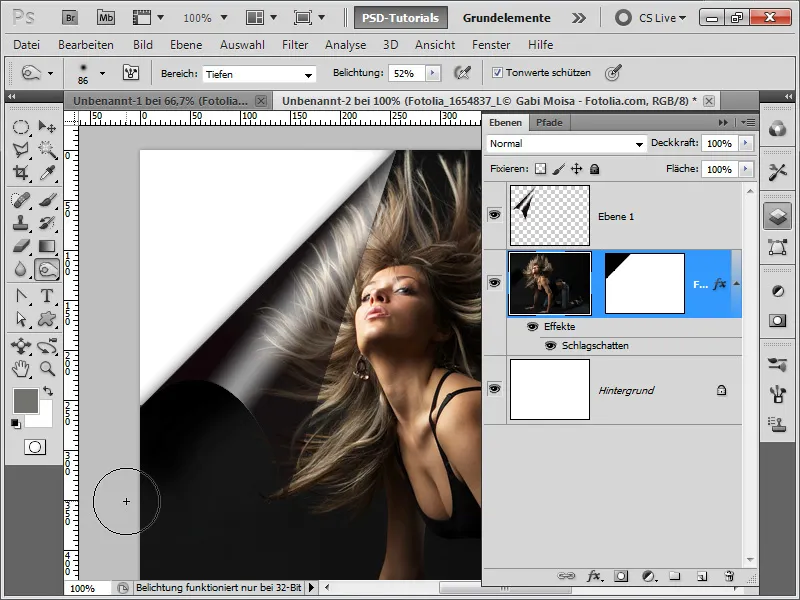
Step 18:
If I want to add more dynamism, I can also go directly into the mask by clicking with the Alt key and warp it using Ctrl+T and right mouse button.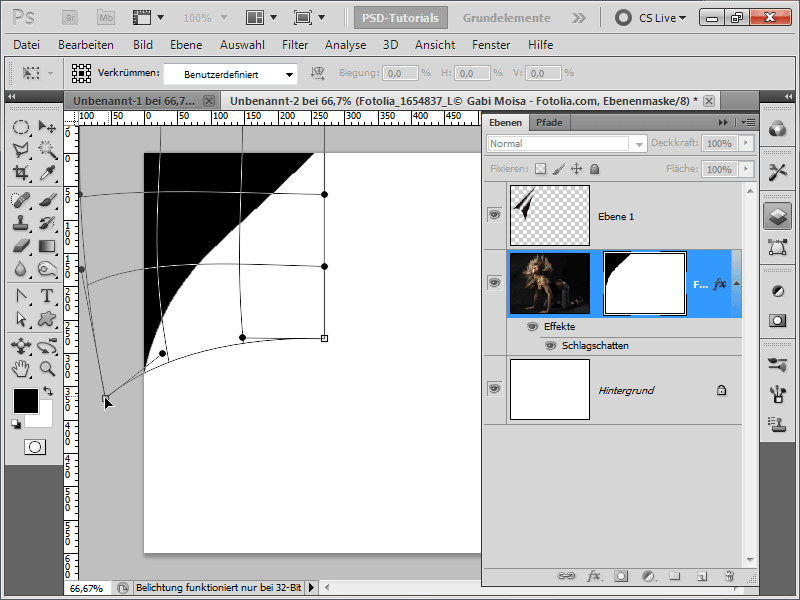
Step 19:
Now I just need to warp my top layer with the shadow/light accordingly.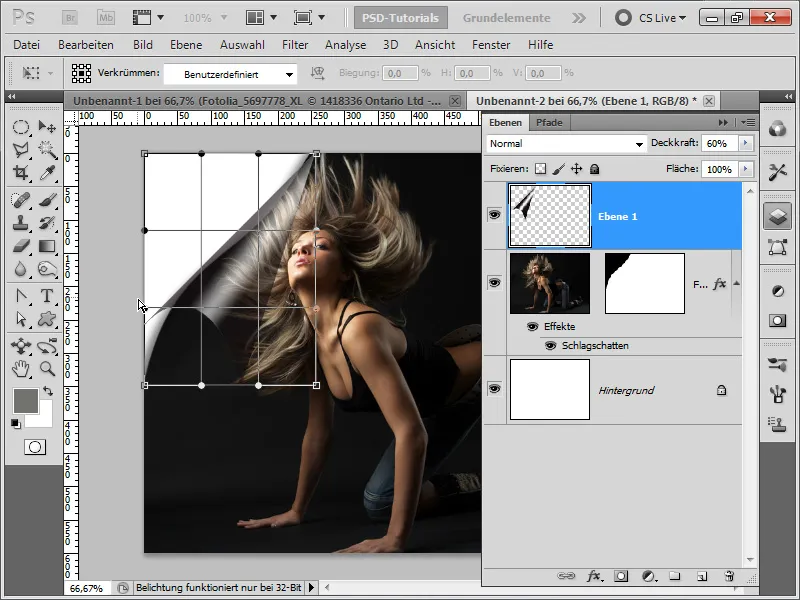
Step 20:
And this is what the result looks like:
Step 21:
So, now it's time for the third variation, creating a page peel effect. To do this, I drag and drop two images into my document.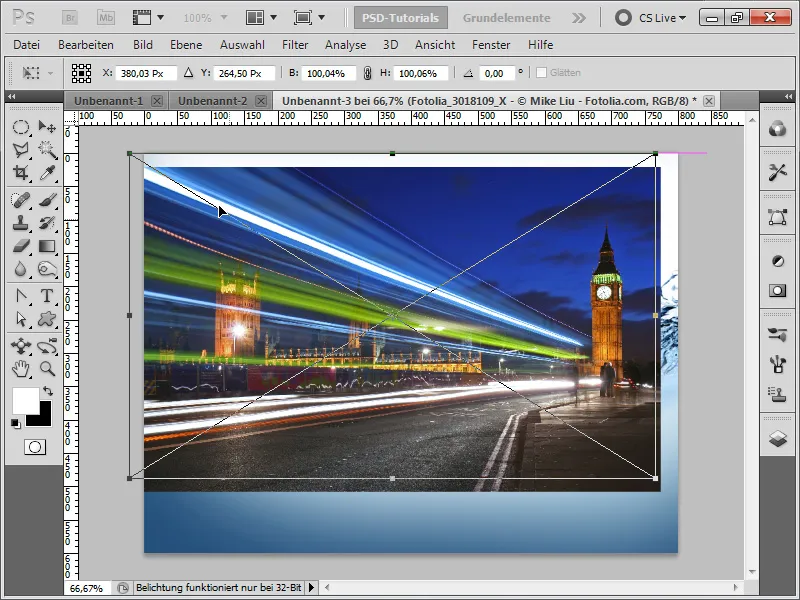
Step 22:
Then I use the Pen Tool to draw a triangle as a path, with the inner part slightly curved.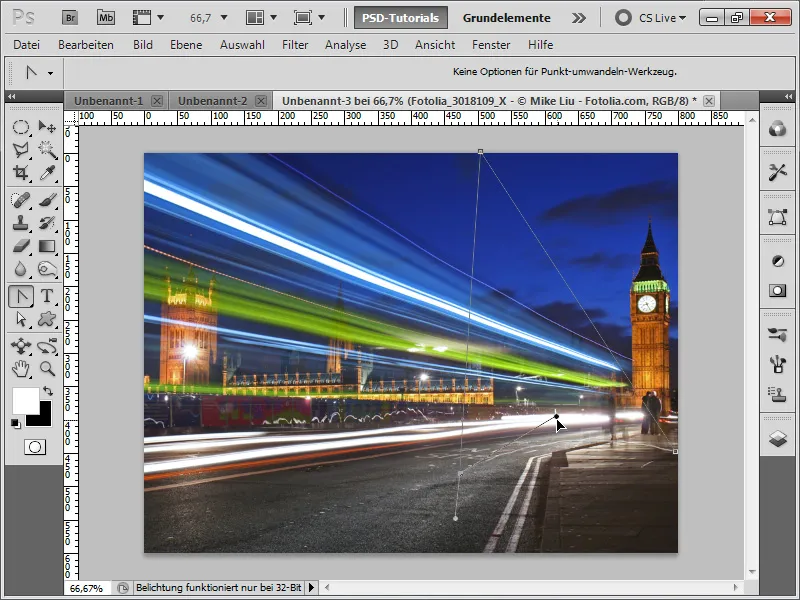
Step 23:
Then I go to the menu and save the path as Custom Shape.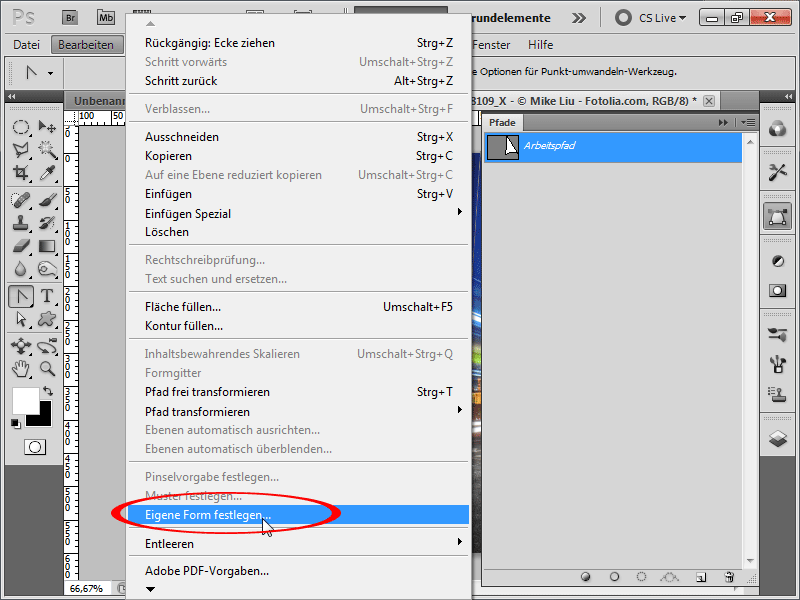
Step 24:
The good thing about this process is: I can now resize the shape to any size and it still maintains its quality because it is a vector shape.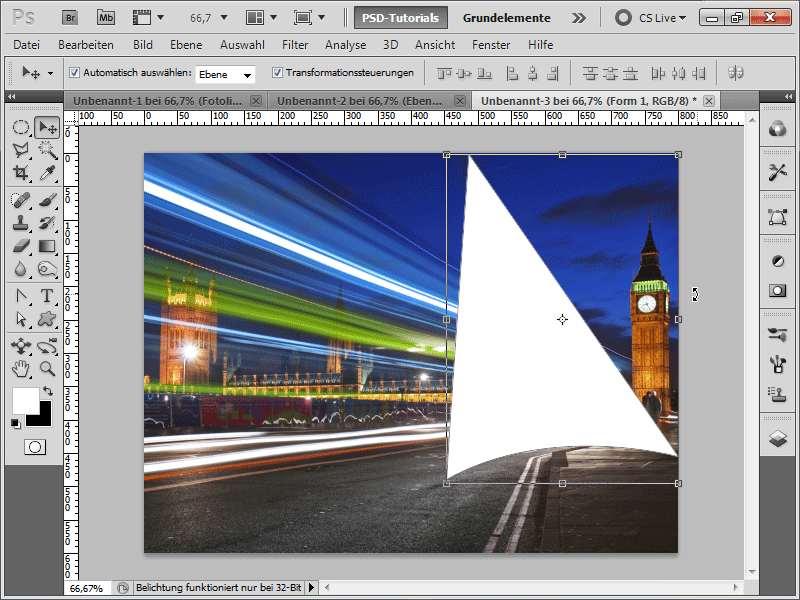
Step 25:
After that, I duplicate my water image, move the copy to the very top, and click with the Alt key between my vector shape and the water image to create a Clipping Mask so that the water is only visible in my shape.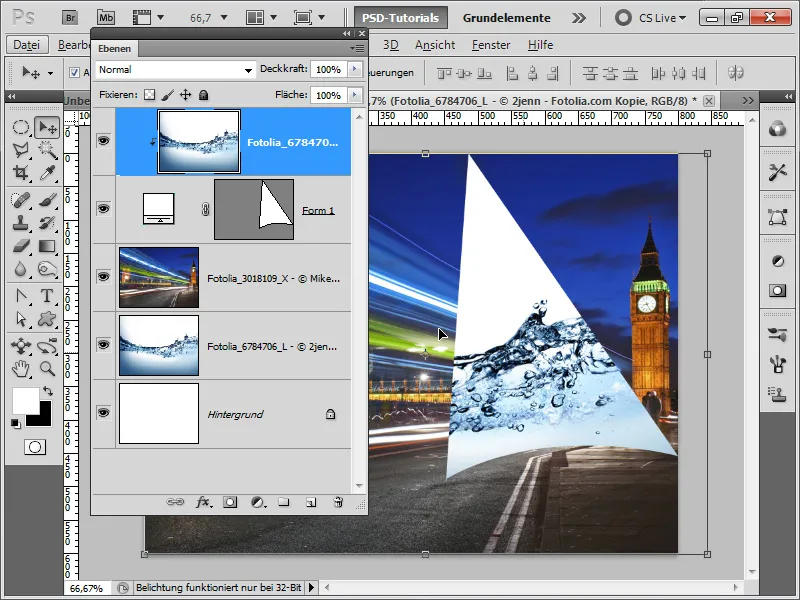
Step 26:
Now I make another selection that I immediately save as a mask.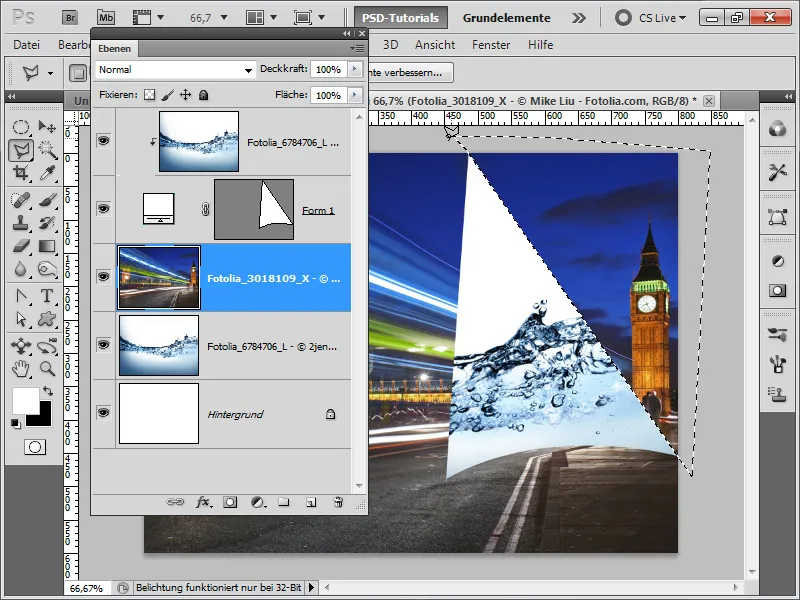
Step 27:
So, after creating the selection as a mask on my photo, I warp the lower water image a bit to make it look a little different from the upper water image.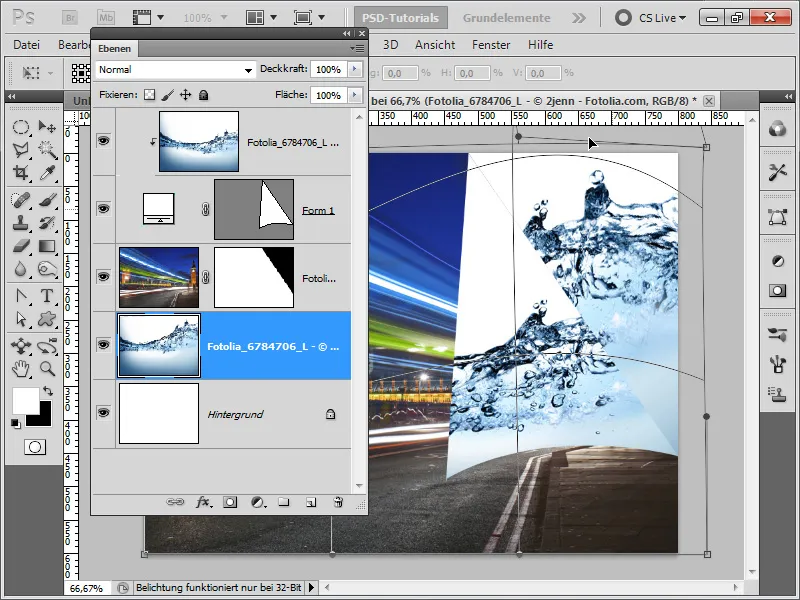
Step 28:
Now I create a new layer, make a selection of my vector shape while holding down the Ctrl key, and then click on the mask icon. Now I simulate the shadow with a large brush that has low opacity and is nicely soft. I paint in the middle of the unfolding side with white.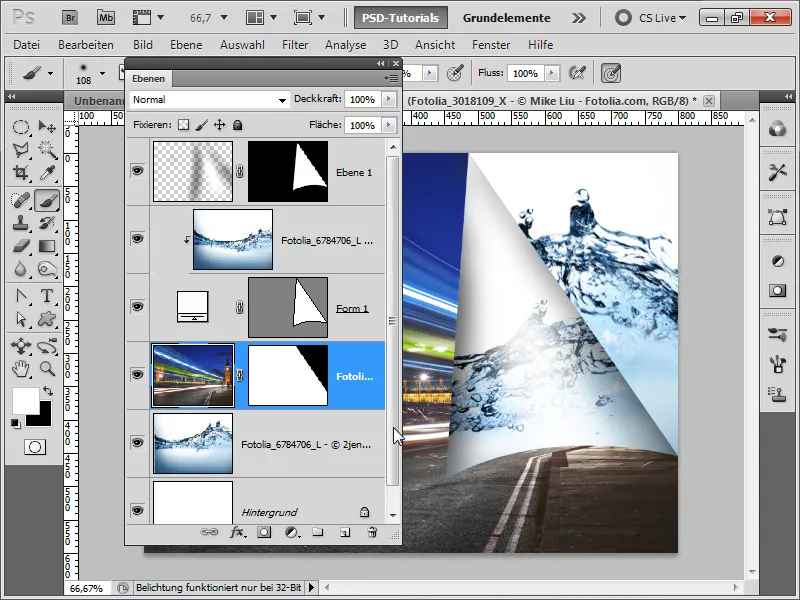
Step 29:
So, now I create one last layer and paint with black color and low opacity in it with my brush the shadow for the lower part of my image.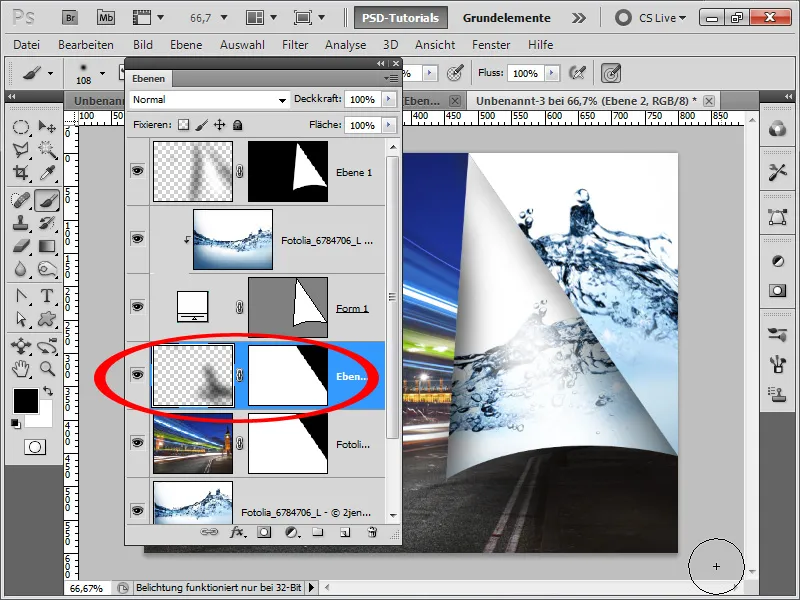
Step 30:
The finished image will look like this: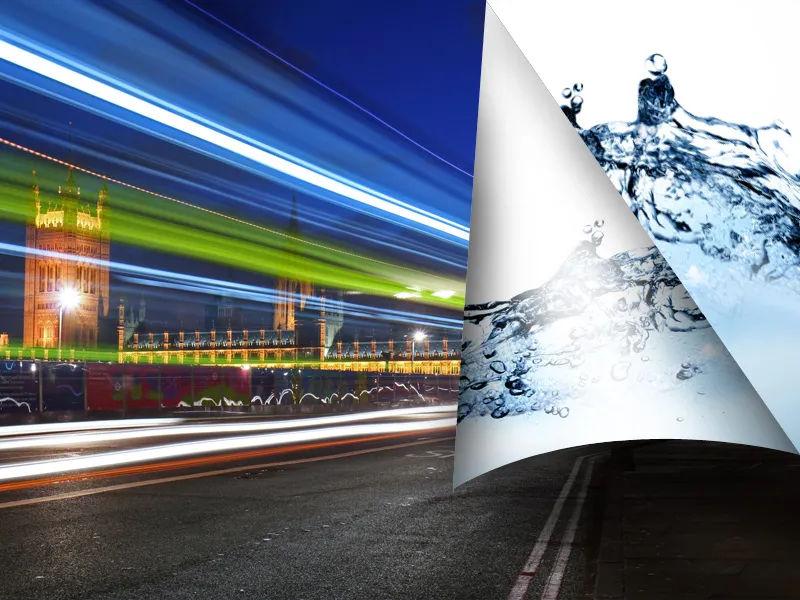
Tip: There is also an action on www.psd-tutorials.de that performs a page turning effect at the push of a button. Simply enter "page turning effect" in the search.


