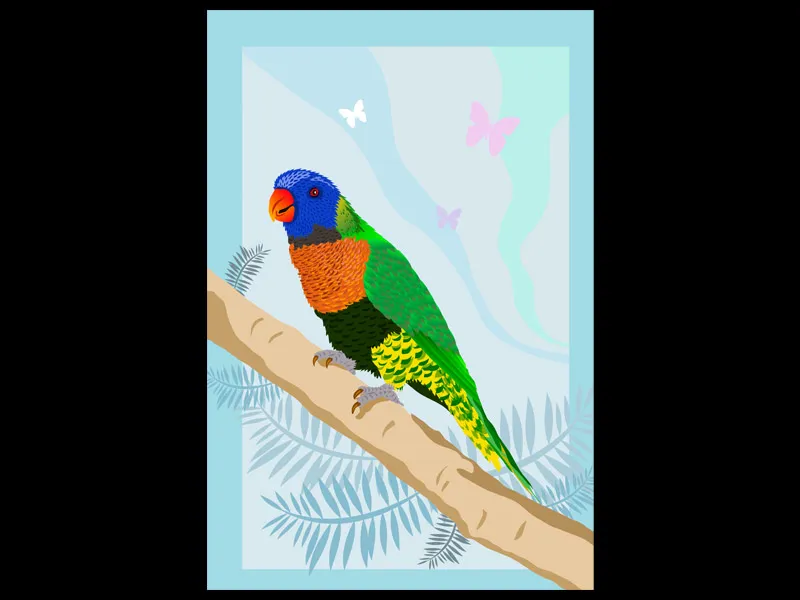
In addition to Photoshop, you can also create vexel art in Illustrator. There is even a tracing function that can partially automate your work, but that's a different story and not the topic of this tutorial. And one more thing: In addition to the trend factor, vexel images have a very useful property. They can be enlarged as much as you want without the contours becoming blurred – logical. We don't work with pixels, but with shapes that are outlined with vectors and can be scaled effortlessly.
Step 1
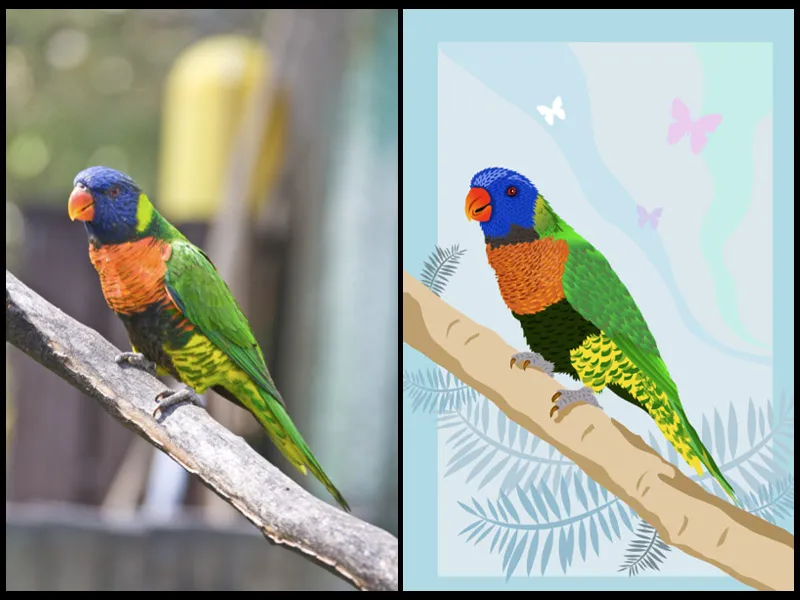
For comparison, I have placed the before and after images side by side so you can see the full extent of the work. For beginners, this is quite a challenging task, but with each vexel image you create, you gain experience and become better and faster. Tip: If you want to create a vexel image, duplicate the original so that you can compare colors and shapes of the vector image with the original during the work.
Step 2
Start by tracing the contours of the image from top to bottom. In our case, this is important as we need to consider the feather structure of the bird. Select the Lasso Tool and trace the upper part of the beak.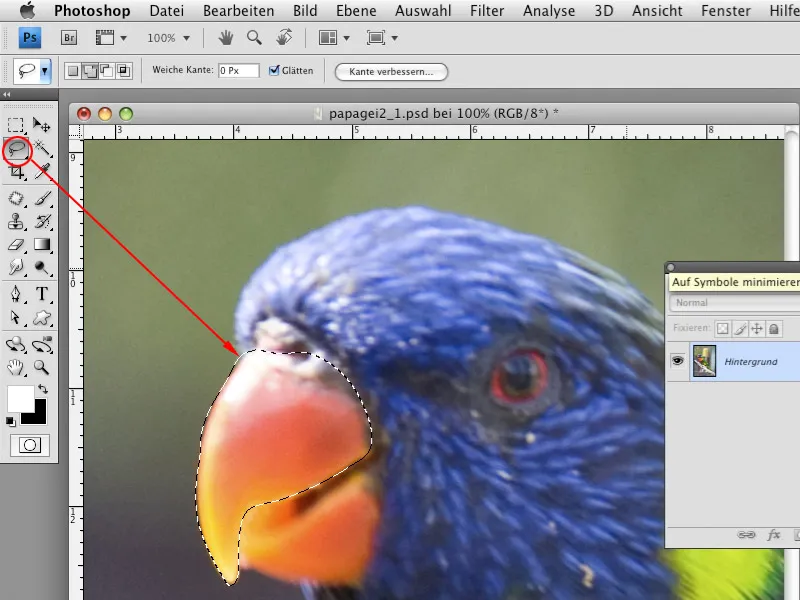
Step 3
Right-click and choose the option to create a work path.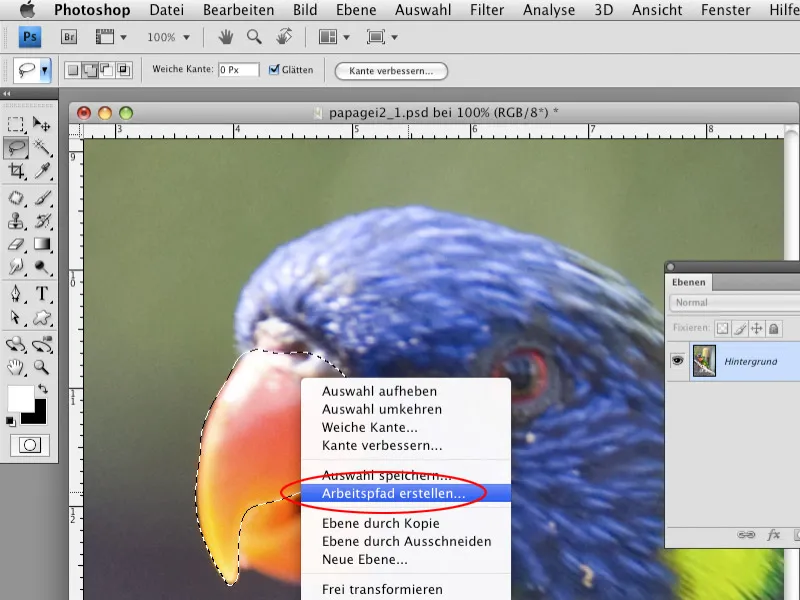
Step 4
In the subsequent dialog, choose the tolerance level. For small details, a tolerance of around 1-3 is optimal, so the path will be created exactly based on the selection and not arbitrarily simplified by the program.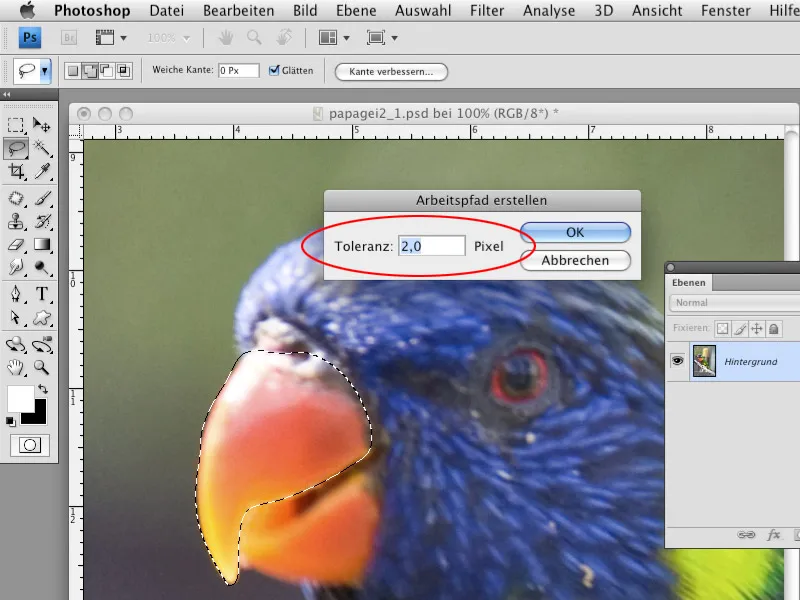
Step 5
The bird's beak is not a solid color, but has some colors that can be represented with a gradient in the vector version. In the Layers palette, select the Gradient option to fill the path.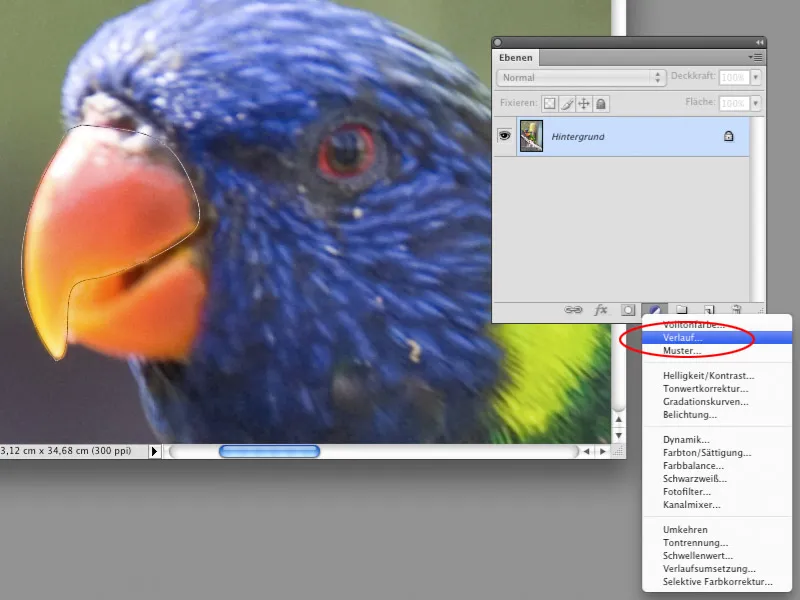
Step 6
First, choose the gradient type Black to White and define the appropriate angle in the gradient fill dialog.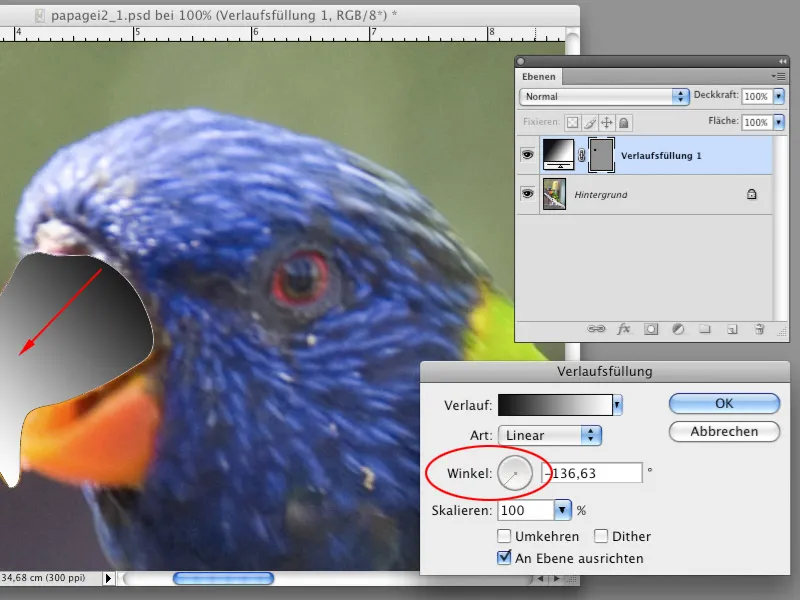
Step 7
The gradient, which is currently black and white, can be filled with any colors. Double-click on the gradient bar and define the colors red and yellow in the gradient edit dialog, as shown in the screenshot.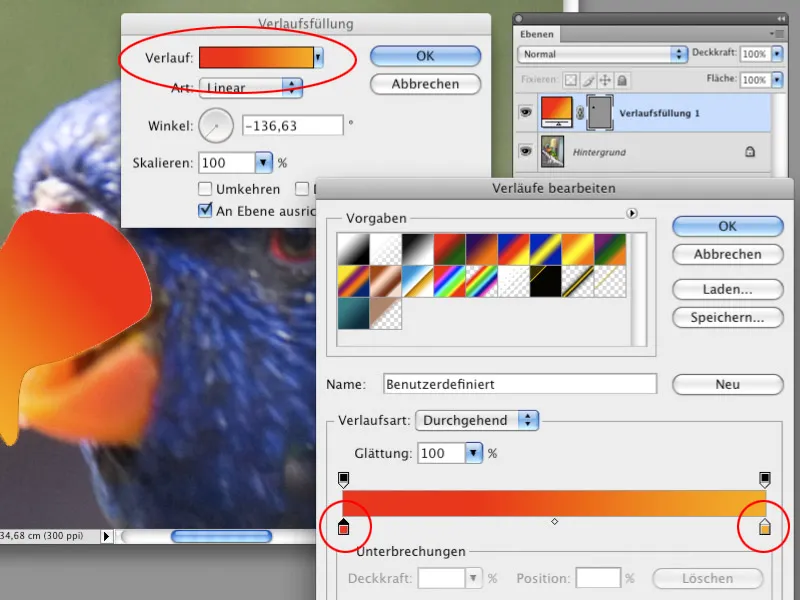
Step 8
In the same way as described in steps 2 to 7, you can also create the lower part of the beak. Pay attention to the order of the layers. The principle of layer positioning is quite simple. The layer with the lower part of the beak is below the layer with the upper part.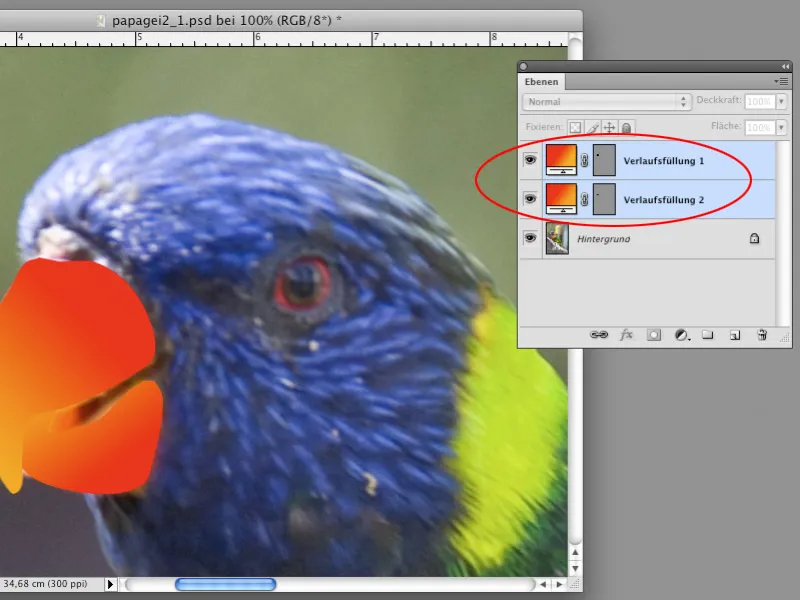
Step 9
Create some shapes on the upper and lower parts of the beak to emphasize the structure. You can create these shapes with the Lasso Tool and convert them into a path.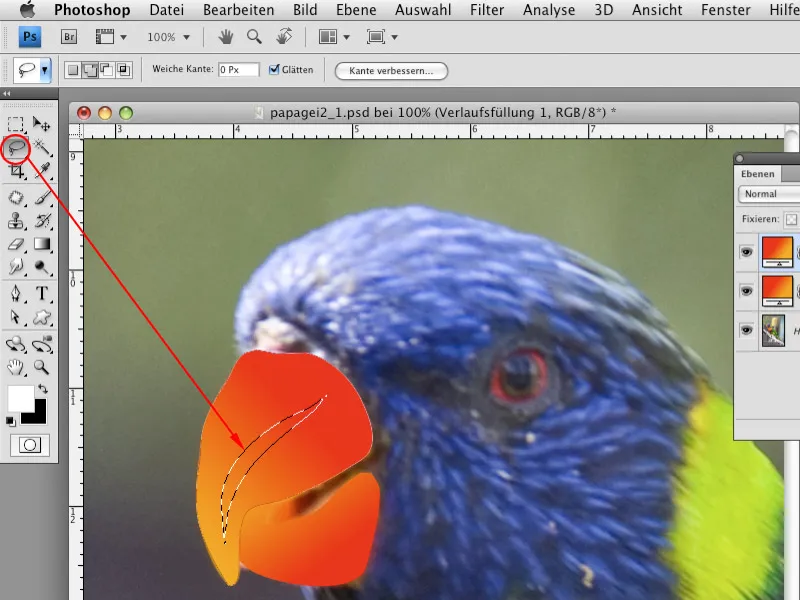
Step 10
The created shapes will be filled with a color, not with gradients. To do this, select the Solid Color option in the Layers palette.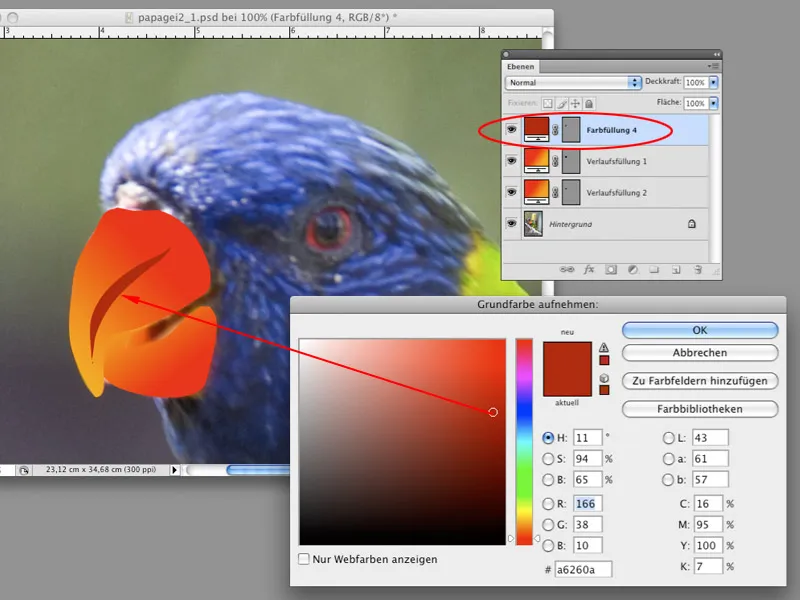
Step 11
In the screenshot, you can see how many fill layers make up the vectorized version of the beak. The mouth was filled with black color. In essence, one could conclude the explanations here, because the techniques will now more or less repeat. However, that wouldn't be fair, as there are still some tips that will make your work easier, and I don't want to withhold them from you.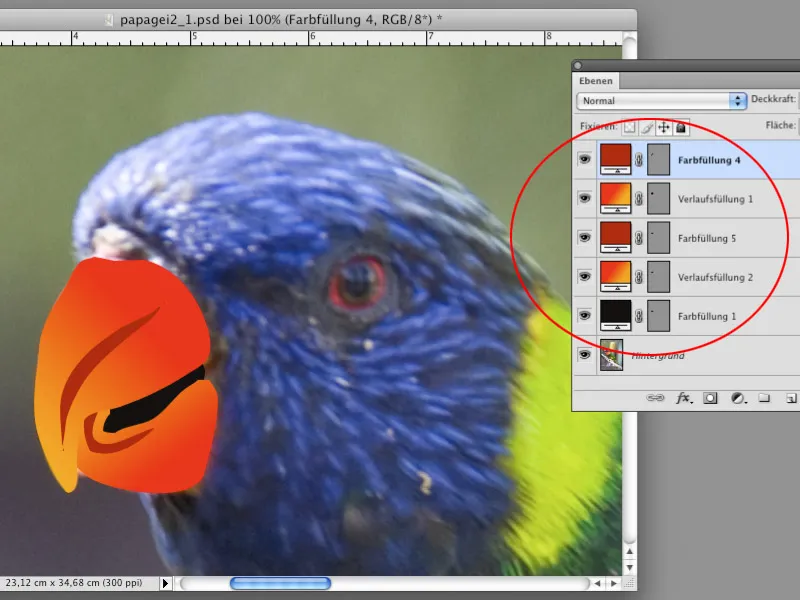
Step 12
For a better overview, it makes sense to unite the fill layers that thematically fit together in layer groups. You can mark the layers that make up the beak while holding down the Shift key and merge them into a group with the keyboard shortcut Ctrl+G. Name the group "Beak".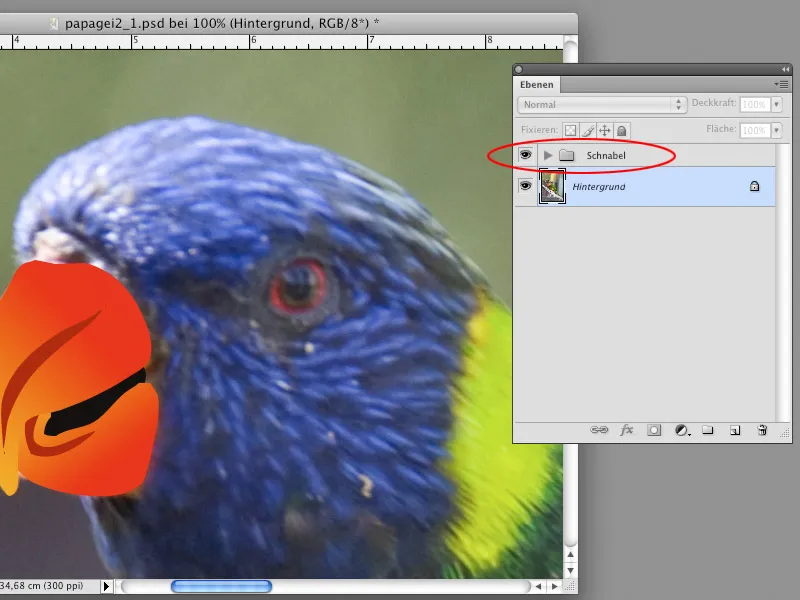
Step 13
Select the background layer and create a selection of the bird's head using the Lasso tool. Use the Add to selection option for the Lasso tool so that you can create the shape section by section more conveniently without having to select the shape in a single pass. Convert the selection to a Path, select a Tolerance of 2. Fill the shape with blue color.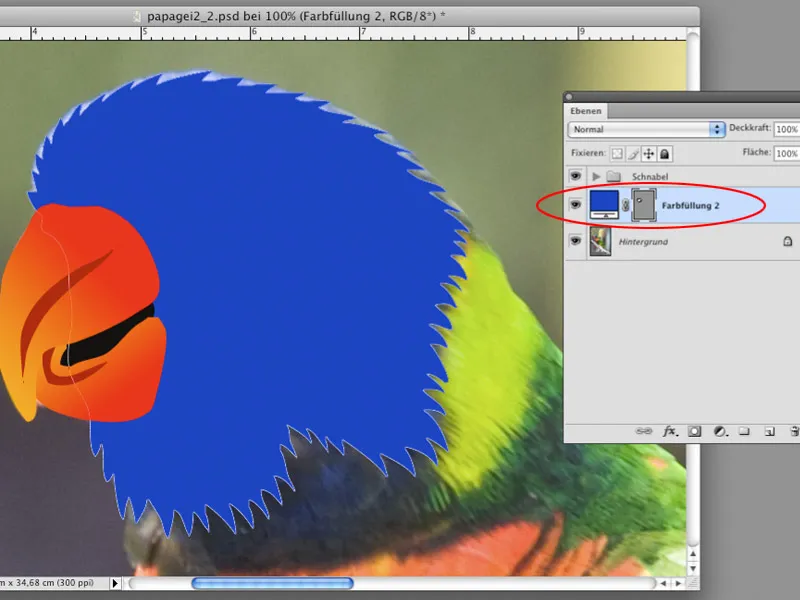
Step 14
If you are not satisfied with the shape of the path, you can drag at the path's anchor points to adjust the shape. For this, select the Direct Selection Tool and the Path Selection Tool.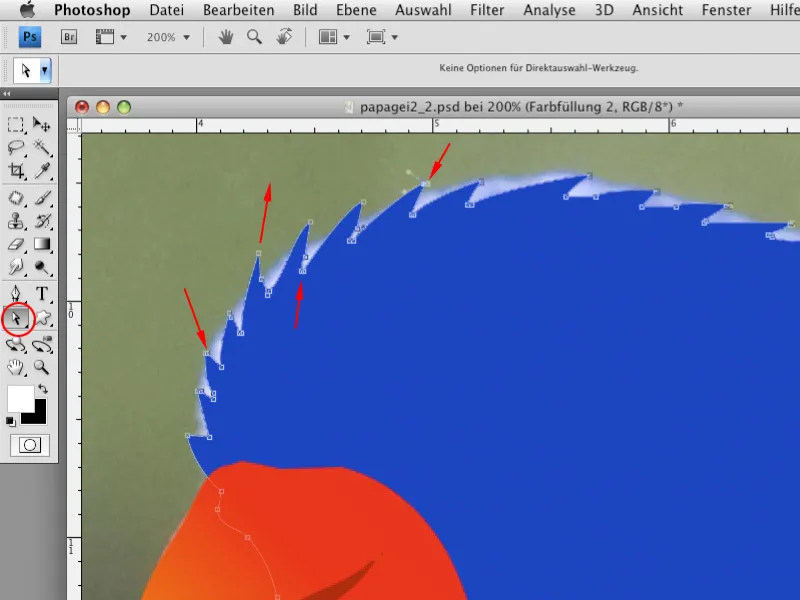
Step 15
To prevent the drawn shape of the head from covering the further details such as eyes and feathers, you can temporarily reduce the Opacity of the fill layer to around 50%.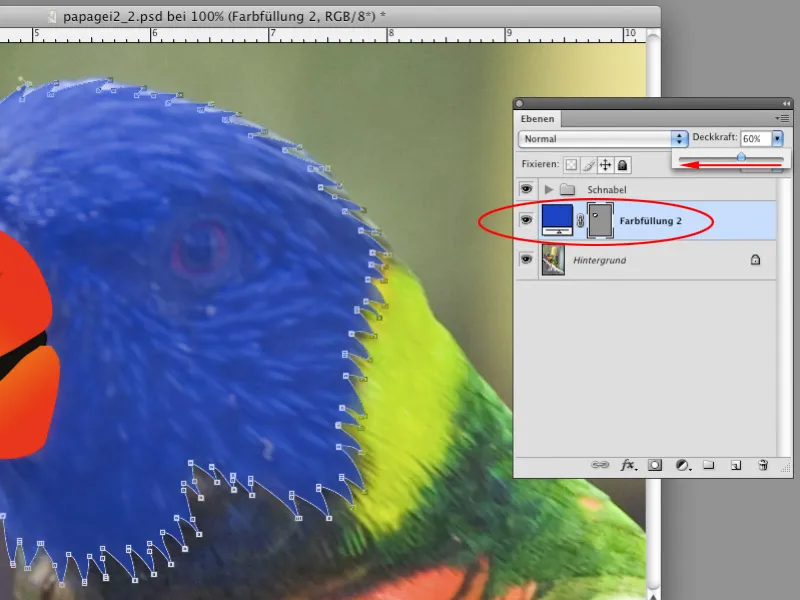
Step 16
Draw the shapes with slightly lighter blue color on top and back of the head. Make sure that the layers belonging to the head do not overlap the layer group with the beak.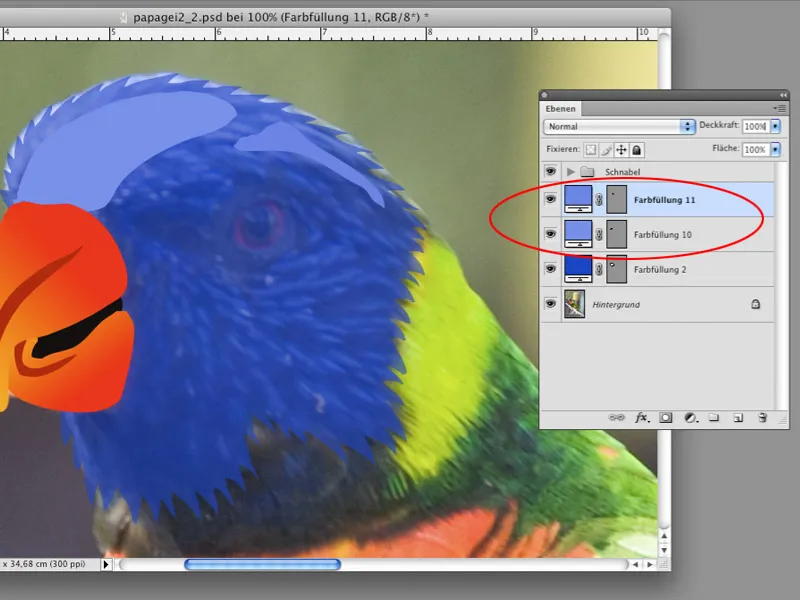
Step 17
You can create the bird's feather on the head using the same technique. Draw multiple small "feathers" with the Lasso tool (using Add to selection option) and then convert them all into a Path. Fill the Path with a dark blue color.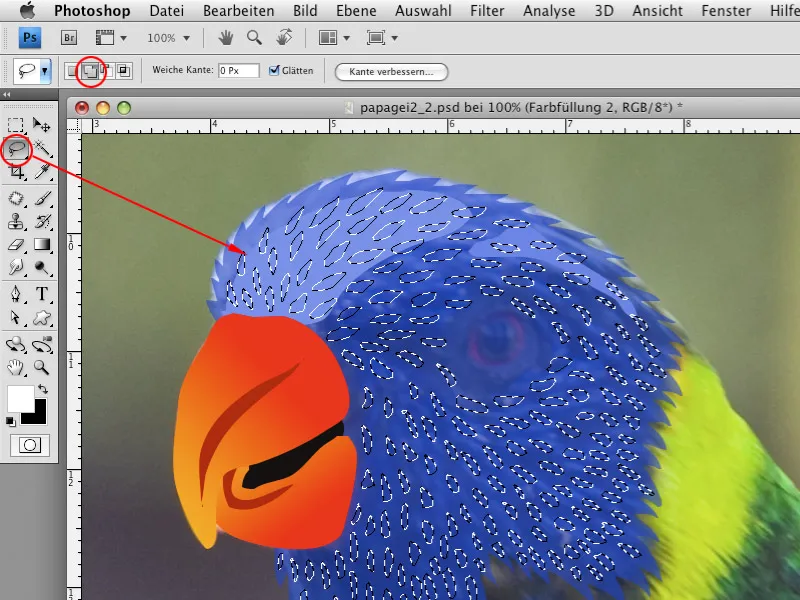
Step 18
Once you have finished creating all the shapes of the head, you can set the opacity of the bottom layer with the head outline back to 100%. Merge the head's layers into a layer group.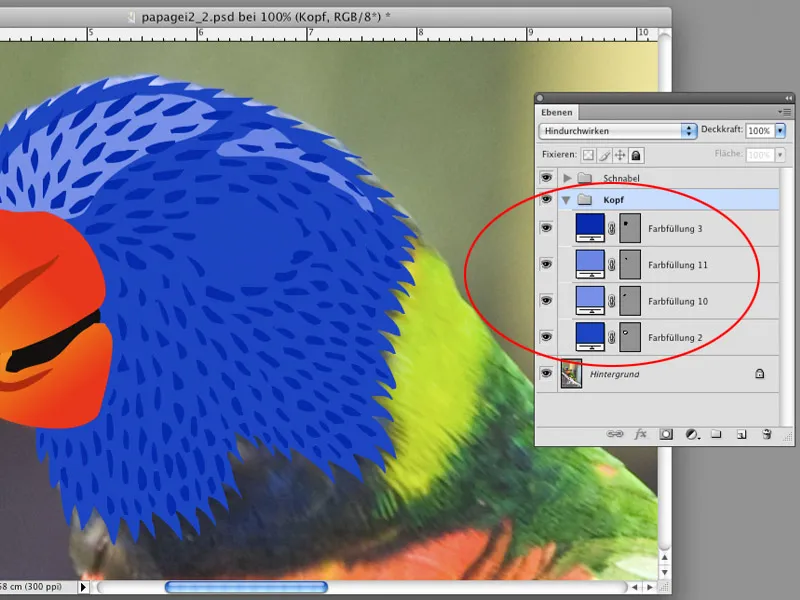
Step 19
Start shaping the eyes. To see everything on the original image under the group with the head, reduce the Opacity of the entire head group to about 30-50%. Create the darker shapes below the eyes.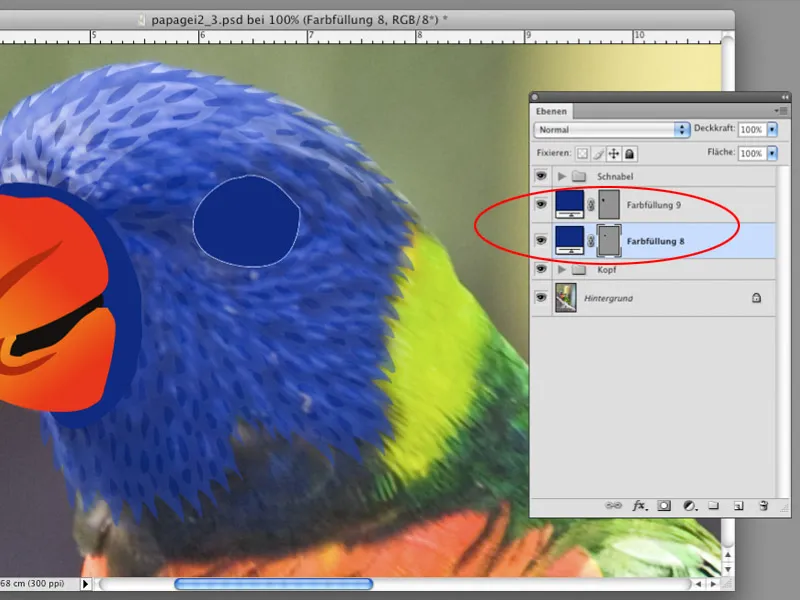
Step 20
Create the shape of the eyeball, which you fill with dark red color.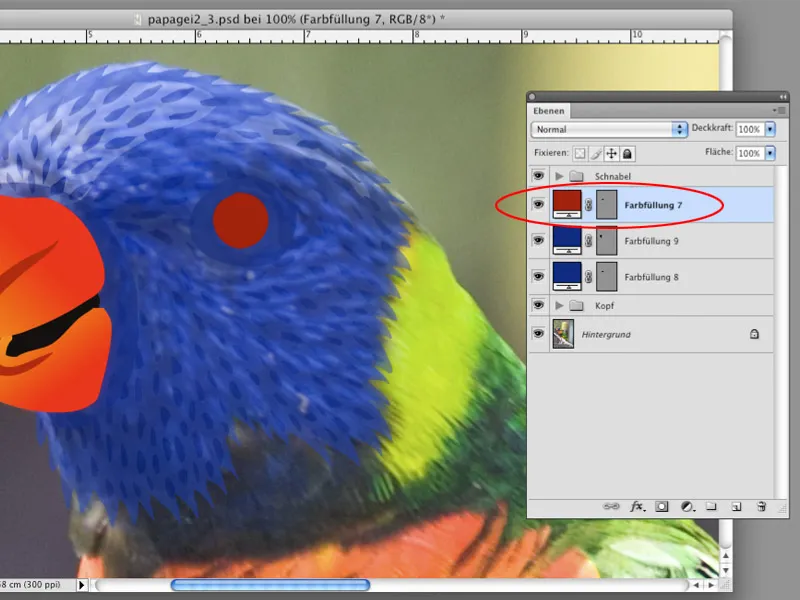
Step 21
Create additional shapes such as the pupil, which is filled with black, a light reflection in the pupil, which you can fill with white. Merge the layers of the eye into another layer group.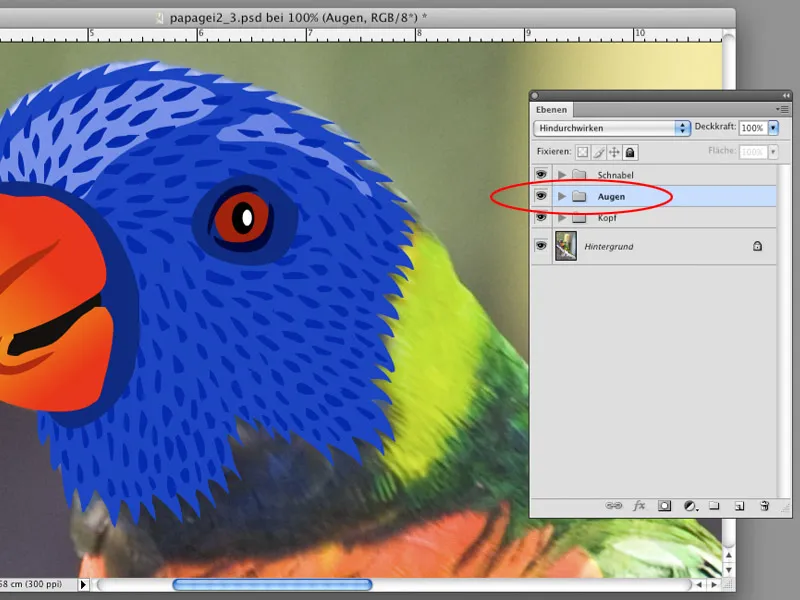
Step 22
As described earlier, create the layers to vectorize the bird's neck.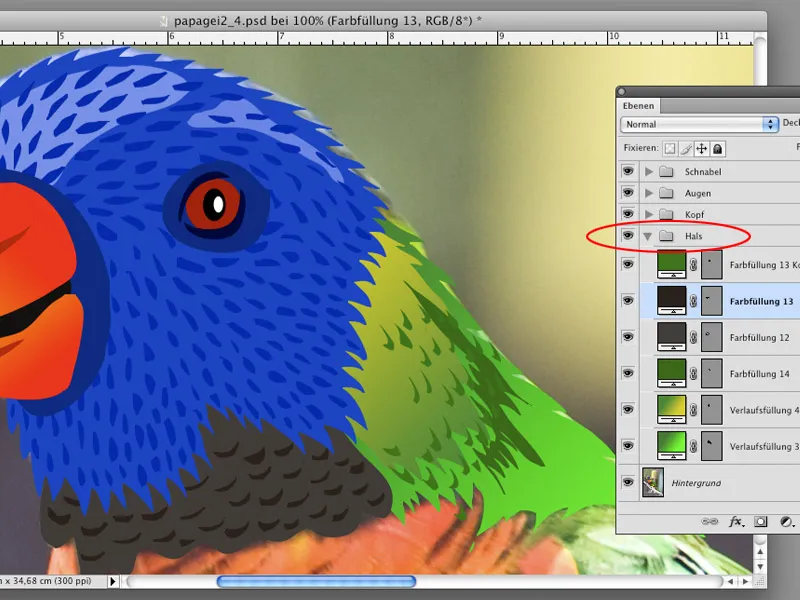
Step 23
For the details that are colorful, such as the bird's chest, you can do a little trick. First, create the basic shape as you did with the head, then create the shape with the feathers, which you fill with slightly darker color.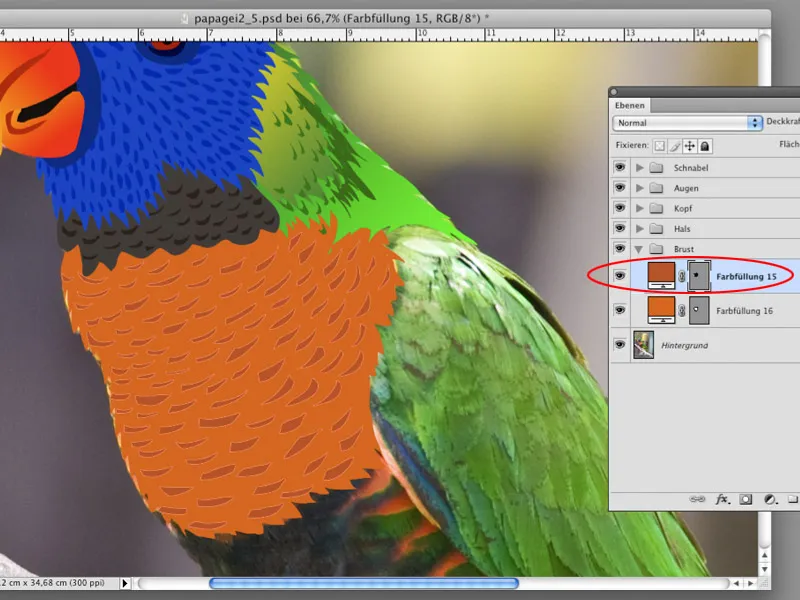
Step 24
Then duplicate the layer with the texture three more times. Scale the copies of the texture fill layer, move them slightly against the first texture fill layer, and change the fill color by double-clicking on the fill layer thumbnail. Once done distributing the textures, merge the layers into a layer group.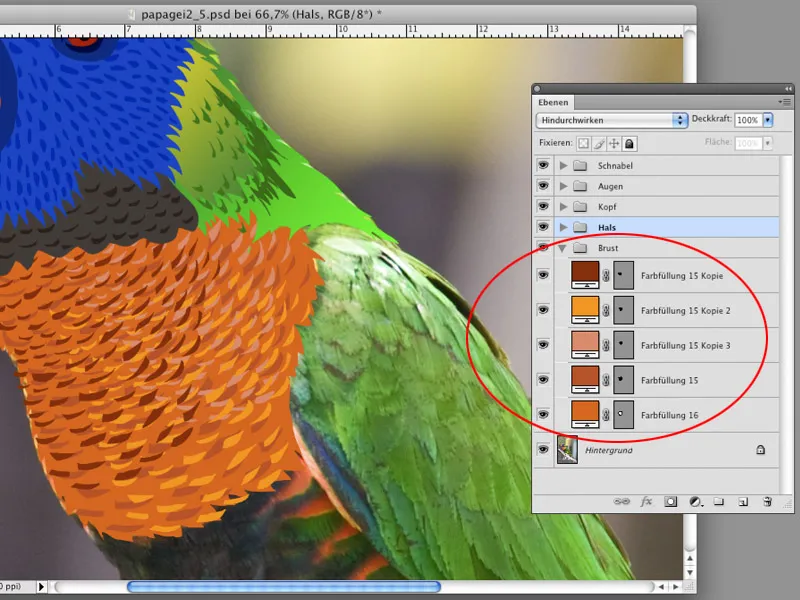
Step 25
For the larger feathers, you can make your work easier by working with copies of the fill layers. First create a fill layer in the shape of a feather and with a gradient from light green to dark green.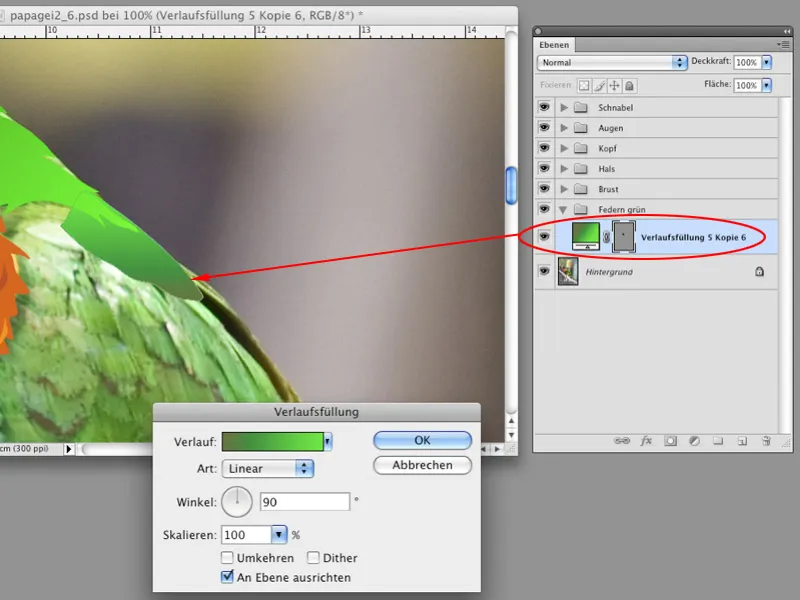
Step 26
Make a copy of the fill layer and move it to a different location. This way, you can create a large number of cloned feathers. To avoid them looking too similar, you can rotate some shape layers using the Free Transform command.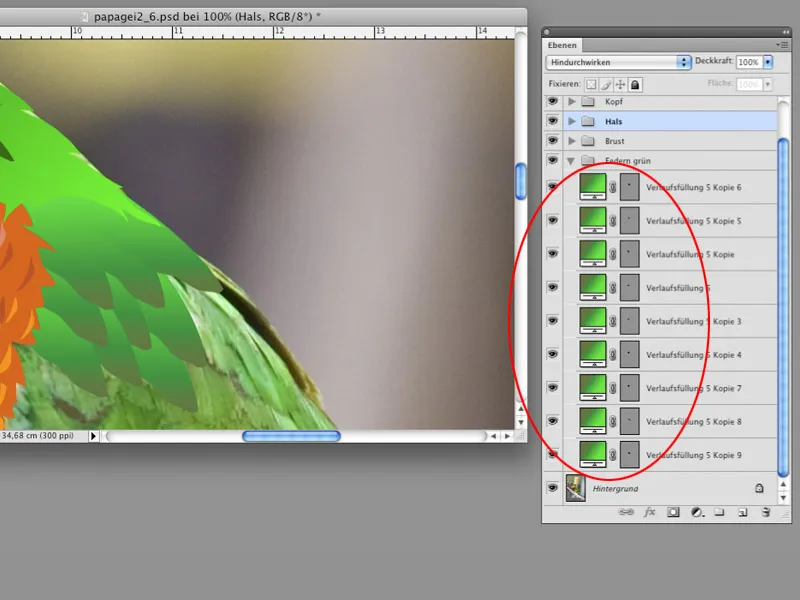
Step 27
Combine the feather layers into a layer group.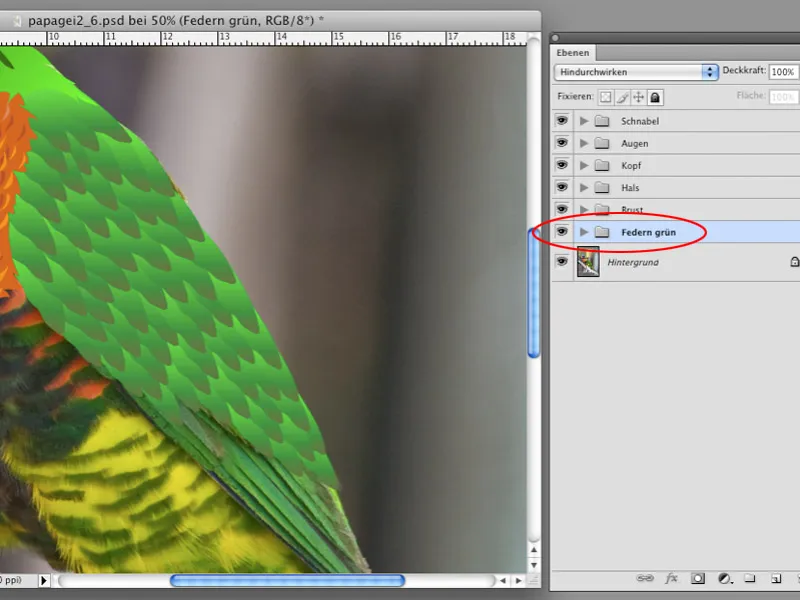
Step 28
To give the feather some more structure, you can apply another trick. Duplicate the layer group with the feathers and resize it so that the structure of the feather group is slightly shifted compared to the original.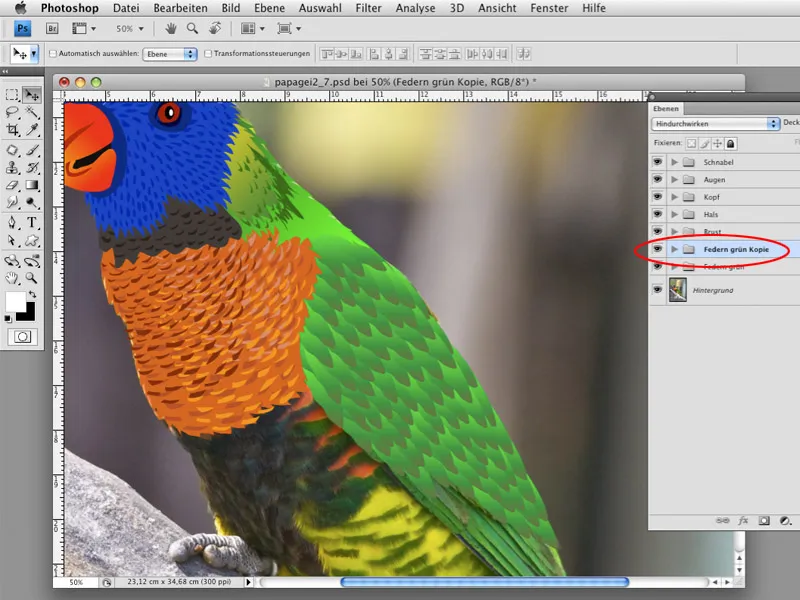
Step 29
Create a layer mask on the layer group with the scaled feathers, and select the Gradient Tool with the option Foreground to Transparent, Foreground Color Black. Drag a masking gradient as shown by the arrow in the screenshot.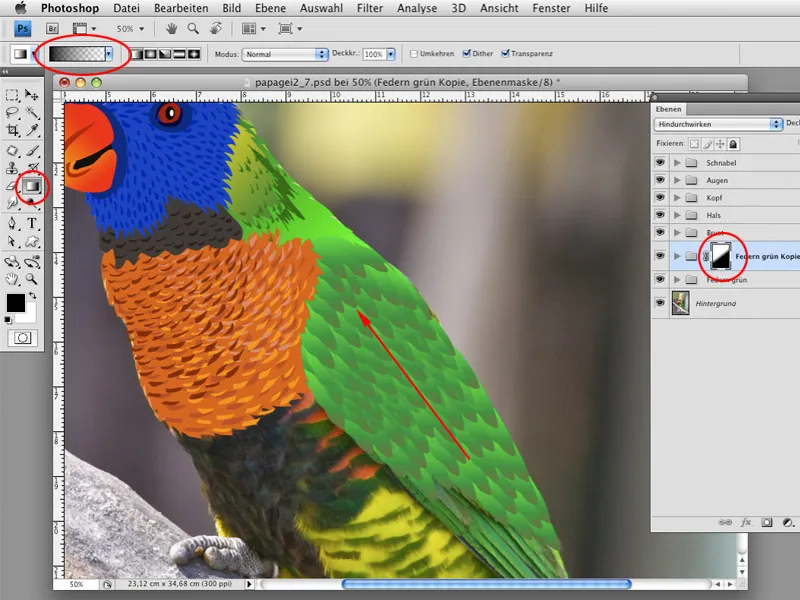
Step 30
As you can see, you can convert the entire design of the bird and the branch into vectors in the way described in the previous steps. It is important to divide the layer structure into layer groups; this will give you a better overview.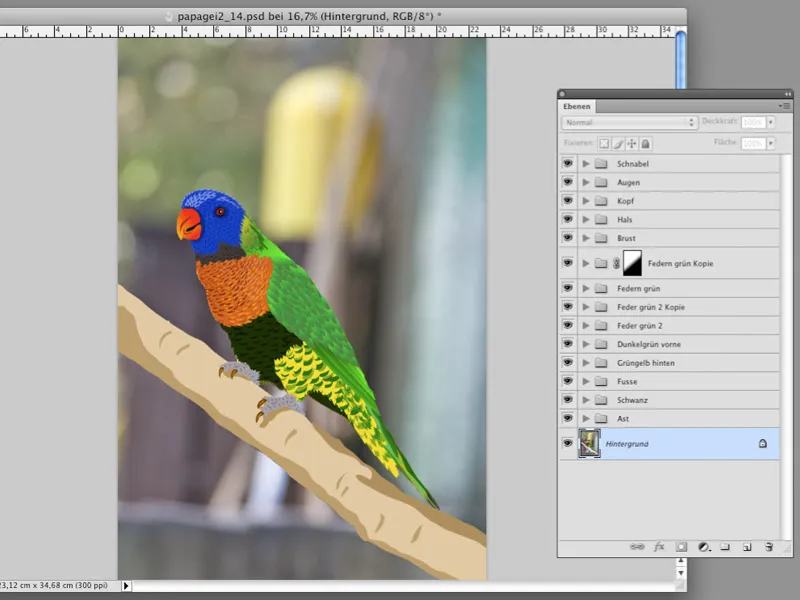
Step 31
To design the background of the image, use the same techniques I have described in this tutorial. When using the Custom Shape Tool, you can access the Photoshop library where many interesting patterns for your design are available. You can also save and use your own patterns.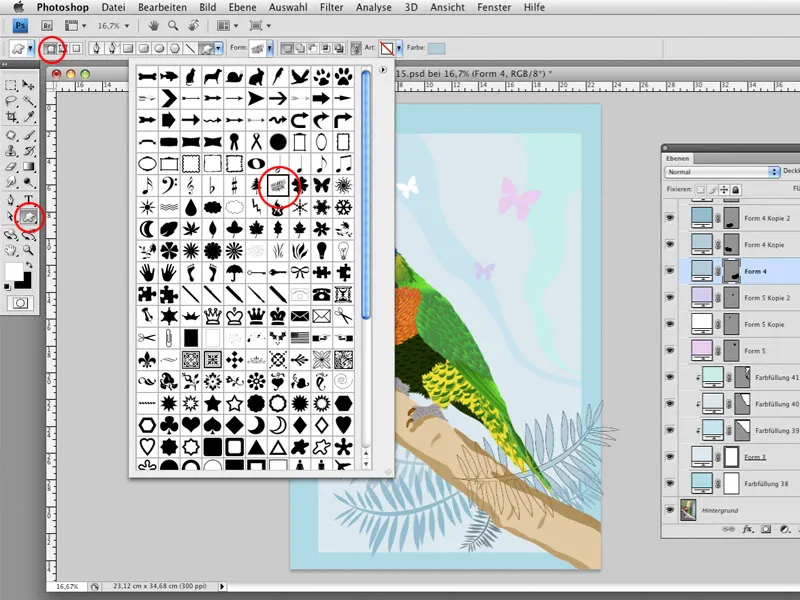
Step 32
If you want to prevent a shape that is above another from exceeding its boundaries (in our example, a free-drawn shape that should not go beyond the boundaries of the square), use the Clipping Mask option, which you can activate by clicking between two layers while holding the Alt key.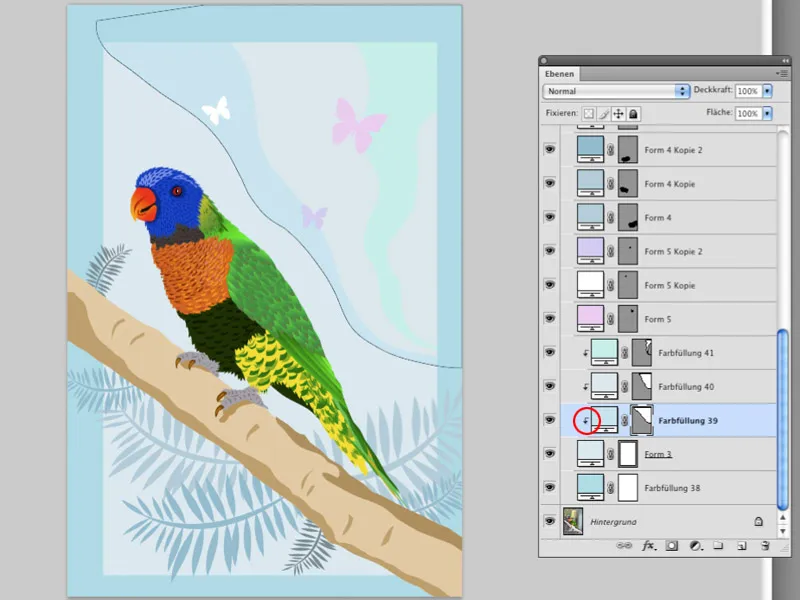
And this is how the finished image looks.