In this movie I show you the so-called pastel look. Pastel because it's a bit reminiscent of those watercolor/pastel paints that we probably all used to paint with. Let me show you what the original picture looked like; these are more natural colors..webp?tutkfid=46767)
Incidentally, this is a photomontage; I hope you can't tell. It was originally sitting in front of Grau here in the studio, but I still find the picture quite funny and think it's also quite fitting to show the pastel look, i.e. this colorfulness, here. Yes, how does it work?
.webp?tutkfid=46768)
All you need here is the so-called gradient conversion (1). If you activate this, you will always see a gradient from a foreground to a background color or vice versa, i.e. what is set here in the foreground is set by default. It looks a bit like a negative, like a ghost image, I think you can also create funny effects with it when I look at it. And all you have to do now is click on the history at the top here (4)..webp?tutkfid=46769)
Then you might not see the whole variety that I have already activated here, you might only see the first line, and all you have to do to generate more gradients is to click on the little cogwheel at the top here (1). There you have, for example, Neutral Density, Disturbance Examples, Photographic Toning is very interesting, Metal is also very suitable in the 3D area to spice up surfaces a little. Or you have the pastel colorshere. If you click on this (2), a small button appears, you say: Attach (3) ...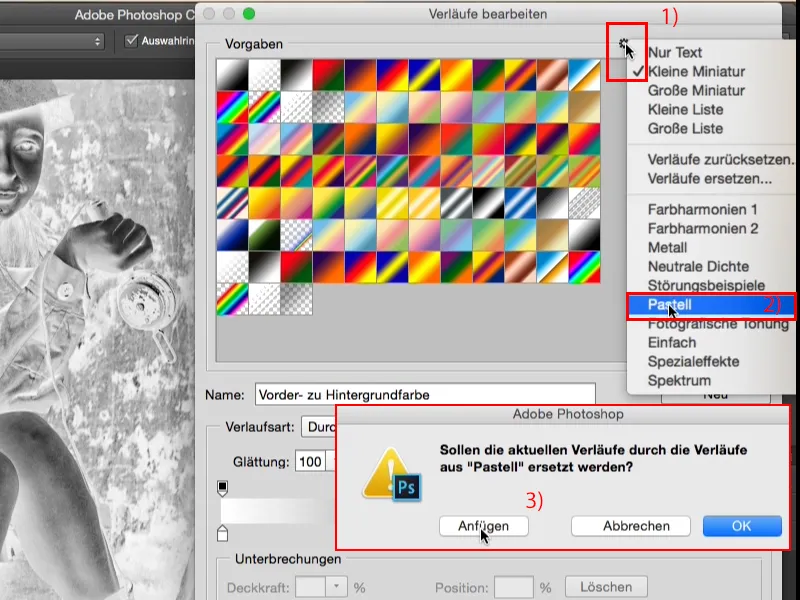
... and the row appears at the bottom and you can now choose freely. For example, you take this course here (1). Then you will see these little stops, the color stops, and you can now define a gradient yourself. If you say, the gradient in the middle, the pink, I would like that to be red, then click on it twice here (2),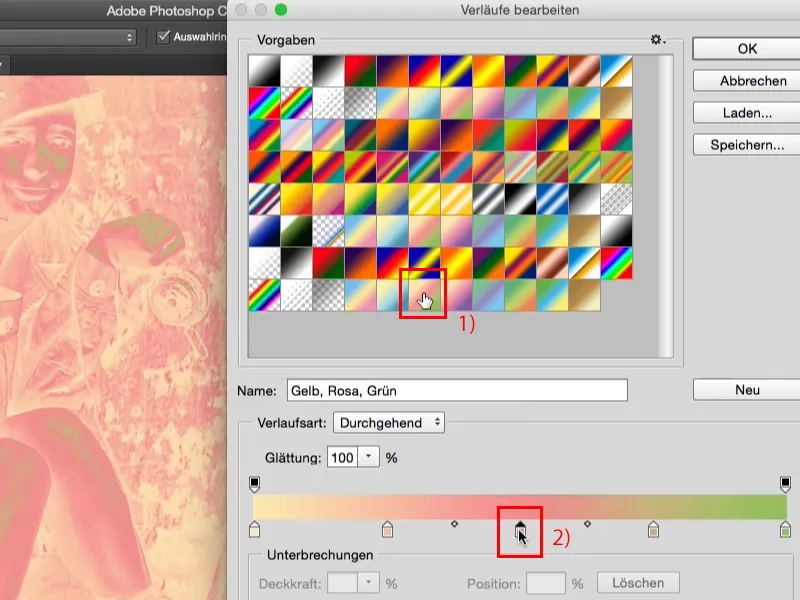
... the familiar Photoshop color selector appears and you simply go to a strong red (1) and confirm with OK (2).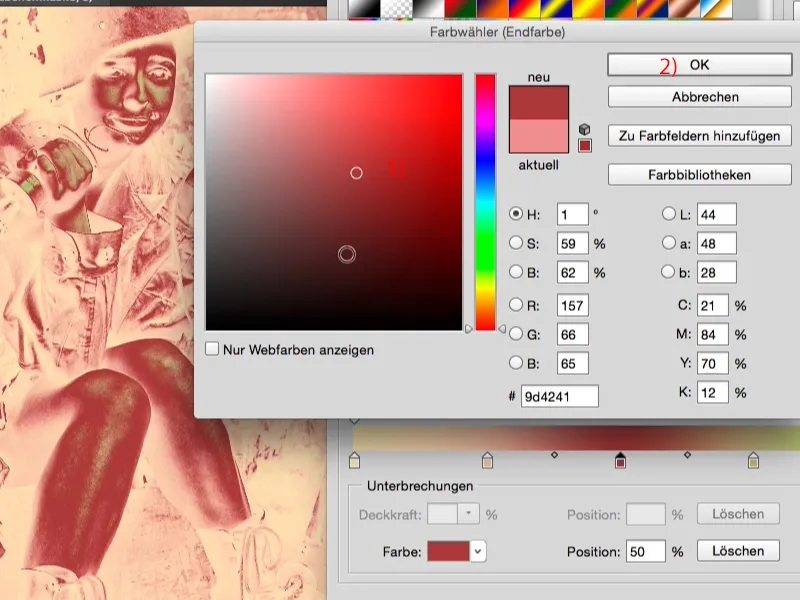
The whole thing is blended completely smoothly (1), it is also called gradient conversion, the whole thing, that makes sense, and so you can now generate your own gradients. You can also save a name here (2) to make it easier for you to find your way around later. At the top of the gear wheel (3), for example, you can also ...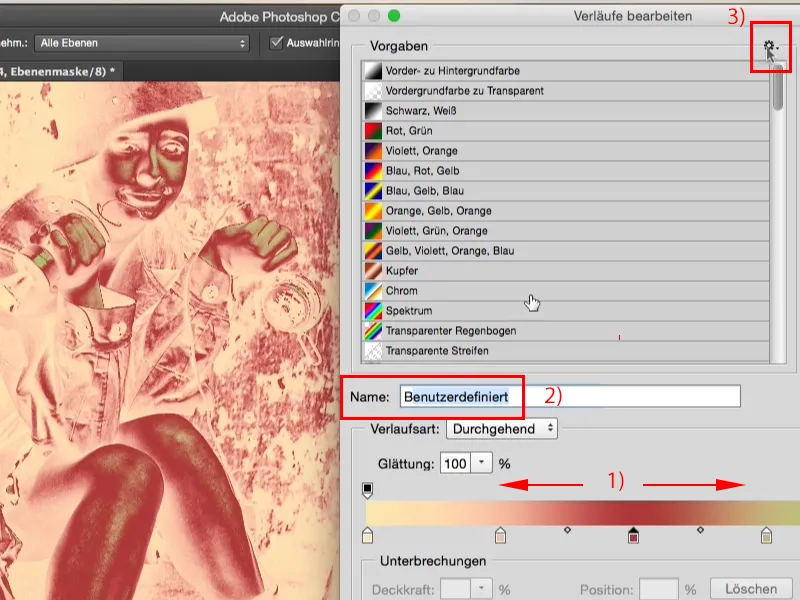
... go to list view, then you will only see a small symbol and your name that you have just saved for your preset will appear here.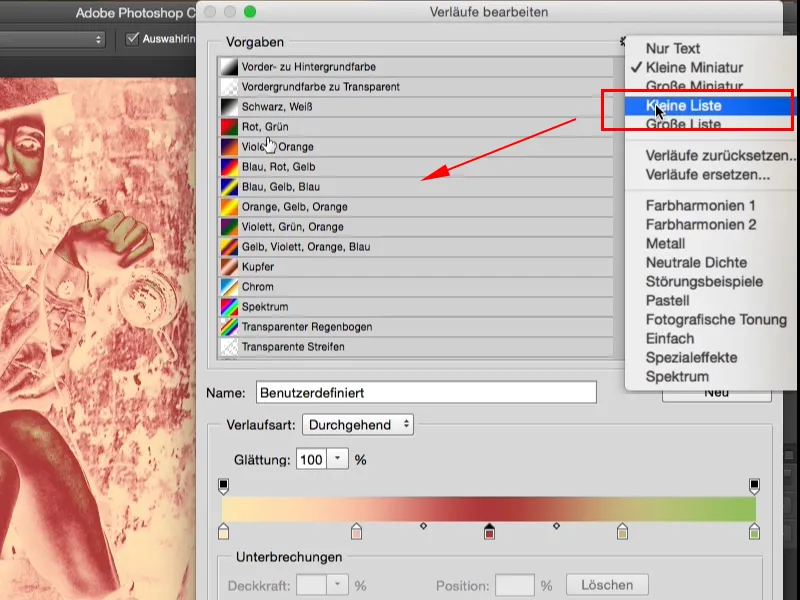
I always like to do it like this (1), click through and choose what appeals to me in the image, I find that more suitable for me, but maybe you prefer to work with the list, with the names, you can do that here too. You can generate new gradients (2), you can also change the gradient type, you can add noise here, (3) but you don't need that for this picture look of pastel colors..webp?tutkfid=46775)
Yes, I'll just start here with this gradient (1) from a creamy yellow (2) to a medium cyan (3) and say OK (4).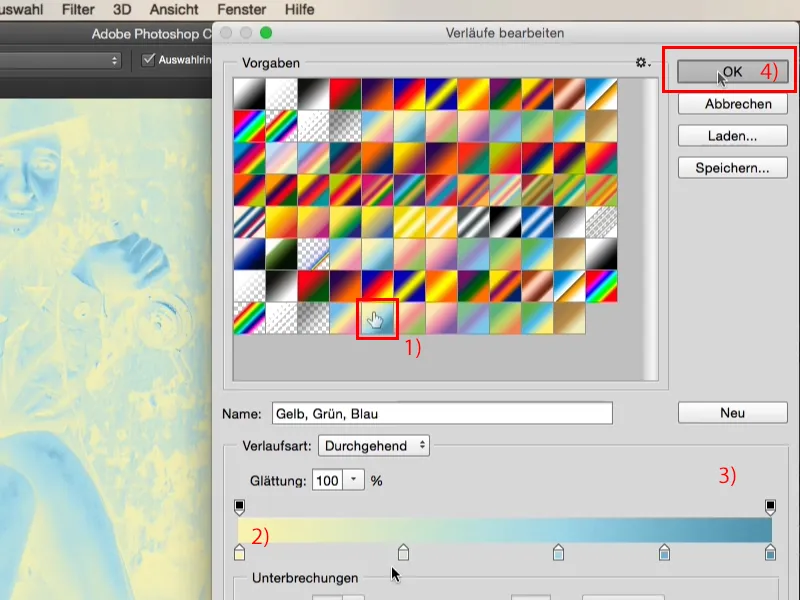
The whole thing looks like this (1), it looks terrible, but look what happens if you set the layer mode to soft light (2). Before (3) - after: (4).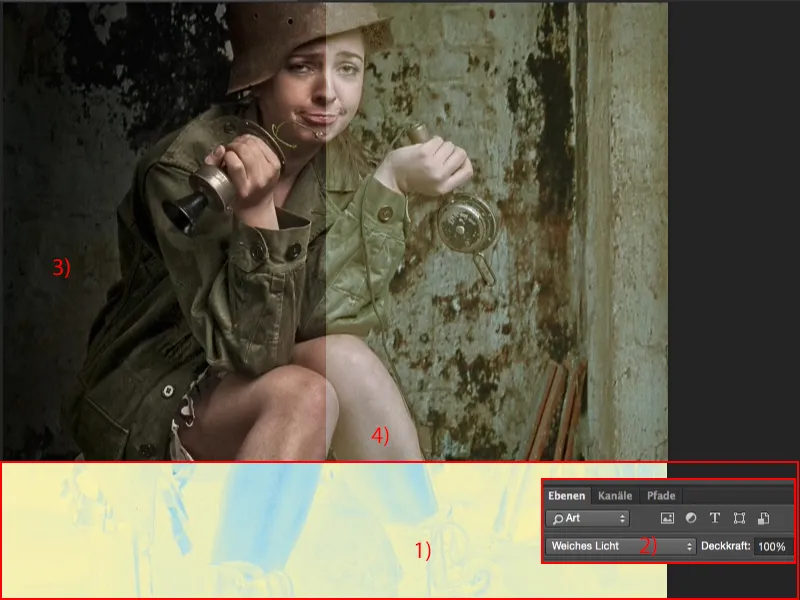
Personally, it would be too dull for me (1), so I usually invert the gradients (2) and don't use them as they are intended by default here in Photoshop.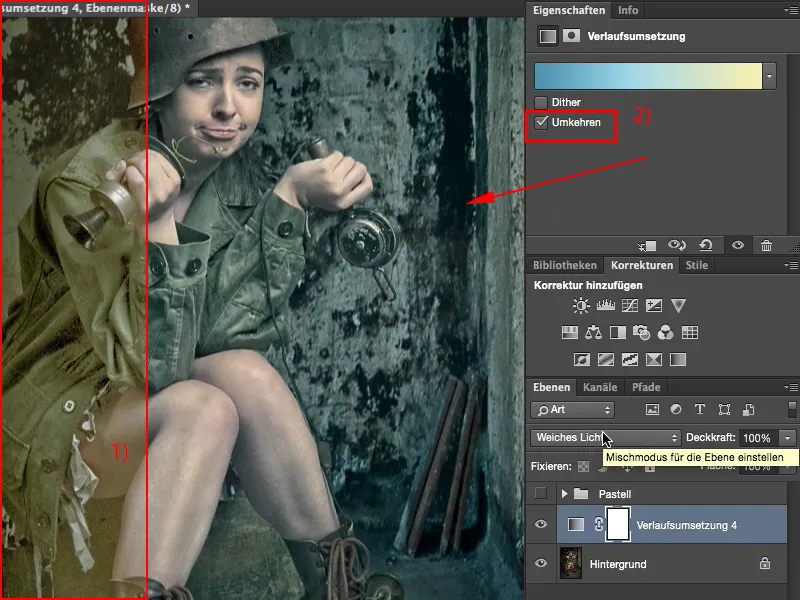
Because if you create a gradient from a dark color to a lighter one and set it to soft light mode, 95% of the time it always looks really, really good, even at 100% opacity. If you do it the other way round, you usually have to reduce the opacity to at least 50% and even then you have an effect, well, it's not fish, not meat, you've just somehow lightened the tonal values, but the colors don't change that much. It may have become a little more yellow-green, but that doesn't really make up the effect.
So always choose the gradient from dark to light, because then it looks cool, and when I look at the picture like this, I think this one gradient conversion: cool pastel color, cool look, I can definitely leave it like this.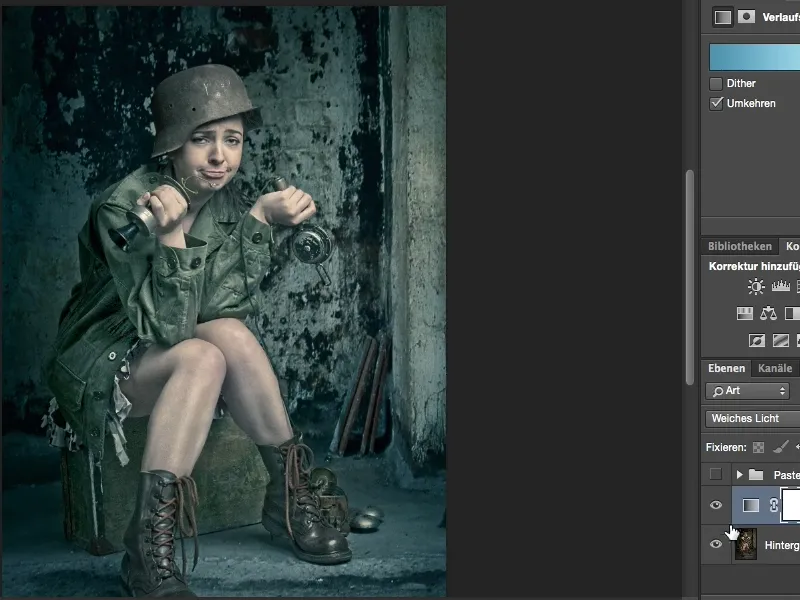
But you don't have to leave it at this one look, you can mix and match here. You can also change the layer mode. Of course, the highlights eat away here, so you have to reduce the opacity a little, but even that can look appealing again. It looks a bit harder, but it's a different pastel look.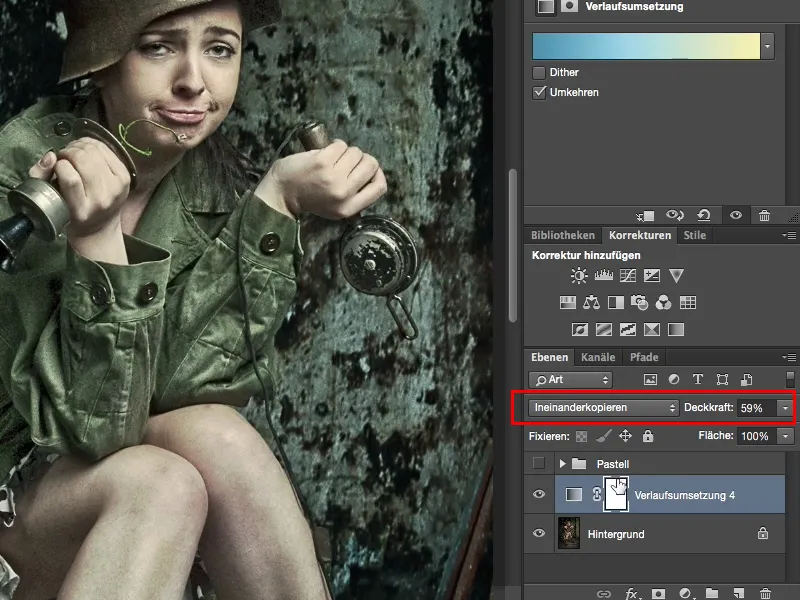
Let's stick with Soft Light here and create another gradient conversion. I'll click on the top here and choose this brown gradient.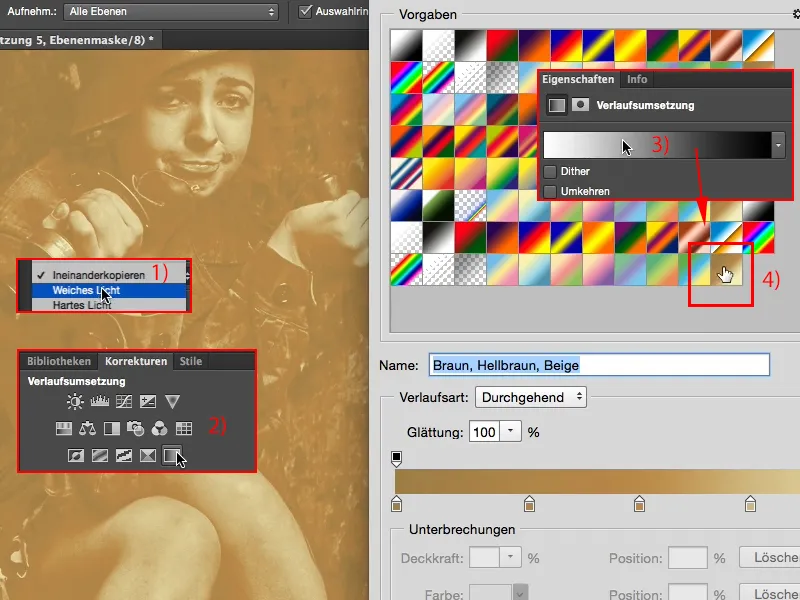
Wonderful, it's already from dark to light, which means I don't need to reverse it, because then I'll get a kind of ghost/negative image again.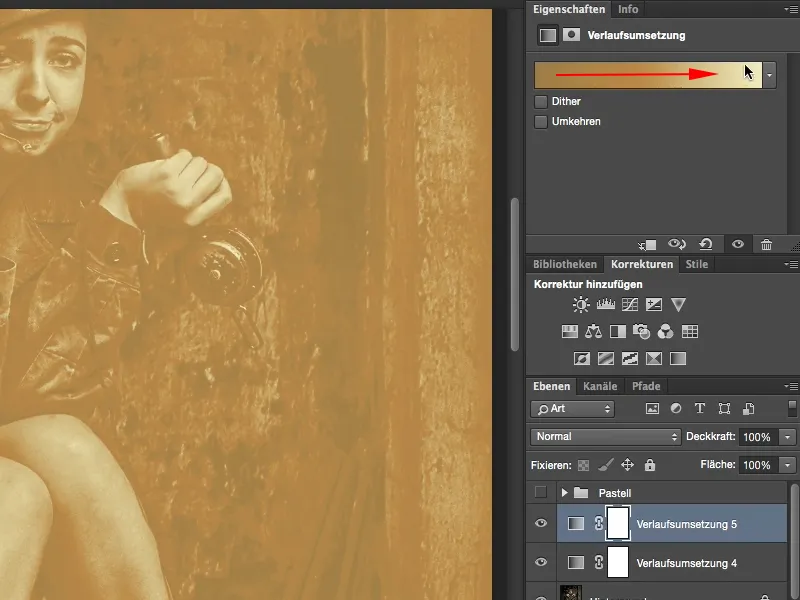
Yes, and if I now set this to soft light (1), then I notice that the color is not bad, but the image is a bit too bright for me; what do I do then? You simply click on this gradient again (2), it's saved, it's still selected, and the depths, i.e. the darkest color tone (3), is simply too bright. And if you lower it (4), you can see how the image gets darker live next to it. You confirm with OK,...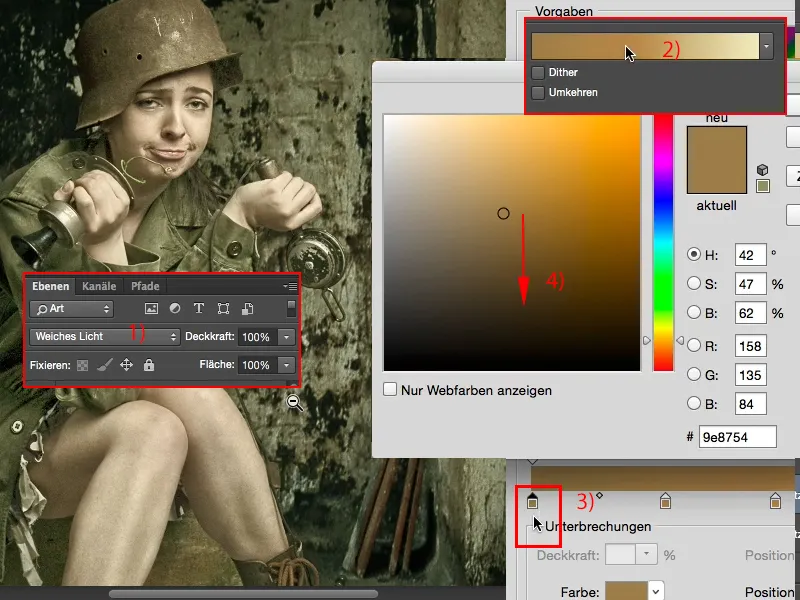
... and it is also still too bright (1), and you also lower it a little (2). You can also step on the gas with the color, which also looks cool, and (3) is still a bit too bright.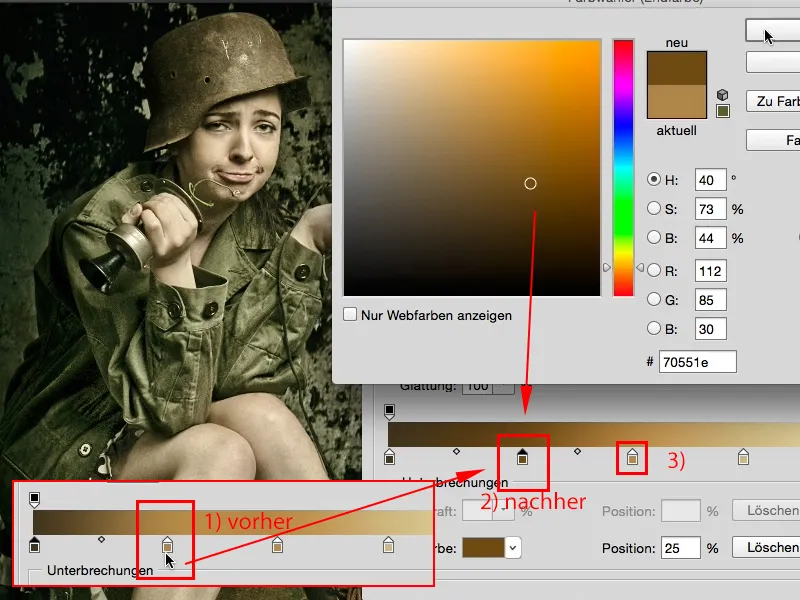
Yes, and now we've created another picture with a completely different look (1), but one that is coherent. Here I can't say "Ah, the depths and highlights, it's all far too dull." It looks cool, it's a bit green-yellowish, but it's definitely a completely different pastel look to this one (2).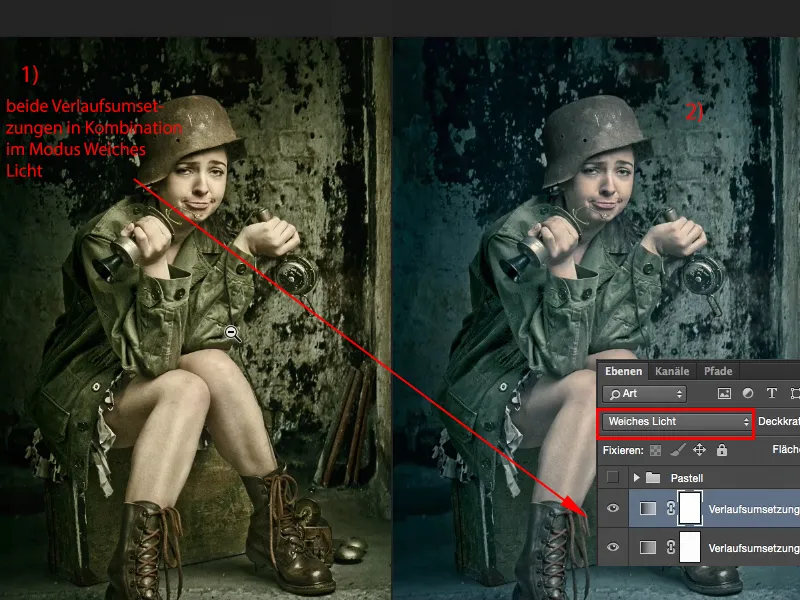
Or I just use it on its own and now you can see what the effect was that you darkened this one. Now the picture is almost too dark, if I want to use it on its own, I have to go back in here and say: "This shade of brown here, it needs to be lighter." And then you can see here how you can really gradually lighten the picture again (example shoes).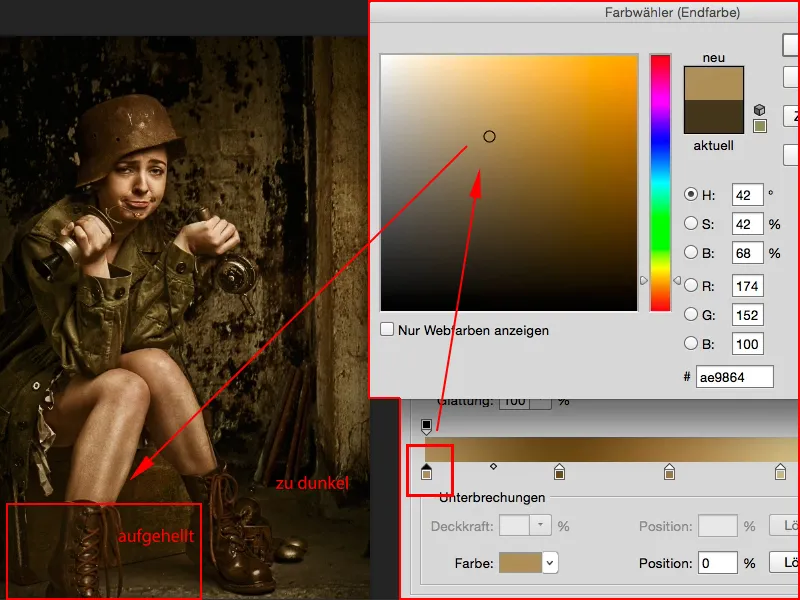
Yes, and before you know it, you've created a completely different pastel look.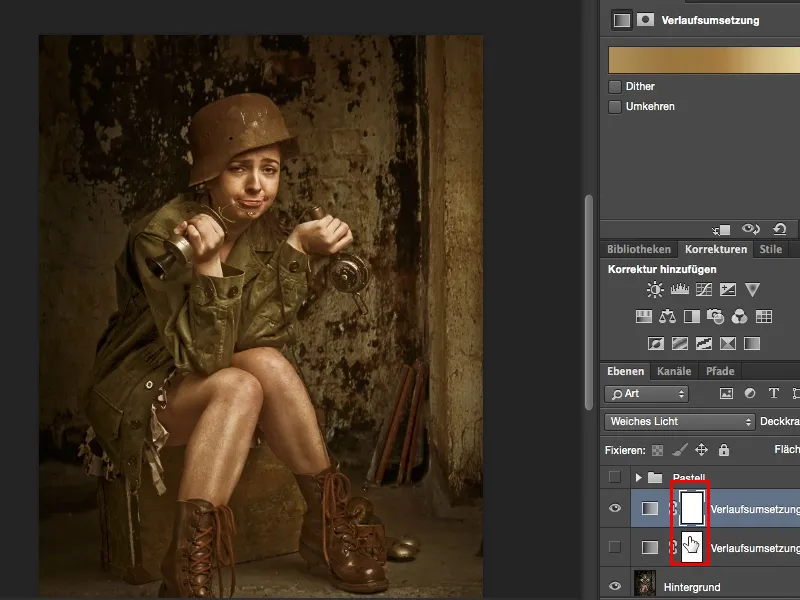
It's a very simple technique, but it's very, very effective. Non-destructive, you have layer masks here , you can also limit this to certain parts of the image, and this is definitely a part of retouching that I like to use when I want to add a touch of different color. So have fun with the pastel look, and mix the colors around here, you can't really go wrong. I usually leave it at 2-3 gradients here, otherwise it gets too confusing and the color mix becomes a bit too extreme. Have fun with it!
