But enough talk now. I hope you enjoy the tutorial ...
Step 1: Building the basic framework for the warning sign
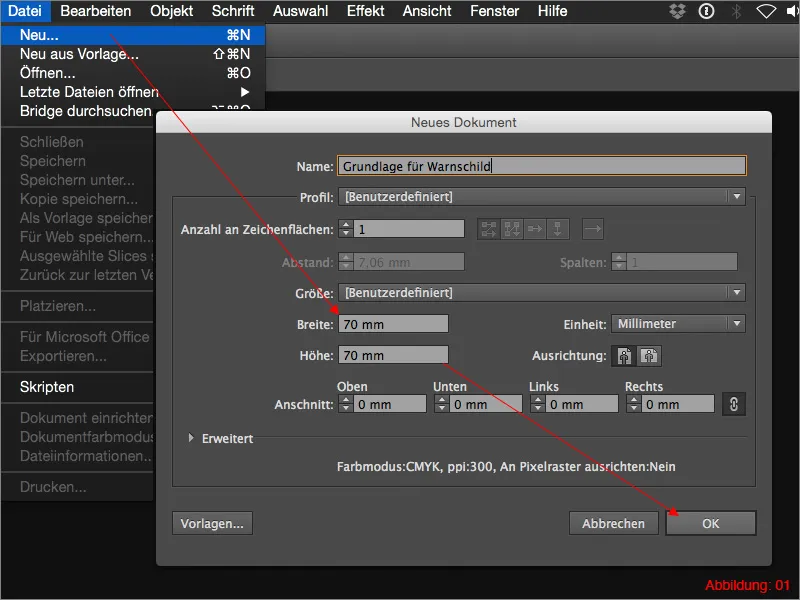
The first step is to create the basic structure for our warning signs. So start Illustrator and create a new document via File>New. For the format, select 70x70mm and confirm with OK.
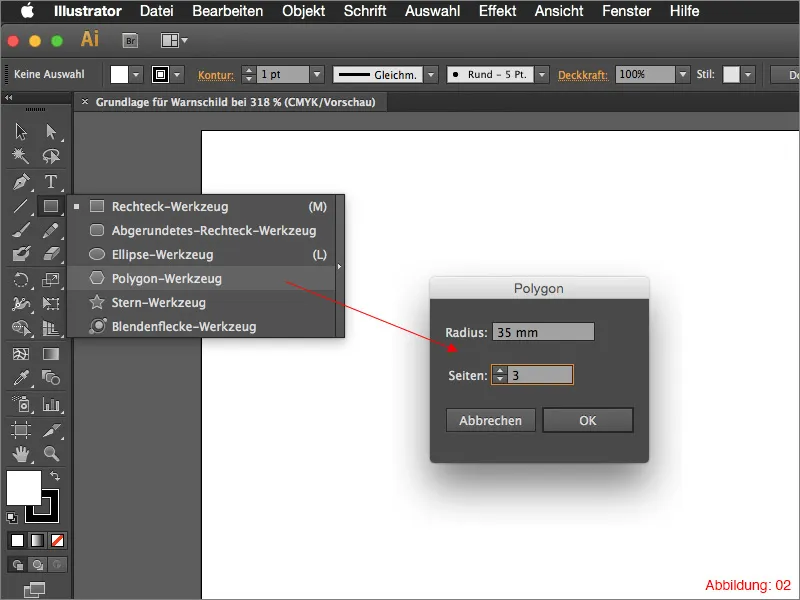
Grab the polygon tool (this tool is subordinate to the rectangle tool and can be called up by clicking on it for a long time) and click anywhere on your workspace. A window will appear in which you can set the radius and the number of corners. Select a radius of 35mm and a value of 3 for the number of corners (Figure 02).
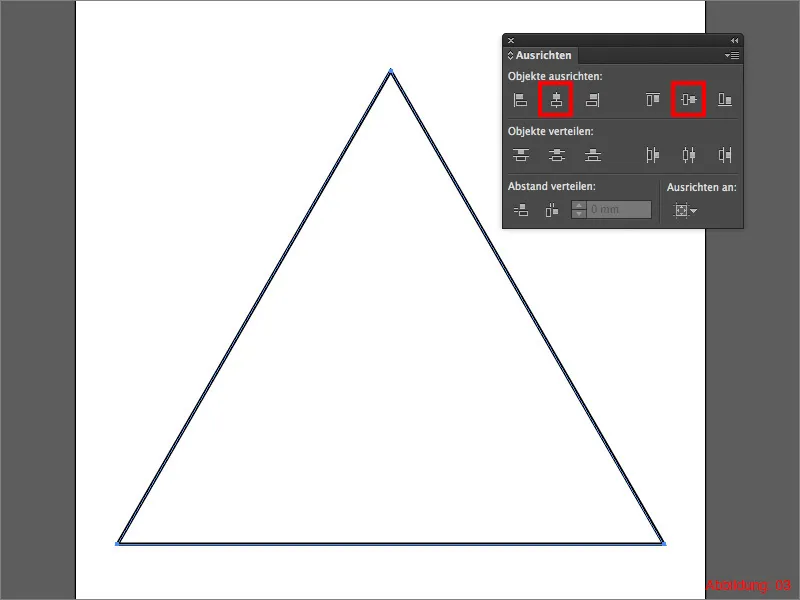
Now go to the Align pal ette and position your triangle in the center of your work surface. If you have not yet opened the Align palette, you can find it in the top menu bar under Window>Align.
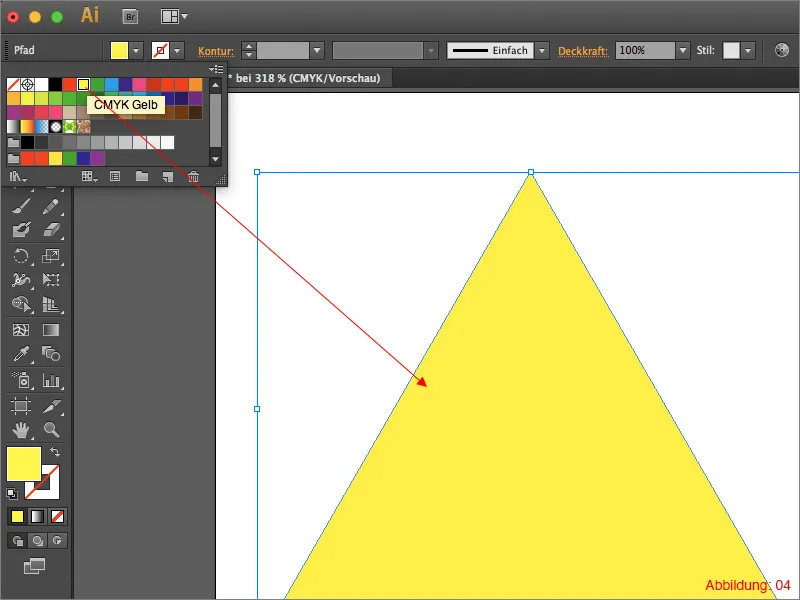
After you have aligned the triangle, you must fill it with yellow color (Figure 04).
Now go to Object>Path>Move Path in the top menu bar ... Set a value of 2.3mm in the following dialog box and confirm with OK.
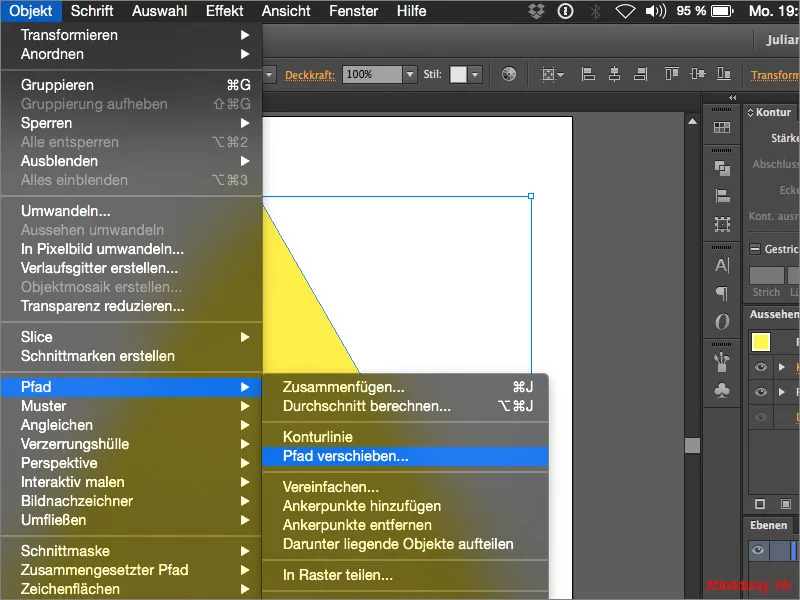
This command creates another, larger triangle. Now fill this with a black area color. The whole thing should then look something like this (Figure 06):
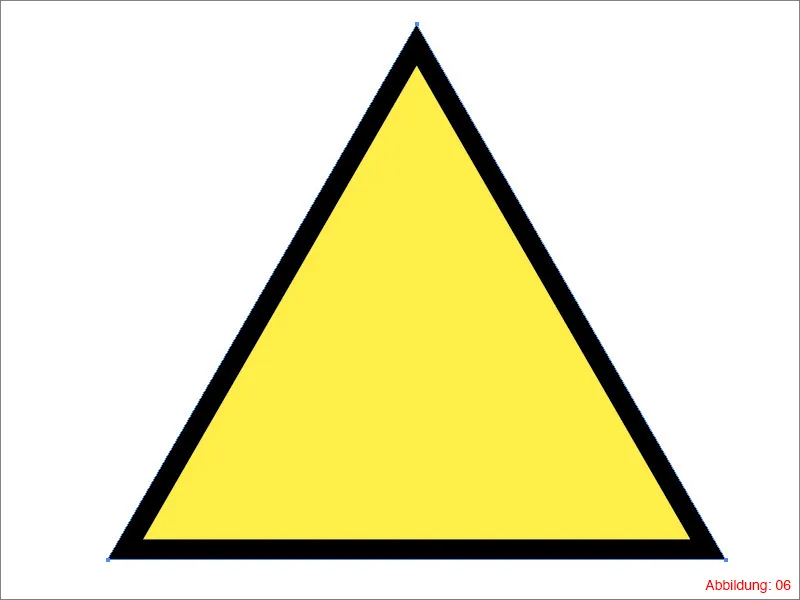
In the next step, we need to round off the corners of the black triangle. To do this, go to Effect>Stylization filter>Round corners ... Enter a value of 4mm and confirm with OK.
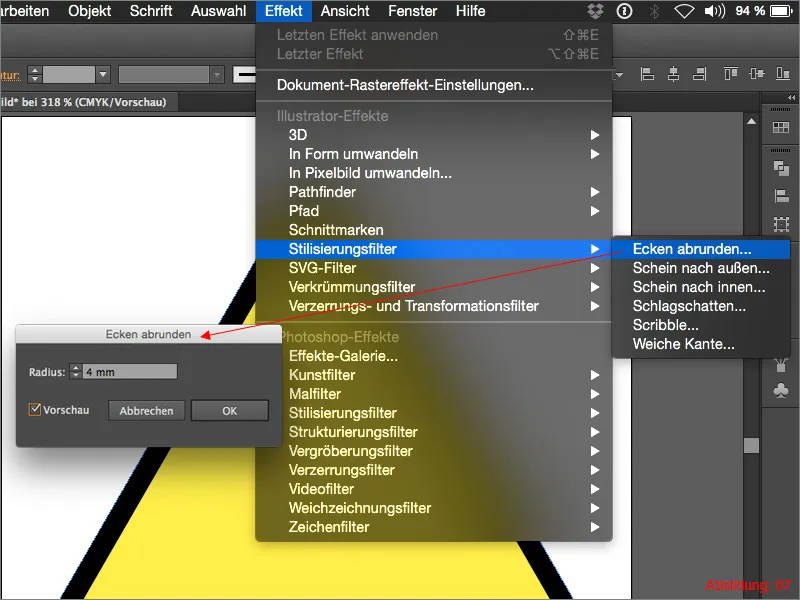
To create the last frame for our warning sign, go to Object>Path>Move Path ... again and set an offset of 1mm. Confirm the whole thing with OK.
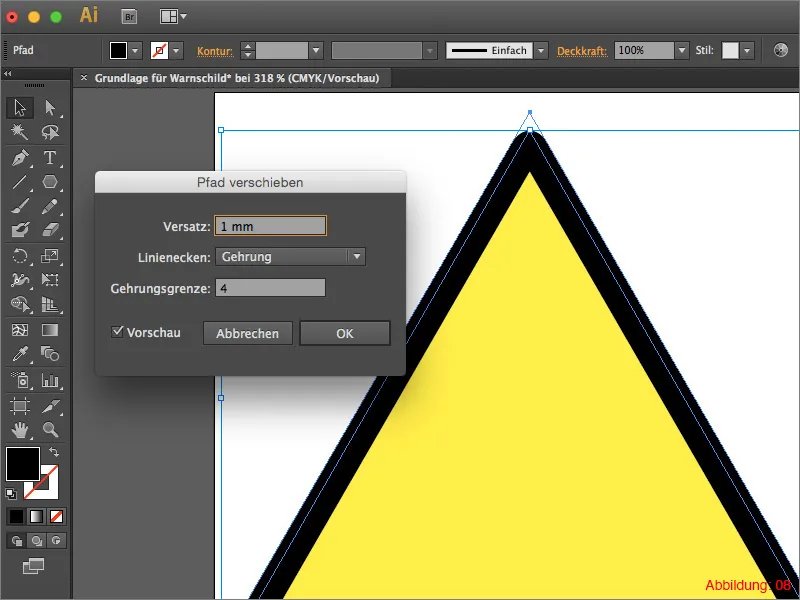
Click on the small reverse arrow in the tool palette to define the surface color as an outline (Figure 09).
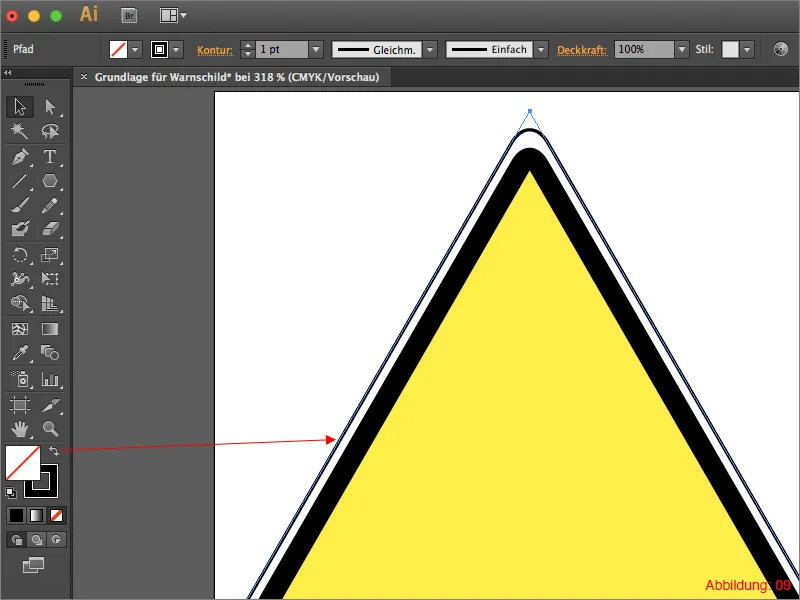
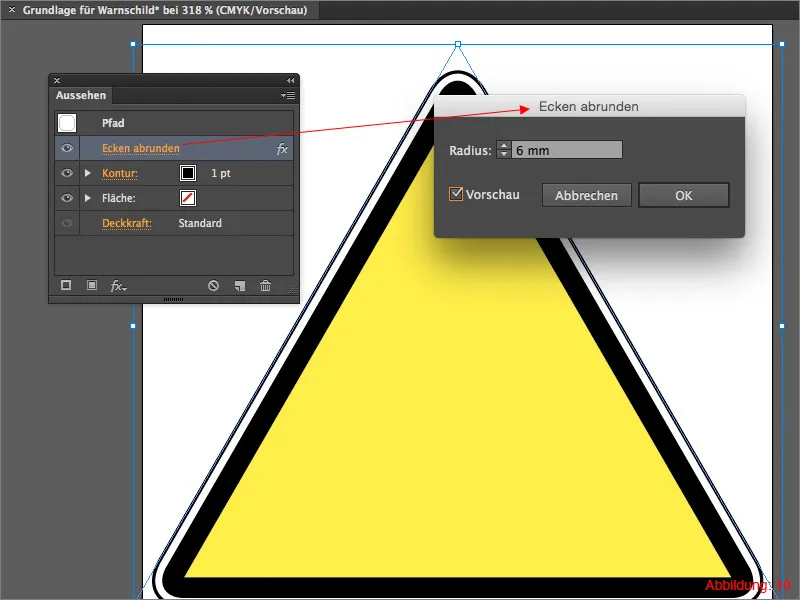
As this does not look very harmonious at the moment, go to the Appearance pal ette and click on Round corners. In the following window, change the value from 4mm to 6mm and confirm with OK.
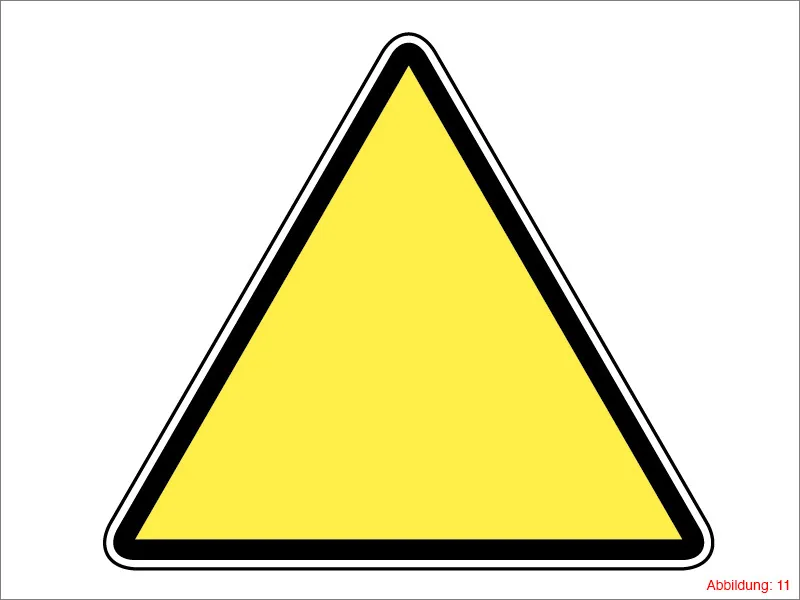
Finally, select everything and press the shortcut Command+G (on PC: Ctrl+G) to group everything.
The final result should look like this. Save this file under the name "Warnschild_Grundlage" (or a similar name).
Step 2: Constructing the radioactive sign
In this tutorial section, we will create a radioactive symbol step by step. To do this, create a new workspace via File>New and again select a size of 70x70mm.
In the next step, you need to show the rulers. The quickest way to do this is to use the shortcut Command+R (on PC: Ctrl+R).
Bonus knowledge:
As you will need this shortcut again and again when working with Illustrator, you should memorize it well. Personally, I can always remember shortcuts really well if I understand the meaning behind them. In this case, the R stands for Rulers.
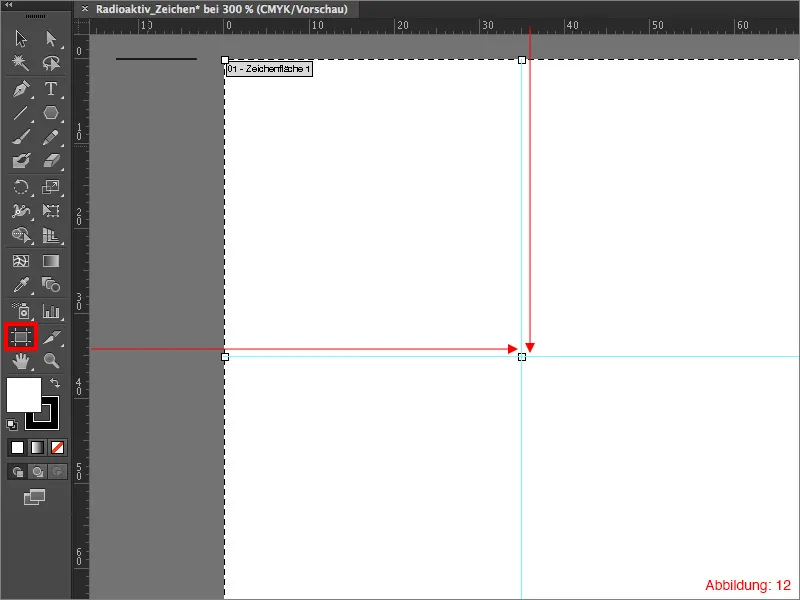
Now switch to the artboard tool in the tool palette. This has the advantage that you can now see the exact center of your workspace. Now draw a horizontal and a vertical guide line from the rulers exactly on the center point.
The whole thing should then look like this (Figure 12):
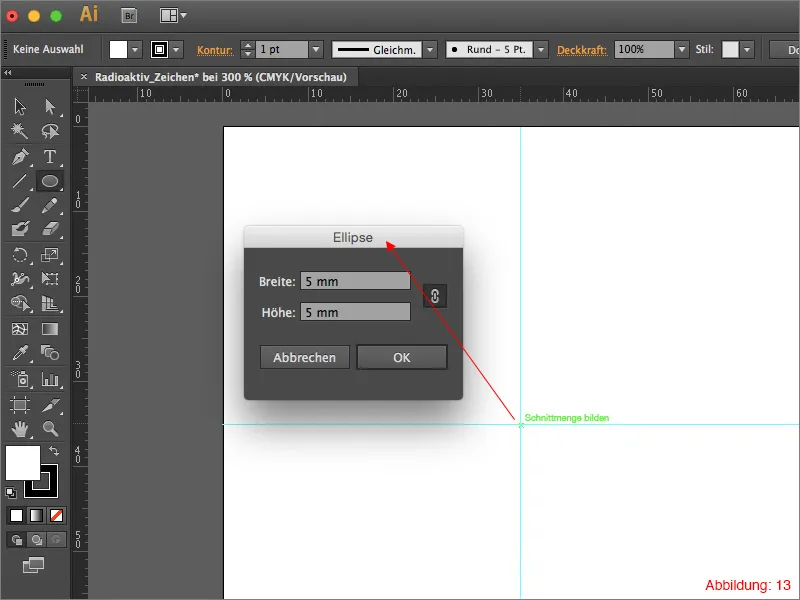
Now grab the ellipse tool from the tool palette and click on your center point while holding down the Alt key. In the following window, select a value of 5mm for the width and height. Confirm the whole thing with OK.
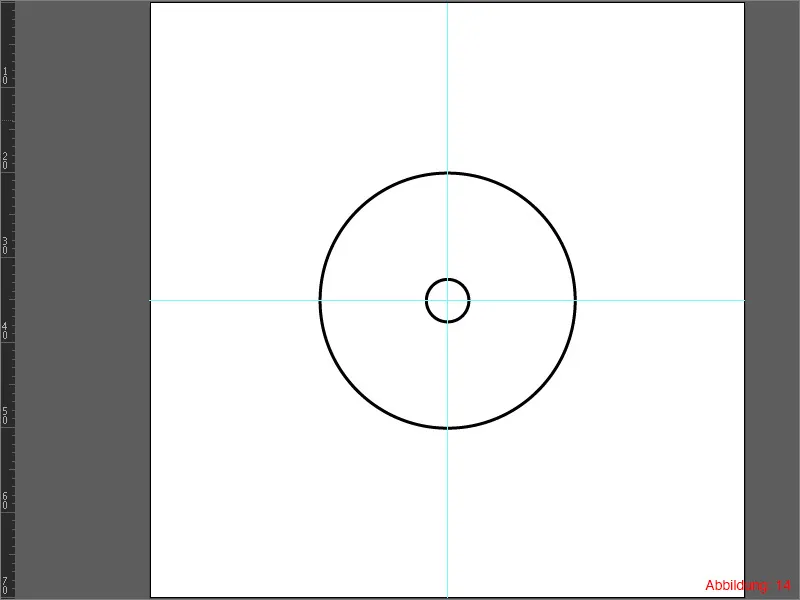
Hold down the Alt key and click on the center point again with the ellipse tool and this time select a value of 30mm for the width and height. The whole thing should then look like this (Figure 14):
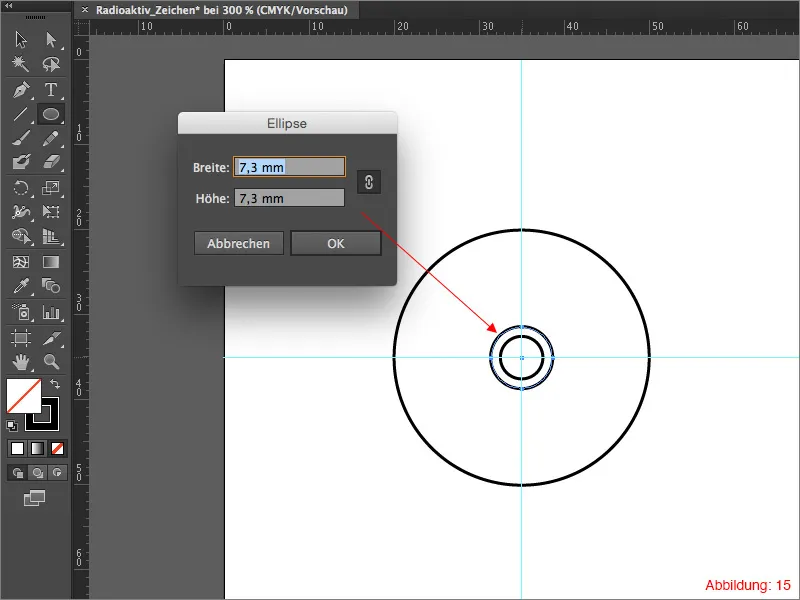
As creating circles is so much fun, we will also create a third circle. Proceed in exactly the same way as with the first circles. However, you need to set a dimension of 7.3 x 7.3 mm for this circle (Figure 15).
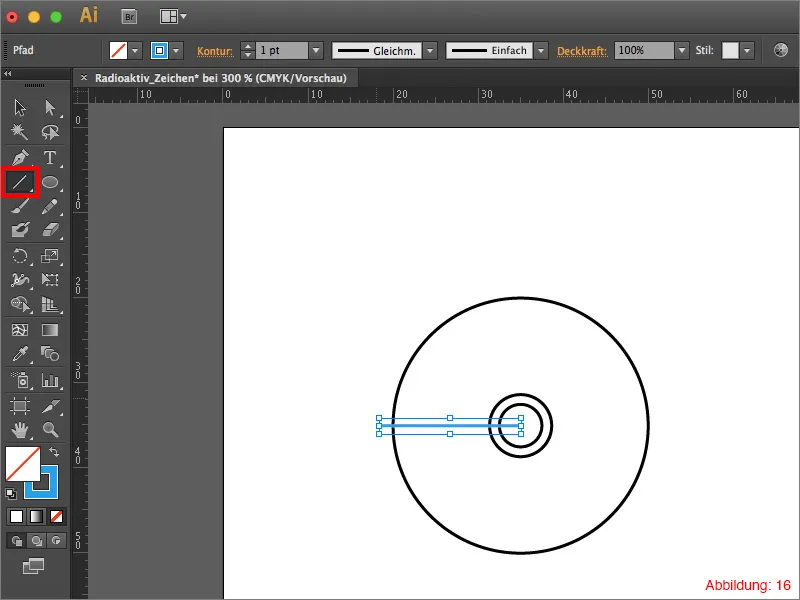
Now select the line tool from the tool palette and draw a horizontal line from the center point to the outer circle (Figure 16).
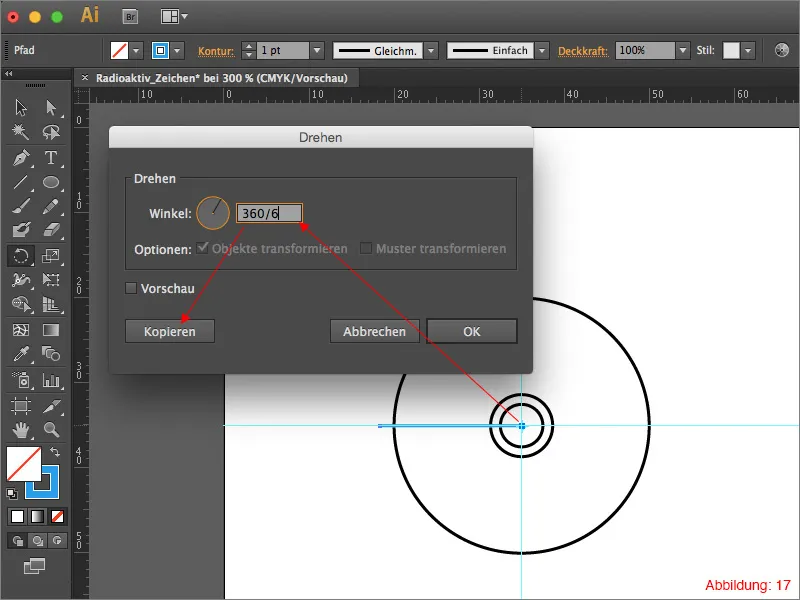
Now you need to grab the Rotate tool and click on the center point while holding down the Alt key (the line you just created must be selected, of course).
Since we need to divide the circles exactly six times, simply enter 360/6 in the rotate dialog box. Illustrator will then automatically calculate the appropriate angle. Confirm the whole thing by clicking on Copy.
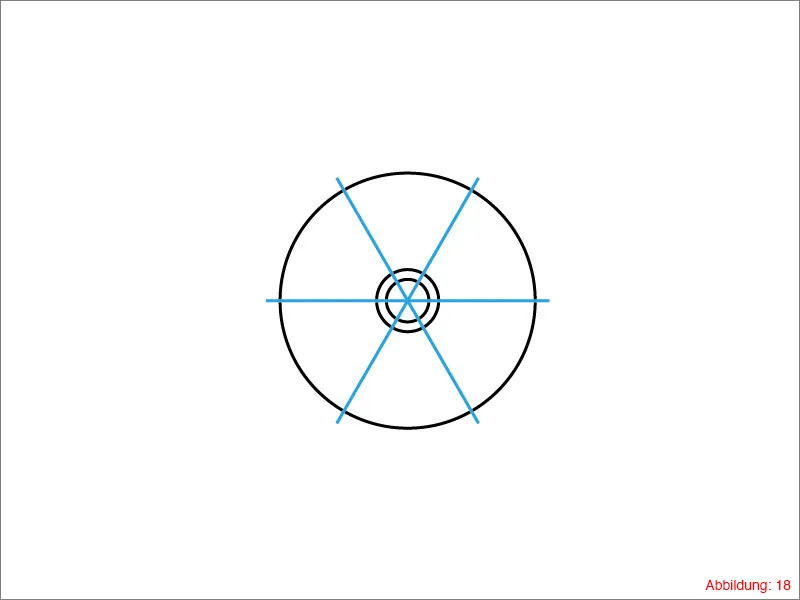
To repeat this process four more times, press the shortcut Command+D (on PC: Ctrl+D). The whole thing should then look like this (Figure 18):
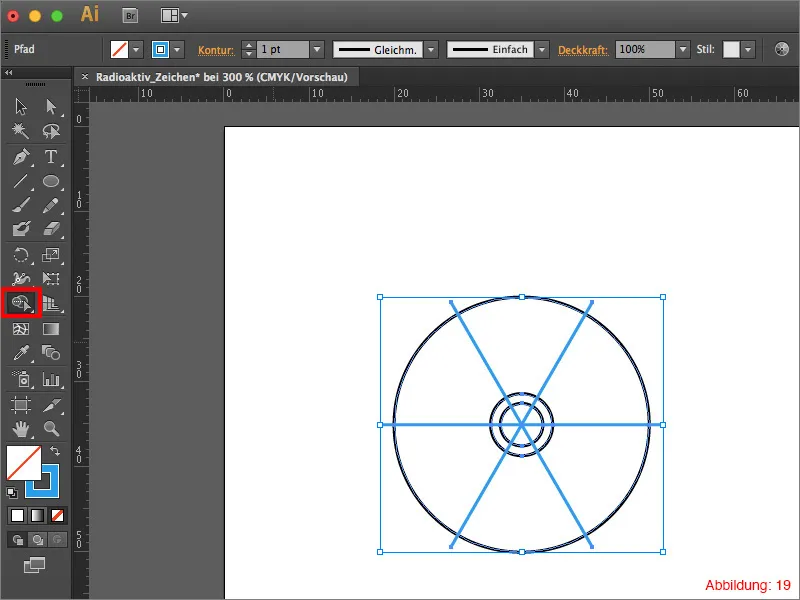
In the following step, we will now use a tool that some of you are probably not even familiar with, although it can be very practical. We are talking about the shape creation tool.
Select everything (the quickest way to do this is via Command+A (on PC: Ctrl+A) and then grab the aforementioned shape creation tool from the tool palette (Figure 19).
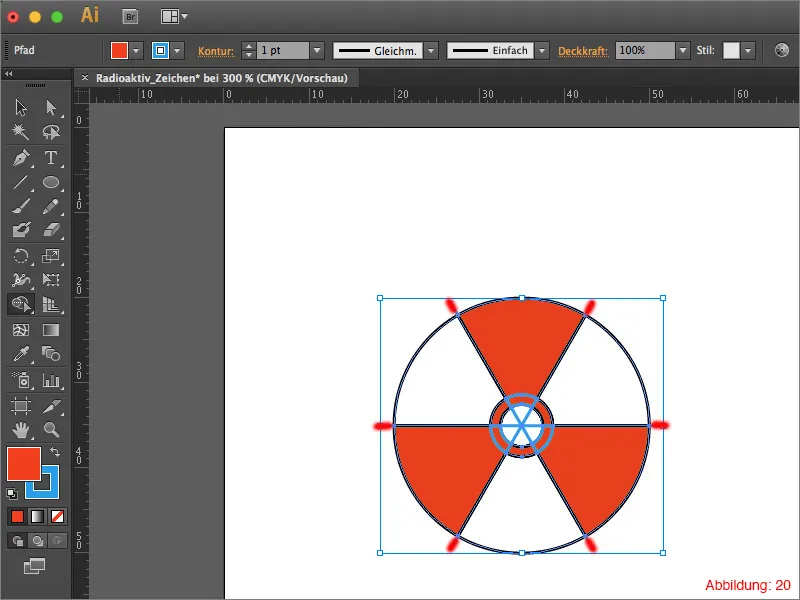
By holding down the Alt key, you now have the option of removing shapes. To do this, simply click on your workspace and drag a selection over the areas you want to remove.
In this way, remove all areas marked in red as shown in Figure 20.
The whole thing should then look something like this (Figure 21):
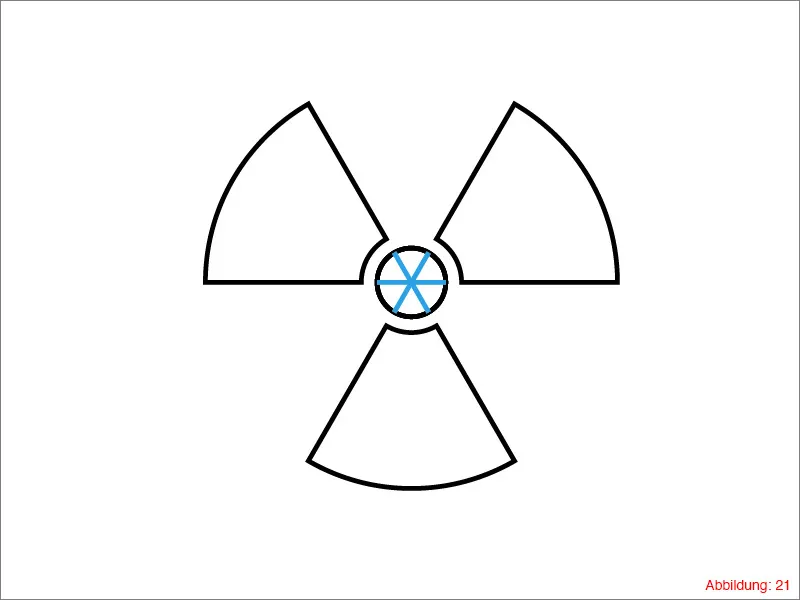
To ensure that the paths are all clean, ...
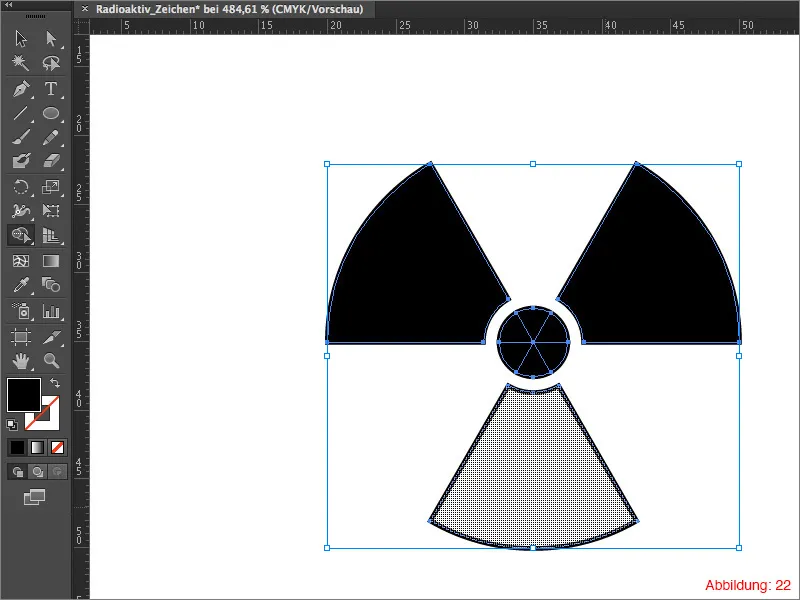
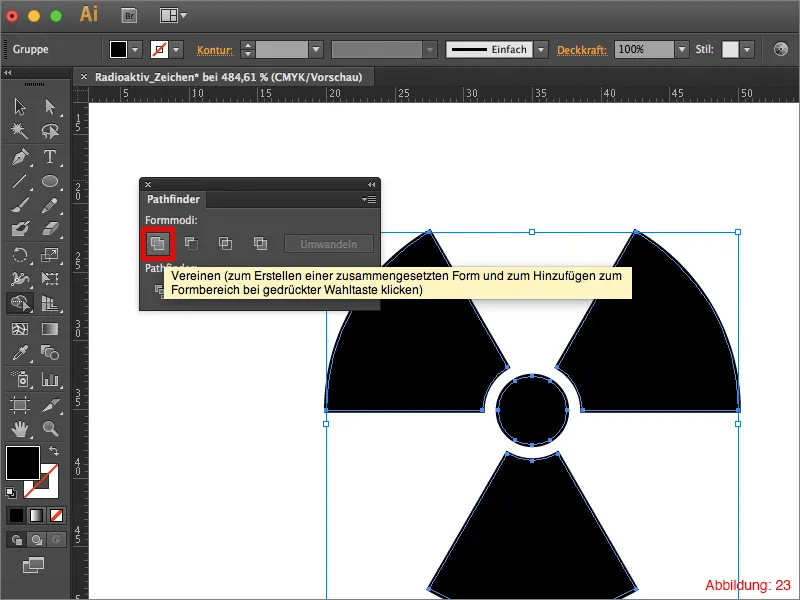
... Now go to the Pathfinder palette and click on Merge. This will remove superfluous paths from the center of your radioactive symbol (Figure 23).
Your radioactive symbol is ready.
Step 3: Constructing the biohazard symbol
Now that you have created the radioactive symbol, it's time for the biohazard symbol.
Just like for the radioactive symbol, create a new work surface with the dimensions 70x70mm and construct your center point with two guidelines, just like in step 2.
Now grab the ellipse tool and click on the center point while holding down the Alt key. Enter a value of 22x22mm for the size and confirm with OK.
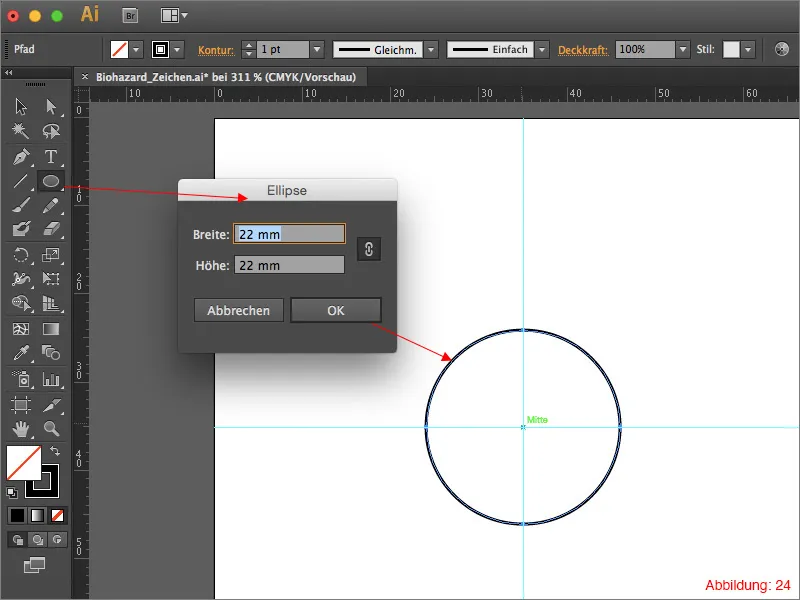
Now select the Move tool and press the Enter key. This will open the Move dialog box, which you can normally access via Object>Transform>Move.
Enter 0mm for Horizontal and -6mm for Vertical and confirm with OK.
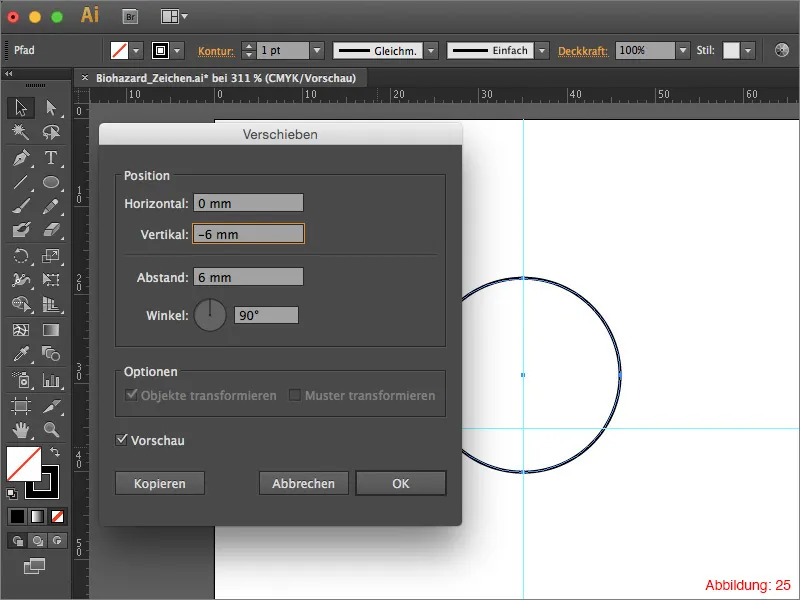
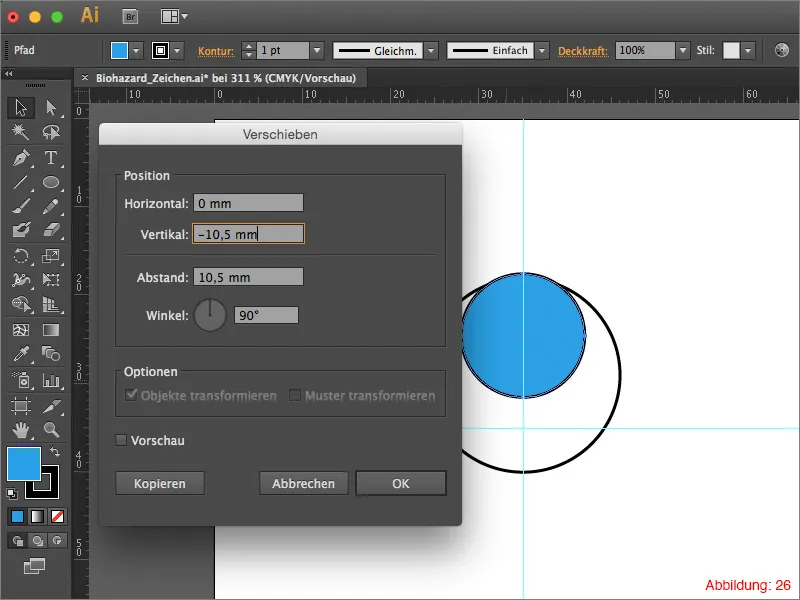
Next, you need to create another circle. Do this again by holding down the Alt key and clicking on the center point. This time, however, use a size of 14x14mm. (It is best to use a different color for this circle (e.g. blue) so that you can differentiate between them more easily).
Now switch back to the Move tool and press the Enterkey to open the Move dialog boxagain. Enter 0mm again for Horizontal and -10.5mm for Vertical and confirm with OK.
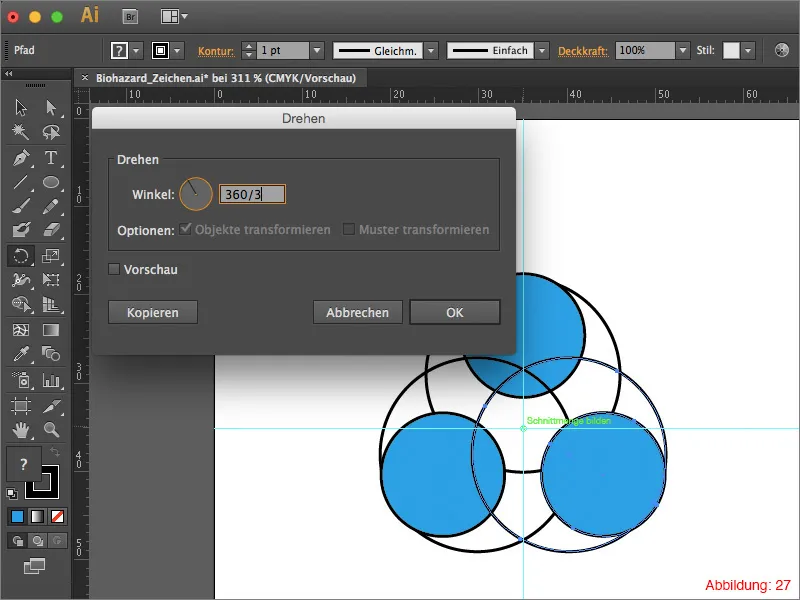
Now select both circles and switch to the Rotate tool. Hold down the Alt key and click on the center point to be able to rotate directly around this axis. Enter 360/3 in the rotate dialog boxand confirm by clicking on Copy. Repeat this process with the shortcut Command+D (on PC: Ctrl+D). The whole thing should then look like this (Figure 27):
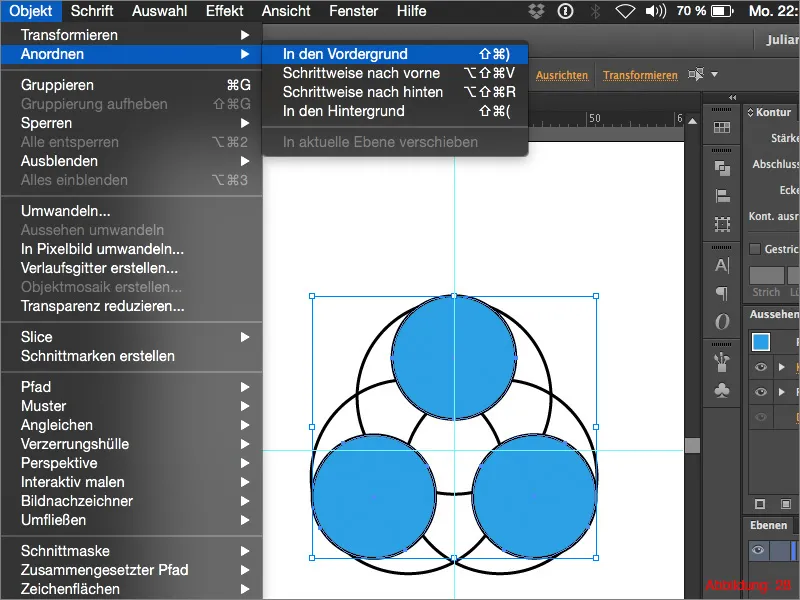
Now select all blue circles by holding down the Shift key and then go to Object>Arrange>In the foreground.
In the next step, select all black circles and then go to Unite in the Pathfinder.
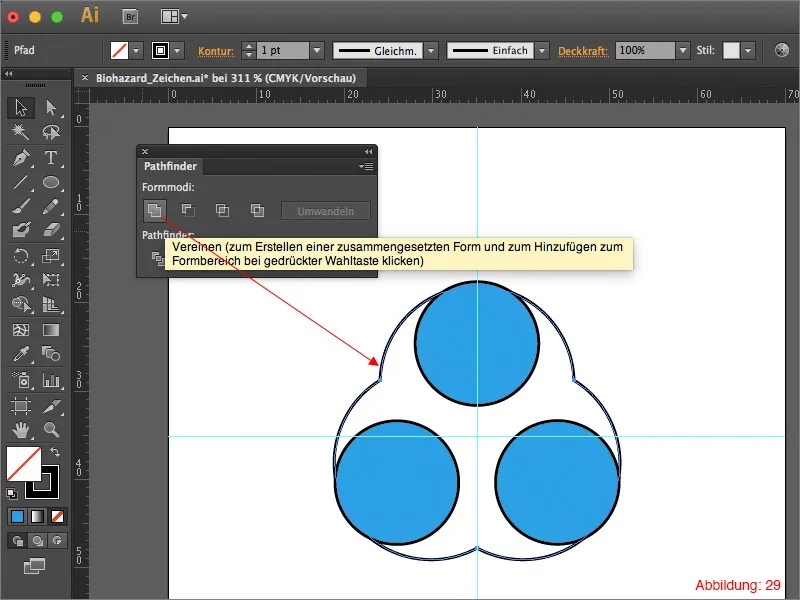
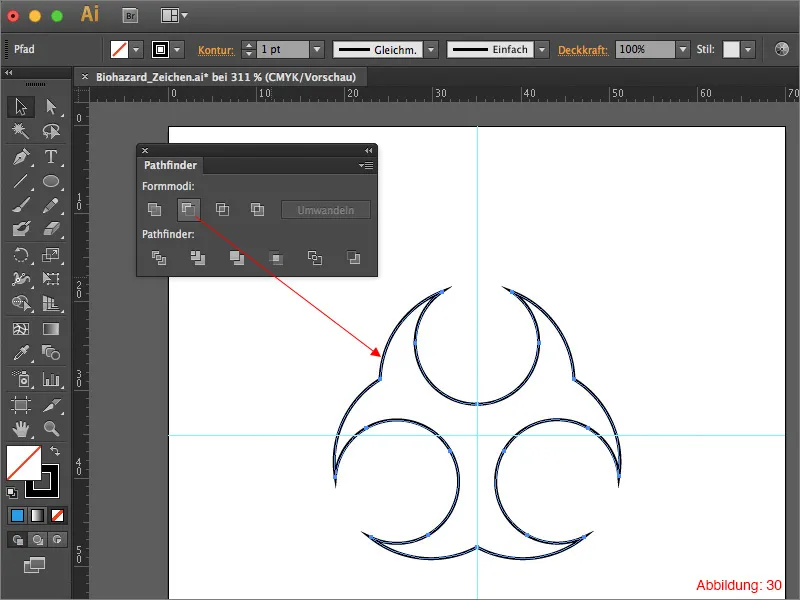
Now select everything using Command+A (on PC: Ctrl+A) and click on Remove foreground object in the Pathfinder. The whole thing should then look like this (Figure 30):
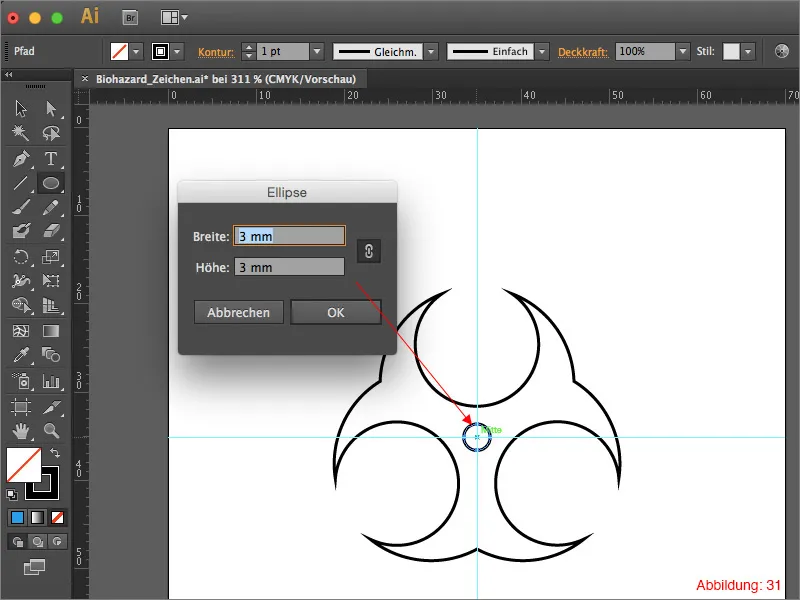
To create the cutout in the center of the biohazard symbol, create an ellipse again as in the previous steps by holding down the Alt key and clicking on the center point. This time select a size of 3x3mm.
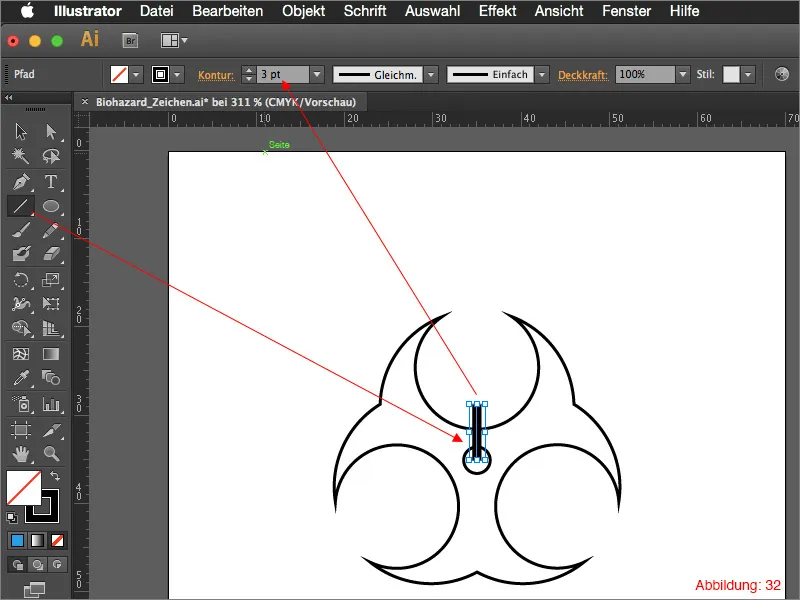
Next, take the line tool and draw a vertical line from the center point upwards (see Figure 32). Give this line an outline thickness of 3pt.
Now grab the Rotate tool again and click on the center point again while holding down the Alt key. Enter 120° for the angle and confirm by clicking on Copy. Repeat the whole process with the shortcut Command+D (on PC: Ctrl+D).
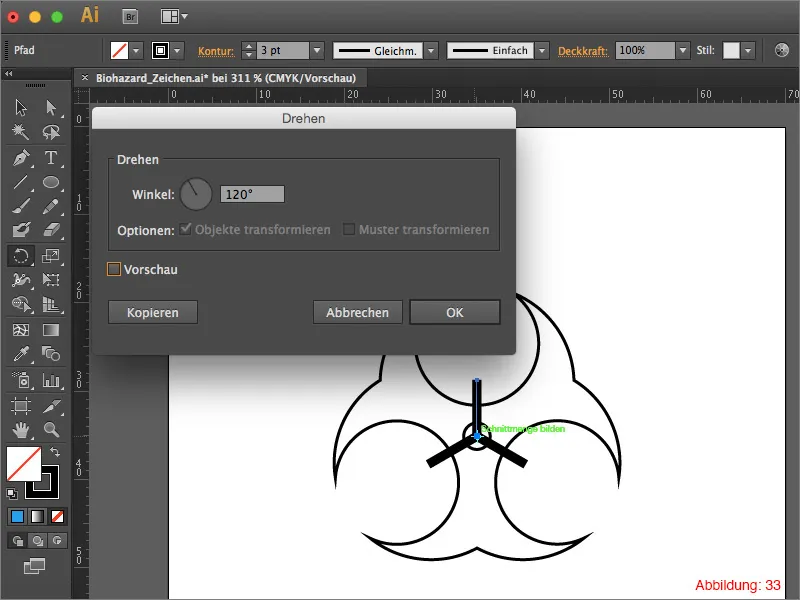
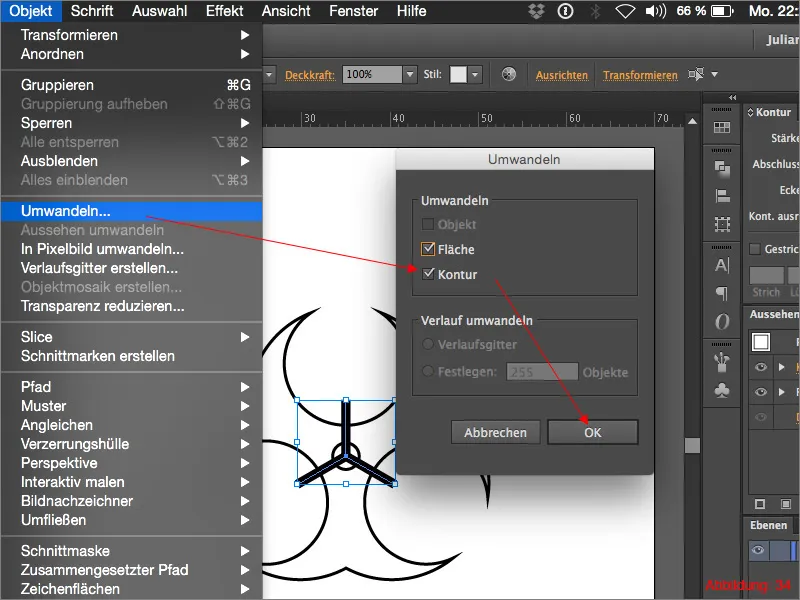
Now select the three lines and go to Object>Convert in the top menu bar. Confirm the following window with OK.
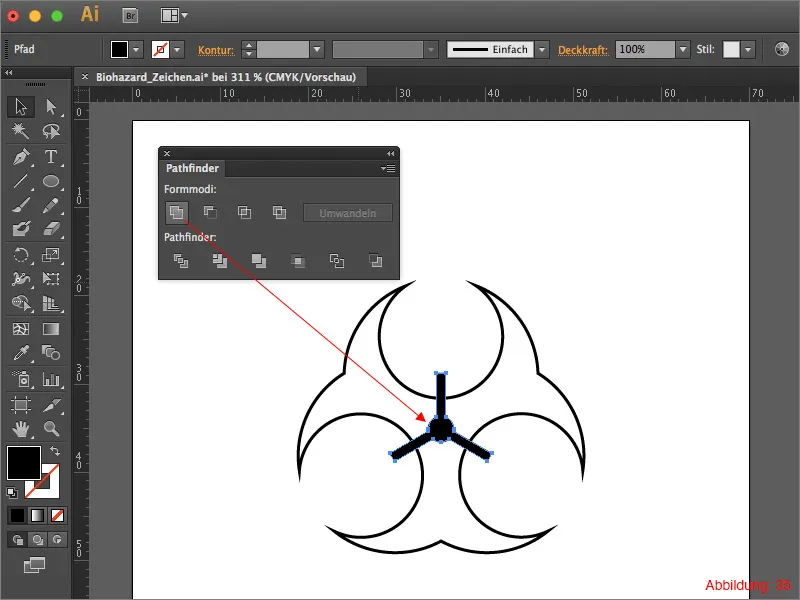
Select the three lines and the middle circle and click on Merge in the Pathfinder.
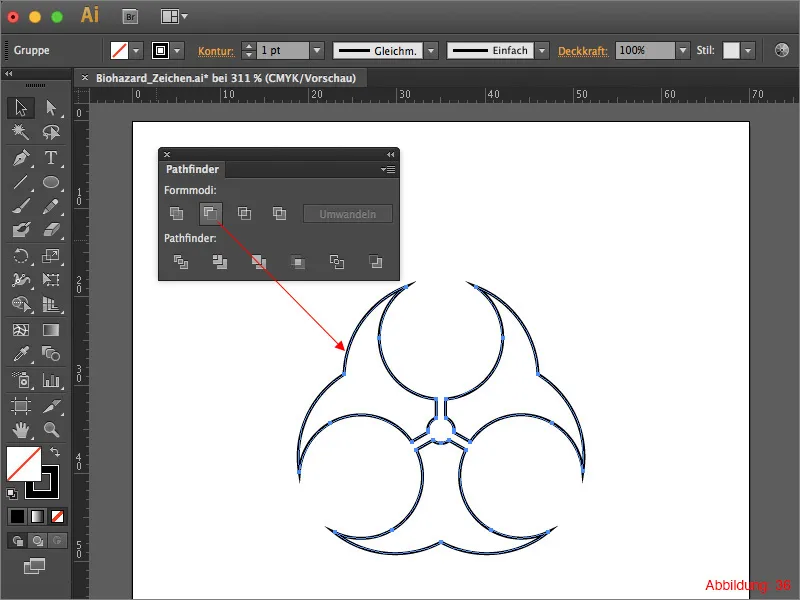
Once you have done this, select everything and click on Remove front object in the Pathfinder.
The whole thing should then look like this (Figure 36):
Now select everything again. Use Command+C and Command+F (on PC: Ctrl+C and Ctrl+F) to copy your objects and paste them in the same place. Give this copy an outline with a thickness of 4pt.
Now go to Object>Convert. This will convert the outline into a surface. In the next step, click on the small arrow in the top right-hand corner of the Pathfinder paletteand then click on Create Composite Shape. Now you have the option of clicking on Convert.
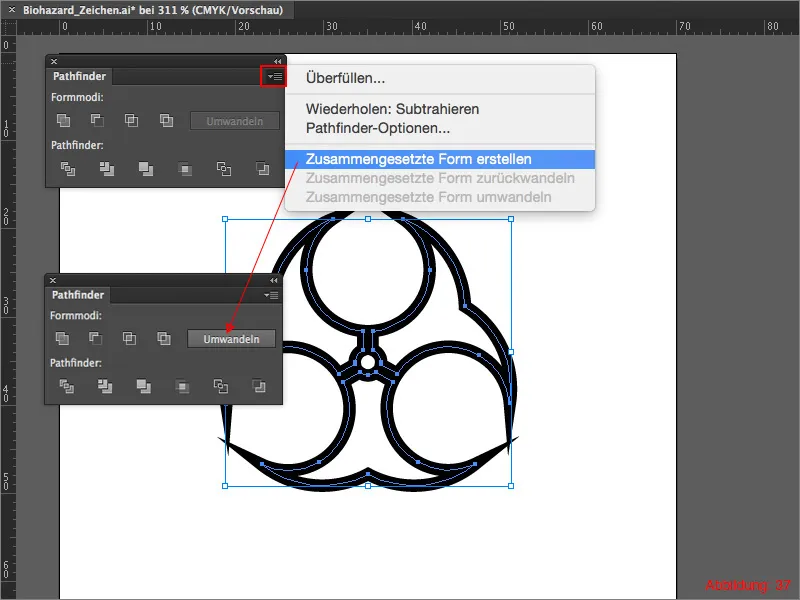
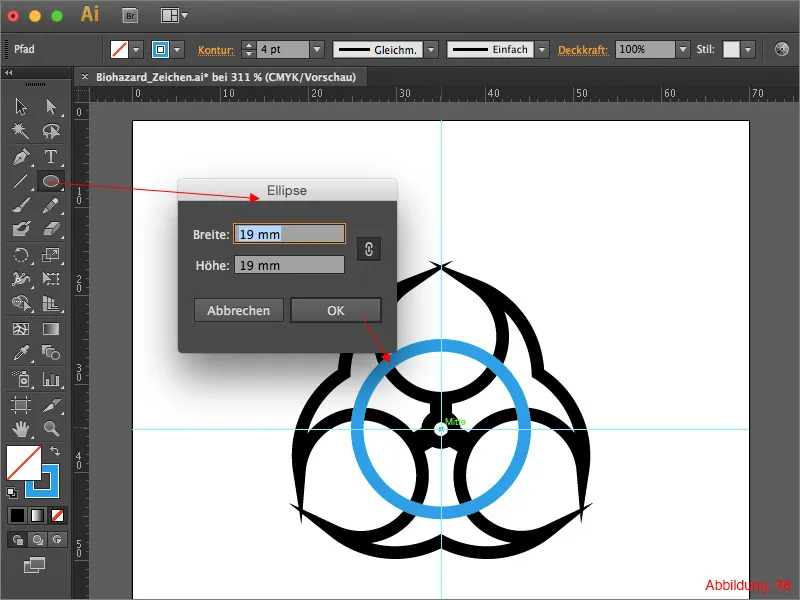
Now we have almost reached our goal. Grab the ellipse tool again and create a circle with the dimensions 19x19mm. Again, click on the center point with the ellipse tool and the Alt key pressed.
Give this circle an outline of 4pt and then go back to Object>Convert. Confirm the following window with OK.
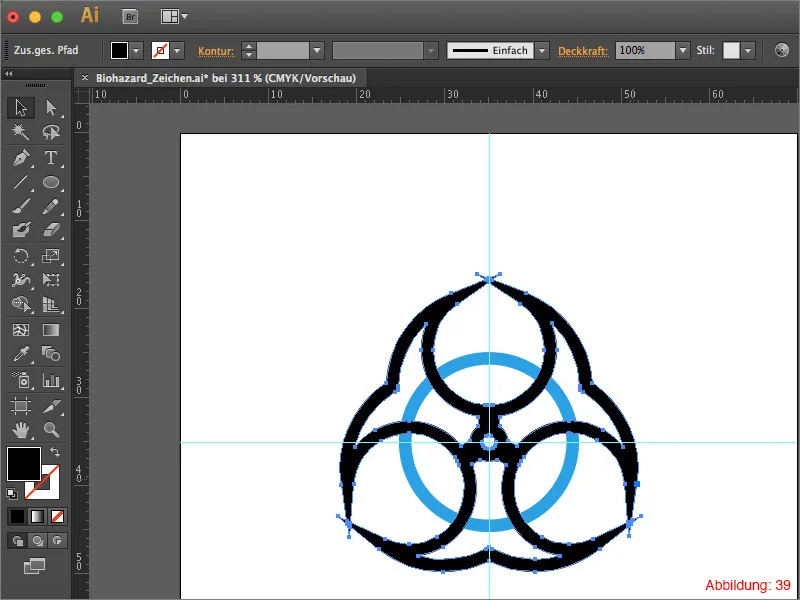
Now you just have to click on the previously created shape (the shape that you have just created with the Pathfinder ) and bring it to the front via Object>Arrange>In the foreground.
Now hold down the Shift key and select the shape in the foreground and the circle. Then click on Remove foreground object in the Pathfinder palette.
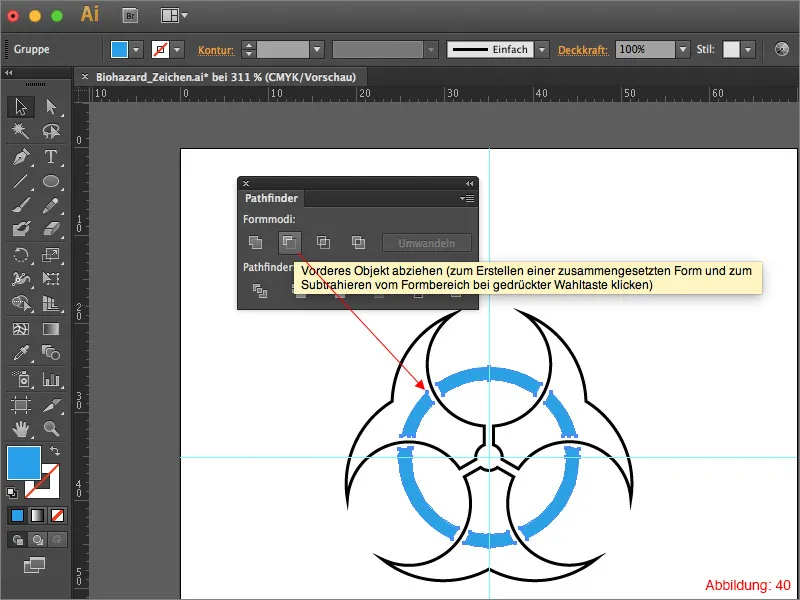
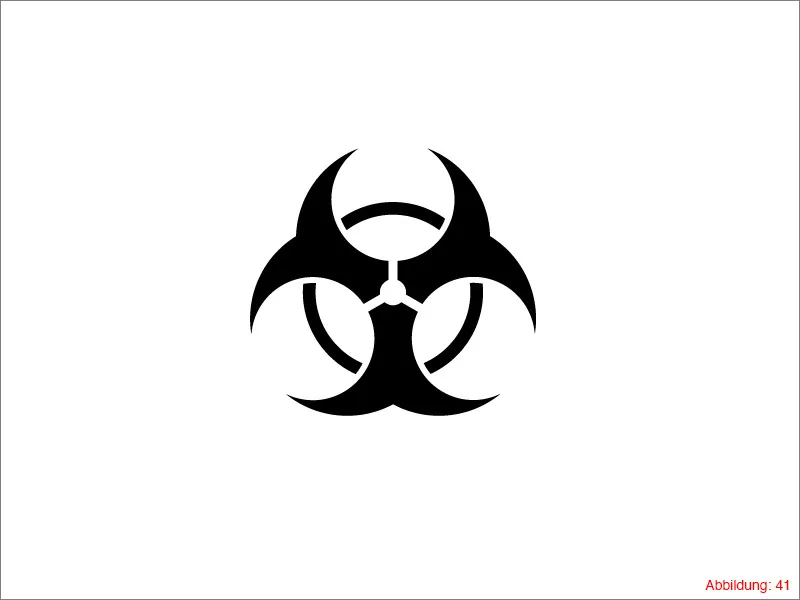
Now remove all outlines and color all surface colors with black. The whole thing should then look like this:
The Biohazard sign is finished.
Finish:
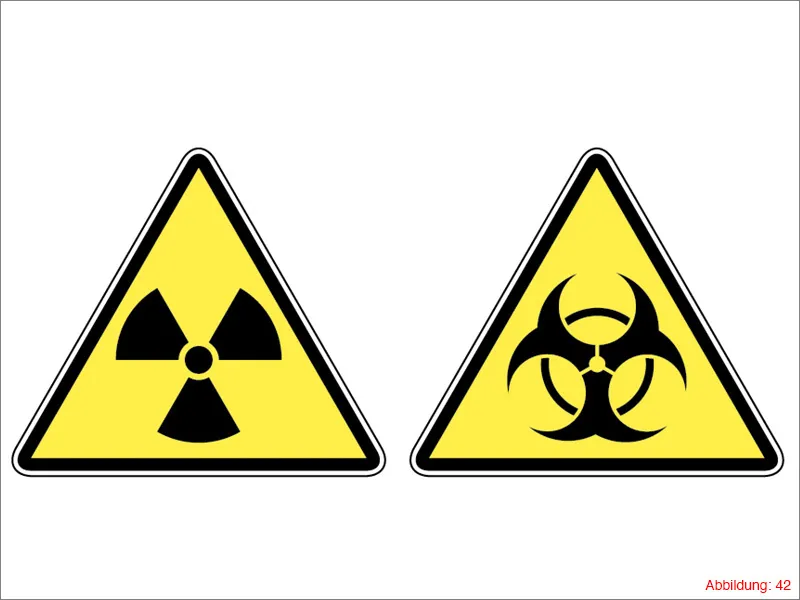
You now have all the elements you need to create a warning sign. Open your file from step 1 and insert one of the symbols you have just created. Now all you have to do is place it in the middle of your triangle sign and your warning sign is ready.
Final words:
I hope you enjoyed the tutorial and that you are now able to create your own warning signs. If you have any further questions on the subject, please feel free to write them in the comments below this tutorial. I will do my best to answer them as soon as possible.
Yours, Julian


