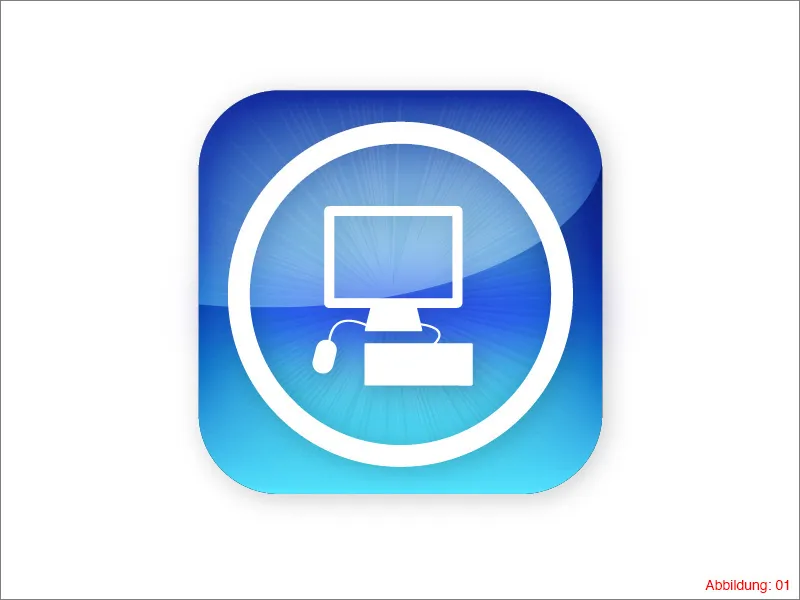
This is what our app icon will look like in the end. But enough talk now. Let's get started directly in Adobe Illustrator ...
Step 1: Create the foundation
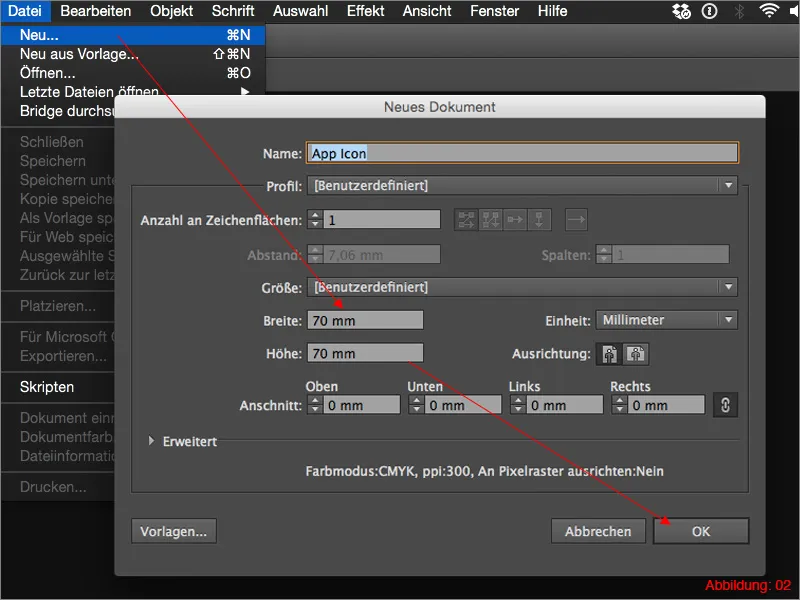
Once in Illustrator, the very first thing you need to do is create a new workspace via File>New. In the following window, select a format of 70x70mm. Confirm the window with OK.
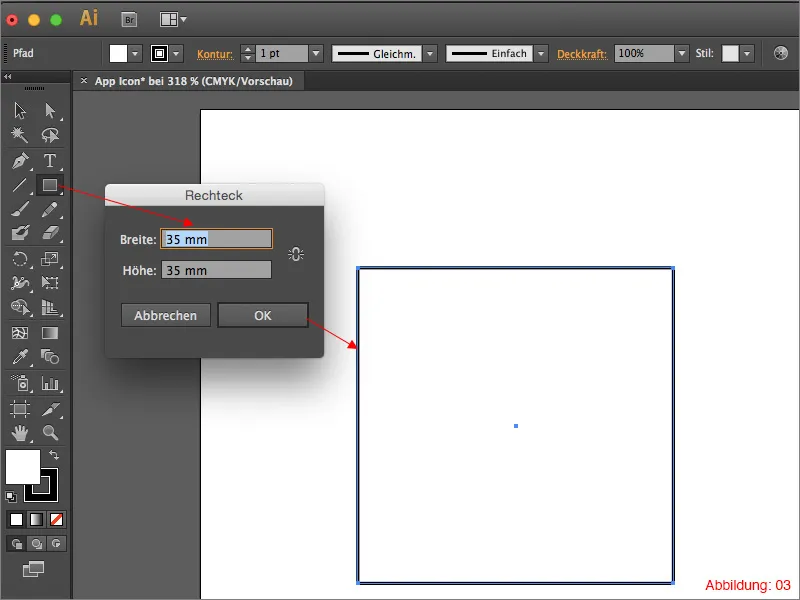
Grab the rectangle tool from the tool palette and then click once anywhere on your workspace. A dialog box will appear in which you can enter the size of your rectangle. Enter a size of 35x35mm and confirm with OK. This is now our foundation for the app icon.
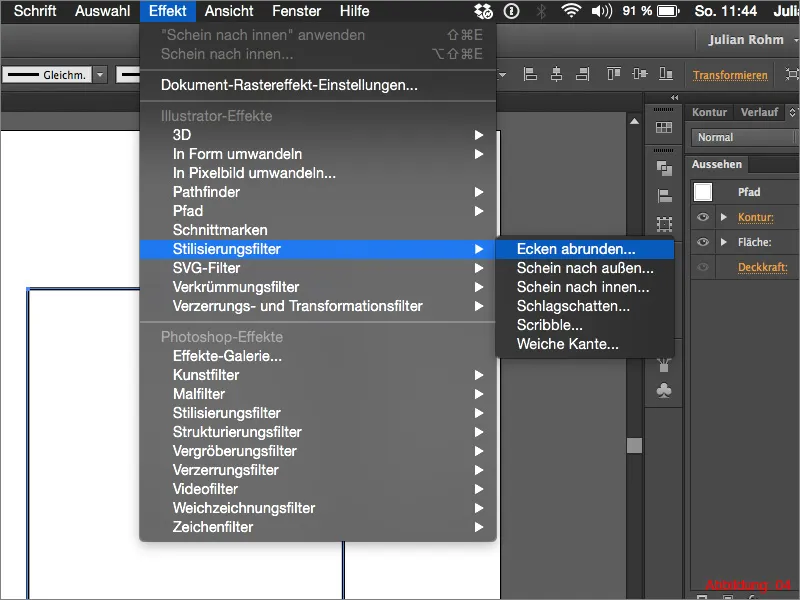
As Apple's app icons are never square, we now need to make sure that the corners are rounded. So select the rectangle and then go to Effect>Stylization filter>Round corners in the top menu bar...
In the following window, enter a corner radius of 7mm. Confirm the whole thing with OK.
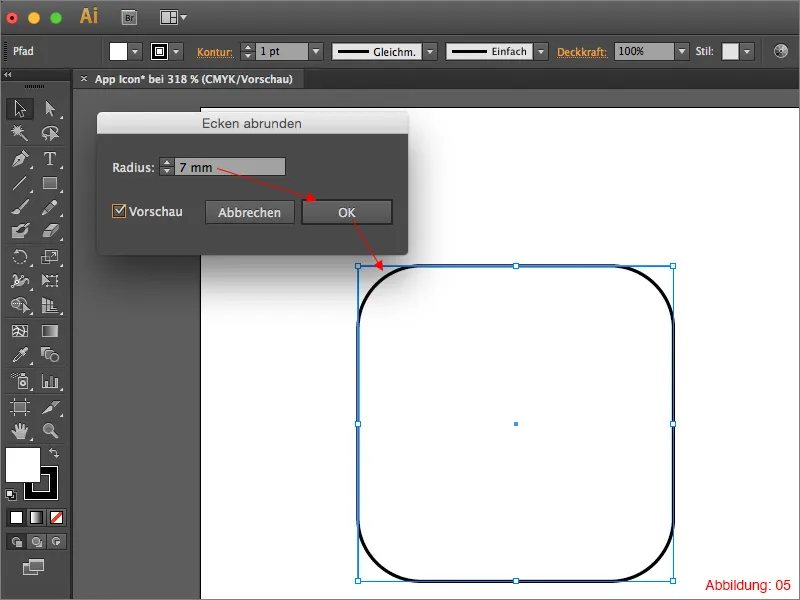
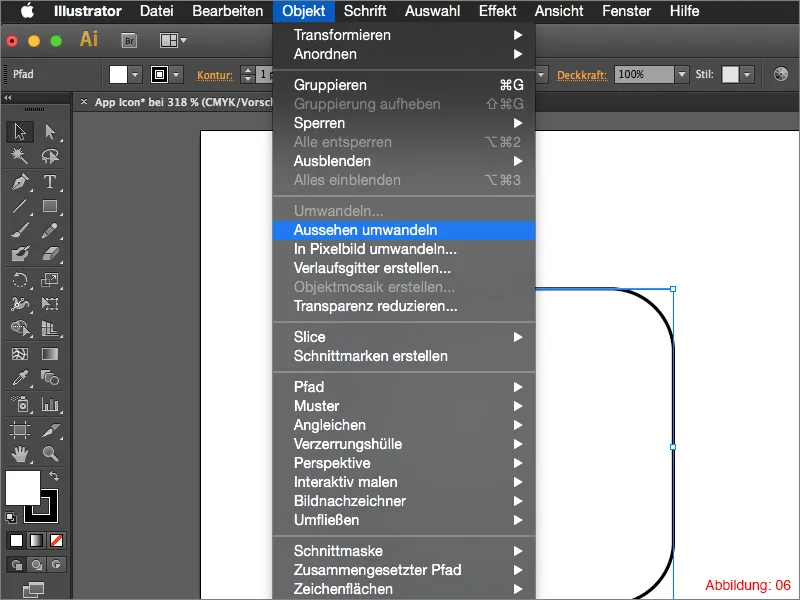
After you have confirmed this effect, the corners will be rounded, but the path will still be angular. To change this, go to Object>Convert appearance. The effect has now been converted into an object (the path now runs directly along the rounded corners).
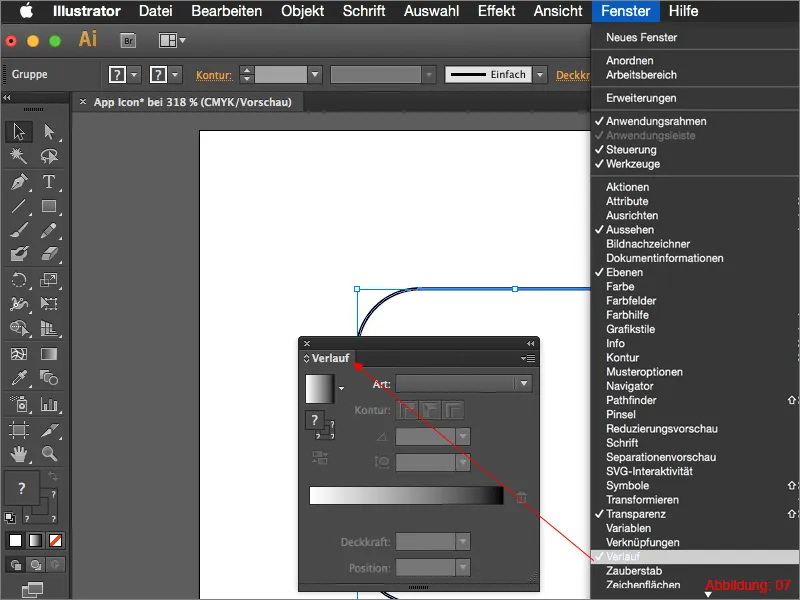
In the next step, you will need the gradient palette. If you haven't opened it yet, you can find it via Window > Gradient.
Now click on the gradient field in the gradient palette to fill your rounded rectangle with a standard black/white gradient. (If your rectangle still has an outline, now is the time to remove it).
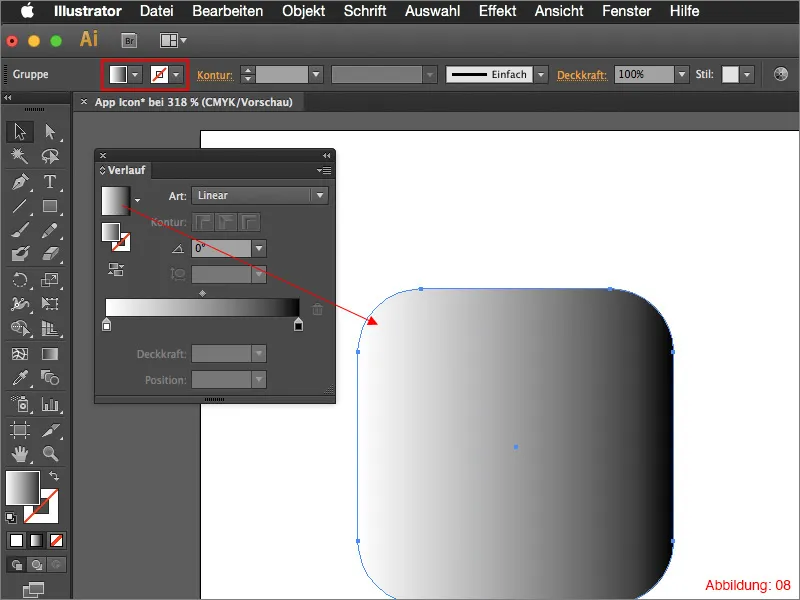
In the setting for the gradient angle, enter a value of 90° so that it runs nicely from top to bottom.
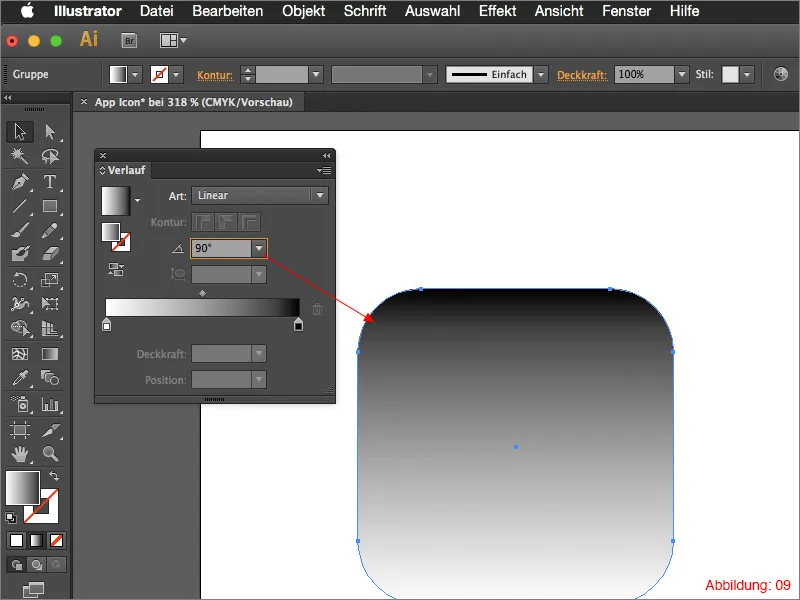
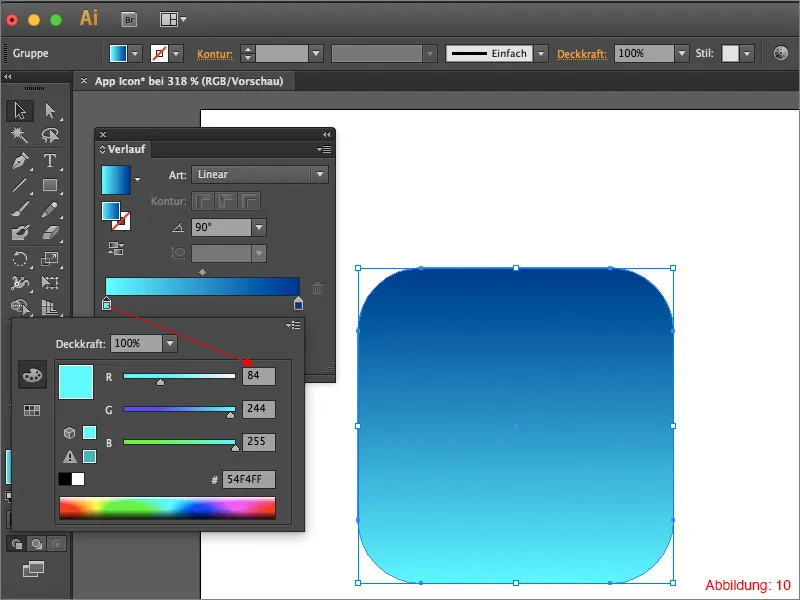
As our icon is to have a blue gradient (you can of course also use your own colors), I have already prepared two RGB color values for you.
- dark blue - 28/57/145
- light blue - 84/244/255
To assign these color values to the gradient, simply double-click on the color fields in the gradient palette. You then have the option of entering the RGB values.
(If you have set a different color mode, click on the small arrow at the top right of the gradient palette to select the appropriate color mode).
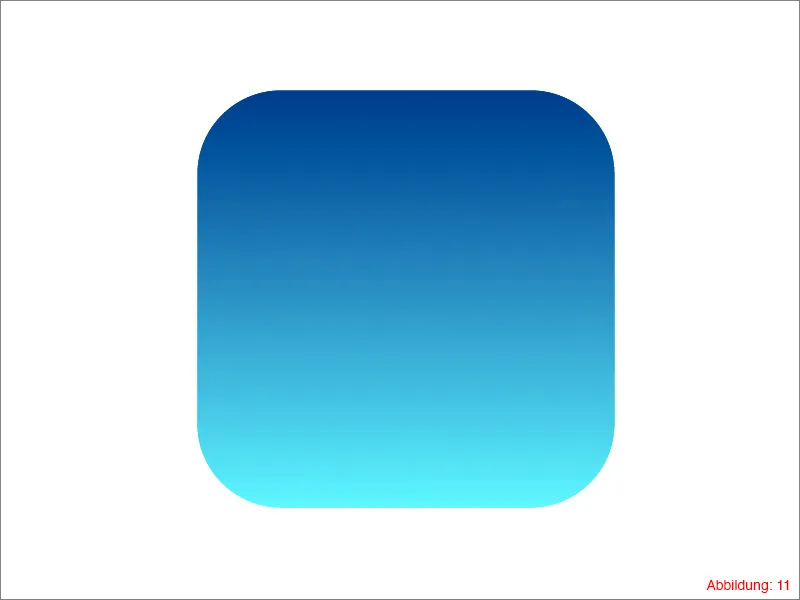
Once you have done this, everything should look something like this. (Figure 11).
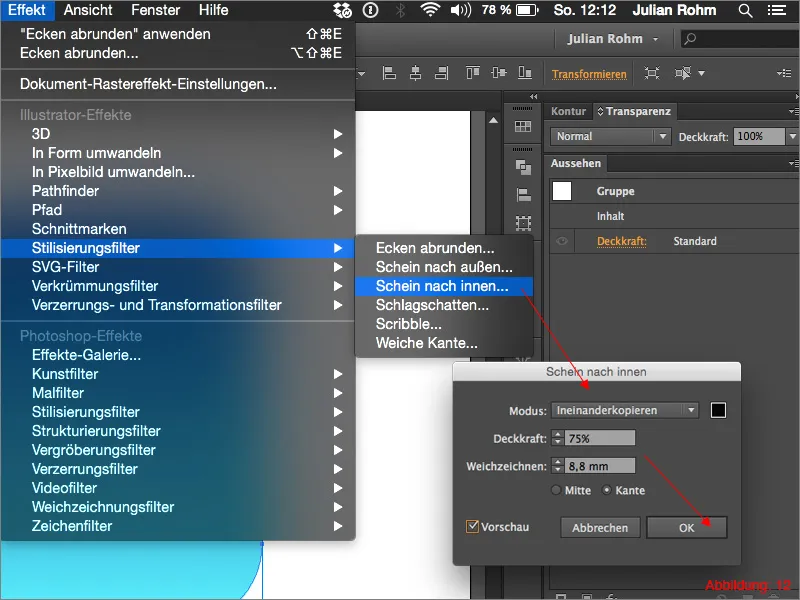
To refine the gradient a little more, go to Effect>Stylize filter>Shiny inwards ... Set the blending mode to Overlay. Set the opacity to 75% and the blur setting to 8.8mm. As we only want to apply this effect to the outer area, set the selection point to Edge. Confirm the window with OK.
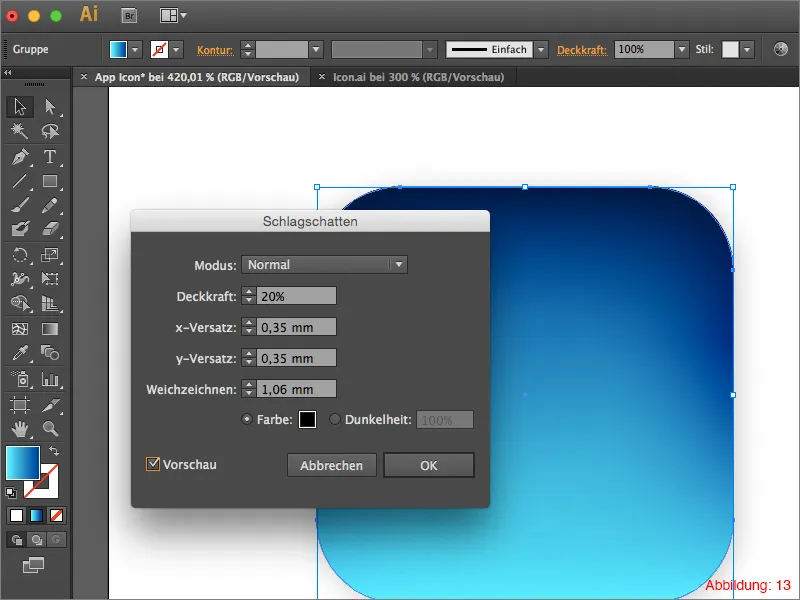
Next, add a drop shadow to the whole thing. This can also be done via Effect>Stylization filter> Drop shadow ... Select the settings for this filter as shown in Figure 13, but feel free to vary them a little.
In the next step, copy the rectangle with Command+C and paste it in the same place with Command+F. (On the PC you can do this with Ctrl+C and Ctrl+F).
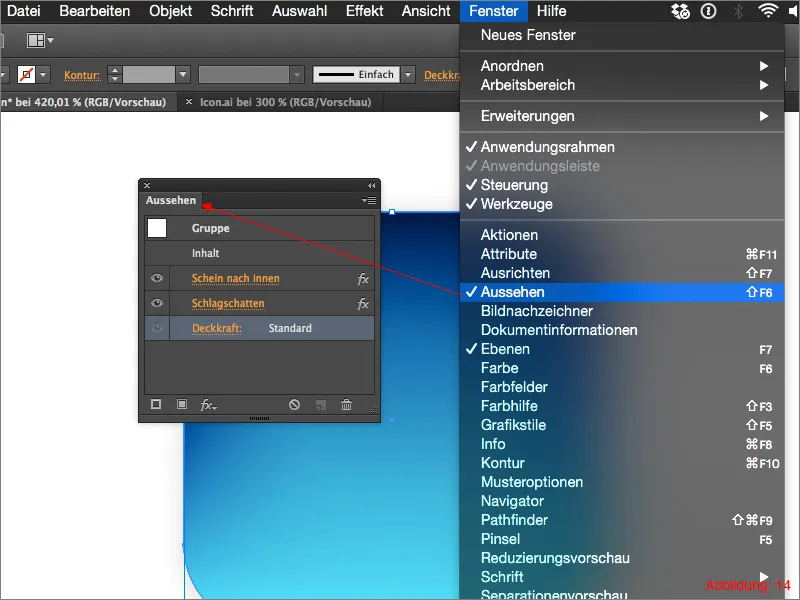
As we no longer need the effects applied above on the copy of the rectangle, you must delete them. As some of you may already know, all effects and filters applied in Illustrator are listed in the Appearance palette. If this palette is not visible to you, you can call it up again via Window>Appearance.
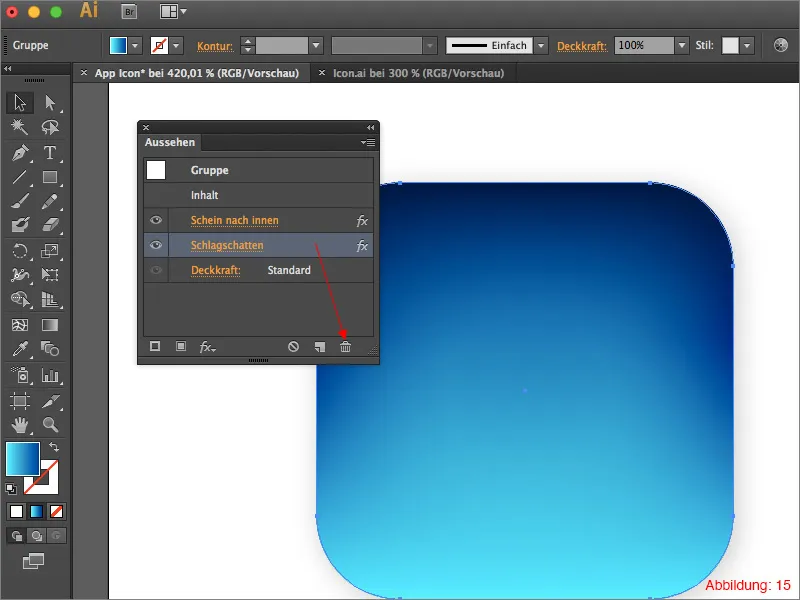
Now delete the drop shadow. You can easily do this by grabbing the drop shadow in the Appearance palette with the mouse button held down and dragging it to the small trash can in this palette in the bottom right-hand corner.
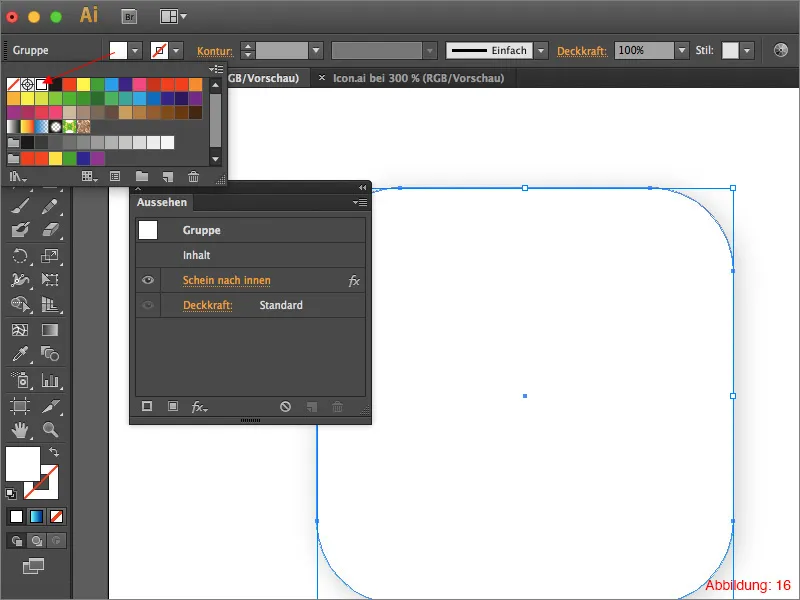
You do not need to delete the inward glow, as we will only adjust it slightly. Before you do this, however, you should change the surface color of your rectangle copy to white.
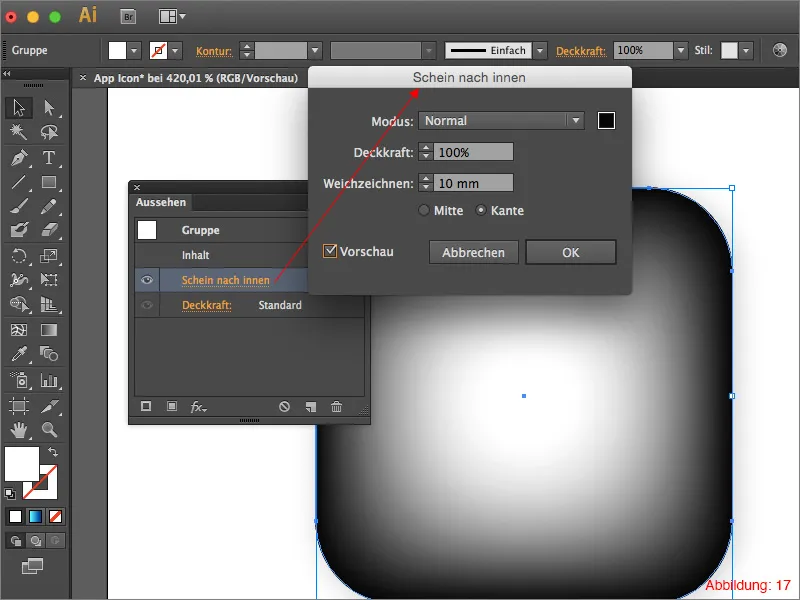
Then click on the inward glow in the Appearance palette , set the mode to Normal and select a deep black for the color. Set the opacity to 100% and set the blur to 10mm (Figure 17).
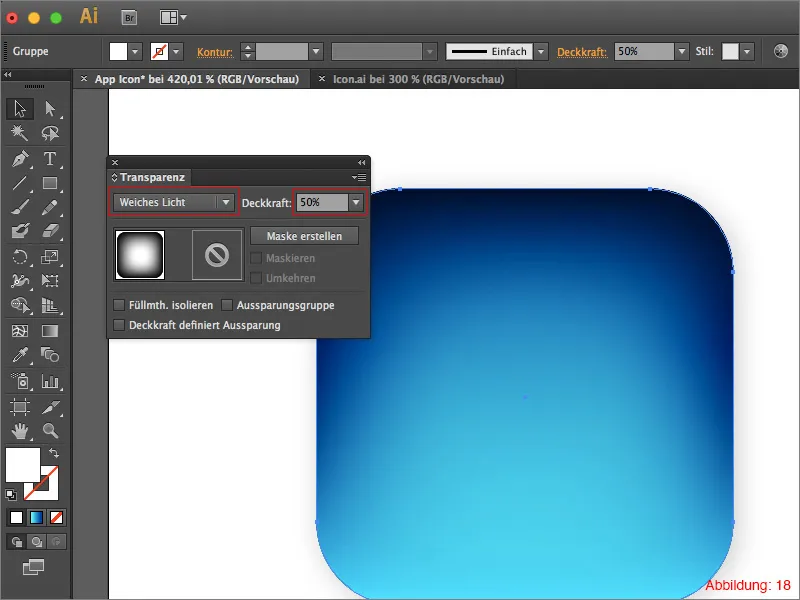
To blend this copy with the original underneath with the blue gradient, simply reduce the opacity to 50% and set the fill mode to Soft light. You can do all this using the Transparency palette. (This palette can also be found under Window>Transparency).
This increases the contrast slightly and gives our app icon more depth.
Step 2: Create a halo
In this step, we will look at how you can create the halo for the app icon. To do this, it's best to first hide the two rectangles you created in step 1 so that you have space on your workspace again.
Grab the line tool from the toolbar and set the outline color to black and the outline thickness to 0.5pt.
Now draw a line upwards from approximately the middle and keep the mouse button pressed. As soon as you have drawn the line (still holding down the mouse button), press the Ctrl key + the key with these two brackets < >.
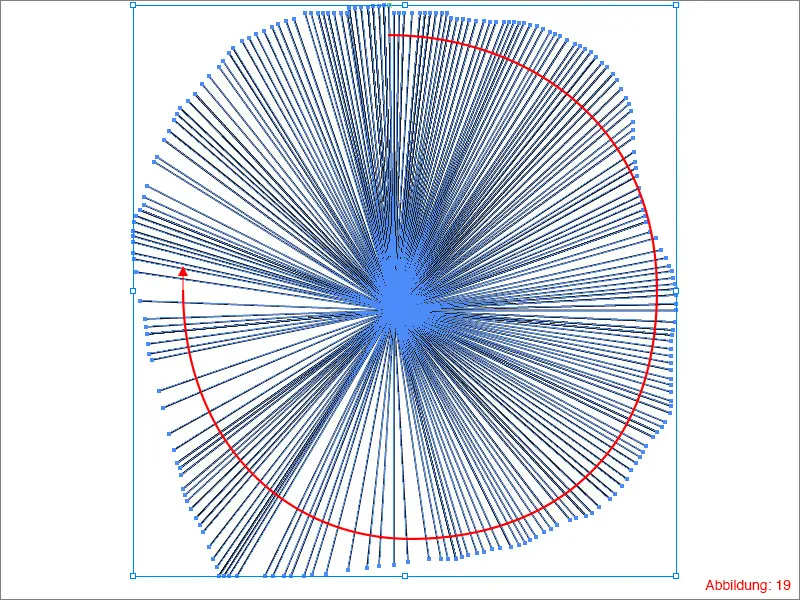
Now drive once in a circle while holding down the mouse button. This key combination creates different numbers of lines depending on the speed of your mouse pointer movement.
Once you have moved in a circle, the whole thing should look something like Figure 19. (Try this a few times, as the saying "practice makes perfect" also applies here).
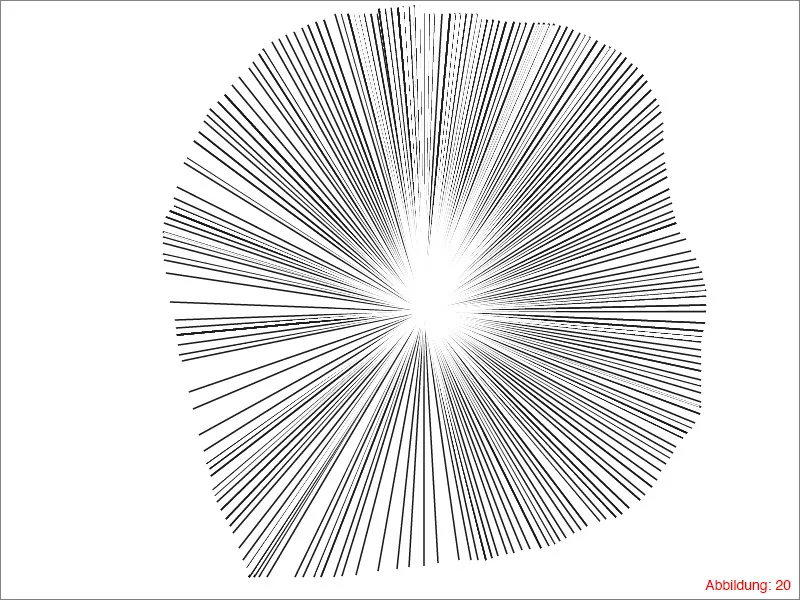
Select all lines and group them with Command+G (on PC: Ctrl+G). Use Command+C and Command+F (on PC: Ctrl+C and Ctrl+F) to copy the whole thing and paste it in the same place. For this copy, change the outline color to white and turn it slightly to the right or left so that the black lines become partially visible again.
The whole thing should then look something like this. (Figure 20):
Now select all the lines again and group them again using Command+G (on PC: Ctrl+G).
Now you can show the rectangles from step 1 again. Make sure that the center of your aureole is approximately in the center of your rectangle.
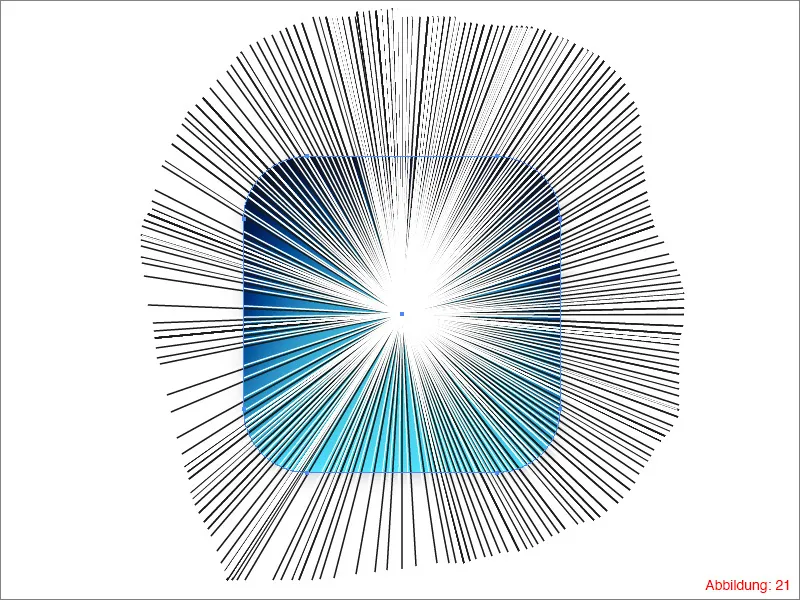
Now copy the gray rounded rectangle that you offset with the blue gradient in step 1. (Command+C or on PC - Ctrl+C).
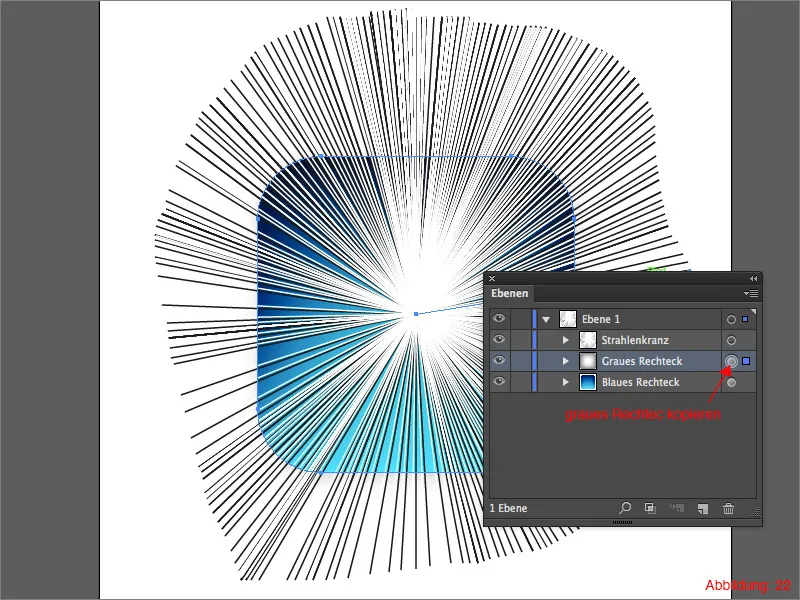
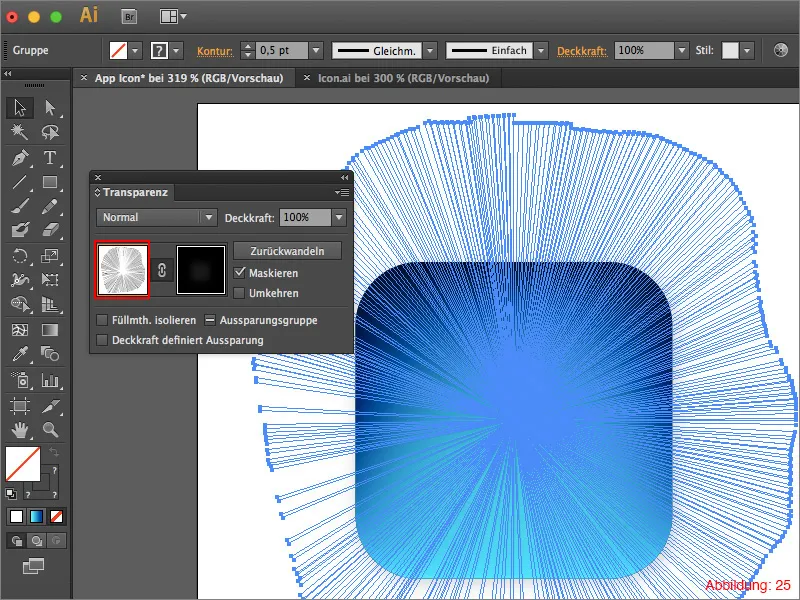
Now click on your group with the halo and look in the transparency palette. Here you now have the option (similar to Photoshop) to create a mask. To do this, double-click on the area shown in Figure 23. This double-click creates an opacity mask.
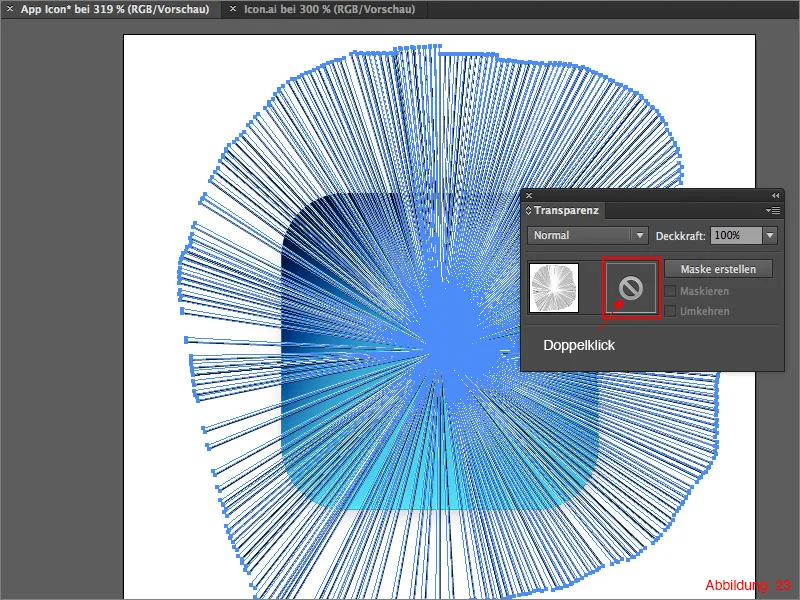
As soon as you have created this, you will also notice that your layer palette has changed as long as you are inside the mask. Now use Command+F (on PC: Ctrl+F) to paste the previously copied rectangle into the mask. Now you just have to reduce the opacity from 50% to 10%.
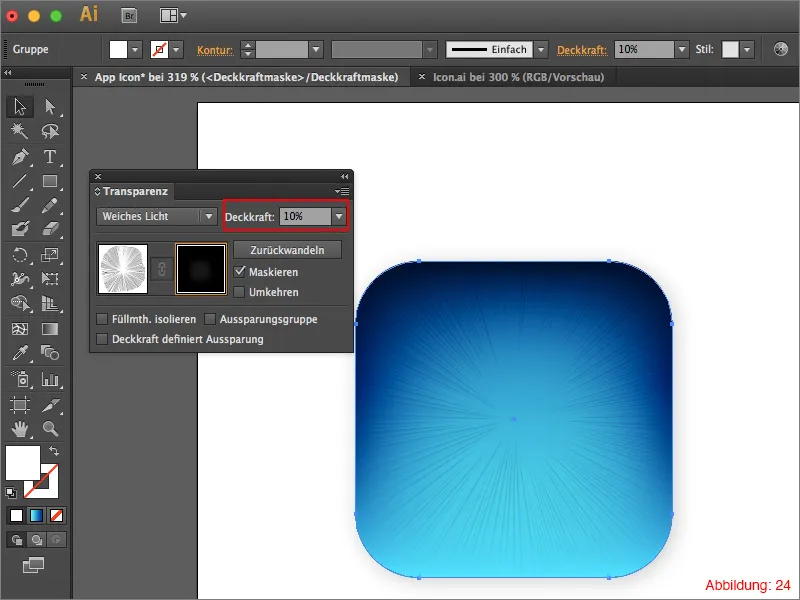
Now you have to leave the mask so that you can return to the normal view. You can do this by clicking once on the white field next to the mask symbol. (Figure 25).
Step 3: Create the basis for the pictogram
Now we've almost done most of the work and are ready to insert a pictogram or symbol into our app icon. However, we need to quickly create a base or a small platform beforehand so that the whole thing looks a little better later on.
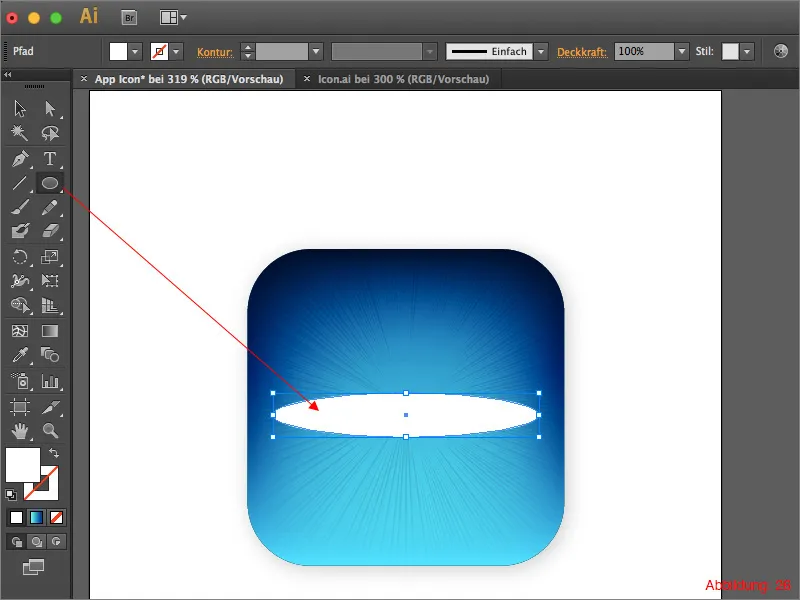
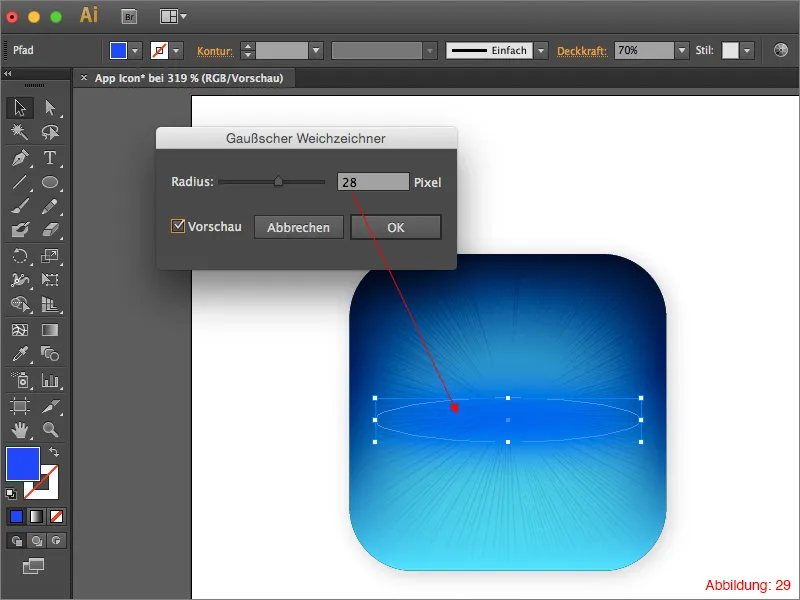
Grab the ellipse tool and draw an ellipse approximately in the middle. (See Figure 26).
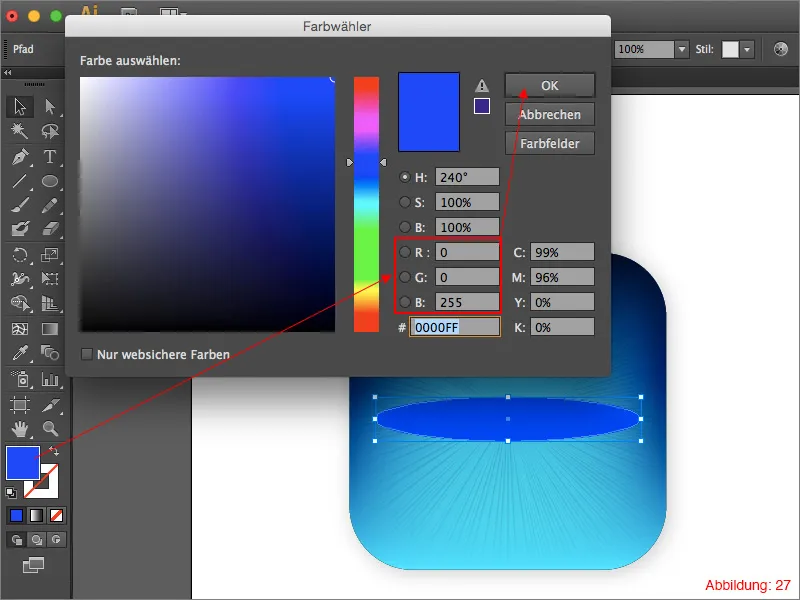
Fill this ellipse with a dark blue. I have used the following color values for this. RGB - 0/0/255.
Reduce the opacity to approx. 70% and then go to Effect>Blur Filter>Gaussian Blur ...
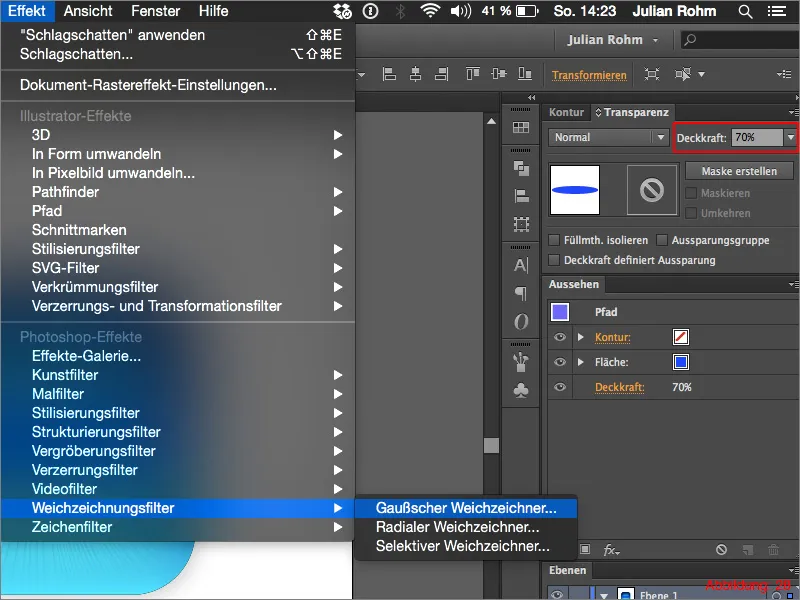
I have chosen a radius of 28 pixels for the blur. You can of course change this value as you wish. Confirm the whole thing with OK.
Step 4: Insert pictogram
Now that the base is in place, the time has finally come. All we have to do now is insert a pictogram into our app icon. As a little extra, I have included a few different pictograms in the working files. But you are also welcome to use your own.
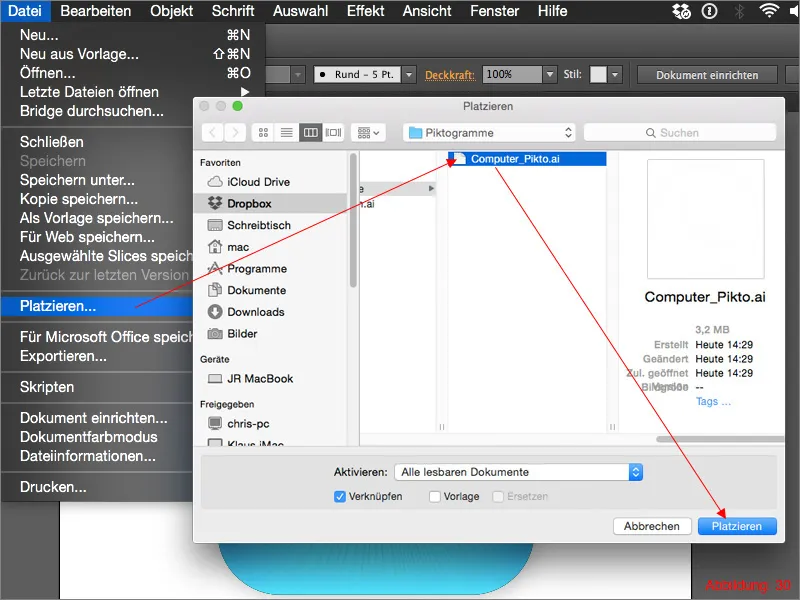
Go to File>Place in the top menu bar and select a pictogram of your choice. In my case, this is the computer from the work data.
... Done! ... you might think ...
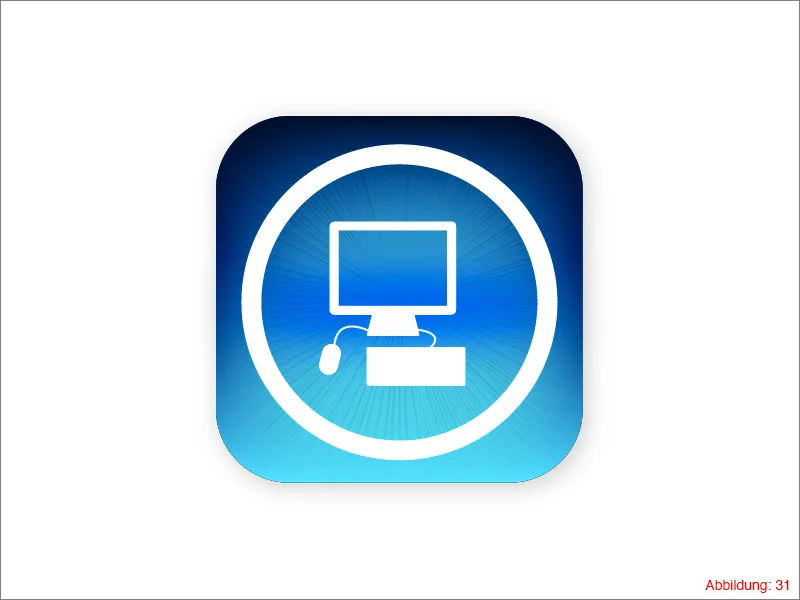
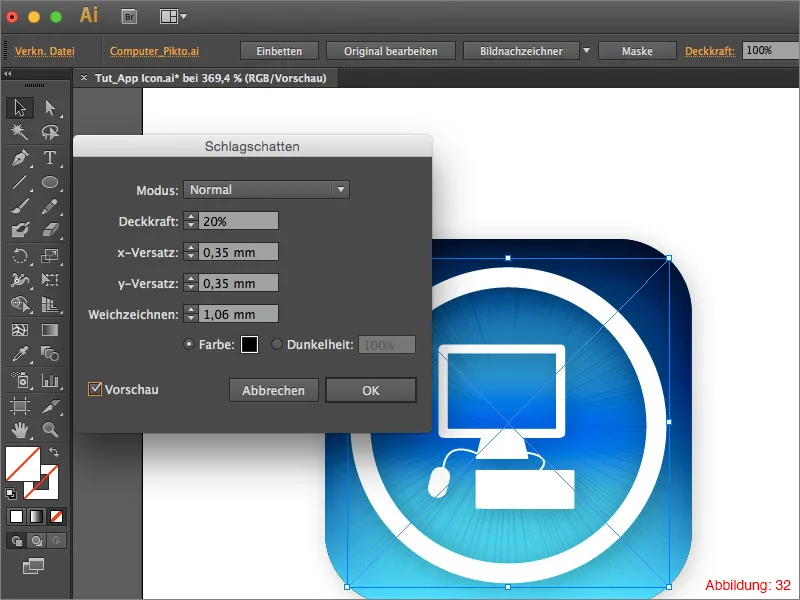
But there are still one or two small things to do. Firstly, the pictogram needs a drop shadow. To do this, go to Effect>Stylization filter> Drop shadow. Use Figure 32 as a guide for the values for this drop shadow.
Step 5: Add a glow of light
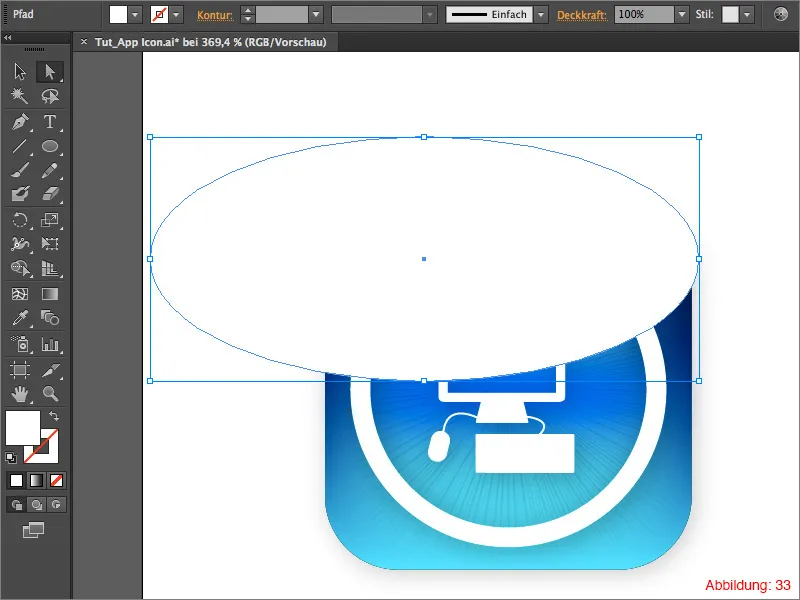
In the last step, we will add a glow of light to round off the whole thing nicely. Grab the ellipse tool and draw a white ellipse as shown in Figure 33.
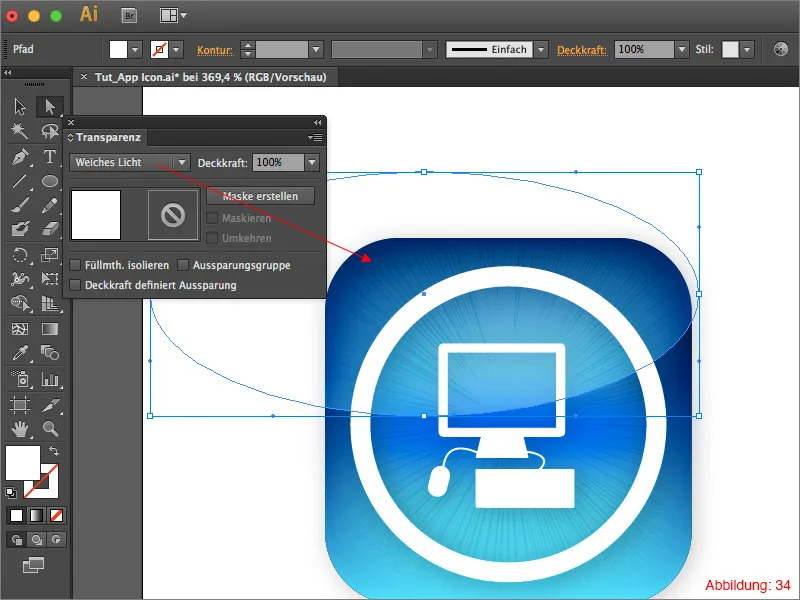
Finally, all you have to do is set the fill mode of the ellipse to Soft light. Your app icon is ready.
Final words:
I hope you enjoyed the tutorial and that you can now create some nice app icons. In the attached files you will also find my original working file, so you can have a look there if you get stuck at any point.
If you have any further questions on this topic, please write them in the comments. I will do my best to answer them as soon as possible.
Best regards
Yours, Julian


