Creating 3D objects
Introduction:
Hello dear PSD community. Nice to have you with me again for one of my tutorials. Today we are going to dive into the 3D world of Adobe Illustrator. Although it is no substitute for professional 3D programs such as Cinema 4D, Illustrator can be used to create one or two 3D objects. For this tutorial, I have prepared three objects that we will create together step by step. But enough talk now. Let's get straight to it ...
Step 1: Create a character
In order to dive straight into the 3D function of Adobe Illustrator, the first step will be to create a typical game character (as known from Ludo).
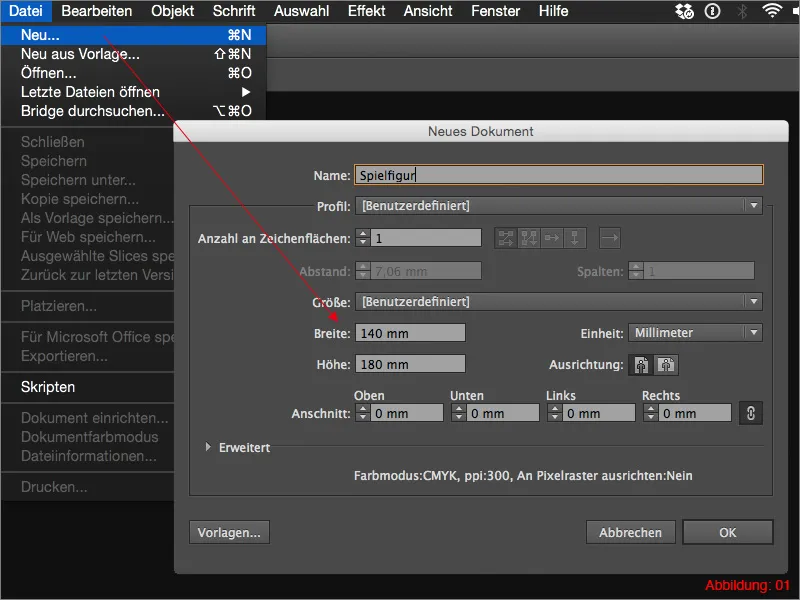
Start Illustrator, create a new artboard with the dimensions 140x180mm via File>New and confirm with OK.
So that you don't have to draw the basic shape out of your head, I have included a picture of such a character in the enclosed working files.
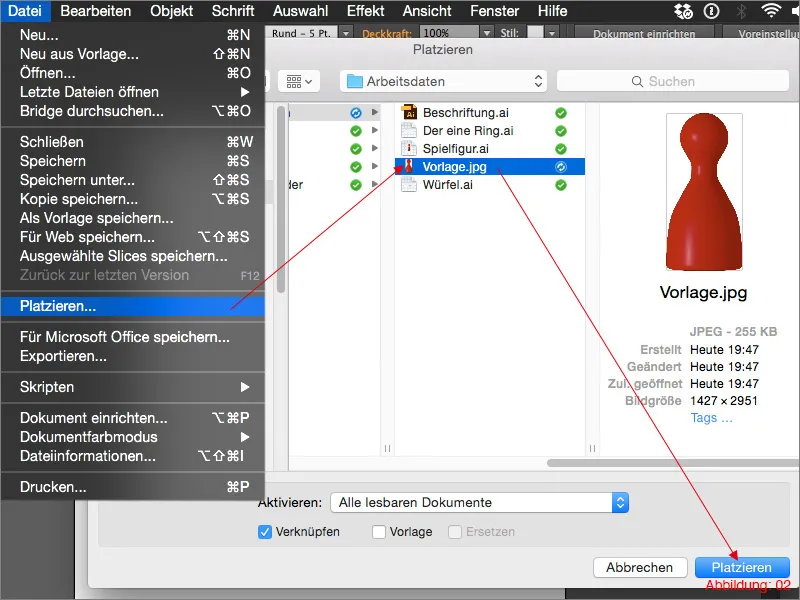
Go to File>Place in the top menu bar , select the file "Template.jpg" from the working files and confirm by clicking on Place.
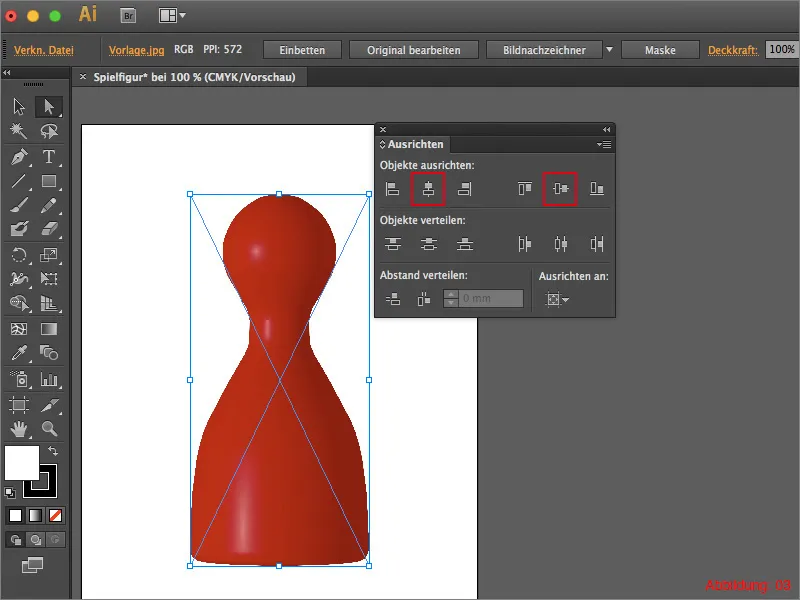
Use the Align palette to position the placed image on your workspace. (Figure 03)
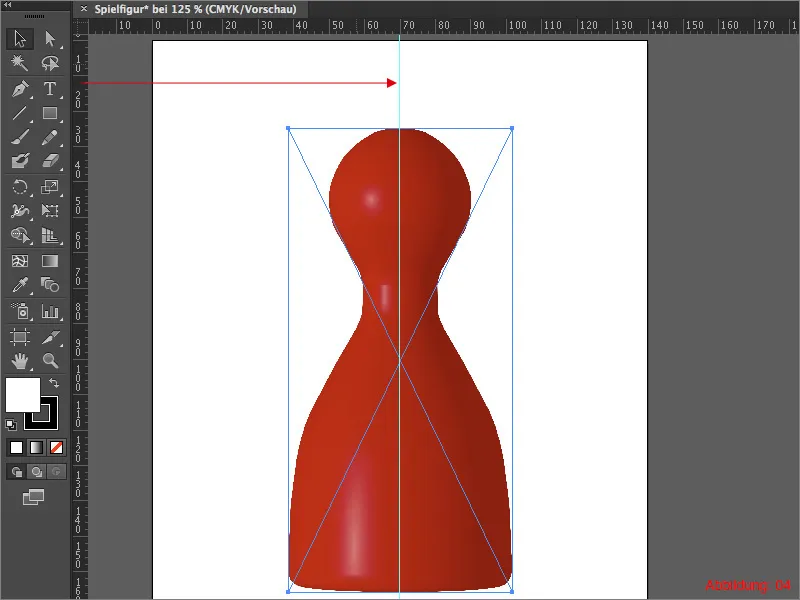
After you have centered the image, use the shortcut Command+R (on PC - Ctrl+R) to display the rulers and draw a vertical guide line directly in the middle of your workspace so that the character is visually centered. (Figure 04)
As such a character is round, it is sufficient to trace only half of the outer contour. Grab the pen tool from the tool palette and create a path as shown in Figure 05 (shown here in green). Make sure that the start and end points are exactly on the guide line.
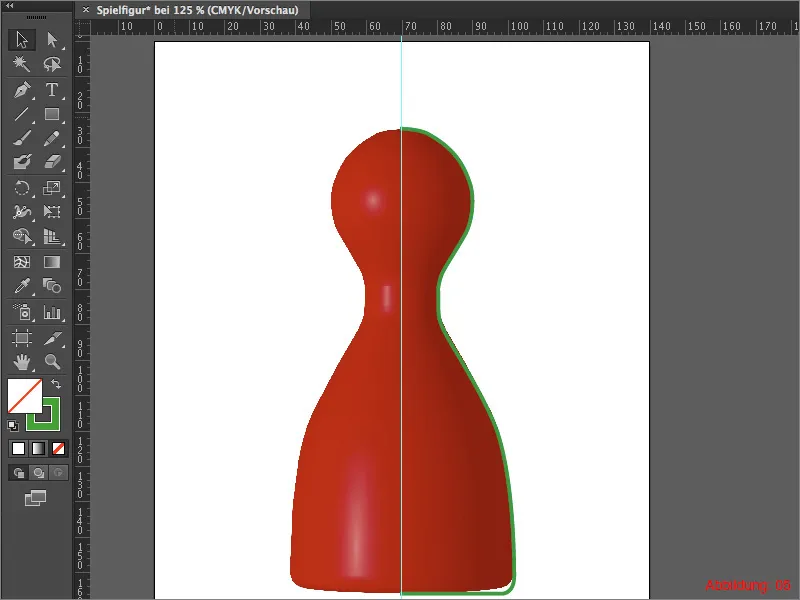
Once you have created the path to your satisfaction, you can either delete the template image or simply hide it in the layer palette. As we want to create a red character in this tutorial, we will assign a red outline to the path we have just created.
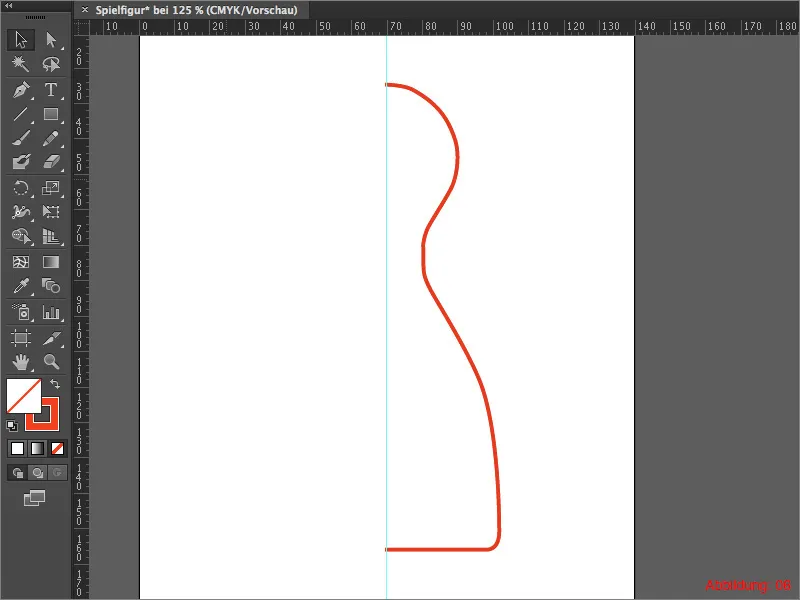
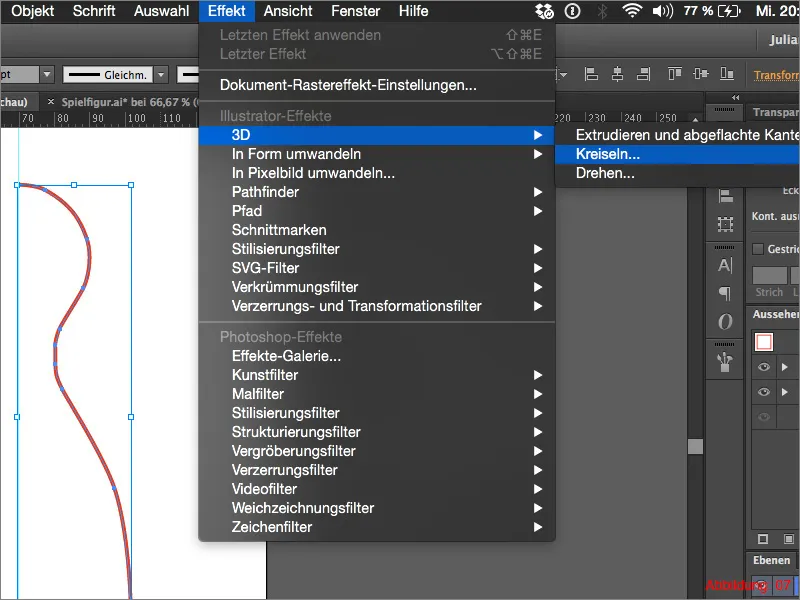
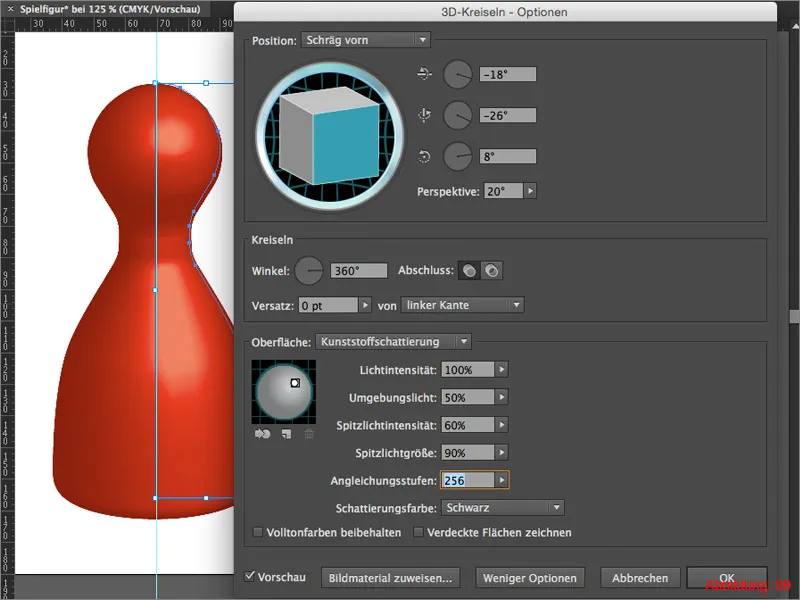
We have now prepared everything we need to turn the path into a 3D object. To do this, go to Effect>3D>Gyro... in the top menu bar.
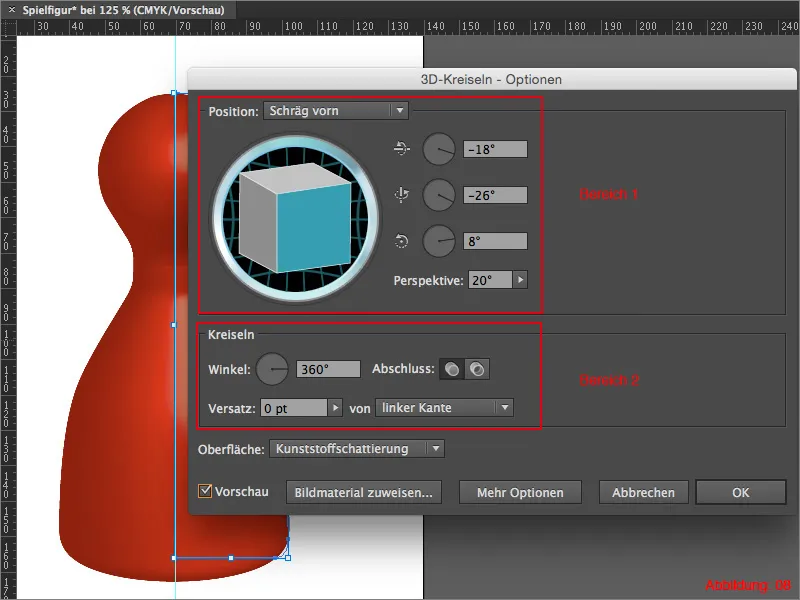
A relatively large dialog window will appear in which you have a few more setting options.
First of all, activate the preview in the lower left area of this window so that you can see the effects of this effect.
In the upper area (area 1), you can set the angle or rotation of your 3D object. You also have a parameter for the perspective here. This is actually nothing more than the focal length of a camera lens. Depending on how you change this value, you can either create a wide-angle look or a telephoto zoom look.
In the lower area (area 2), only the angle is of primary importance to you. If you want a complete character, you must set this angle to 360°. However, if you only want half a character instead, you can reduce the angle to 180°.
As you usually want to illuminate such a 3D object, you can click on More options at the bottom of the dialog window. The window then opens downwards and allows you to set one or more light sources (which, however, only affect the 3D object).
The first three menu commands, such as Light intensity, Ambient light and Highlight intensity, are almost self-explanatory.
Things get interesting again with the adjustment levels. This refers to the 256 possible tonal values that are available in the RGB color space. If these tone values are set to a relatively low value, the highlight is projected onto the 3D object quite roughly and with unsightly color tears. However, this has the advantage that Illustrator can calculate the whole thing more quickly. If you set this value to the maximum, i.e. to the 256 tonal values, all available color gradations are used. As a result, the highlight is projected onto the 3D object with high quality. However, depending on the computer performance, Illustrator's calculation may take a little longer.
Once you are happy with your settings, all you have to do is confirm with OK. Your character is ready.
Mini tip:
If you realize after confirming that you want to change your settings, all you have to do is select your character and click on the 3D spinning top effectin the Appearance palette. The dialog window will then open again, in which you can adjust the 3D settings.
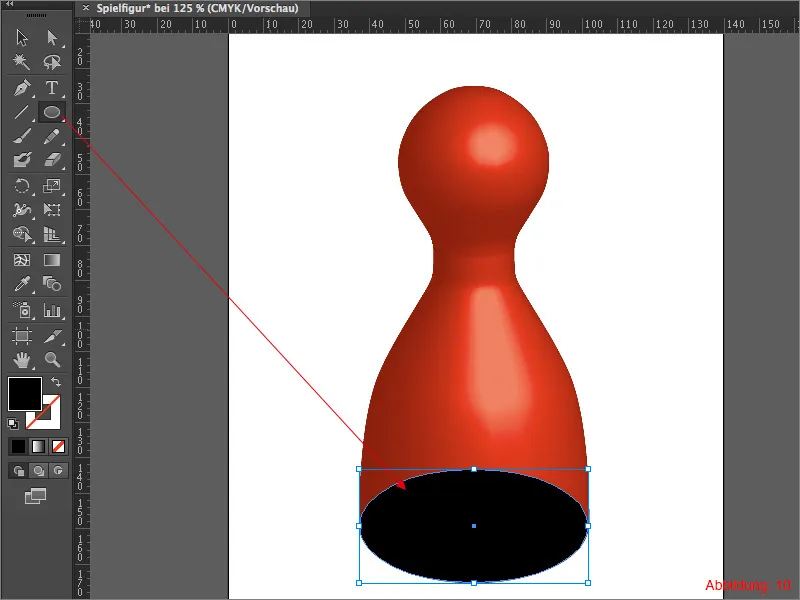
To do some fine-tuning, grab the ellipse tool and draw an ellipse approximately the size of the lower area of your character. (See figure 10)
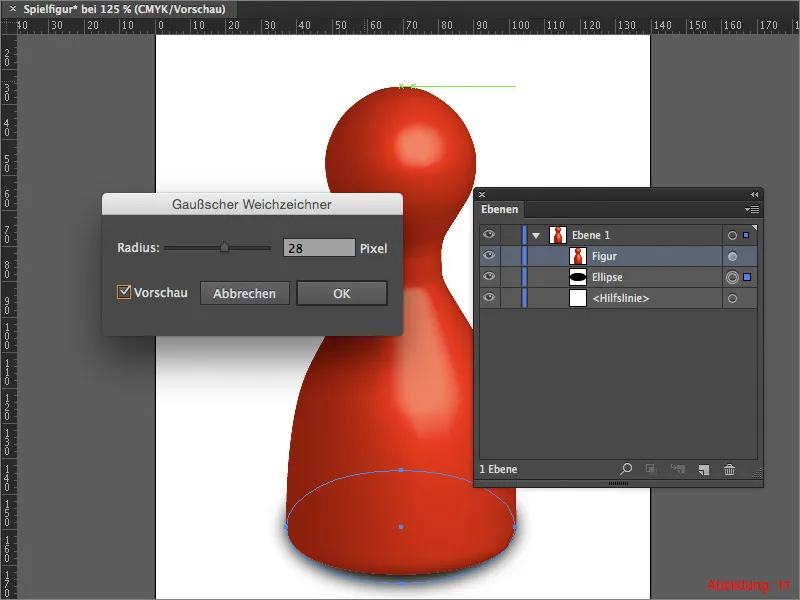
Place this ellipse in the layer palette behind your character and then go to Effect>Blur Filter>Gaussian Blur. Enter a value of around 20 pixels in the following window and confirm with OK. Now you have created a kind of shadow and your character looks a little more three-dimensional.
Step 2: Create a cube
Now that you have created a 3D character in step 1, it is time for another 3D object. In this section of the tutorial, we will create a fully textured game cube.
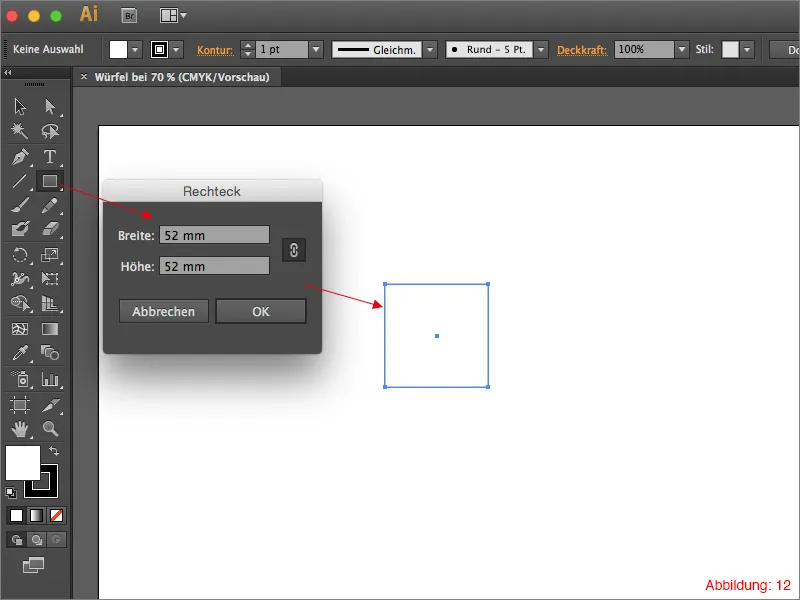
To begin with, create a new workspace via File>New in DIN A3 format in landscape format. Then grab the rectangle tool and click once on your workspace so that a window appears in which you can enter the size of your rectangle. Select a size of 52x52mm and confirm with OK.
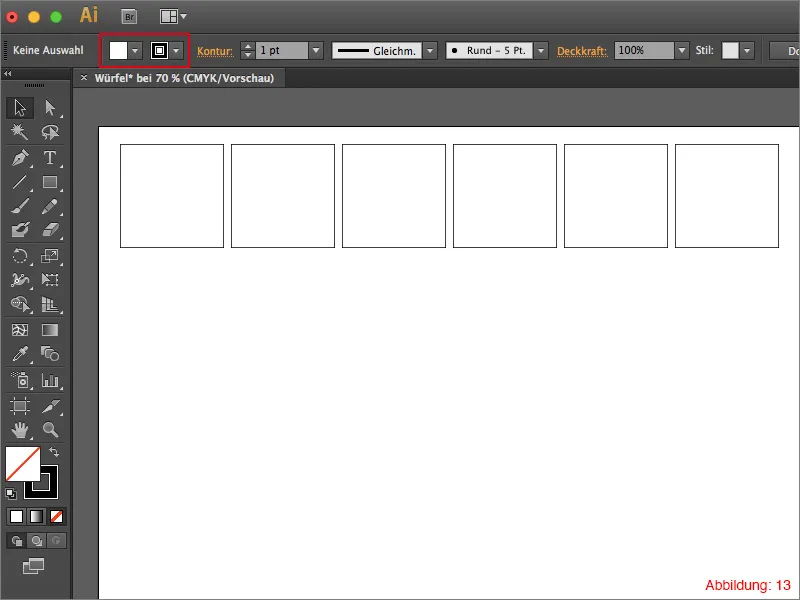
Give this rectangle a black outline and create a white fill if none is available. Duplicate this rectangle five times and arrange the rectangles next to each other. (Figure 13)
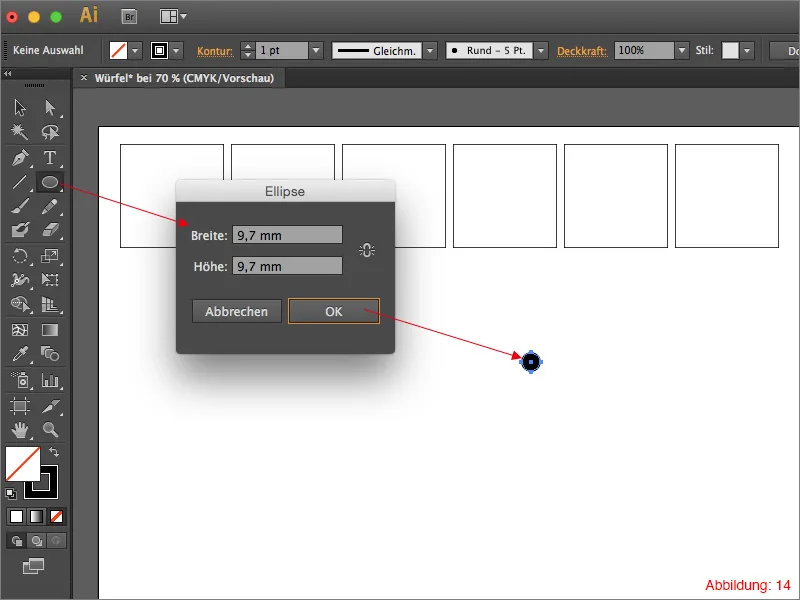
Now take the ellipse tool and click on your workspace again. Give this ellipse a size of 9.7x9.7mm.
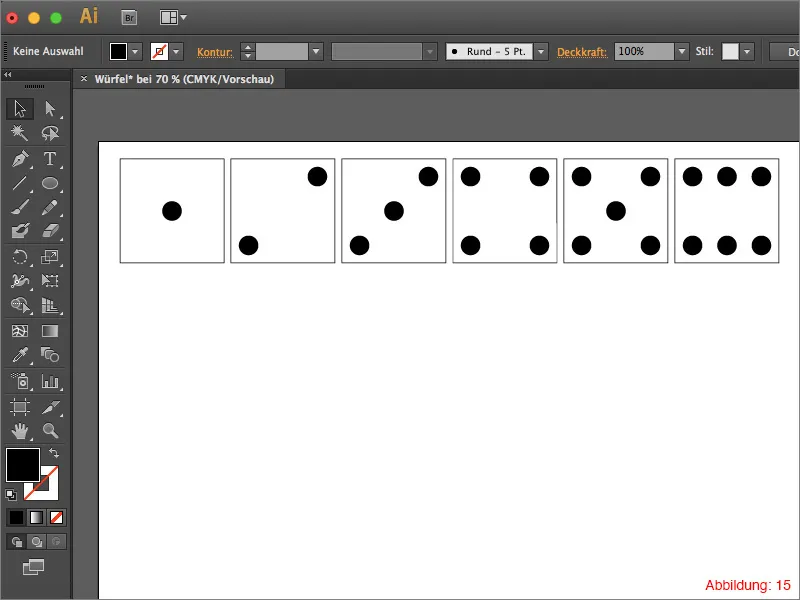
Duplicate this ellipse and arrange it so that you get the typical sides of a game cube. (See figure 15)
Mini tip:
Activate the intelligent guides via Command+U or Ctrl+U to make this task easier to master.
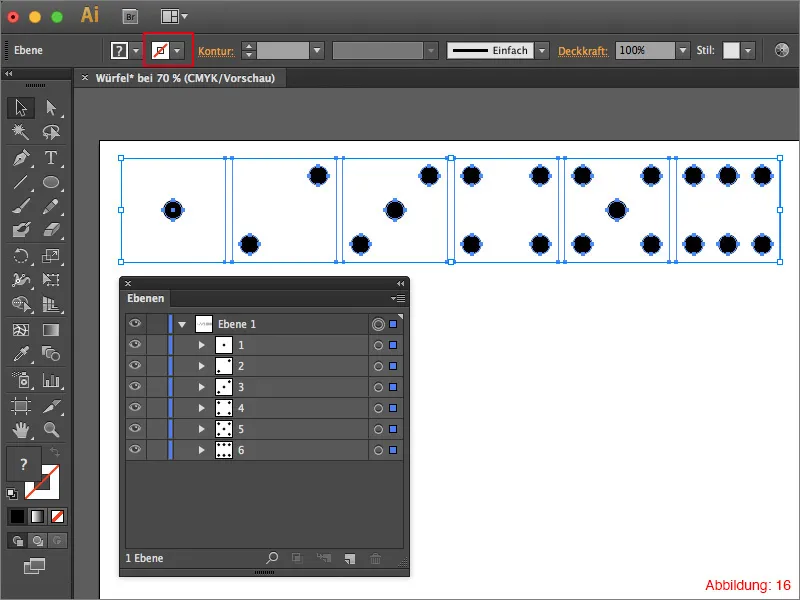
Once you have created all six sides of a cube, you can remove the black outlines of the rectangles so that they are only visible to Illustrator, but not to the human eye. Then select one cube face at a time and group them using Command or Ctrl+G. You should then have six groups in your layer palette.
Next, you will need the symbols palette. You can find this under Window>Symbols.
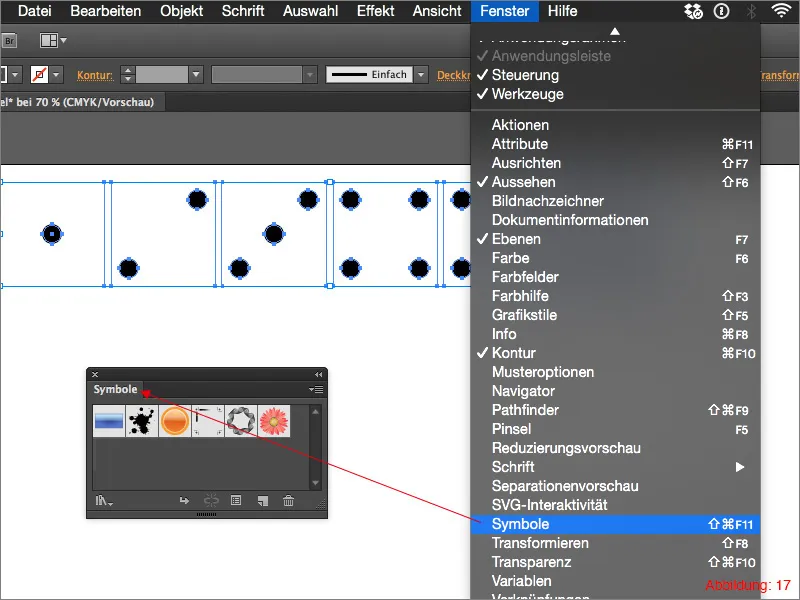
Now select the first group and then click on the small arrow in the top right-hand corner of the symbols palette. A drop-down menu will then appear in which you must click on Create new symbol. You can now assign a name to your new symbol.
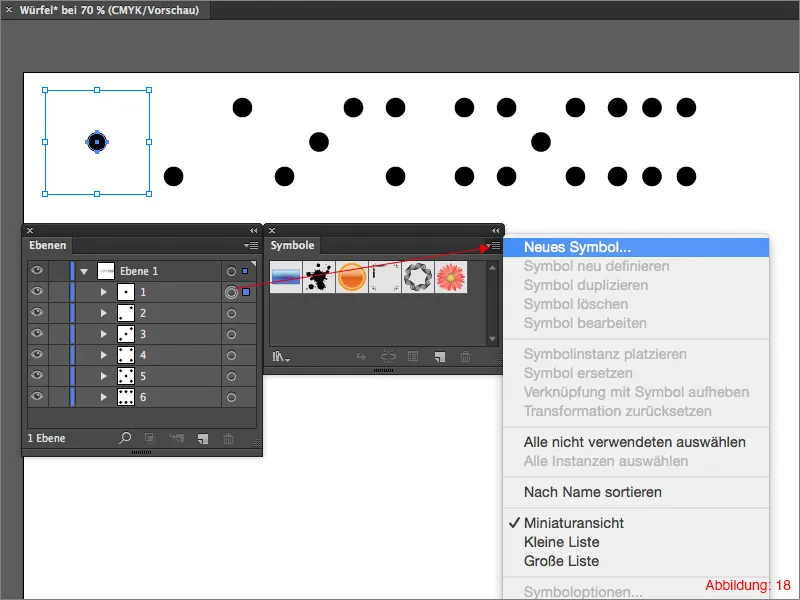
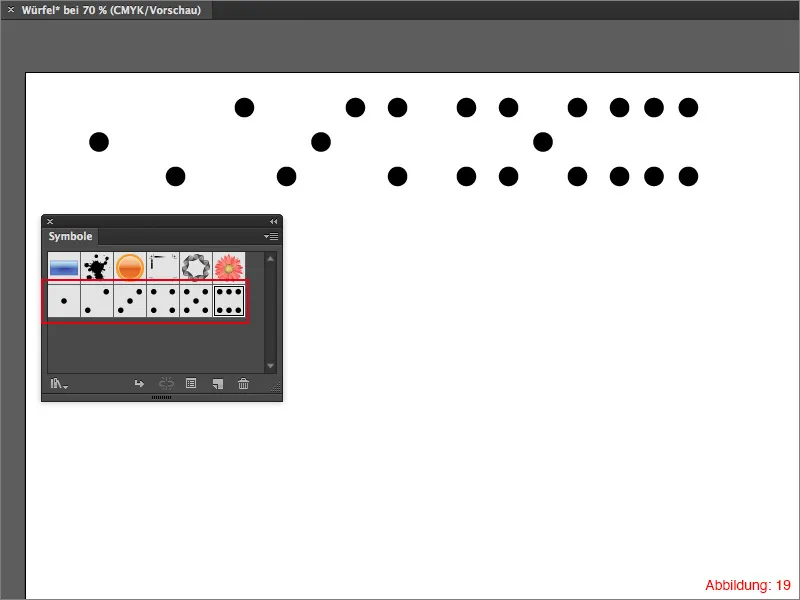
Once you have done this with all groups, you should have six new symbols in your symbol palette. (Figure 19)
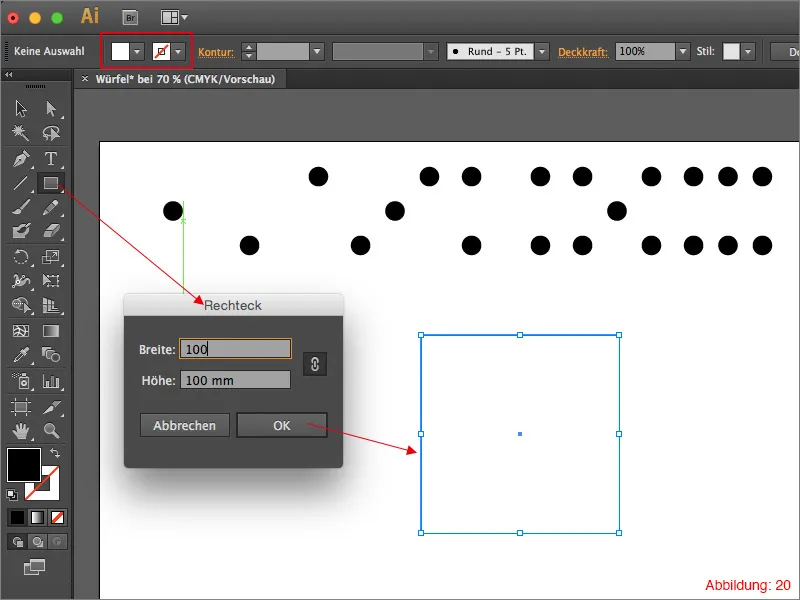
Now that you have saved all the textures as symbols, you can start creating the matching cube. To do this, grab the rectangle tool and click on your work surface. Select a value of 100mm for the width and height and confirm with OK.
Give this rectangle a white surface color. You do not need an outline.
To create a cube from this rectangle, go to Effect>3D>Extrude and flattened edge ...
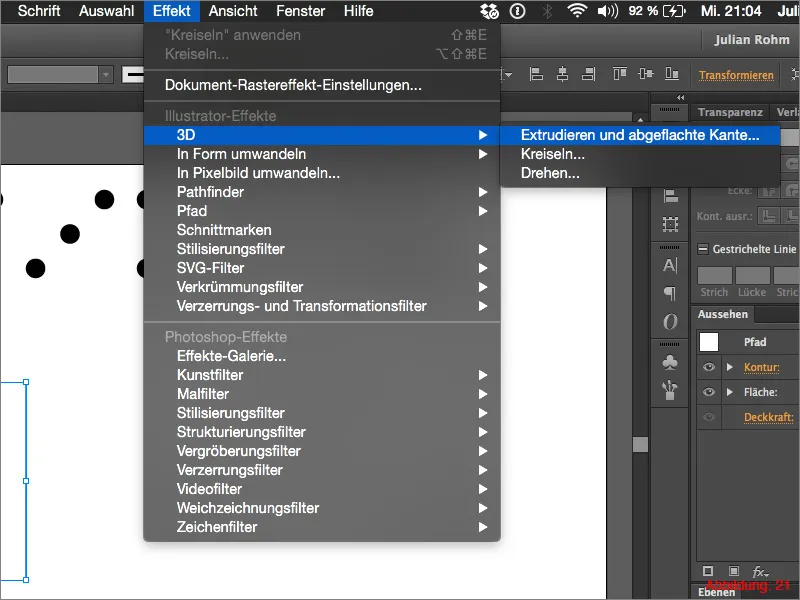
Once you have selected this effect, the familiar dialog box appears again where you can adjust all the settings for your 3D object. You can choose any setting for the angles that determine the rotation of the cube. (You can see my settings on the next screenshot). As you want to create a cube, all sides of the cube must of course have the same size. Therefore, enter a value of 100mm for the depth of the extrusion. Illustrator converts the whole thing into the unit of measurement pt.
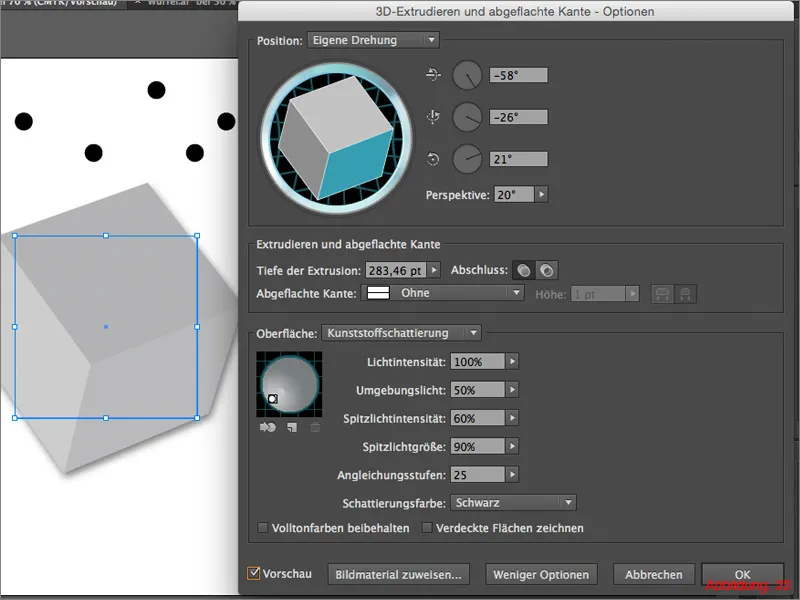
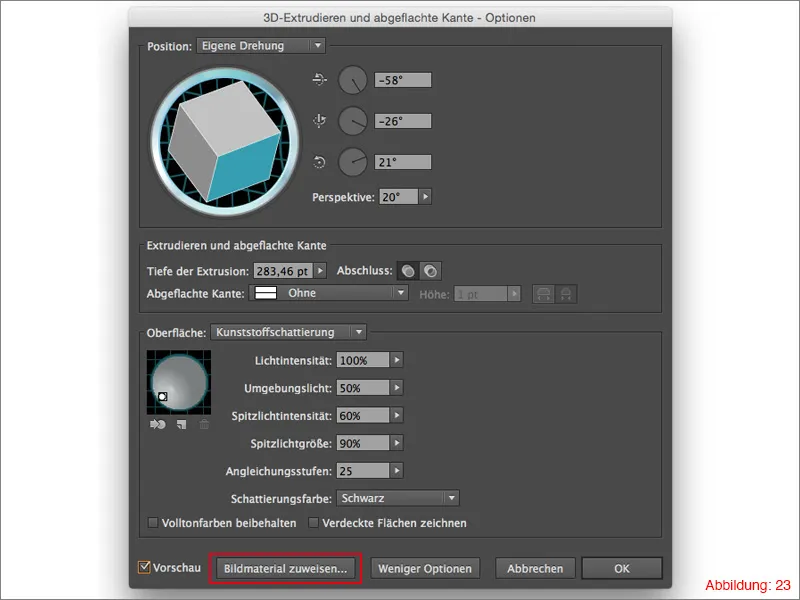
To texture this cube now, click on Assign image material at the bottom of this dialog window. (Illustration 23)
In the following window, you now have the option of texturing each side of the cube individually. Area 1 (Figure 24) allows you to select the respective side face of the cube. As a cube has 6 sides, you can navigate up and down between the values 1-6. In area 2 (Figure 24) you can select the respective texture or the previously created symbol.
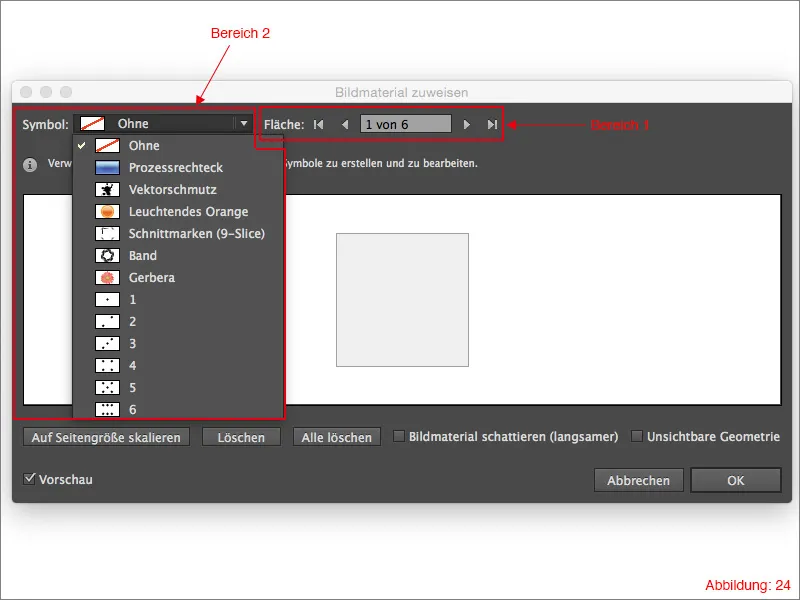
To texture the cube, you now need to assign one of the six symbols you have created to each side of the cube. You can click on Scale side size so that the symbols really fill the cube surface completely. (Figure 25)
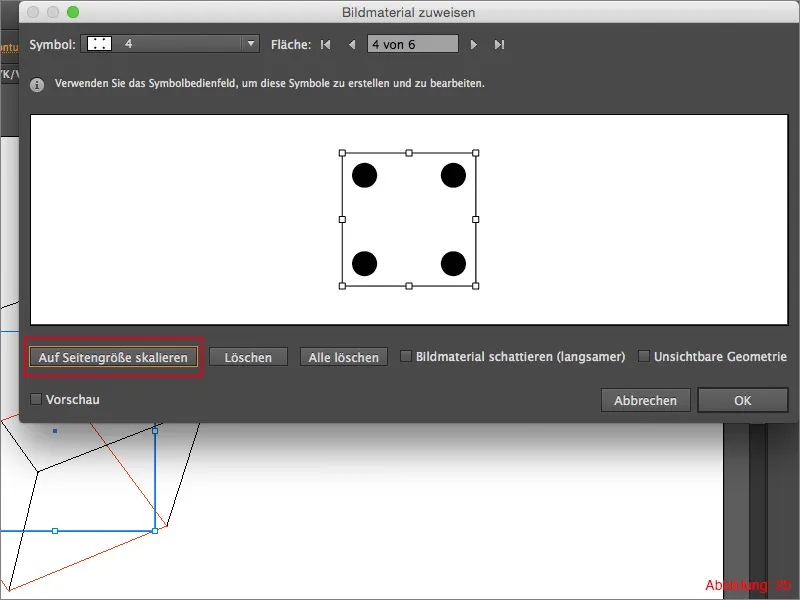
Once you have textured the cube, you can confirm the window with OK. Your game cube is ready.
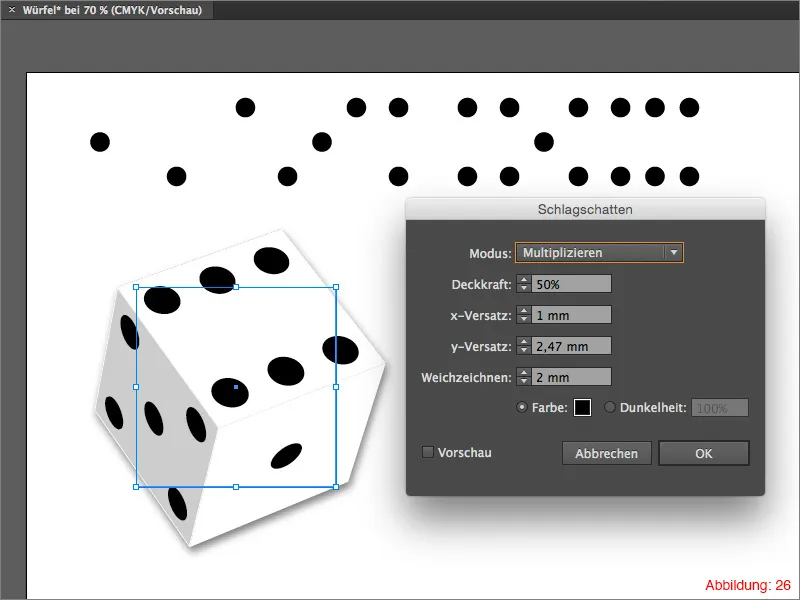
Finally, you can add a slight drop shadow to your cube. You can do this again via Effect>Stylization filter> Drop shadow ... in the top menu bar.
Step 3: Bonus content - The one ring
As I am personally a very big Lord of the Rings fan, I thought I could explain how to create The One Ring in Illustrator as a little bonus. As the 3D functions are also used here, the whole thing fits in very well with today's topic. And I'm sure there are a few Lord of the Rings fans among you. So let's get straight to it ...
First of all, create a new work surface. An A3 landscape format should easily suffice for this.
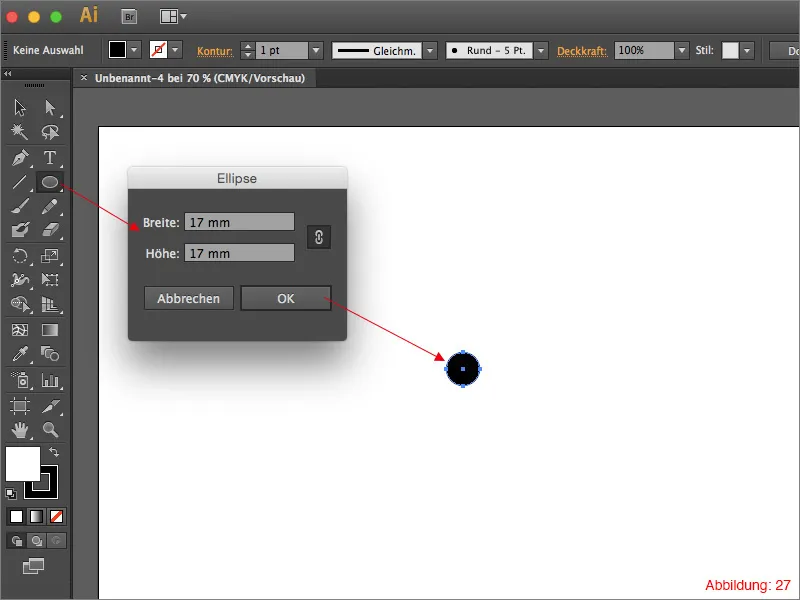
Then you need the ellipse tool from the tool palette. Click on your workspace, select a size of 17x17mm and confirm with OK.
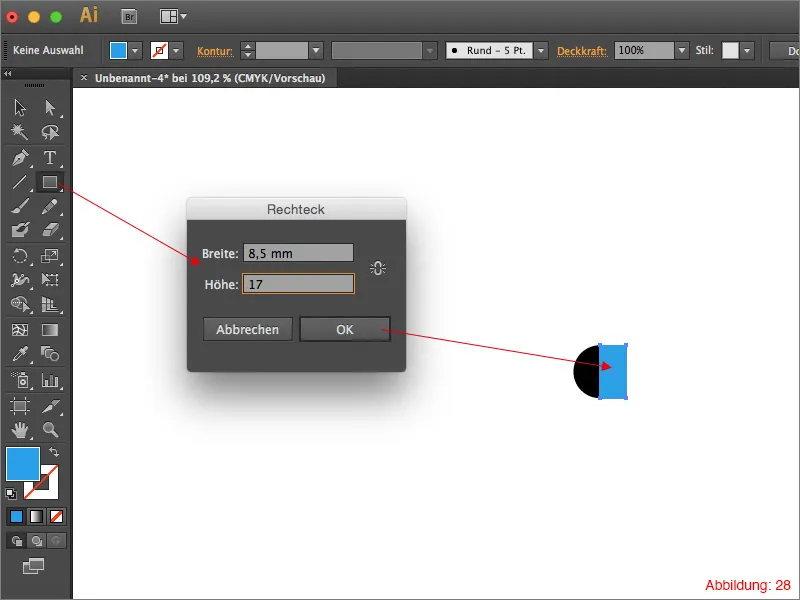
Then grab the rectangle tool and create a rectangle measuring 8.5x17mm. Position this rectangle so that one half of the circle is completely covered. (Figure 28)
Mark everything with Command+A (on PC - Ctrl+A) and subtract the rectangle using the Pathfinder so that only a semicircle remains. (Figure 29)

Give the semicircle a golden surface color. I have chosen the following CMYK color value: CMYK - 0/28/95/0.
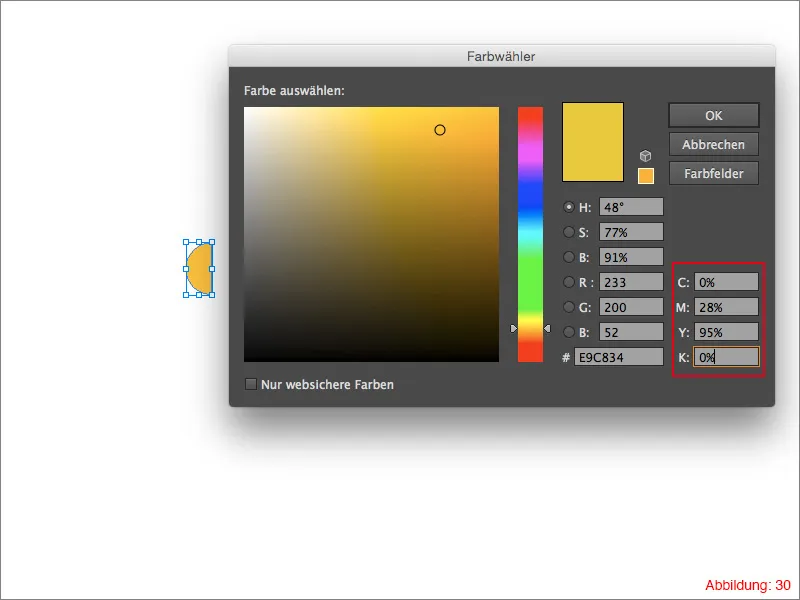
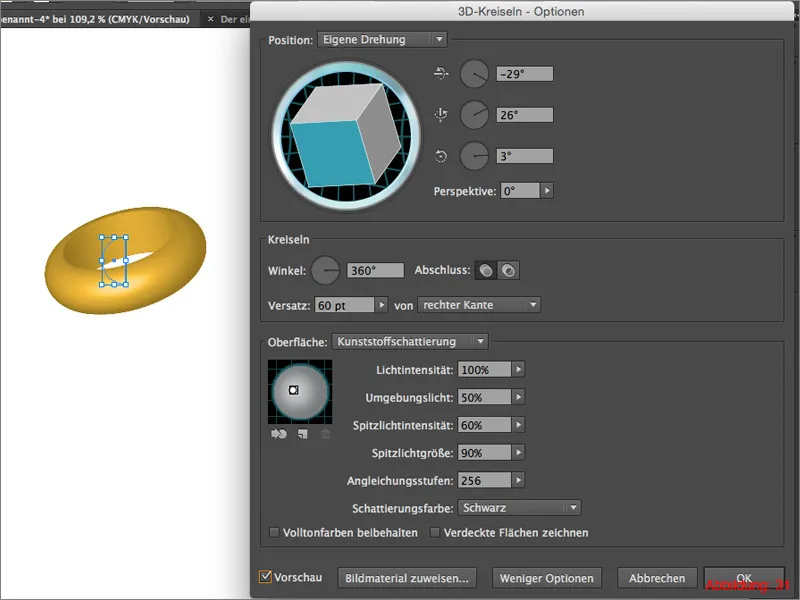
Now go to Effect>3D>Circle ... In the following window you can make your settings as usual. You can see my settings for this ring in Figure 31. Then confirm with OK.
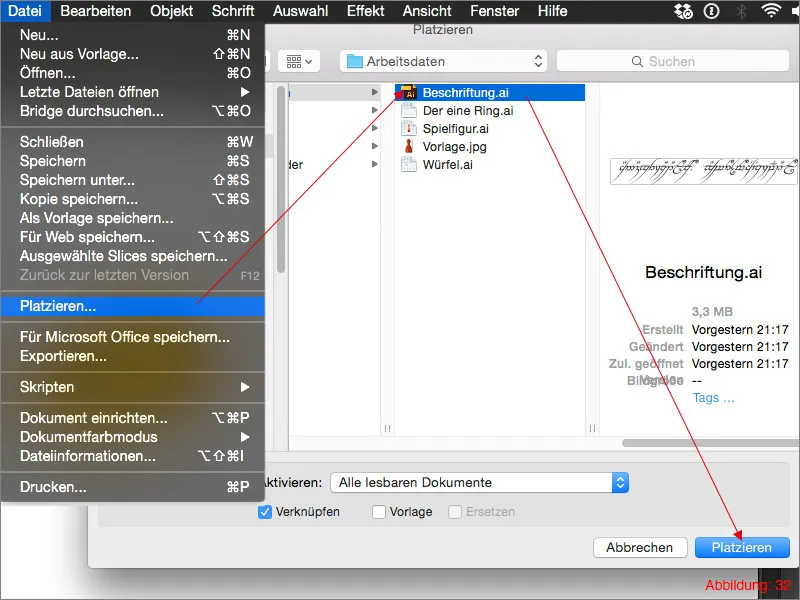
To turn this normal gold ring into The Ring, you now need to apply the typical lettering. In the enclosed working files you will find a file with the name: "Beschriftung.ai". Place this file on your work surface via File>Place.
Once you have placed the lettering, you must create a symbol with the lettering using the symbols palette as in step 2.
Now click on your ring again and open the 3D spinning top effectagain (you will find this in the Appearance palette).
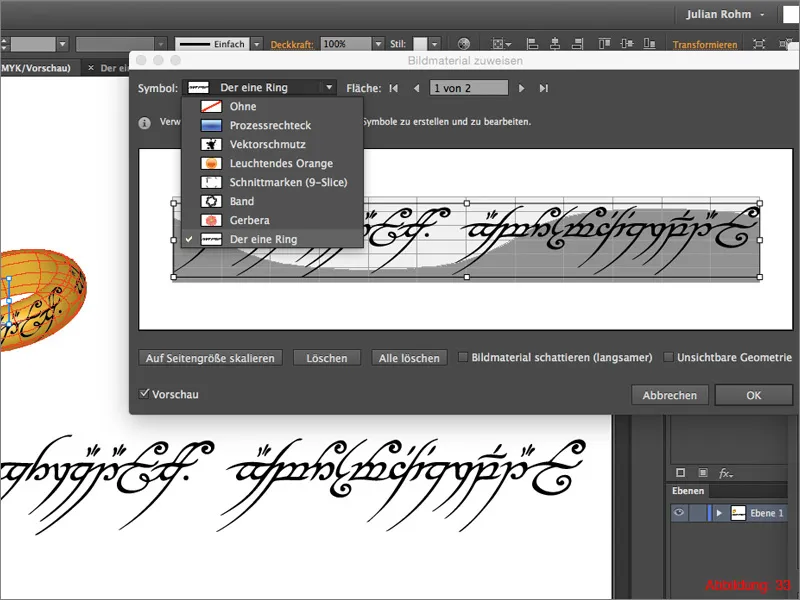
In this dialog box, click on Assign image material ...
In the following window, you can now assign the lettering or the symbol you have just created. (Figure 33)
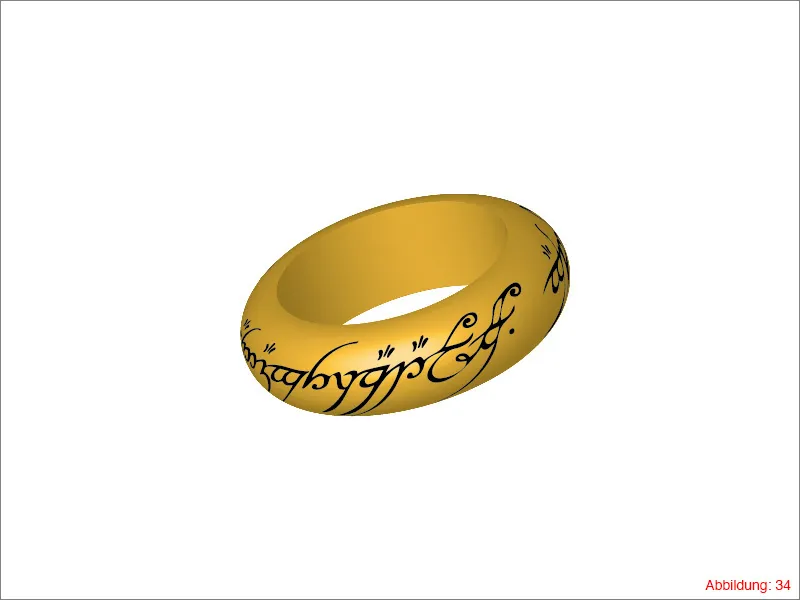
Confirm with OK. Your ring should now look something like this (Fig. 34):
The one ring is finished:
Closing words:
And once again we have come to the end of a tutorial. I hope you have enjoyed it and have learned a thing or two. If you have any further questions, please feel free to leave a comment below this tutorial. I will do my best to answer them as soon as possible.
Yours, Julian
