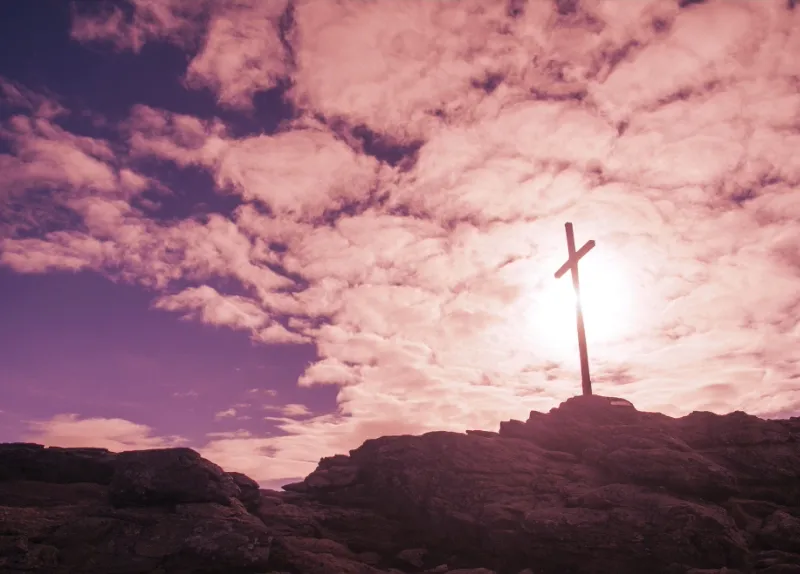
I'll show you the so-called split toning look. This is nothing more than a separate coloring of highlights and shadows in the image. Let me show you the original image: this was taken here in the Bavarian Forest on the summit of the Arber. The very first thing I did when taking the picture was to walk around the cross and ask myself: Yes, how do I position the whole thing?
I thought about doing a rule of thirds, which is always good for the eye, and placing the rocks in the lower third and the cross in the right third. That's not the golden ratio, of course, but it works just as well if you stick to these rules of thirds when taking photos. Yes, and then I thought to myself, I have drawings everywhere, what could I do with them now?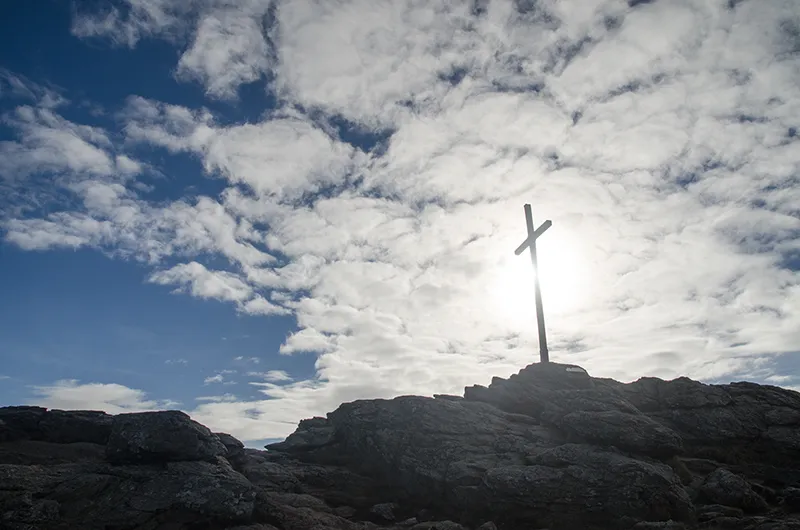
And then I tried out this split toning look here. I'll show you how it works here.

Step 1
First, go to Layer (1) at the top and say: New Fill Layer>Color Area. You can also give it a name (I'll leave it like this for now) and confirm the whole thing with OK (2).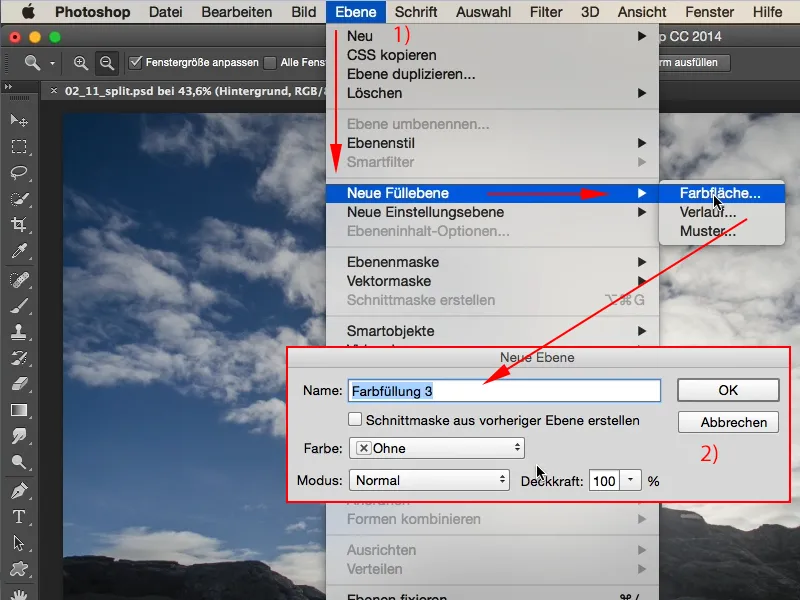
Step 2
Then the familiar Photoshop color picker appears and you can now choose any color you like. I want a bright orange color like this (1) ...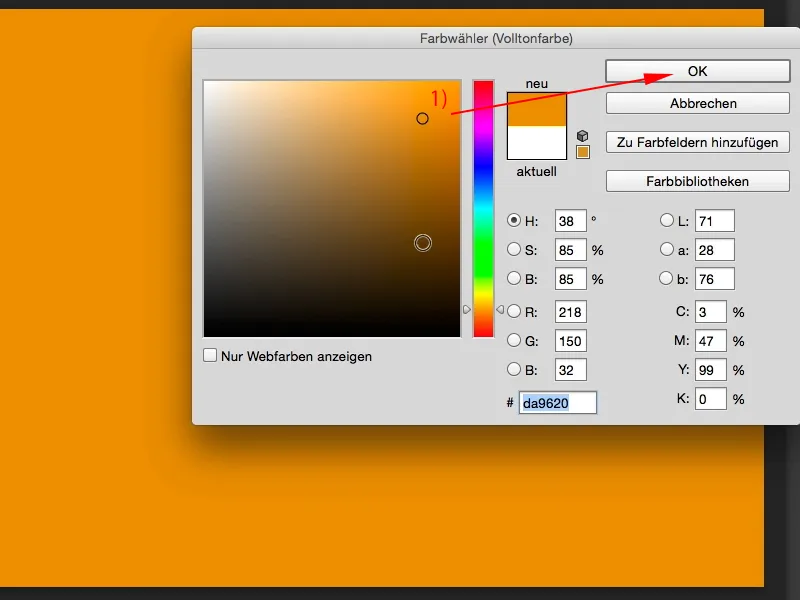
Step 3
... and you do the same with a second, with a third, as you like: Layer>New fill layer>Color area, again I confirm the new layer with OK and decide on a bright violet.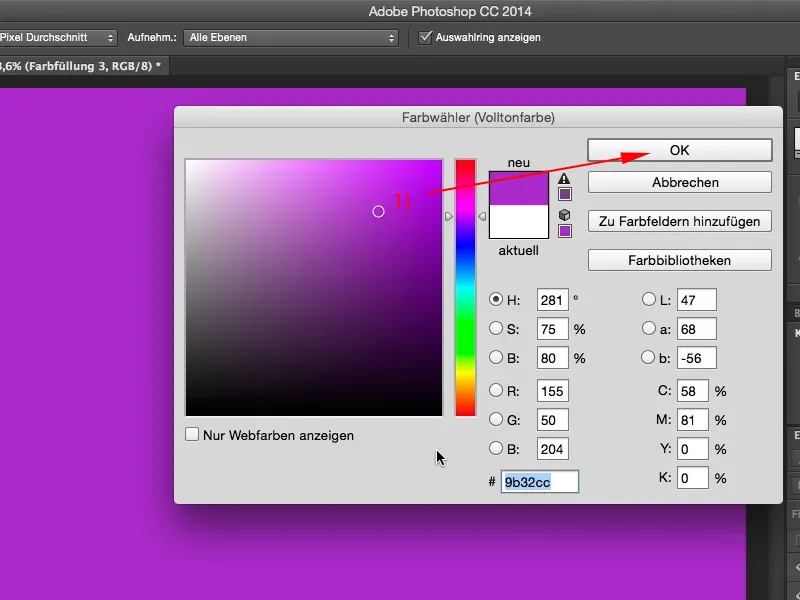
Step 4
If you now set these two layers, starting with the orange layer, to Color (arrow), for example, you will get something like this (2). This almost looks like the 300 look, which is quite cool, and the second layer as well (3), and we now also set it to the color layer mode (arrow; looks like this: (4)). And now I have purple in one layer and orange in the other.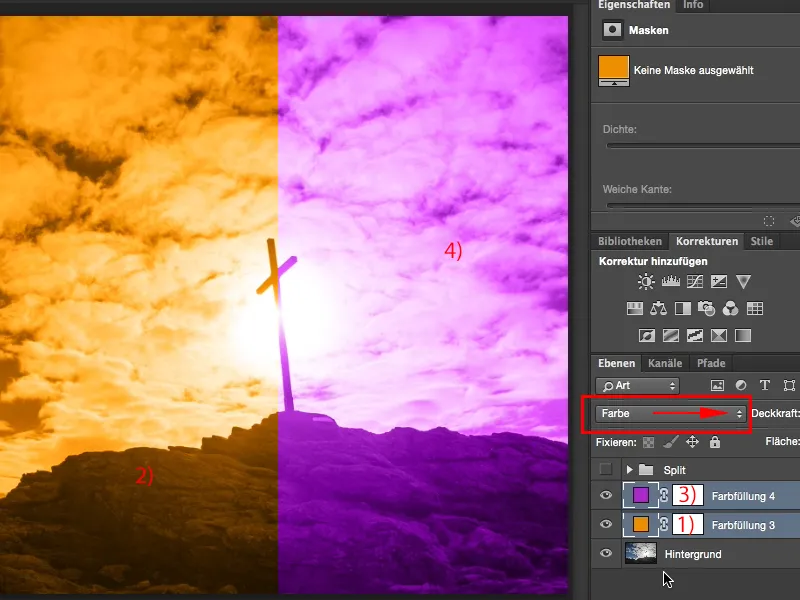
Step 5
How do I combine this and how do I blend it now? You can do this very, very easily by double-clicking behind the layer name (1), then open the window for the layer style. Of course, you can also try gloss, color overlay or whatever else on the left, but what we need is to hide this gray (2). And you now have various sliders. You have a black point (3) and a white point (4) for the layer and the one below it, all set to zero or at the beginning of the shadows and highlights. And what you can do now is drag the sliders up and down. Not much will happen, because I can't blend anything on this layer. If I drag the lower one, nothing will happen there either. The reason is that this purple layer is still on top of it at the moment (5).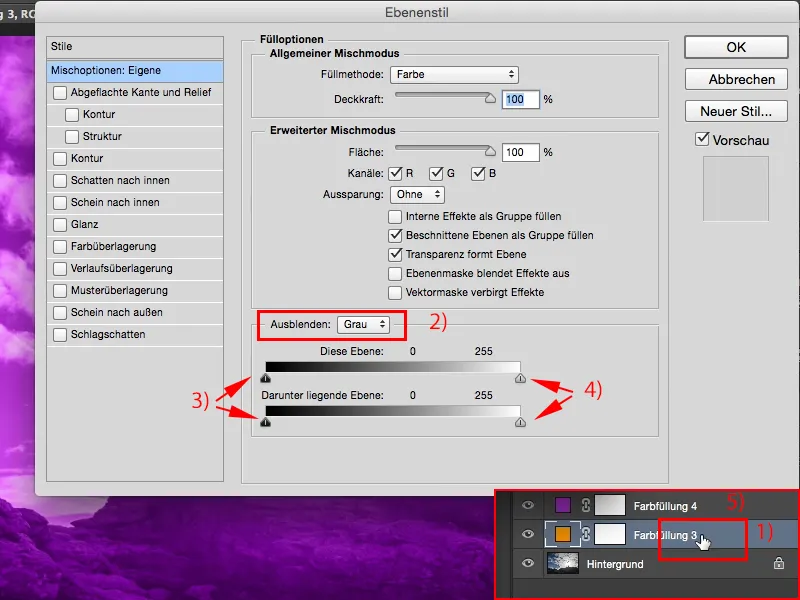
Step 6
So I have to start from the top down (1), and if I drag over here now, I can define the transition. The whole thing will only happen from the middle and then suddenly it changes, so I have (2) purple here and I have (3) orange here again, so I'm no further along than if I (4) fade the layers in or out. What can I do?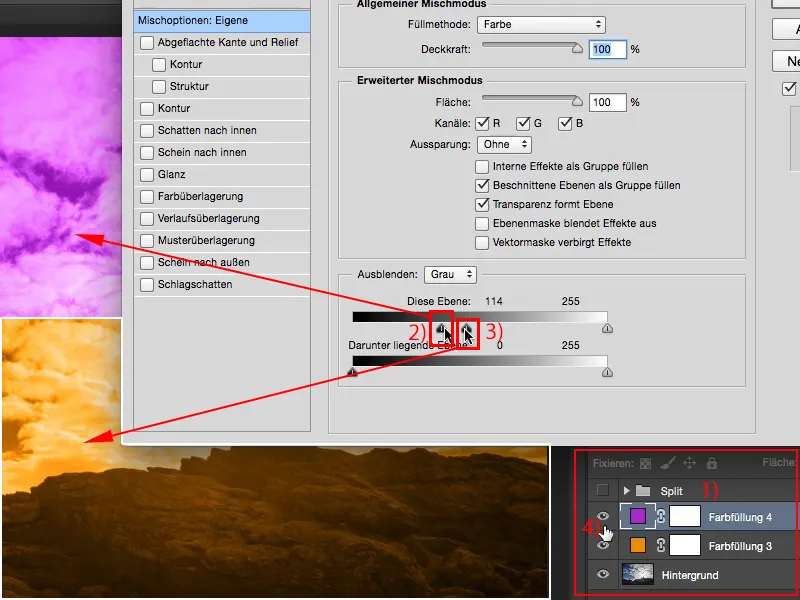
Step 7
You can, as you so often do in Photoshop, hold the magic Alt key, the magic key. And if you hold down the magic key, the Alt key, and then drag over here (1), aha, then this will be softly blended. And you can now play with it, you can use the function on this layer, but you can also activate it on the layer below (2), which is the orange layer, and if you hold down the Alt key there, you can now blend these two very, very cleverly. This brings you a little closer to the split toning effect.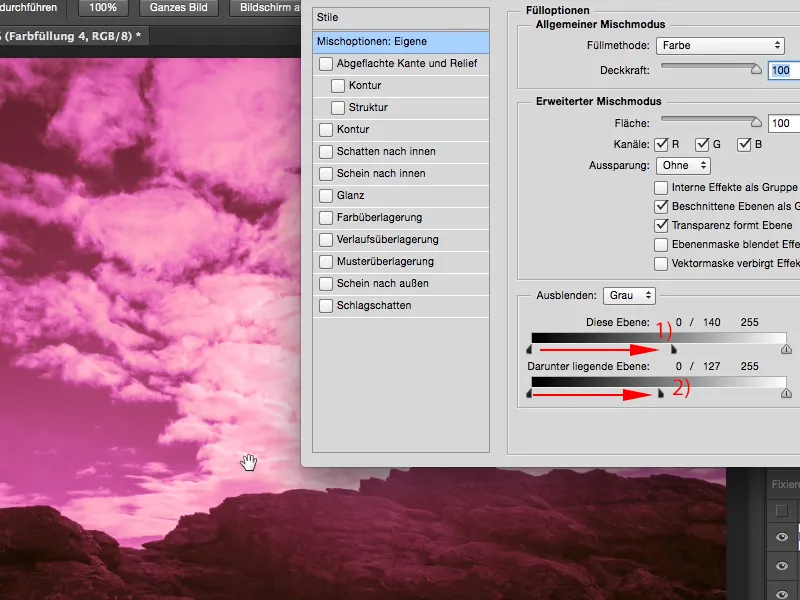
Step 8
I'll now say OK and do the same on the layer below (1). So I'll hold down the Alt key again and add a little of the bottom layer. I can of course do the same with the highlights (3). I can drag them back and forth, I just have to keep the Alt key pressed.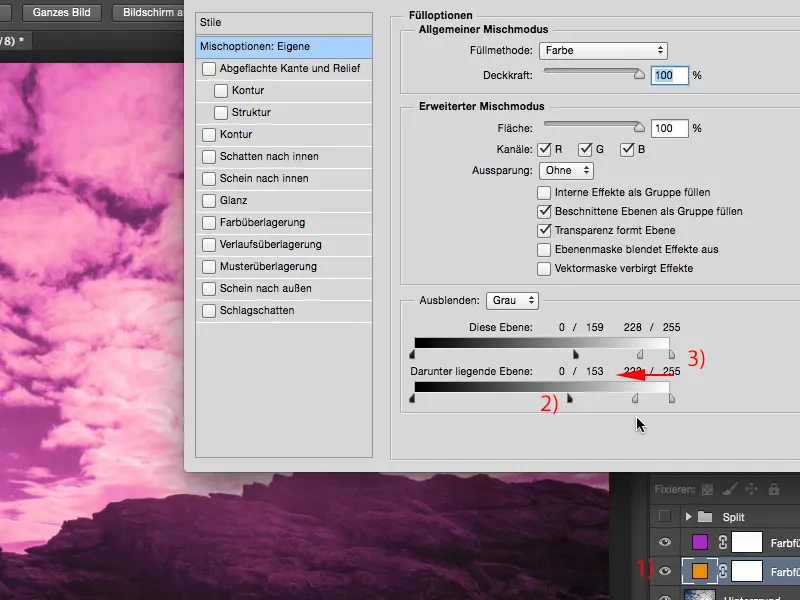
Step 9
What you should always try out at the end with things like this is: What does the whole thing look like if I have now split the depths and highlights a little, for example, if I set the Color mode to Soft Light or Copy one into the other? Let's do this for both layers.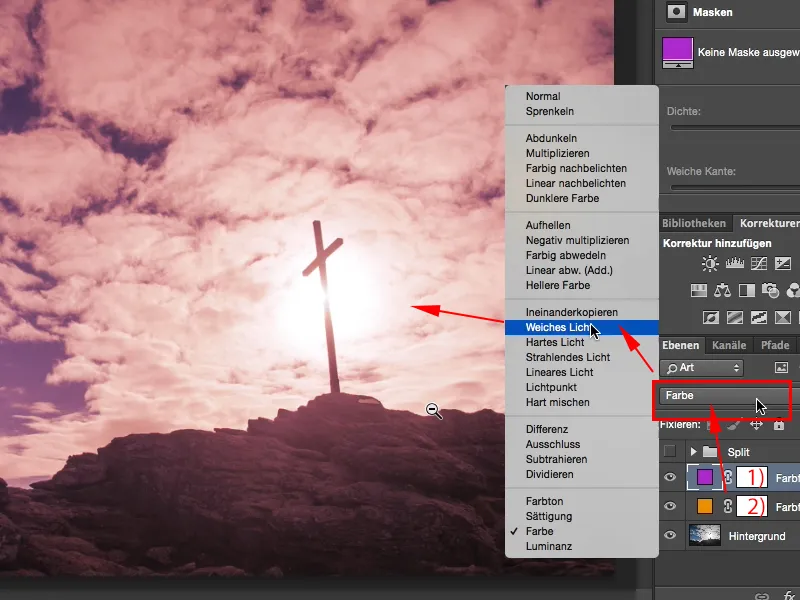
Step 10
And now I really have a very diffuse color look that looks really cool, it could be a sunset mood. A few more meters and then the sun disappears behind the horizon and becomes really glowing red. That's more or less how you could imagine it. If you look at the before/after, you can also see it: the highlights and the depths have a hint of orange and purple, not both, not separately, but a nice, really good mixture.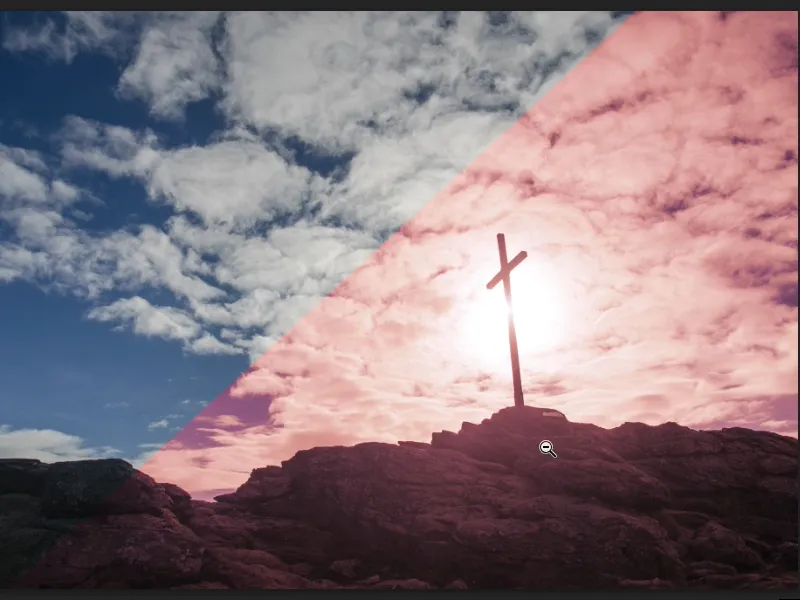
Step 11
And if I put the whole thing into a group, I select both layers with the Shift key pressed and now say Group of layers (1), then of course I can also reduce the opacity of the effect for the group (2) a little.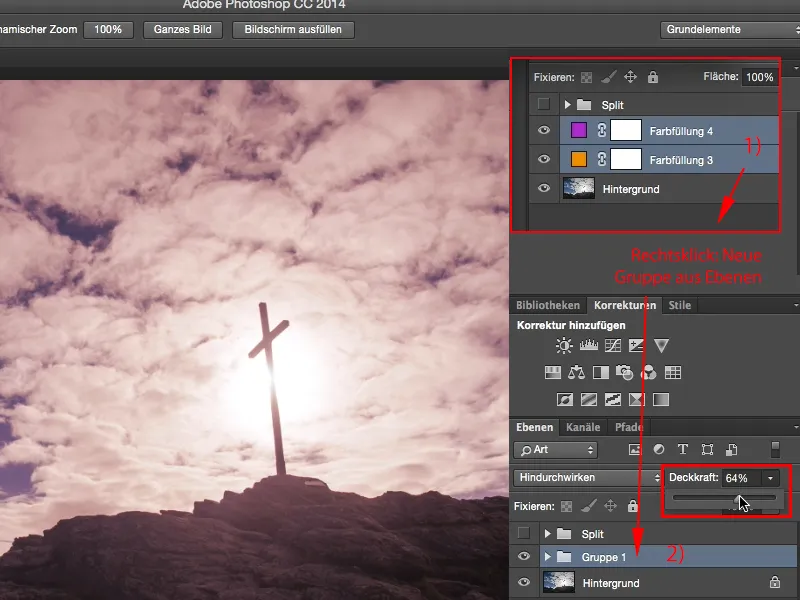
Step 12
Yes, and this is a very nice, soft look that can be used not only for outdoor shots, but of course you can also use it for portraits in the studio, for anything that comes in front of your lens. It's very simple, you need this color fill (2) twice, this solid color here, and then you split the whole thing by going back here (2) to these layer styles. The cool thing is: The setting is non-destructive, it remains saved, so Photoshop remembers this virtual value that you have just selected and you can make changes at any time afterwards.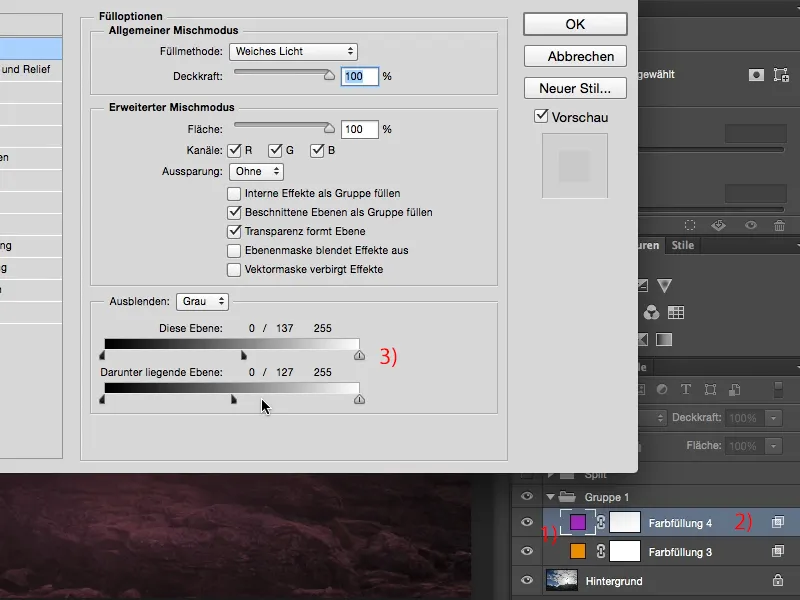
Step 13
Non-destructive working methods in Photoshop are always very important to me personally and with this layer style, with this split toning look, I can work very well non-destructively.