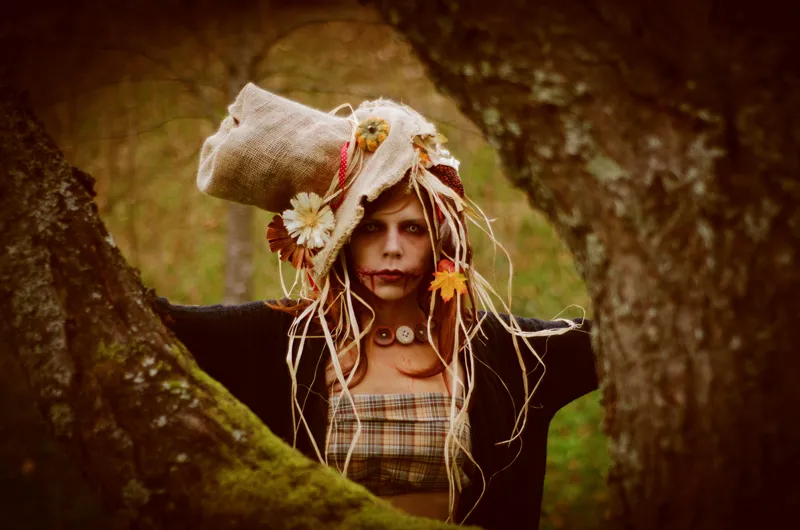
I'll now show you how you can use a very simple initial image ...
... to create warm and cold colors very quickly.
Step 1
The very first thing I do when I see a picture like this is to think: What do I do with it now? I definitely want to increase the contrast in this picture. It's nicely framed by the trees, my beautiful scarecrow, but the bokeh isn't that great and it's also a bit distracting, you always look at it like that because it looks so fuzzy, and I want to distract the viewer from that now.
And I achieve that quite simply through a color look, through a certain style, and my first decision is always: do I make the whole thing warm or cold? Sometimes that's not so easy for me and it works quite simply by going to the color balance (1) and dragging the sliders for red and yellow, for example, to plus and minus (2). You have to make sure that you have a line here. It doesn't necessarily have to be an exact straight line, as you can see from the values, you now have to set both to +25 or +28 and -28, then you have really hit exactly the one color tone, but you can also vary it a little. The important thing is that they should be roughly in line. Now you have a warm color look. Before (left) / after (right). Much, much warmer, more appealing to me.
Step 2
Or you can go to the other side (1) and create a cold color look. It's important that you always think of an X here. With magenta-green, which is at zero here, that is the center of your X (2), and the legs of your X, so to speak, you can now move them.
Step 3
But I definitely opt for warm colors and do it like this (1). Yes, and the contrast, I don't like it yet, and the quickest on-board means of increasing the contrast is quite simple: I go back to the background layer (2) and create an adjustment layer of the tonal correction type (3).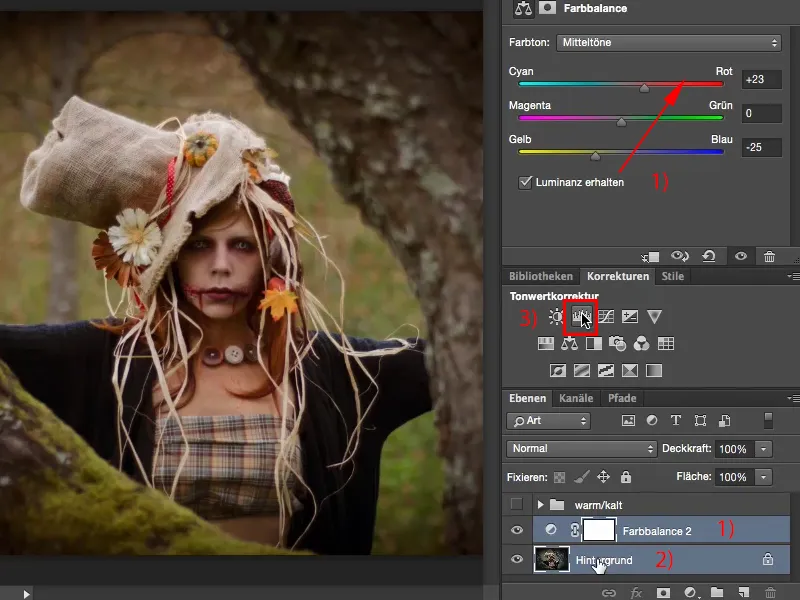
Step 4
Now, of course, I could tinker around here (1), but you don't need to. The quickest way is to change the layer mode to Soft light (2). The contrast is increased, the saturation is increased, I don't like it so much because the eye (3) is almost completely gone.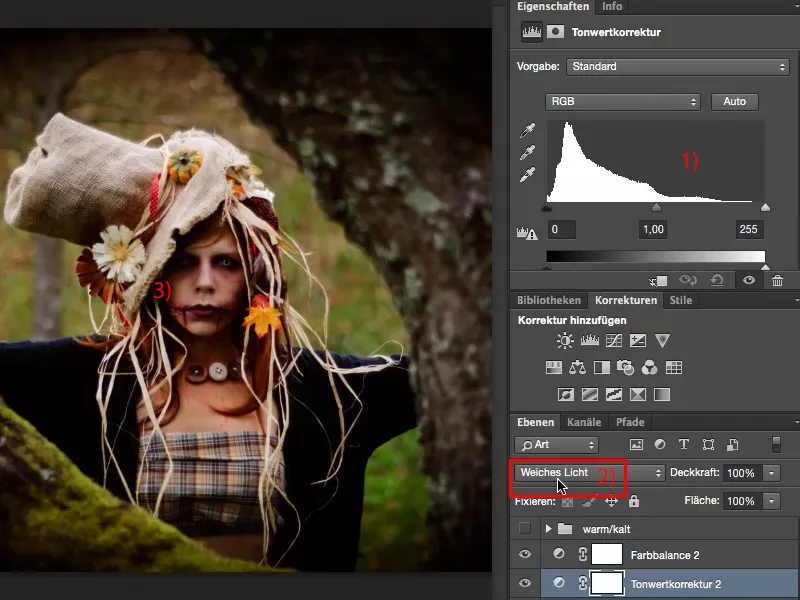
Step 5
As a rule, I always set the opacity to between 40 and 60 %, I take the golden mean, 50 % (1), and look at the before and after (2), so I can still see the pupil (3), that's important to me, that's what matters to me. And now I'm really here with my scarecrow, with my wonderful model, which is now even better framed, and the background no longer distracts me.
Step 6
I would now like to optimize the whole thing a little more and to do this I usually use Selective Color Correction (1). The selective color correction looks a bit more complicated, it is actually designed for CMYK color changes, as you can see from the naming at the front (2), I have cyan, magenta, yellow, black, CMYK here. And I have highlighted individual colors here (3). But the nice thing is: I have highlighted white, gray and black (4), which is no different than the midtones, shadows and highlights of an image.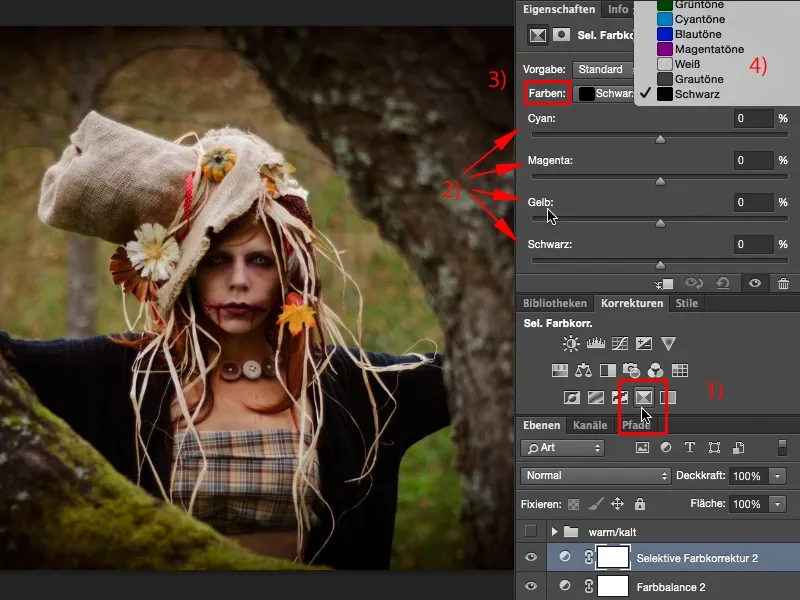
Step 7
I can now color them again separately from each other in this warm-cold look, and I usually go for the gray tones, because they are the most present in almost every normally exposed image. If I go to the right here and to the left here, which is what actually created the warm look in the color balance, it's exactly complementary to that. This is because this adjustment layer is actually designed for CMYK and I have to think laterally reversed, complementary in terms of the colors.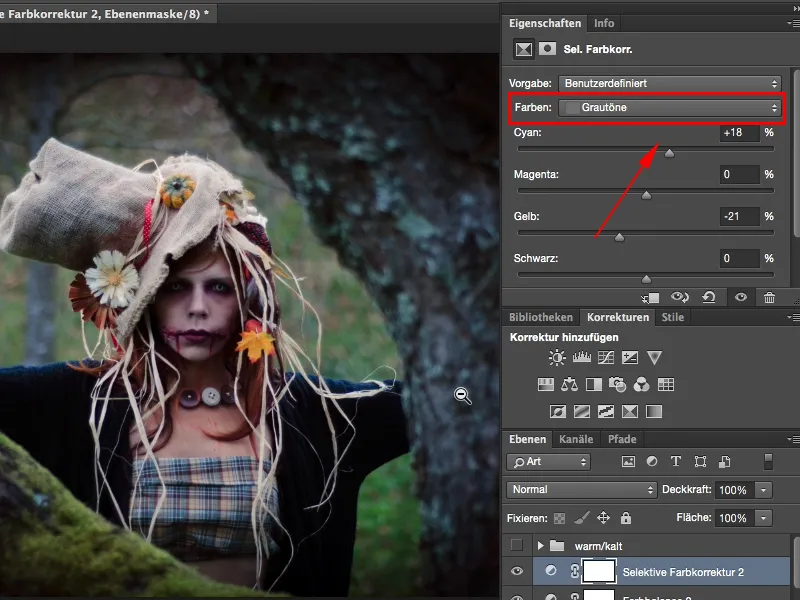
Step 8
However, if I move it around like this ... that's exactly the result I wanted.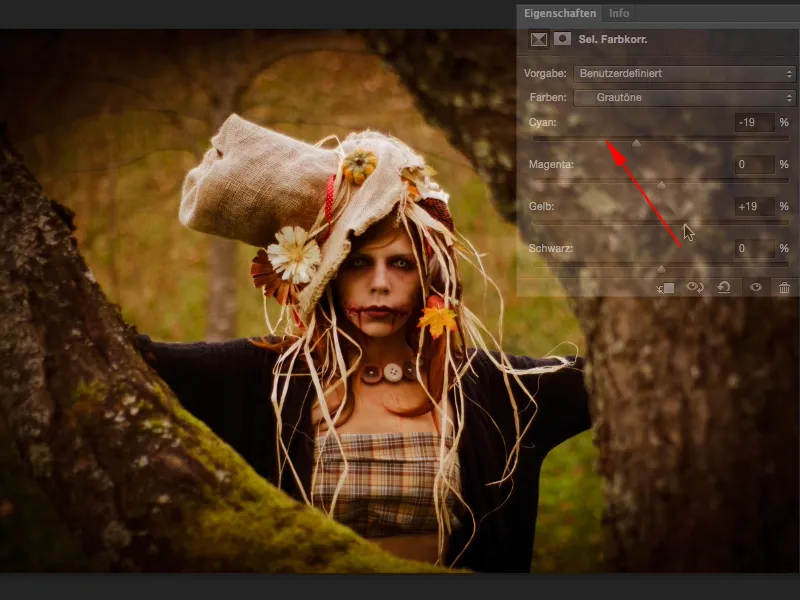
Step 9
Let me show you the before and after: now the picture really pops and has exactly the color effect I wanted.
Step 10
You can of course do the same with the black values. You can also move them to warm. I like that ...
Step 11
... but I would definitely try out what happens if I move the whole thing to cold: now the picture has really got that wow effect.
Step 12
Maybe the opacity is a bit too much, but I can easily adjust it here (1). I now have a light gray-black (2), the whole thing almost tends towards a cross-look, and that's what makes the picture for me now. Now it's round. Now I'm the center of attention and I'm no longer looking at the surroundings. I'm right by the model's eyes, where I want my gaze to fall. Yes, and because it's so nice and non-destructive with these two adjustment layers, I can go back to the color balance at any time and play around.
Step 13
I can now also see what it looks like if I make it extremely cool, and that's also a very cool look.
Step 14
I'll leave it at the warm colors, but as you can see, you can turn and tweak the sliders as much as you like, even if you pull magenta a little into the positive range, it gets a purple touch ...
... and if you take a look at the original image with the Alt key pressed on the background layer, it's almost mega-boring. And I actually liked the original image quite well photographically, but I knew that you had to tease out some kind of look ...
... that really turns the whole thing into a wow effect. And that's easy to do with this tonal value correction for contrast enhancement, color balance and selective color correction, and you're able to create warm and cold looks in a very flexible way.
