When you dive into the deep waters of Excel, you will quickly realize how important it is to manage and display data effectively. Often you have large tables and only need a small part of them in another table or report. However, the traditional way of copying and pasting is not optimal – not only do you have to format a lot, but changes in the original table also have no effect on the copied data. But with a small, often unknown trick (Camera Icon), you can significantly simplify this process: the Camera Icon in Excel. In this tutorial, I'll show you how to efficiently use this function.
Main Insights
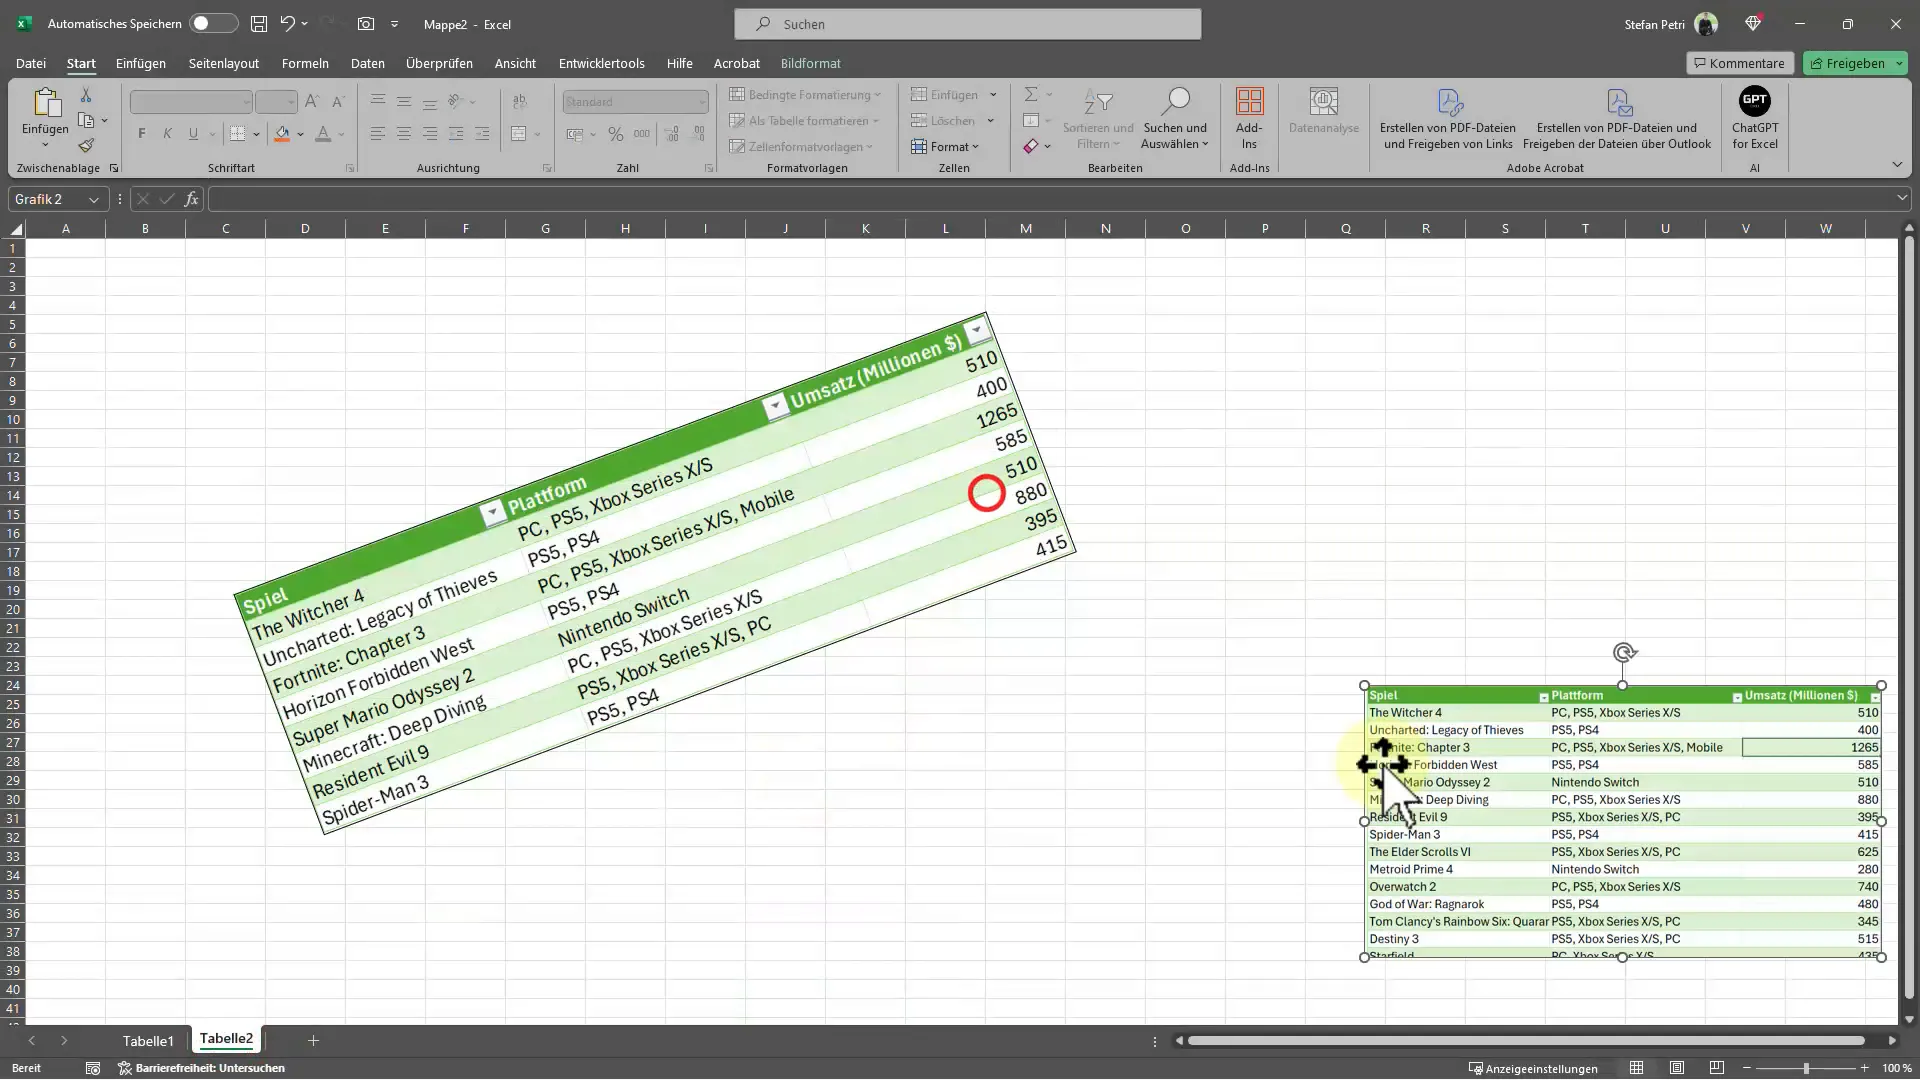
With the Camera Icon, you can insert any range of an Excel table as an image into another table. The special thing about this image is that it remains dynamic: As soon as the data in the original range changes, the image is automatically updated. You can adjust the size of the inserted image and even rotate it to fit perfectly in your reports. In addition, the formatting of the original range remains intact, and you don't have to worry about readjusting after pasting.
Step 1: Inserting the Camera Icon
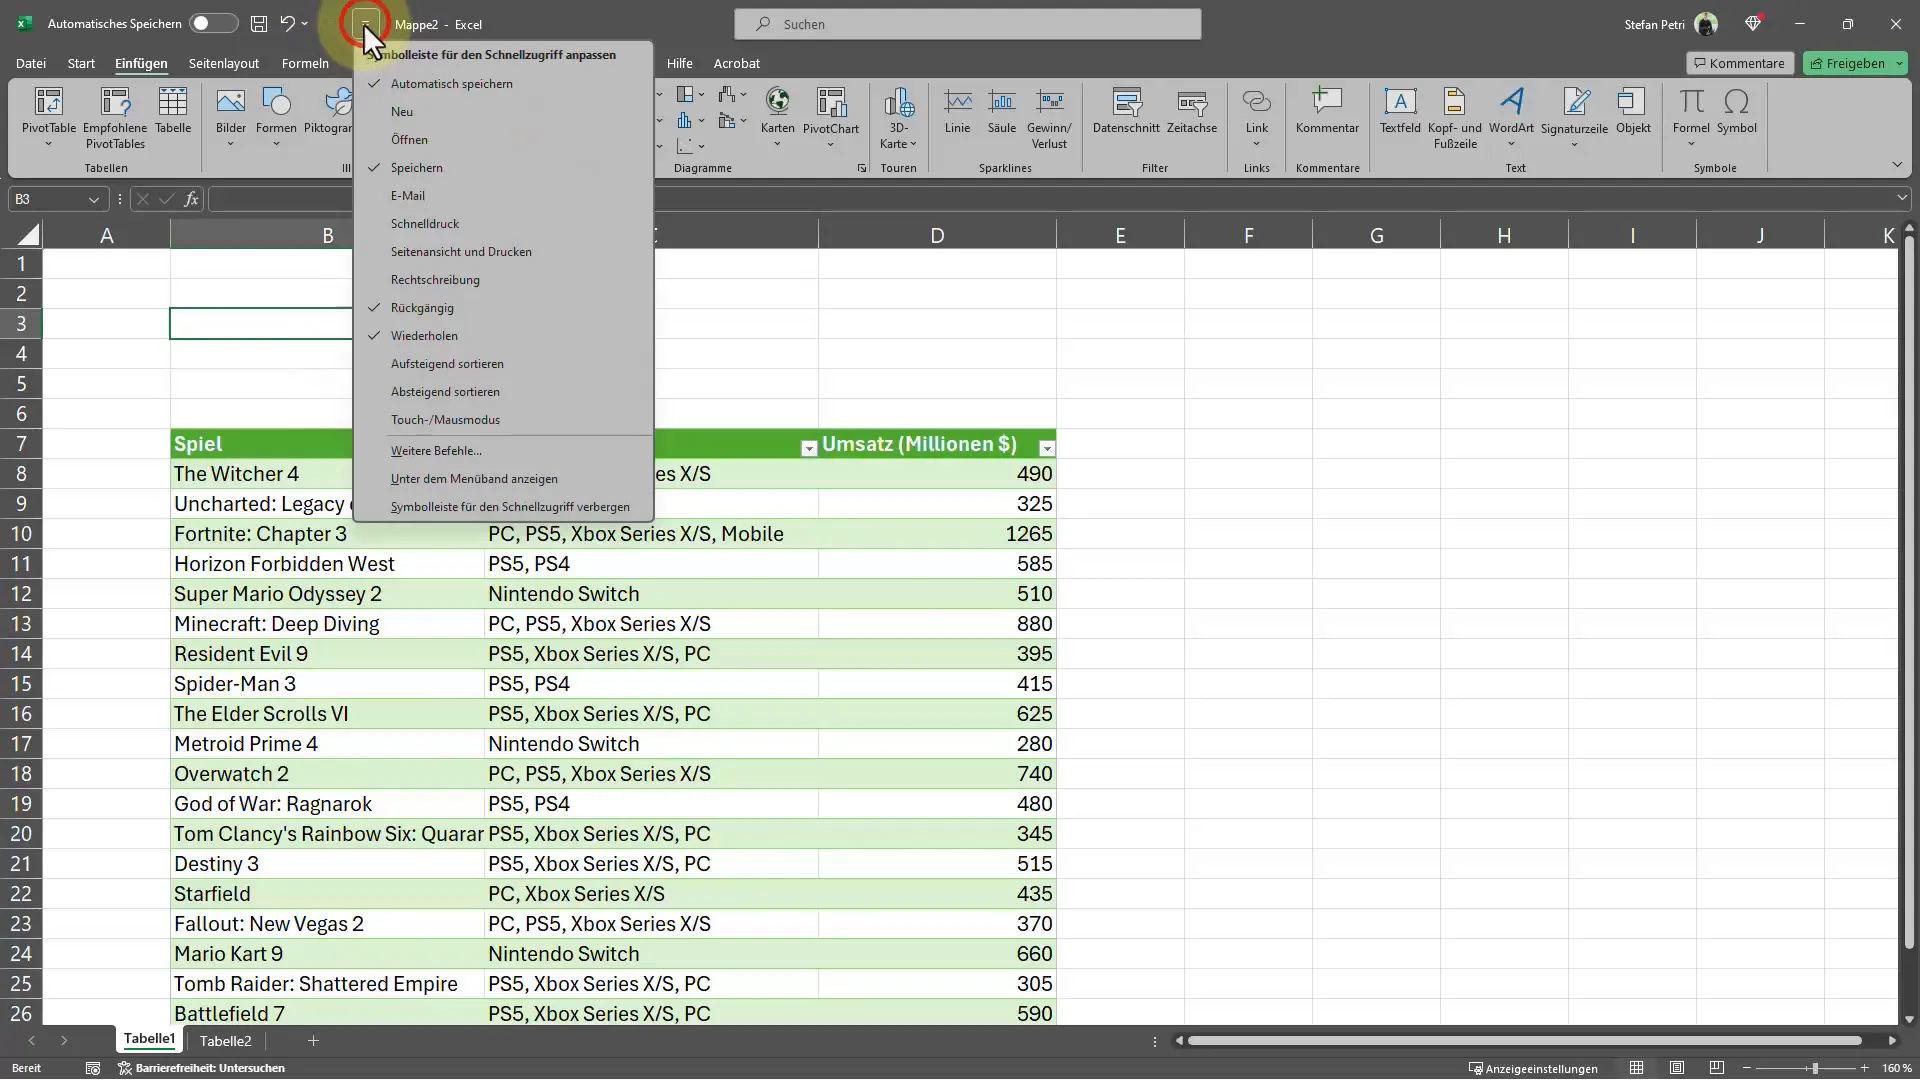
First, you need to find the Camera Icon in your toolbar. This is not always visible by default in Excel. To do this, click on the small icon in the menu bar that represents the advanced commands.
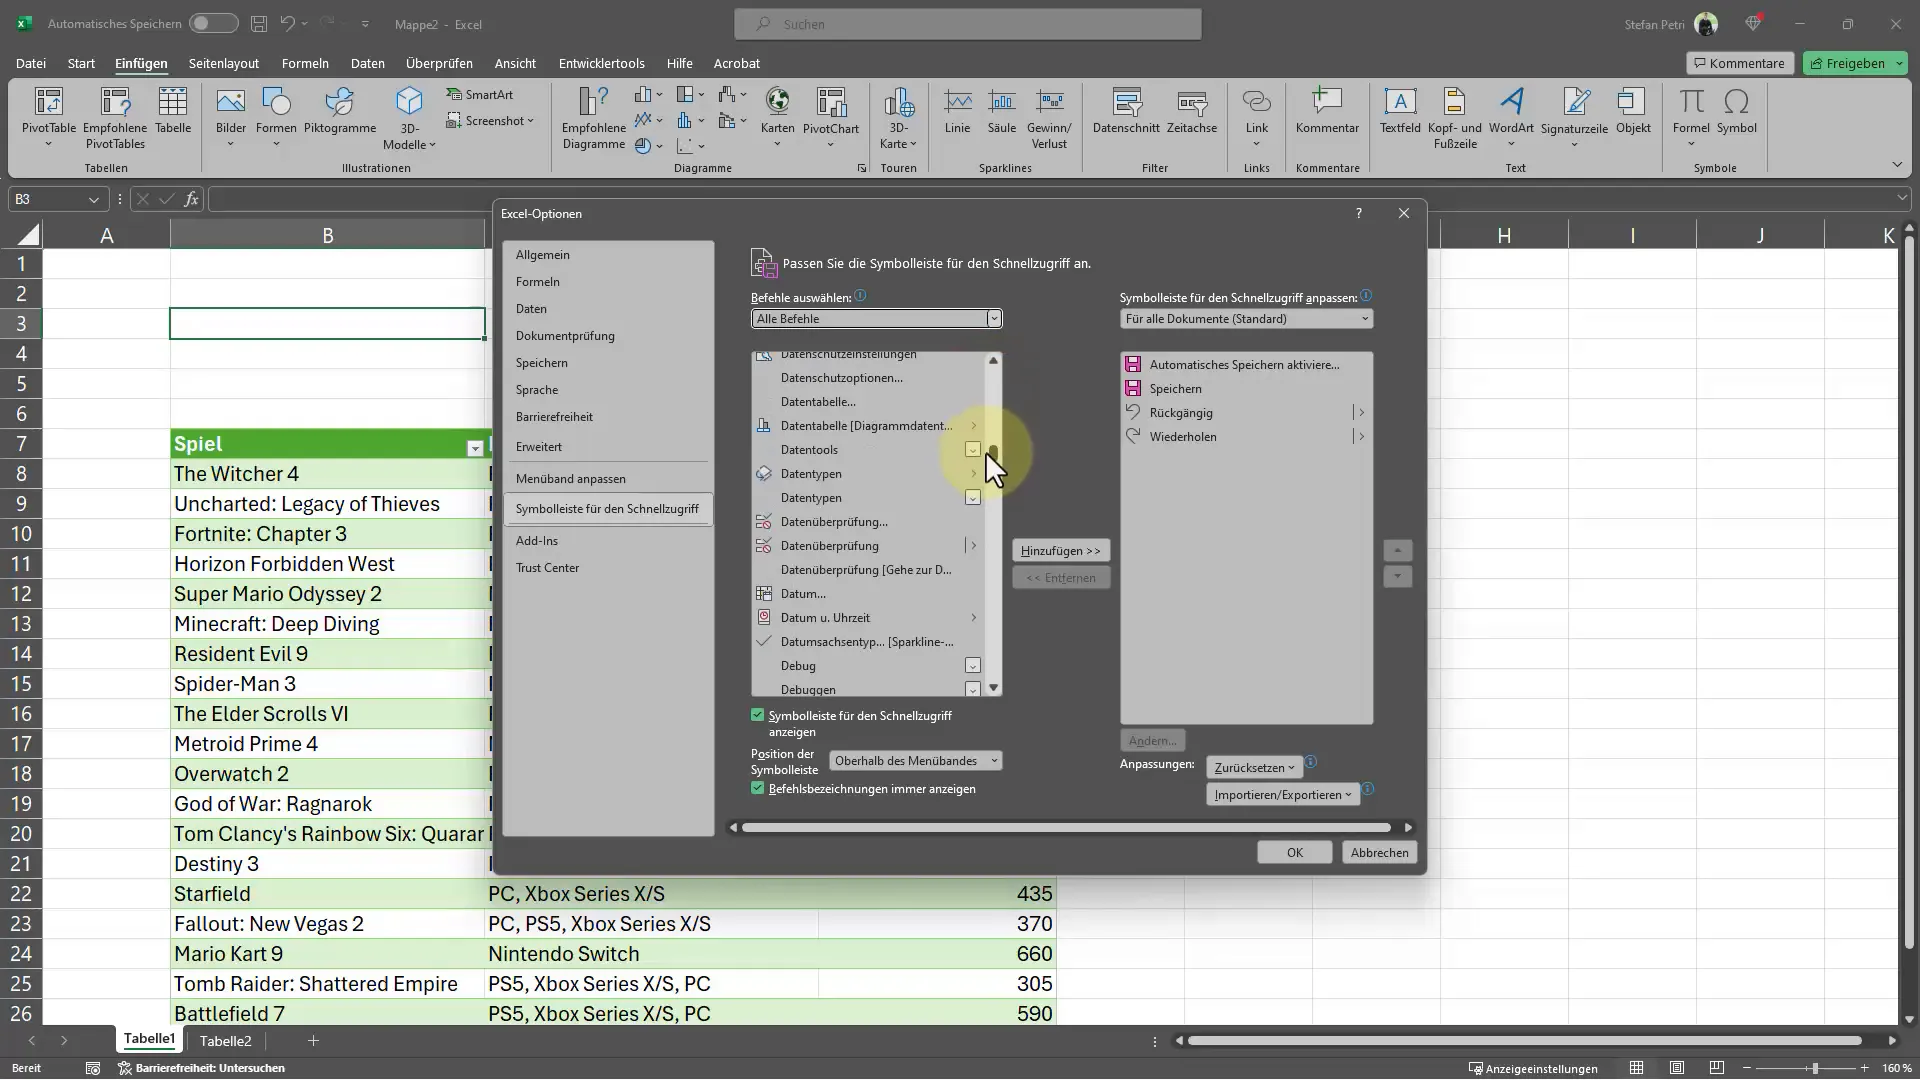
Then look for the option "All Commands." Once you have selected this, scroll through the list until you find "Camera." This is the first step to working with this ingenious function.
Step 2: Selecting the Range to Copy
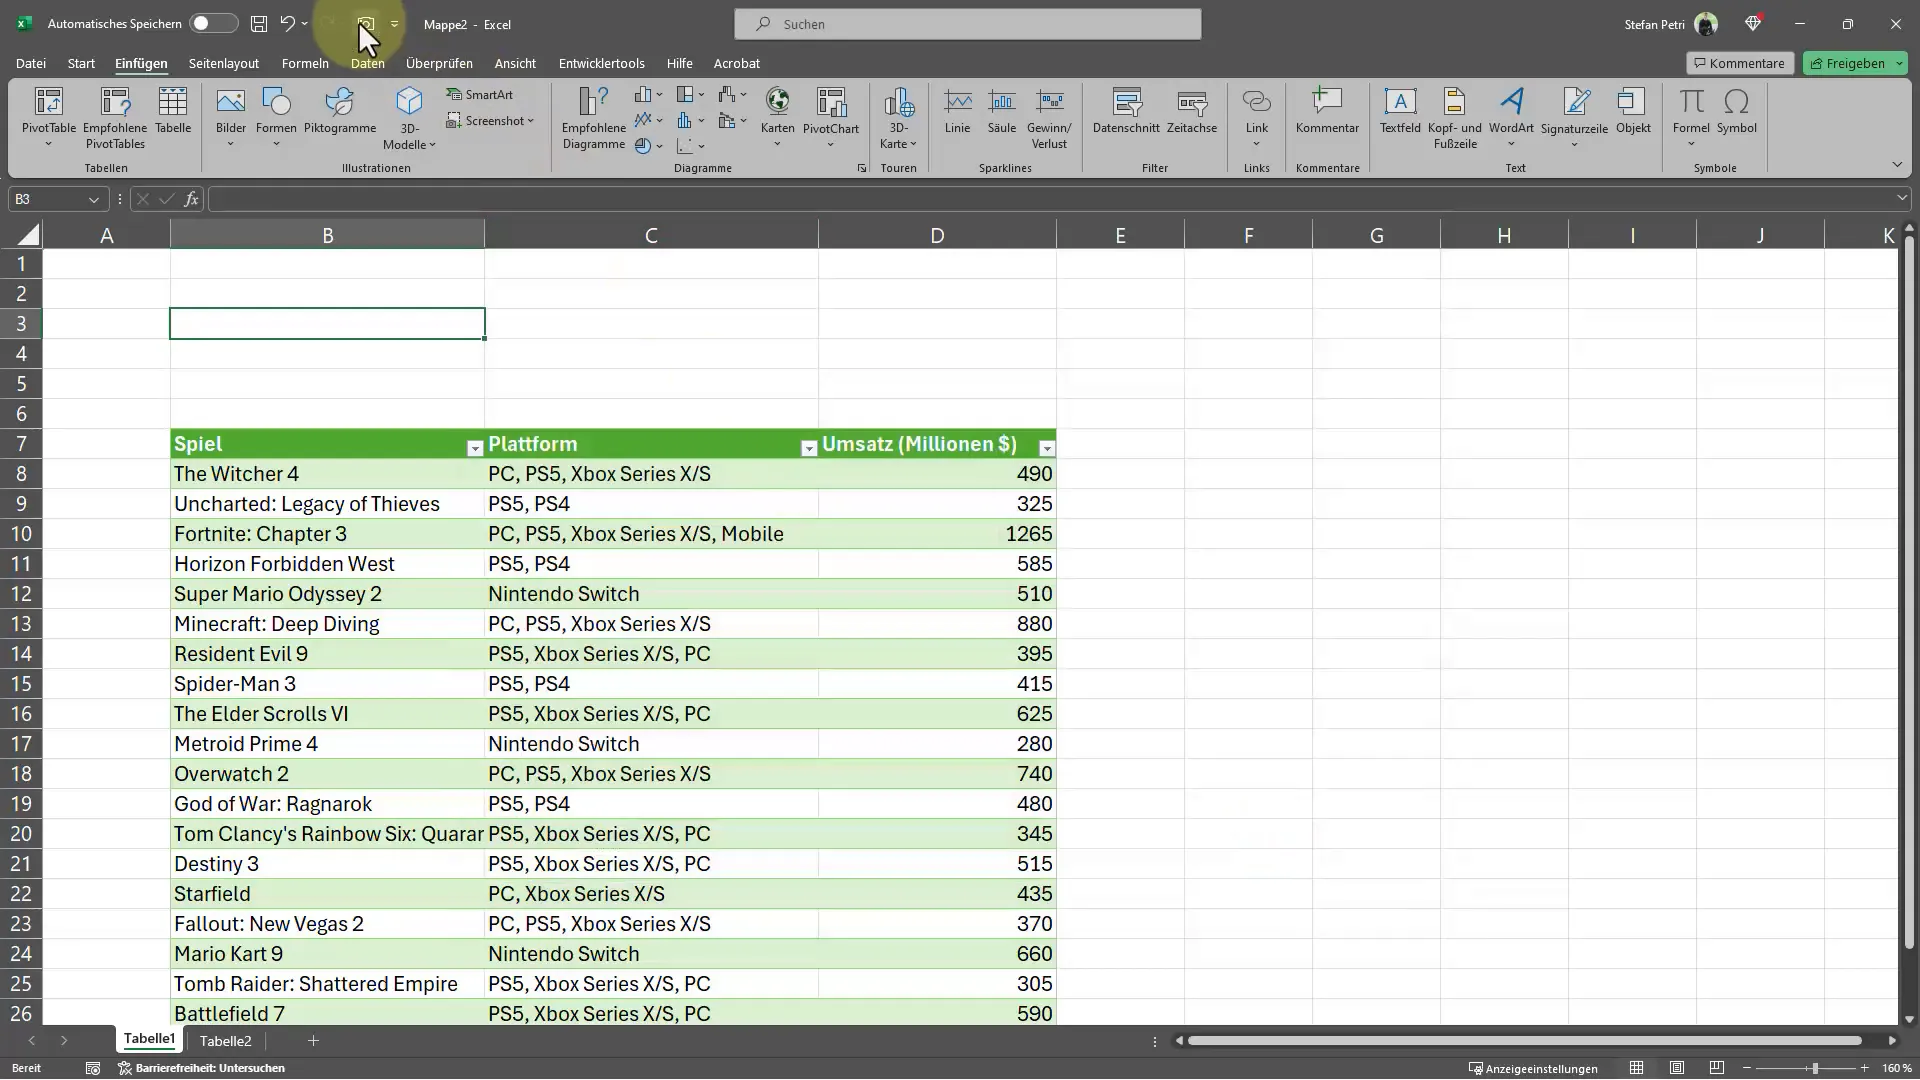
Now it's time to select the range that you want to insert as an image. This should be the part of the table that you want to display in your new table. Once you've marked your range, go back to the Camera function and click on the Camera icon. This will copy the image of this range to the clipboard.
Step 3: Pasting into the New Table
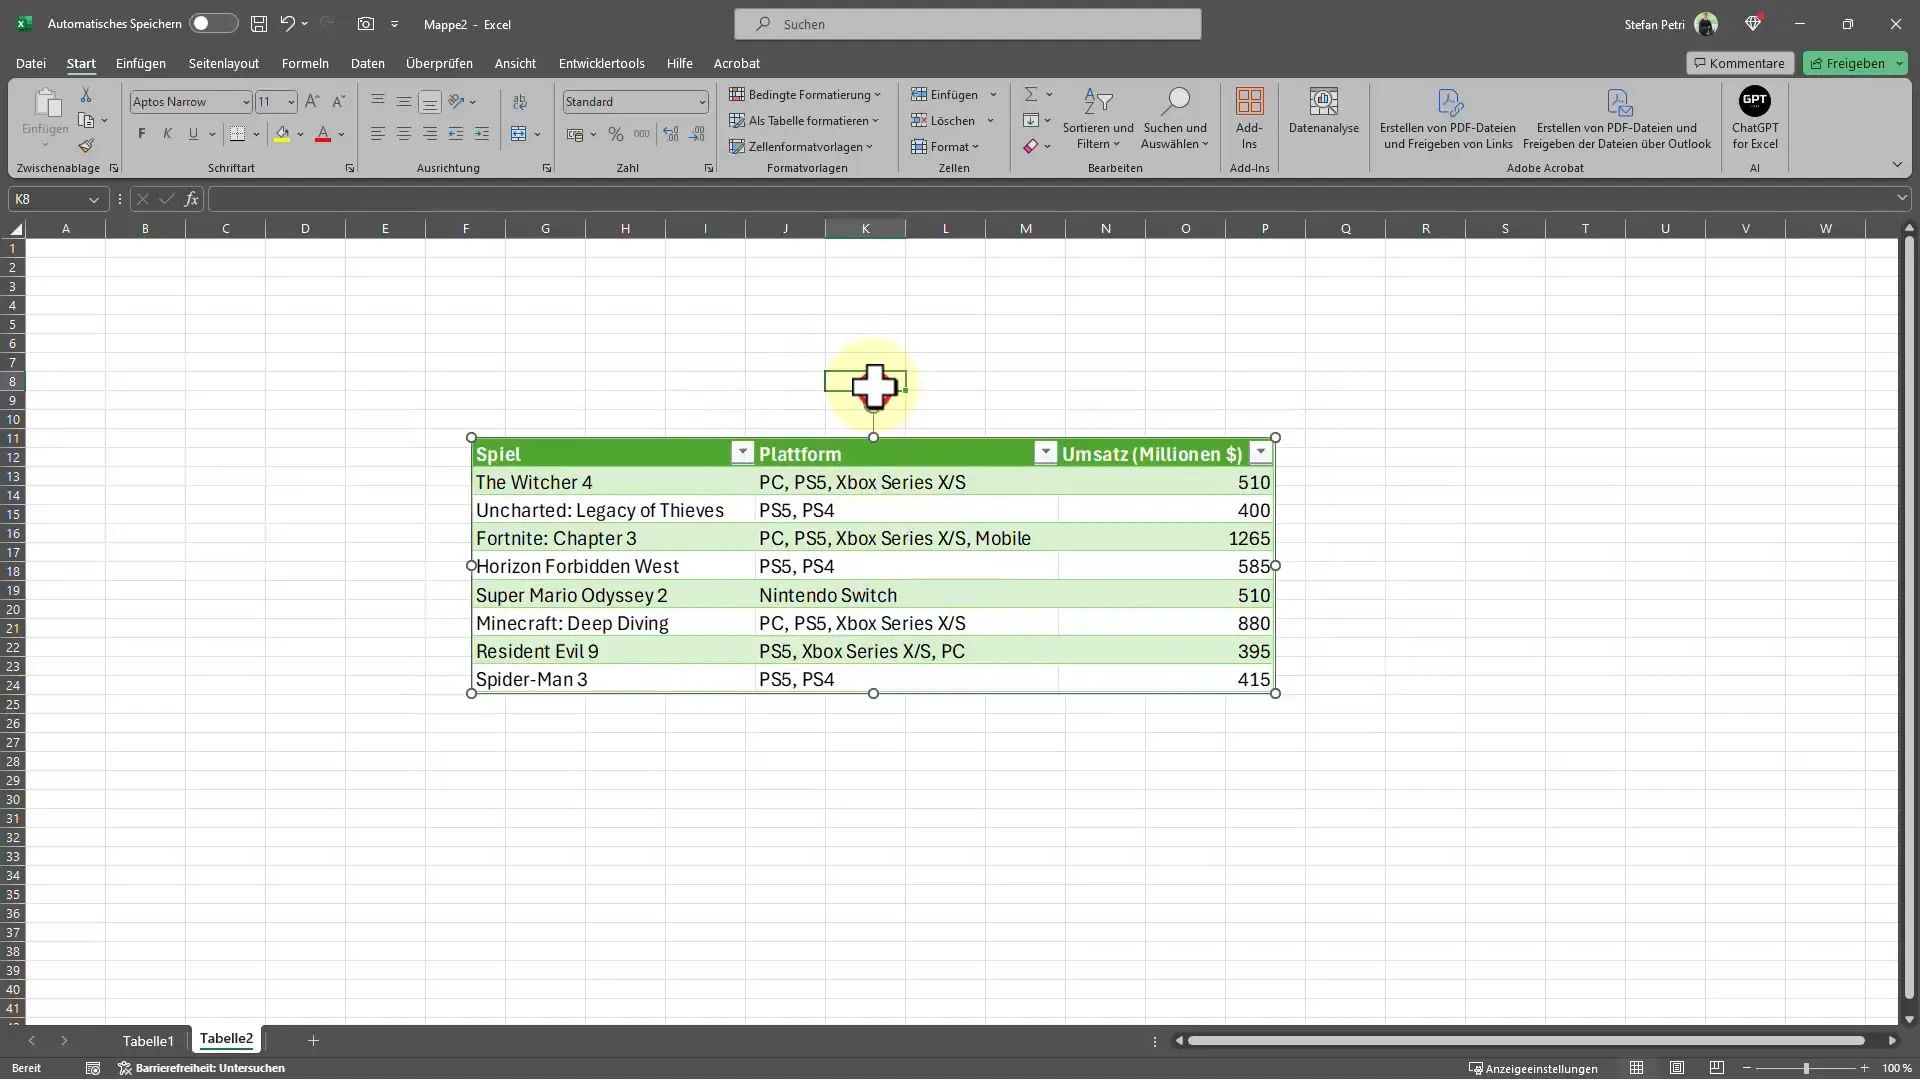
Now switch to the table where you want to insert the image. Once there, you can paste the image by pressing "Ctrl + V." At this point, you will notice that your selected range is now displayed as an image. The practical part is that you can resize this image as you wish and even rotate it if necessary.
Step 4: Dynamic Data Update
One of the greatest advantages of using the Camera Icon is that it works dynamically. When the data in the original range changes, this is automatically updated in the image in your new table. You can test this immediately: For example, change a value in the original table and see how the image in the secondary table updates.
Using the Camera Icon is particularly advantageous in situations where you create reports that need to be regularly updated. Instead of manually updating data, the image does it for you, always reflecting the current values. This is especially helpful in business environments where tracking key metrics is important.
Step 5: Making Further Adjustments
Once you have inserted the image, you can make various adjustments. For example, you can format the image according to your preferences: You can adjust the border, change the background, and even format the text inside the image. This flexibility allows you to design the image to fit perfectly into your presentation.
Step 6: Conclusion and Outlook
In conclusion, using the Camera Icon in Excel is an excellent method to present tables dynamically and attractively. By enabling automatic updates, you save time and don't have to worry about data integrity. If you work with Excel regularly, you will quickly realize how valuable this little trick is.
Summary
In this tutorial, I have shown you how to use the camera icon in Excel to insert a dynamic snapshot of a table range into another table. This function not only simplifies working with data significantly but also allows you to keep an up-to-date overview of your values at all times without having to make further manual adjustments. Give it a try and revolutionize your way of working with Excel!
Frequently Asked Questions
What is the camera icon in Excel?The camera icon allows you to insert a range of a table as an image into another table that is dynamically updated.
How does my image stay up-to-date in Excel?Changes in the original range are automatically reflected in the inserted image, ensuring it always displays current data.
Can I resize the inserted image?Yes, the inserted image can be resized and rotated to suit your needs.
Where can I find the camera icon in Excel?You can find the camera icon under the advanced commands in Excel's toolbar.
Is this feature available in all versions of Excel?Yes, the camera icon is available in most popular versions of Excel, but it may be hidden in the standard toolbar.


