I will now use blurring techniques to create an interesting look. When all this is applied, it looks as if someone is looking through a mask like this, and the person is sitting right in focus. The whole thing isn't just blurred, it looks a bit "strange" - and that's always interesting. I'll show you how it works.
First, make a copy of the background with Command + J or Ctrl + J or drag the background layer onto the small symbol for a new layer (1). Then you can get started. Important: Before you work with filters in general, you should make sure that you create a smart object here (Layer>Smart objects>Convert to smart object) if it is possible in your layer stack. Then you will get a small box here (2), I always say. You can imagine that this box of settings is now empty, there is nothing in it. In principle, the smart object and the background are now distinguished by an empty box. What do you put in this box now?
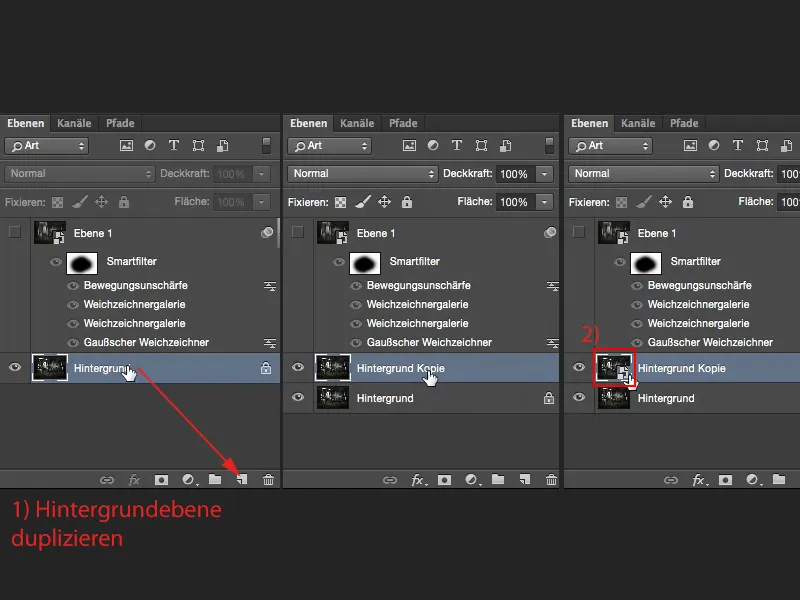
First of all, I'll show you the simplest blur filter to create a quick look. This is theGaussian blur filter (Filter>Blur filter>Gaussian blur).
Now simply adjust the pixels, or the strength here below (1), to create a blurred effect in the image and press OK (2).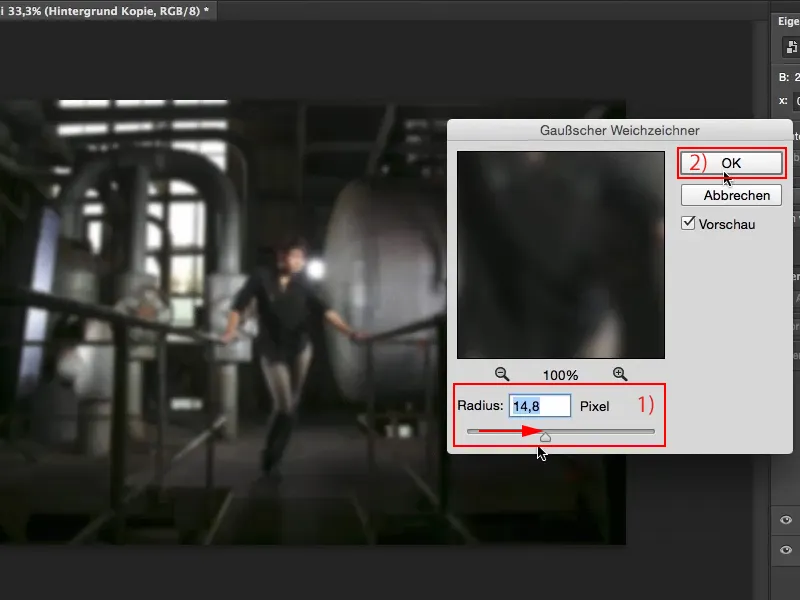
The smart filter that is now created here (1) automatically creates a mask (click), and you can brush out the center here (2) with a black brush (3) (4). It looks quite exciting. However, everyone will immediately recognize that this is a Gaussian blur from which something has been erased. I still think it's better than taking the original picture. The two striplights (5) at the back here bother me. If I blur it, they're still there, but I'm a bit more focused on the model in the middle.
I'll now go back a few steps (Edit>Undo) so that I can clear the mask here (1) and Blender out the Gaussian blur at the bottom here (2). The nice thing about smart objects or smart filters is that a mask is automatically attached. I can now filter as I like. I can return to the Gaussian blur settings at any time here (3) by double-clicking on it.
Then I go to the blur gallery here. It must be powerful if Photoshop has its own gallery in addition to all the blur filters. And so it is. These are the field blur, the iris blur, the tilt-shift blur, the path blur and the circular blur. In this case, I opt for the iris blur.
A new window opens. Here you can move this blur around the image very nicely and really look for the exact point where you want to go.
Then you have different handles. The distance between these two points (1) or also between these two points (2) determines the soft transition. If you draw the whole thing here (3), it will of course disappear. But the transition is between this point and this point (4). If, for example, you want to include the model's shoes, you should start the point (5) at the bottom (6). This transition is now used.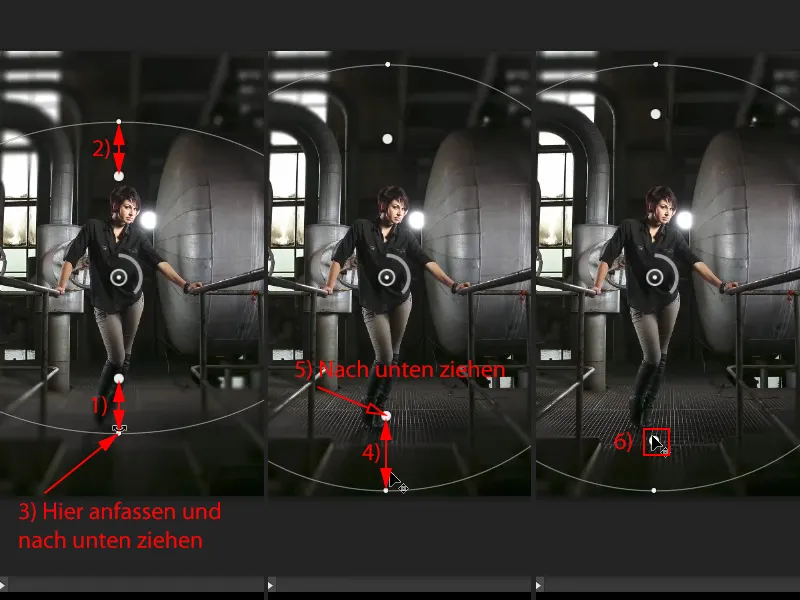
If you pull the whole thing inwards (1), you can see how it all runs into the model a little. However, I'd rather have it at the bottom of the shoes (2). It looks quite nice like this. In contrast to the Gaussian Blur filter, where you can only set a fixed value and paint a mask and that's it, here you have the option of adjusting the transition and you can place the non-blurred spot (3) exactly where you want it in the image.
And what you can also do is adjust the strength here (1). Simply turn this wheel (1) here. I'll pull it almost to the maximum (2). Then you can see how all of this is virtually erased. And the more I do this, the less I notice these softboxes/striplights (3), for example. This could also be some other industrial light, I can no longer recognize it, and that's the purpose.
I'm going to go down (4) until I realize again that it must be softboxes/striplights. And that's how I leave it now. Confirm with OK (5), Photoshop now calculates this back.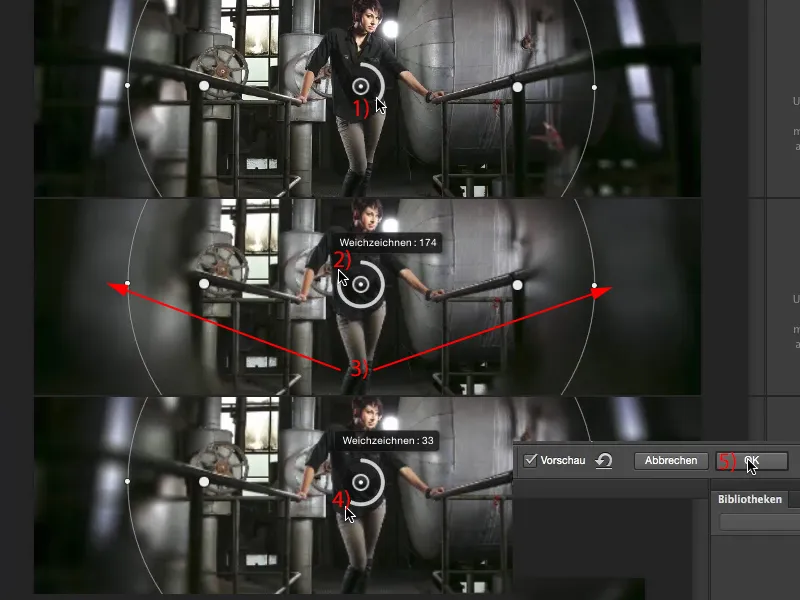
And now I've basically created a better blur effect than this Gaussian blur because I've specifically defined this area (1). I'll Blender that out again here (2) and continue filtering.
I go back to the gallery and next use the tilt shift effect (Filter>Blur Gallery>Tilt Shift...). In principle, it works in exactly the same way as this iris blur. I now have a kind of soft transition between these two lines (1). I can again determine the strength of the effect in the middle (2). I can drag (3) up and down here. However, the center of the image now suits me quite well.
Then I move the line (4) down first, ...
... because it can already be blurred down to here (1). I'd just like the transition a little further down (drag 2 down). This time, however, I let it run into the shoes a little, because the effect here (3) is so minimal that you hardly notice it.
It can be stretched a little more towards the top (4 pull upwards). Then I step on the gas again with my filter, turn the wheel (5) ...
... and see how the ceiling and floor are now softened. I have to move a bit more out of the head area (pull 1 upwards) because the head should of course be sharp. The tips of the feet don't bother me that much. Then I can confirm the whole thing again with OK (2), Photoshop thinks a bit, but pauses to think are always good.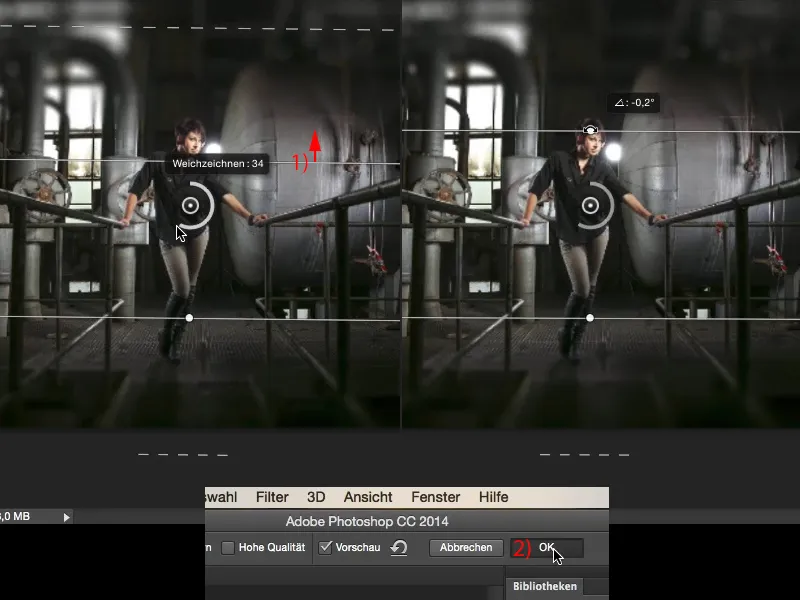
Then I can display the before and after. I always like the effect with pictures like this because the viewer is focused in the middle. I can also combine them. I can now simply leave the blur as it is (only tilt shift shown) and add the iris blur (show). Now I'm almost at this effect where I'm looking through a blurred window. Maybe it's some kind of alien that's out and about in this factory looking for the lady. Who knows?
Next, I want to apply another blur filter here, namely the motion blur (Filter>Blur Filter>Motion Blur). An angle of 90° (1) causes everything in the image to be blurred upwards and downwards. You can experiment a little with the distance (2), it doesn't have to be so extreme (3), it can also be applied more gently, as in this example (4). But especially if you want to make it very diffuse (5, then press 6 OK), ...
... so that it looks very "strange" and creates a picture look (1). Then I can now brush out the center. To do this, click on the smart filter (2) and brush it out with a black foreground color (3) and a brush (4) in the image (5). At (6) you can see the painted area. Now I have the effect that it looks as if this is really happening through a mask.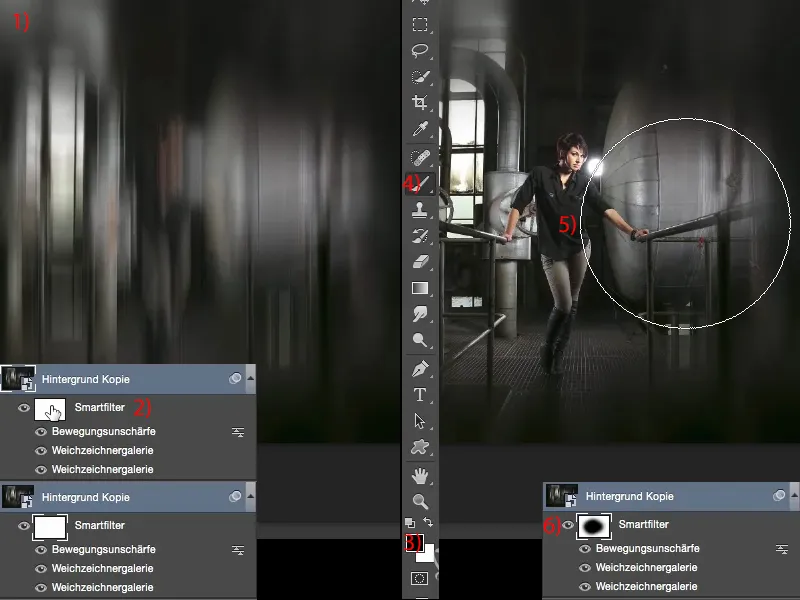
The only thing I don't like here yet is: I've brushed a bit too much on the left and right of the mask. I simply changed the foreground color to white (1) and painted these strip highlights away with the brush here (2, 3).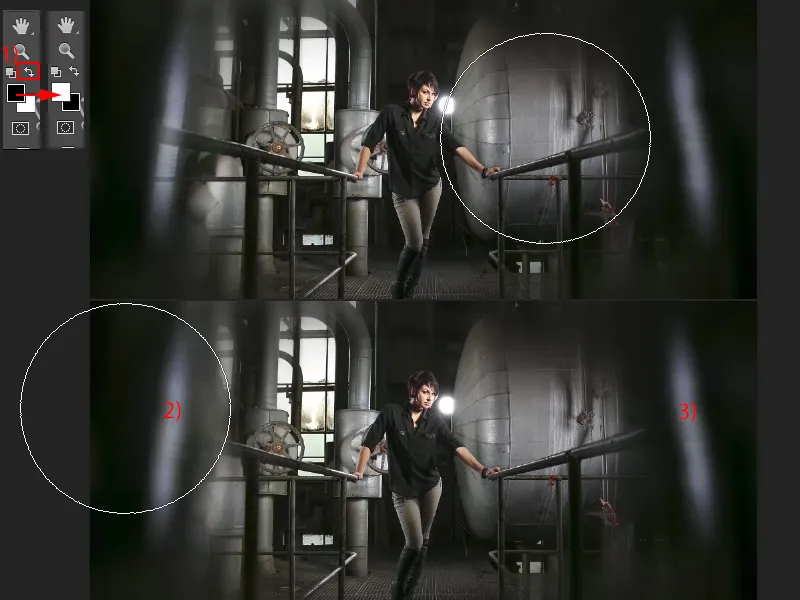
Sure - this has nothing to do with a normal photo, but who says that a picture look always has to bring out the best in photos? It can also be used creatively, as in this example. Who would have thought that you could achieve such a cool effect with two or three blur filters and a smart object?
