In this tutorial, I will show you how you can easily integrate table contents from the internet into your Excel document. This method allows you to always use up-to-date information, whether for analysis, reporting, or any other evaluations. Let's get started right away!
Main Insights
- You can import data directly from the internet into Excel.
- The information can be automatically updated.
- There are various customization options for the data you import.
Step 1: Prepare Excel
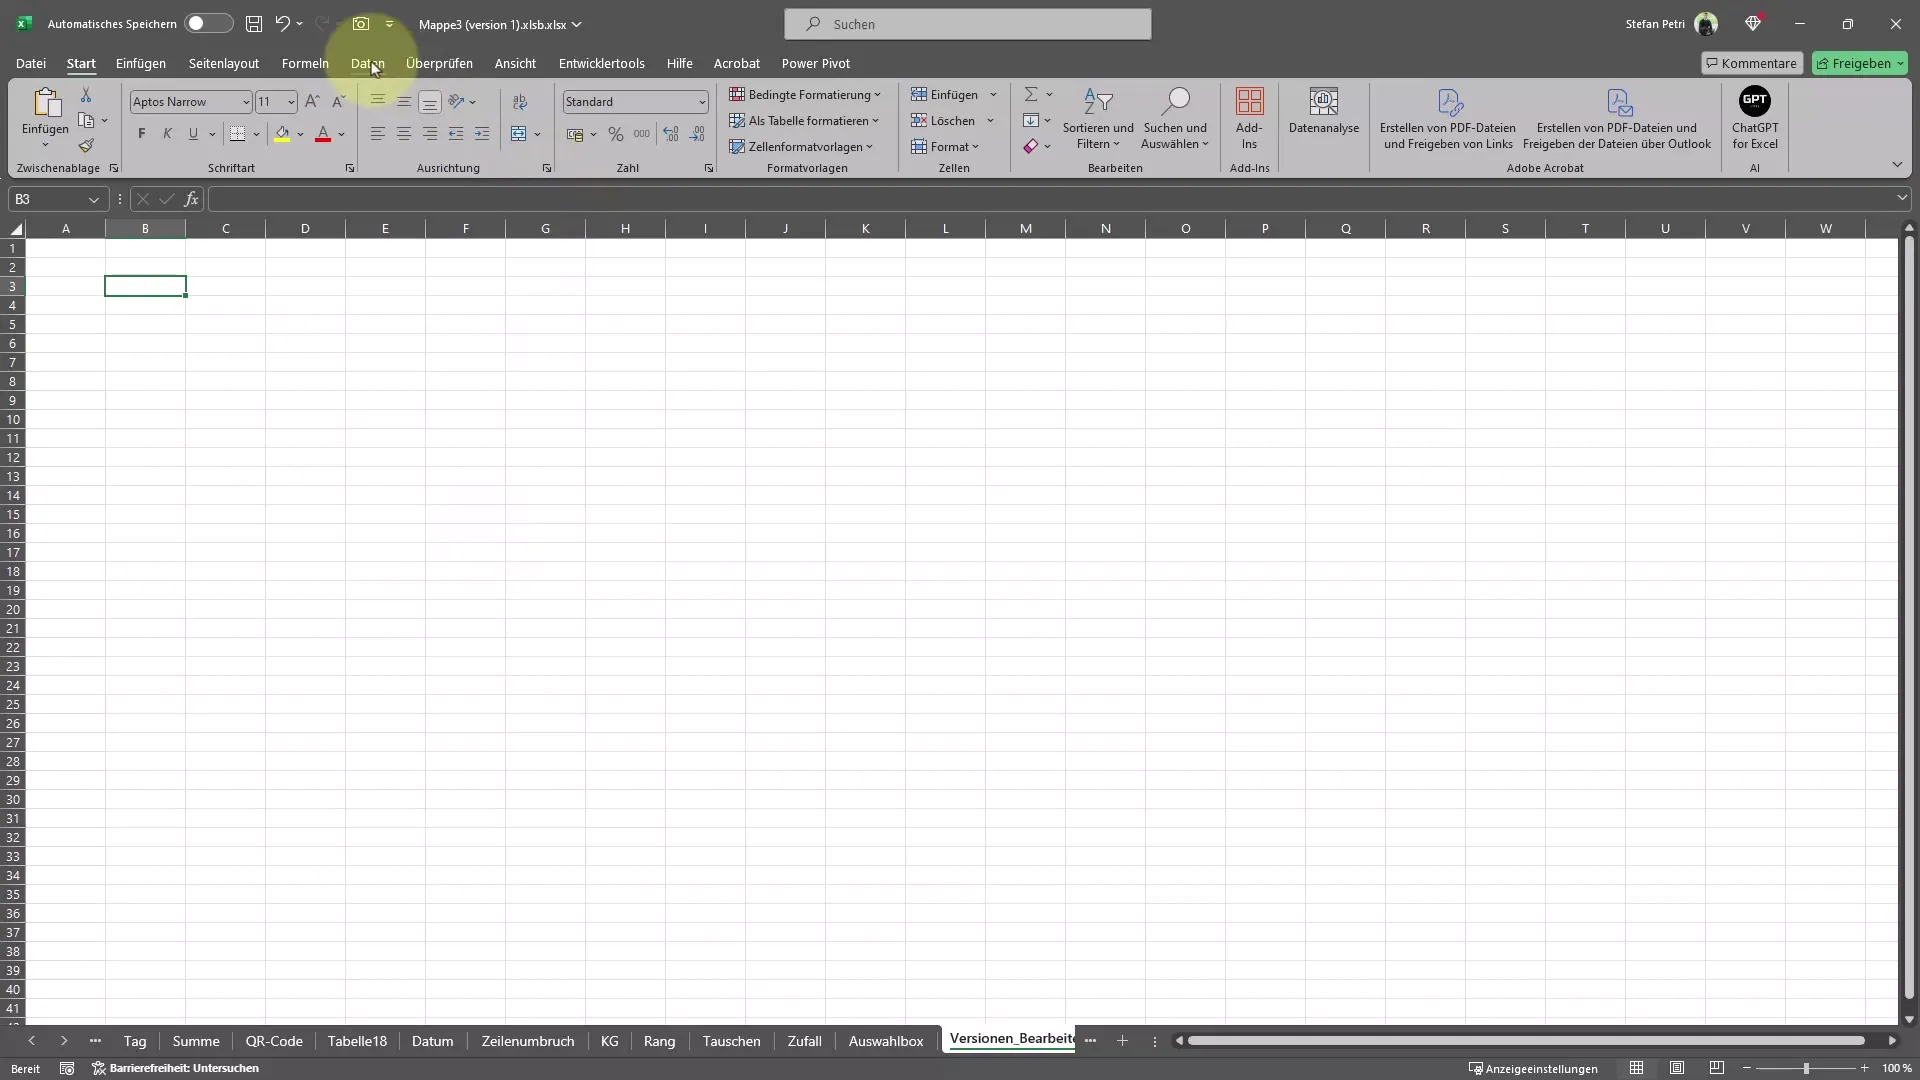
First, you need to open Excel and make sure you go to the "Data" tab. This tab contains all the functions needed to import data from external sources.
Step 2: Import Data from the Web
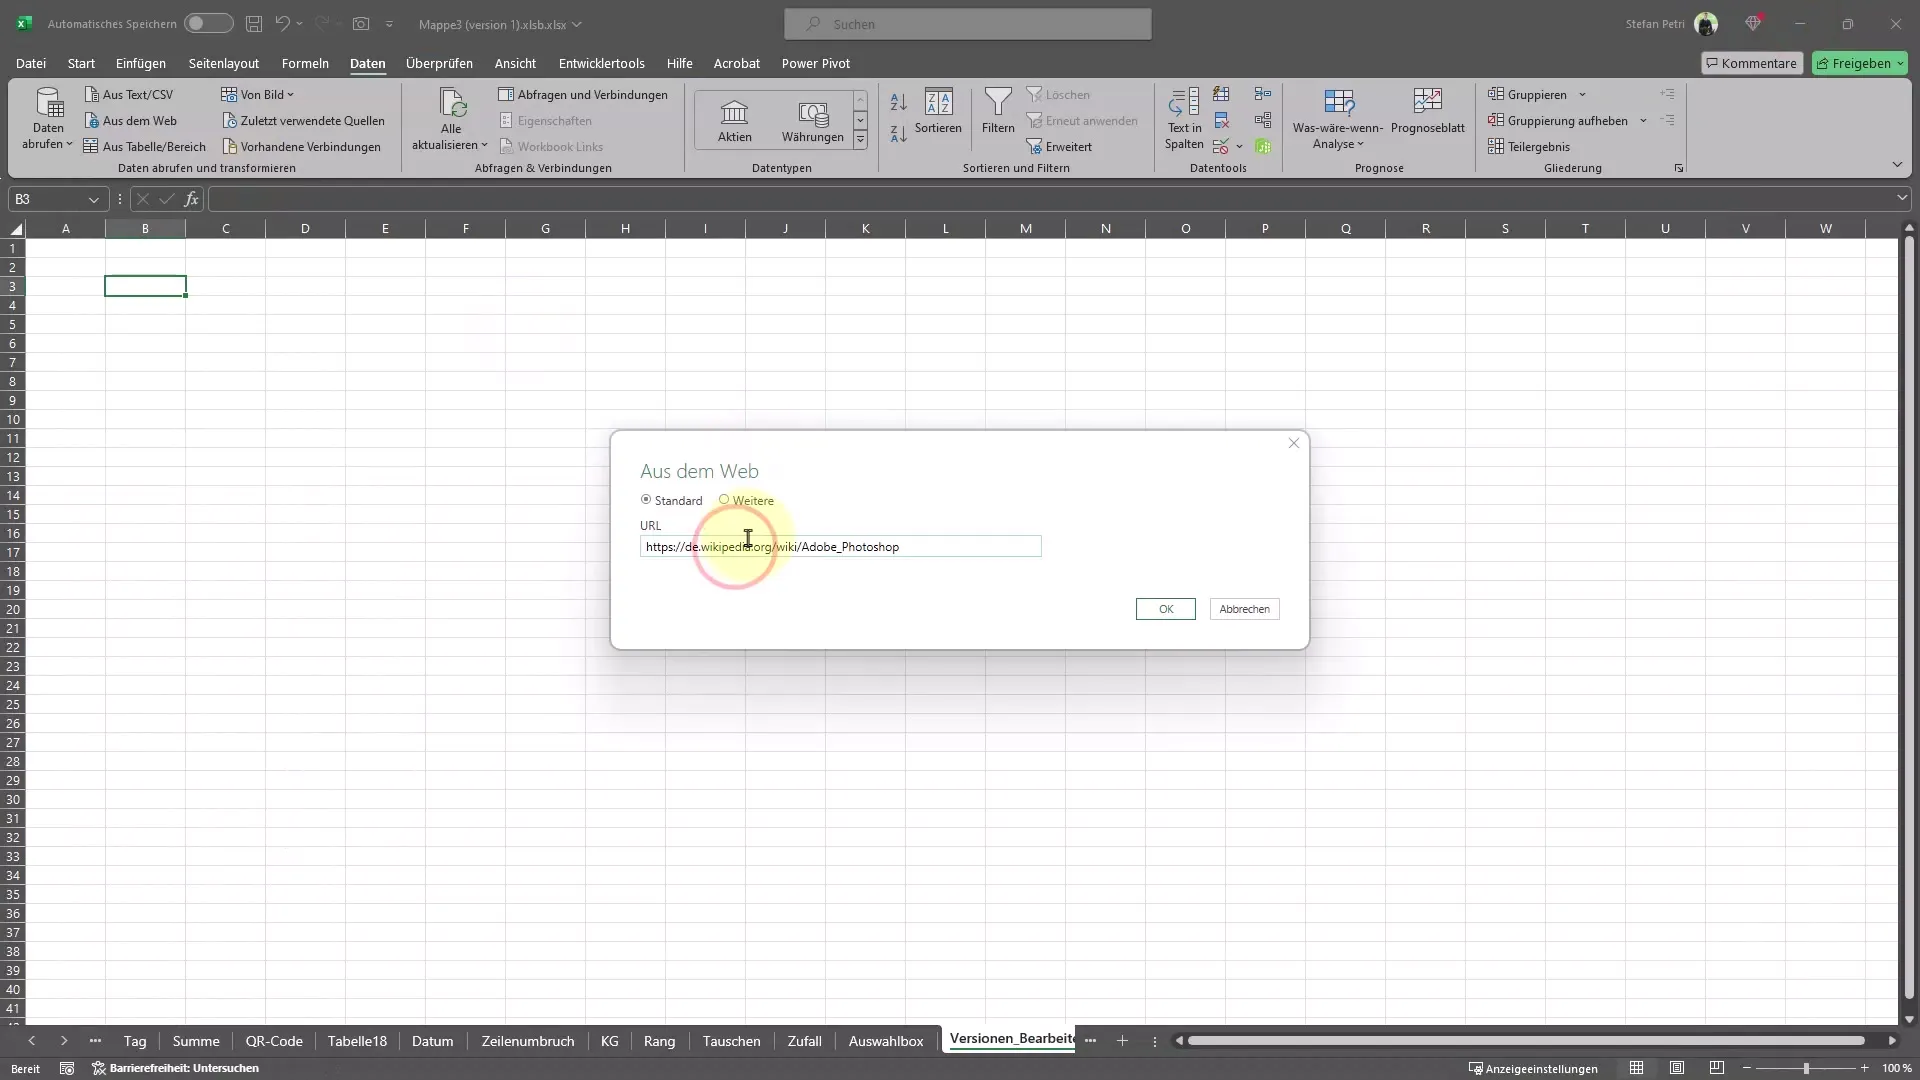
In the "Data" tab, you will find the option "From Web." Clicking on it will open a new window where you can enter the URL from which you want to retrieve the data.
Step 3: Specify URL
Enter the URL of the webpage that contains the table you wish to import. In our example, we are using Wikipedia to retrieve the latest Photoshop versions. Copy the URL of the page and paste it into the corresponding field.
Step 4: Establish Connection
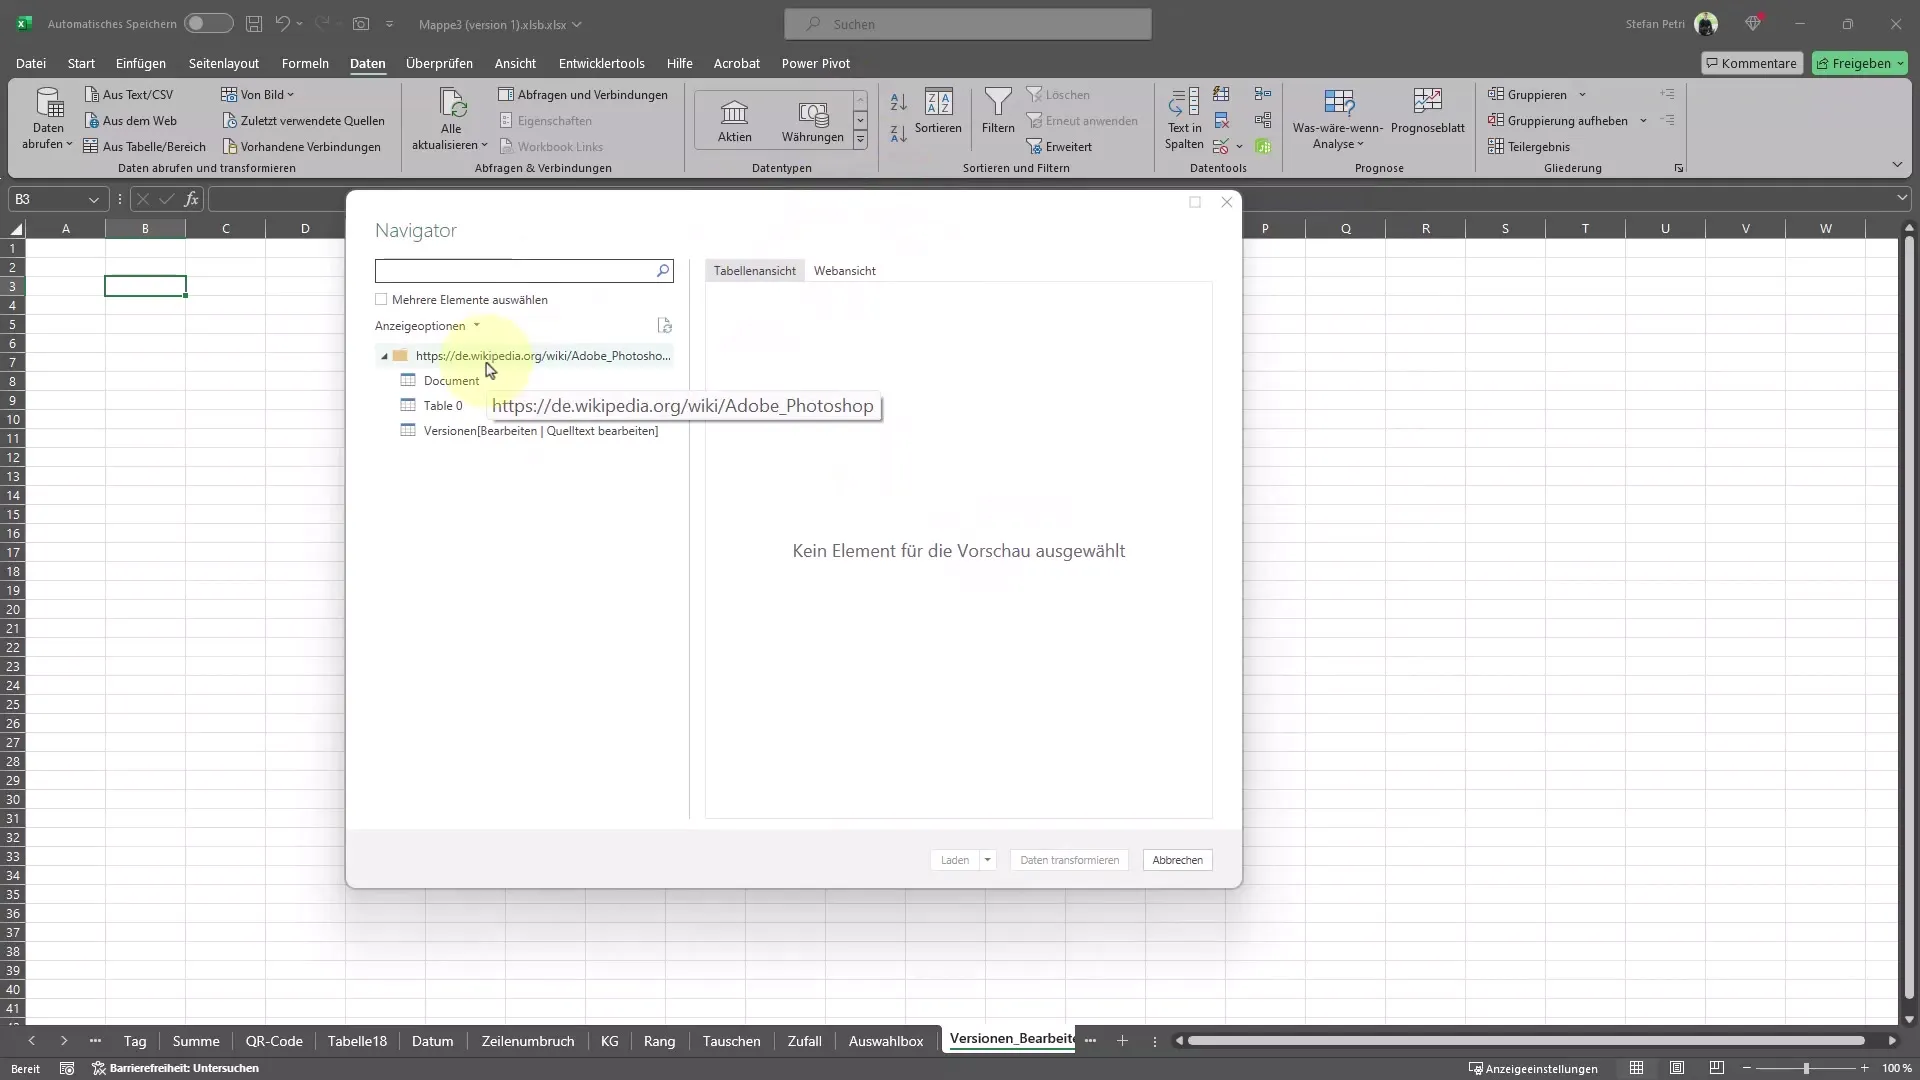
After entering the URL, click on "OK." Excel will now establish a connection to the webpage and show you how the document is structured. It may take a moment for the connection to be established.
Step 5: Select Table
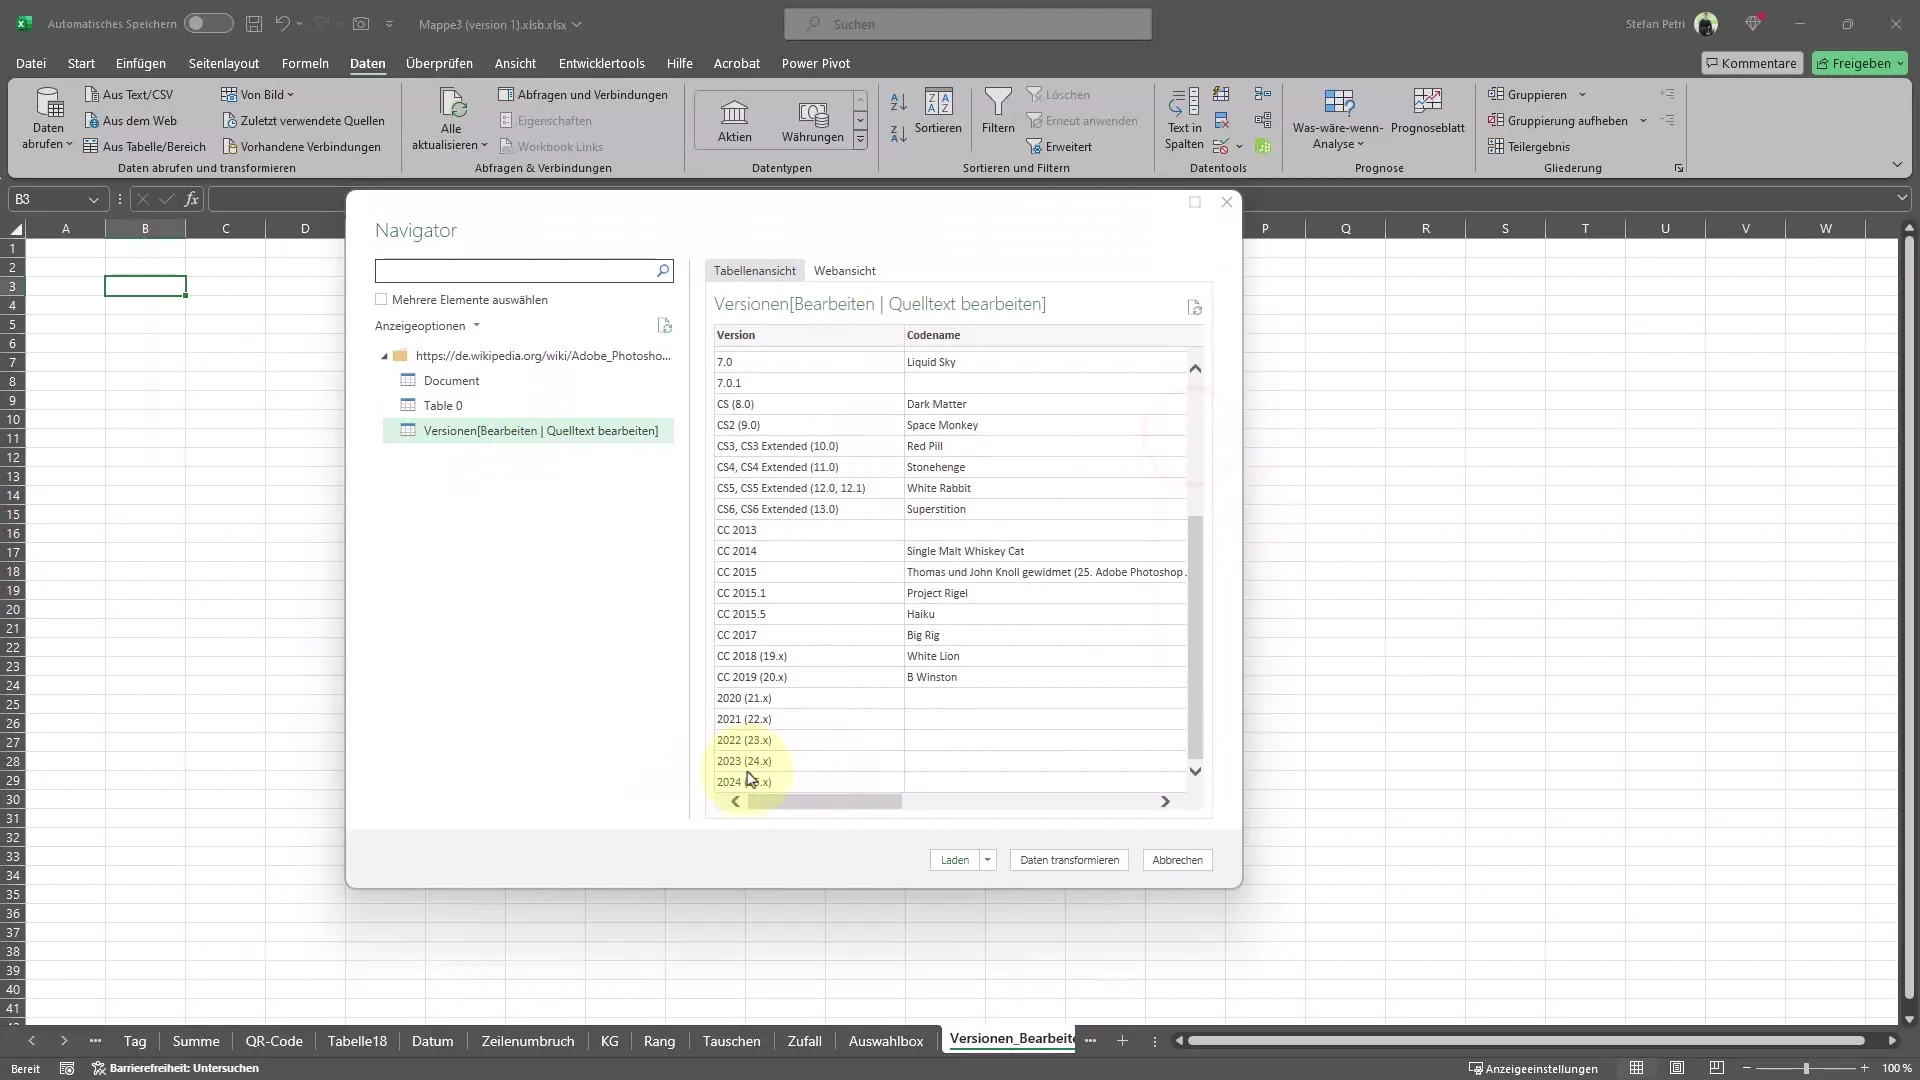
Here you will see an overview of the available tables. Choose the table that is relevant to you. In our case, it is the table with the Photoshop versions.
Step 6: Transform Data
To further customize the data, click on "Transform Data." This will open a new window where you can make various settings. Here, you have the option to sort the table or remove certain columns.
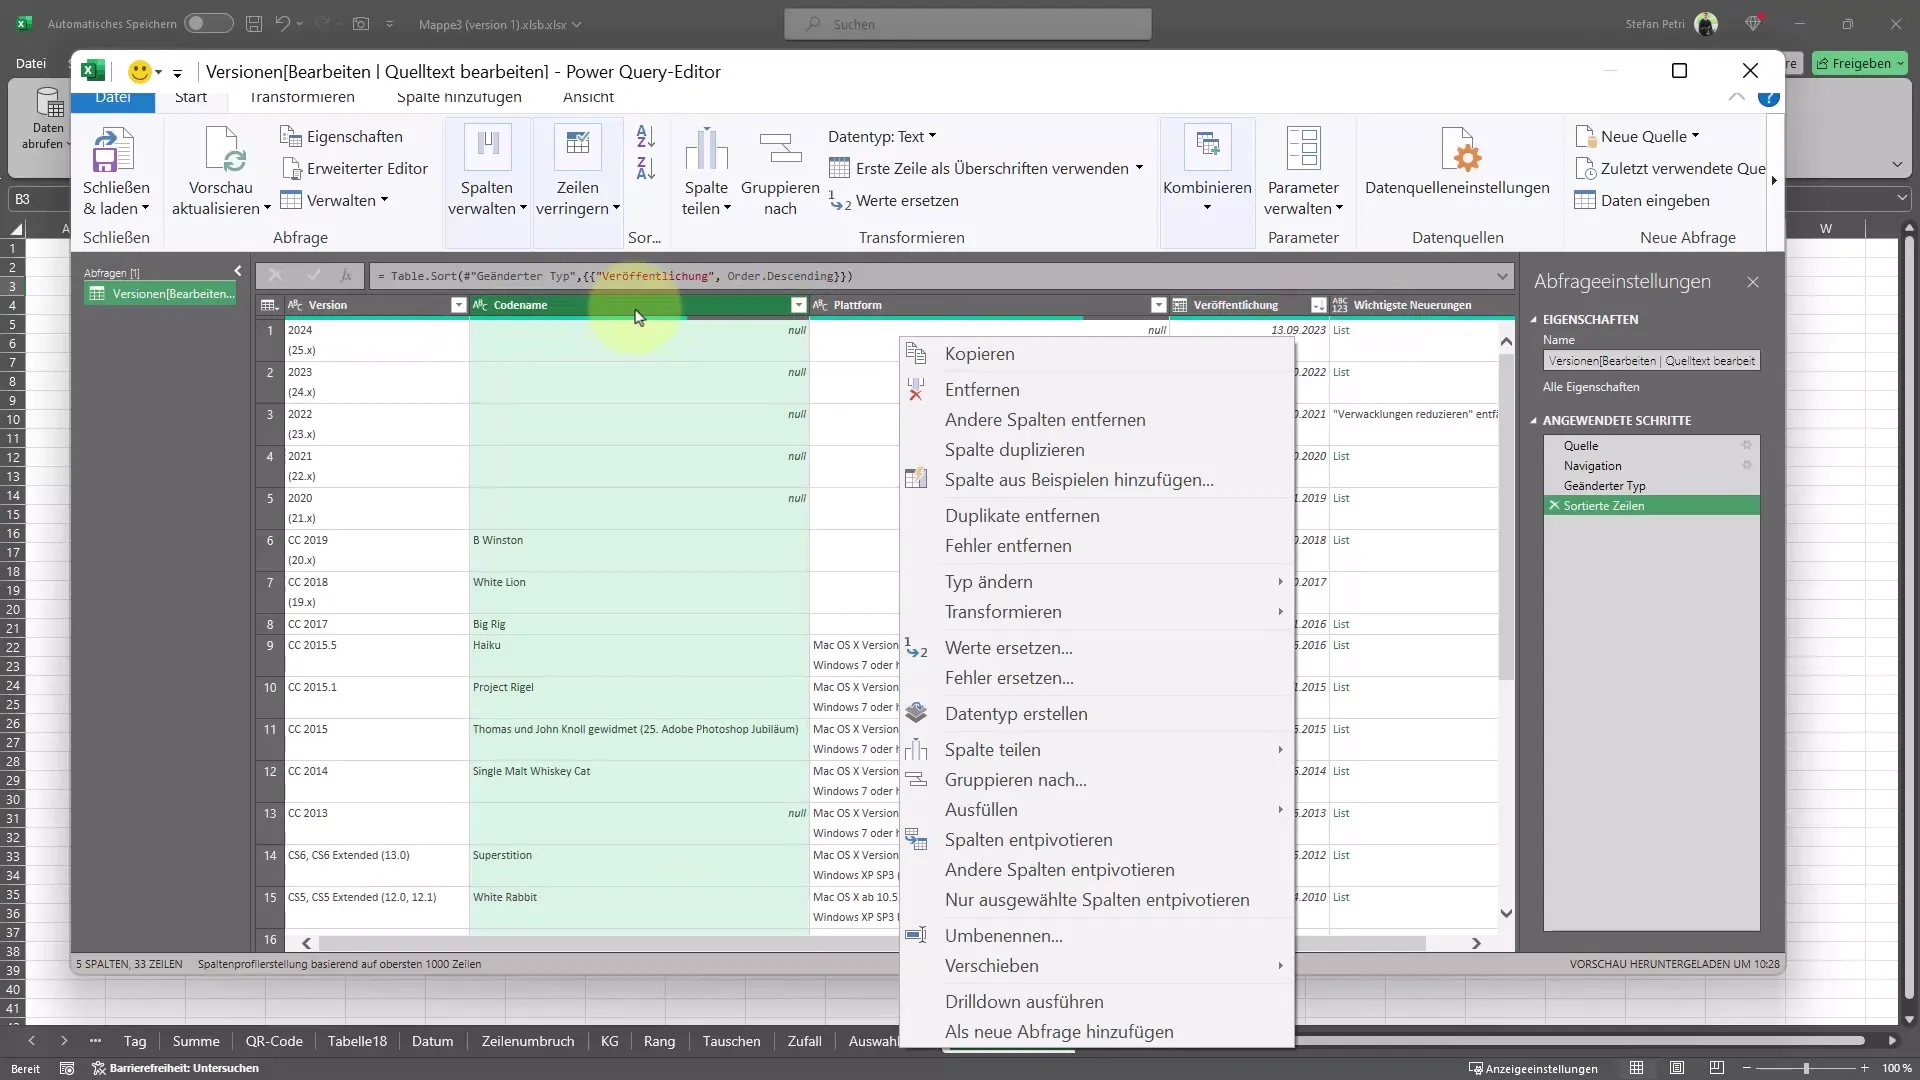
If you want the table to be sorted by the publication date, you can set that here. Choose the desired sorting method, e.g., descending, to display the latest versions at the top. If there are columns you do not need, you can remove them with a right-click.
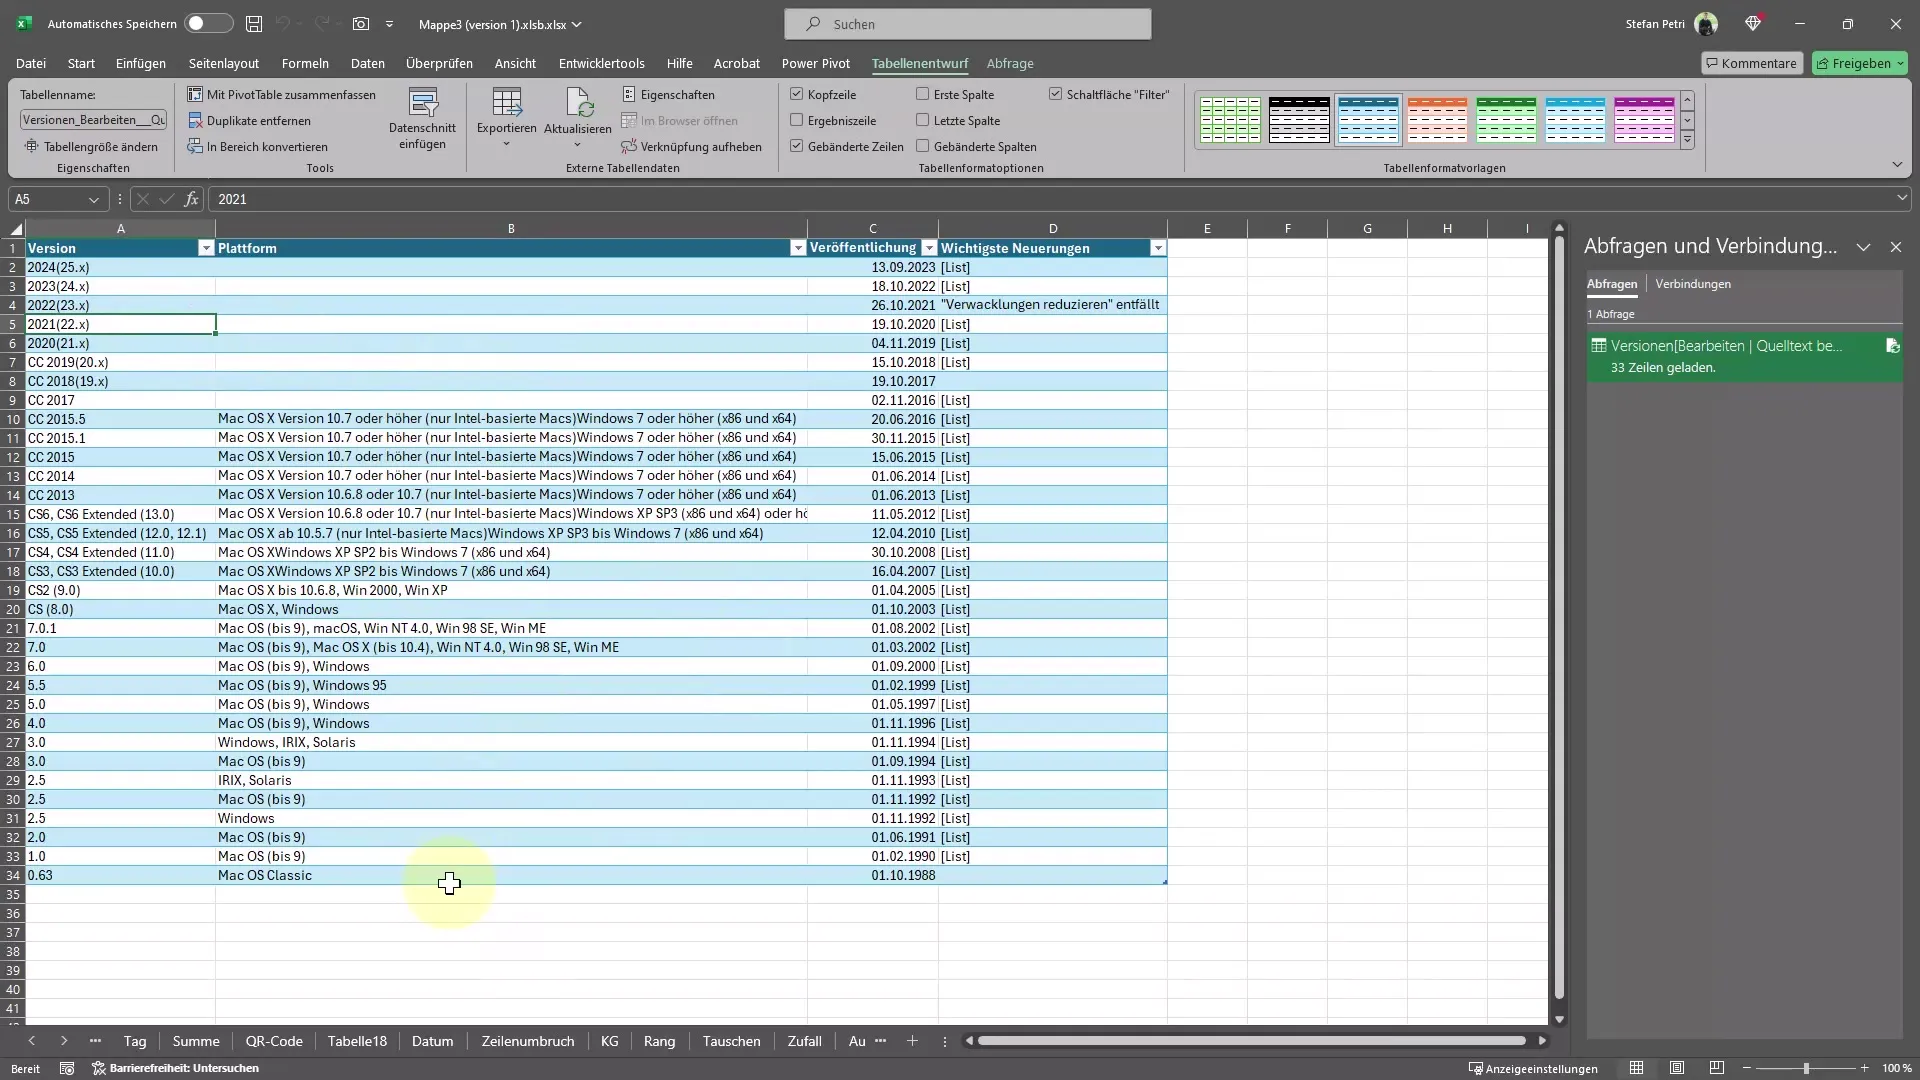
Once you are satisfied with the customizations, click on "Close & Load." This will import the data into your Excel sheet and format it exactly as you want.
Step 7: Set Up Automatic Update
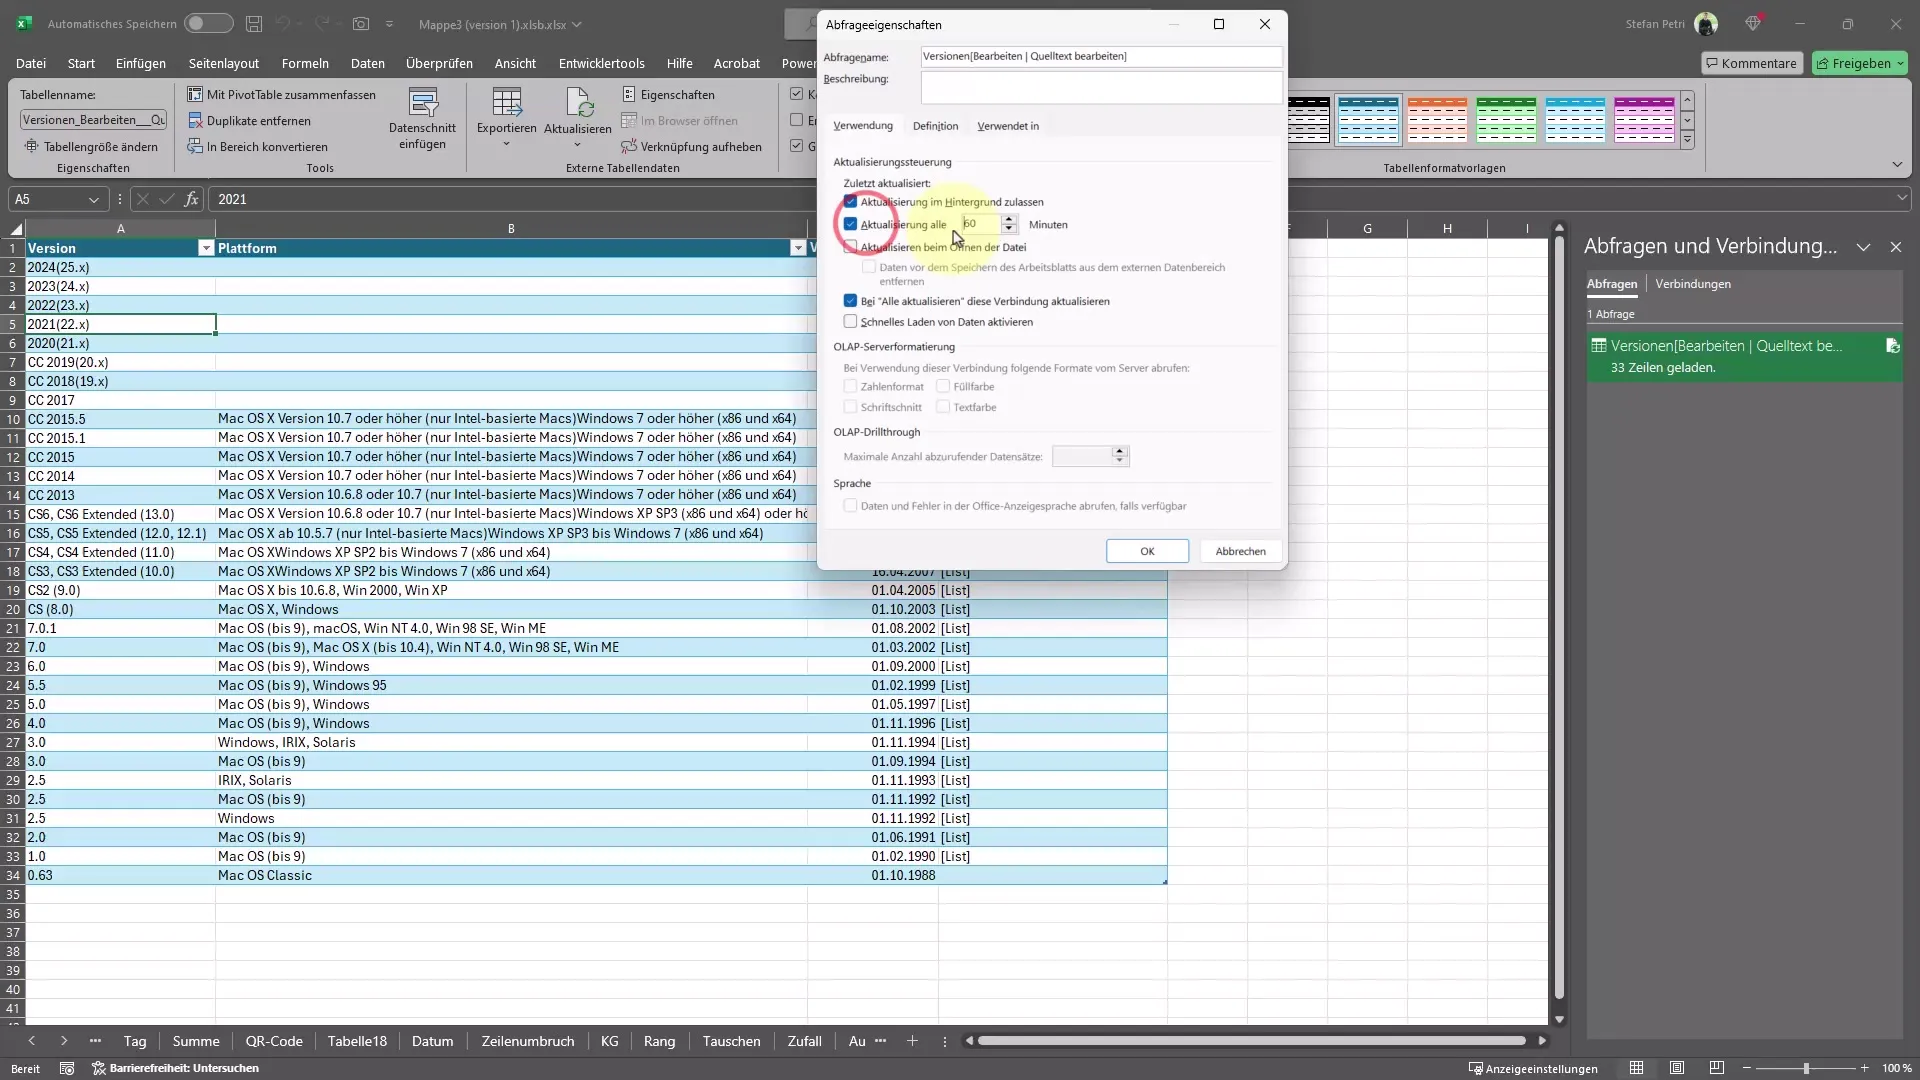
Excel offers the option to automatically update the data. You can set how often the program should check the connection, e.g., every 60 minutes. Alternatively, you can also manually update by clicking on the refresh button.
Step 8: Remove Link
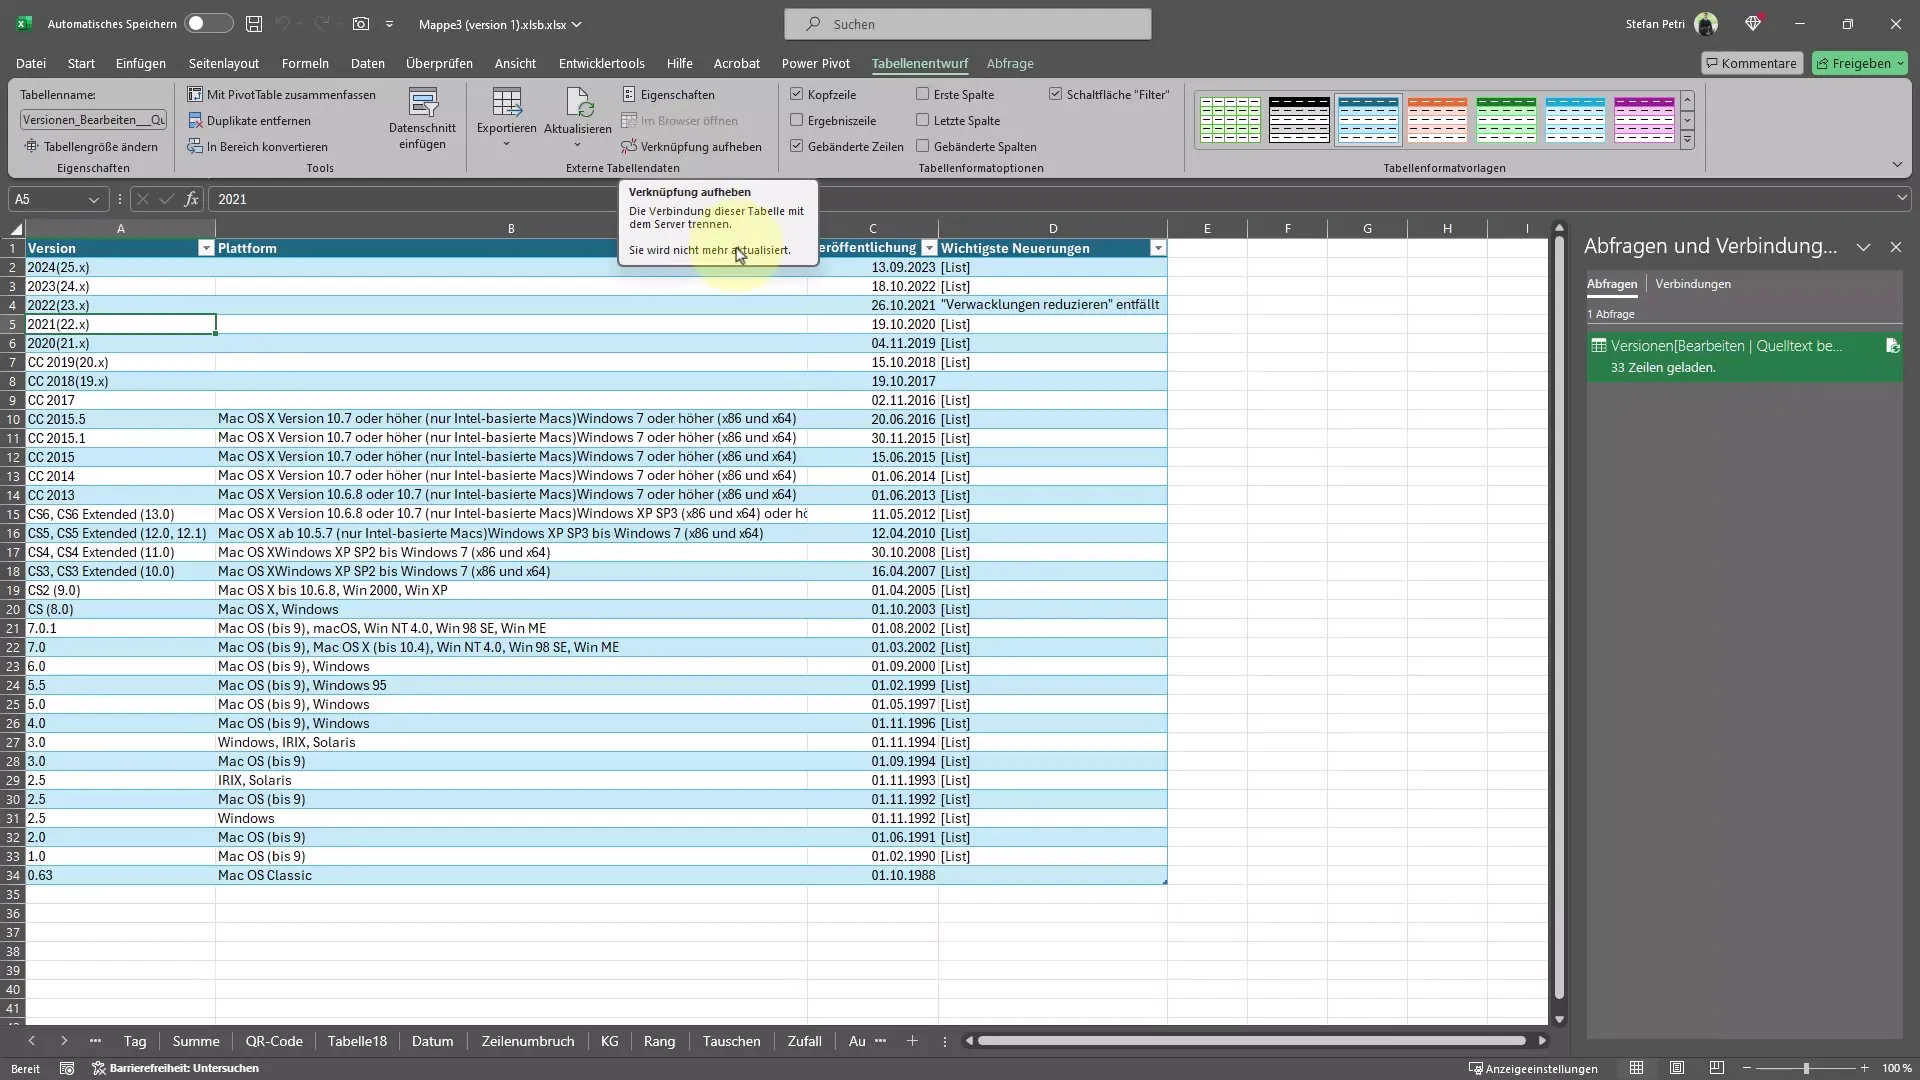
If you no longer need the connection to the table on the internet, you can remove the link. This means Excel will no longer search for the data if it has changed.
Summary
In this tutorial, you have learned how to import data directly from the internet into Excel, giving you access to up-to-date information at all times. The option for automatic updates can save you a lot of time and help you make your analyses more efficient.

