In today's tutorial, I'll show you how to achieve a mystical forest effect in Affinity Photo with just a few clicks. This effect gives your photos a magical and atmospheric touch, which is particularly suitable for forest shots. So grab your photo and let's get started!
Main Insights
- You can create the mystical effect using the motion and sharpness filters.
- The gradient helps to make certain areas of the image sharp or blurry.
- A sunlight effect can enhance the atmosphere further.
- Adding a vignette and a slight noise texture give the final touch to the image.
Step-by-Step Guide
Step 1: Select the image and apply the motion and sharpness filter
First, choose a suitable image that includes at least some straight trees. These trees serve as the basis for the mystical effect.
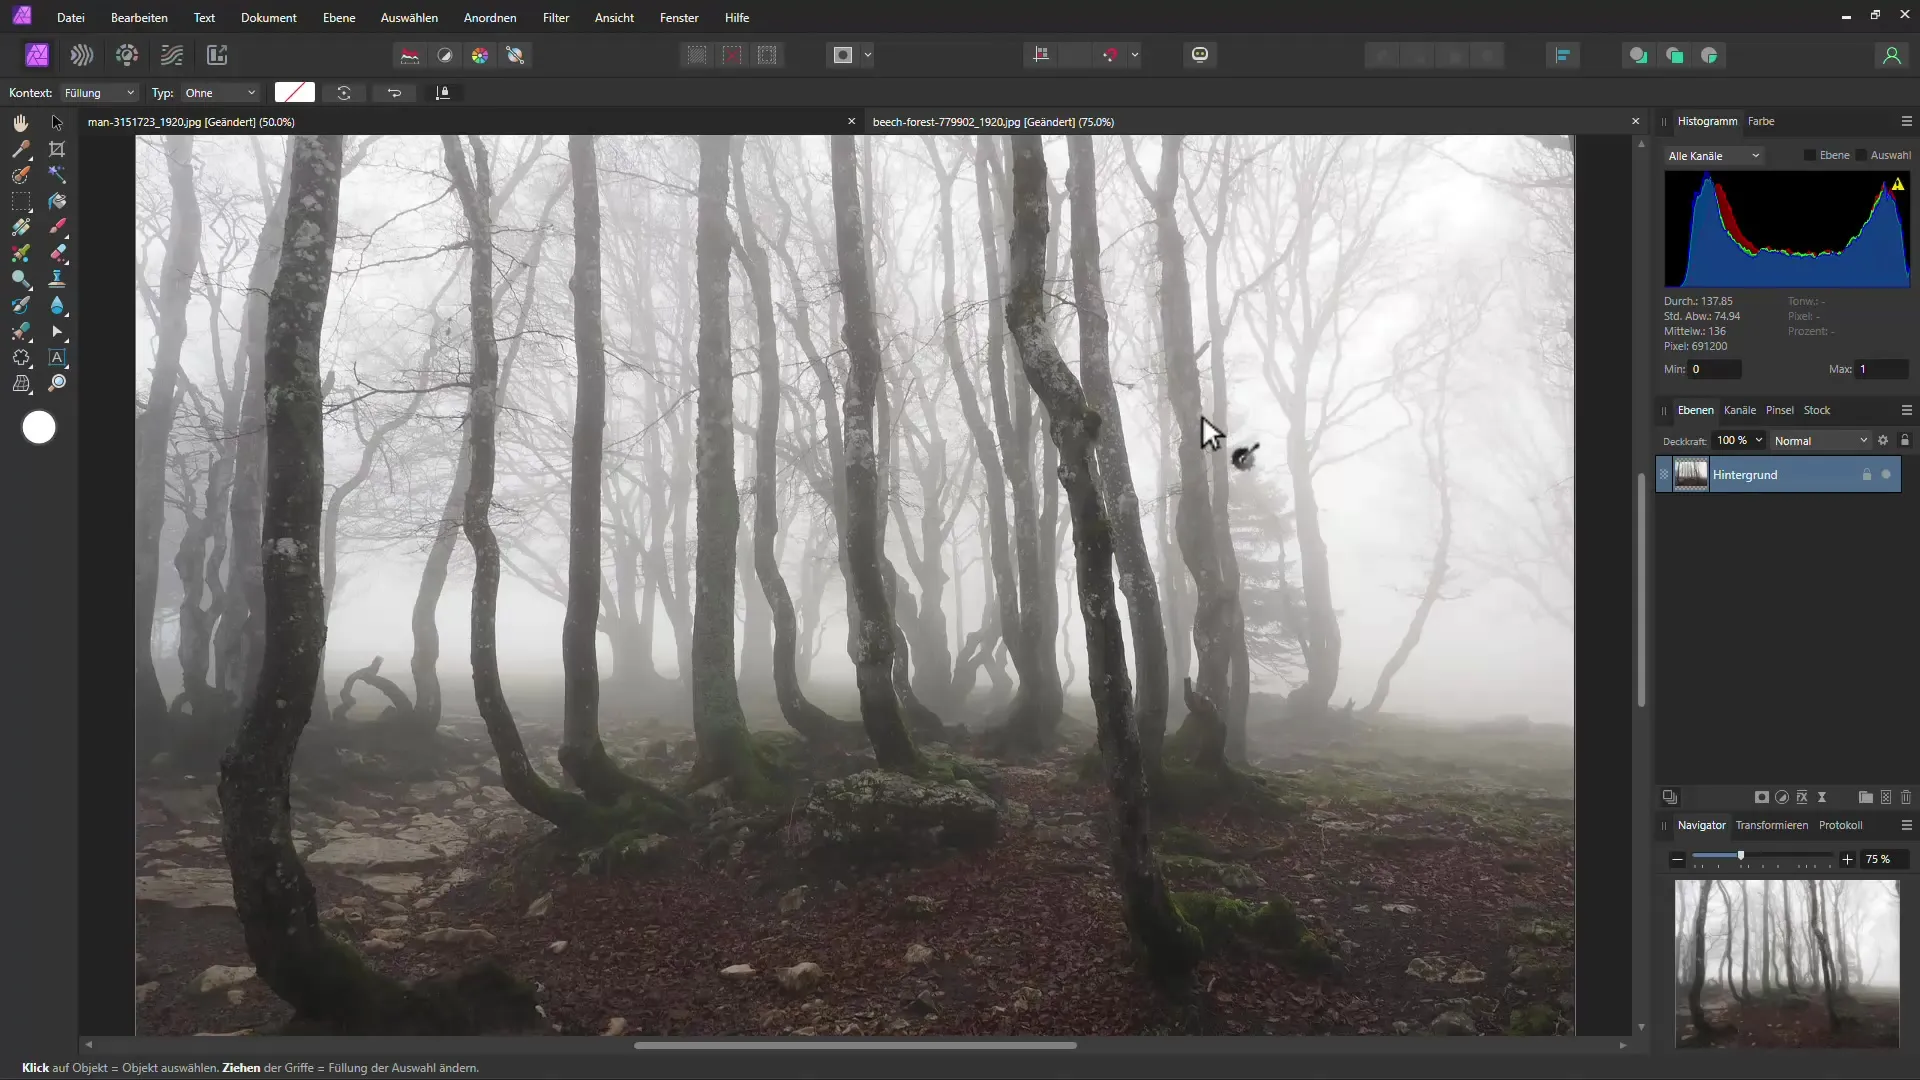
Step 2: Define blurred areas
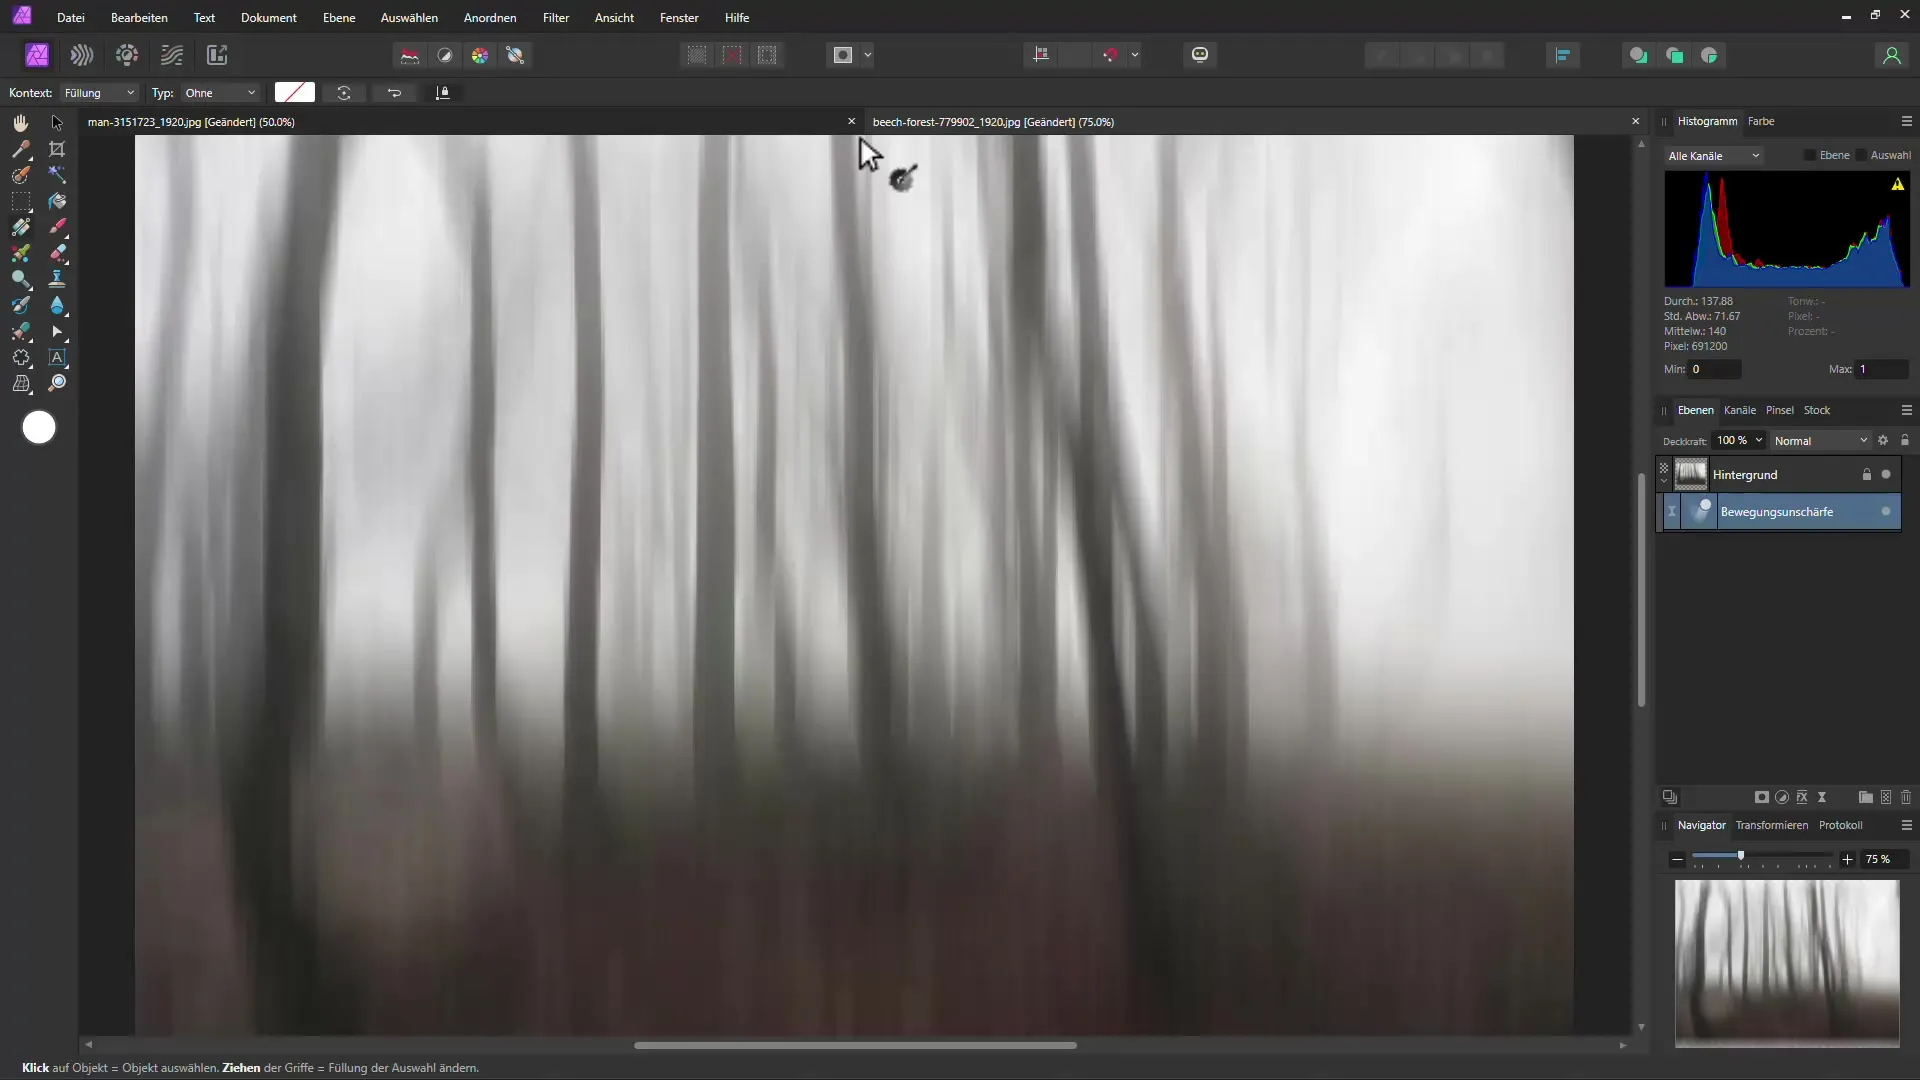
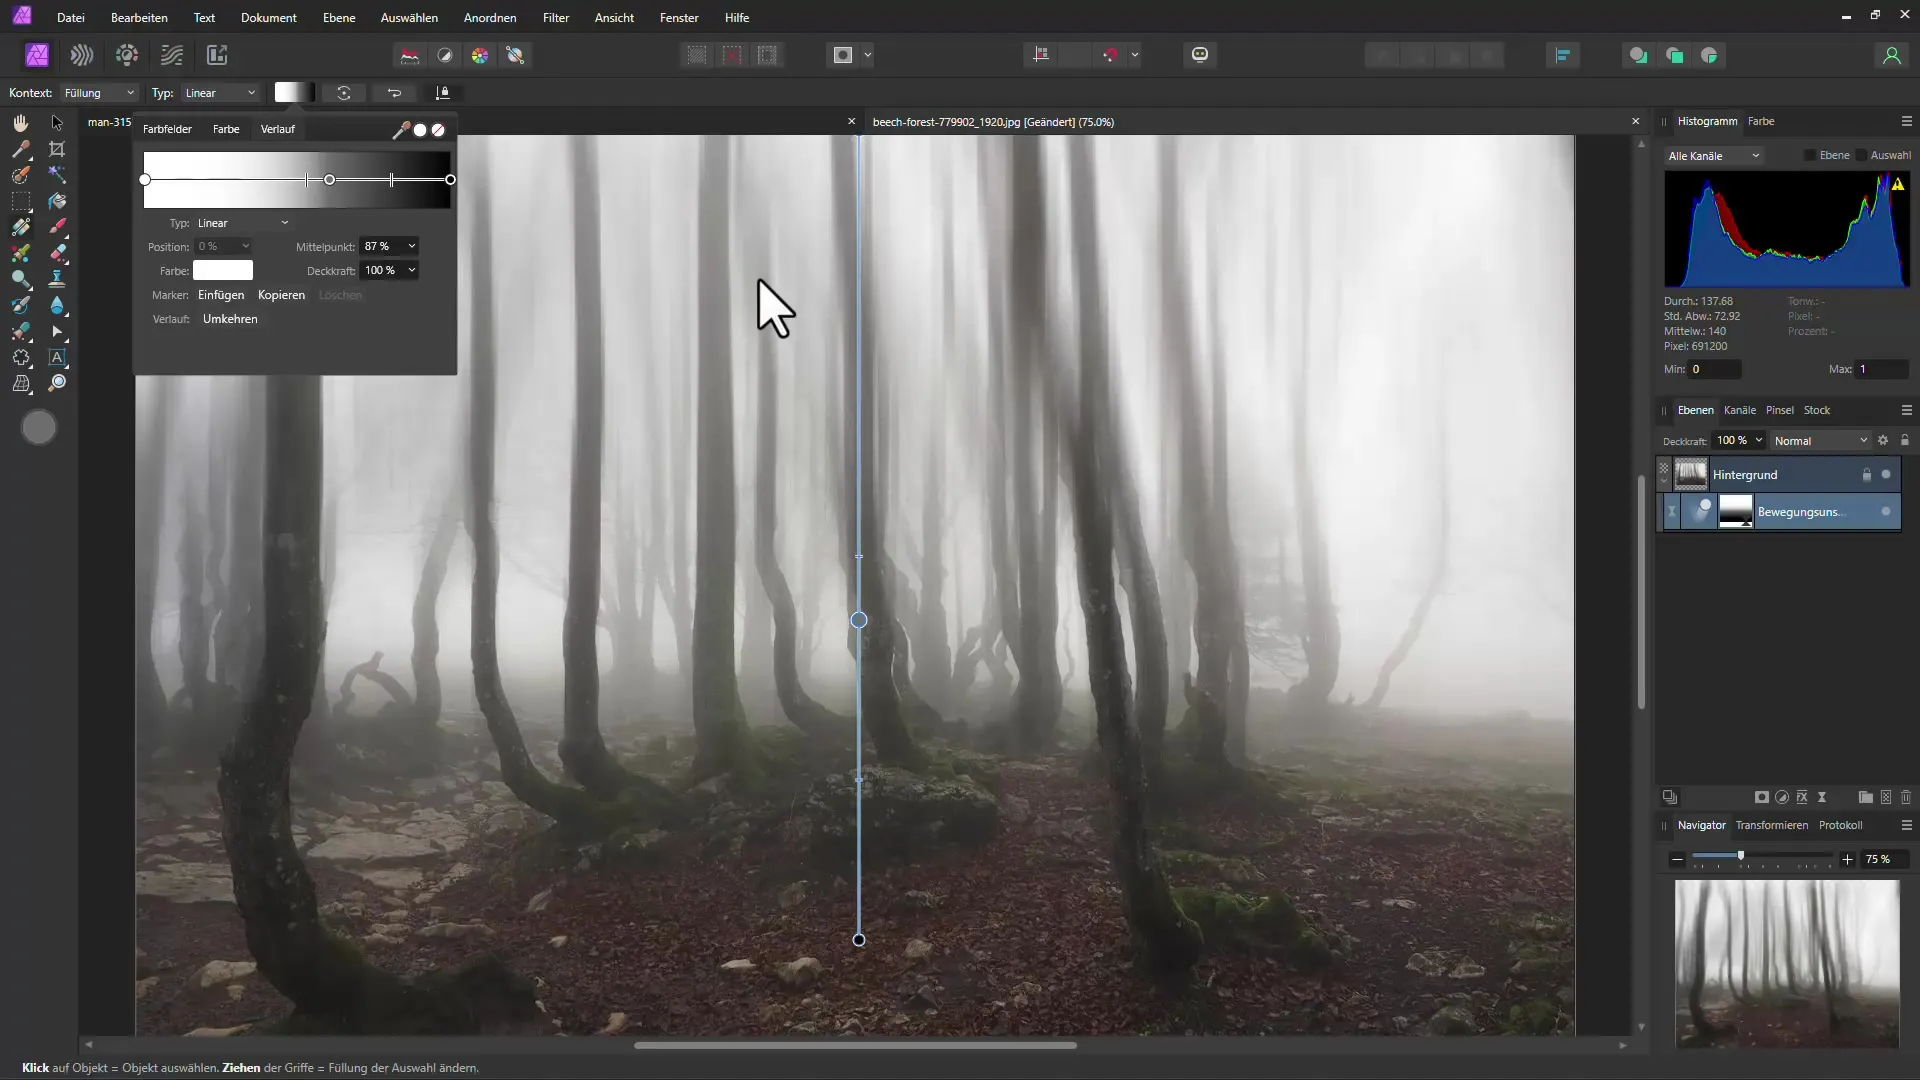
Then go to the Filter menu and select the motion and sharpness filter. Set the rotation to 270° and the intensity to the maximum to achieve the desired effect. To avoid making the entire image blurry, it's important to work with the gradient tool. Drag a gradient from the top of the image to the bottom while holding the Shift key. Ensure that the upper part of the image remains blurry and the lower part sharp. You can adjust the gradient as needed to vary the blurry area.
Step 3: Add a color gradient to enhance the effect
The next step is to add a color gradient to further enhance the mystical effect. Drag the gradient in a way that makes the upper areas appear darker and the lower areas brighter. Experiment with different colors to achieve the best effect.
Step 4: Create sunbeams
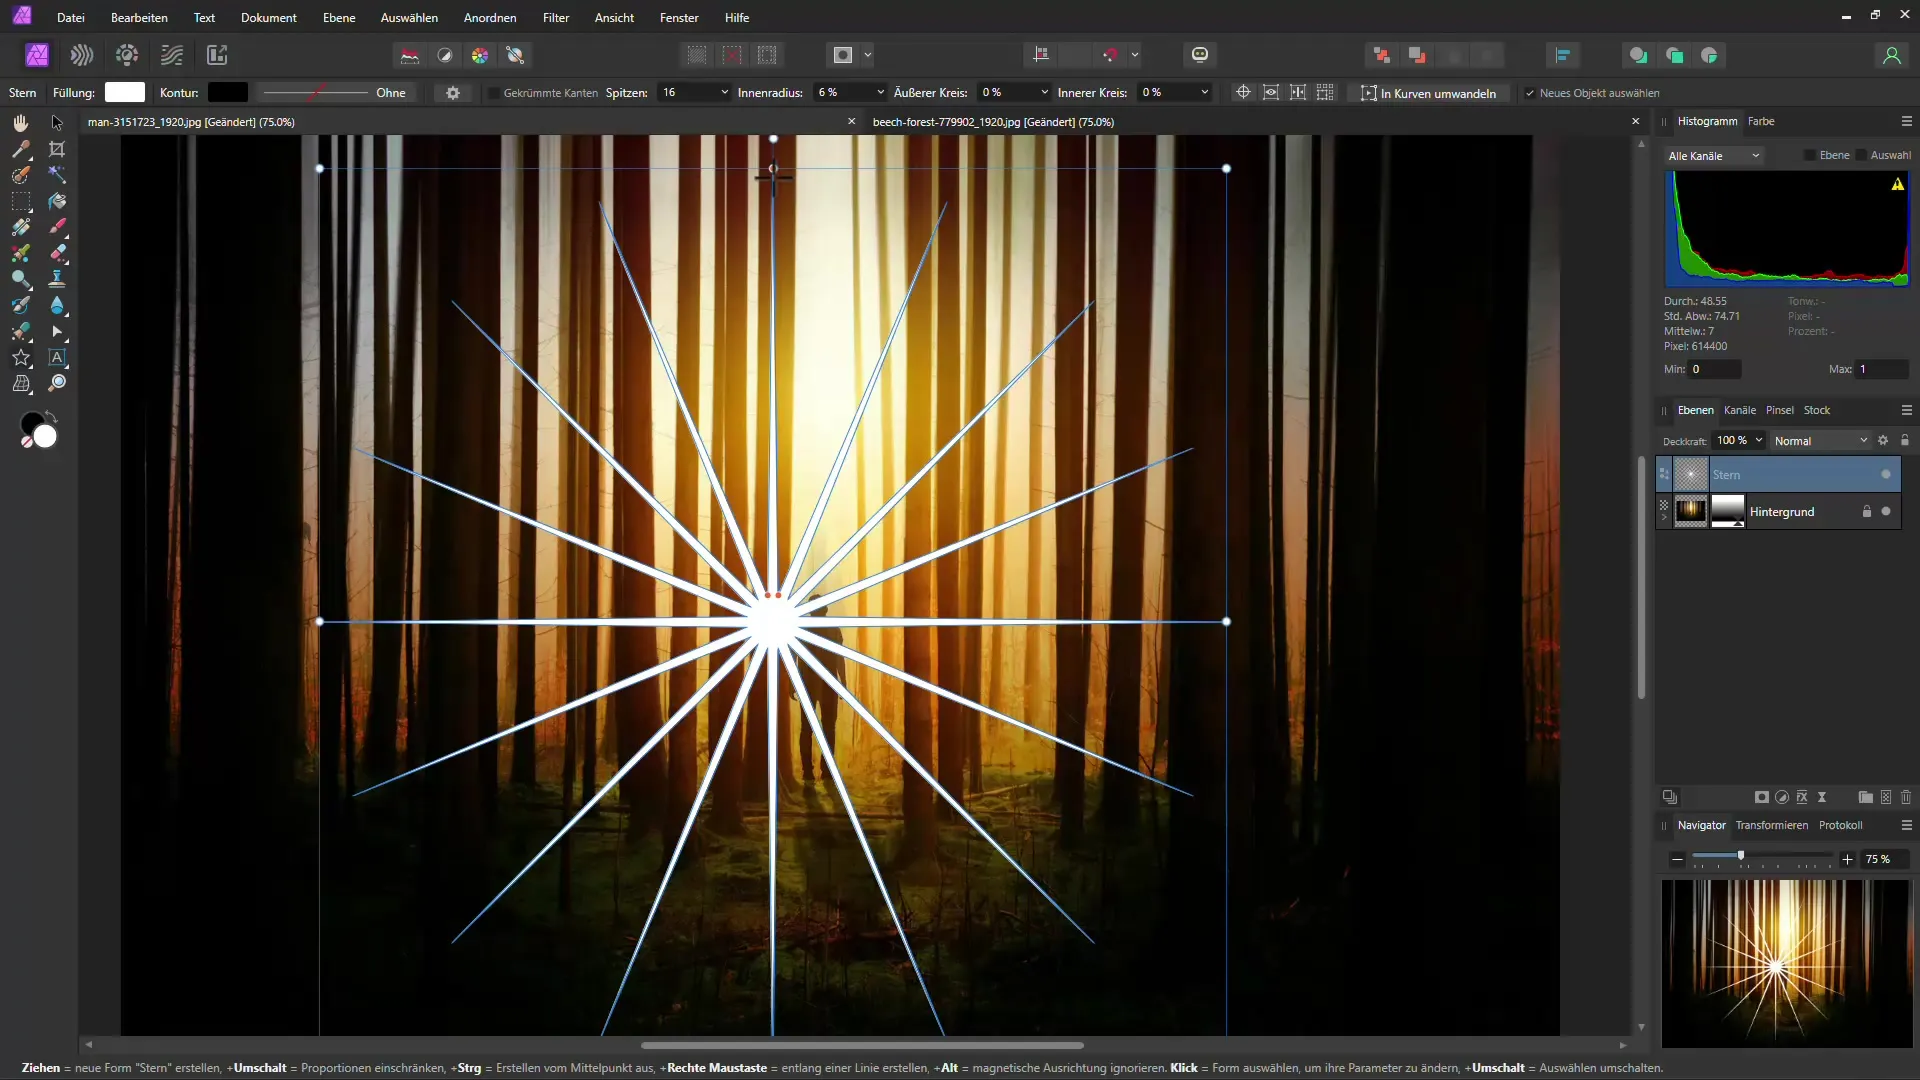
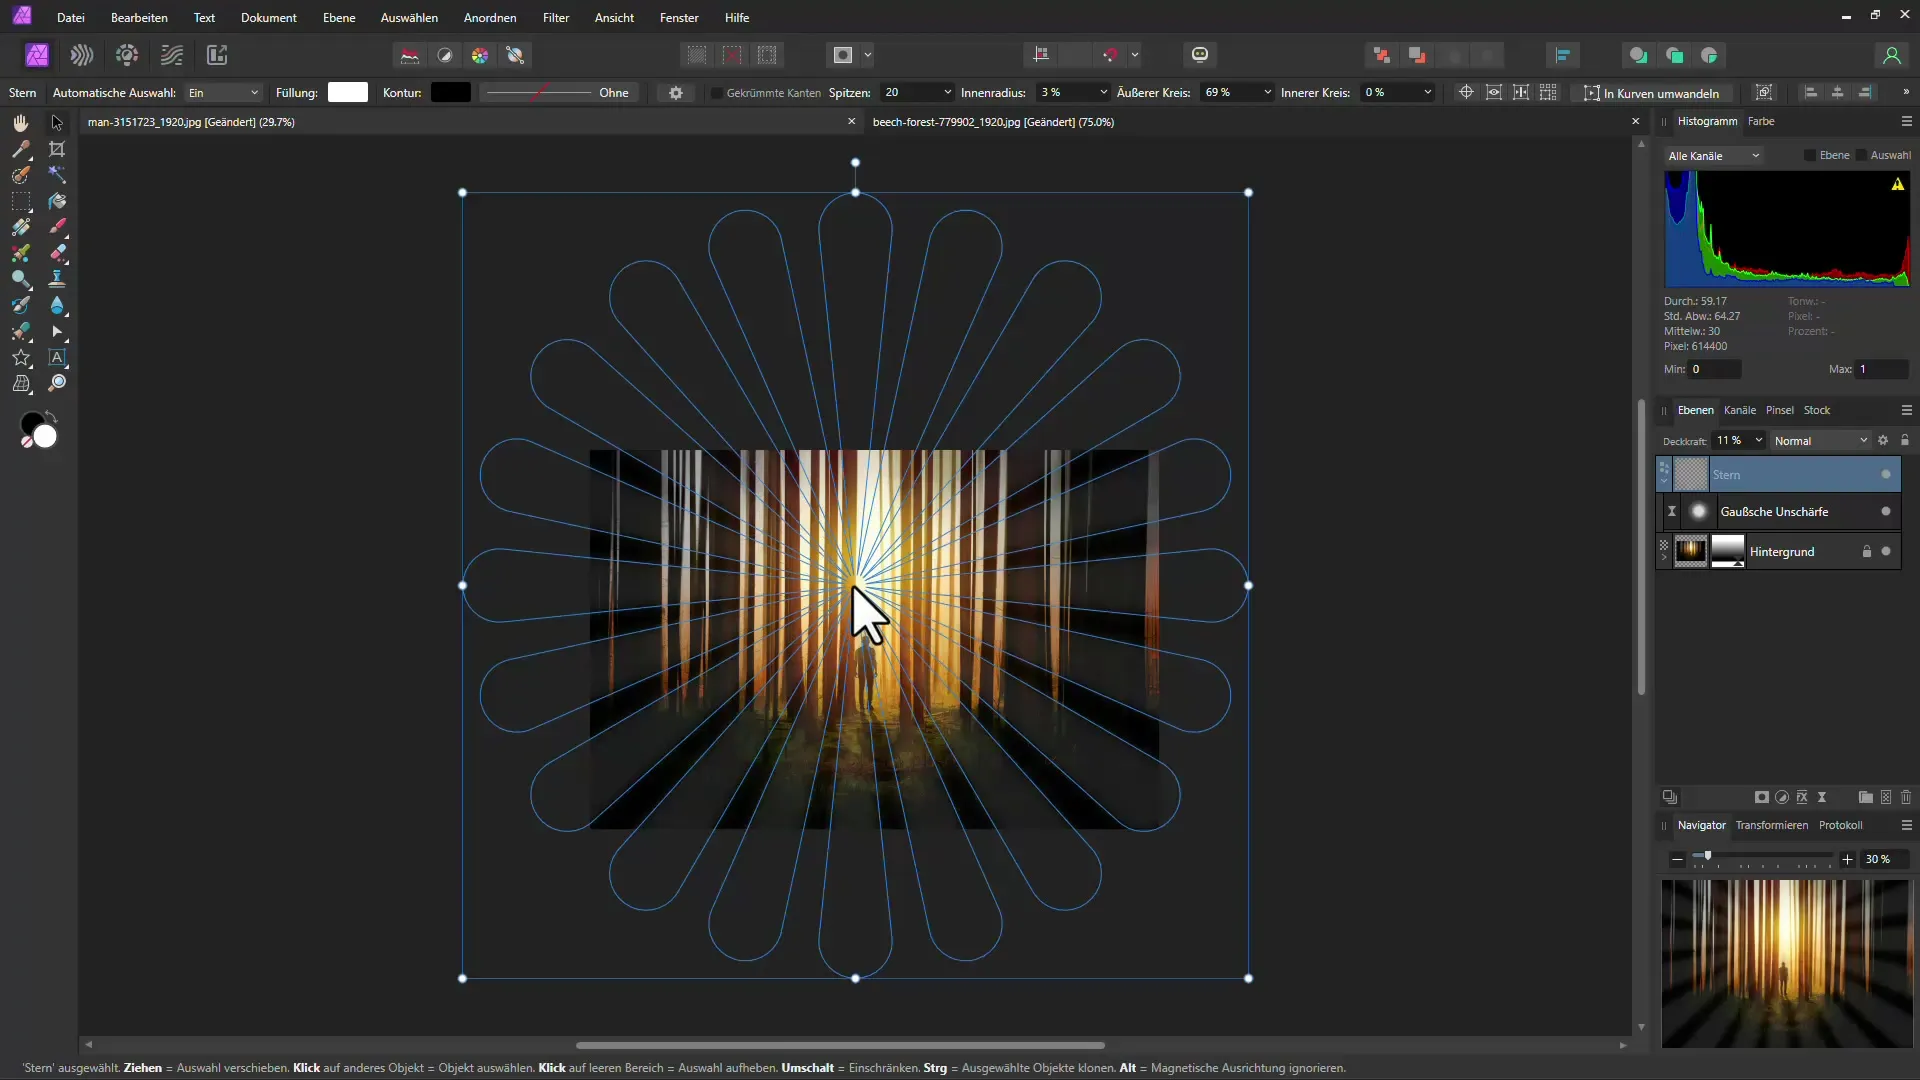
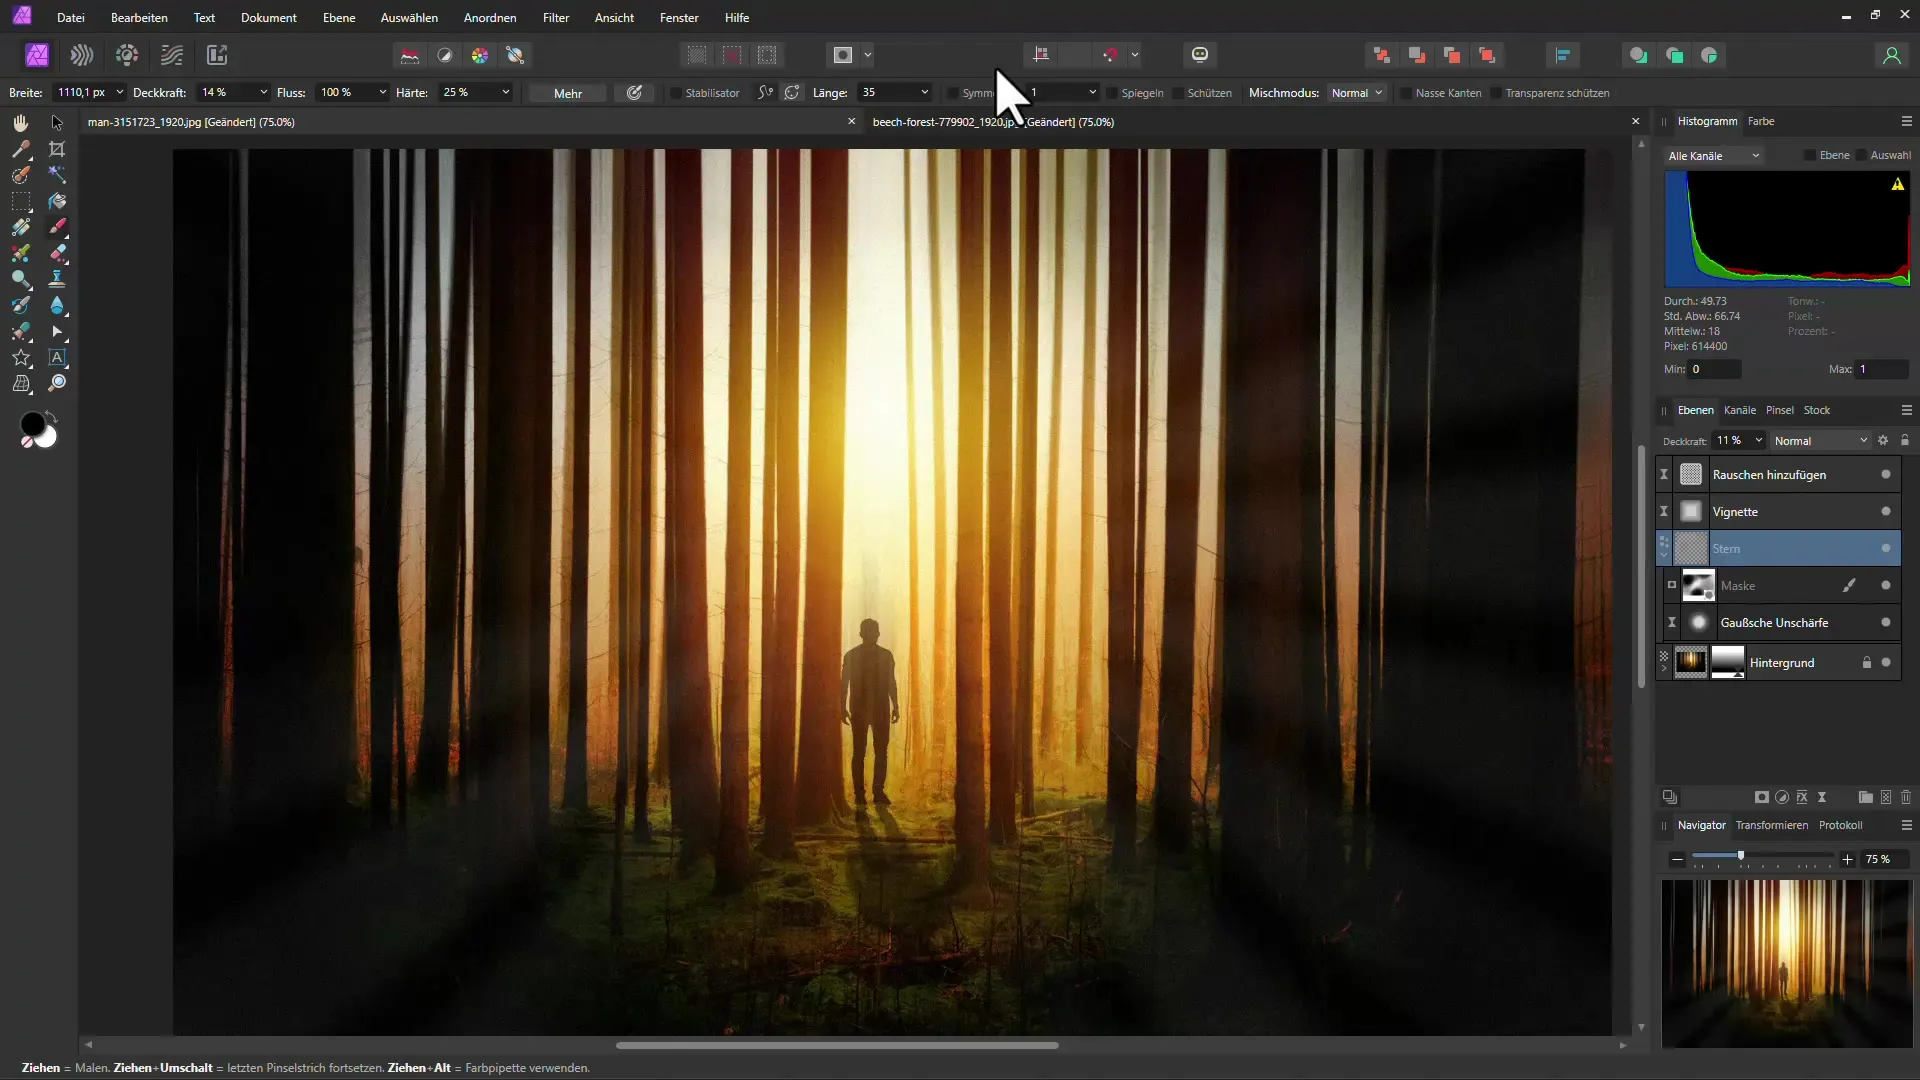
To create an even more mystical atmosphere, you can now add sunbeams. Select the star tool and drag it proportionally while holding down the Shift key. Make sure the beams look soft and not too sharp by applying the Gaussian blur filter. Also, reduce the opacity of the beams to make the effect appear more organic.
Step 5: Fine-tune the sunbeams
You can further adjust the beams. Click again on the star tool and separate the tip and inner radius settings. This gives your sunbeams a more natural appearance. By manipulating these values, you can comfortably customize the look of your sunbeams.
Step 6: Create a mask for the beams
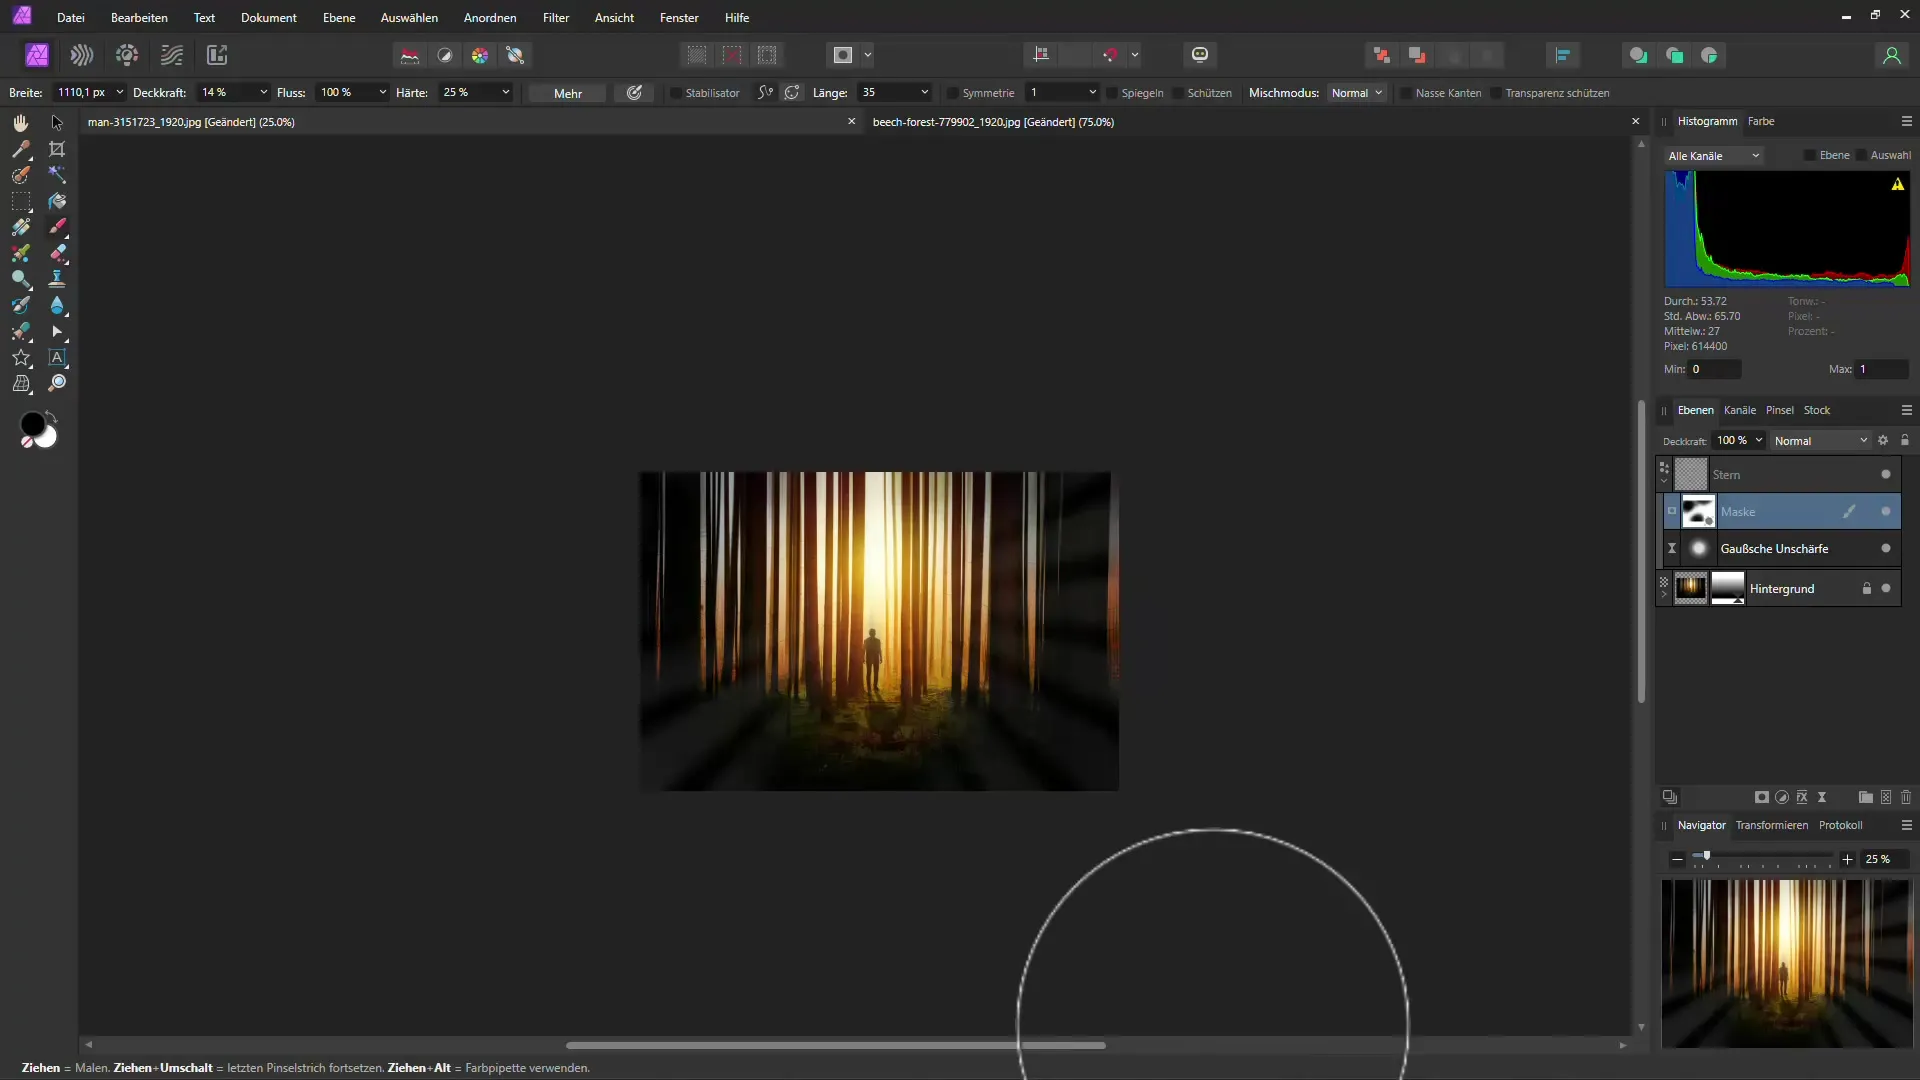
To give the beams a more realistic look, create a mask to remove some beams that may be obscured by trees. Use a soft brush to paint over the areas where you want to see fewer or no beams.
Step 7: Add a vignette
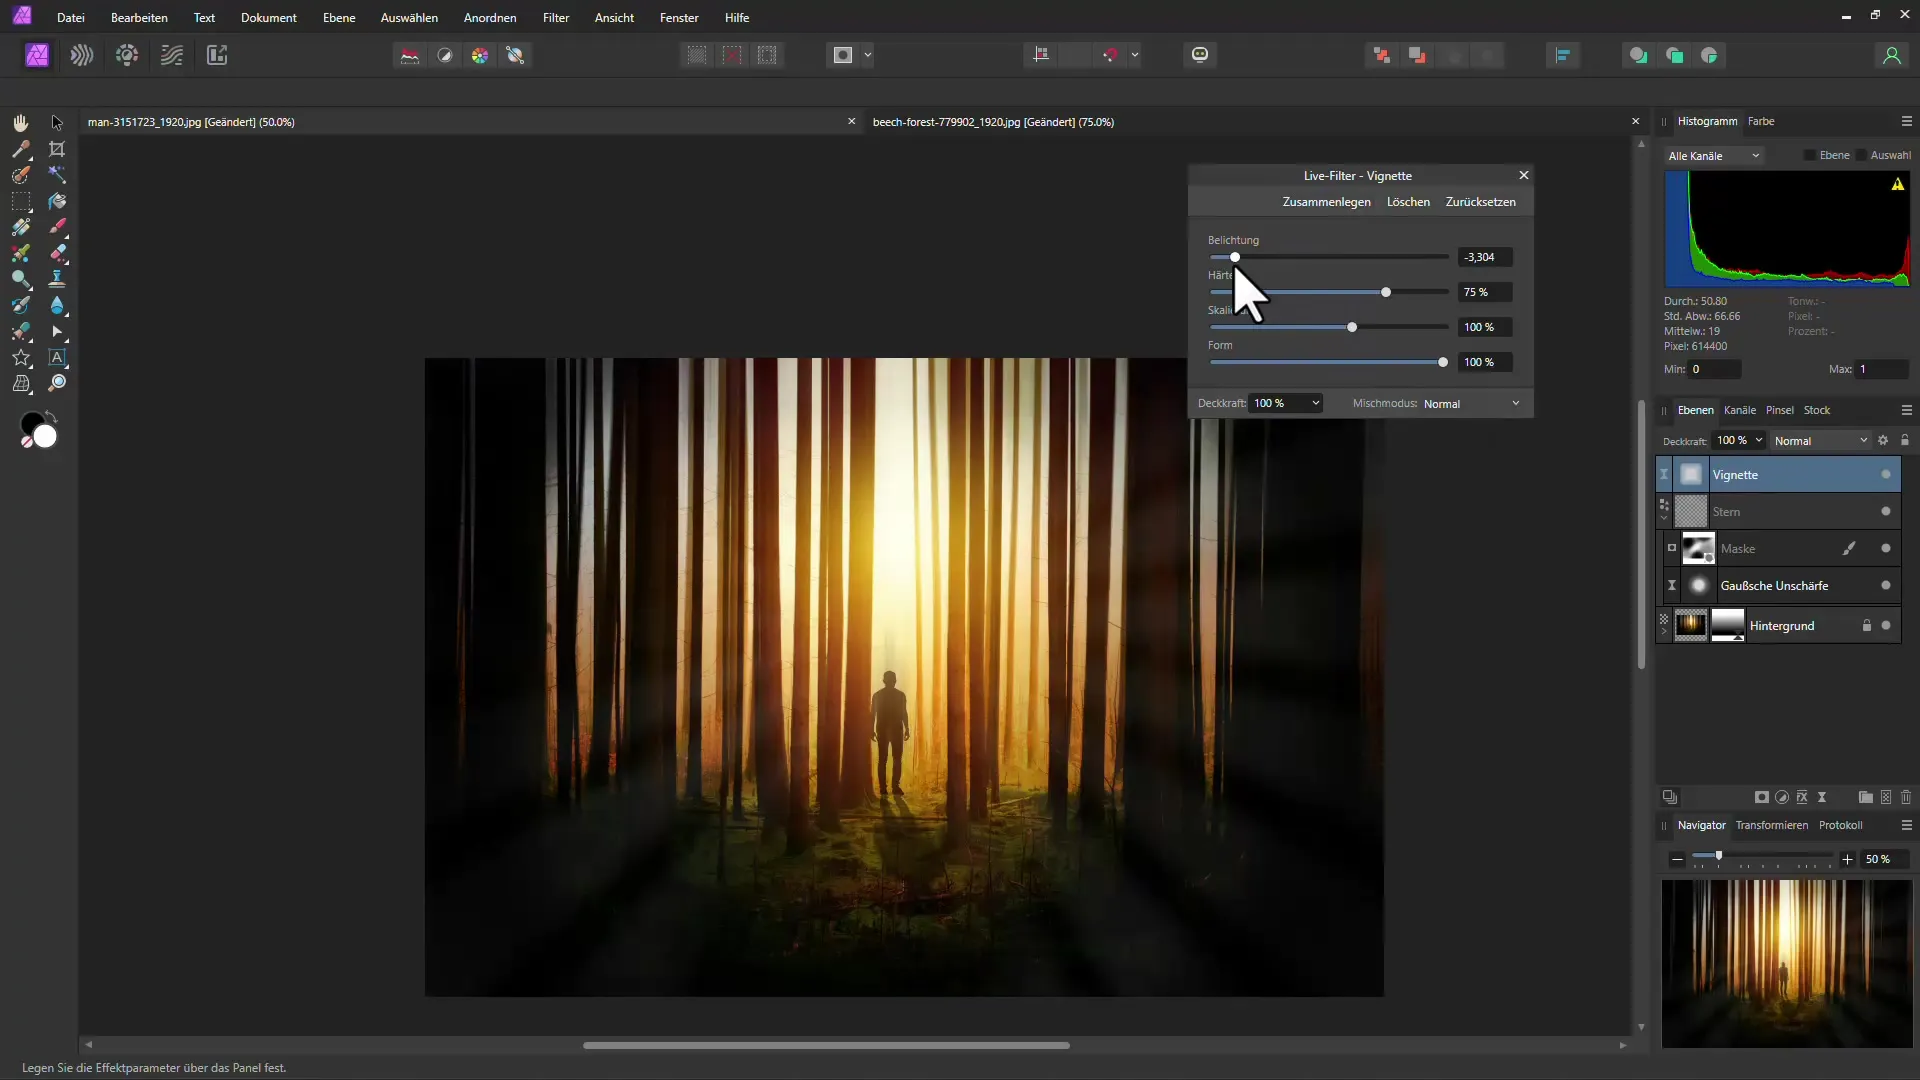
A vignette can help focus on the center of your image and enhance the mystical effect. Go to the Live Filter menu and select "Vignette." Slide the darkness slider to the left to darken the edges of the image.
Step 8: Add noise
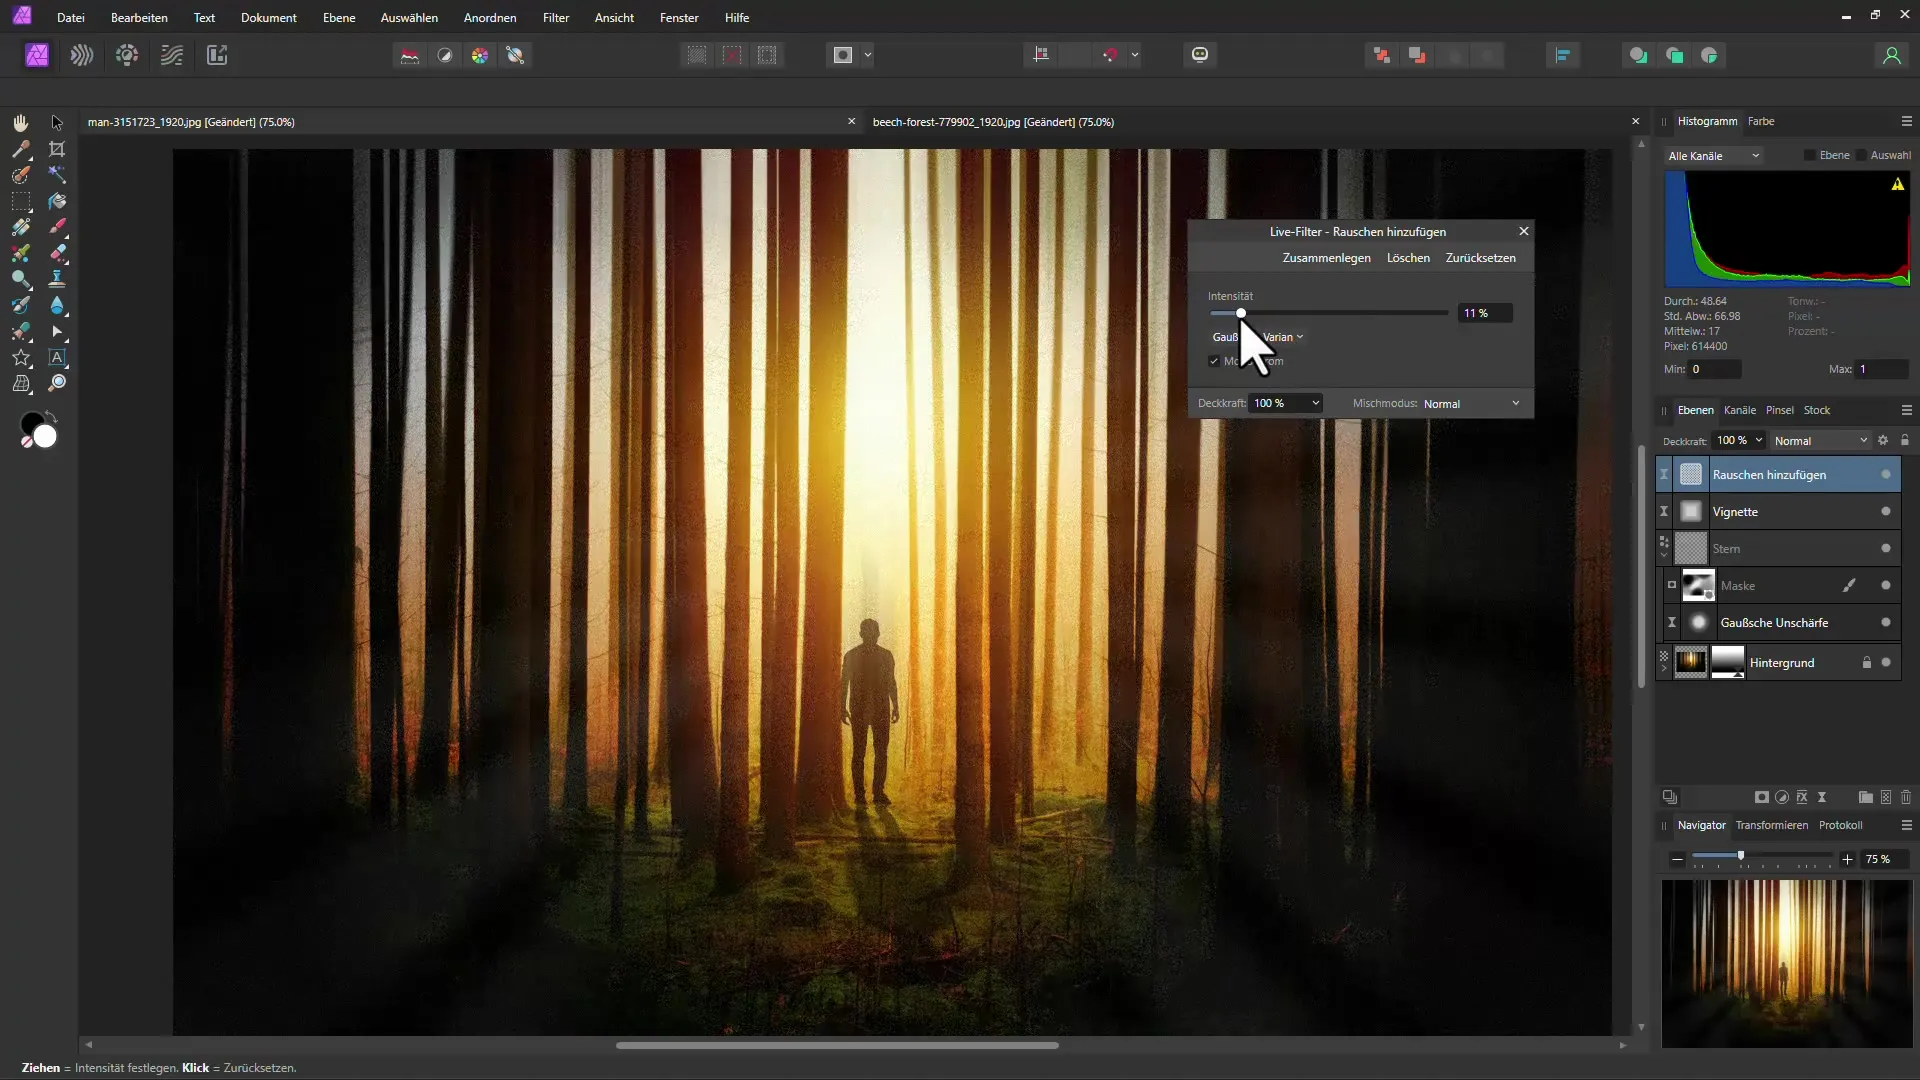
To give the image a final touch, you can add a light noise. Select "Add Noise" under the Live Filters and adjust the intensity to add some structure to the image. A little bit of noise can give your image more depth.
Step 9: Check and Adjust the Final Image
Look at the end result and compare it with the original shot. You can make adjustments to the live filter at any time to ensure everything looks optimal. This way you make sure that you are satisfied with the final image.
Summary
In this tutorial, you learned how to create a mystical forest effect with Affinity Photo. By using various filters and tools, you were able to give your image a magical aura.
Frequently Asked Questions
How do I choose the best image for this effect?Choose an image with tall, straight trees and an interesting lighting atmosphere.
Can I adjust the effects afterwards?Yes, all effects that you add as live filters can be adjusted at any time.
How do I prevent the image from looking too unnatural?Make sure to adjust the intensity of the filters and effects gently and add some noise.


