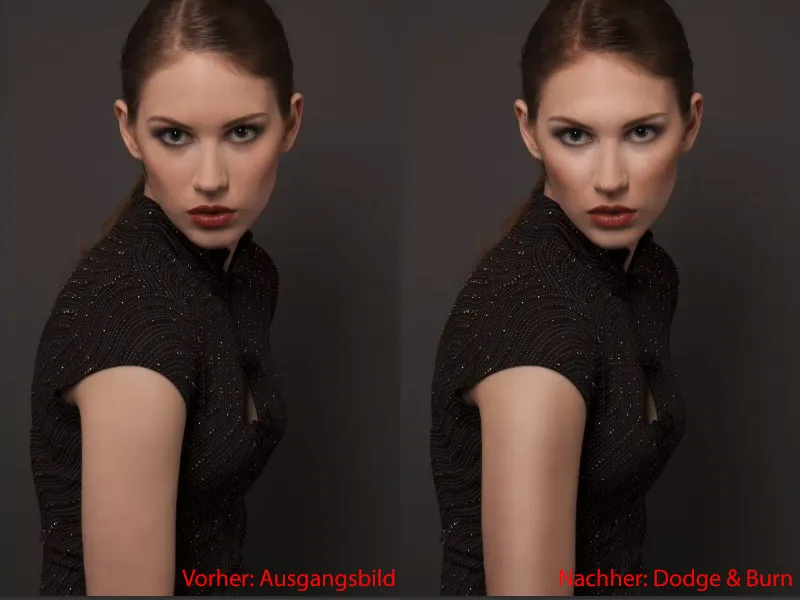
I don't think any look has been discussed and tested more than the Dodge & Burn look. Dodge & burn is nothing more than lightening and darkening. I'll show you the before and after here. Before, the whole thing looks flat on the face and arm; after, it's emphasized a little three-dimensionally. You're also directing the focus here, you have an edge of light (1), and the focus is clearly in the middle of my pretty model's head (2). If I take that out, the face looks very flat. It doesn't look any less pretty, but the edited image is a bit more memorable. And that makes the whole thing exciting here, without me having changed anything about the skin or needing another image look. This dodge & burn look works here on a very simple level.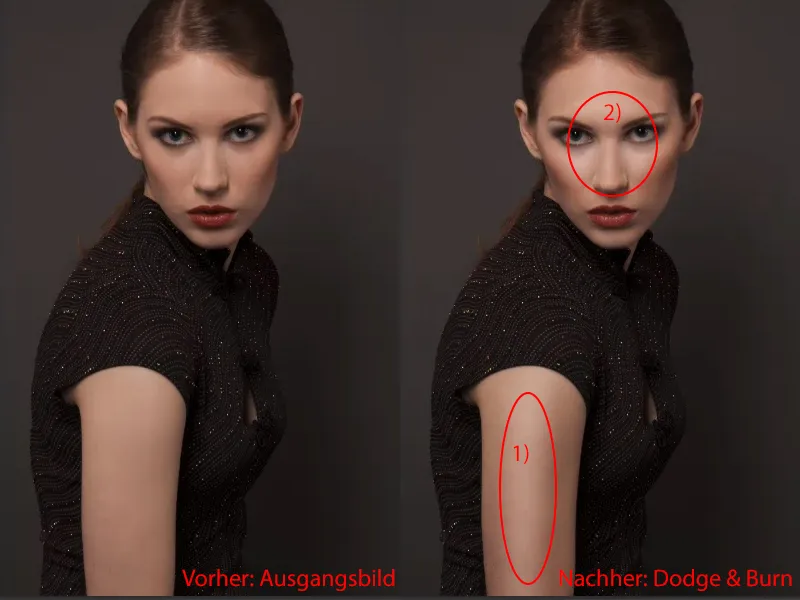
The textbook way is to create a neutral gray layer, i.e. fill it with 50% gray, and then lighten and darken it with the Dodge and Burn tools. There are many other techniques to accomplish this.
Here I'll show you a fun method that also teaches you how to read your image. The Dodge & Burn technique is very easy to learn, but where do I actually use it? This quick-and-dirty dodge-and-burn shows you that quite well.
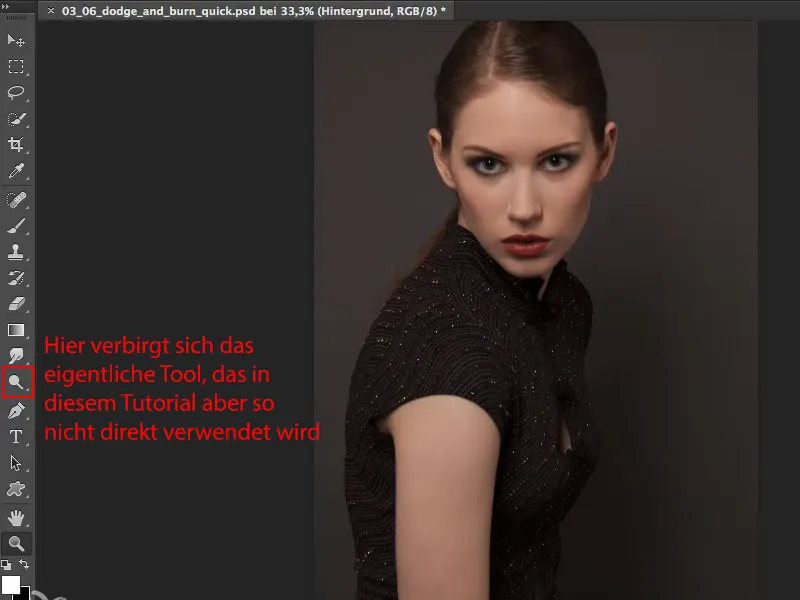
I'll Blender this layer here (1) and create a new, empty layer (2). I recommend this new, empty layer (3), this timetable layer, as I call it, especially to people who are working with Dodge & Burn for the first time or for whom other methods always result in blotchy and not really coherent images.
I use a brush here (4). I'll make the size a little smaller here (5), depending on the image. That should be about right.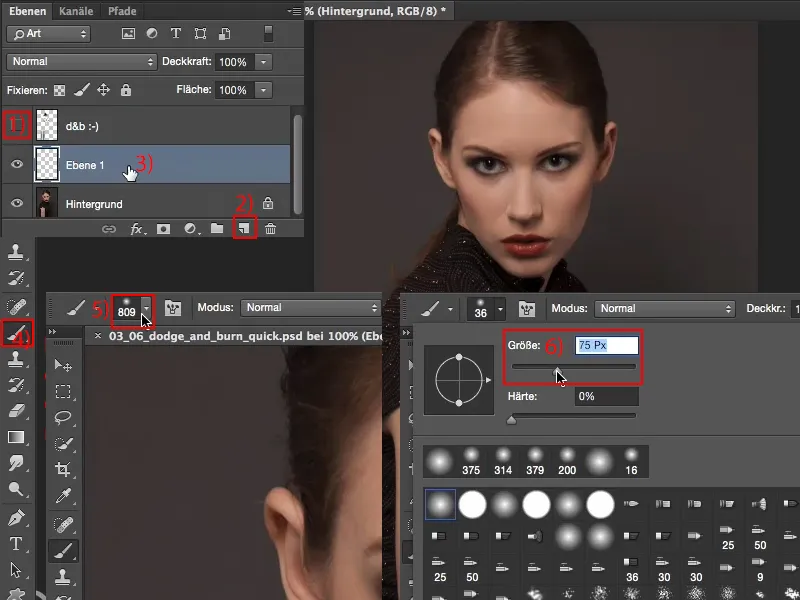
And then I'll think about using black and white, I can brush around on this empty layer here and paint markings into the picture: Where do I actually want to do Dodge & Burn? (Note: If you have now painted into the image, undo it so that the layer is empty again).
If you do this intensively, you will spend at least two to three minutes looking at your picture and really get to know it. Where are the deficits? Where are the plus points? Where do I need to do something? Where do I need to lighten, darken? And so on ...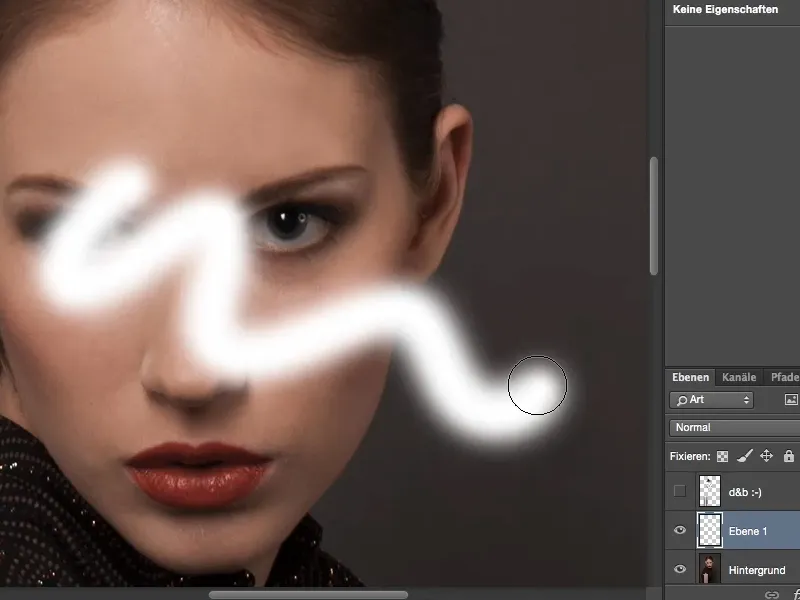
When I look at the face, I notice: Eye shadows (1). Nose (2) and lips (3) could do with a bit of shine. The chin (4) could perhaps be a little more pointed. Here on the side, the cheekbones (5) could be worked out a little. Here (6) between the eyes I have a dark spot. Here at the top (7), it's a bit too bright or the hairline could be darkened a bit. That's actually what I'm painting in the picture now.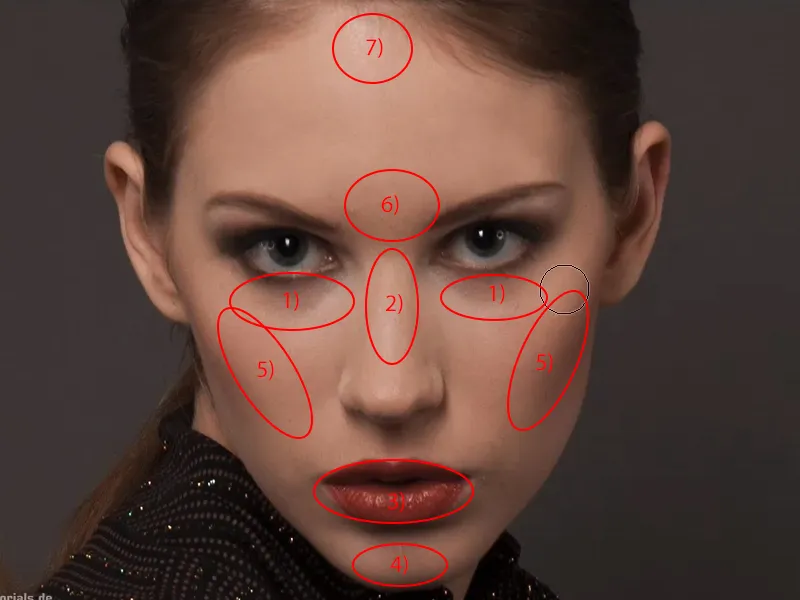
I'm going to draw a triangle like this. I want this area to be lighter. Then I want to lighten the nose a little, so I draw a line like this. The eyes could be a little brighter, at least that's what I like. Lip gloss, no question. The chin should be lightened a little, just a small dab here.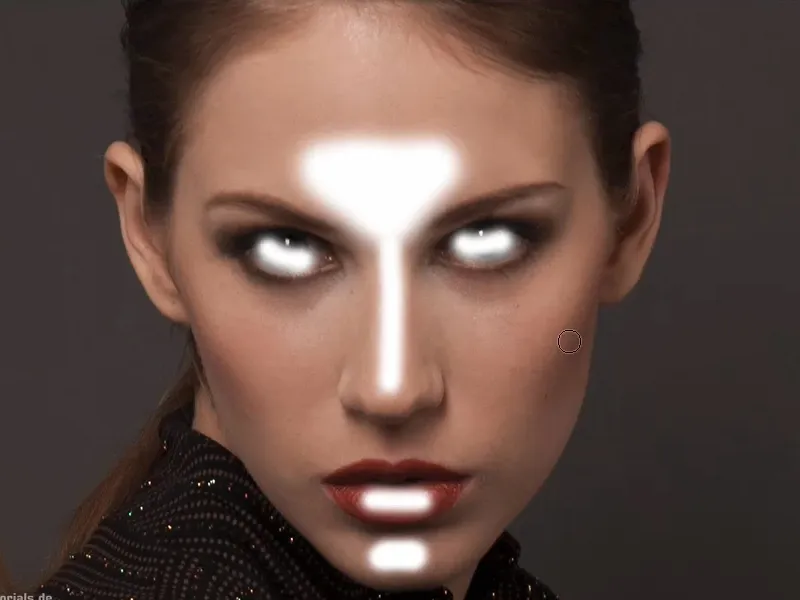
I make myself a slightly larger brush tip. I told you to take out the cheekbones and the shadows under the eyes a little. So I want to lighten the white areas a little. Then I've finished brightening my face so far. It already looks a bit "strange".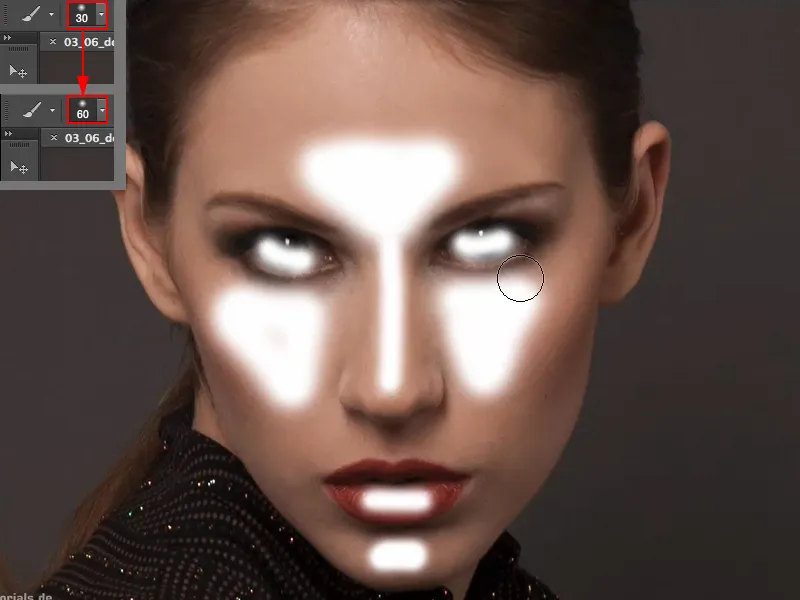
Same thing on the arm. I want to have a slight light edge in the middle here, so I paint on a white line.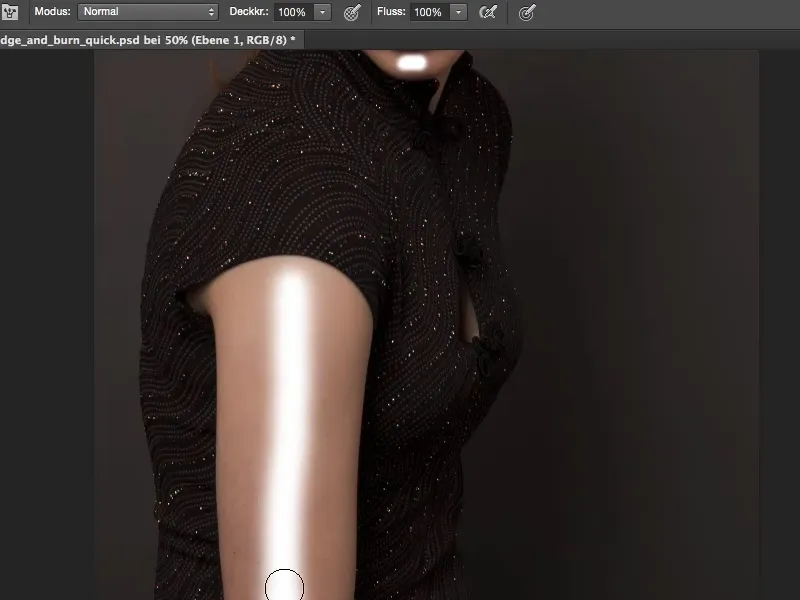
Now I simply change the foreground and background color with X or here with this little arrow and go to black (1). I want to darken the hairline there in the middle (2) a little and around here (3) it should also be a little darker.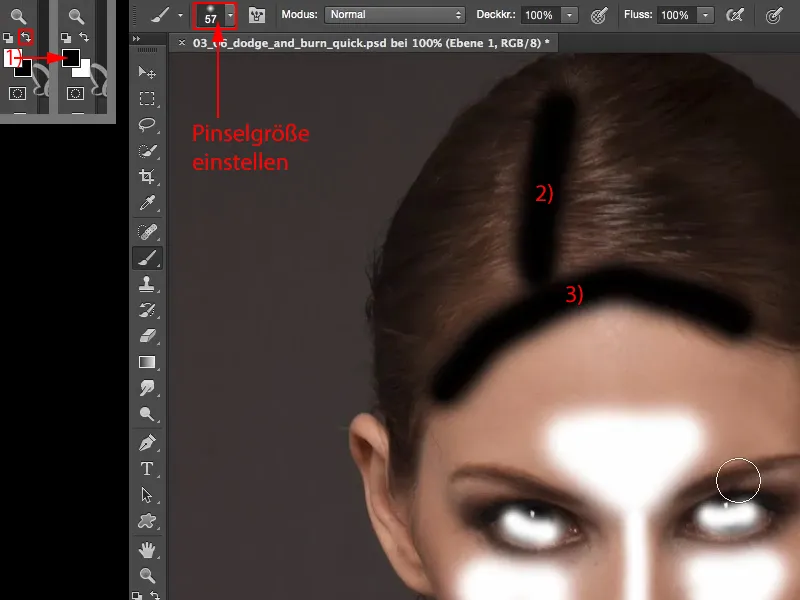
If I were to darken the hair to the left and right of the shiny area on the nose (1, 2), the nose would become more pointed towards the middle. This means that the nose looks narrower. If I have a slightly wider nose, I do it this way, because then the nose looks a little narrower (although I think it's absolutely great on the model as it is here).
The blush (3, 4) should be darker, so I put two black lines here so that I can keep this in mind for later. Under the nose (5) it should perhaps be a little darker.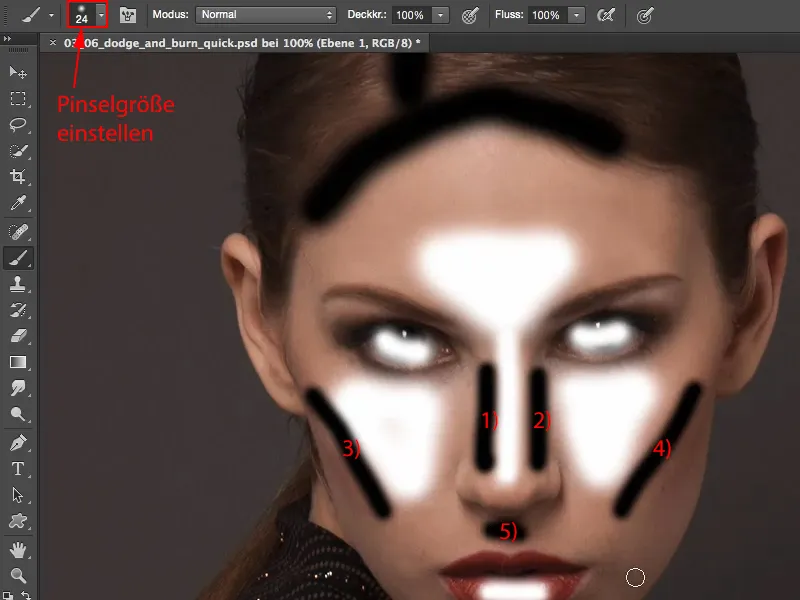
Then I'll zoom out here again. I still have this light edge on my arm. I'll just make two black lines down here as well.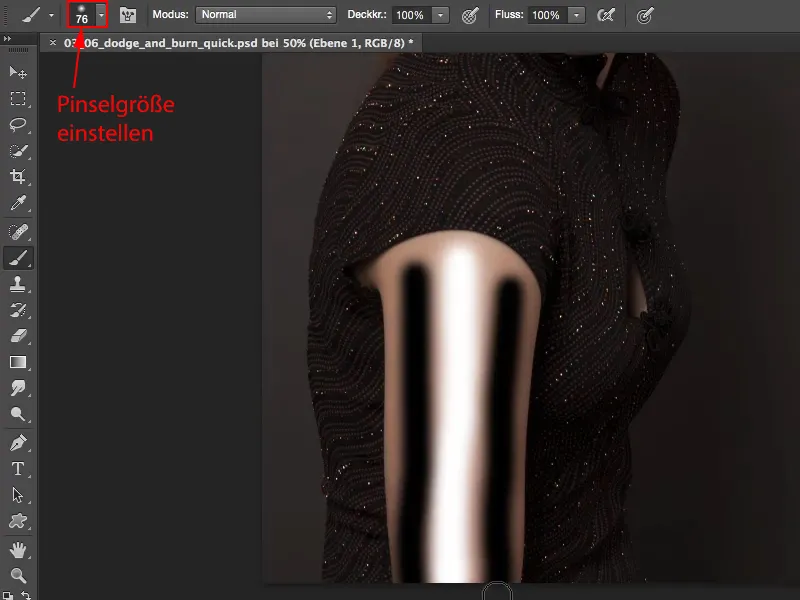
I've now created a timetable that I can always use as a guide when I'm doing the whole thing using the textbook.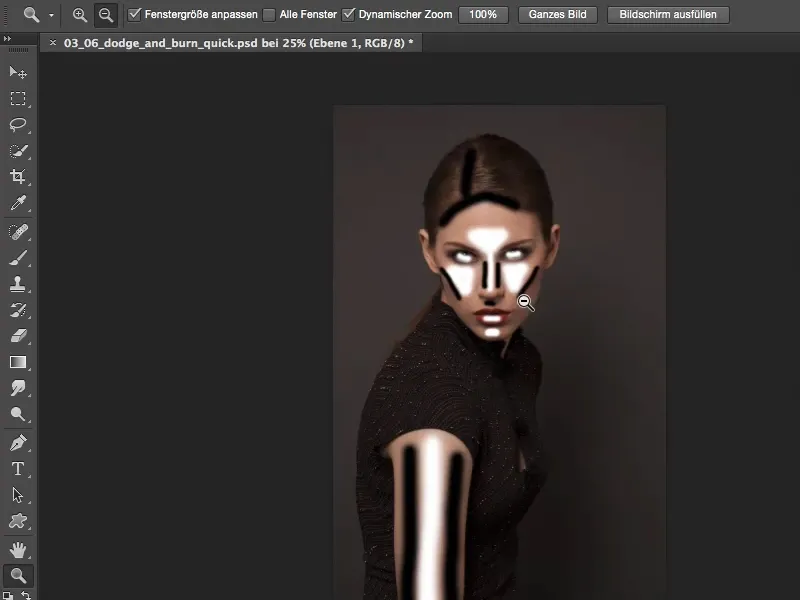
If I don't do the whole thing using the textbook, there's a super simple trick here: I simply go to Layer>Smart objects>Convert to smart object. I now have this smart object ...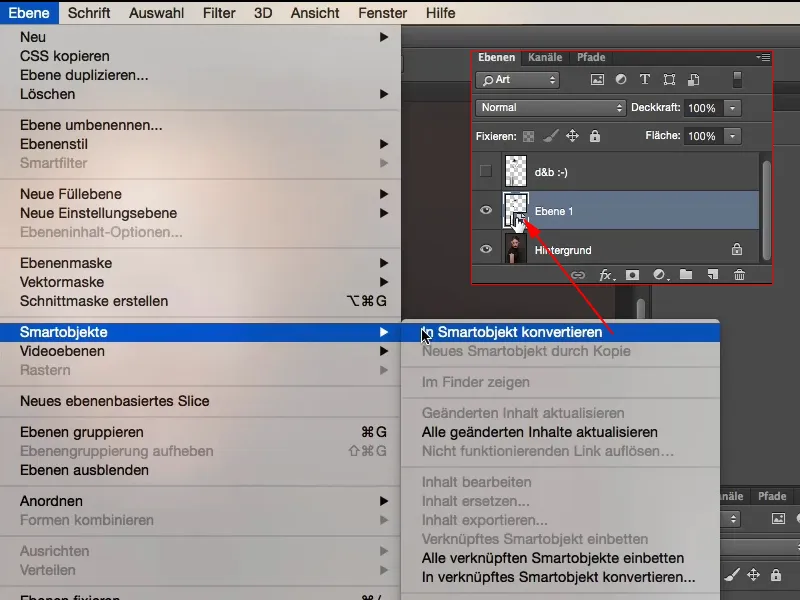
... and put a blur filter on it, namely the Gaussian Blur filter (Filter>Blur Filter>Gaussian Blur). I set the radius here (1) to 14.8 pixels. That still looks pretty stupid. I press OK (2).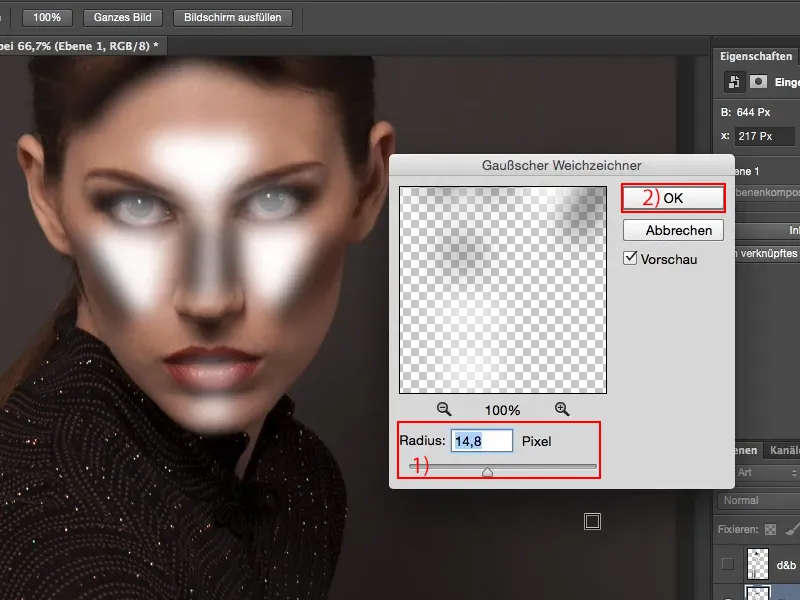
Next, I change the layer mode to Soft Light. And then comes this aha effect, because now the brightness of black and white in my picture is offset, and everything I've brushed on so blithely has had an effect on the picture. Let me zoom in a little closer ...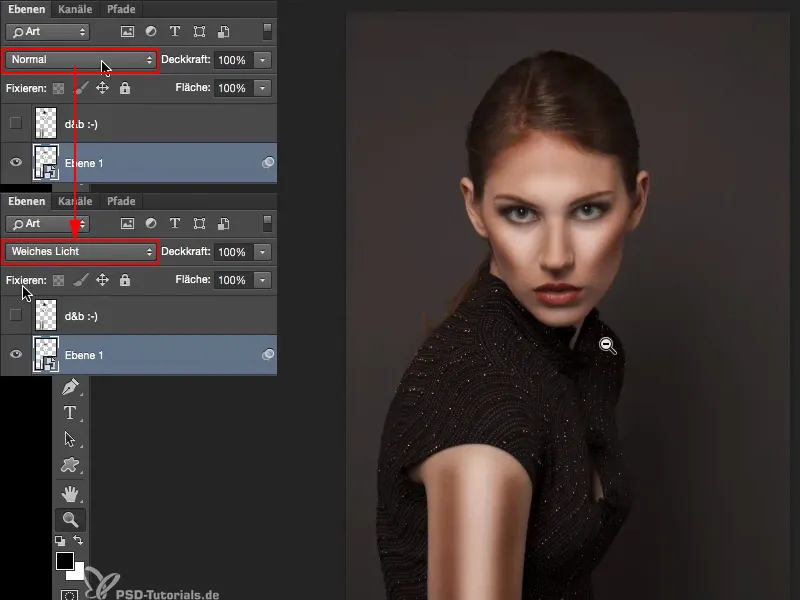
So here (1) I've really darkened the left and right of the nose, I've got a bit of gloss here. This one (2) has been lightened up. Everywhere we brushed this timetable layer before, which didn't necessarily look nice, I've now got dodge & burn.
I wrapped the whole thing in a Smart Object because I was aware that this initial blurring might not be enough. Or maybe it was already too much, and I want to fix that after the fact. So I now double-click here (3) ...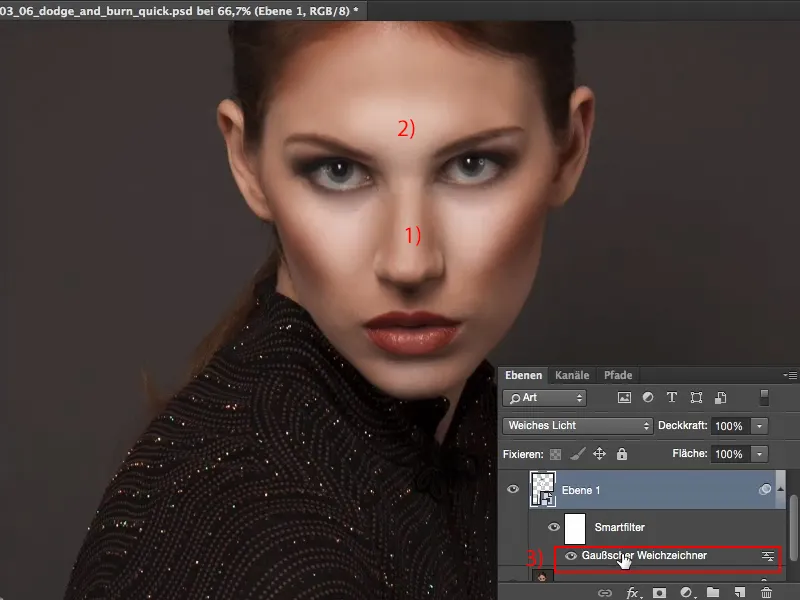
... and can now pull up my soft focus in Soft Light mode. I notice that at around 30 pixels (1), the whole thing is blurred so softly that it looks good again. Confirm with OK (2).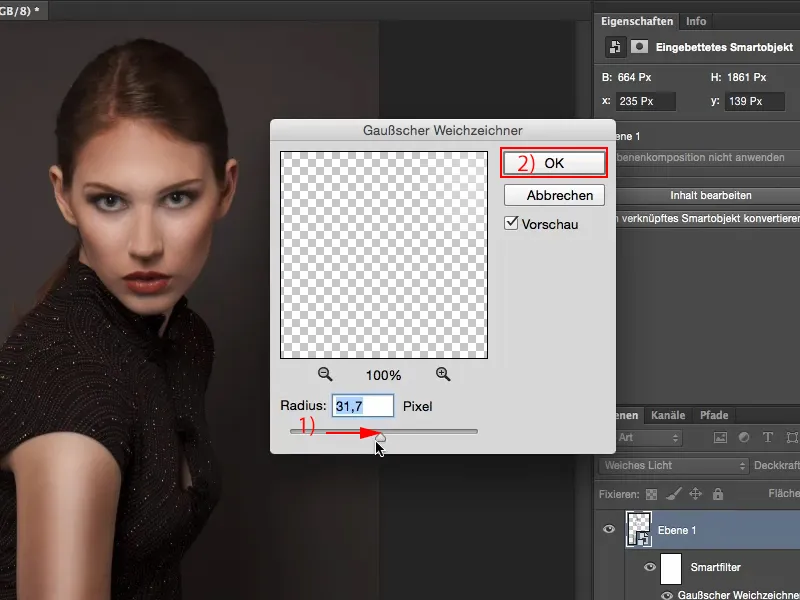
Now I still have the opacity at 100 %. I'll take it down a little further. I'm going to go down to 60 % to 70 %.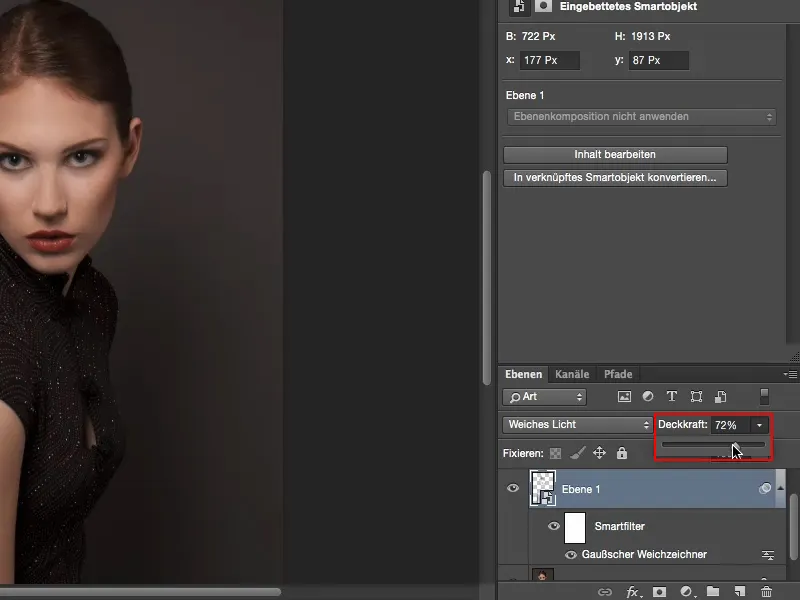
When I look at the before and after, I have this dodge & burn look here on my face, and I haven't actually done any dodge & burn at all, at least in the classic textbook sense. All I've done is use white and black to highlight what I wanted to lighten and darken. Thanks to the calculation mode and the Gaussian blur filter, it's so fluid that I must be a master of dodge & burn to be able to paint it like this. But with this technique, you can do it too.